Archive for category vanagon mods
Quick and dirty Westy table fix
Posted by albell in syncro, vanagon, vanagon mods on March 30, 2011
The old westy table I have in my syncro was loose where the metal base attaches to the tabletop. It used a form of captured nuts in the table top to secure it to the base, and those nuts were loose in the wood, and the holes were chipped and enlarged. I had used some glue to help hold things togther but that was a short lived solution. I think the newer Westy tables have a better system of attachment.
So I set about doing a quick fix. I had some scrap 3/4″ thick PVC sheet:

What was I thinking years ago when I painted that base yellow? I need to repaint it. I cut the PVC to size:

And countersunk some 1/4″ bolts:

Then some PL Premium polyurethane construction adhesive ( the poor man’s Sikaflex) to glue PVC to table:

Now I really do have to get rid of the yellow.
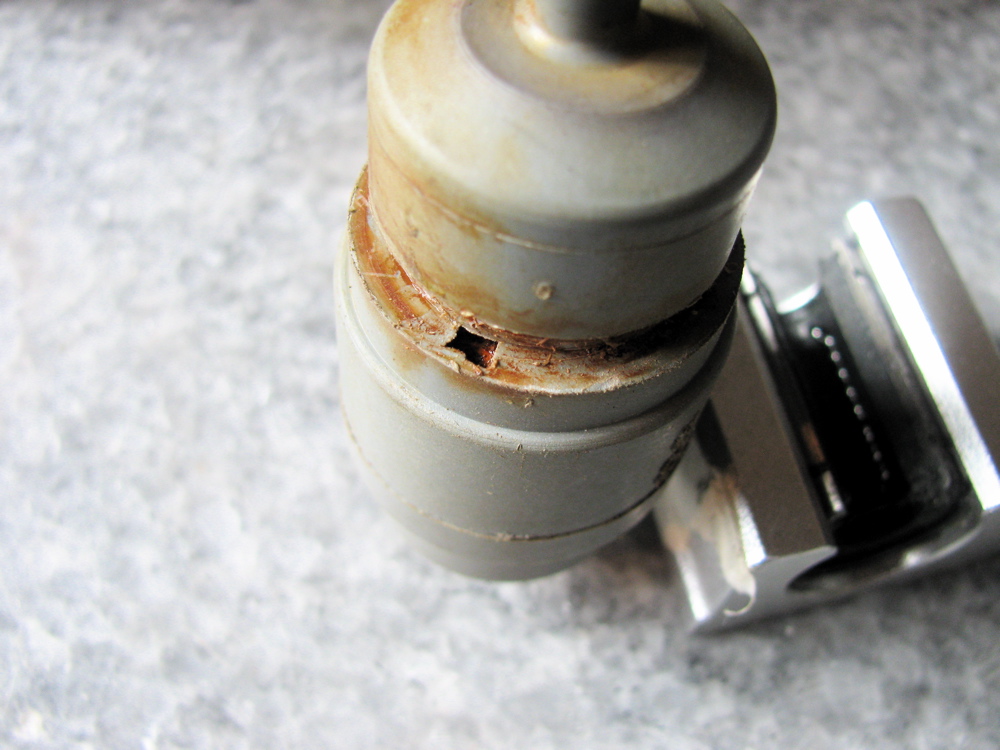
Vanagon ignition switch
Posted by albell in syncro specific repairs, vanagon, vanagon mods on February 24, 2011
It has been “discovered” that the Vanagon ignition switch is a weak design. Why? Well it switches a fair bit of current and the contacts seem just adequate for the job. All right, I admit I have no real data to present to prove this, but maybe it is wise to have OCD and switch off accessories (heater fan, wipers, lights) before starting the van. If these loads are present then contacts in the switch have to handle a bigger current, and the resulting sparking will degrade the contacts over time. Mind you, the actual switch is relatively cheap ($20 – $40), so this really does fall under the category of Vanagon nerdom.
Excerpt from manual showing switch:

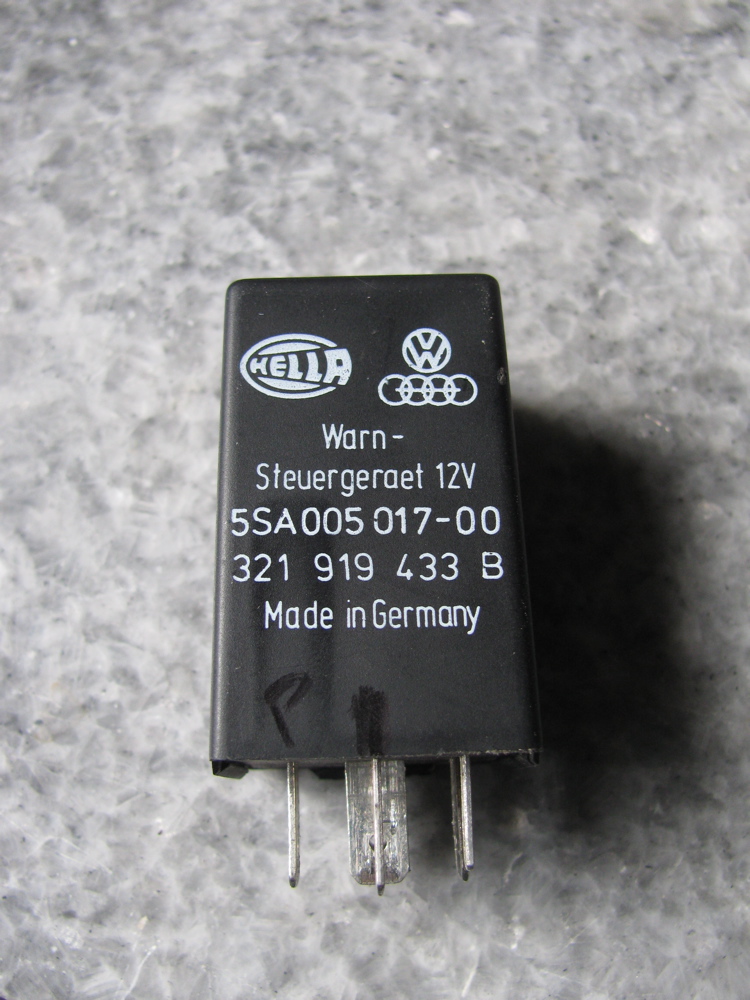
David B.’s photograph of dissected used switch:

I must be so bored to resort to posting such a flimsy entry 🙂
Update: Maybe its not such a flimsy entry after all, Jay Brown sells a relay package to reduce switch load.
Also, headlight relays on there own will reduce load on the ign. switch.
Vanagon – N. American vs European tail lights
Posted by albell in vanagon, vanagon mods on February 20, 2011
Pulling together some stuff I have on the differences in the tail light assemblies. As some of you know, European tail lights have the provision for a rear fog light (Nebelschlussleuchte), that is, a brighter red tail light to be used during poor visibility. The light is controlled b a 3 position switch (off, front fogs, front fogs + rear fog) on the dash. I have one of those switches controlling my aux. lights. Part number for this one is 171 941 535A, the VAG says 251 941 535 is the one for the Vanagon – bet ya they are one and the same. Here are a couple of pics:


And here is a German manual diagram:

And here is an annotated English language diagram

And here is my diagram of the circuit boards (right hand side):

And now some pictures of a pair of right hand side tail light boards, “USA” vs “Europa”:

“USA” lens front:

“Europa” lens front:

“USA” lens back:

“Europa” lens back:

Arcane and nerdy stuff, eh Ben?
Vanagon heater hose insulation
Posted by albell in syncro, vanagon, vanagon mods on February 15, 2011
While I was under the van installing the newly balanced propshaft, (prelim. verdict is good, but I haven’t tightened up front diff. mounts yet. Letting things find their happy place), I wrapped the heater lines to the front heater with some pipe insulation. Why did I do both the feed and the return? Well to be honest, I didn’t know which was which. I still haven’t figured out the coolant path through the added hoses that the Webasto heater brings to the party.
The pics make it look like the hoses hang low, but they don’t. White cable ties are all I had. Who cares anyway, its under the fricken van!


Update, 13/05/2011. I’m not happy with the way the insulation is handling the abuse under the van. For one thing, the foam under the cable ties has compressed so that the ties needed tightening. Also the foam is ripped in places, from road debris. I need to find a tougher material to put down there.
Homemade pressure bleeder
Posted by albell in vanagon, vanagon mods on February 9, 2011
This is what I use to pressure bleed the hydraulics. A 4 litre Nalgene polyethylene bottle with a presta valve in shoulder and a bulkhead fitting in cap. Other end of tubing connects to bulkhead fitting attached to an old brake reservoir cap. The 4 litre bottle is pressurized to about 7 psi with bike pump. You do have to top up reservoir every so often when bleeding, but its not much of a chore. The 1 litre bottle collects the bled fluid.

Aux. Battery connection to fuse panel
Posted by albell in vanagon mods on January 19, 2011
Probably like a lot of you Vanagon Westy owners, I have been powering my interior lights, radio, and cig. lighter from my auxiliary battery by running a (fused) wire up and into the bottom contact of the #3 fuse spot (fuse removed) on panel. This works ok, but its sort of a kludge. I looked at the wiring diagram and noticed that there is a spare connection on “E” multiprong connector, “E3”, that goes directly to the circuit that fuse #3 powers. I have a bunch of scavenged wire pigtails that have the molex-type connecter on one end. Connect one of those pigtails to the aux. battery wire, and pop the other end into “E3”. Fuse spot #3 is left without fuse as before. Diagrams below might help, I should make an annotated one… crudely annotated diagram added.


Dual horn relay and wiring
Posted by albell in vanagon mods on October 6, 2010
Minor but sort of fun mod… in the German wiring diagrams I noticed a page with the schematics for a dual horn set up. It uses a relay in relay position #6, and some minor wiring changes on back of fuse panel. The only special tools needed are molex connector removal tools, 2 sizes (see this post on how I made mine). Also, you need a few of the molex connectors or you can connect to salvaged pigtails.
Here is the German wiring diagram, kinda hard to read, sorry:

And here is the stock single horn set up:

You can see that you “only” have to move the wire from connection C15 to L2, make a new connection between L2 and C15, add a ground wire to L3, and make a connection between L1 and C20. And of course, you have to add another horn and wire it up in parallel with original horn.
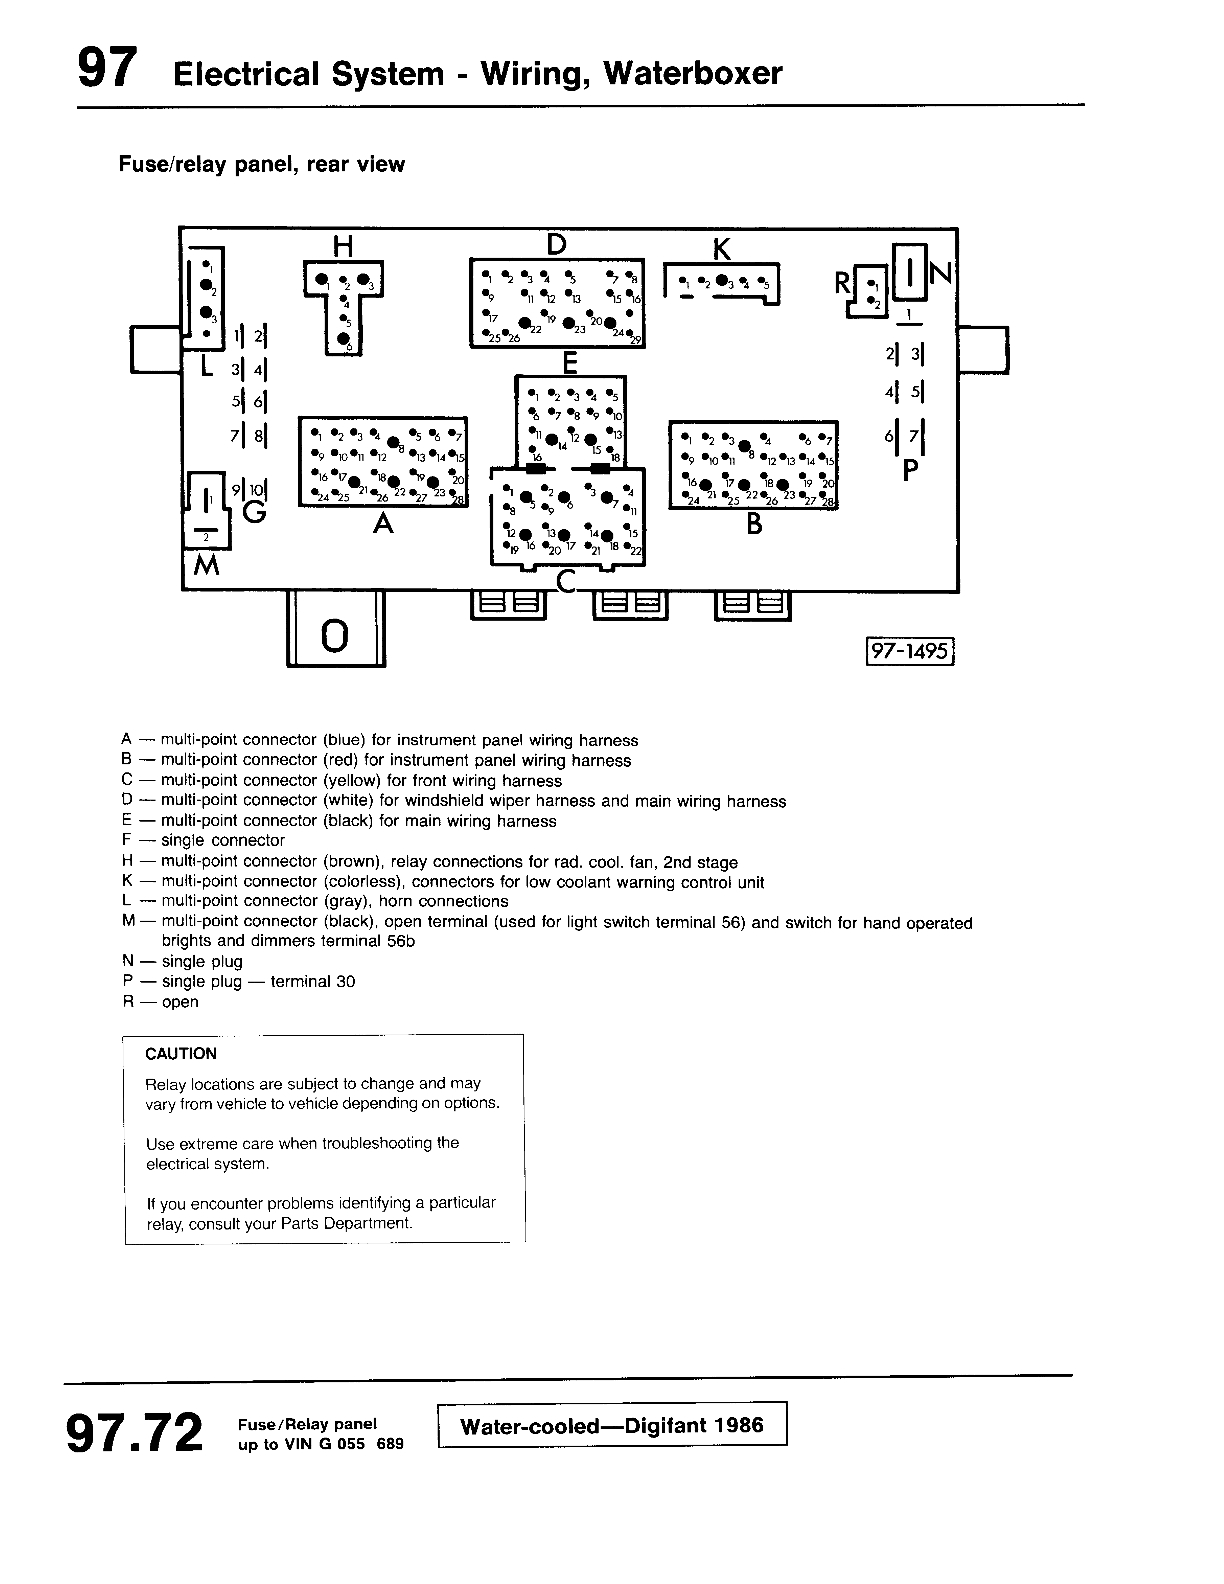
So what and where are those connections L1, L2, etc? They are on the back of the fuse panel, and the legend is here:

Funny how the label the L block as for horns, when the wiring diagram later show the horn wiring going to C and B blocks. The manual is not perfect 🙂
Finally, my crappy version of the modified wiring diagram (you see I have a 40 A relay in position 6, its only because that’s what I had on hand, 20 A would be fine):

For a more professional drawing of the modified wiring diagram, check out this on Michael Sullivan’s site (and have a look around the site, pretty interesting).
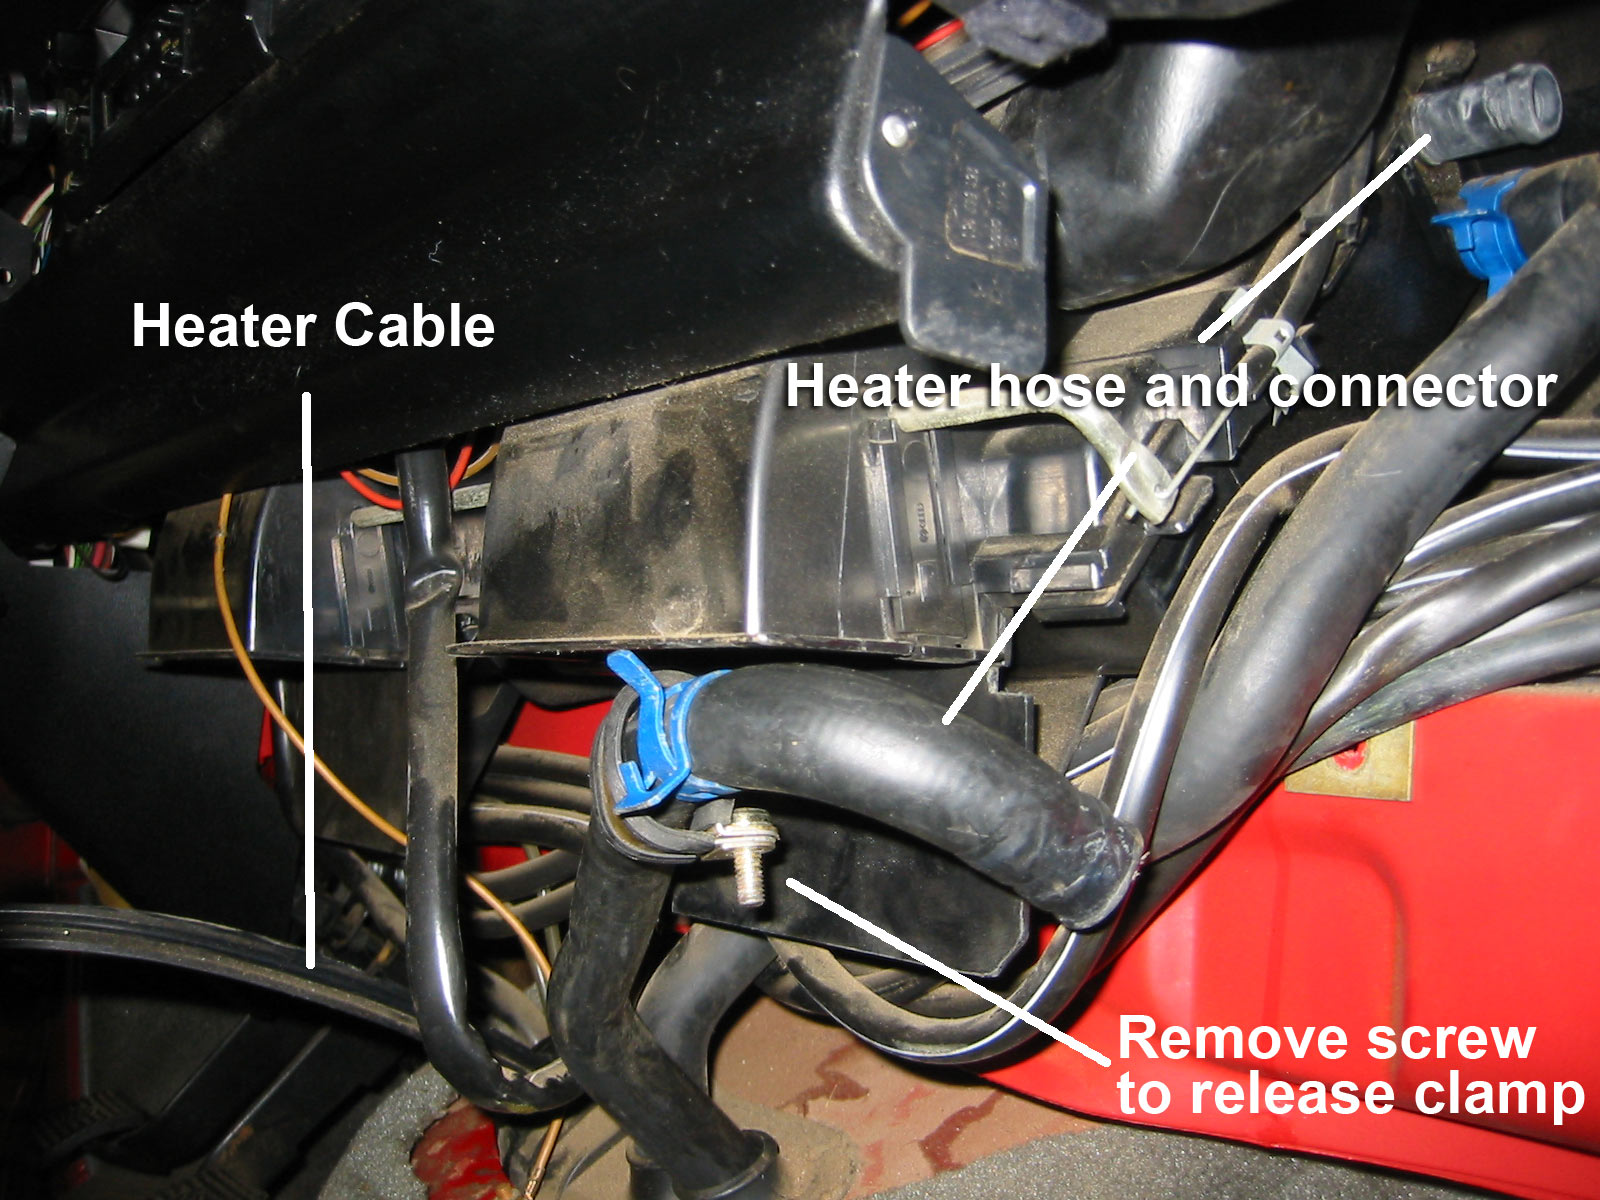
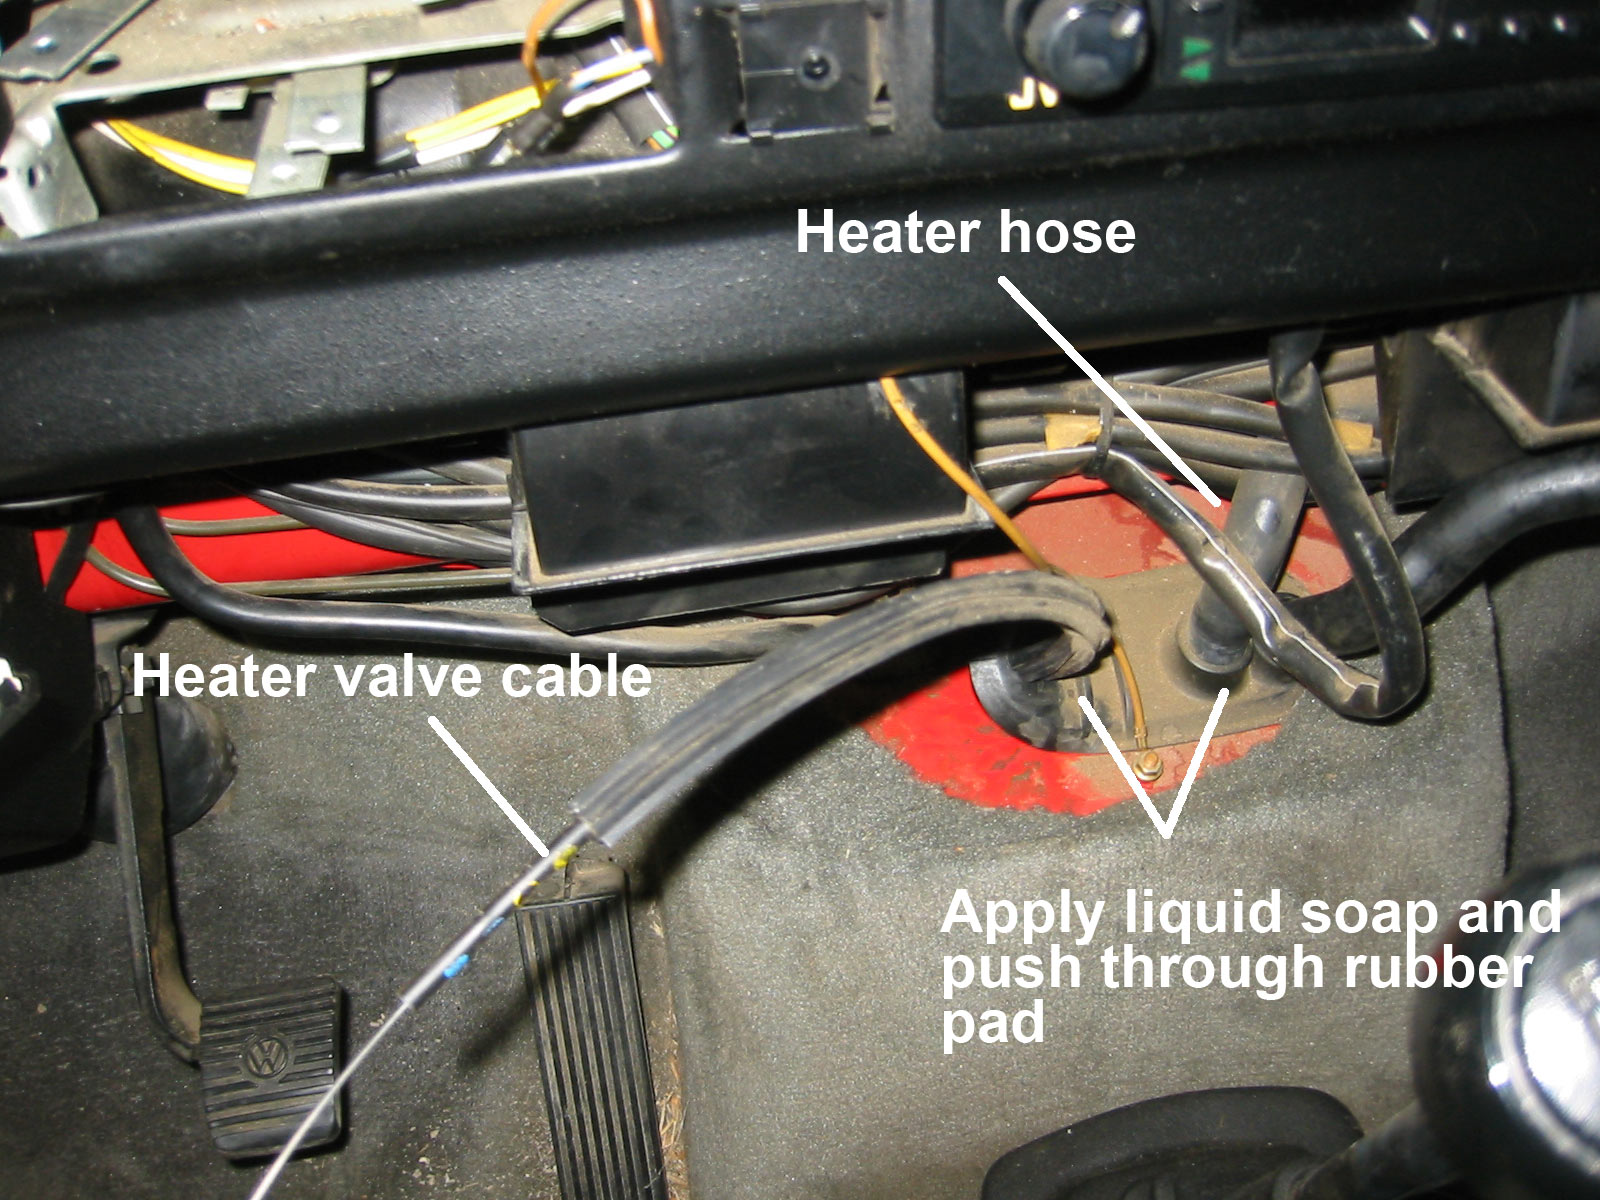
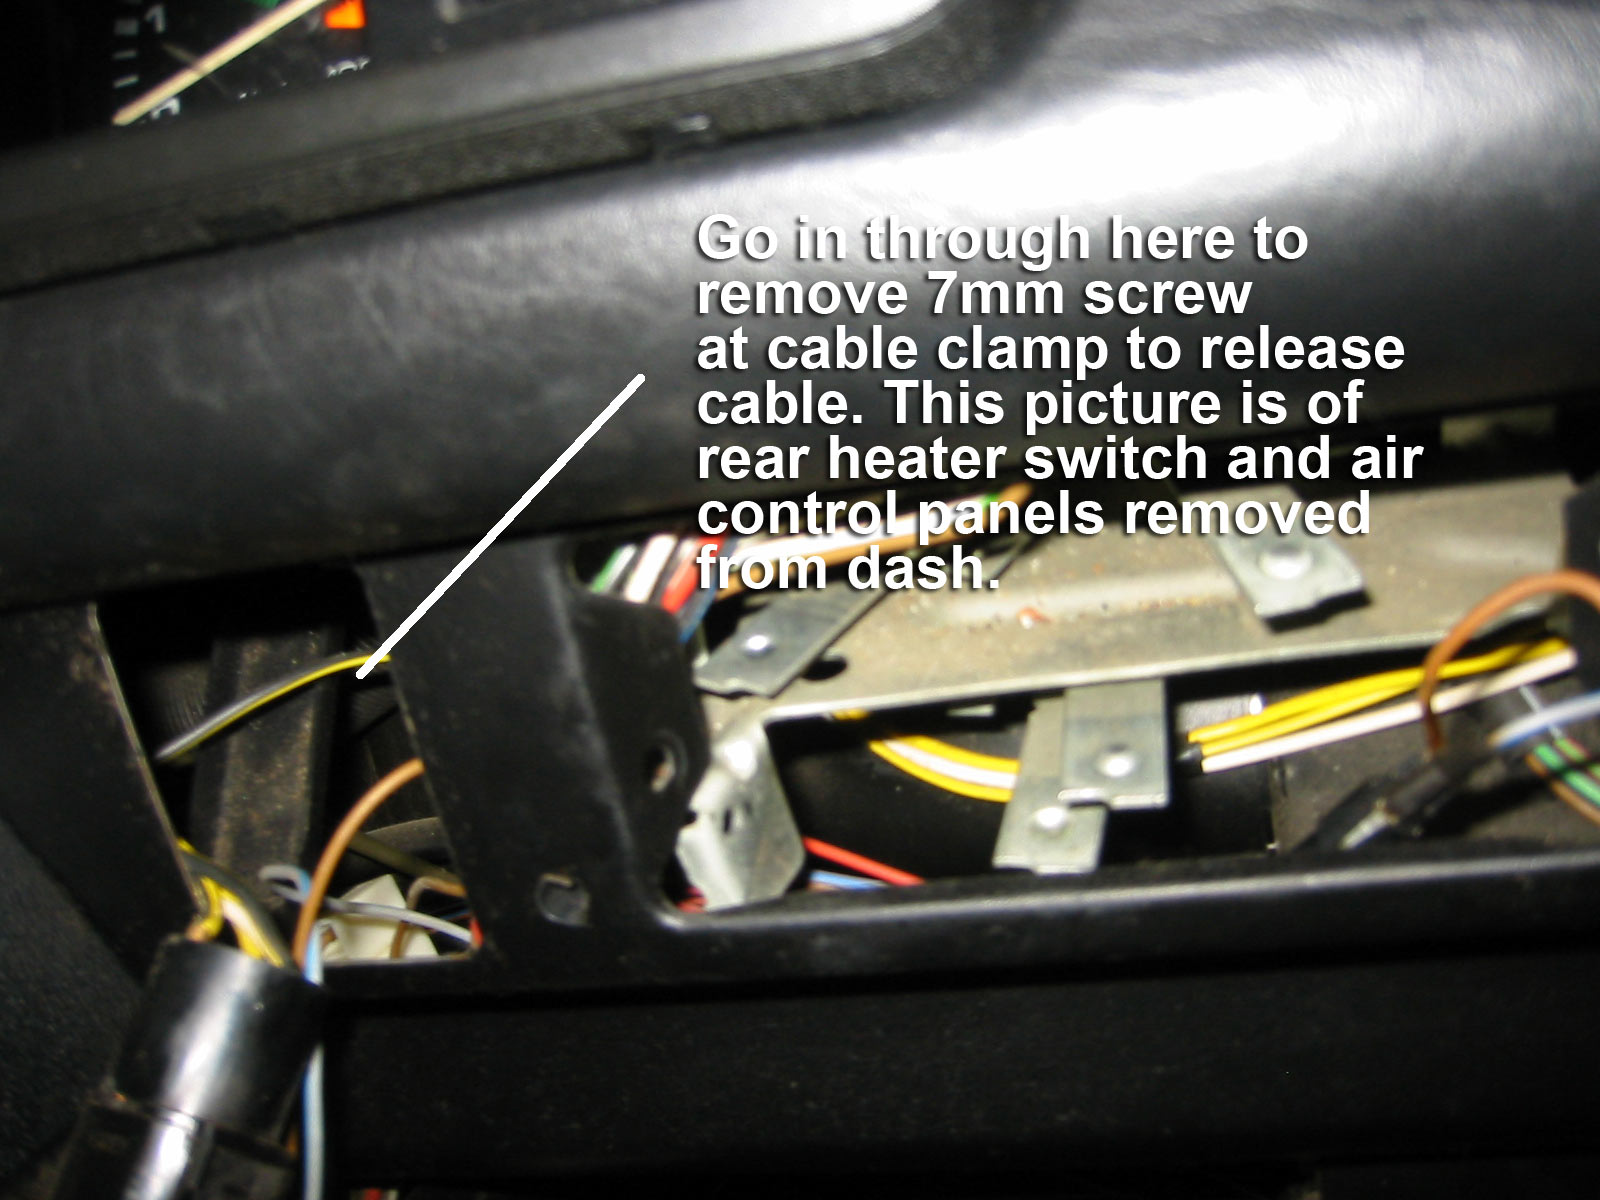
Vanagon heater valve replacement
Posted by albell in vanagon, vanagon mods on August 19, 2010
Jim’s annotated photos.
’83 Vanagon diesel dipstick mod.
Posted by albell in vanagon, vanagon mods on August 19, 2010
Jim writes:
This might be of interest to anyone wanting to use an 82 block with a later Model vanagon, or for anyone wanting to get away from the stick-in-the filler tube setup.
A few weeks back I wrote that I had carefully studied and measured the dipstick tube on my vanagon-specific NA diesel and was trying to make another one out of brake line for the 82 vanagon-specific block I was building.
What makes the blocks specific to the years is the treatment of the “dipstick” hole in the side of the block. With the 82 block, the hole is plugged with an aluminum piece, and the dipstick assembly is part of the oil filler tube.
I was going to use the dipstick tube out of the original 83 engine after knocking the aluminum plug out of the 82, but upon careful inspection, it isn’t that simple.
The machining in both holes is different. The 83 has a larger top part—the holes are step- drilled so that the bulge in the dipstick tube will seat at the step, assuring that the marks on the dipstick itself are the correct distance from the bottom of the pan and thereforeread accurately.
The bulge in the dipstick tube on the 83 will not even fit into the 82 hole at all without grinding it down, which would thin the tube walls, making it weak and ruining for further use in an 83.
So here’s what I did:
Start with a 7.5 mm steel brake line 36 inches long, and while you’re buying it get a brass compression fitting that just barely fits over it. They make one that’s perfect, you just have to try a couple of sizes to find it.
Cut off the flanges on both ends of the tube. slide the compression fitting over one end and touch a grinder with the fitting so that it grinds concentrically as the fitting is spinning on the tube. It doesn’t take much, you want a nice fit so be careful
Push the fitting up from what will be the bottom of the tube so that the bottom of the ferrule is 30mm (7 and 5/8 inches) from the bottom. This has to be exact. Now mark the top and bottom position of the fitting and use a small file to clean the metal of the tube where it will sit. Now solder it in place.
Slip a coil spring type pipe bender over the tube and bend it to shape by hand (I think I’ve already posted a picture of the proper bend photographed against a 1 inch grid for reference). The curve should be smooth, but it doesn’t have to be particularly faithful to the original for the setup to work. What DOES have to be accurate is the distance of the compression fitting from the bottom of the tube, and the length of the tube overall.
Go to a junkyard and get any VW gas or diesel dipstick where the orange plastic piece snaps over the end of the tube. Unsnap it and throw away the tube, you are going to put the plastic piece on the end of the tube after bending the pipe, and cut the tube several times until the dipstick (dealer item if you don’t have one) protrudes from the end of the tube exactly two millimeters.
Once done, drop this into the dipstick hole in your block and seal with black permatex. Behind the alternator, under the nut, drill and trim a hadware store angle bracket to fit under the nut. I bent the top, flat part of this to conform to the roundness of the tube and secured the tube to the bracket with a hose clamp.
After putting 3.5 quarts of oil in the car, the dipstick shows the level exactly halfway between the marks.

adding middle seat rails to a Westy
Posted by albell in vanagon, vanagon mods on August 19, 2010
Jim writes:
How to install middle seat rails in a westy
You’ll need a way to get under the car, a circular saw, the usual hand tools, a set of seat tracks and the fasteners for those tracks, a marker, a tape measure and a straight edge and some 2″ wide painter’s tape. The tape will allow you to mark accurately for the cuts, and will help the carpet cut cleanly. You will need a very long 3/16th (approximately, it just has to fit through the center of a 13mm bolt hole–that’s a head size of 13mm, not shaft diameter) drill bit, about a foot long I believe. You will use the bit to drill up through the bolt holes in the bottom of the van to locate the center of the pieces you are going to remove. It’s tight up against body crossrails, and the drill body will interfere with these if you don’t have a really long bit.
When the instructions refer to bolt holes in the floor, realize that every vanagon ever made, as far as I know, has the bolts for this welded into the metal of the floor. The trick is to remove two sections of wood that cover the holes in such a way that when the sliding seat trays are dropped in, their holes align exactly with the fastener holes. It isn’t difficult if you can mark and measure carefully.
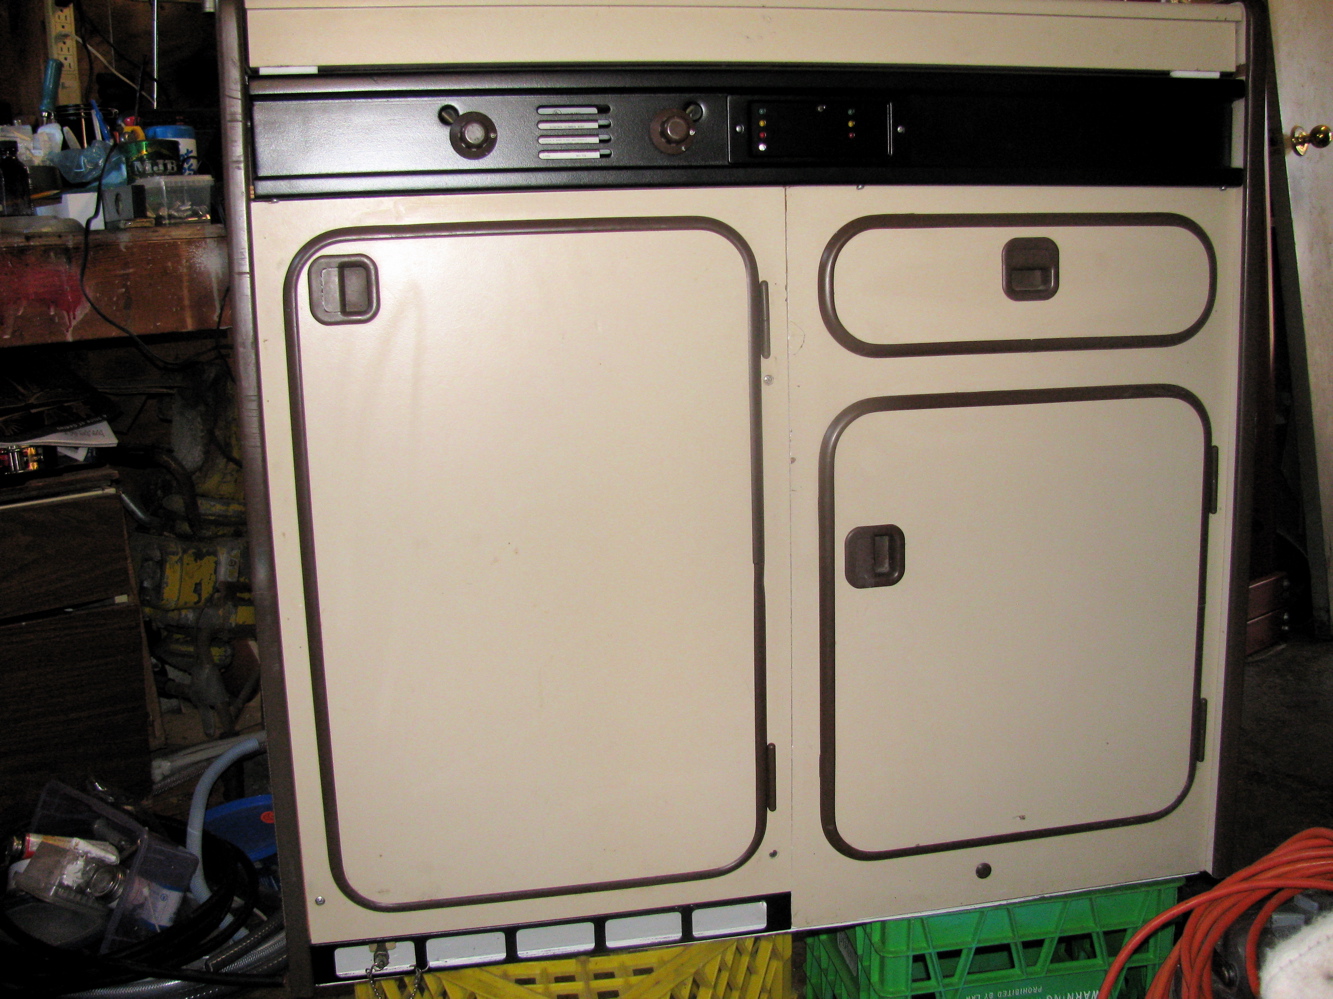
First pull out the fridge unit so you have access to the whole width of the floor board. Take off the front (door side) trim.
Go underneath with the long drill and locate the fitting welded into the floor where the floor track will be. This will be obvious as there will be two rows of them across the car in about the middle of the rear area. Once you have drilled up through the two fasteners near the door, measure over the width of the floorboards and then go below to locate the corresponding pair. You don’t want to go all the way to the driver’s wall because there’s no point in removing the plugs. You are not going to use them because the seat rail won’t reach them.Start at the ones just inside the door and drill up through the floorboard. You are drilling through a plastic plug. After you get the floorboard strips removed, you can remove all of the plastic plugs from the top with with a phillips head screwdriver. But, until you can remove the wood flooring, you must very carefully mark where you are going to cut, and for now must be content with drilling as small a hole through them as is feasible. You don’t want to break the drill bit off, but you don’t want to big a drill either. Just something large enough to find the hole in the carpet to use as a point of measurement. If you drill too large a hole in the plastic plug, you will just spin the plastic plug and it will not want to come out. You will also have drilled out the molded phillips head pattern in the top. So, use as small a drill as you can.
Lay down a strip of tape over all four holes, running fore and aft, each about ten inches long. Punch down over the hole to locate it in the tape. This will create your four reference points. Now run masking tape across the floor of the van between the marks. Now measure the width of the seat rail tray where it drops into the slot (not at the edges of the flanges). Look at the end and you will see this for yourself. The flanges down both edges of each piece are meant to cover the edge of the channel and embed in the carpet.
Measure this distance, divide it by two, and mark this distance out from your reference holes. Connect the marks across the width of the floor with a line from the straight edge. The material between these lines is what you will saw away.
Use the open area between the floorboard and the wall to set the depth of the circular saw to saw through the bottom of the wood without touching the metal and ruining the blade. It can be done. If you are worried about this, leave yourself a 64th or so and get the last with a knife blade. Lift the strips out and you will see all the plastic plugs that can now be removed.
Simply screw in all the track pieces–they will only go in one way–and replace the stove and fridge. Slide the seat in for reference before you do final tightening on the rails.

Westy water tank install
Posted by albell in vanagon, vanagon mods on August 14, 2010
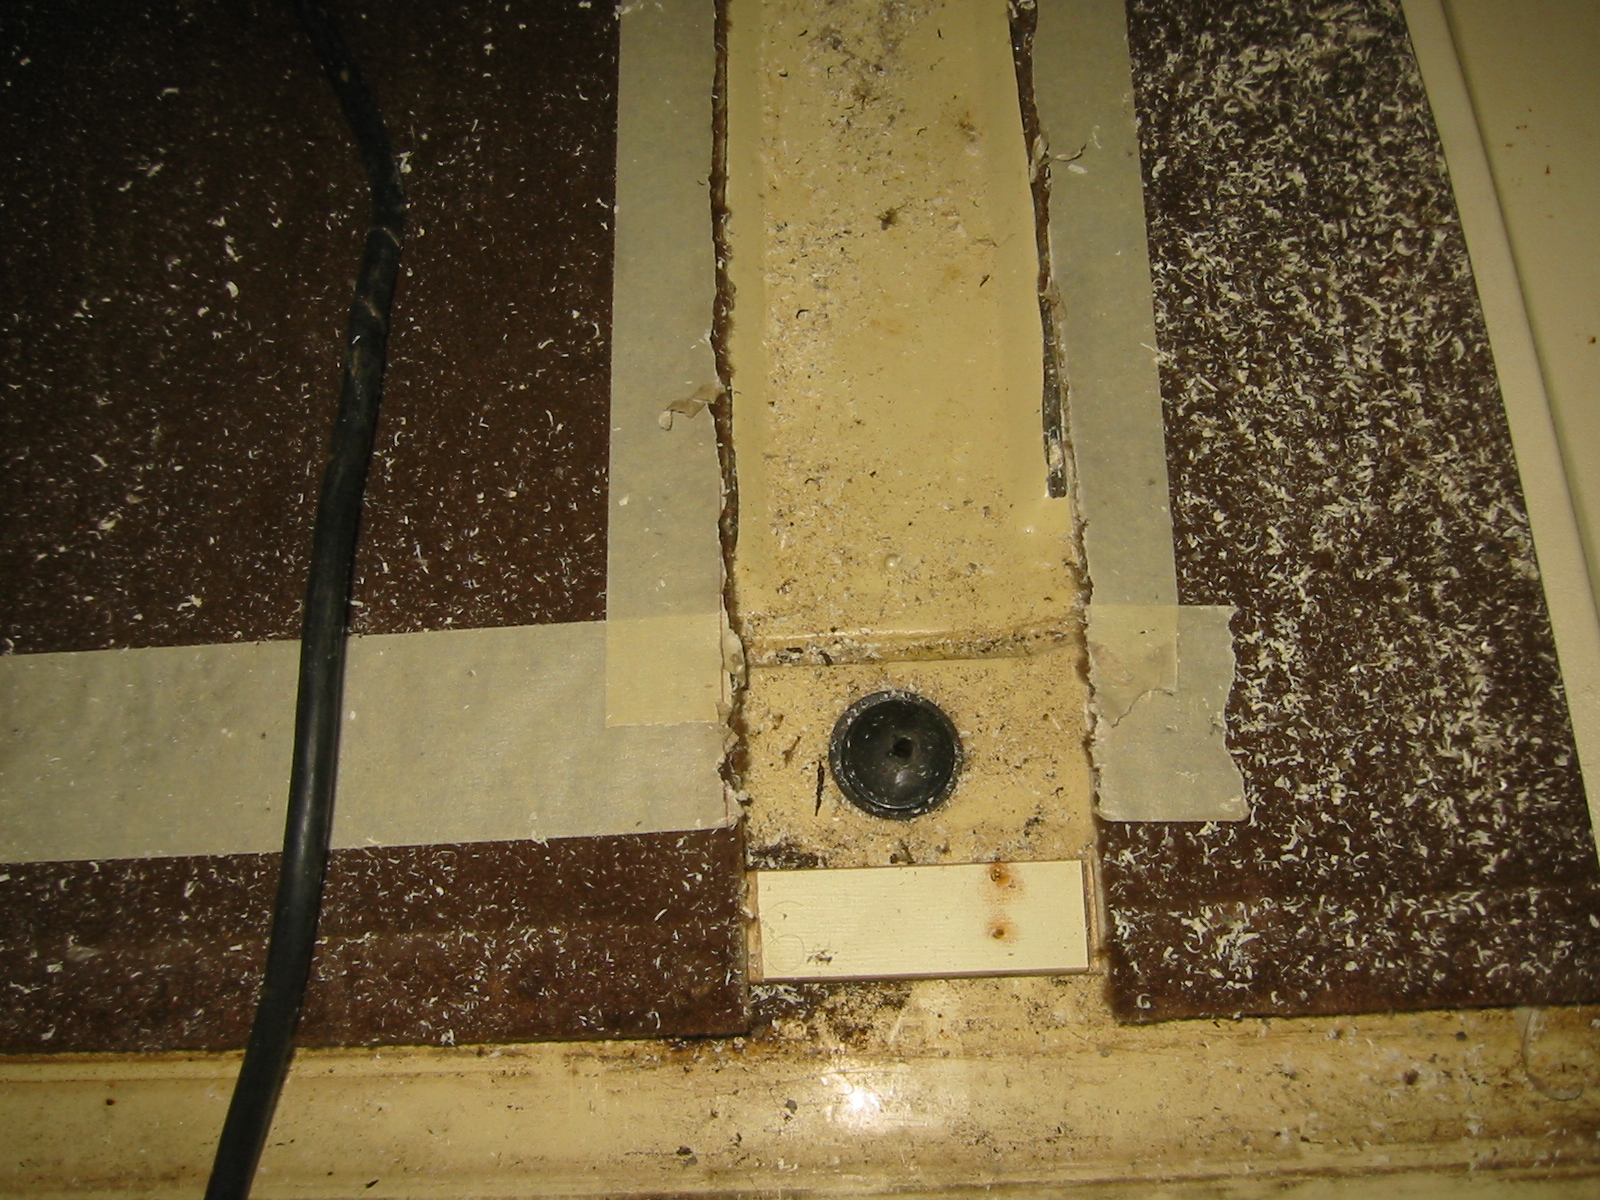
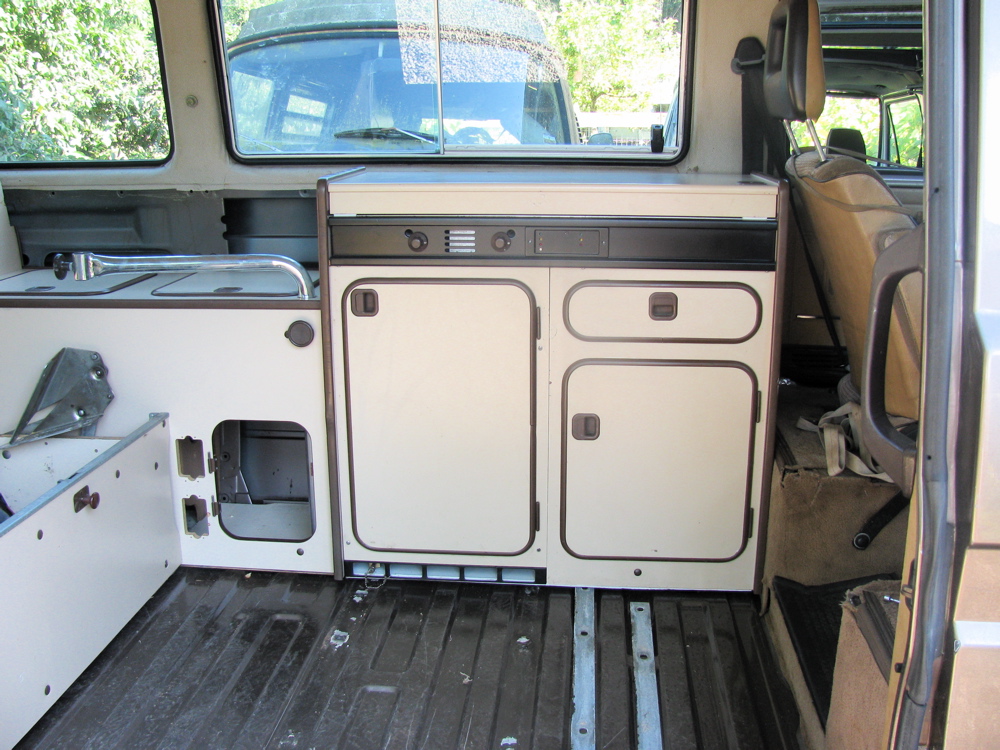
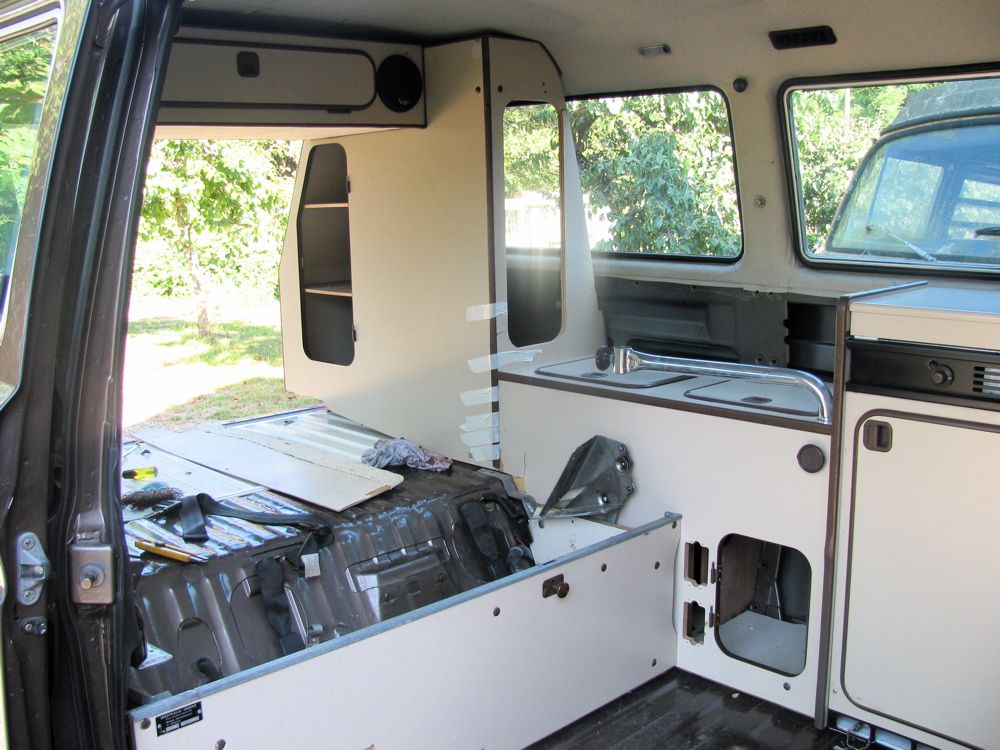
Hot day today, for Lower Vancouver Island, in the low 30’s. All I felt like doing after the overhead cabinet install was installing the fresh water tank. It sits against the angled back wall on the drivers side, and the drain pokes through hole in the floor. I measured where that hole is in my ’82 Westy , but crikey, there was a dimple on the Syncro’s floor right where the hole is supposed to be. And same thing further forward for the sink drain hole.
Water tank area:

And sink drain area:

Drilled on the dimple and went under van to realise hole was right where the old Webasto heater fuel pump is. The heater is not working, and wont be anytime soon, so I removed the pump.


Using that hole as pilot, I punched out bigger hole with Greenlee punch.

And then a bigger Greenlee punch.


So much nicer than using a hole saw. At this point I wondered why the heck was I working with the cabinet in place? Out it comes and a trial fit of tank.

I stuck some closed cell foam on bottom and back of tank for cushioning and maybe reduce any sweating. Westfalia jams in fibreglass insulation on the back, against the angled wall. Then caulk the opening (I had painted cut surface) and the tank goes into the cabinet and the cabinet lowered into place.


Tomorrow I’ll fit up some sort of gasket plate or just caulk the area on the underside of van where drain emerges.
Rear overhead cabinet install
Posted by albell in vanagon, vanagon mods on August 14, 2010
With the way I am camperising my Syncro, ie just cutting sunroof sized hole, it means that there is no flat ceiling where the rear overhead cabinet goes. In the regular Westy, the flat ceiling is the plywood upped bunk surface, and the rear overhead cabinet bolts securely up to it as well as being bolted at the side to the wardrobe.
Having a headliner covered curved steel roof back there makes it a little harder for me to install the cabinet, and because the ceiling is not flat, my cabinet will have a space between it and ceiling. The Westfali Mosaik kit solved this problem by having a curved front face on the cabinet to match the curve of the ceiling, and uses rod like hangers to mount the cabinet to the van. Here is a diagram.

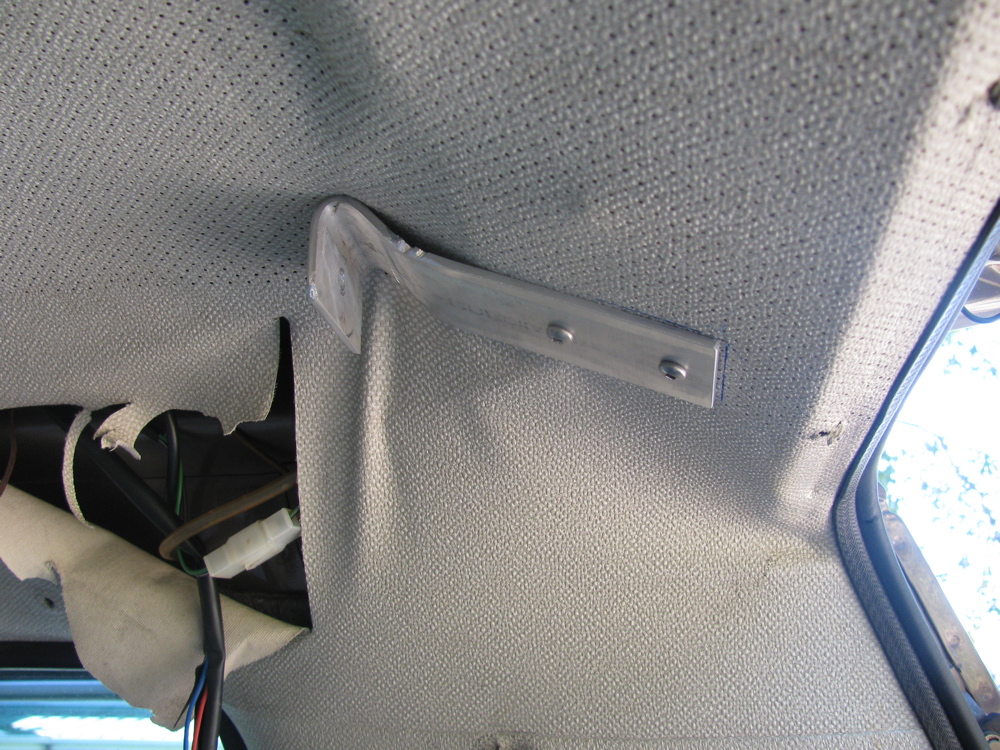
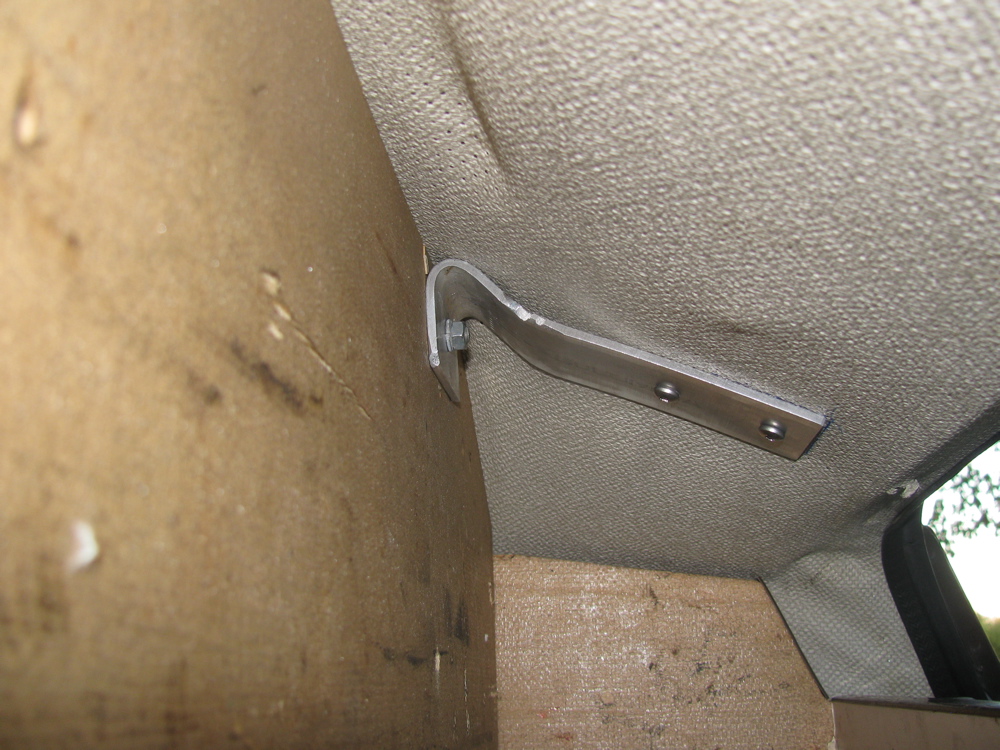
But, like and idiot, I couldn’t find the diagram above when I went to install the cabinet. I fussed over how to mount it securely – it was held on the wardrobe side by two bolts into top of wardrobe, but the other end was unsupported. I solved that partially by making a rather feeble bracket at the rear, right hand side. Its made from a ratty scrap bit of aluminium which had a tight bend in it, close enough to the angle needed. It was very awkward to fit and did not fully support that end of the cabinet.
Later I found the diagram and made a hanger from a 3/8″ stainless bolt, and one of the brackets used in the rear AC electronics. The hanger hooks up and onto the box section reinforcing part of where the wall meets the roof. I may have to adjust things a little, I detect a slight misalignment, but all in all this worked well, the cabinet its fully supported.

Westy rear view mirror mod
Posted by albell in vanagon, vanagon mods on August 12, 2010
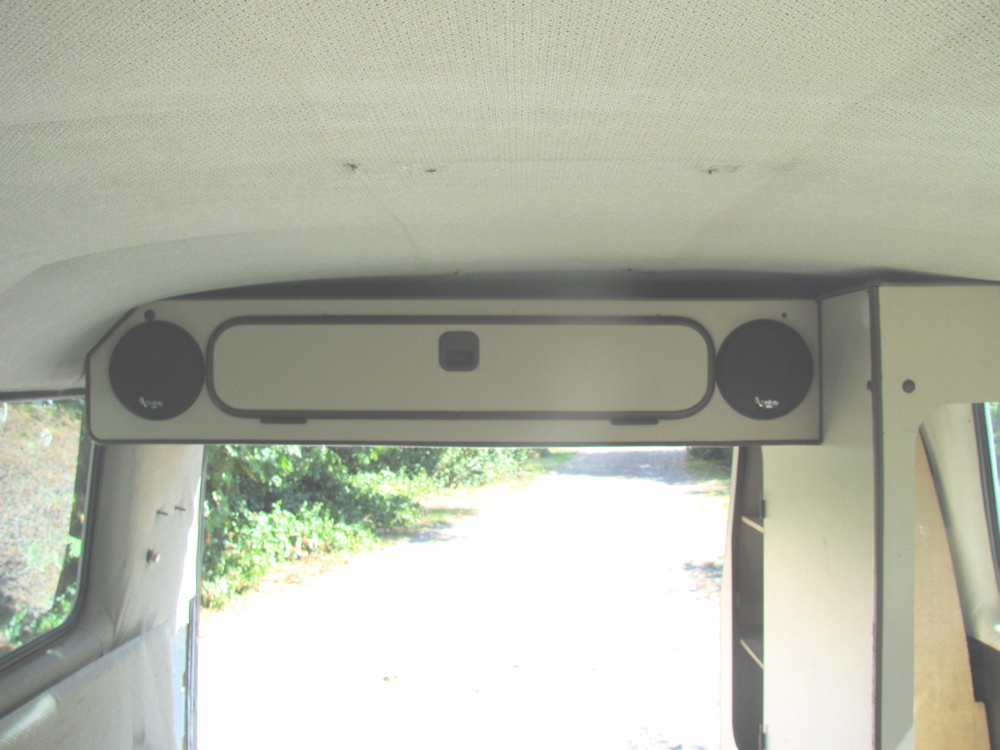
The rear overhead cabinet or AC unit in the Westfalia reduces your rear view (huh? you know what I mean) and that bugs a lot of folk, including me. There was a Samba thread on this subject with some good solutions. One was to use a baywindow van mirror stalk, there were some that had extended stalks and this is the hot ticket. I have a ’72 westy gathering moss with regular sized stalk, so I removed the rear view mirror – clockwise twist on stalk – and tried it our with the Vanagon mirror (why on earth had I not bothered to do this before you ask? I guess I’m slow).
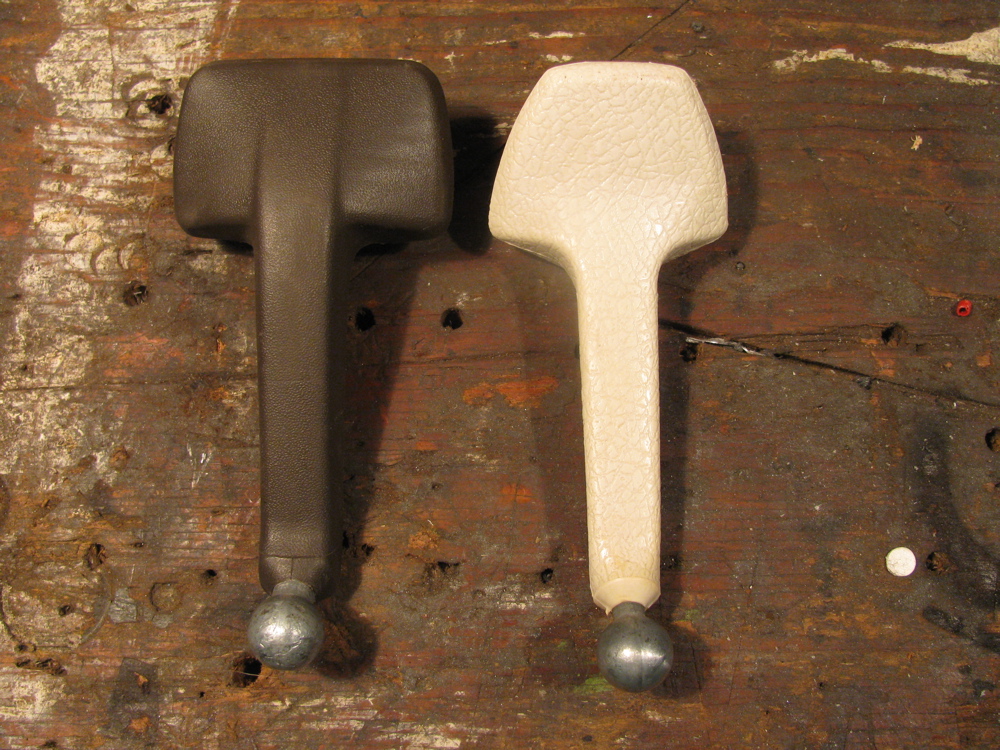
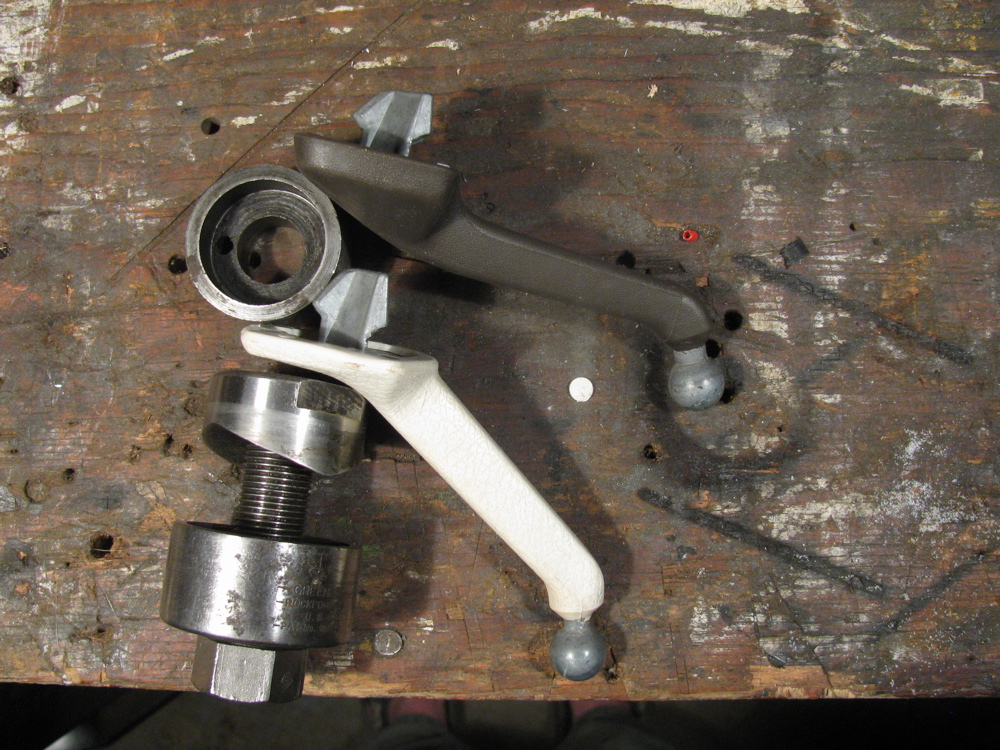
The ball joint between the mirror and the stalk are the same on both, and the mirror comes off with a little bit of twisting.
The baywindow stalk is perhaps a tad longer than the vanagon’s, but the attachment angle is different. The upshot is it may provide a bit better rear view. Pictures to prove this assertion to come, but for now some pics of the stalks. The baywindow stalk in off white, the Vanagon in brown.
Update: took pictures of both stalks (same mirror) in van. The shots from drivers point of view, showing rear visibility are crap, sorry. Don’t know if you can tell that there is improved viewing angle, but I think there is. The side views show clearly the different angles of the stalks. If you have a spare baywindow stalk lying around its worth trying it out.


Westy new old floor
Posted by albell in vanagon, vanagon mods on August 11, 2010
I couldn’t help myself, this evening I put the floor tracks and the old floor I made for my ’82 Westy (original “82 Westy floor, cut into 3 strips, faced with luan door skin plywood, and shellacked) into the Syncro. The floor has weathered pretty well, mind you it has been covered by foam and carpet, but still its 10 years old.
I need to do some minor fitting to get it just right but now the camperisation is really coming together.

Here’s what I wrote in my old web site about the floor in the old “82 Westy:
“Back in ’00, when I reno’ed the interior of my van, I replaced the foor.
Early Westies (like my ’82) had a floor made from carpet covered plywood. Later vanagons had a “floor track system” that I thought was useful as it allowed the installation of a stand-alone seat, or a second bench seat.
So I got the tracks from a wrecker (they are bolted to the steel floor of the van) I ripped the original (awful quality) plywood into three sections, faced them with luan plywood (3mm doorskins) and installed the whole shebang. The luan ply is finished with shellac and wax. I trimmed the original carpet to lay on top of the new floor.
The shellac and wax finish has held up surprisingly well but is quite slippery, doh! The carpet would slip around on it until I installed a foam flooring material discovered at the local Home Depot (I had originally wanted to face the ply with some cork flooring – still will someday).
The foam is about 3/4″ thick and the edges interlock together. I don’t know what kind of plastic it is made from, but it is like a beefed up version of those foam jigsaw puzzles for kids.
One package (around Ca$19) makes a square about 4 feet by 4 feet, not quite large enough to do the Westy floor perfectly, but it works fine.
The foam just lays on the ply, trimmed a little to fit the cabinet projections and stops the carpet from slipping as well as providng a very nice feel to the floor. Also, it comes right out with no fuss and can be used as a seating/lying/playing pad when camping.”


Camperisation Part 2
Posted by albell in syncro, vanagon, vanagon mods on August 11, 2010
I did some trial fittings and screwed down some cabinets in final positions. Made a spacer for bracket that holds pass. side of rear bench to wall of van. I mentioned in “the start of camperisation” post that the rear bench did not fit as tight to the wall in the syncro as it did in the ’82 Westy. The spacer allows the bracket to be used and bolts the bench tight to the wall.
Wardrobe actually fit in without cutting headliner. Bracket at back on engine deck is fixed in place, and wardrobe is bolted to next cabinet and that cabinet is bolted to rear bench. Its alll pretty secure even though low cabinet not attched to van wall yet and also the rear bench is not bolted down to floor yet.
Overhead cabinet bolted to wardrobe and held up on other end by prop until I figure out a support bracket to hold it to ceiling and to pass. side wall. In the Westy, its bolted to flat ceiling (plywood) which is the upper bunk. You can see how the ceilings differ in that there is a space between overhead cabinet and the ceiling. The Mosaik “kit” has a differently shaped cabinet face to account for ceiling difference. (I can’t seem to find a pic of that modified cabinet right a the moment) I will have to do something to fill gap between cabinet and ceiling.
Apart from little fitment issues, the cabinets went in pretty easily. Next step is making holes for propane lines and watertank and sink drains.
Westy sink/stove top rattles
Posted by albell in vanagon, vanagon mods on August 11, 2010
Every Westy owner knows that the stove top rattles when you’re driving on bumpy roads. The rattling can be reduced by:
– making sure latch on top adjusted properly
– installing new rubber/foam bumpers under lid front edge
– laying a tea towel or sponge on stove grate before closing top
– making sure that drain tray in held firmly by bullet catches in lid (not applicable to Canadian market versions)
The rattling comes mostly, I think, from the stove grill and drain tray. But looking at the kitchen unit on the bench, I could see that the groove that the stove top sits in the cabinet is wide enough to allow the rear of the stove top to move up and down a couple of millimeters or so. The front fo the stove top is held firmly by the metal front panel (or should be if all the screws are in place tight), but the rear is only held by one screw to the back grill that runs the full length of kitchen unit. I tightened up the fit of the stove top in the groove with some thin plastic shims, silicon caulked in place. Pics show left and right sides, the gaps and the fix. The rear grill was removed.

Westy Dometic fridge performance
Posted by albell in vanagon, vanagon mods on August 11, 2010
A few years ago I recorded the temperatures inside and outside the fridge just to see how well it works. Data shown below. Unfortunately I did not record what I meant by “back fan on”. Was it the fan on the cooling fins on back of fridge? I think so. But was it cycling and what was the cycle period? It might have been the fan I added to the external water supply port on van, but I doubt it. Nothing worse than half assed experiments eh?
Oh, almost forgot to add, this is with fridge on propane power.

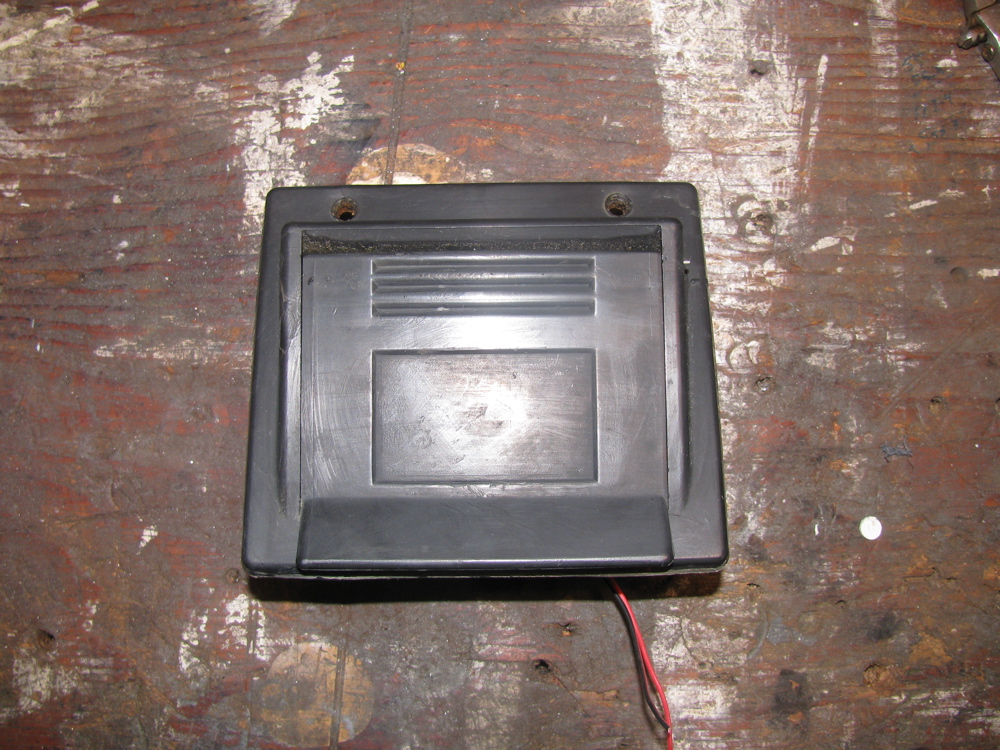
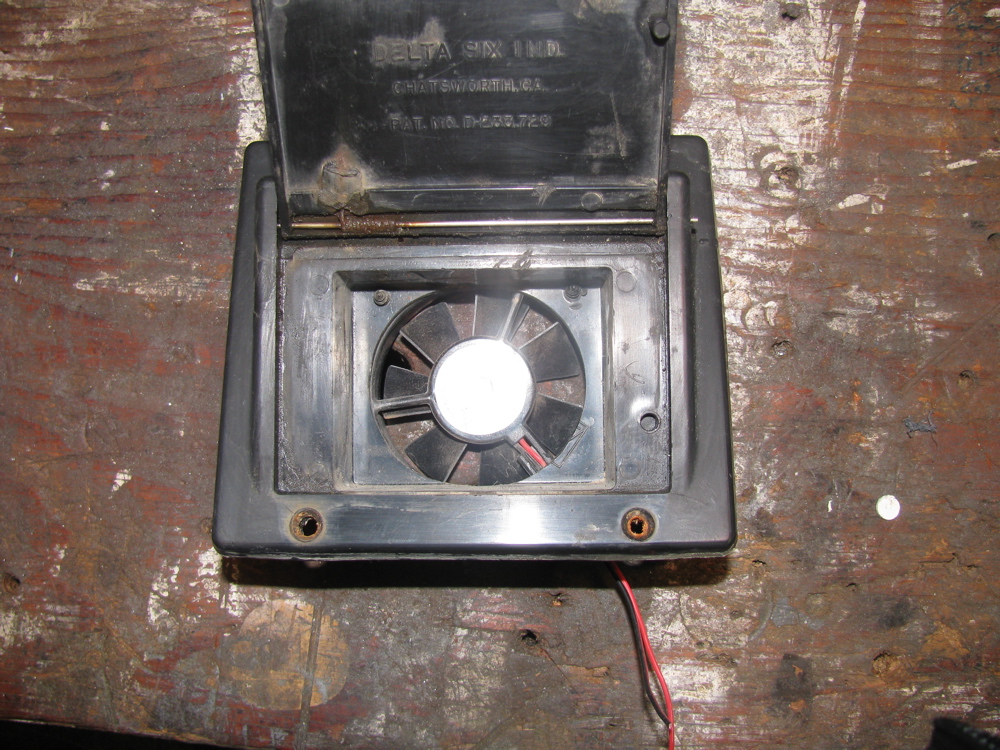
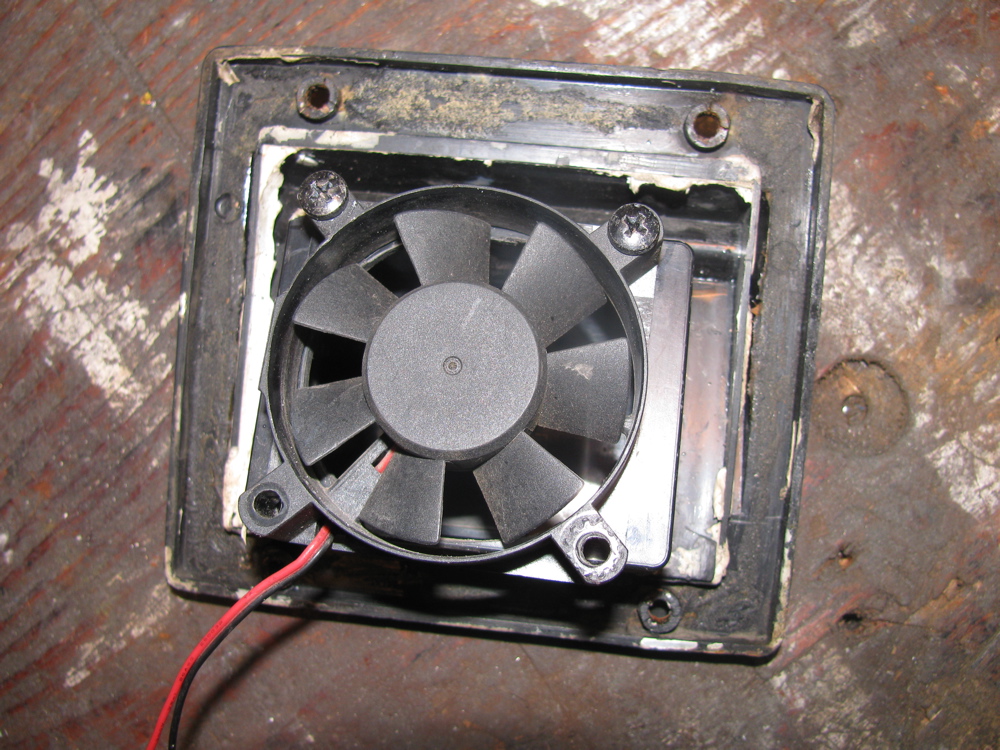
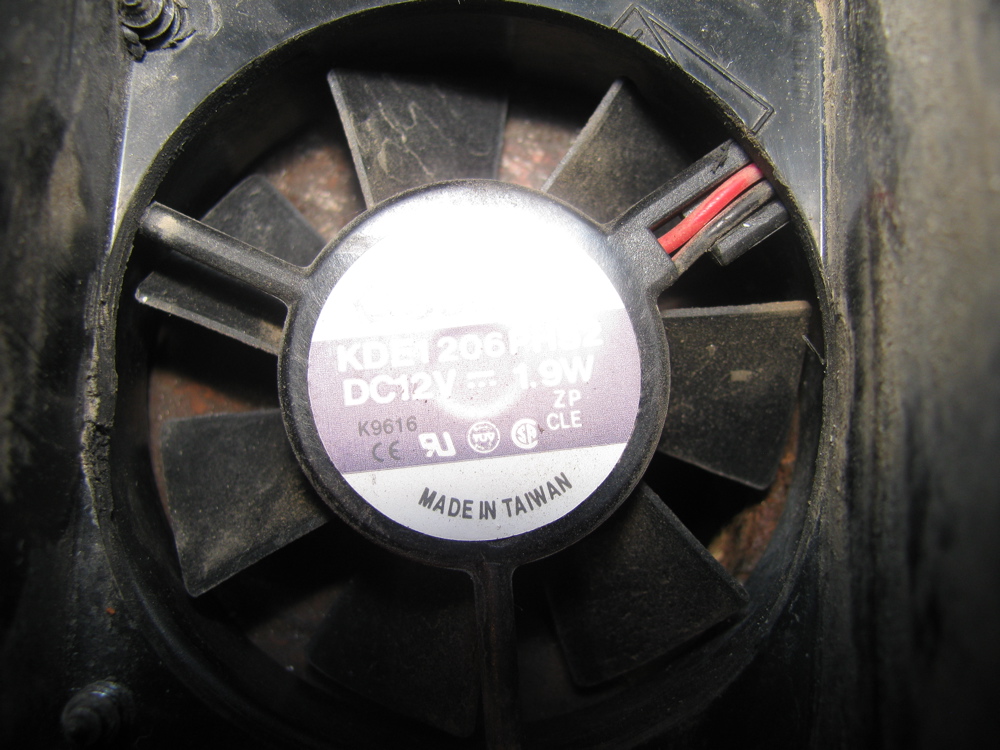
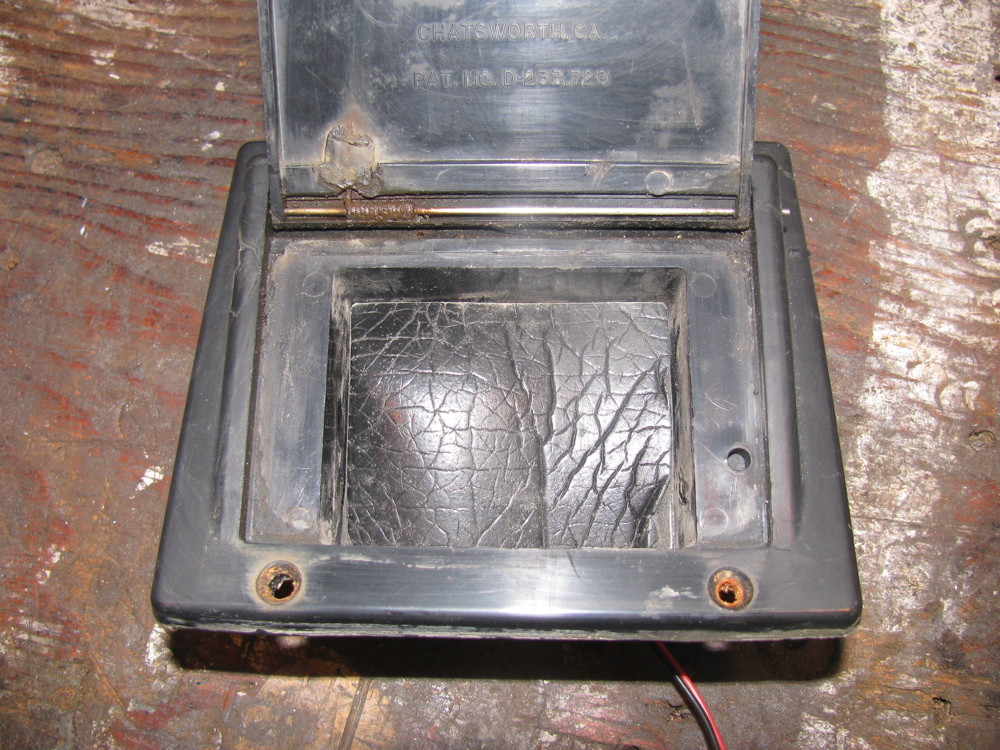
Westy city water port fan mod
Posted by albell in vanagon mods on August 10, 2010
In last post I talked about how well a fan in a modified city water hatch/port works to cool the back side of the fridge. I pulled the port from my old Westy to take pics to show… fan was initially wired in parallel to fridge cooling fan, but later I put it on its own manual switch. It is oriented to blow air out of van. Hatch is propped open by a square of foam material which doubles as a gasket when hatch closed.
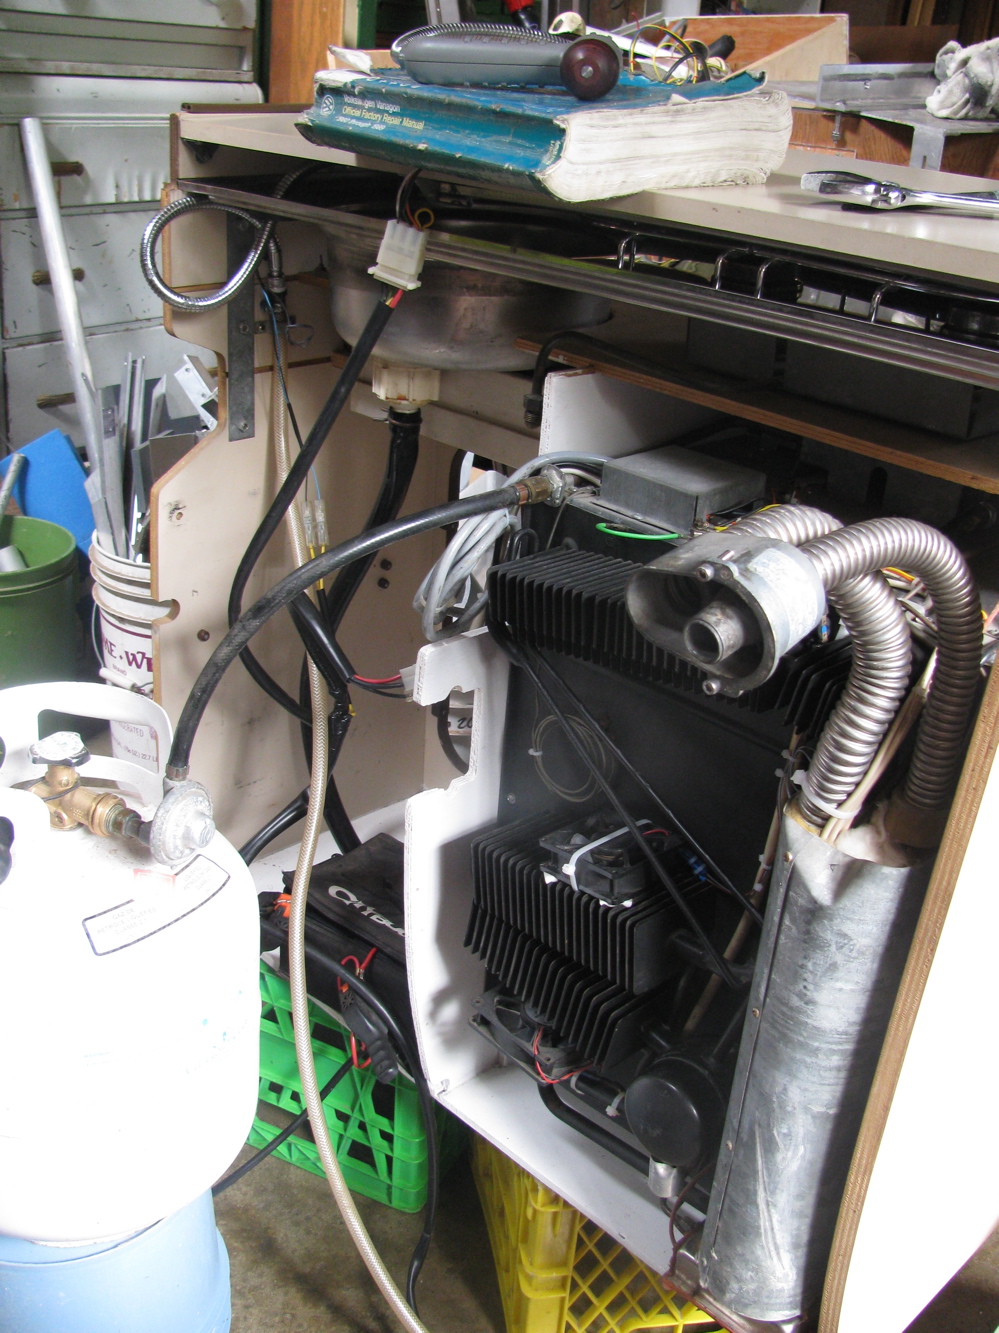
Westy kitchen unit clean up
Posted by albell in vanagon, vanagon mods on August 8, 2010
Spent some time cleaning up the fridge, sink, and cabinet. I added another muffin fan to fridge cooling coils. I’ve had a muffin fan installed for a few years since the original fan crapped out. These muffin fans do not move as much air as the original, but they were free, and as an experiment I decided to add another in parallel. It is cable tied to the second row of cooling fins, with some foam to isolate noise. I am sure the foam will degrade pretty quickly, but we’ll see before that if 2 fans arranged thus is better than one.
Over the years, I’ve done a fair bit of dicking around trying to get more air over the coils of the old fridge, and now I am back to pretty well stock. Best modification I ever did was to use the westy external mains water connection port as a vent. I took out the plumbing and put in a small fan. This really did get the hot air out from back of the fridge. But I don’t plan on cutting a hole in the syncro to do this mod when I install the cabinets though.
Other notes, water line to faucet fixed down to cabinet, and I never did find a good colour match for the brown on the metal bits… exasperated, I sprayed with satin black wheel paint. If I ever find a good brown paint match I’ll re-spray. The black looks a bit funny.
One pic shows propane tank and reg. connected to fridge, and small battery pack powering the electrical system. The fridge lit up easily and started to cool down nicely. Its amazing for such an old unit (1982) which has had a pretty well used life (you can tell by the tatty state of the cabinets) that it still works as well as it does.


Eurovan faucet in Vanagon Westy sink
Posted by albell in vanagon mods on August 7, 2010
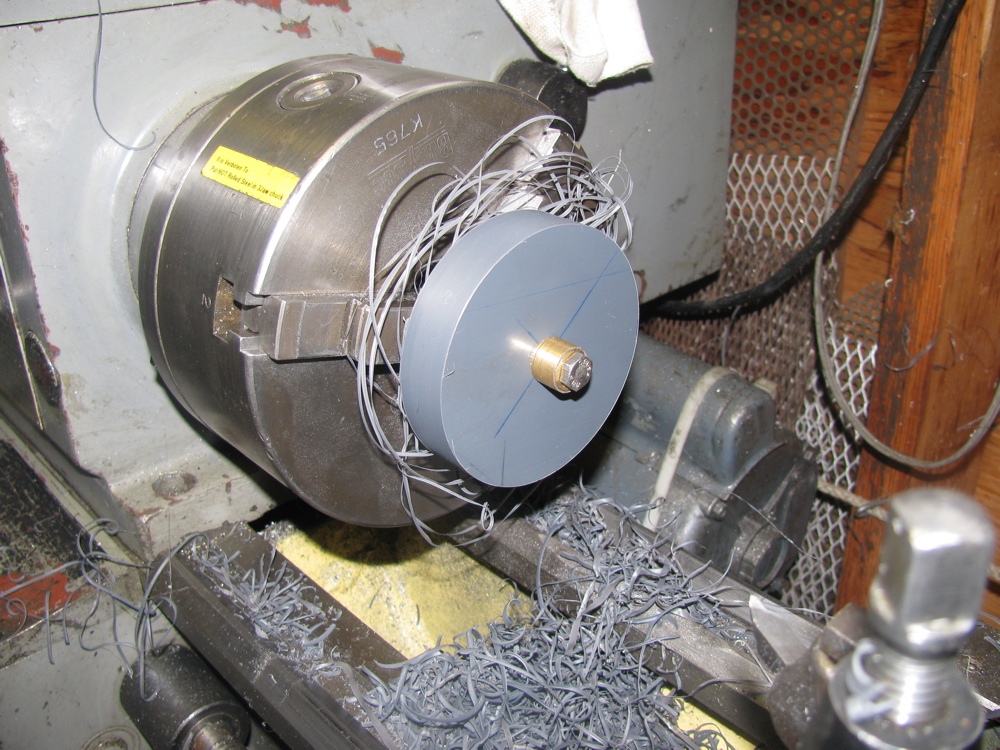
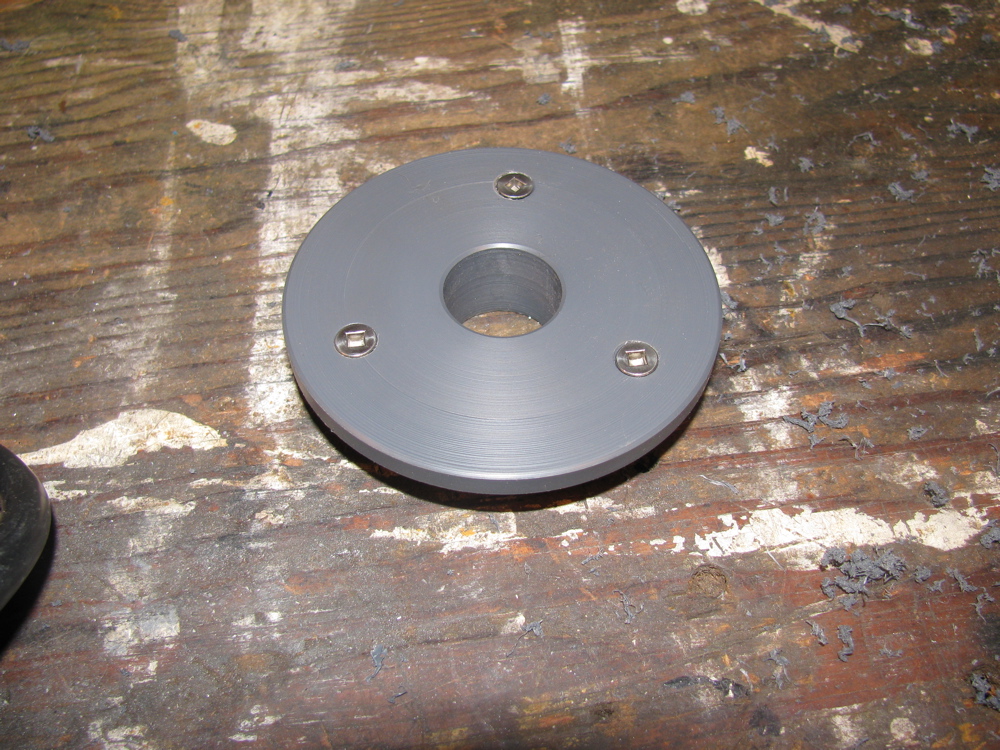
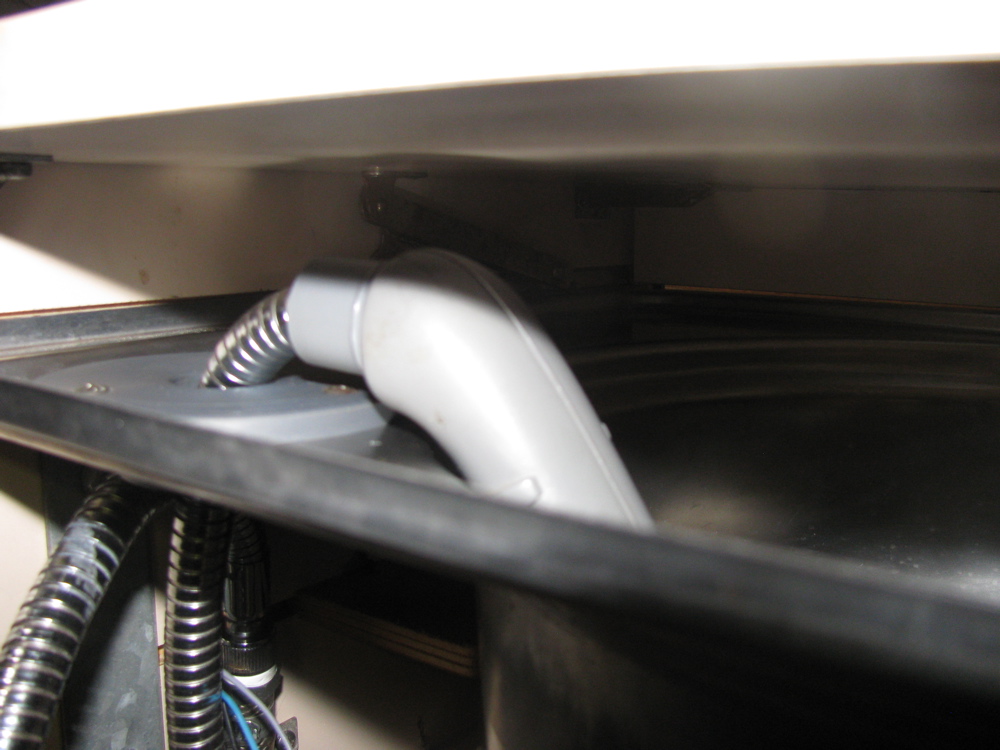
Years ago I bought an Eurovan faucet at a wreckers for a few bucks. Was a good deal except it had no control knob. I made a simple knob on the drill press, out of some phenolic impregnated plywood and never got around to installing in my Westy sink. Finally I am, first I needed to make a flange type bracket to go in the stock faucet hole to hold the detachable Eurovan faucet. Its some PVC scrap. Pics tell the story, next job is to connect the pump wires and the water hose. Oh, one problem with this unit is it has to be laid in sink to close lid. See Gary Lee’s install.


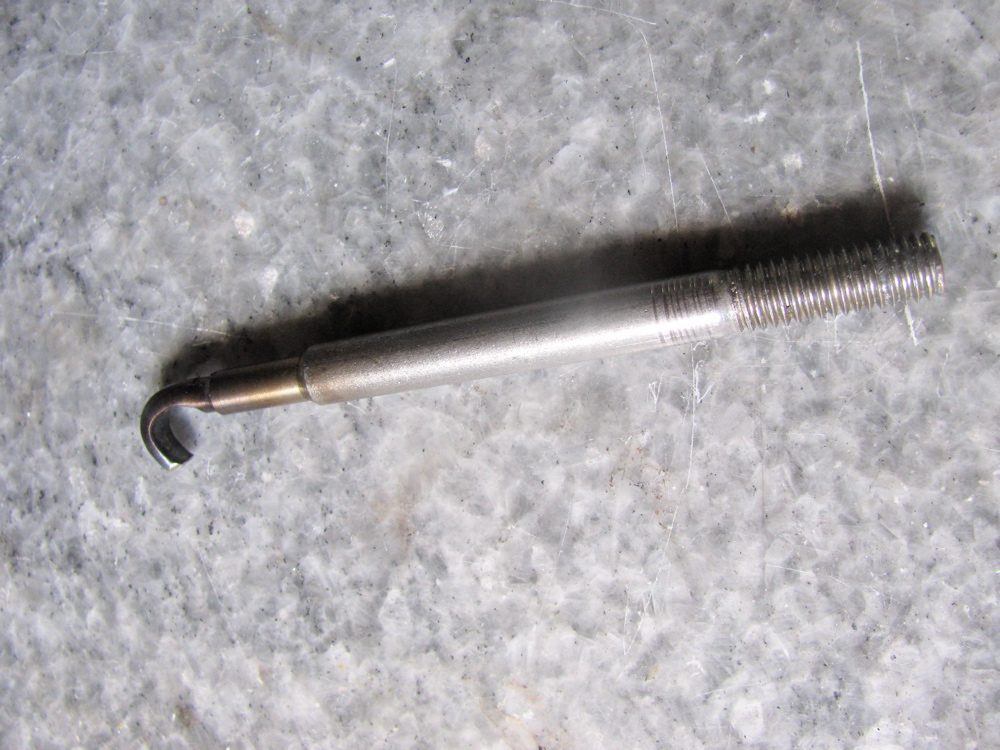
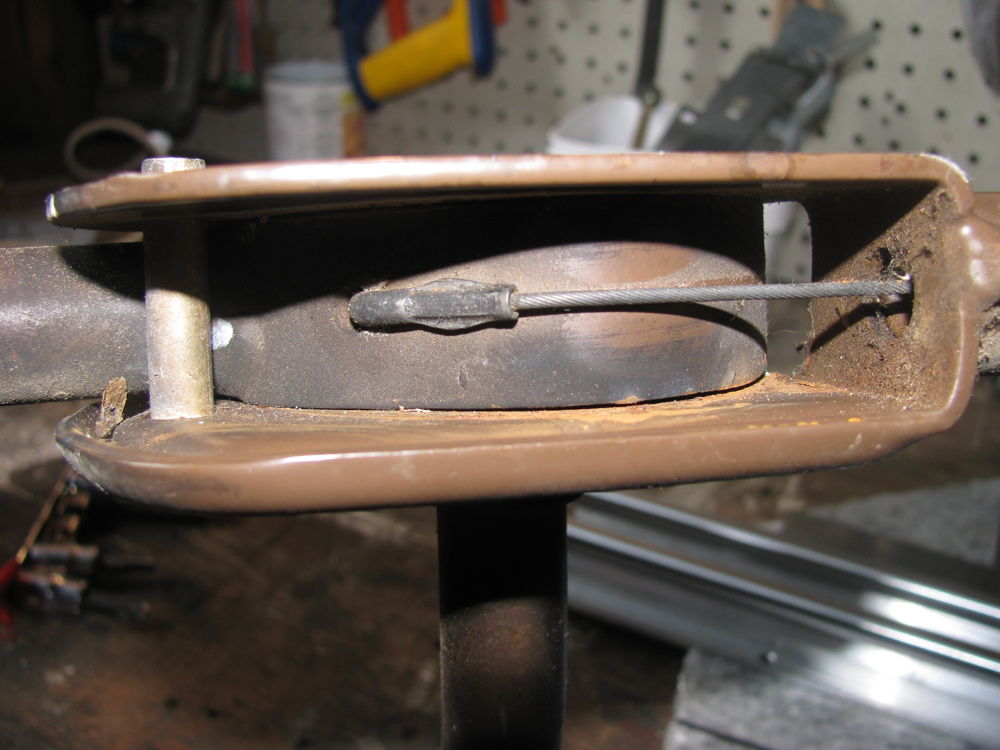
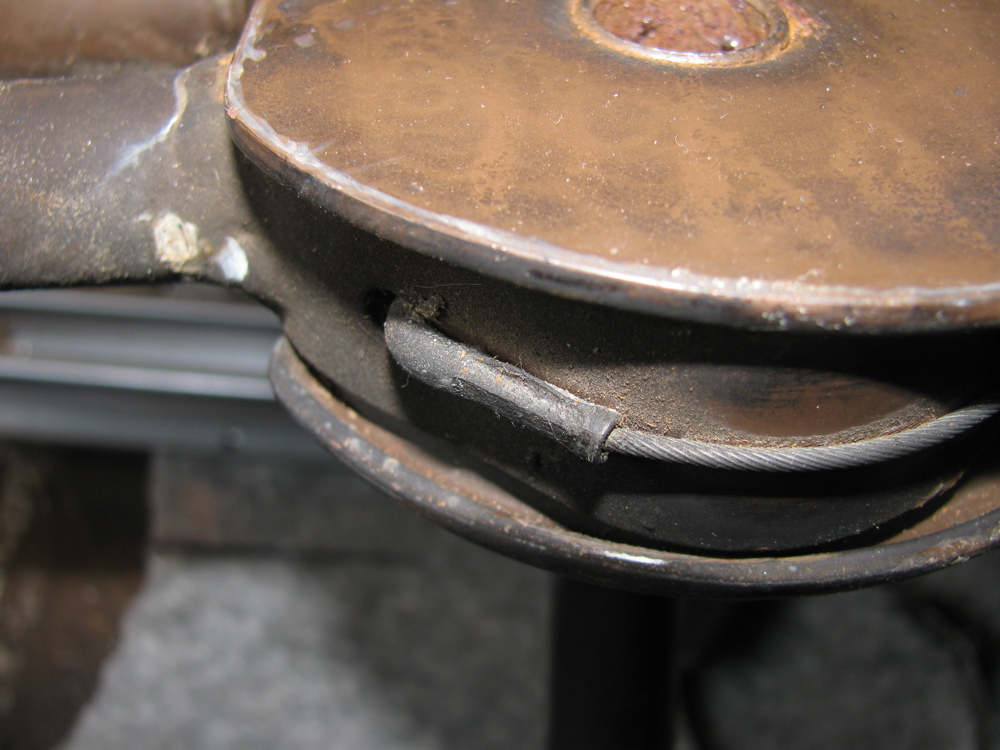
Pop top strut cable fitting
Posted by albell in vanagon mods on August 4, 2010
For fellow listmember Neil… pics of “Z” fitting on end of cable on an old smoke stained (junkyard find) pop top strut assembly. This is the fitting you are trying to reproduce Neil?
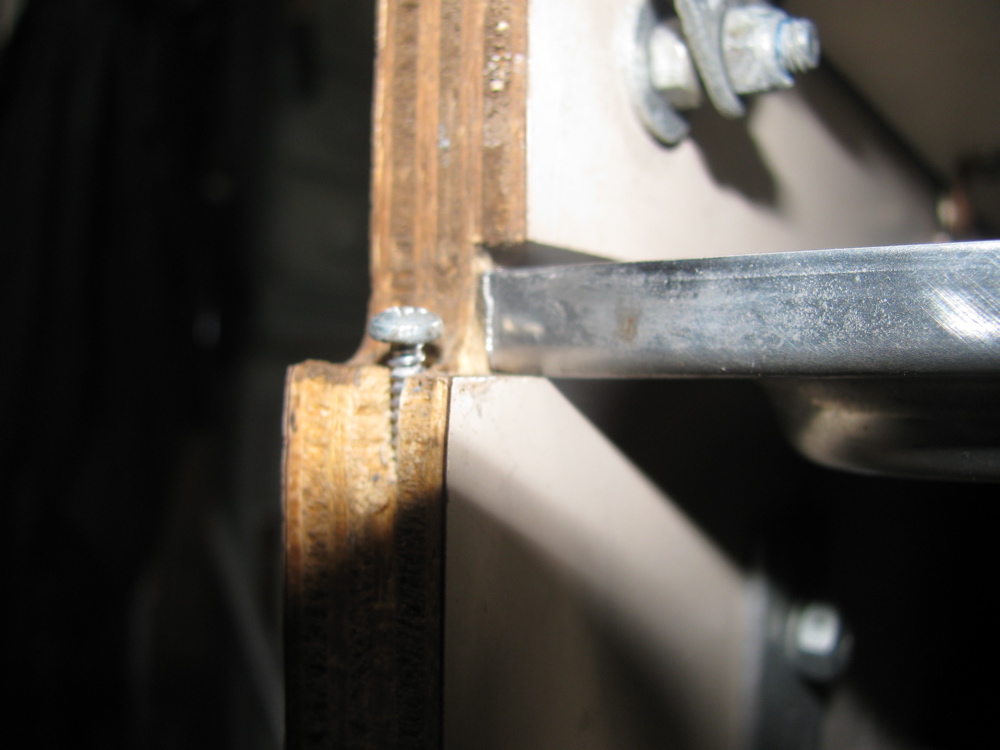
Rear seat/bed bracket attachment
Posted by albell in syncro, vanagon, vanagon mods on August 3, 2010
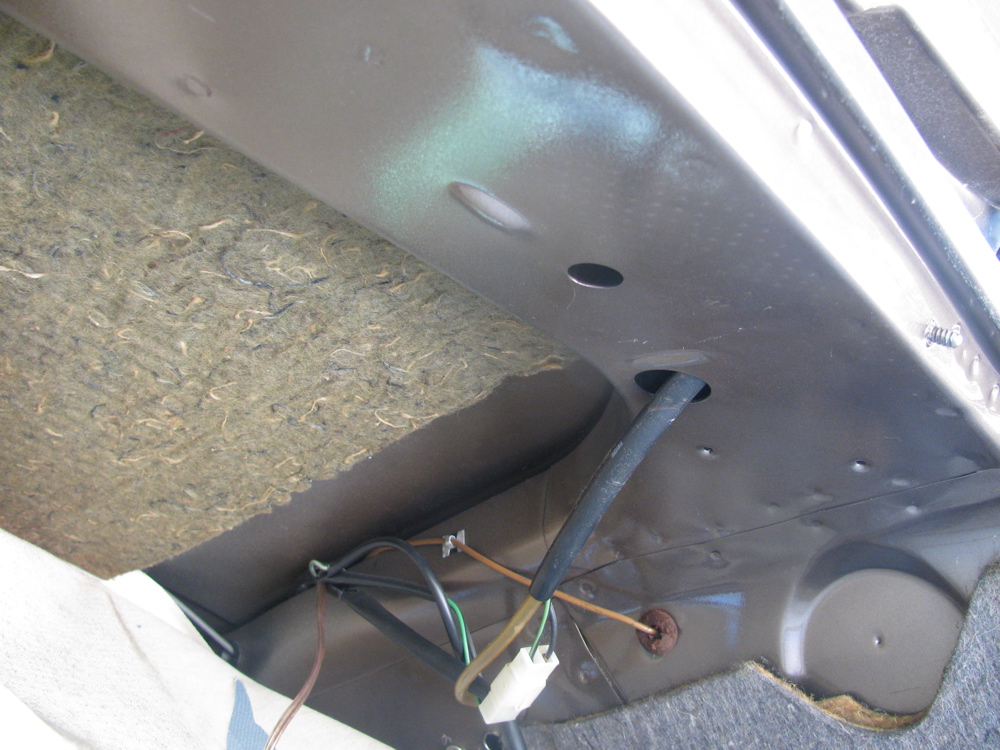
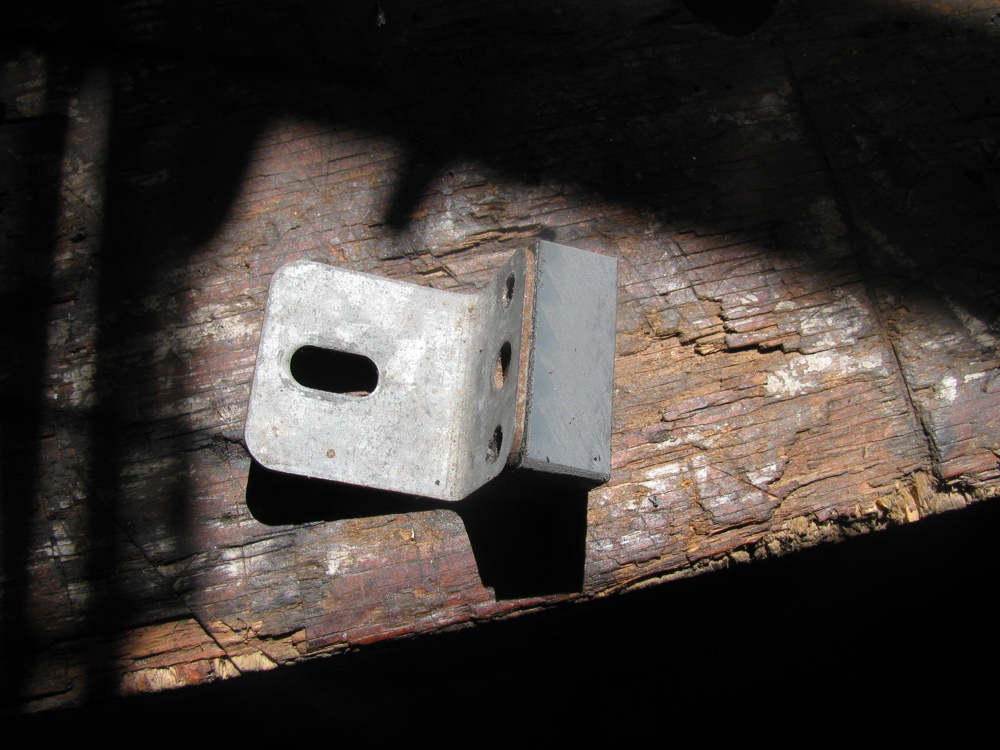
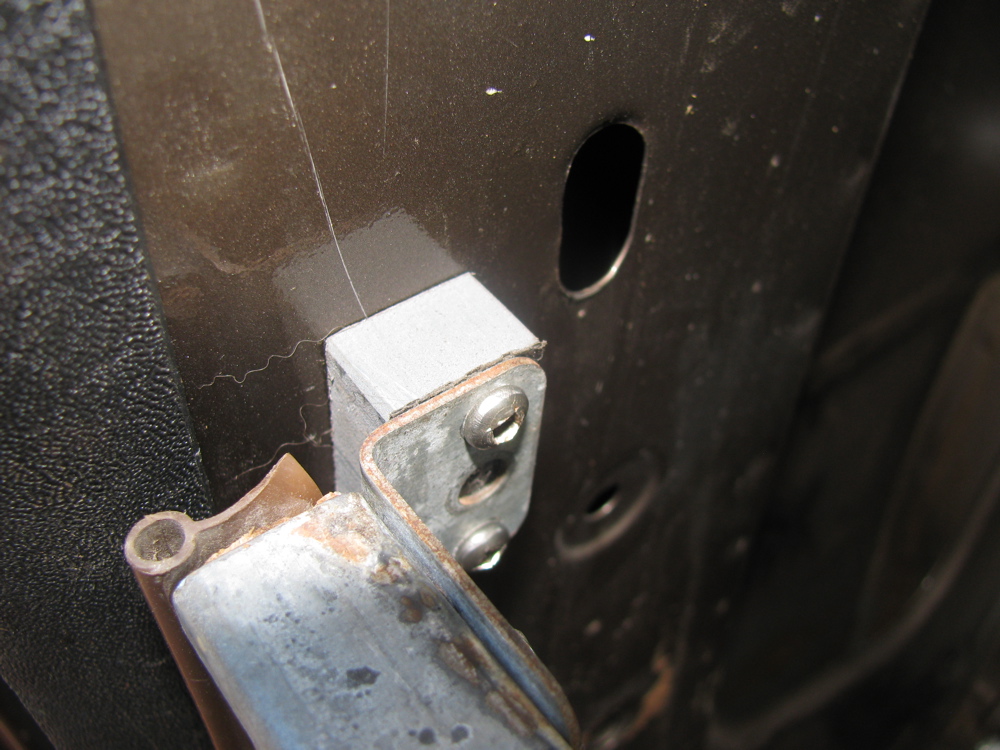
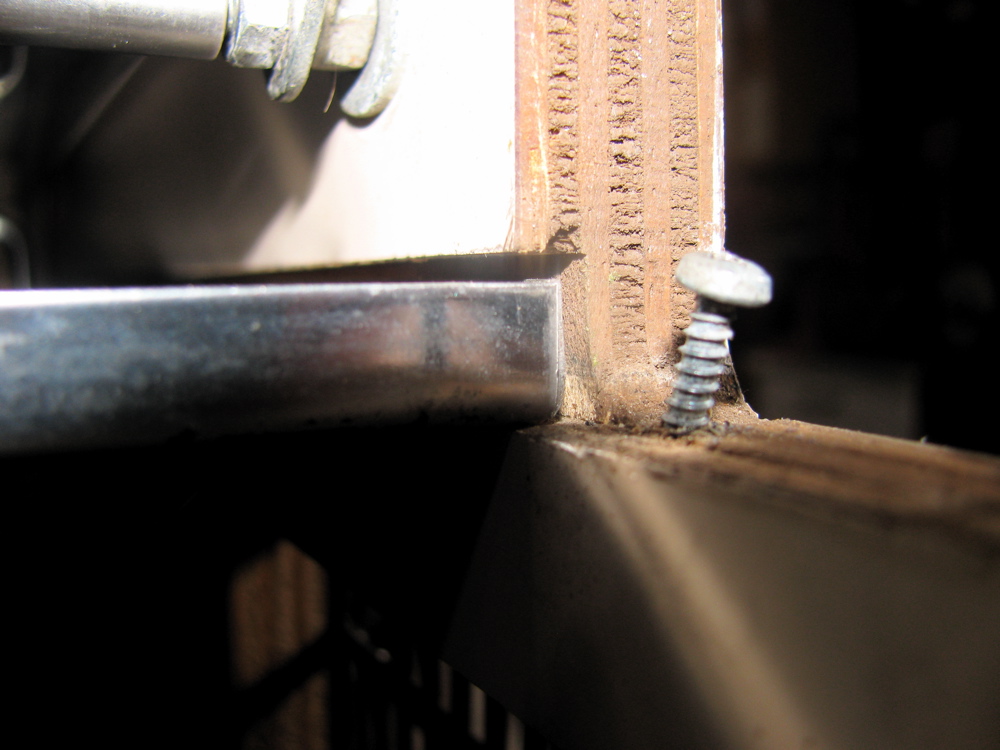
I mentioned before that just drilling a hole through the sheet metal of the rear deck to attach the rear seat/bed brackets is not good enough to get a firm connection. The screws used are self tapping screws which sort of implies, I think, that the factory did not weld on nuts on the underside of the sheet metal. Looking closely into the holes in my ’82 Westy the metal appears thicker than in the same place on my ’86 syncro. Here is view from inside of van of one of the brackets in place (in place but askew).

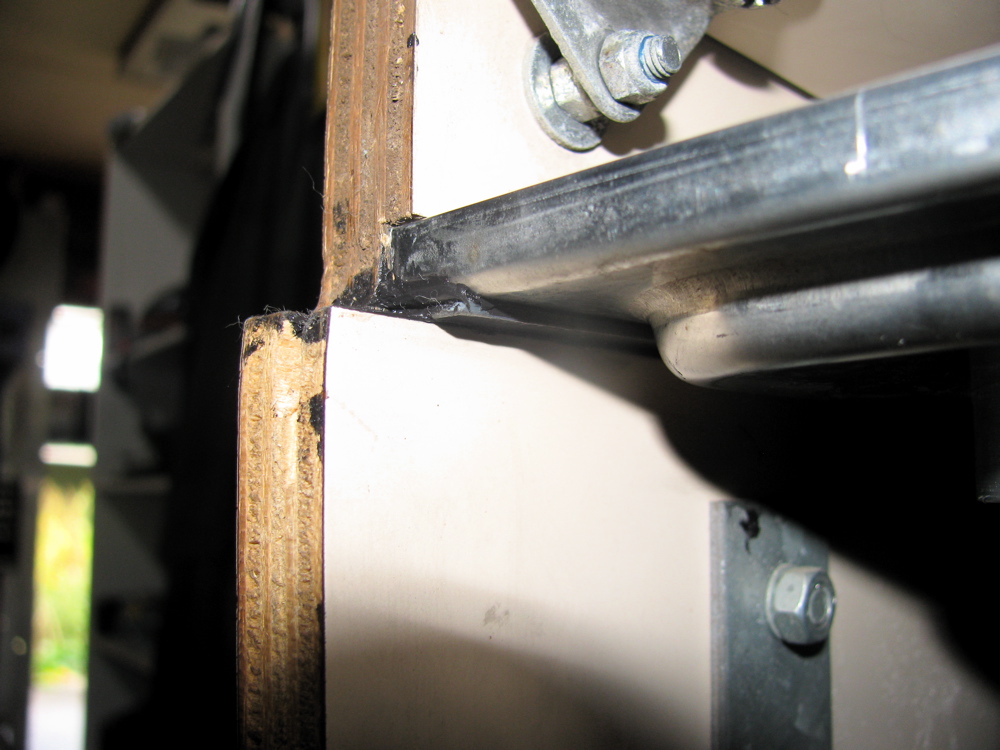
So I set about making some little backing plates to give the screws more thread to love. I used 3/16″ thick stainless bar to make to little plates, 3/4″ wide, 1″ long and a hole in each tapped for 6 X 1.00 mm thread. My plan was to use some Sikaflex to glue the plates to the underside of the deck so that the would stay in place when I screwed the the brackets down. Here is exciting picture of one of the “plates”.

And here is one of the little chaps stuck up in the passenger side rear wheel well where the right hand bracket screw comes through – boy am I slow, it just occurred to me now to check the same place in the Westy to see if there is any similar thing going on. Edit: I just looked at the passenger side rear wheel well on my ’82 Westy where the bracket screw comes through, and lo and behold, looks like a nut is there, surrounded by goop. I assume same thing done for other bracket. So I am not completely mad thinking my little plates will work.
My plate:

Westfalia’s version:

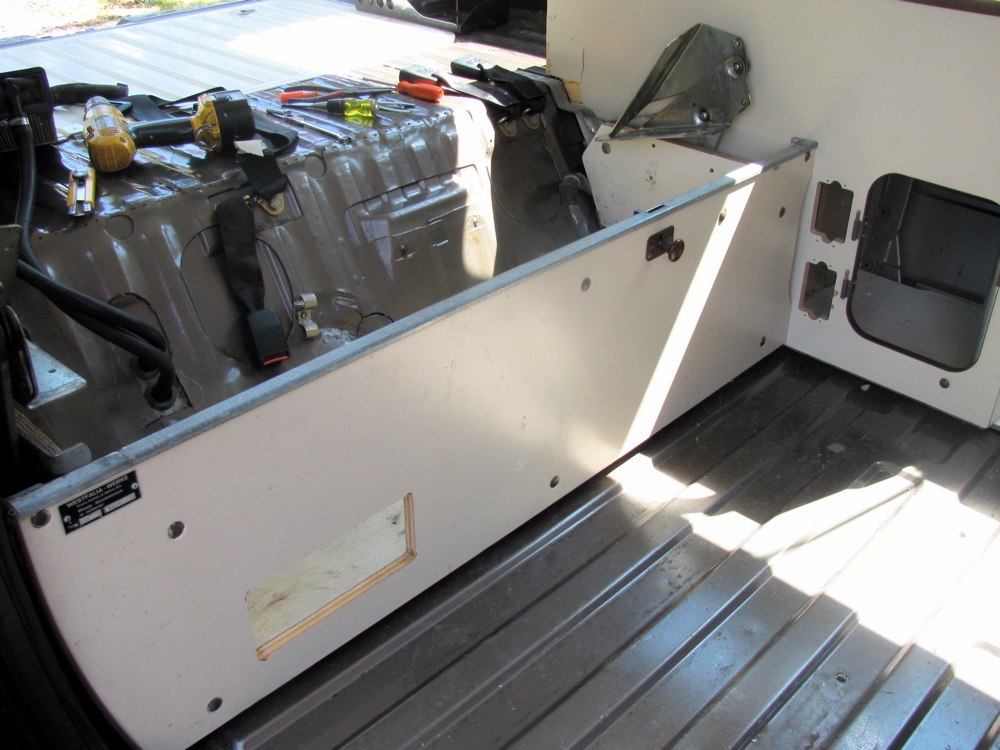
On the driver’s side, the screw comes through above and behind the gas tank of the Syncro.

And here is the plate in place, all smeared with Sikaflex.

I’ll let the Sikaflex cure overnight and then I will remove the screws and I hope the plates will stay in place.
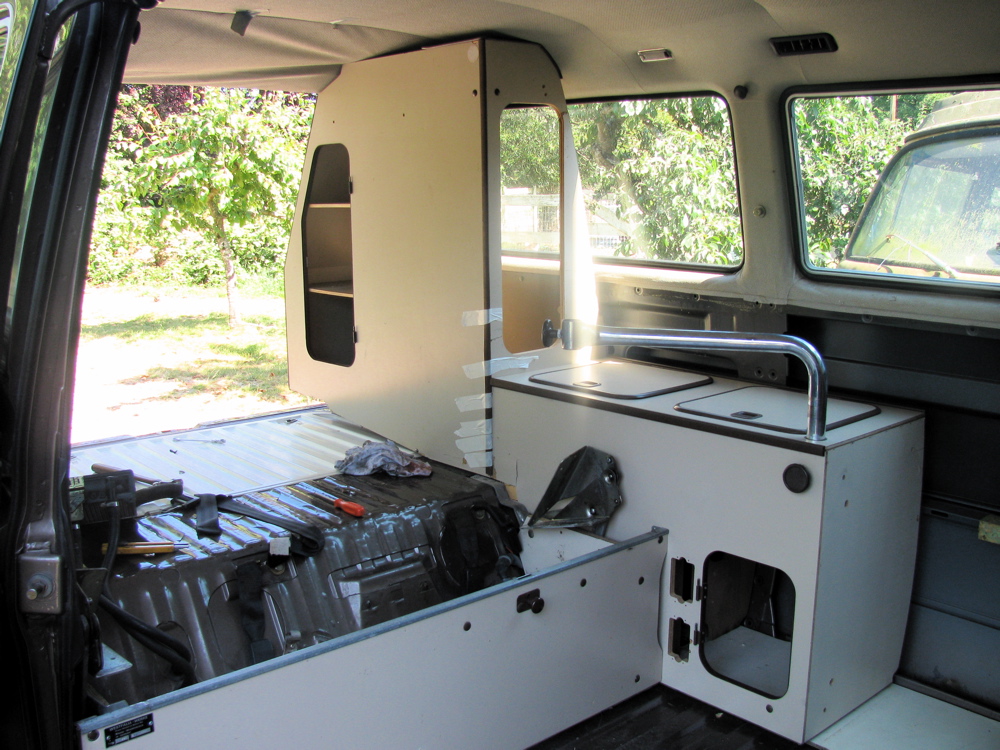
Start of the camperization
Posted by albell in syncro specific repairs, vanagon, vanagon mods on August 2, 2010
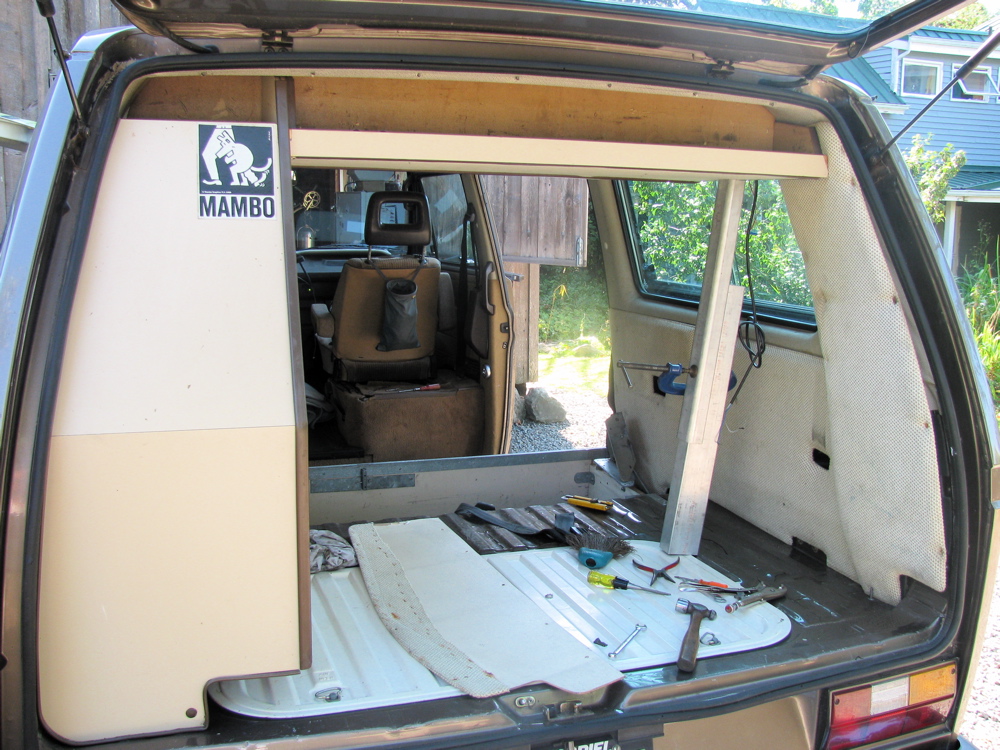
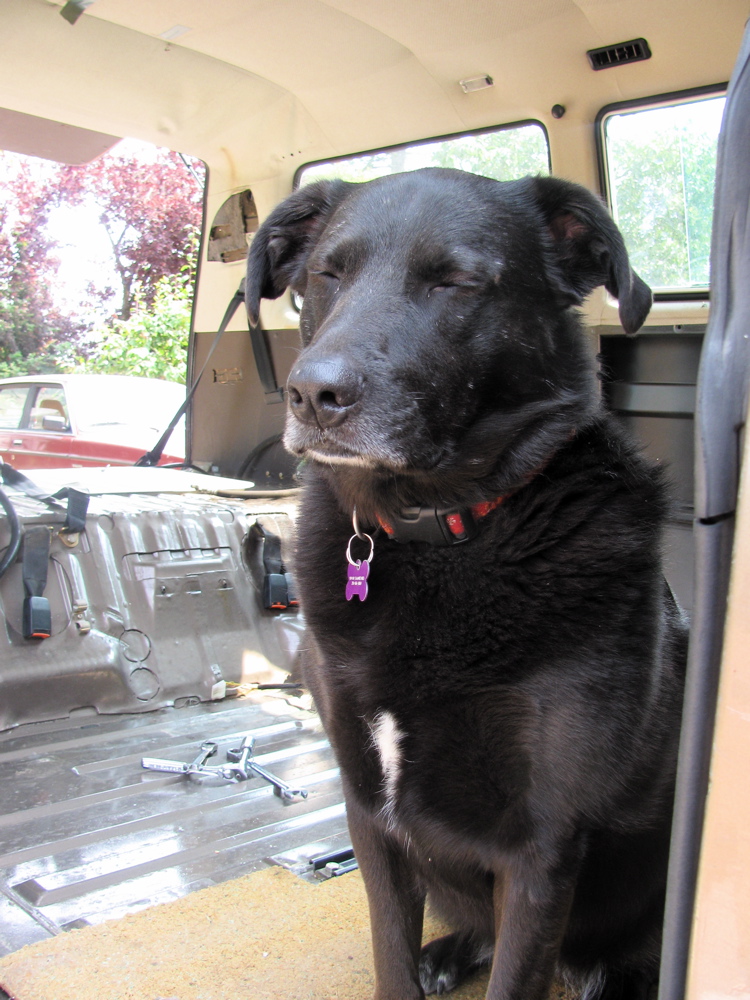
Finally… getting round to putting the innards of my ’82 Westy into my ’86 Syncro. Cleaning out the Syncro, the rear seats removed (boy they are heavy) and having a gander at just how much work it will be to put in the Westy stuff…
A few notes:
-the Syncro’s ECU looks like it was installed yesterday
– the rear heater had a bit of dried up coolant at one of the hose connections. I pulled the core just in case it was leaking too. The core had a date stamp of “00” so I am assuming it was replaced 10 years ago. Closer examination showed that the core was sound, but I swapped in a fresh one – an Iltis front heater core, same part number as Vanagon rear heater core – that I got at a govt. auction. The “old” core has a better construction method, the end cap opposite the valve covers return tubes, where as the “new” core I put in has the end cap being part of the return path… so if that end cap fails we get leakage.
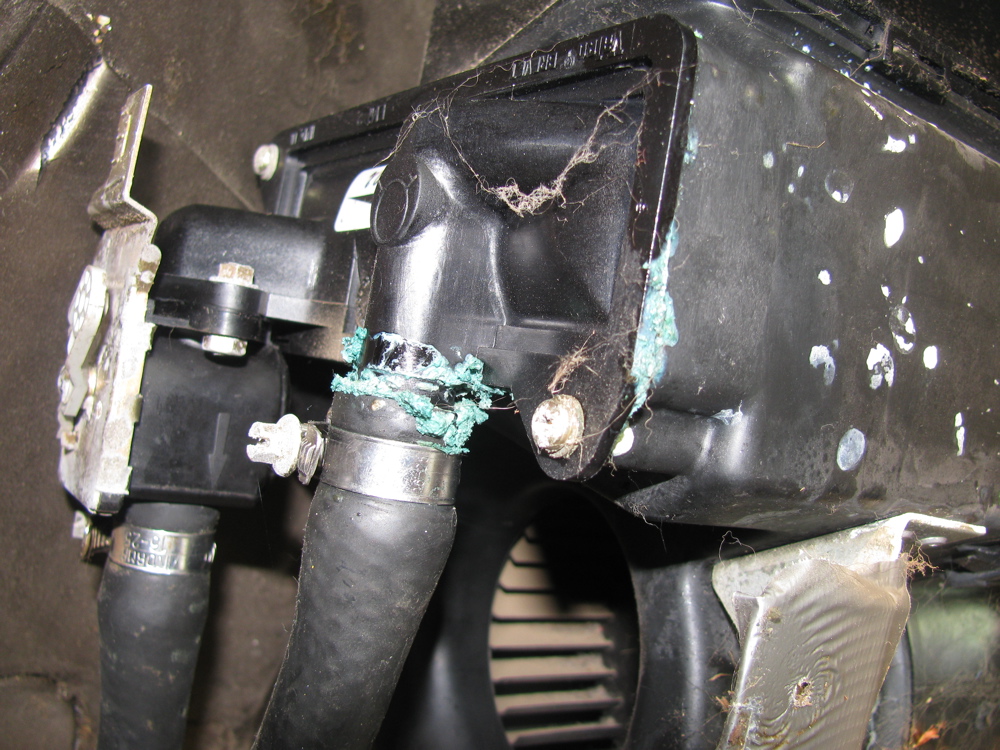
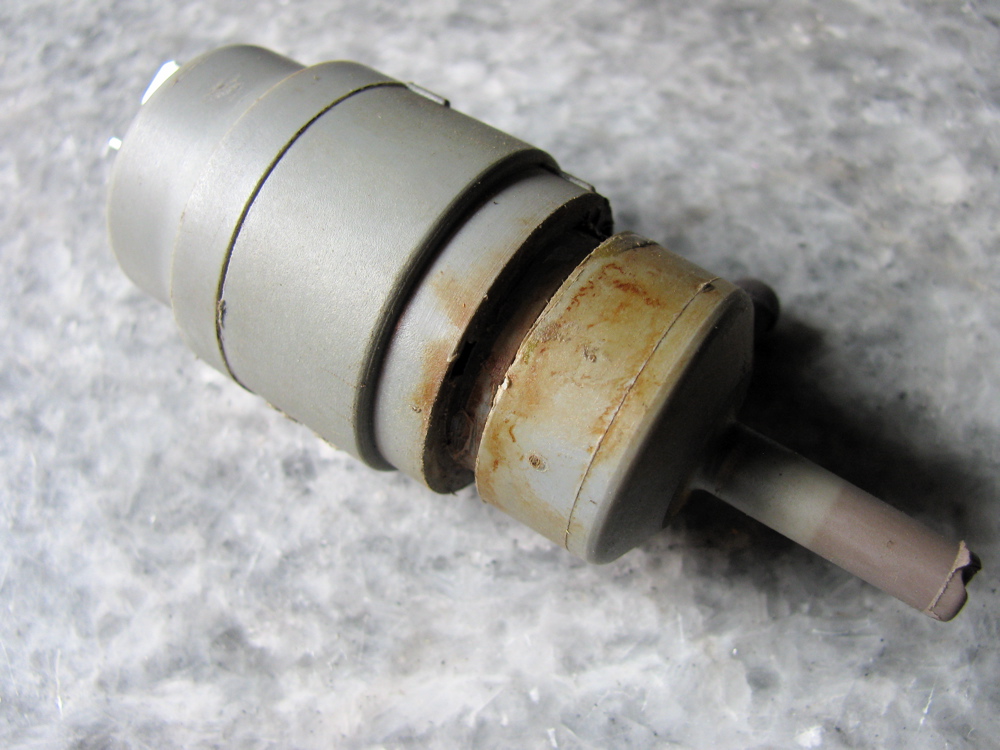
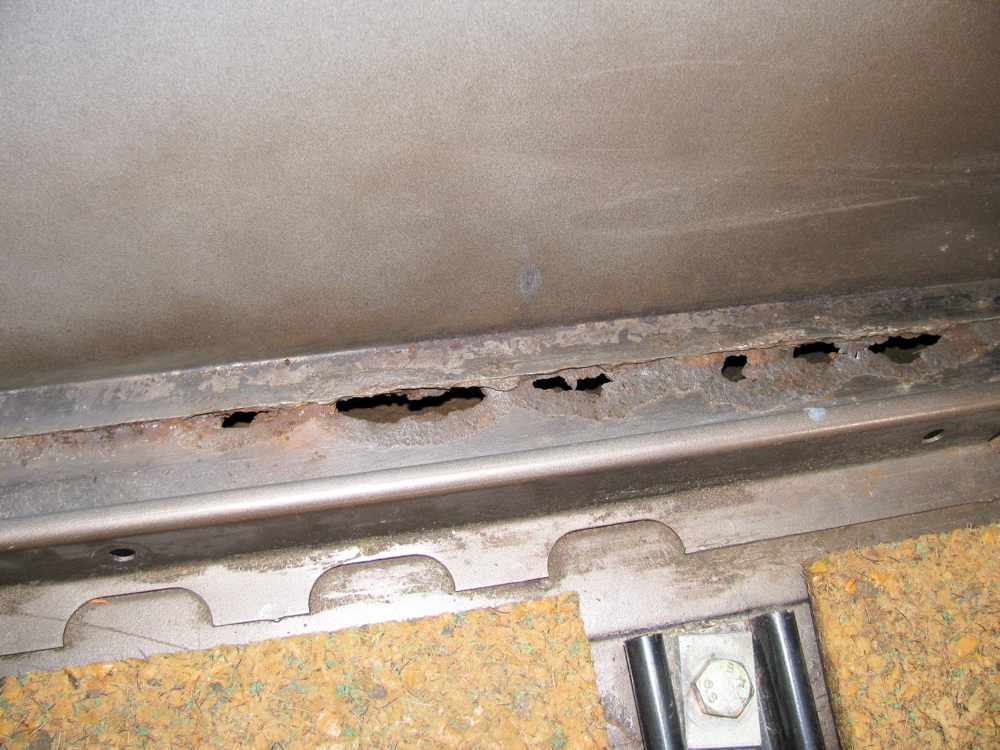
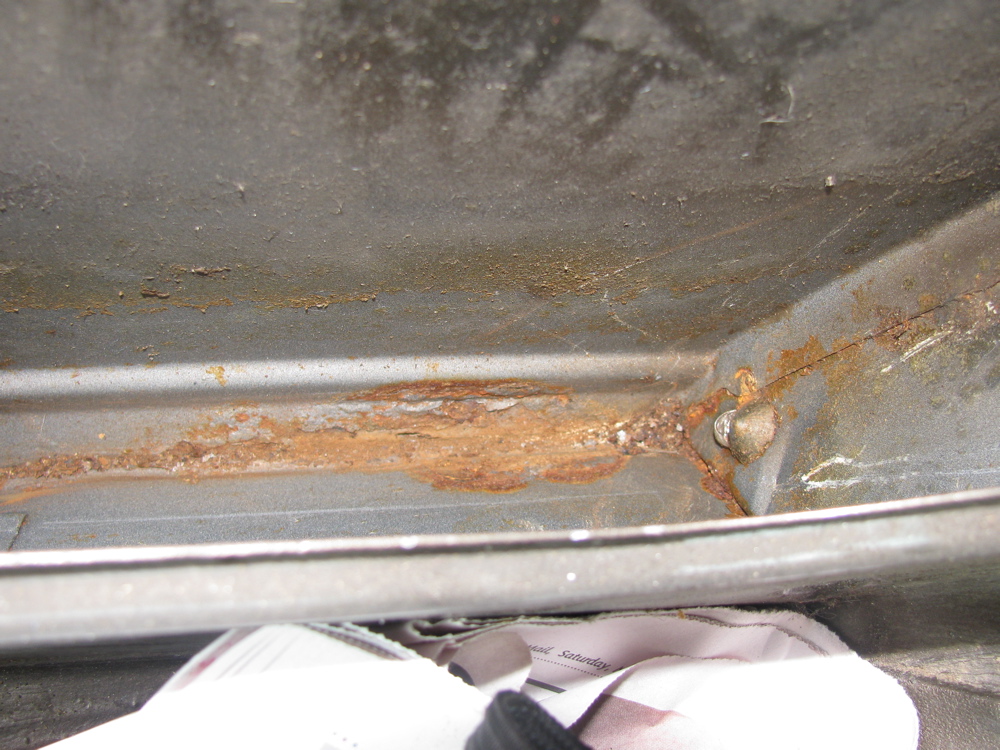
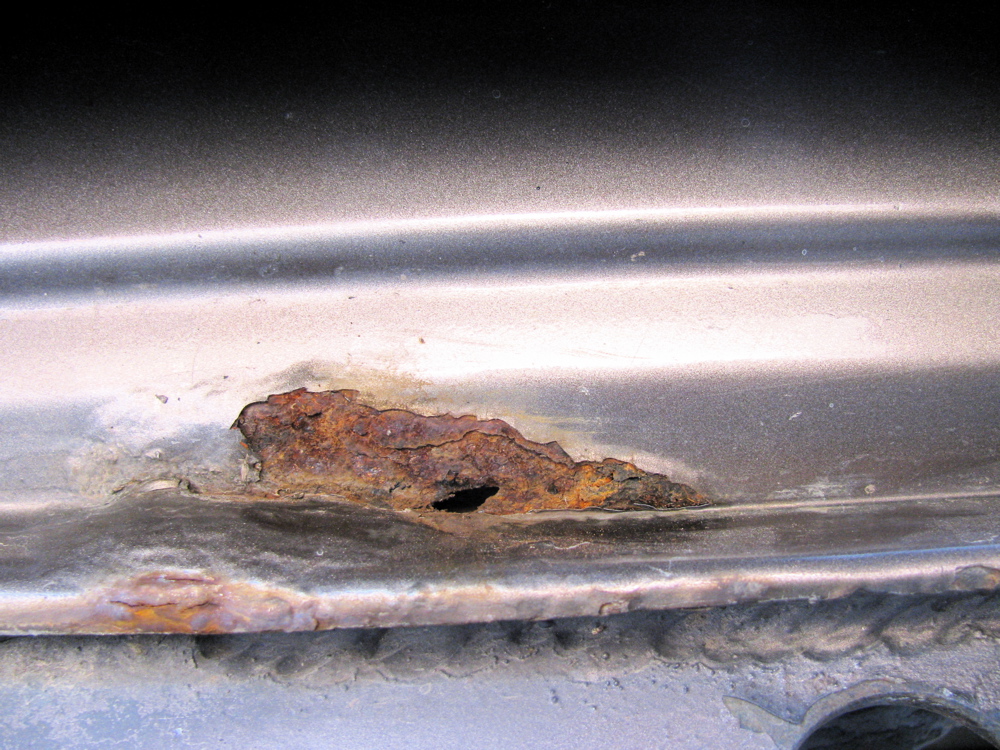
– leaking rear window washer reservoir had caused rust severe rust… Was like that when I got the van. To be precise, it was the pump that was leaking, I spent 5 minutes mucking around trying to seal the bugger, but hen found out they are pretty cheap and available.
– rust on drivers side inner lower seam worse than I thought. Again, I know, I know.
– the rear bench sits in ok, and I measured the holes in the Westy were the hinge brackets attach to the rear deck and drilled in the Syncro deck (after cutting out a bit of the asphalt based sound deadening stuff). I tapped for a 6 X 1.0 mm thread (not much threading meat available on the deck, there must have been a backing plate on the Westy, I’ll see about doing same on syncro) and I screwed down the brackets. Well, it turns out that now the bench sits away from the pass. side wall more than it should. I remeasured the holes and found that on the old Westy the hole is 5 mm further inboard than on the Syncro. Funny eh? Both sets of holes are centred in the “same valley” . Something must have changed over the years. I have noticed that some Westys have a trim plate on the side of the bench, this might have been Westfalia’s answer to some body change VW made. I have one of those trim plates, I may use it.
-I tried the wardrobe fitment, and it looks like it will fit with no modification, even though I don’t have the Westy modified ceiling. The headliner might need cutting though.
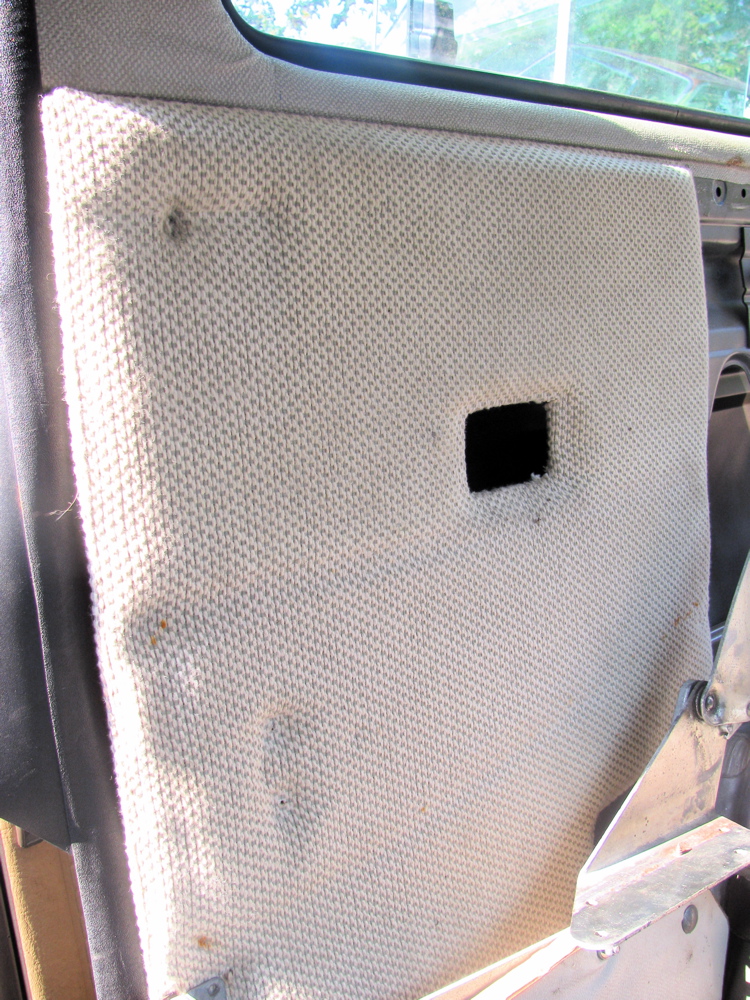
-I tried a panel from Westy… I recovered most of the interior panels on my old Westy about 10 years ago, its held up well and I may re-use them.
Many other little details to iron out, but nothing difficult


Westy table mod
Posted by albell in vanagon, vanagon mods on August 2, 2010
I have all of the Westy interior out of my ’82 Vanagon now, and I am going over the parts in preparation of installing them into my ’86 Syncro. Some of the cabinetry was damaged in the accident I had with the Westy that took it out of commission. I was hit by the front end loader on the driver’s side, just in front of the rear wheel, so the Westy “wardrobe” and the low cabinets just forward of the wardrobe got a bit banged up. I’ve patched them up to be structurally, if not cosmetically, sound. While I have the cabinets in the shop I thought I might do some of those old modifications I never got around to before.
The first one is a modification to the table clamping system that allows the table “leg” to extend up and let you get into those top loading cabinets. This is not my idea, many others have done this. There are 2 ways to go about this, one is to install a rod, fixed to the lower mount of the table leg and the rod extends inside the table leg itself. The other route is to use some tubing, fixed between the upper and lower mounts, which the table leg inserts into. I chose the latter approach as I had scrap aluminium tubing lying around. You can see in the pics that I made a collar to join the tube to the upper mount. The collar is a close fit to both the tube and the upper mount. The table leg is a nice tight fit inside the tubing, actually tighter than I would have liked. Either the table leg or the tubing must have a slight bend for its a tighter fit when installed than I found when I tried the combo with a short bit of scrap tubing. Oh well, at least there will be no rattles.


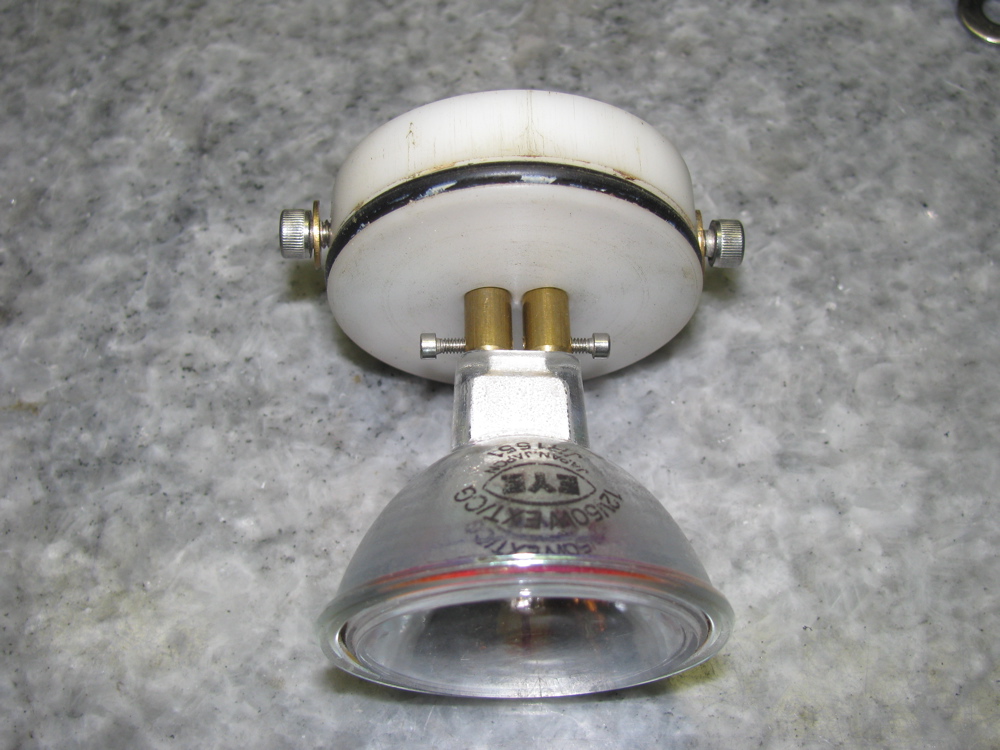
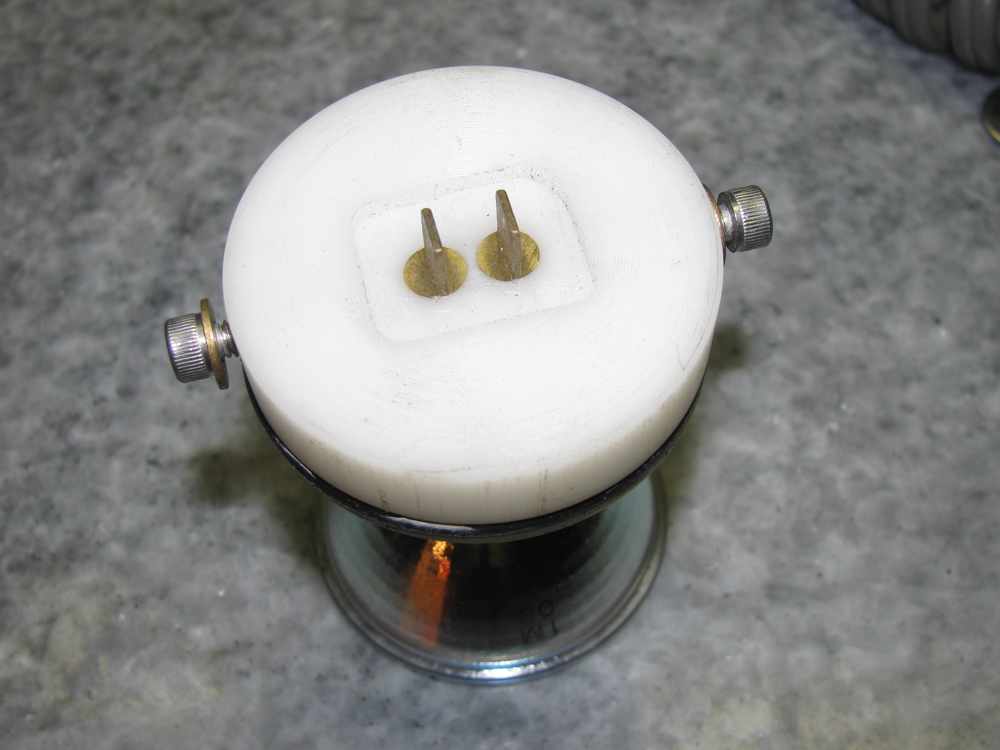
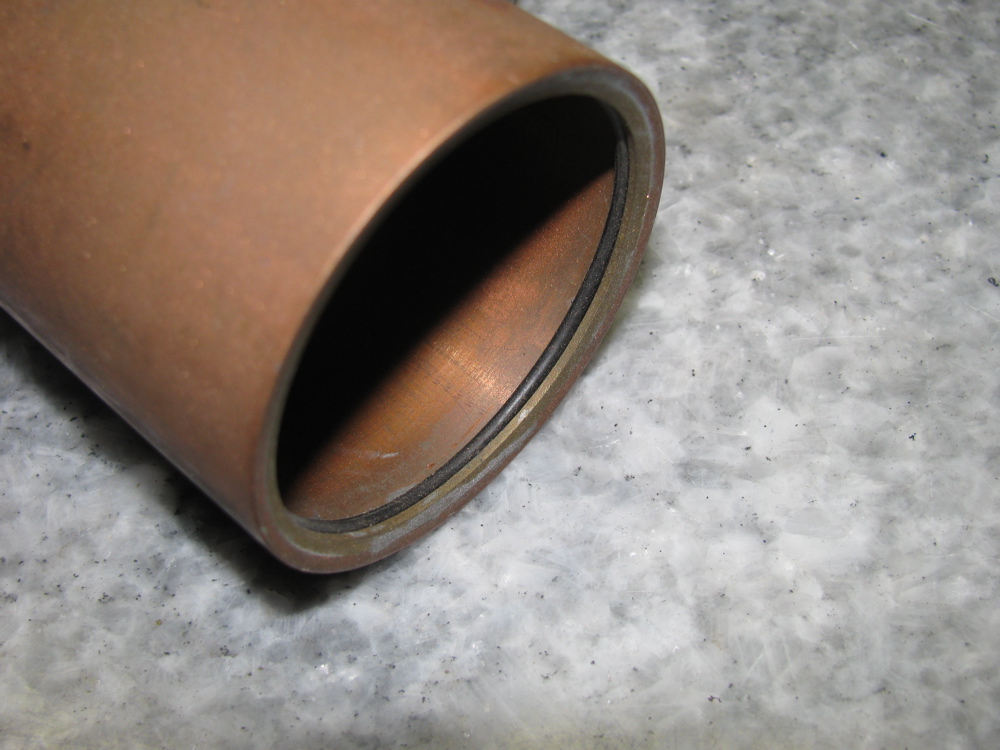
Homemade trouble light
Posted by albell in vanagon mods on July 12, 2010
About 10 years ago, Dave the machinist in the UVic physics dept. made this trouble light for me. It uses a 50 watt glass shielded 12 volt lamp, copper tubing, some hardware, O-rings and polyethylene. I connected it to a length of reclaimed cord and a connector that fit the “silver socket” type socket. The plug and socket was salvaged from an agricultural dust mask. I wired the socket in the engine bay of my ’82 westy.


Westy sink p-trap
Posted by albell in vanagon mods on June 27, 2010
I have the cabinets out of my ’82 westy and while moving the sink/stove top I carelessly broke off the hose barb that connects the sink drain hose. I had replaced that part years ago after i broke it the first time, this time I decided I didn’t need a p-trap on the sink. Why do you need a p-trap there, eh?
I took the trap assembly off (4 screws and a gasket) and I connected the drain hose directly to the sink drain “spout”. That spout is still made of the suspect brittle plastic but try as I might, I could not unscrew the plastic from the stainless sink. Heating the drain hose, which by the way is 28 inches long, with a heat gun allowed me to get the hose over that spout, and secure with spring type hose clamp. Its not a barbed spout, but the hose is on there pretty darn tight.


Home made steering rack bushings
Posted by albell in vanagon mods on June 27, 2010
All my talk about rubber mounts reminded me of this neat home made solution to steering rack movement. I had this posted on my web site, thought I ‘d put a copy here too.
Gary Stearns’ method of how to make your own polyurethane bushing to replace the slopy or worn out stock units.
Gary writes:
“Attached is a bitmap of drawings that I made of these bushings and their installation. The one’s that I started with came from Autozone and were sold as anti-roll bar bushings in a pack of eight.
I was able to get the bushings in and out without removing the rack completely, but it’s not easy. To permit “test fits”, you might want to take the rack out; I’ve done that too and it’s not as difficult as you might think. ”

Headlight on warning chime mod.
Posted by albell in vanagon mods on May 15, 2010
Just for a lark, I thought I’d try and repurpose the seatbelt/key in ignition warning chime to make it work as “lights left on’ chime.
Funny thing is my van does not have a complete seat belt warning/key left in ignition circuit:
-it does not have a switch on drivers side seat belt latch for seat belt warning light
-warning light unit only has handbrake light and logo, seat belt space blank
-warning light unit does not have wire into connector for seat belt switch (yellow/red)
-door/seat belt warning relay missing
-relay socket on top of fuse panel), has some wires to it, but not all. Missing black wire from fuse S18. only one grey wire from door switch the missing grey is for seat belt switch. Missing grey/red wire that is also part of seat belt switch.
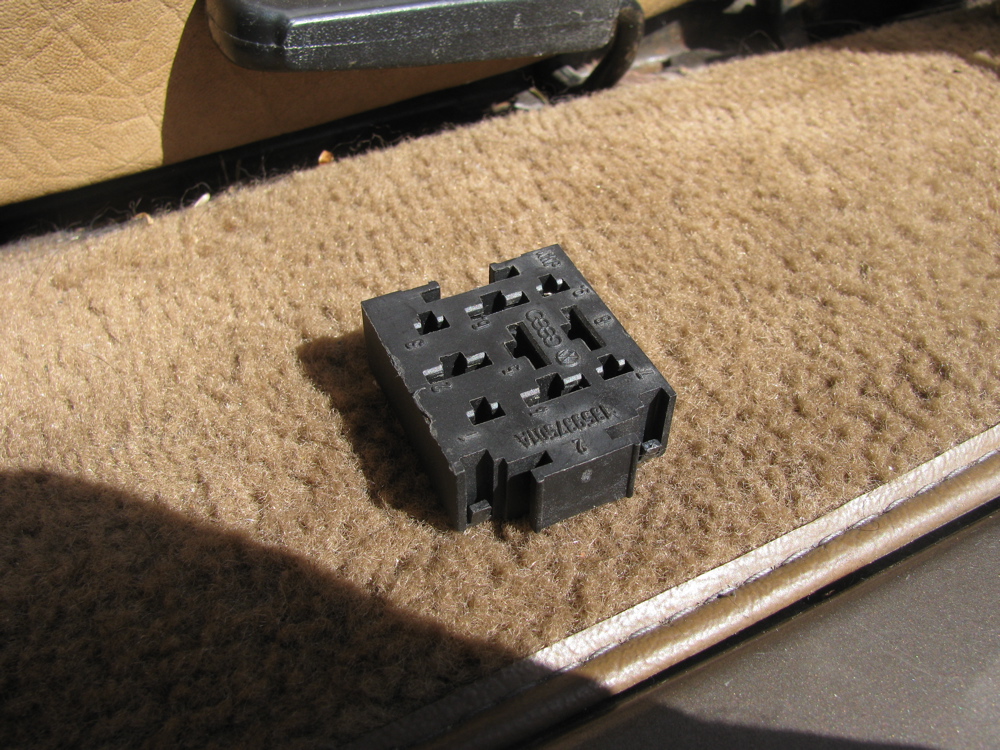
So I thought I would use that incomplete socket to make a “lights left on chime” circuit. Turn out it is easier just to take another socket and slip it onto the relay panel, less fussing with pulling wires out of the relay socket, which is a bit of a pain.
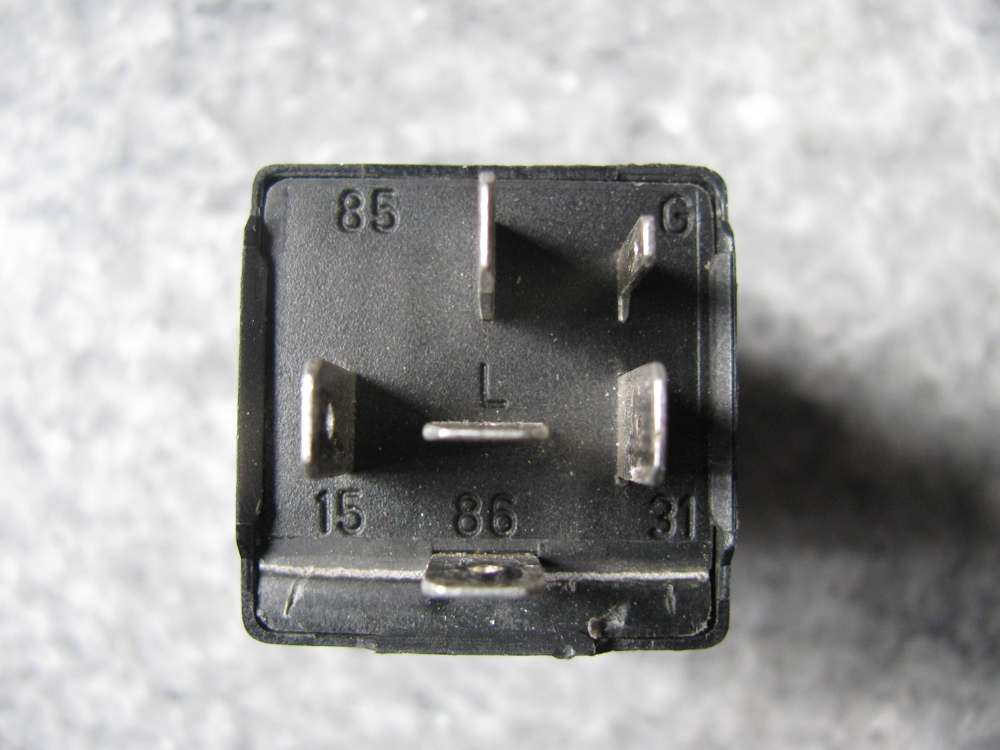
Anyway, this is what I did… I had a 99 chiming relay, the “do-do-do, do-do-do” annoying tune, a spare socket, and a short length of 14 gauge wire with female spade connectors at each end. I pulled the single grey wire from the incomplete seatbelt/key in ign socket (those of you with two wires there, you will have to cut the right wire, the one that leads to door switch, and put on a new female spade on) and this will connect to 86 on the chiming relay. See how the relay fits in the socket so you can get the spade connection into the right hole so it will connect with 86.
This is the switched ground, grey wire will connect to ground when door open, drivers door only.
Now we need power to the 85 terminal of relay. But we only want power when lights are on, right?
I choose terminal G9 on back of relay panel. Its on the right hand side as you look at the panel, a group of 10 spade terminals. G9 gets power when license plate lights get power, so it will supply power to chiming relay when light switch is on.
So that’s pretty well it, get the female spades of both the grey door switch wire and the new wire to G9 in the relay socket so that the grey wire goes to 86, and the newly installed wire goes to 85.
When installed, the obnoxious chime will sing out whenever driver’s door is opened and the lights are on.
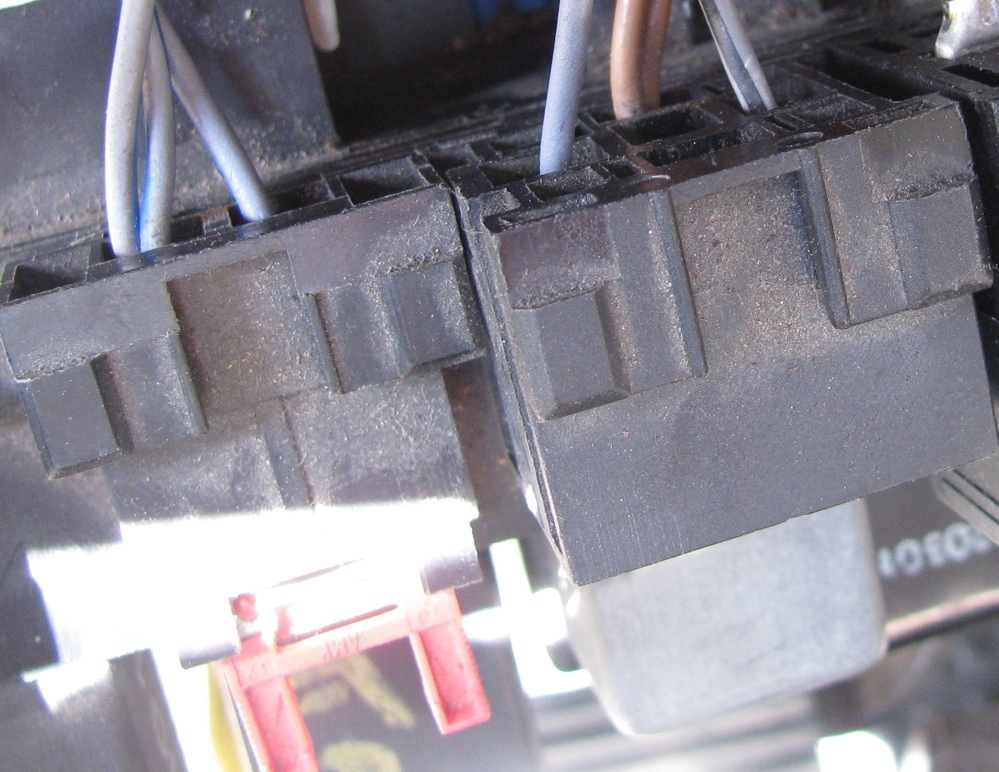
Pics below illustrate somewhat, see the incomplete wiring to the seat belt warning relay socket? Only a grey, a grey/black, and the double brown ground are installed.
Edit 29/05/2010: had pics of wrong relay. Of course its not a “99” relay, the “99” relay is the programmable intermittent wiper relay. Proper relay pics inserted.


Hi-Lift/Jack-All jack adapter
Posted by albell in vanagon mods on May 11, 2010
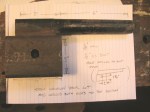
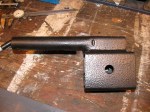
Here you go Michael, my home made adapter I made a few years ago. I cut up a stock Vanagon jack and welded the post onto some 4X3 1/8″ wall steel tube. The hole to secure the adapter to the jack, using a 1/2″ SS bolt and Nylock nut, was located to suit my jack. Nominal location given on sketch.
I could have welded about one more inch of the Vanagon jack onto the box section, looks like I only did 3″. As is it works fine, keeps the jack body clear of the Vanagon body. Note: as in all the pics on this blog, keep clicking on them to get the highest resolution. Most pics are 800 X 600 pixels, the jack adapter pics are 1000 X 750 pixels.
Addendum: you can buy commercially made versions, Go Westy sells one very much like the one I made, Gary Lee takes a different approach, see here.

Update: after taking measurements and pics, I realised it might look better painted. I gave it a shot of rattle can bed liner.
Auxiliary fuse panel
Posted by albell in vanagon mods on April 6, 2010
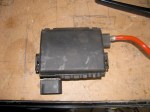
I found this handy little fellow on 2002 model year New Beetle ( I believe they are in Golfs/Jettas too). I used it on my 82 I4 engine westy, attached right on top of starting battery as an auxiliary fuse panel. I had it wired to an automatic charging relay (Blue Sea systems #7600) and “house battery”.
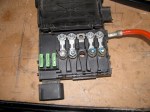
Its handy to have those 4 fusible links (2 X 110 A, 2 X 50 A) and 3 spade fuses to connect various accessories.
Addendum: I now have it installed in my ’86 syncro, mounted under driver’s seat. Instead of using the stock pigtail I’v introduced power from the Blue Seas ACR (which is mounted under passenger seat) into the box via the connection to the fusible link on the right. My auxiliary battery positive is connected to the next fusible link. I have tapped power via the 3 spade connection (with the spade type fuses) on the left:
-one to the kitchen unit for the water pump, fridge (not 12 V cooling function though), and indicator lights.
– one to my stereo head unit
– one to connection E3 on back of fuse panel (see this post)
