Archive for category vanagon mods
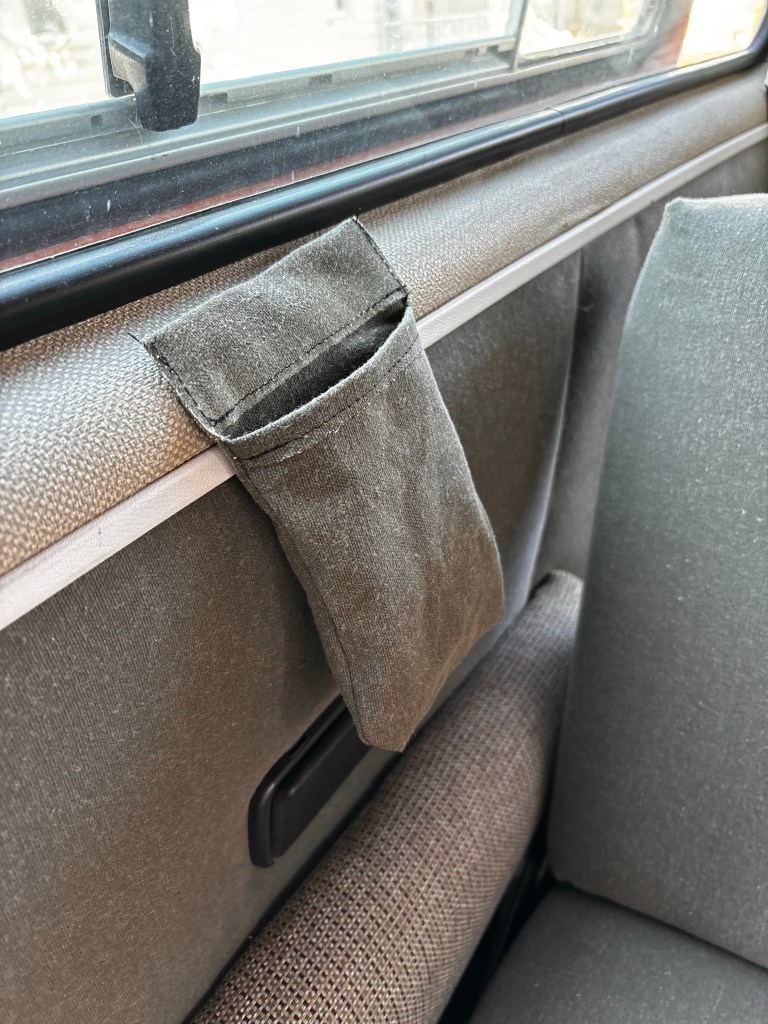
Vanagon – simple pouches
Posted by albell in vanagon, vanagon mods on August 4, 2024
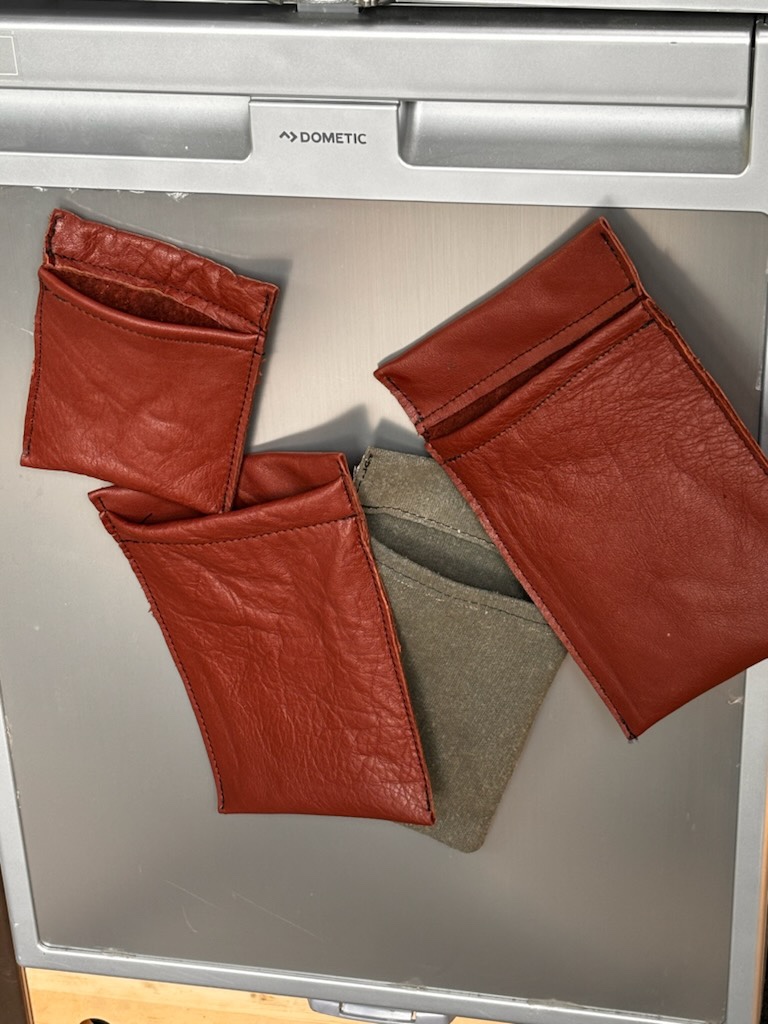
Recent samba thread about dash mounted , mag attached, pouches for phones, specs, whatever, got me thinking . I dont need that on dash but I do need a pouch to put my specs in when sleeping back in the cabin.
So, bad sewing me tried to make simple ones today. Started with a canvas one and of course got a hem on wrong side. But it works. Single 20mm magnet in the top hem .
Tried again with thin leather. No turning inside out this time . It worked. Setting aside my bad sewing .
I like them, will be useful back in cabin .
Update a day later… my sewing isn’t improving…


Update two… fridge quoits … stand outside van and chuck them in …
Vanagon – rear seat molle panel
Posted by albell in vanagon, vanagon mods on July 31, 2024
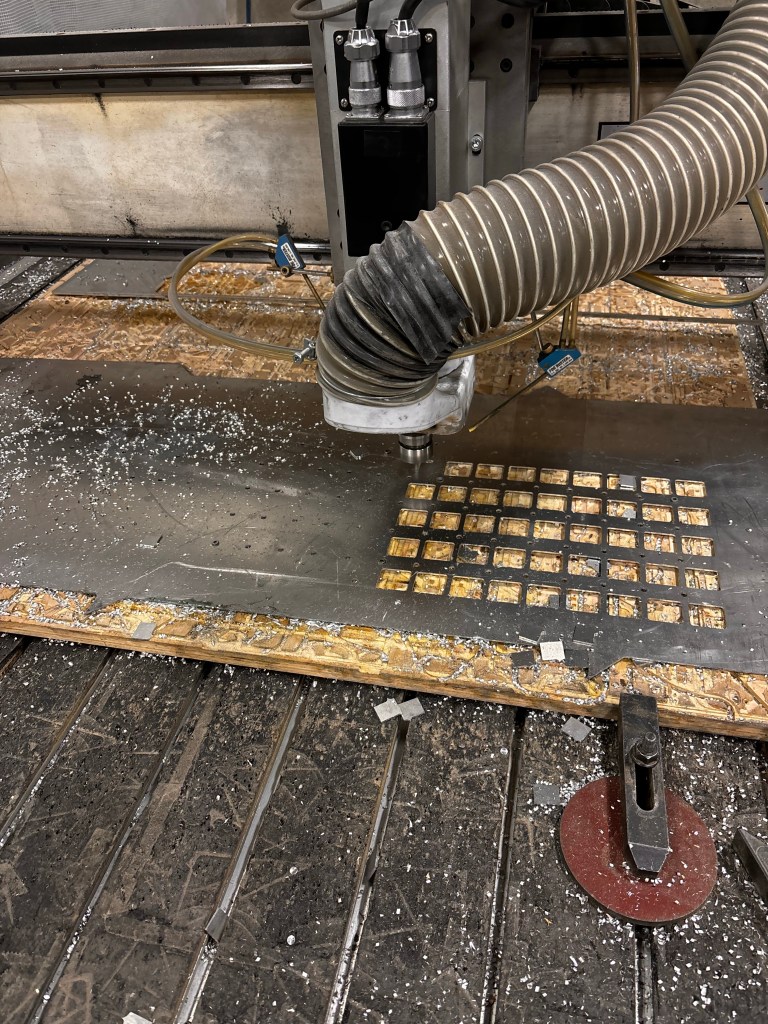
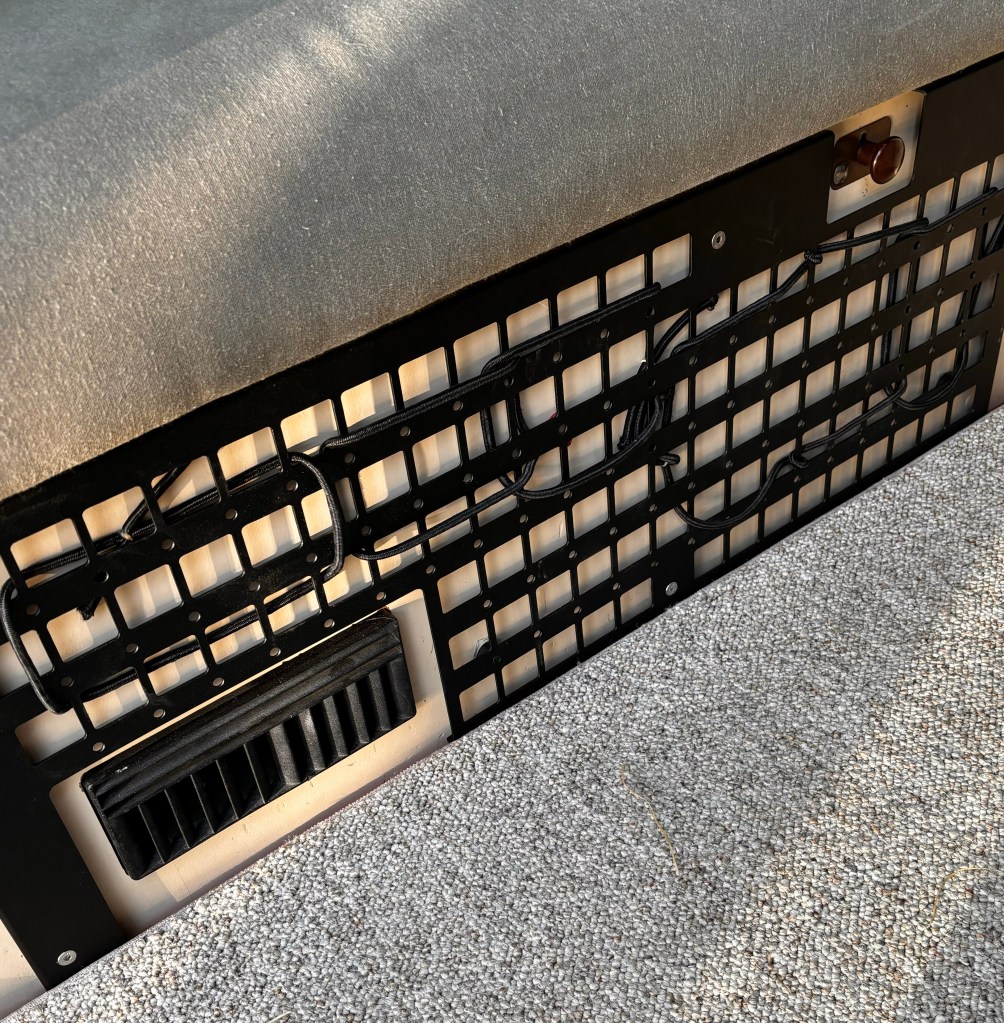
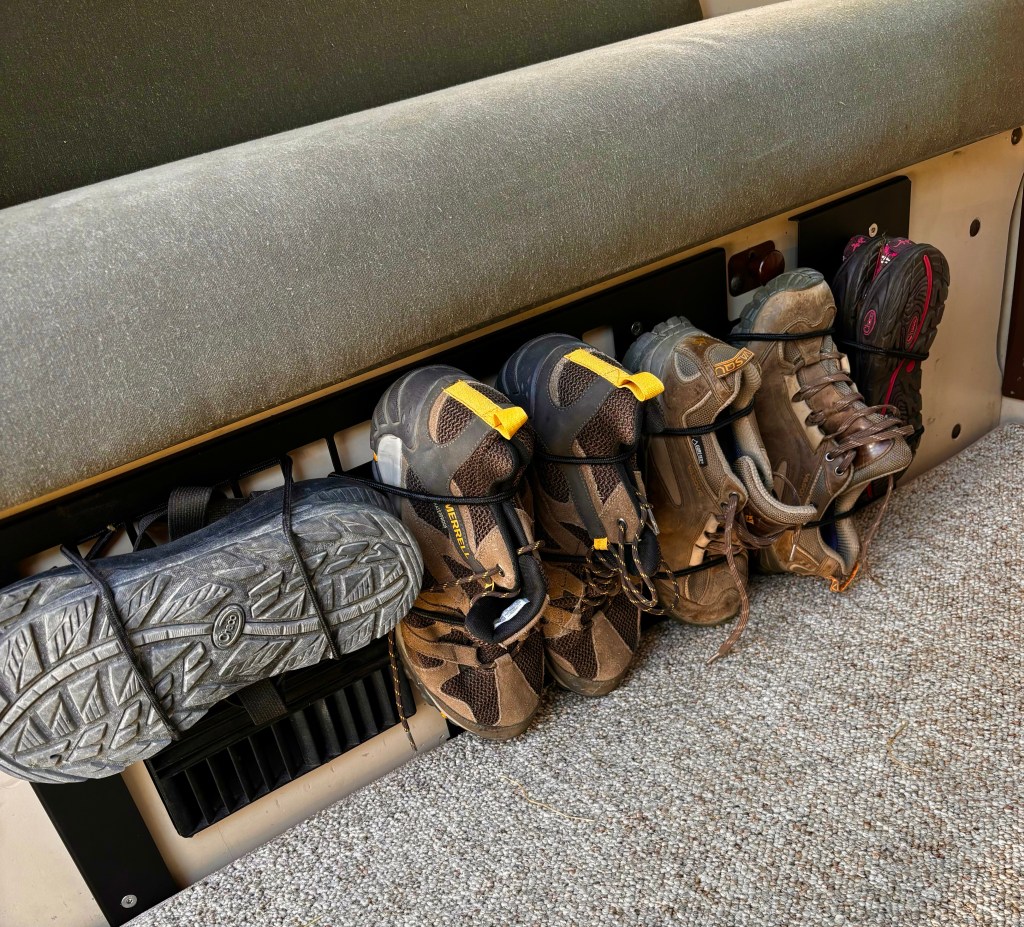
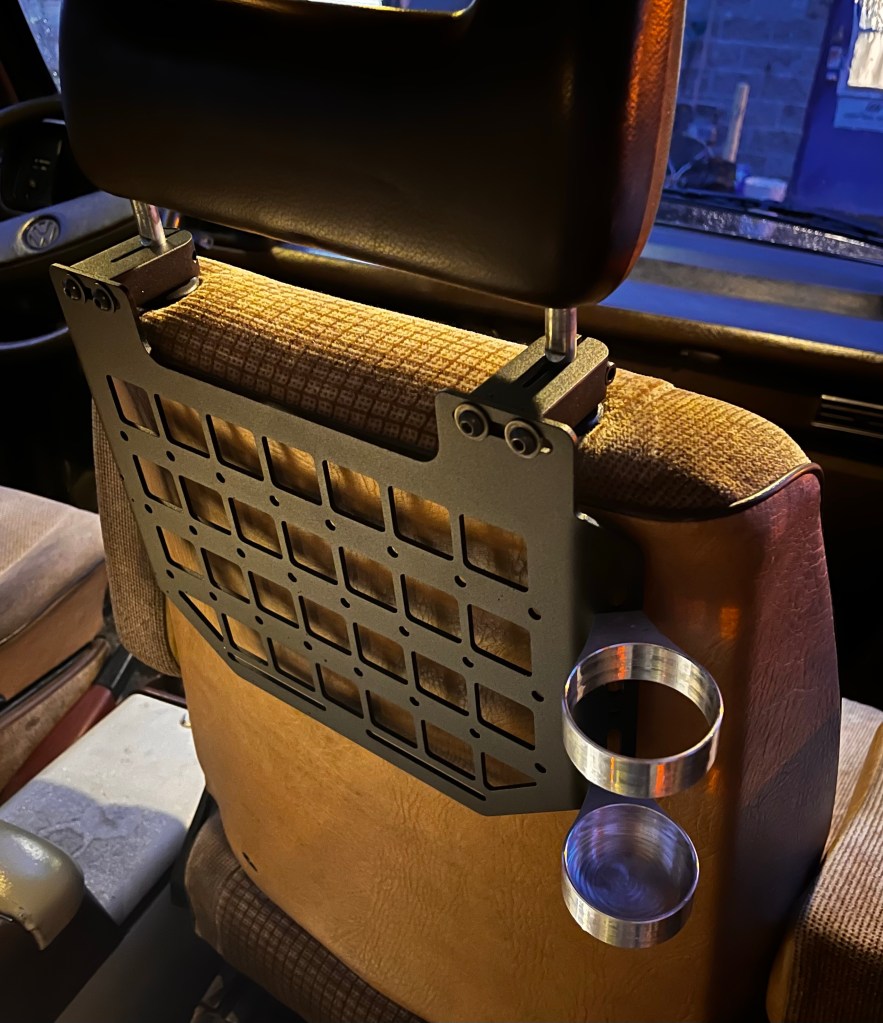
This is not something I needed. But was just an idea I thought I’d like to explore . My front seat back molle panel I made and showed a while back is great, and useful. But one on the rear seat… well maybe. I have played with shock cord loops and shoes, sandals, boots before I had it powder coated … and that does work so I think that’s what the main use will be .
Anyway…
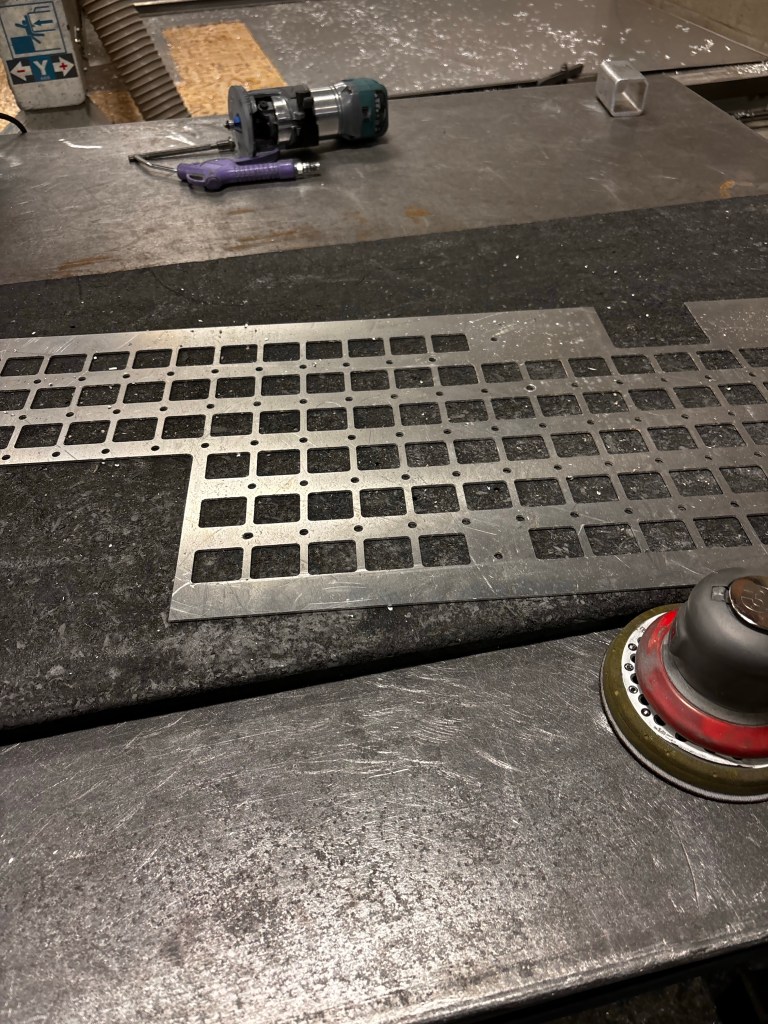
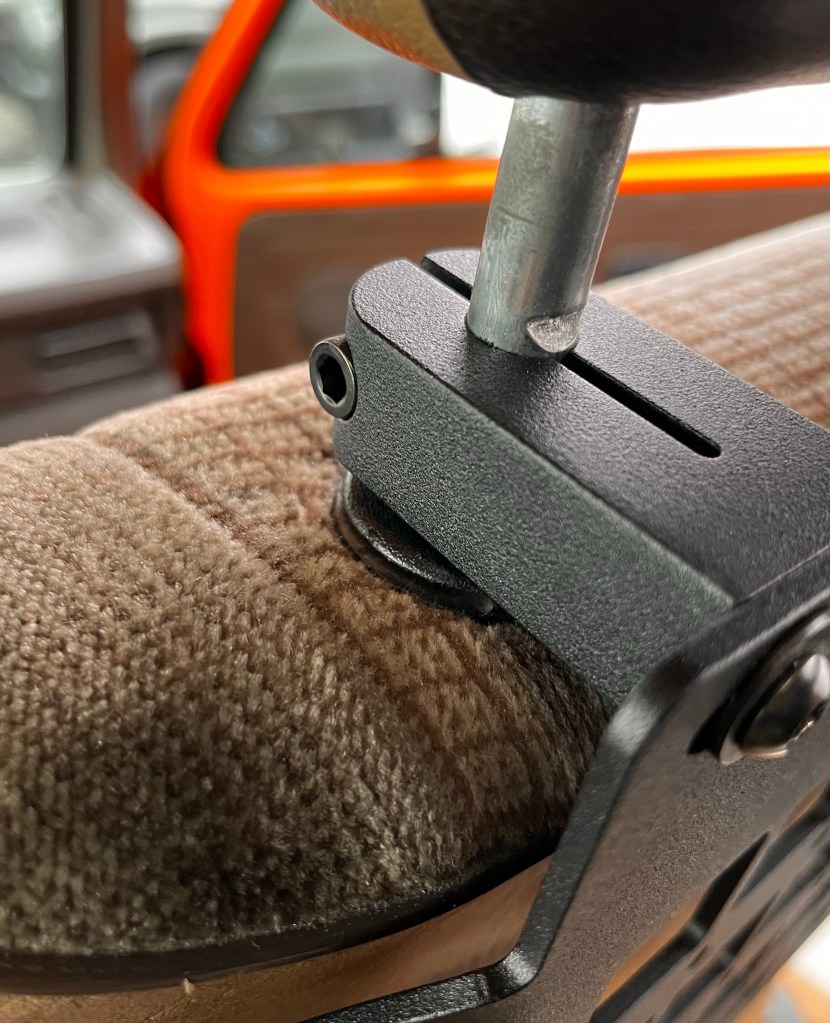
It’s 0.088” thick aluminum , powder coated slight texture satin black. I made some spacers with locating bosses to put in spot where I thought it need some more support. Bit of sticky pad ( not double sided tape) on those spacers just to conform and support better.
Mounting screws to stock bolt locations, countersunk and with support spacer there too.


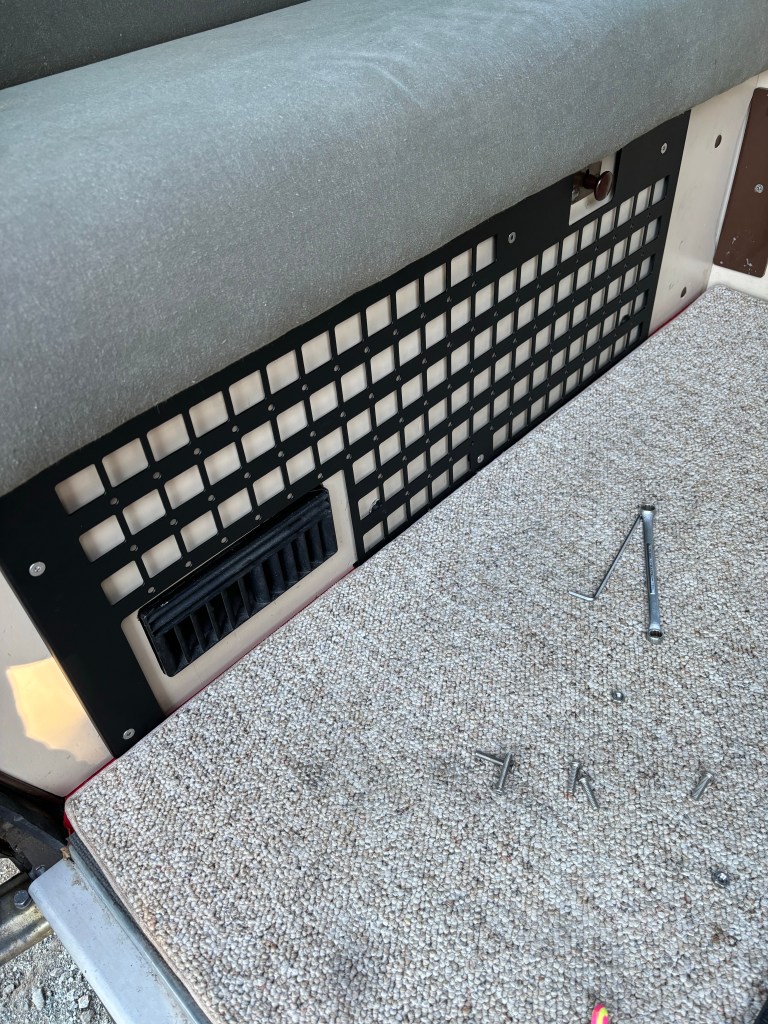
Update …. Shock cord crudely attached… full house of foot wear
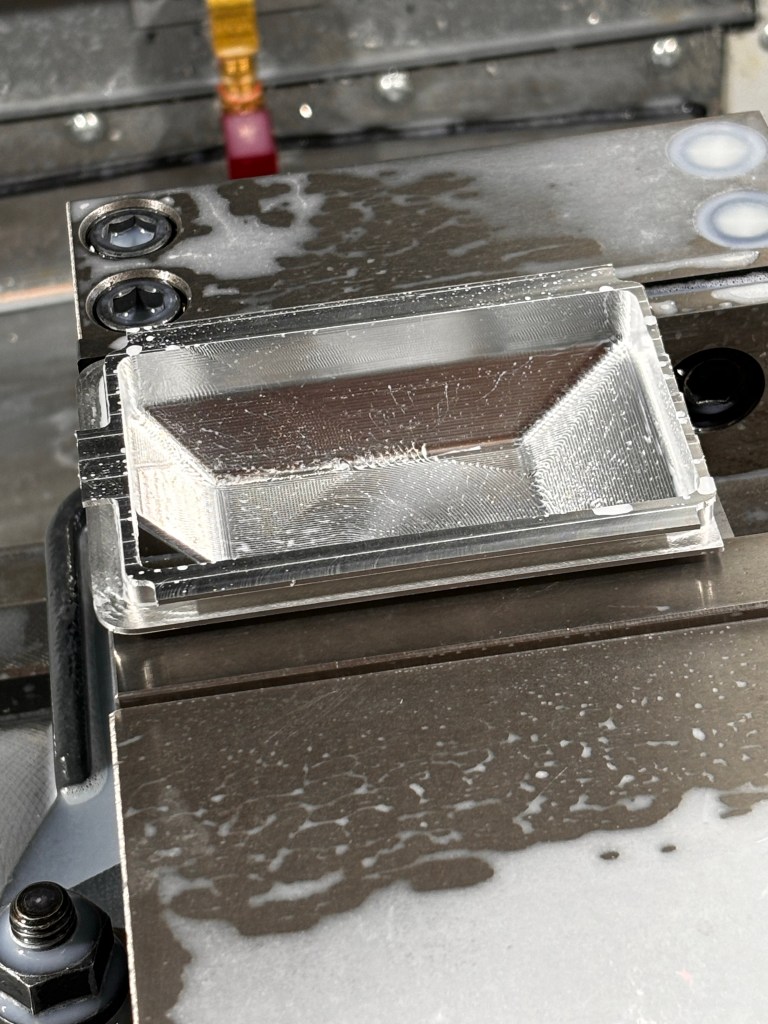
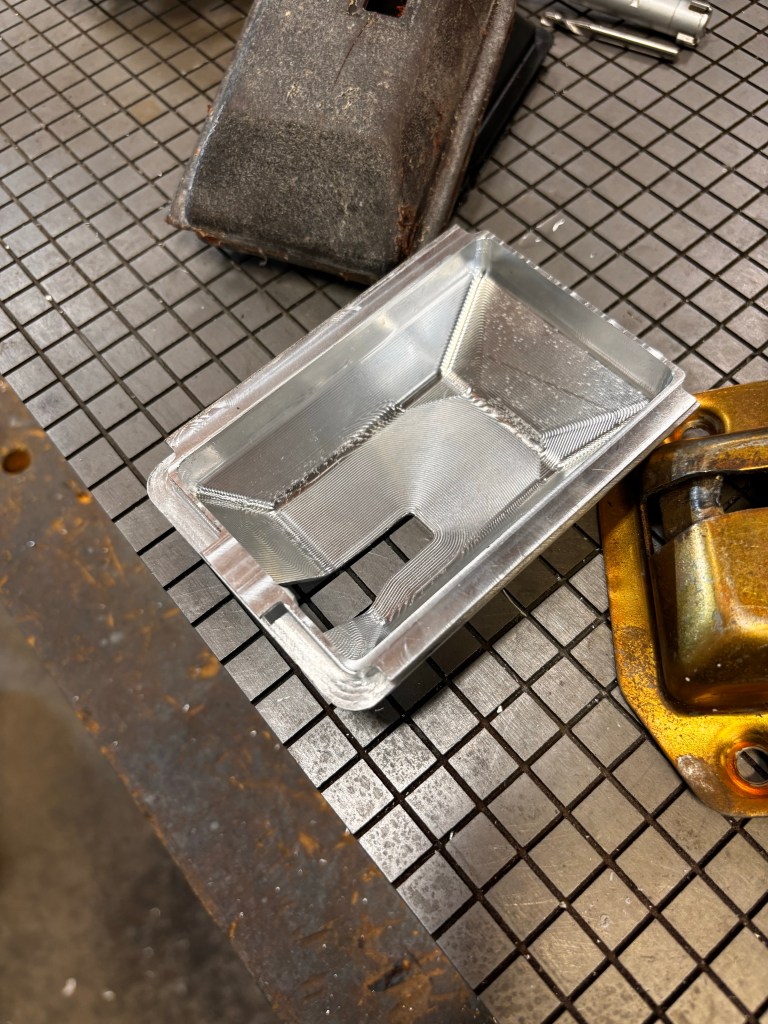
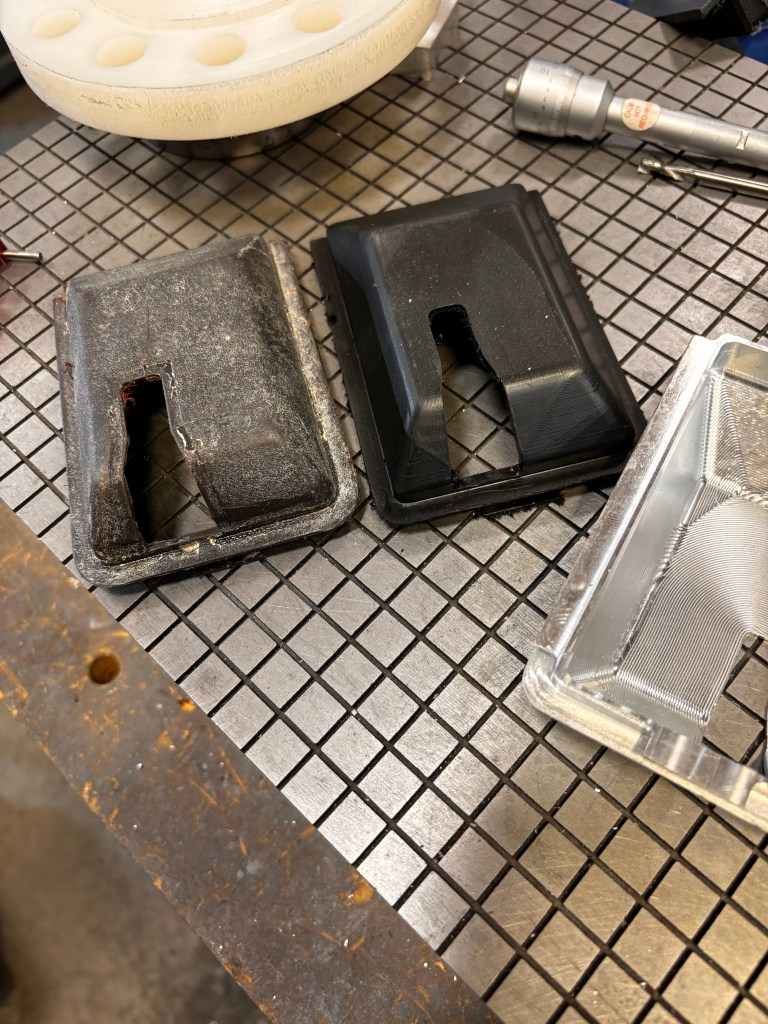
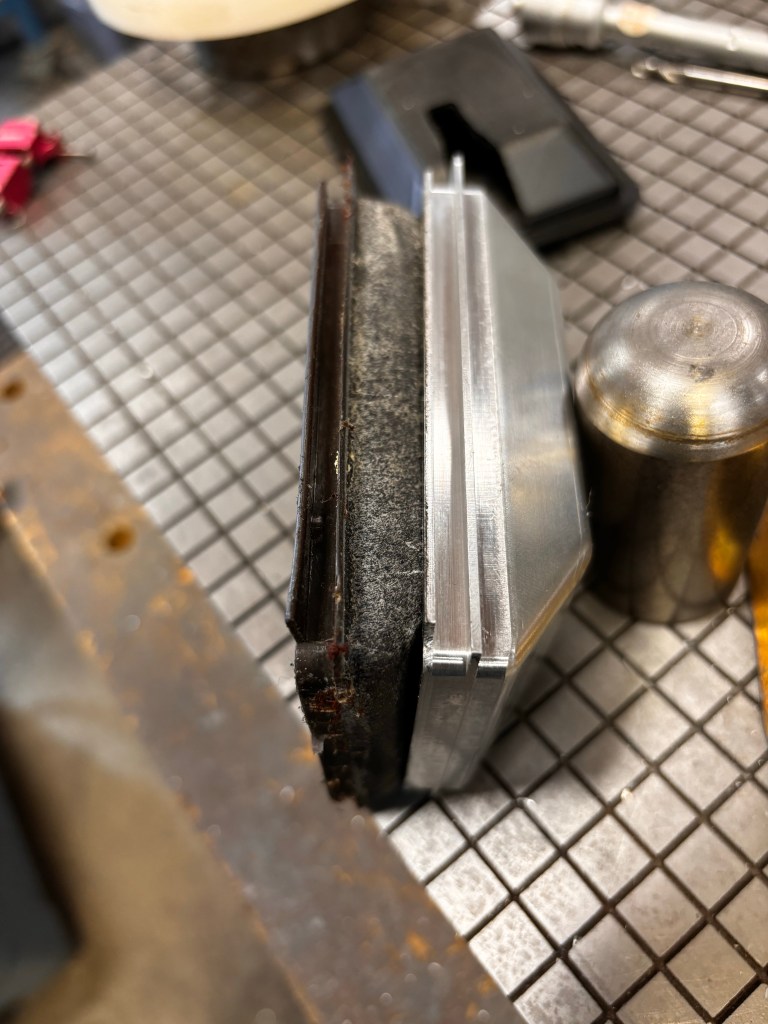
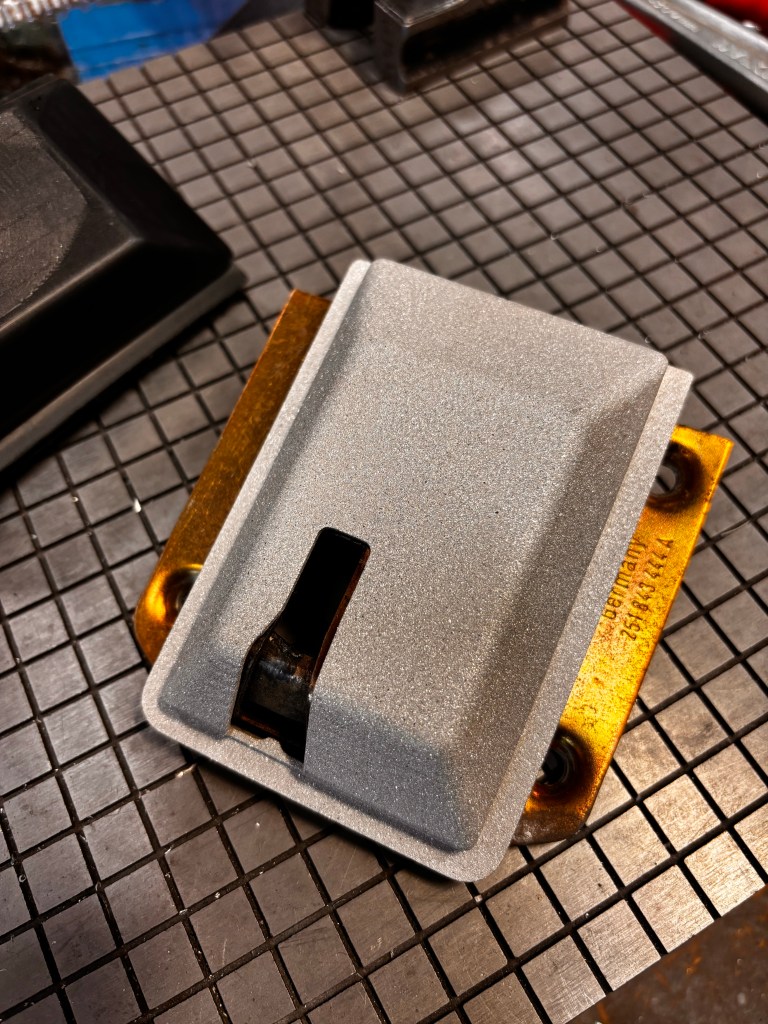
Vanagon – over the top slider door latch cover
Posted by albell in vanagon, vanagon mods on July 12, 2024
Update: Aug 2024
Finally powder coated and installed . Yeah not the best door card recovering, it’s a slightly waxed canvas.

My stock plastic one is degrading . My spare is degrading . Degradation all round.
So I took one of my crappy stock plastic covers and really just measured up with calipers. Made a computer model and tried that out in hdpe. That plastic didn’t cut cleanly and I adjusted model cos the latch opening wasn’t right. Didn’t get that correction correct , but ok, good enough .
Went ahead with a block of aluminum , adjusted the shell thickness via stock to leave on the programming of cut . Turned out good enough .
Sandblasted it . I’ll powder coat black
Damn, forgot to add. If it fits I’ll post the step file of the model . you can 3d print it


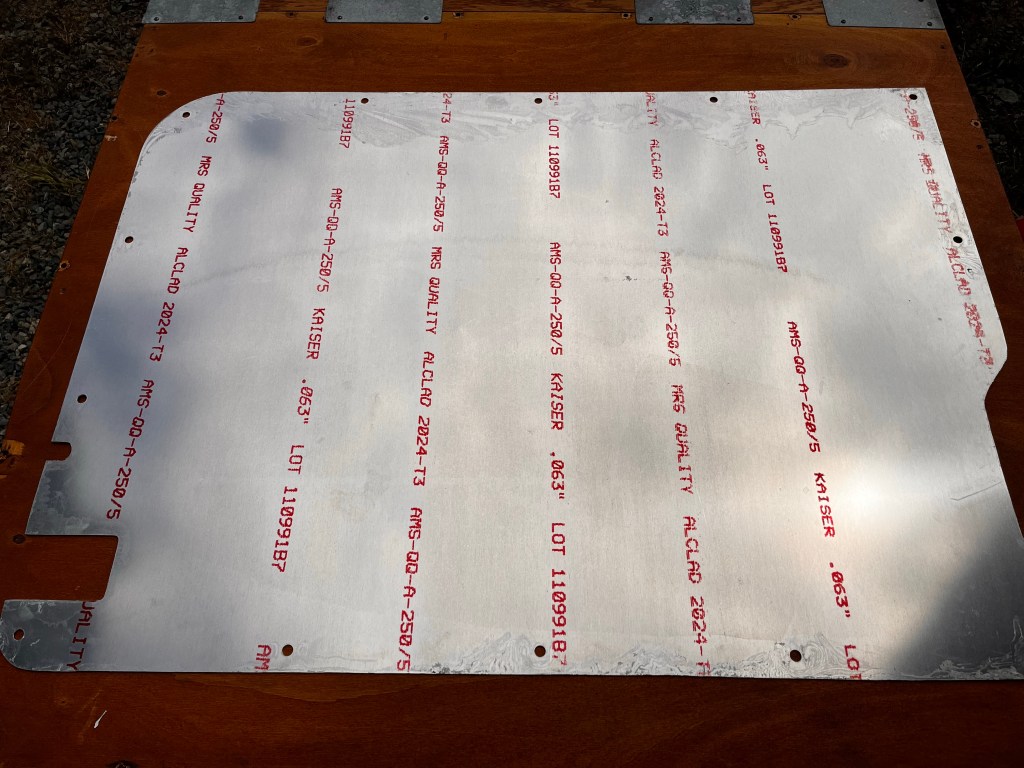
Vanagon – kinda crazy recovering project
Posted by albell in vanagon, vanagon mods on July 2, 2024
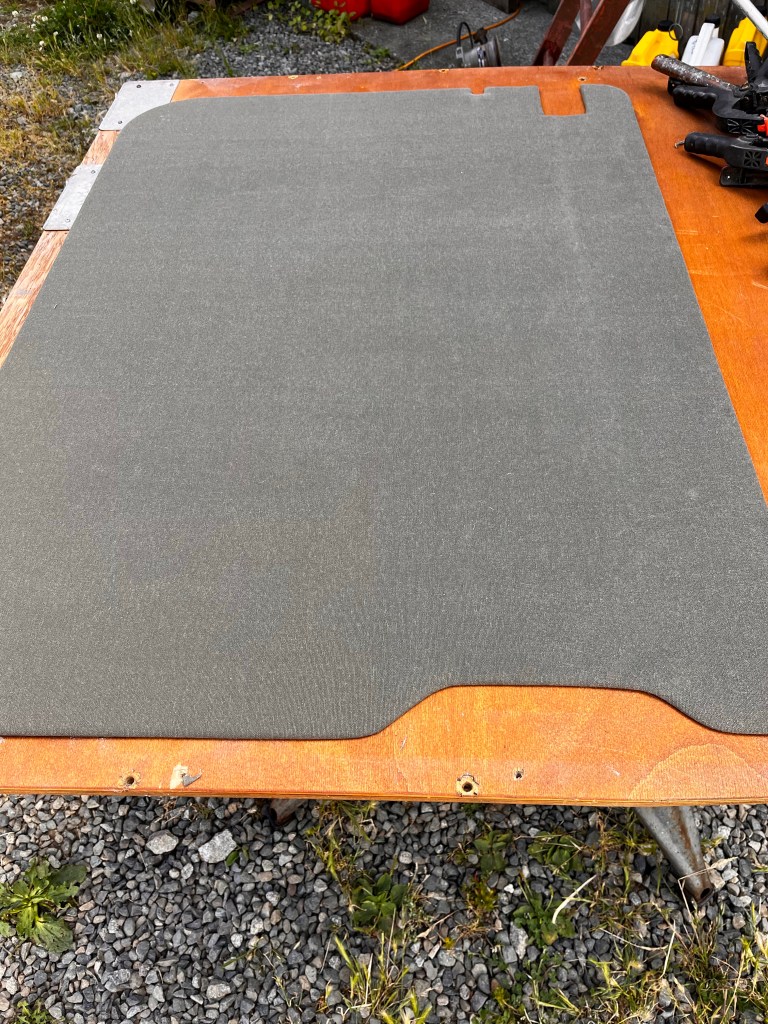
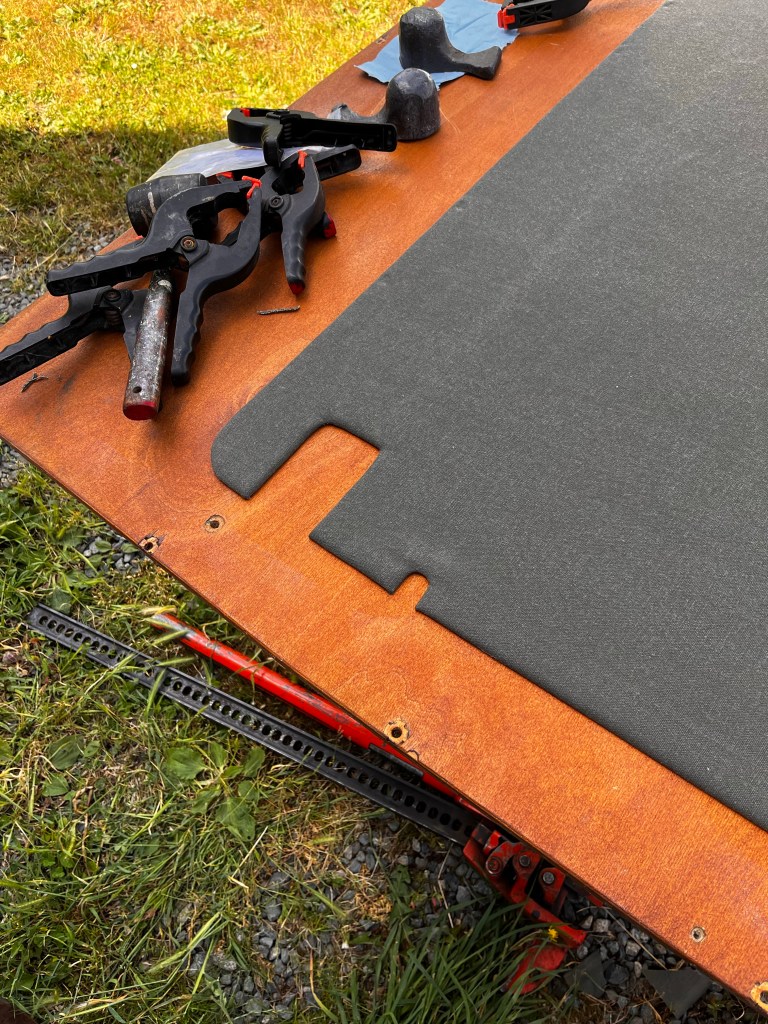
A few years ago I made an aluminum door card for the slider door. 1/16” 2024 , I traced the stock card and cut the aluminum by hand. No cnc 🙂
Been using it naked for all this time. But I had bought some olive drab water repellent canvas ( pic says 15 oz, but I recall now that weight was out of stock and I bought 12oz), and the crazy plan was to cover it with that.
Now I say crazy, as why would anyone do interior trimming in olive drab lightly waxed canvas?
Well I wanted that look, and I don’t mind the slight odour the fabric has. Yes, it has the waxed canvas smell.
Oh btw, I made my tintop syncro into a Westy 11-12 years ago using the parts from my ‘82 Westy.
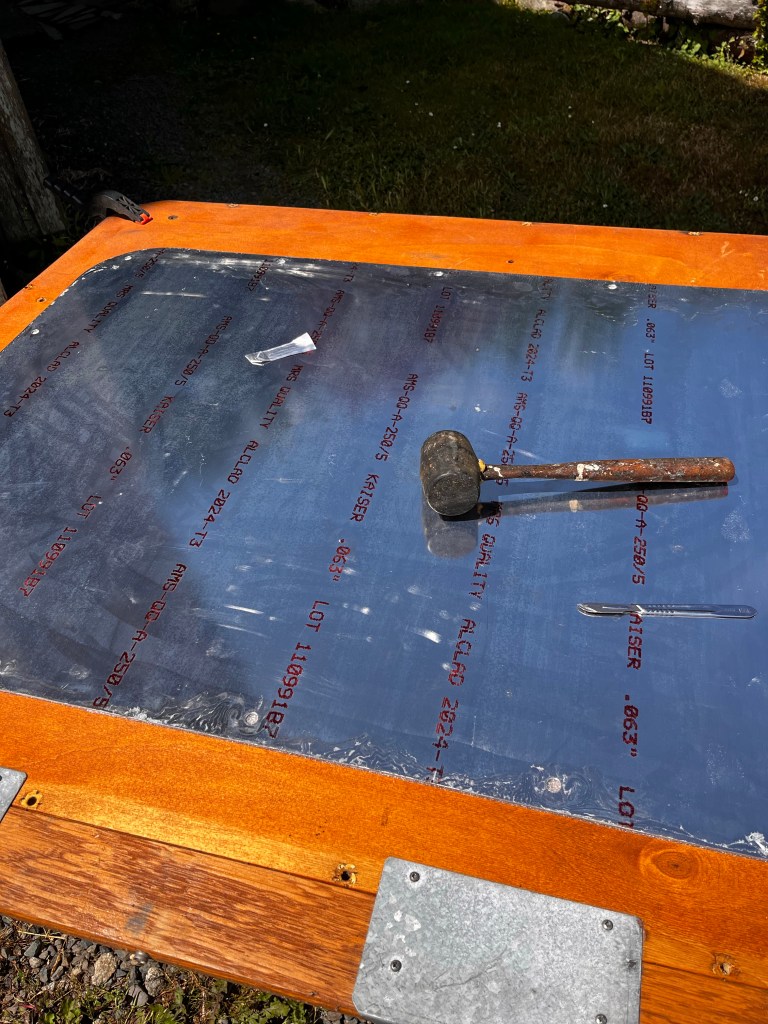
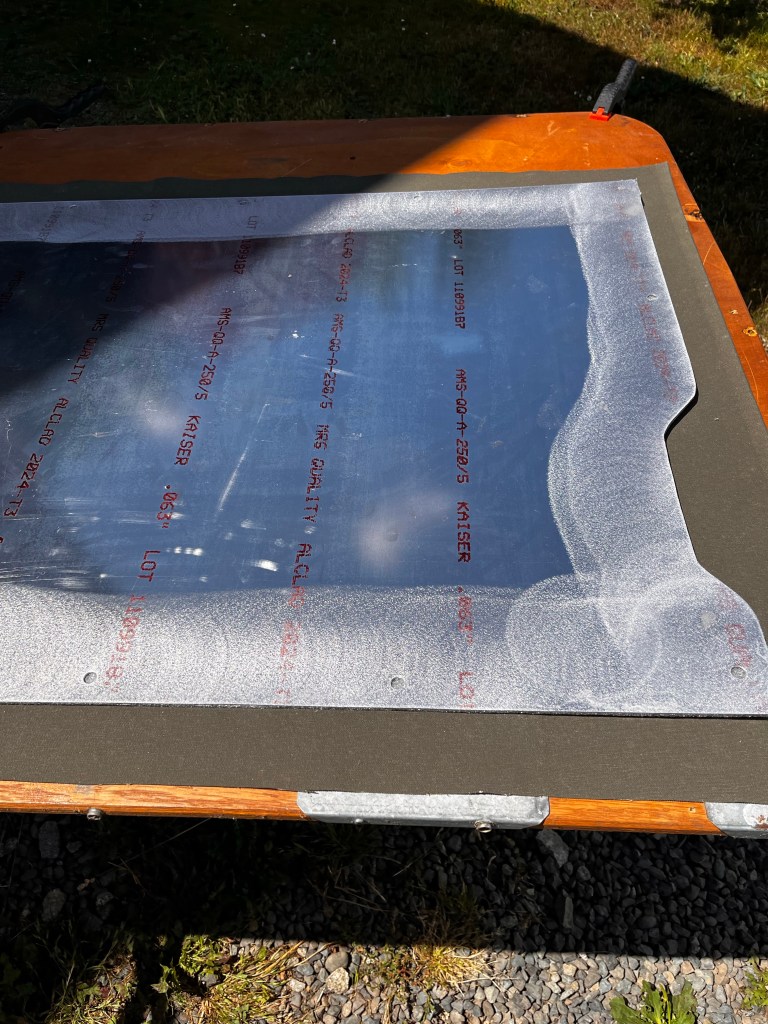
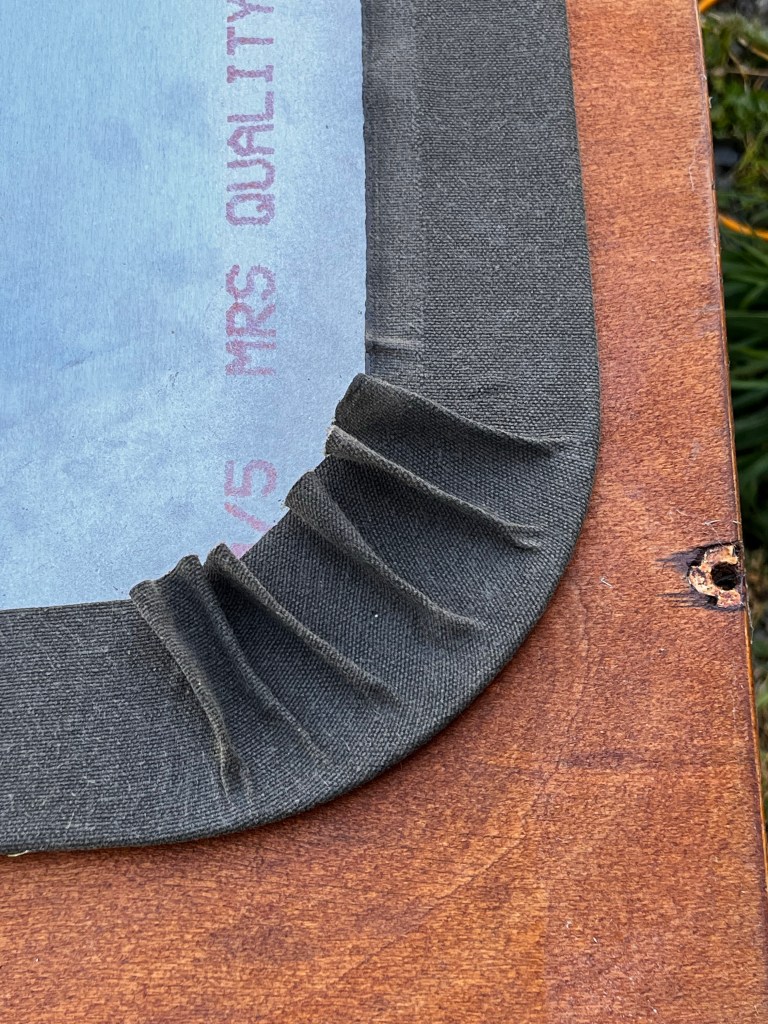
I glued some 1/8” closed cell foam to the panel and then glued the fabric to the foam and wrapped it around the back. I had tested my contact cement a while back, how well would it glue the canvas to the aluminum. I was surprised that it really did glue it well.
The pleats you see in the corner in one of the pics were trimmed flat. Used some fasteners I found online to attached panel to door, they worked well and for the most part reusable (90% removed without damage from the naked panel )
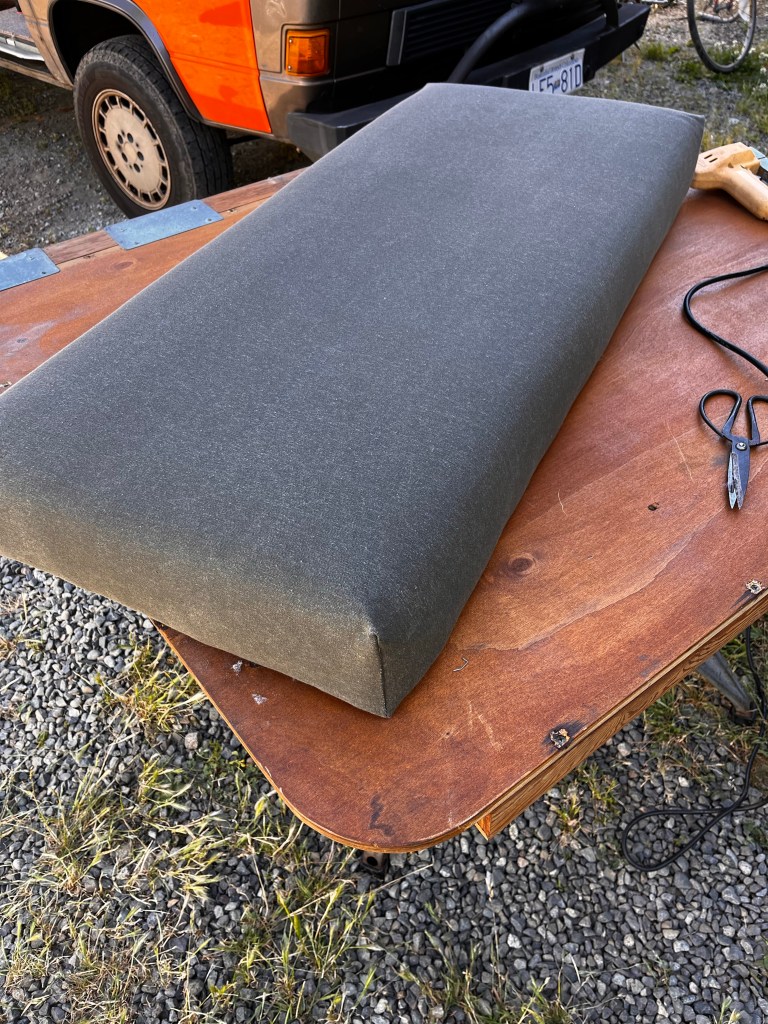
Next day I refoamed and recovered the rear bench. Was way overdue. The stock foam was degrading. I had some 4” foam , but not quite enough to do it properly. Should have 1/2” or so of foam sticking out from the plywood base. I had enough foam to be exact match with plywood , I added quilting stuffing material to pad things out .
Oh and I don’t have an electric carving knife to cut the foam, but a hand held hacksaw blade worked very well
Corners sewn, fabric stapled to back of ply as in the stock 82.
Oh and I used 4” thick foam. I don’t know the density but it’s close to stock. The stuff I took off was about 3.5” thick. But it was old and compressed a bit. But… I think 4” foam might be a tad too thick. It’s tight between the seat back and the base. That’s not a problem sitting, or deployed as bed, but it’s impeding lifting the seat base fully to get to storage . I’m thinking of what to do.


Vanagon – syncro fuel gauge sender ground
Posted by albell in syncro specific repairs, vanagon, vanagon mods on June 11, 2024
Did this mod a month or so ago, another one of Tom’s good tips. My fuel gauge had been reading low for quite a while , and then started acting even more erratic. Tom posted on samba a clever fix.
The short story is that the sender ground path is from the steel sender plate to a lug in the engine compartment, but the connection at the sender plate becomes corroded. Instead of trying to clean that corroded connection ( spade is steel not copper) , just add a ground wire from plate stud to somewhere close by on the body.
The only gotcha in this method is that the studs can be corroded and a stud may break when trying to loosen the nut. So plenty of penetrating oil and some good judgement in how much to force things is needed.
Pics are self explanatory , the samba link is the best reference.
This fix worked for me. Fuel gauge now much more accurate .


Vanagon – the THM ( Tom’s hatch mod)
Posted by albell in vanagon, vanagon mods on June 8, 2024
Update June 10, 2024: I’ve been told that in some countries it is illegal to have a rear license plate hatch that does not close by itself.
Old Tom, Sodo on the samba, decided he was sick of the springs on the license plate hatch at the rear. You know, coolant and oil checking hatch. Tired of propping it open. So he cut the springs.
His YouTube …
Being a Tom fanboy , I decided to do same. I didn’t have trouble removing screws as I lead a pure life , unlike Tom .
I bent the spring pigtail with the pliers, and it broke off. No need to grab angle grinder .


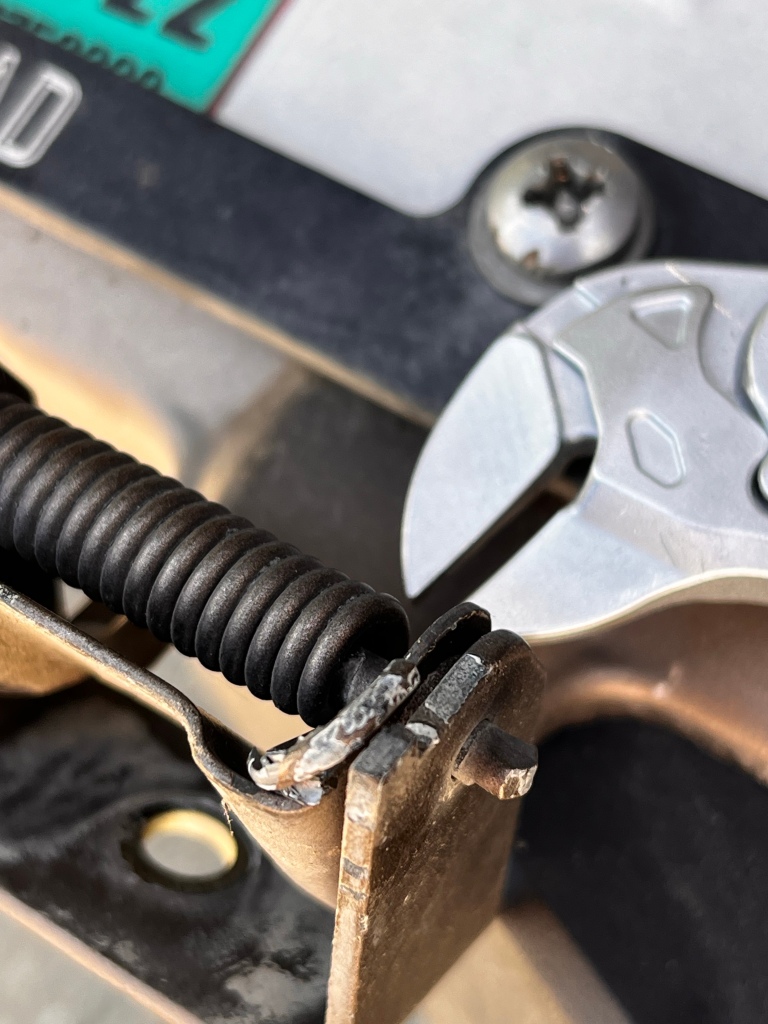
I gave the clip a bit of a push to the rear, left in pic. Didn’t seem to move, but it did clip better.
Antisieze on the screws back in, and a dab of grease on the clip.
Now I have a floppy hatch like the old Tom .
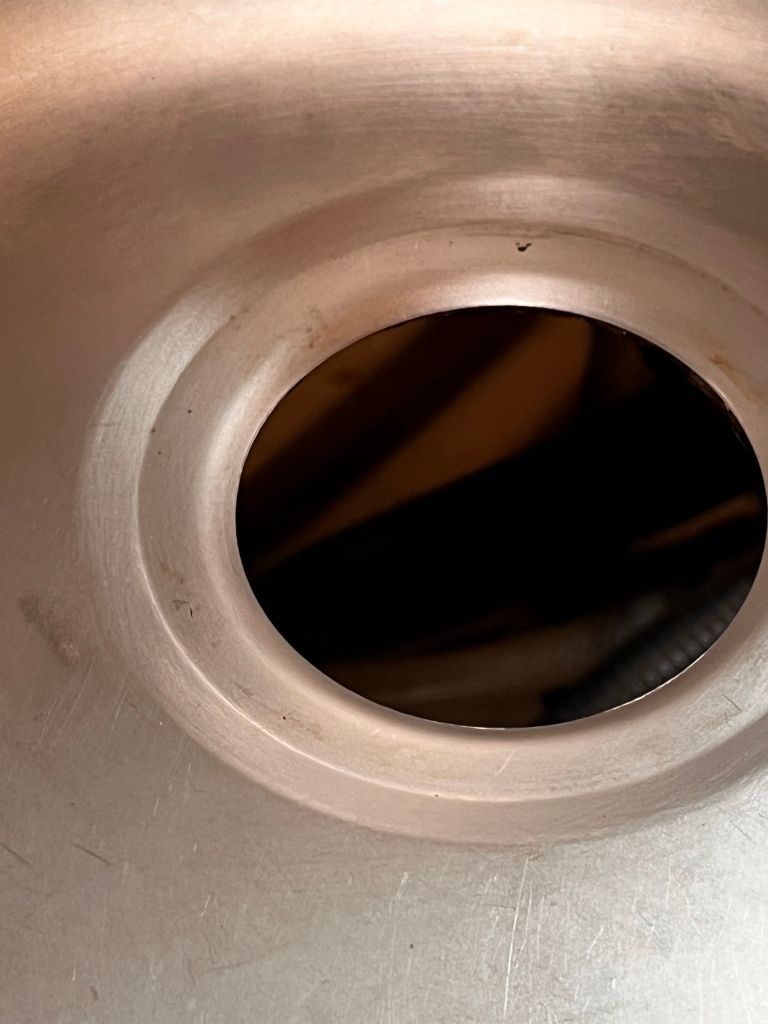
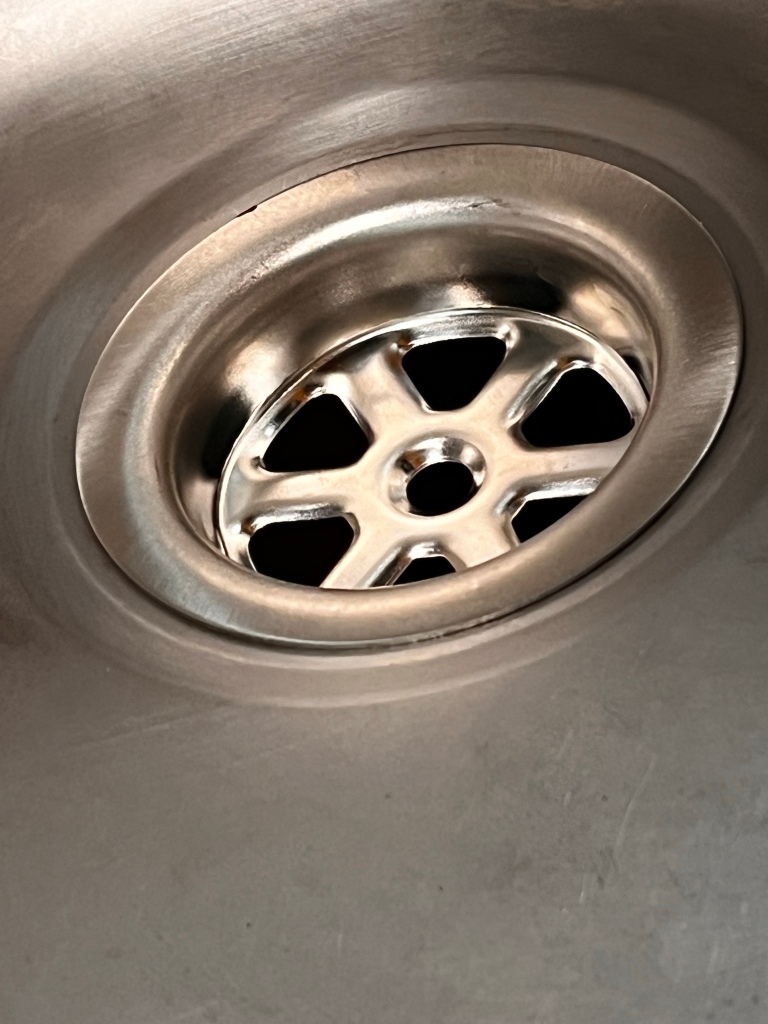
Vanagon – stock sink drain replacement
Posted by albell in vanagon, vanagon mods on June 3, 2024
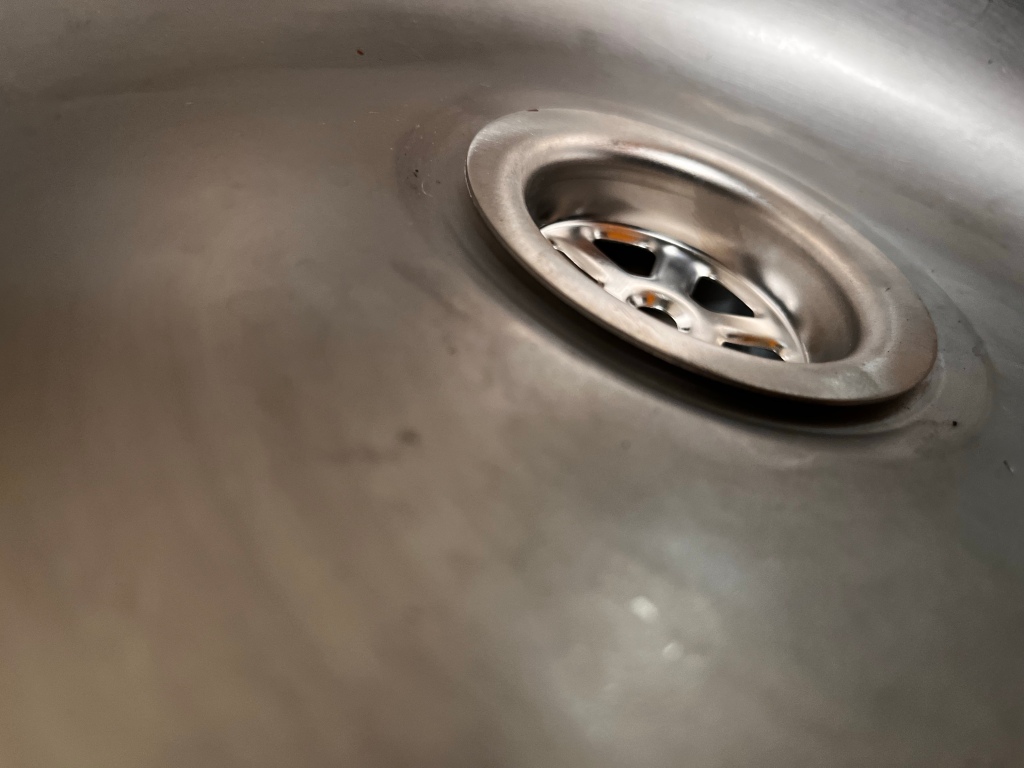
Start of it, the low profile drain being used by the kids on samba
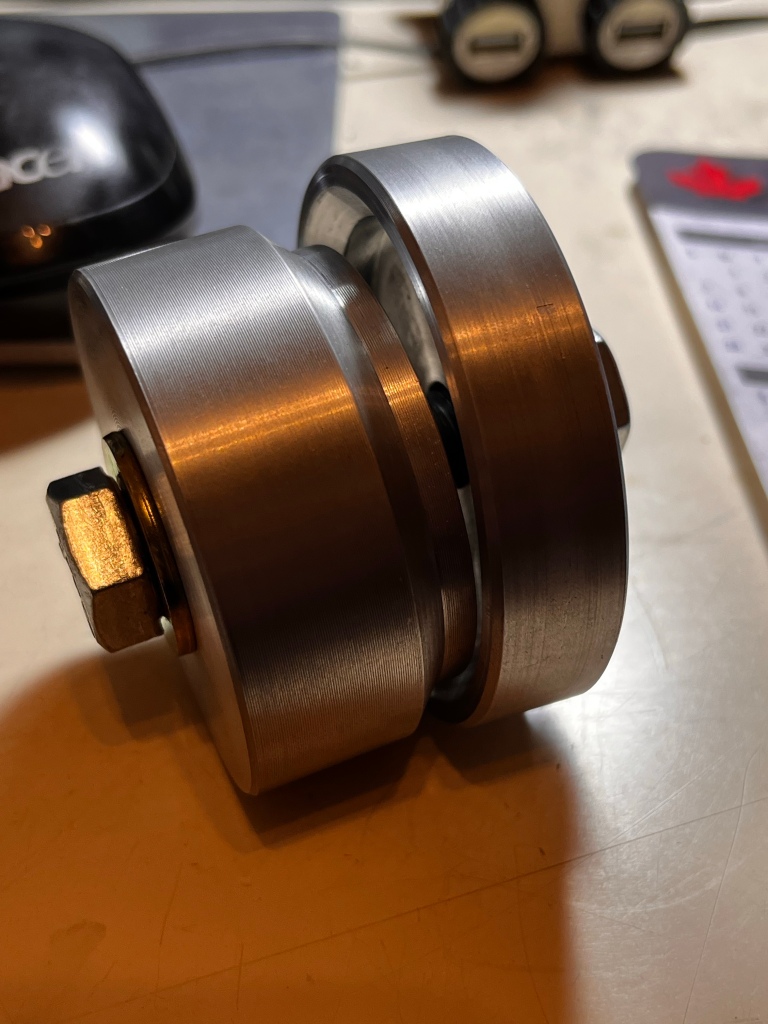
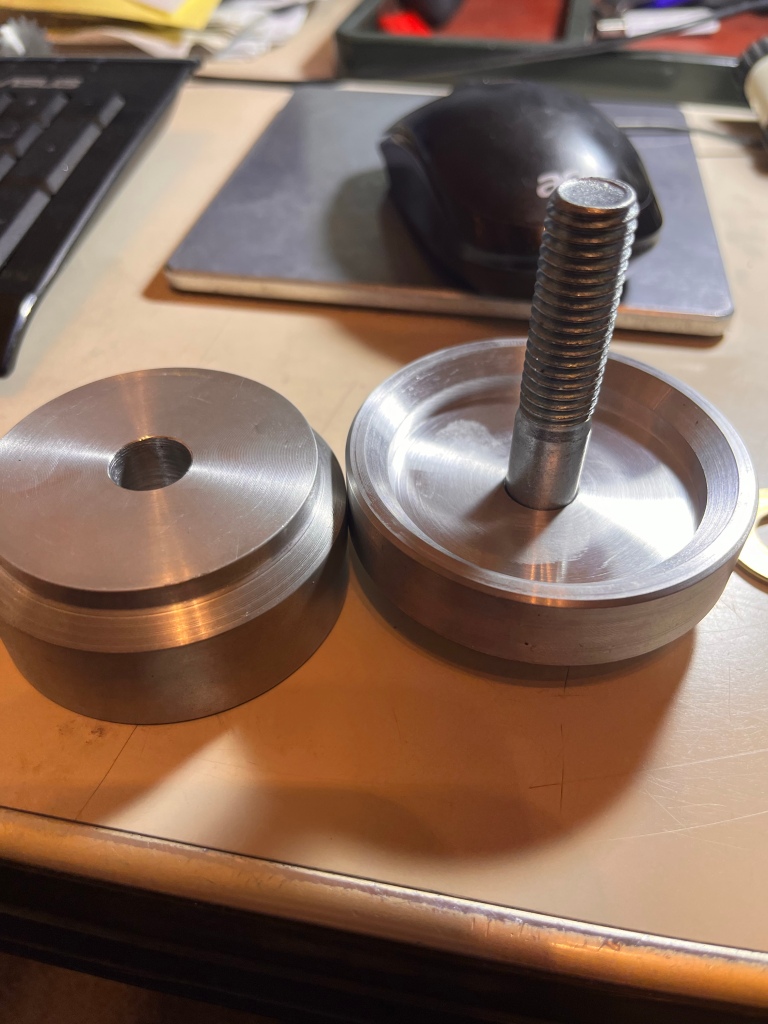
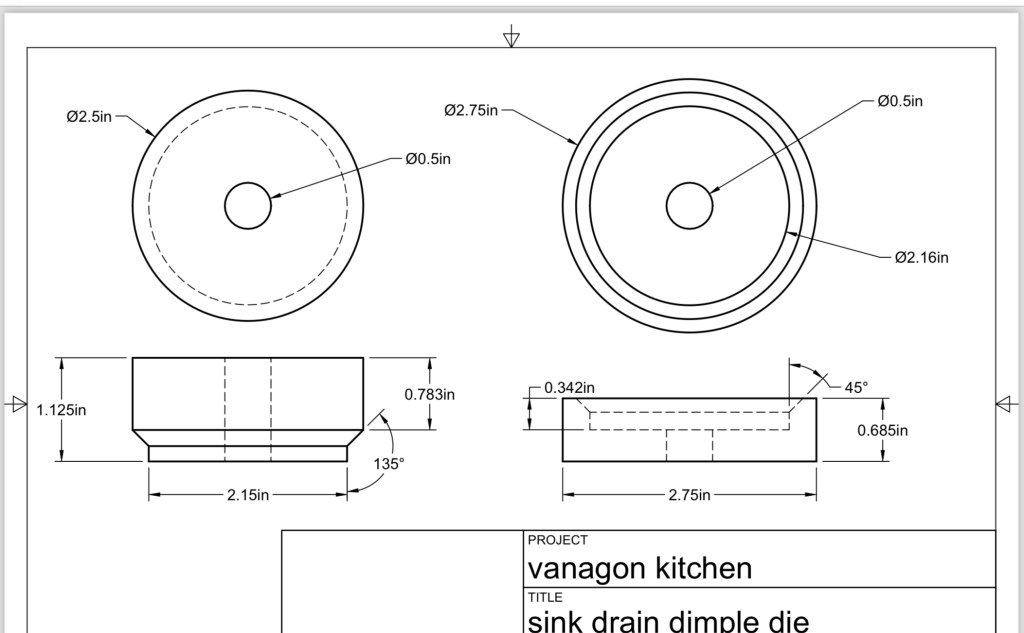
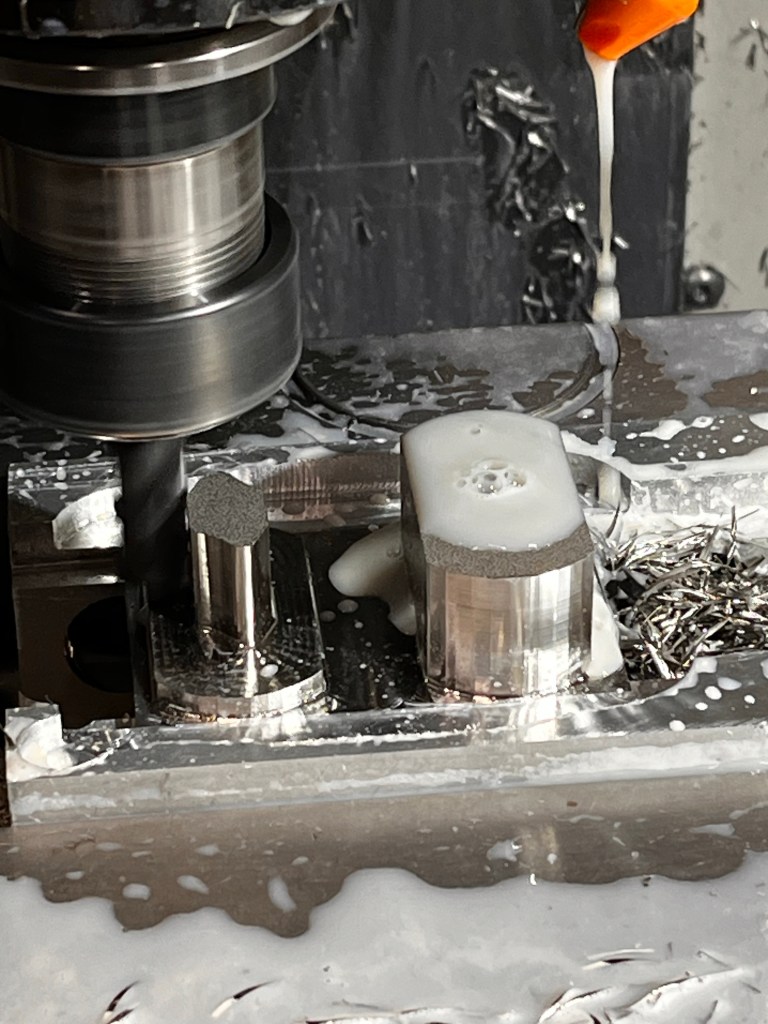
I didn’t like how the strainer fit into the sink hole. I didn’t like other methods of making it fit. So I made a dimple die thing.
Pics kinda explain it all. One note, if making the die , take another five thou ( inches) off the short straight section of the upper die. Shown as 2.150” in drawing . Make it 2.145”
Pics show the un mod situation and the adjusted .


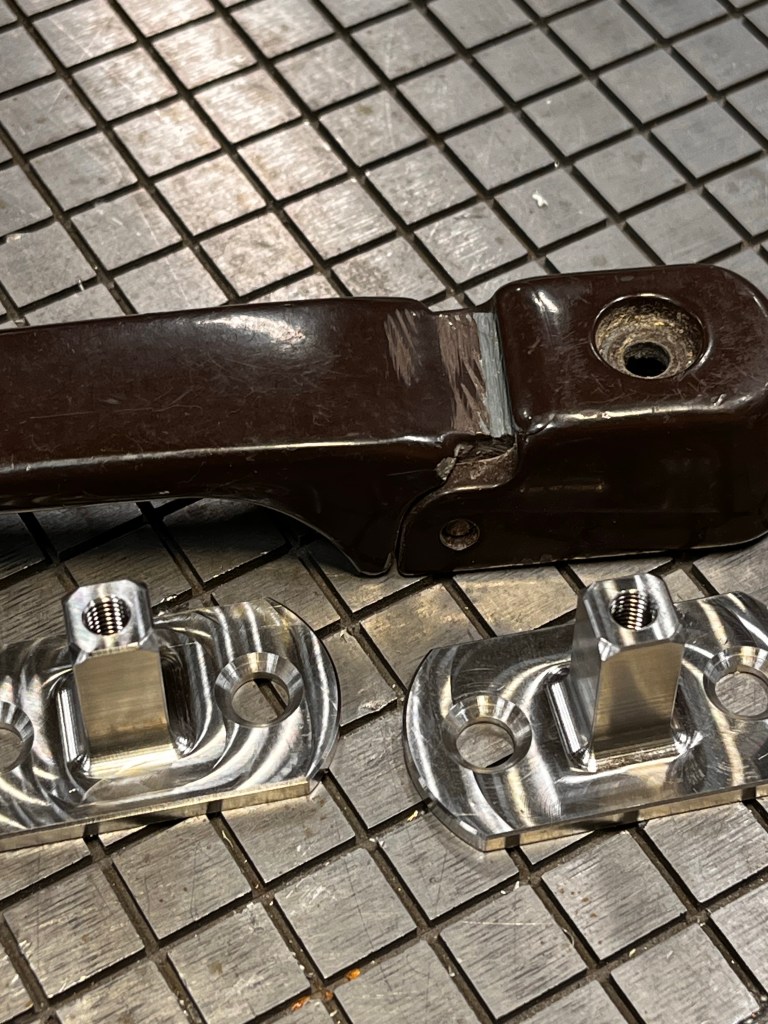
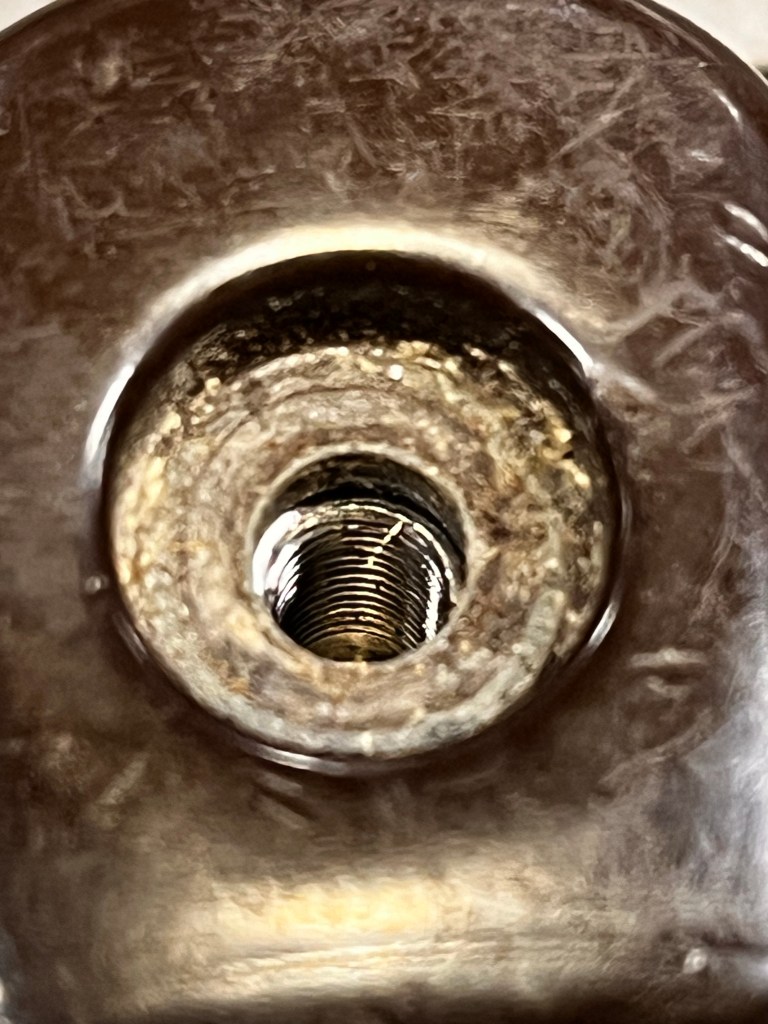
Vanagon – pre 85 slider door rear handle stud
Posted by albell in vanagon, vanagon mods on May 27, 2024
Was asked to make a pair for a friend. I had some 316 ss drops and machined the studs. Very much not the most efficient nor the most economical way to make them. I’ve posted a drawing and the step file. Sorry about the unprofessionally dimensioned drawing.
Oh, the step file … having issues uploading with the .stp extension so I’ve made it .txt
So change extension to .stp and it should be good


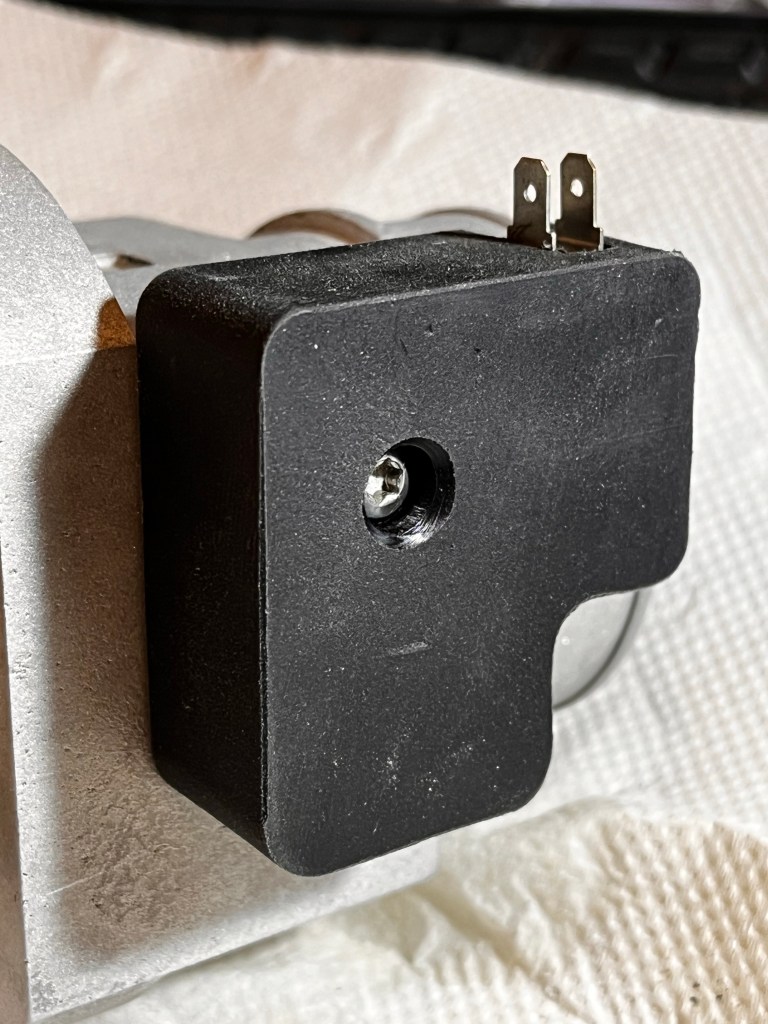
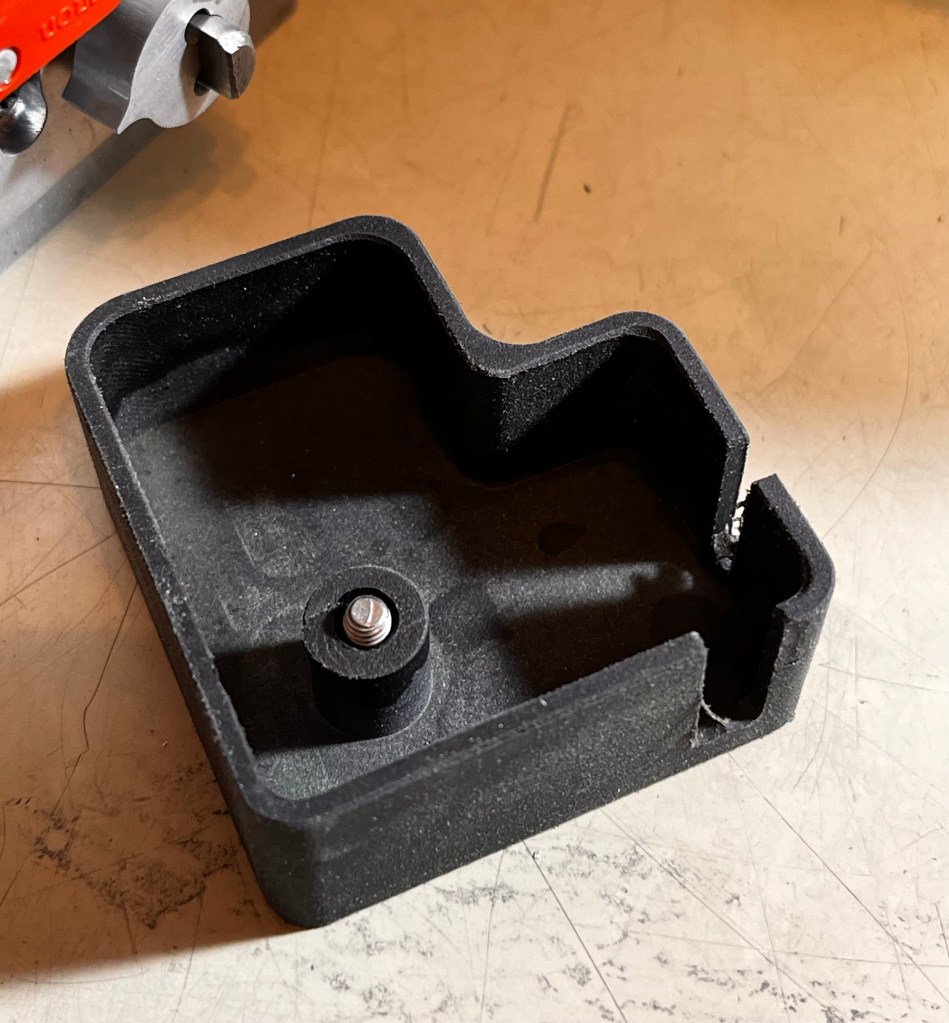
Vanagon – playing with old gowesty throttle body
Posted by albell in vanagon, vanagon mods on March 20, 2024
I grabbed the tb from a fire damaged van. So the anodizing on the body badly affected and all the meltables gone. That’s the tps and the bearing seals and additional shaft seals.
But the body was good. I blasted it, popped in new bearings, and thought I’d try to make an off the shelf, meaning my shelf, micro switch work as a tps sub.
Oh and I also had to make a cam for the switch , goes on the throttle shaft.
Oh yeah, of course, I made a delrin cover .
This was all just for the exercise. I haven’t tried it out .


Vanagon – AFM optical
Posted by albell in vanagon, vanagon mods on February 7, 2024

I’m testing this device. It’s the one on the right . The left hand AFM is what I’ve been using . Chinese made replacement board .
Only been a few days but has worked flawlessly . It replaces the carbon track board and the wiper with an optical sensor set up . More to come but I’ll say now it’s working perfectly. Smooth throttle response, prefect throttle tip in, no bucking on slow trailing throttle crawling .
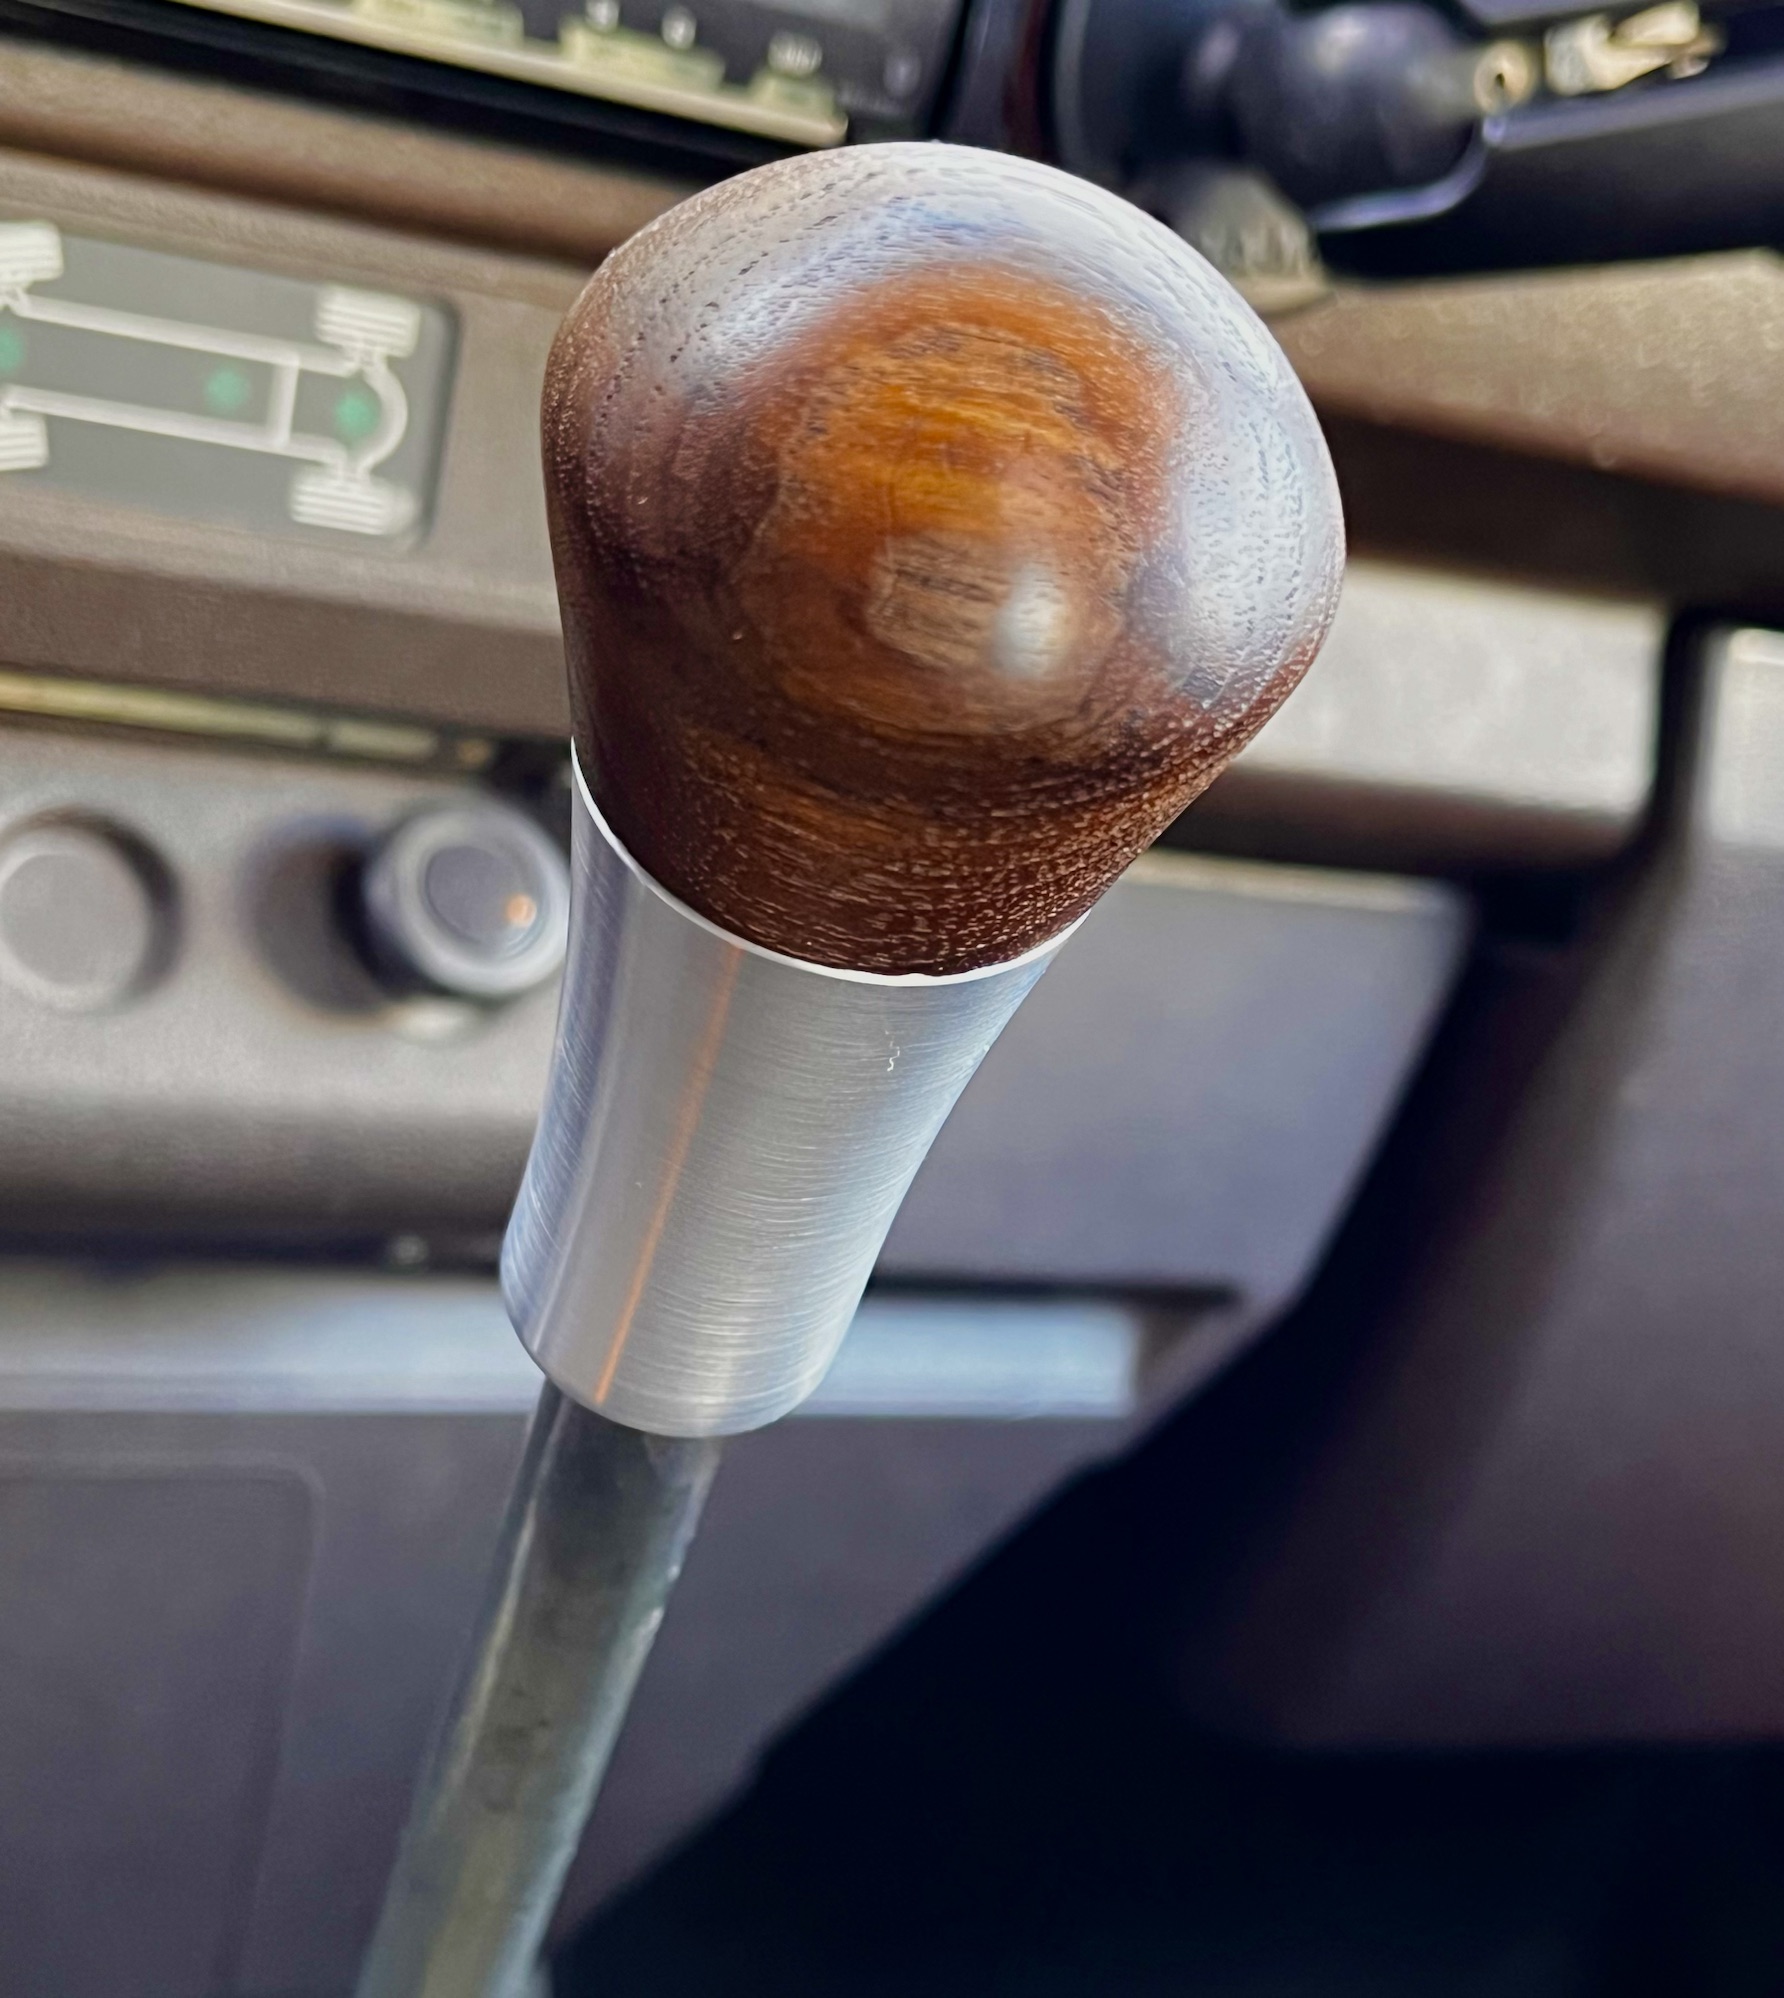
Vanagon – another shift knob
Posted by albell in vanagon, vanagon mods on January 13, 2024
It got too cold for the aluminum shift knob I made a while back. I mean it, it’s not the greatest choice of material for a shift knob. So yesterday afternoon at end of work I quickly made one with a bit of wood. Scrap teak that I had at work for some reason. Could have been bigger in diameter but that’s what I had. Wood screwed onto a threaded boss in the aluminum base.
Pic of the cold all aluminum

The new semi wood

Vanagon – Molle panel thing with more stuff
Posted by albell in vanagon, vanagon mods on December 27, 2023
That thing I posted a while back, more stuff on it. Bag has the pump and shower head ( https://www.flextail.com/en-ca/products/max-shower).
Shower was Xmas gift from good friends Simon and Maria. Works very well testing it at home .

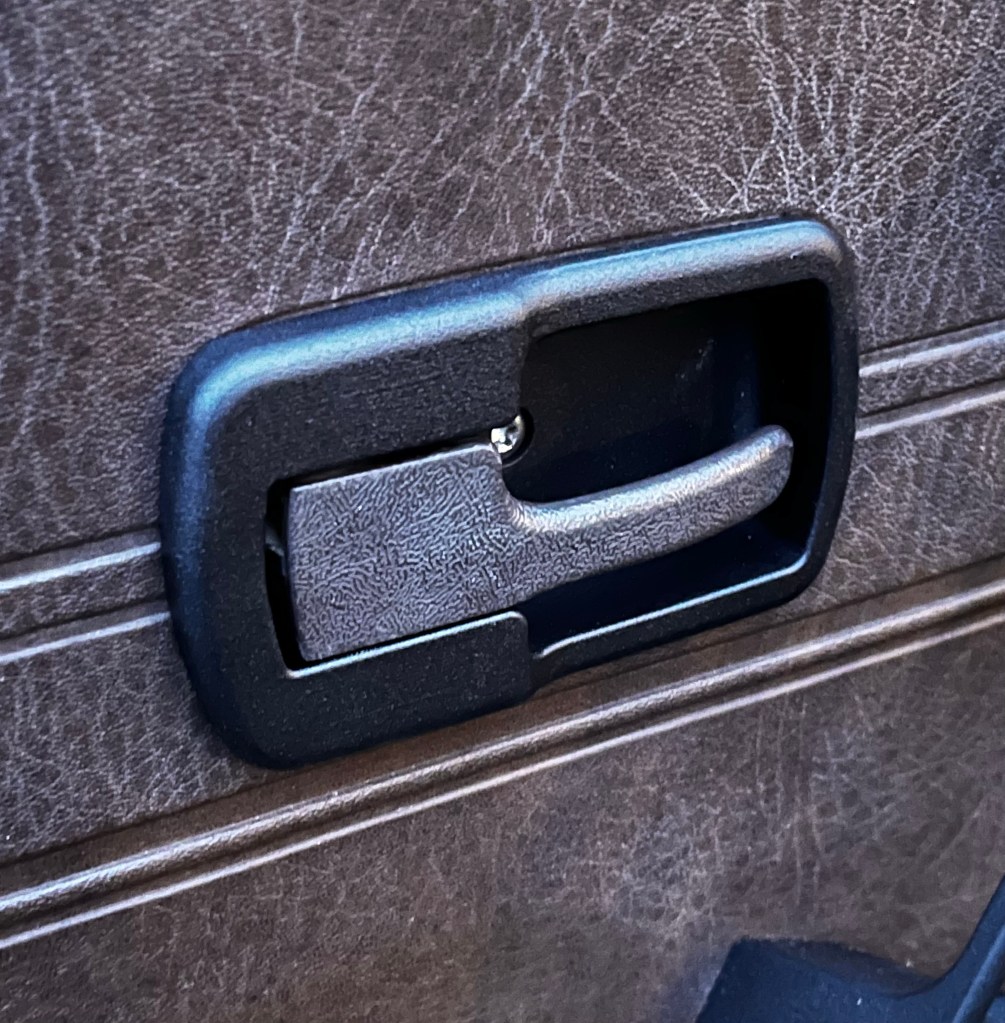
Vanagon – front door, inside release surround
Posted by albell in vanagon, vanagon mods on December 24, 2023
I went down this silly rabbit hole about a month ago. I thought it would be easy to make a pair of door latch surrounds. Well it wasn’t , made mistake after mistake. Finally got something that works, but it sure wasn’t worth the effort.
Yes, there are aftermarket aluminum versions. I think it’s uniwerks that sells some UK made units. That set includes the trigger and the trigger mount. I chose to try and use the stock trigger and mount, and that was a huge part of my problem.
Pics show some of my attempts, including 3d prints. And my final attempt, the “good enough, I’m not gonna waste any more time” , powder coated and on the door.


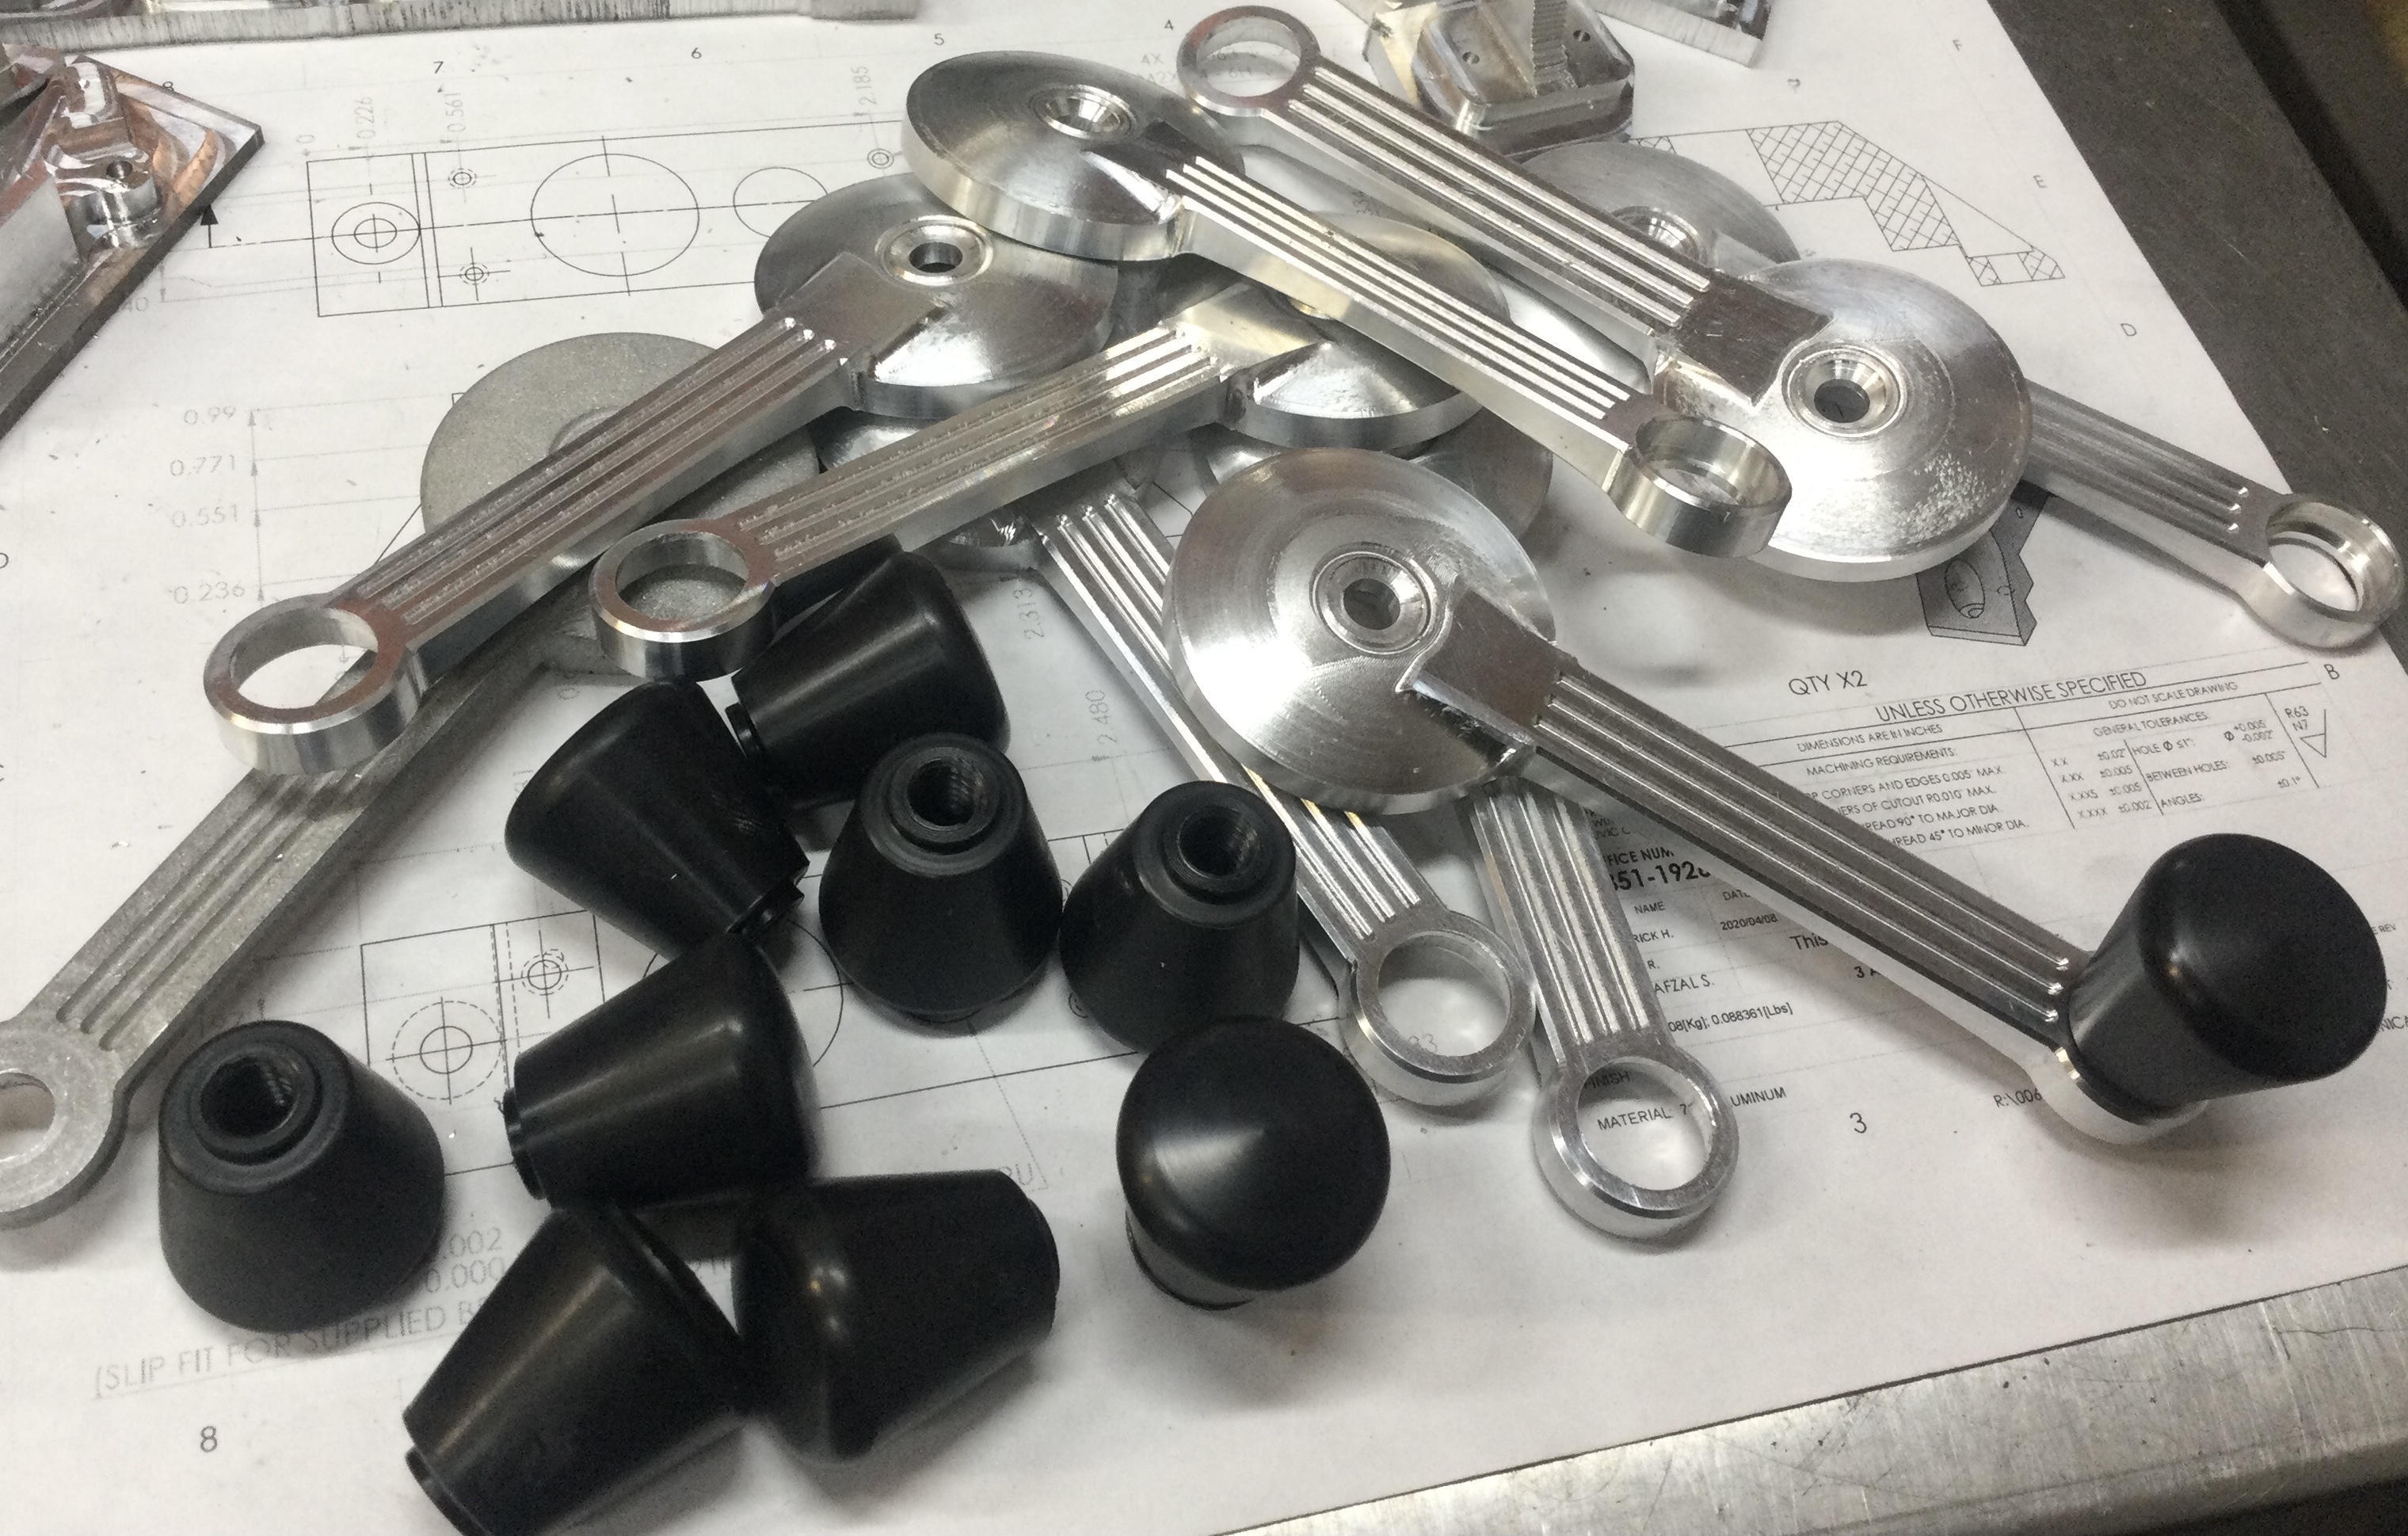
Vanagon – old project – window winders
Posted by albell in vanagon, vanagon mods on December 23, 2023
Started fooling with this about 4 years ago then I lost interest. Was more of a design exercise than anything else. I had this notion of a spacer set up, keyed to the handle…. Blah blah…
I don’t have a broach to cut the internal splines so I did a kludge by drilling small holes then boring a boring with a slight taper. Seems to work, but I haven’t used handles much.
The knobs are delrin, and a bearing pressed and glued into handle. That part of the experiment works well.
I think I’ll revisit this project soon and do a bent handle for more clearance. I’ll keep the delrin knob as I like that better than the knurled knob on the GW handles ( been using them for a year, I find the knurled knob kinda not great).


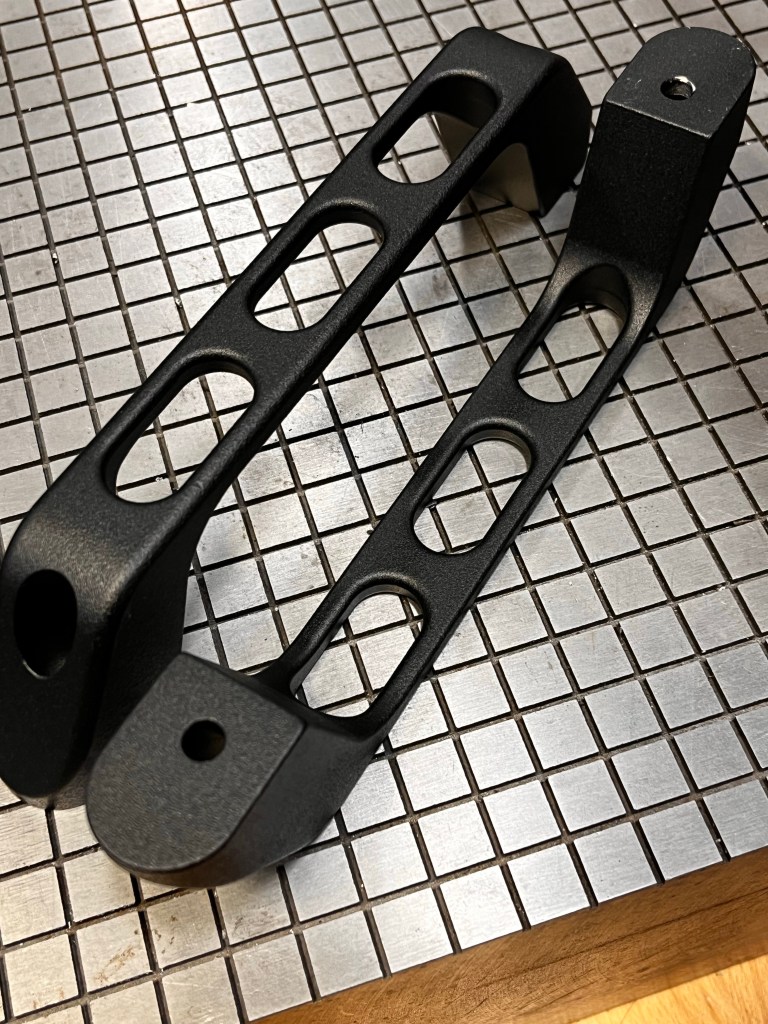
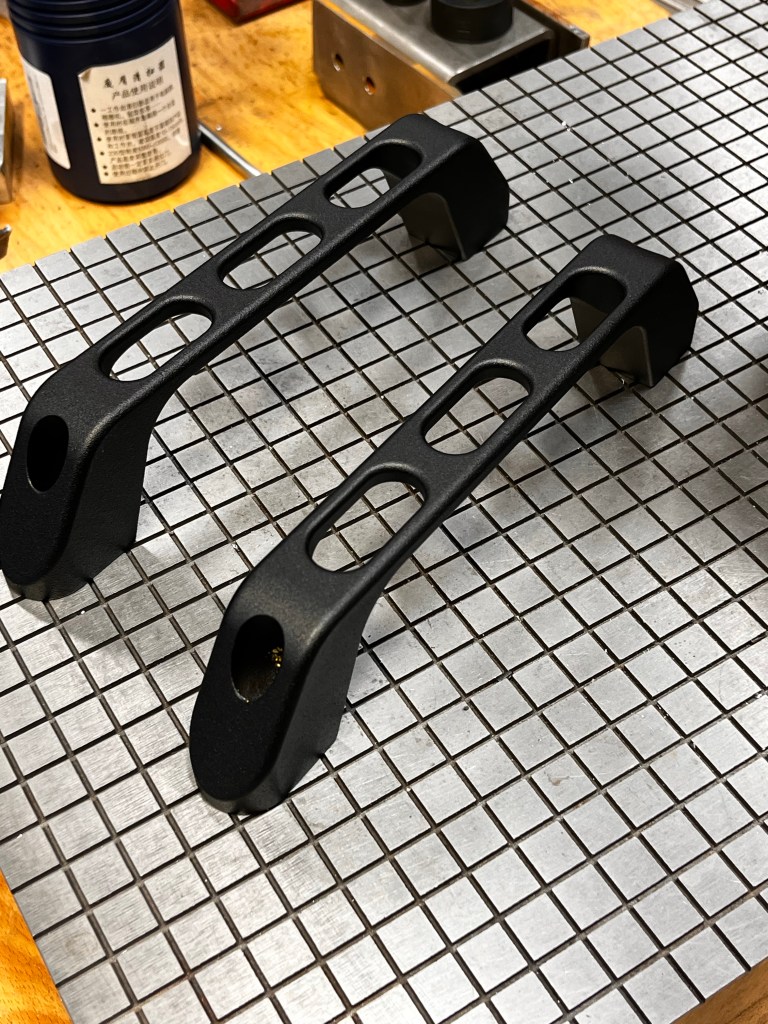
Vanagon – aluminum door handles
Posted by albell in vanagon, vanagon mods on December 9, 2023
Another thing I’ve been playing with. And I’ve posted about them but they deserve their own post .
Machined aluminum handles for front door. Yeah, there are some for sale on the market still, I think. Syncrotimes https://www.syncrotimes.com/
They do an anodized version for a crazy low price. Check them out.
Anyway, back to me .
I’m not a fan of “billet” aluminum things. Maybe it’s because I’m matching aluminum all day and I really don’t want to see it all the time 🙂
Plus they are cold, or hot depending on the weather, to the touch.
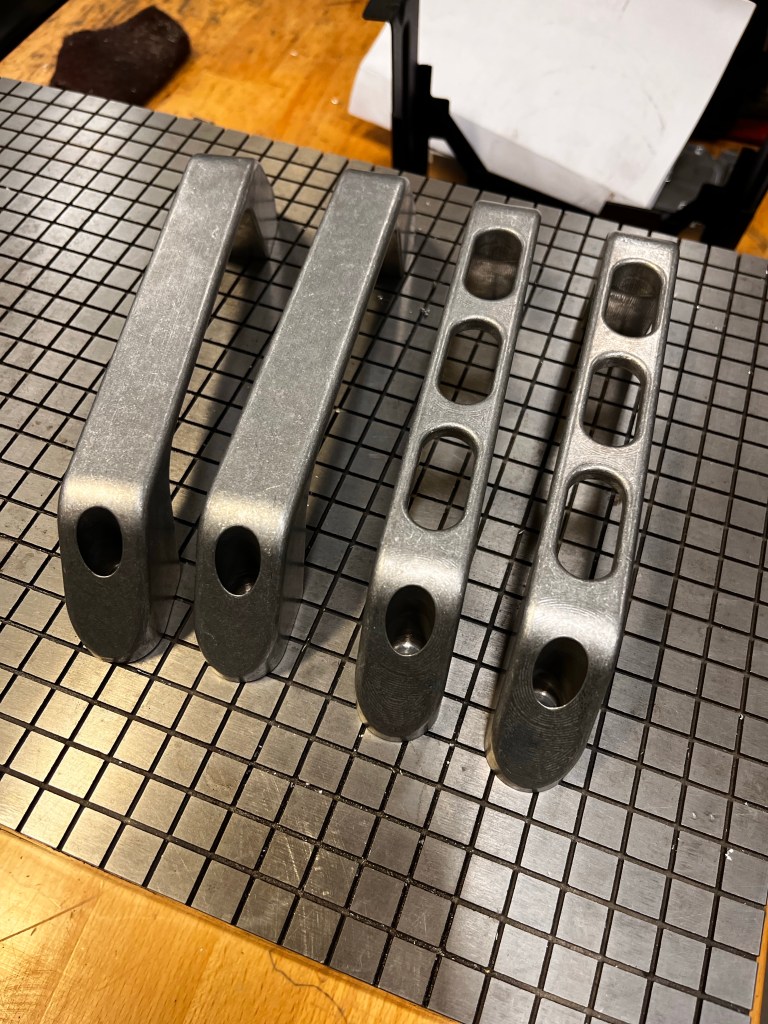
But I made these. Solid and ones with holes. And once they are powder coated, by golly I like them. Don’t seem as cold once painted.
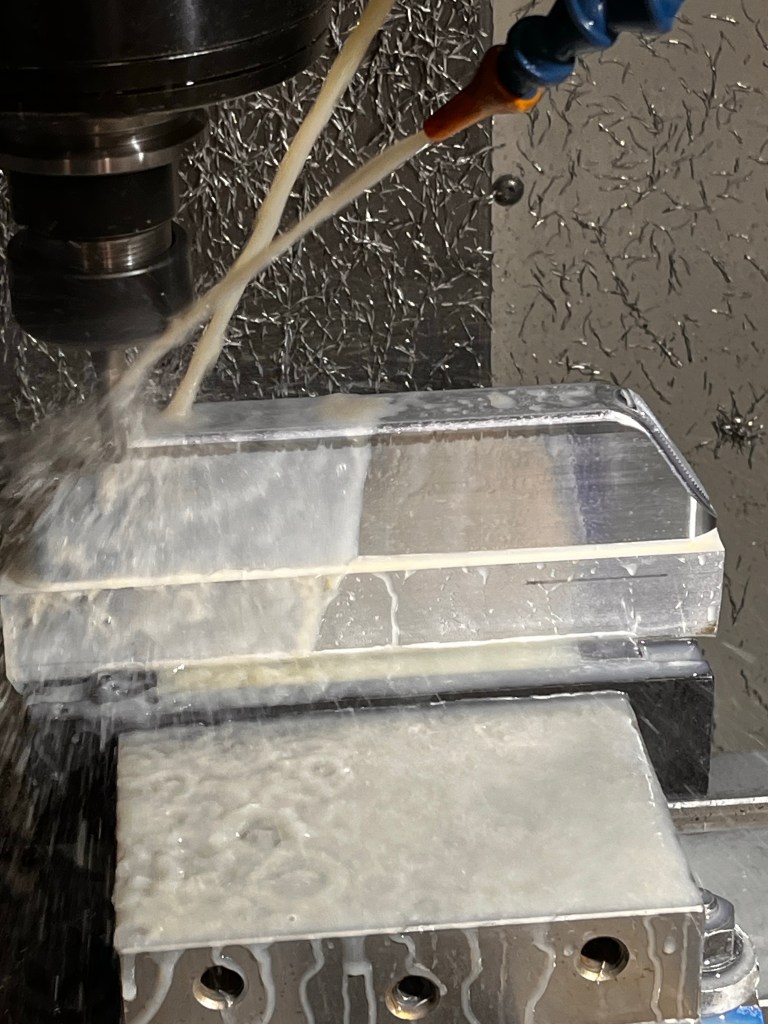
It’s a two set up operation for machining as you can see in the pics.. Then I tumbled them, and painted some. I left a pair of the solid versions unpainted , polished the tumbled finish and wondering if I should try a partial leather wrap .
Notice I’m only using the two large screws that go into the plastic insert in the door. The smaller screws are not needed.


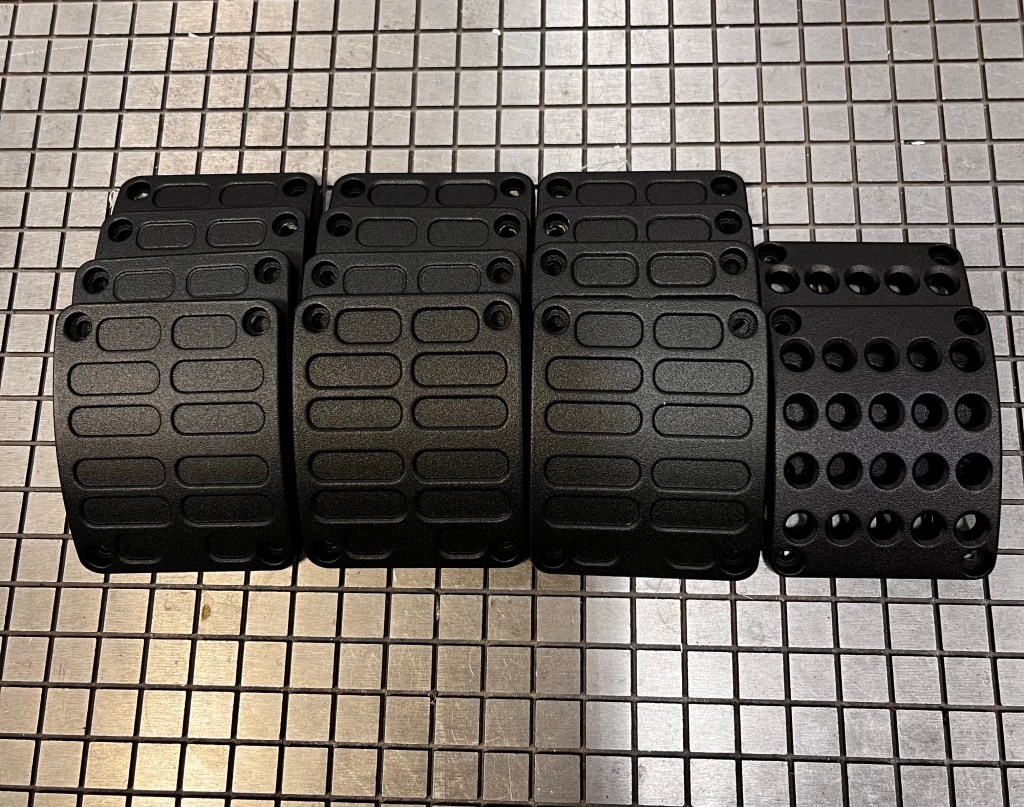
Vanagon – brake pedal pads
Posted by albell in vanagon, vanagon mods on December 9, 2023
I posted about them a few weeks ago but decided to post again by themselves .
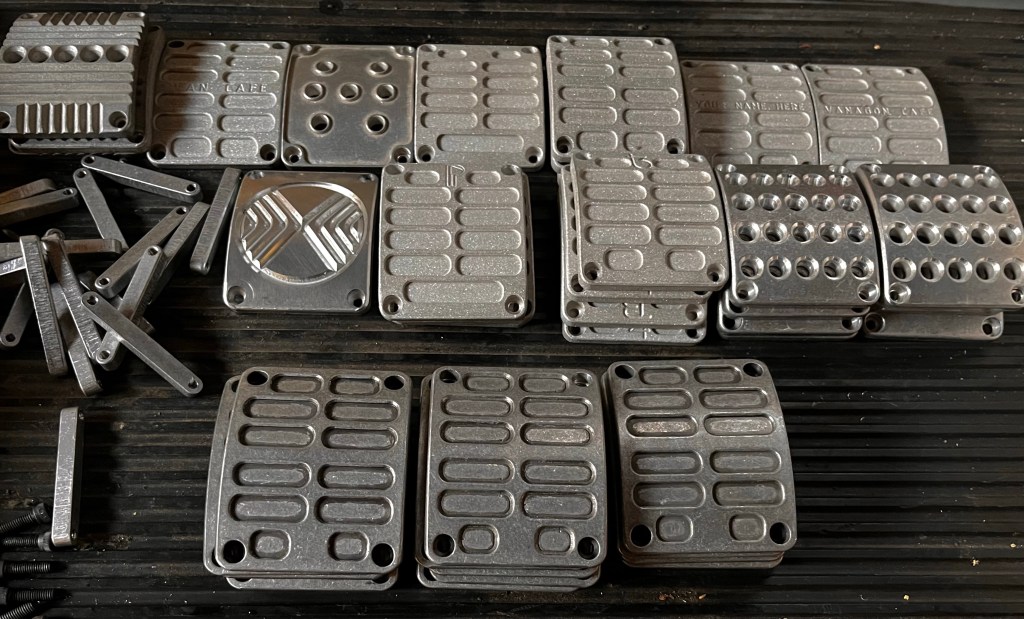
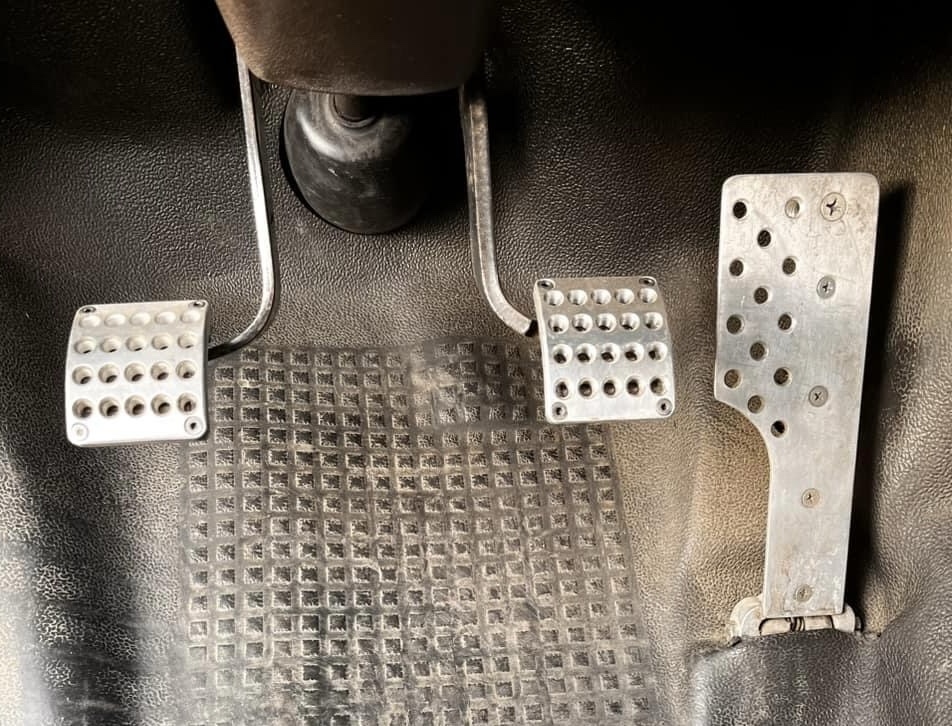
Something I’ve been working on , on and off since summer. I’ve tried out various styles but I like the rectangular recessed ones best.
They are 1/4” 5052 aluminum, machined, bent, then powder coated. Held onto the stock pedal ( after the plastic stock pads are removed) by cross bars top and bottom, m4 socket headed cap screws. The bars go behind the pedal.
I’ve had a pair of non painted, raw aluminum ones on van since summer. There’s no problem with a wet foot slipping off pedal .
Pics show a sample of the designs I tried, the ones in the van, and the powder coated ones I’m going with.
Yes I’m going to make a few to sell.
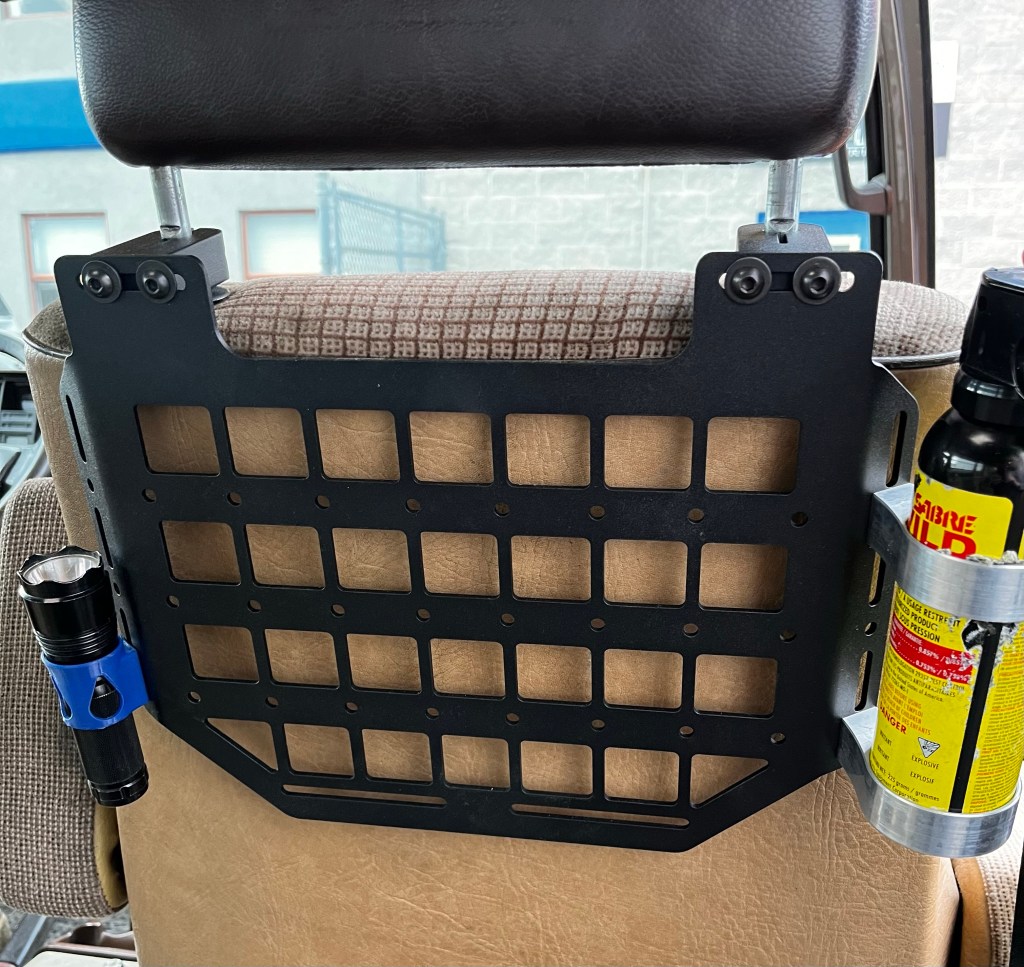
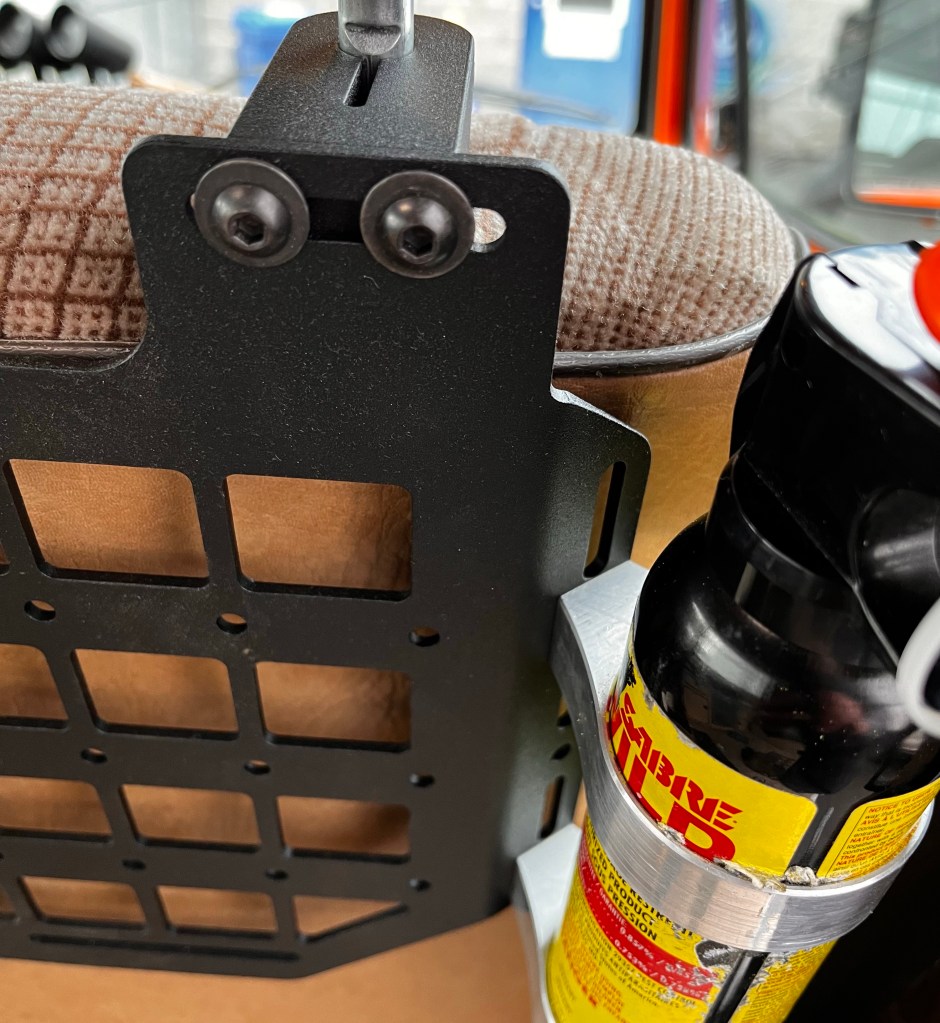
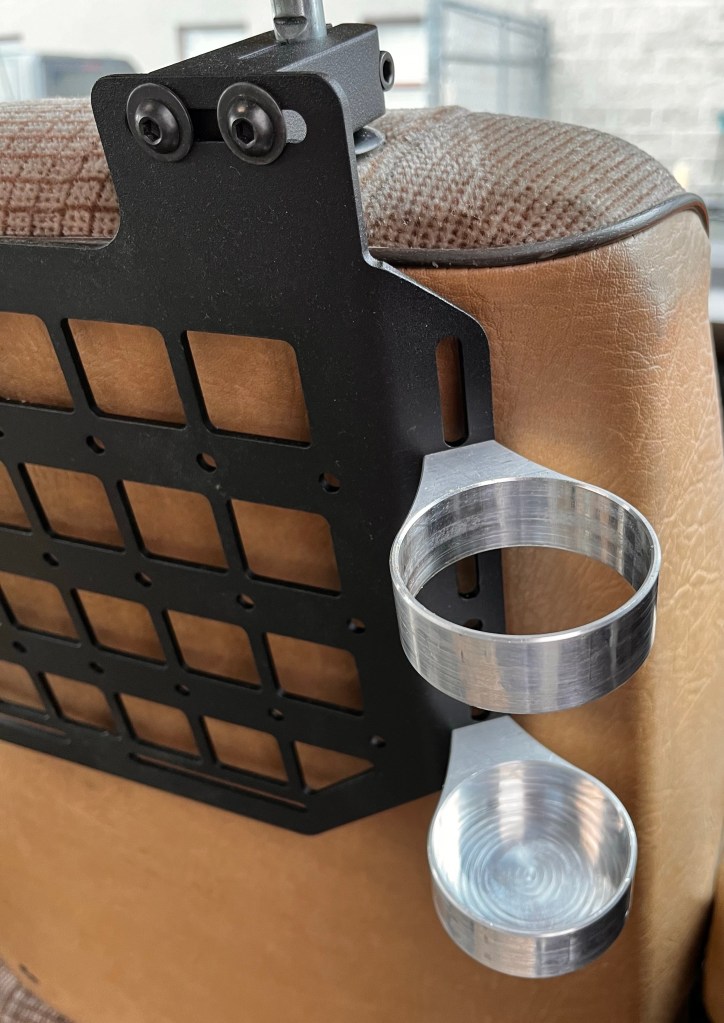
Vanagon – behind seat storage rack
Posted by albell in vanagon, vanagon mods on November 30, 2023
Ok, right away, I know this will appeal to only a few. But it works well, it’s stiff and secure. I quickly machined a bear spray holder and printed a flashlight holder for examples of things to attach. Bag type things can use Velcro straps. Yes, it’s the molle/PALS type system.
I’ll make them to sell if I get enough interest


Vanagon – oil tower vent thing
Posted by albell in vanagon, vanagon mods on September 2, 2023
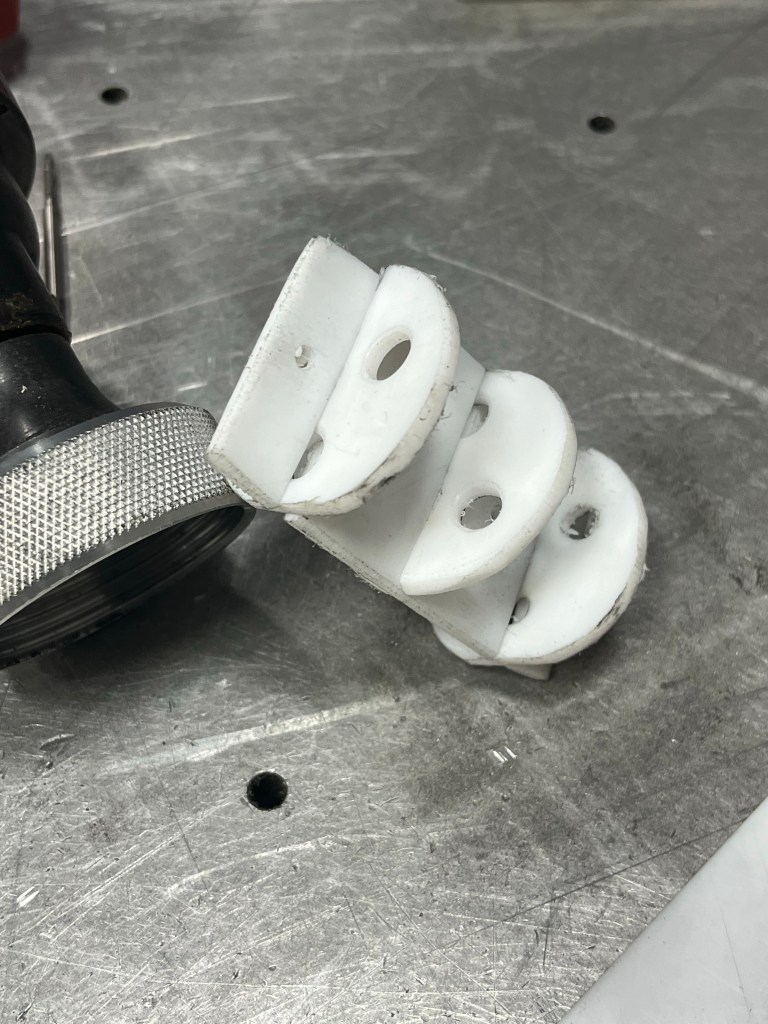
Revised my thinking on an oil tower. I posted about original plan a few weeks ago. But now I’m not putting putting on a golf mkii “pcv” thing on top of my aluminum tower (Teflon baffles inside ) i took one apart and in all respects except for the diaphragm size, it’s identical to the van set up.
I’m doing this one free flow thru. I’ll see how it goes.
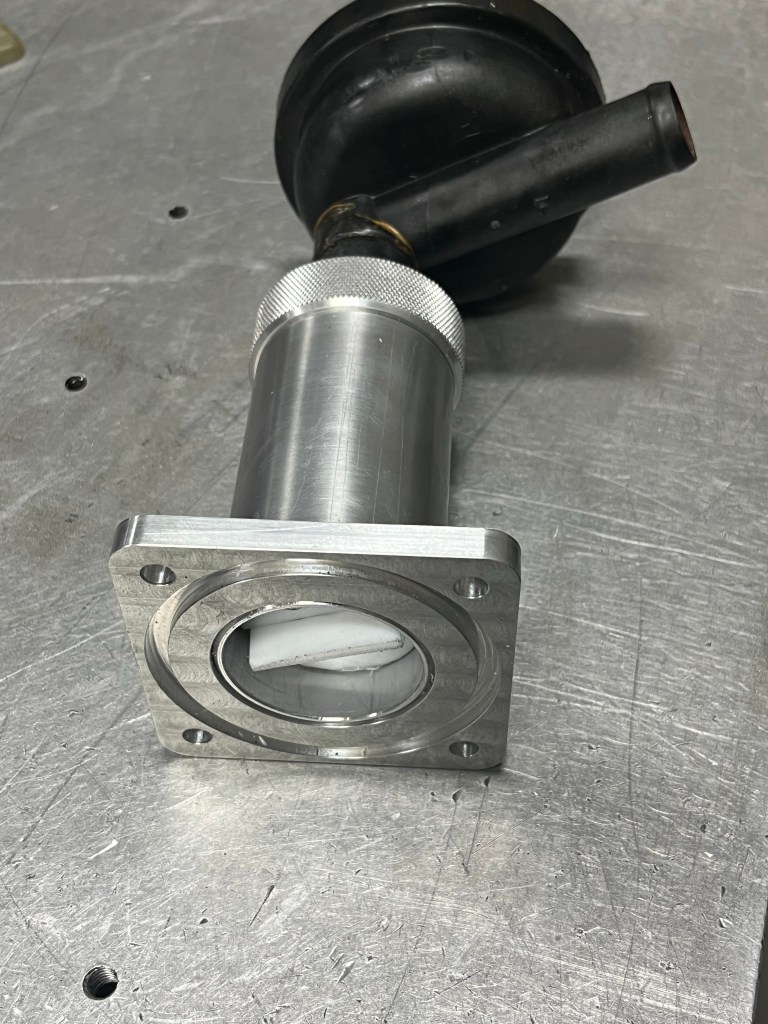
Hose barb Part just a tight press fit. Cap screws on , Teflon washer to seal.
If you want to read thru my understanding of the stock tower… here you go
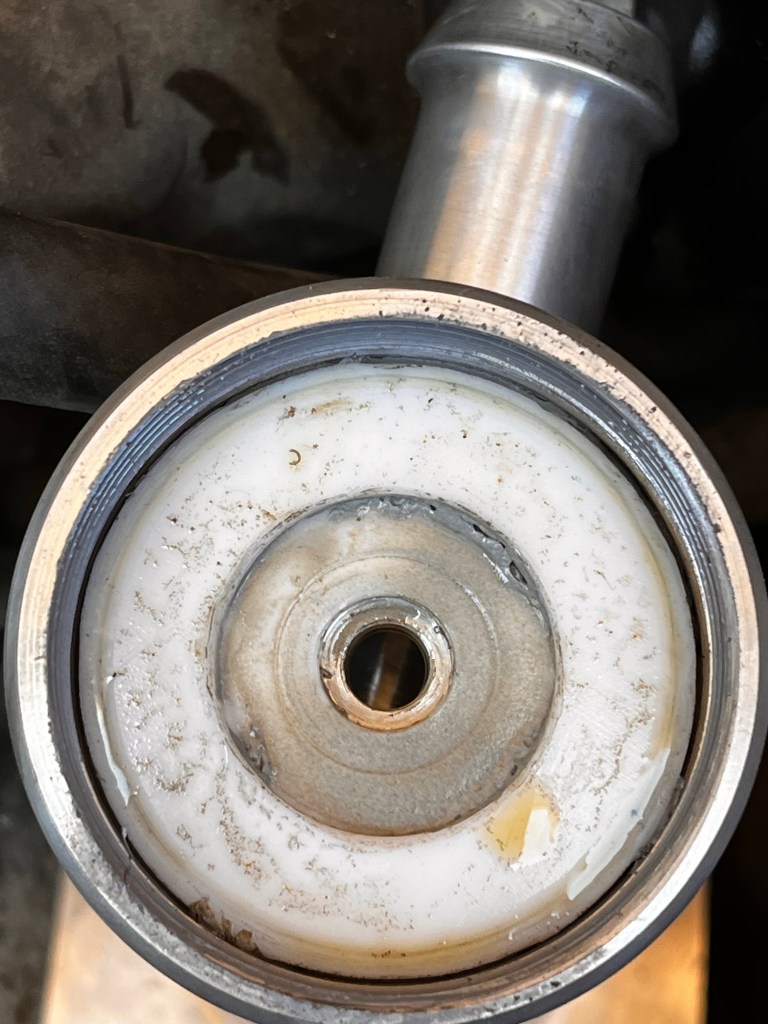
The main body of the tower has a removable baffle . Above that you can see a right angled bent tube. This tube has a small hole in it facing down, towards the engine. This tube continues out thru the tower and is what connects to the engine air intake upstream of the throttle body via rubber hose. Also in that path is a heating element , with a narrow orifice, maybe 5mm diameter. Heating element to prevent icing , the narrow orifice presumably to restrict air flow to a degree.
Back at the tower, inside, where the tube curves 90 degrees up ( and again, mention of the small hole on the underside of that bend) the tube ends and there is a rather weak spring supporting a rubber diaphragm. The spring keeps the diaphragm off the end of that tube. In other words, the passage from the crankcase to the intake boot is clear. The diaphragm is attached to the tower top, with some space above it. There is a small hole on the underside of the top of the tower that connects to the space above the diaphragm, thus keeping that space at atmospheric pressure.
So when does that diaphragm do anything? Well… as far as I can tell the diaphragm is pulled down to block the bent tube leading out of the tower when you have greater than a certain amount of intake vacuum. Probably not at idle or at wide open throttle . More likely at some mid throttle range.
Btw, the pro training manual has description of the tower and function but I’m not sure about the statements made there of when there is high or low intake manifold vacuum.
That little hole at the bend of the tube inside.. I’m guess that allows some passage from crankcase even when diaphragm pulled down under high intake vacuum.
In short, my understanding is… the crankcase vapours are allowed to travel up thru the tower and then into the intake manifold when there is not sufficient intake manifold vacuum to overcome the spring pressure and pull the diaphragm down. When there is sufficient vacuum then the diaphragm is pulled down and the passage is closed saved for the little bleed hole .
Update December 2023. Been running it since I posted this. Seems to work fine, can’t detect any engine running differences. I had a look inside it after a couple of weeks, nothing much to report. Oh one thing, you see how I used a Teflon gasket instead of an oring. Was slightly worried that joint would weep oil. But it hasn’t. I’ll add those pics to the gallery. I’ll prob look inside again over the Xmas break.


Vanagon – pcv Tower Experiment
Posted by albell in vanagon, vanagon mods on August 11, 2023
Just fooling with an idea. The 90’s era Vw pcv valve shown here is a place holder of sorts.
Tower packed with Teflon. Screw top in case needs cleaning without taking tower off engine block. I’ll try it out in a bit, going on holiday next week , exploring Klanawa again


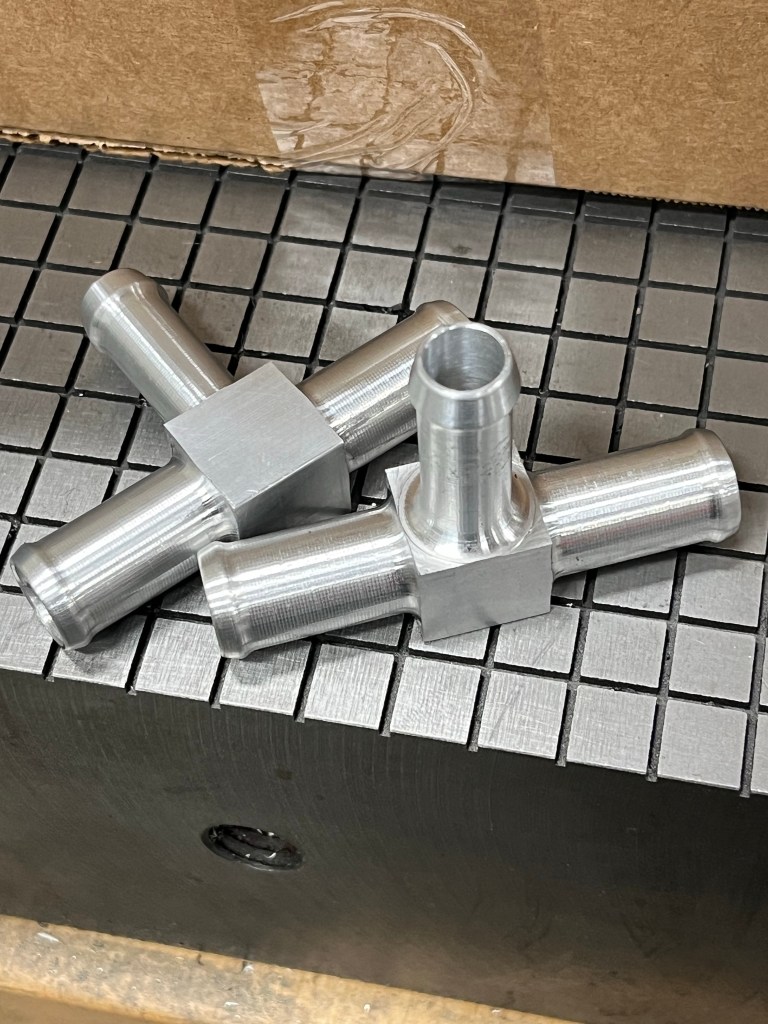
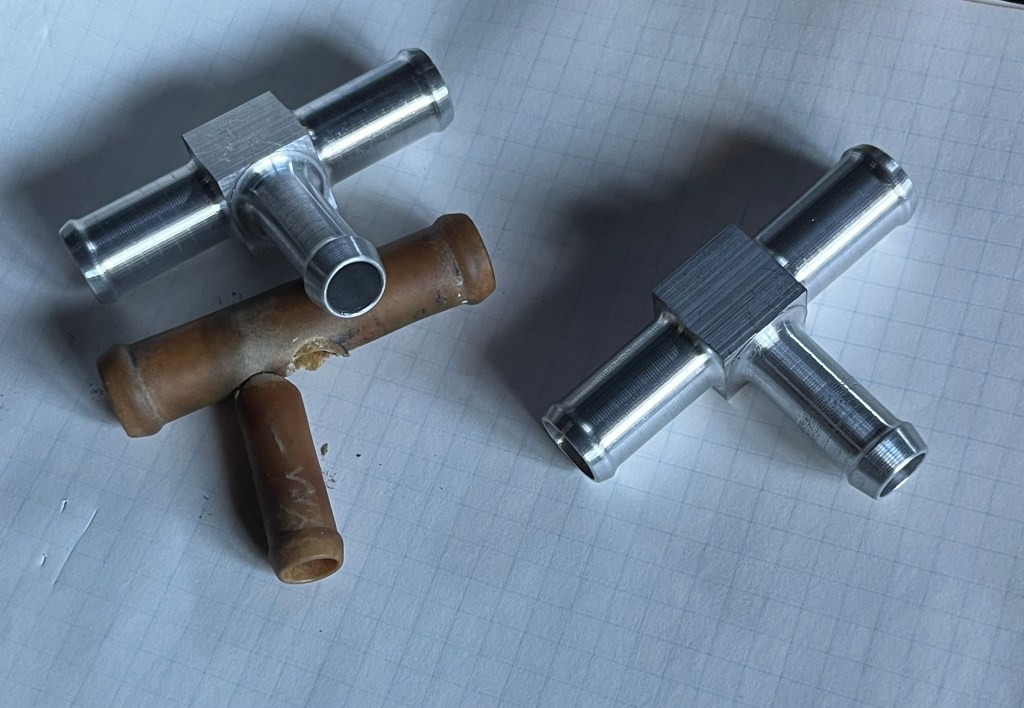
Vanagon – rear heater tee
Posted by albell in vanagon, vanagon mods on July 26, 2023
Last weekend one of them let go under pressure testing. I was trying to find leak at tee. Yes I did catch a whack of coolant on my face.
Van cafe and others sell metal replacements. That’s the smart way to go. I didn’t go that way.
Made a pair from 6061, 3/4” thick stock. Also bought 15’ of gates heater hose to replace the runs from tees to rear heater.

Vanagon – key fob for that special someone
Posted by albell in vanagon, vanagon mods on July 23, 2023
I was trying to cut and etch leather with diode laser. Had to have something to use as test. Made a key fob thing with a message .
Yeah I haven’t dialled in the settings.

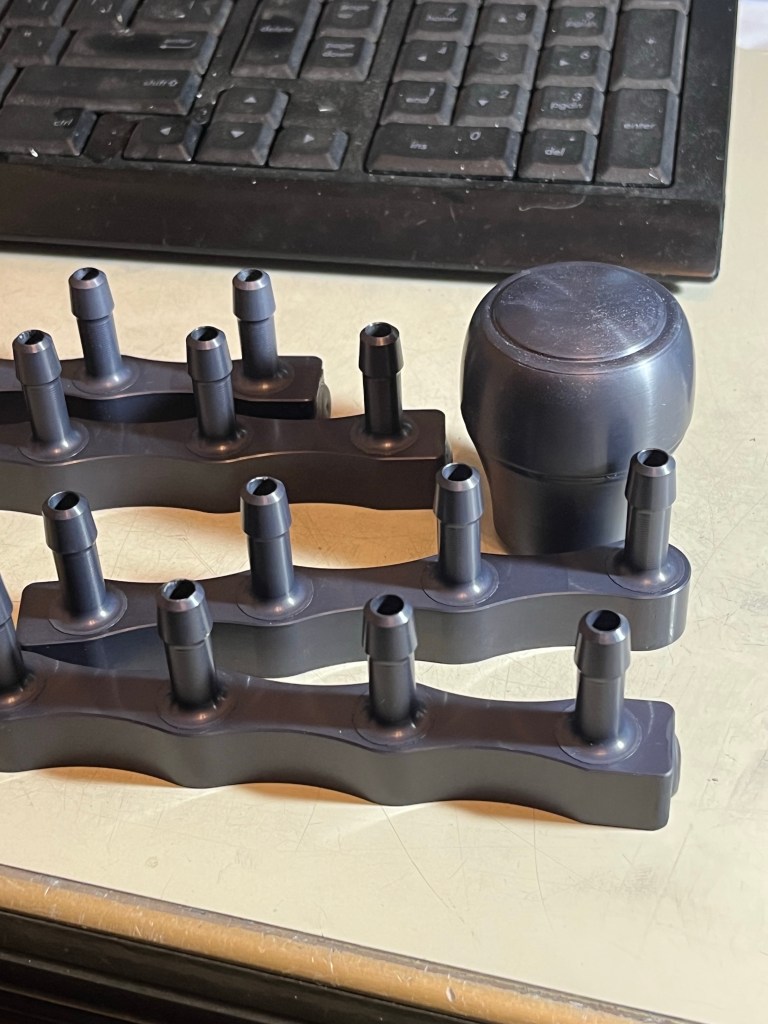
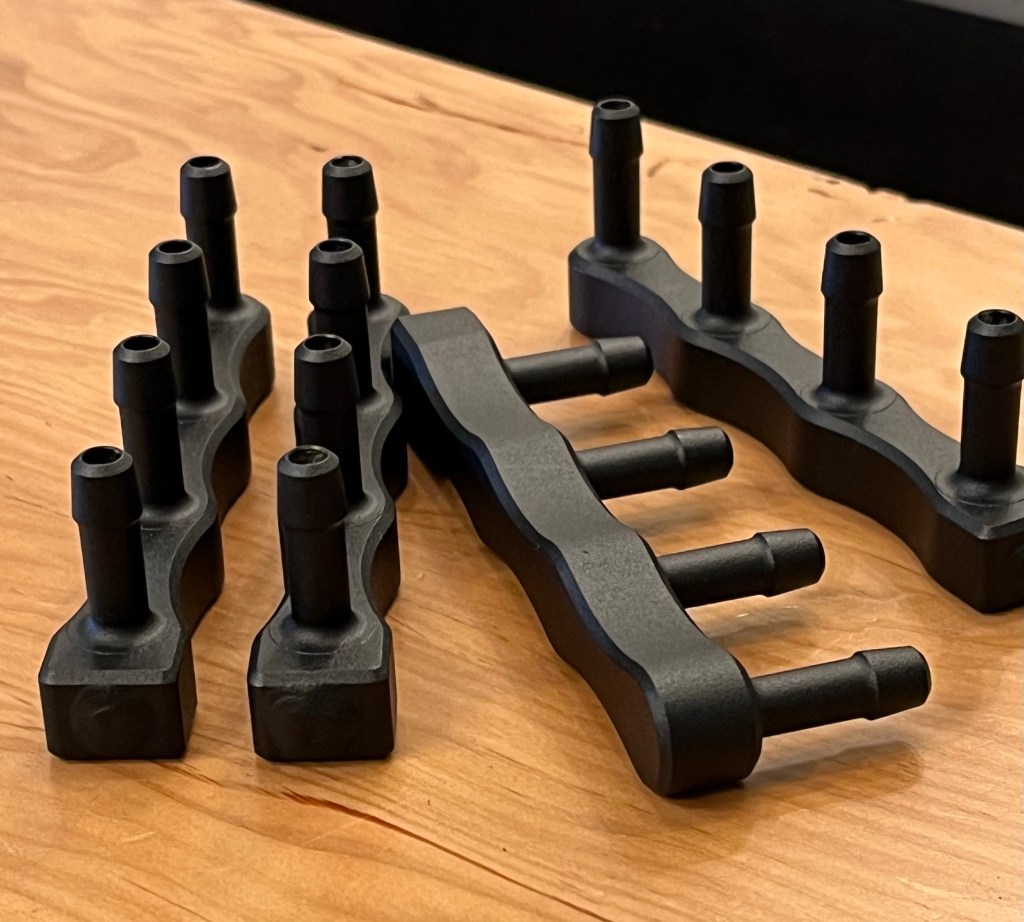
Vanagon – fuel rails
Posted by albell in vanagon, vanagon mods on July 23, 2023
Recently had a go at making aluminum fuel rails to replace the stock plastic ones. I wasn’t really taken with the current choice on the market. I thought they were a bit big. So I slimmed down. Been running a pair on my van for last couple months, and have some others out for testing and critique.
Had some powder coated black and some anodized grey .
Yeah that’s an aluminum copy of the stock shift knob.

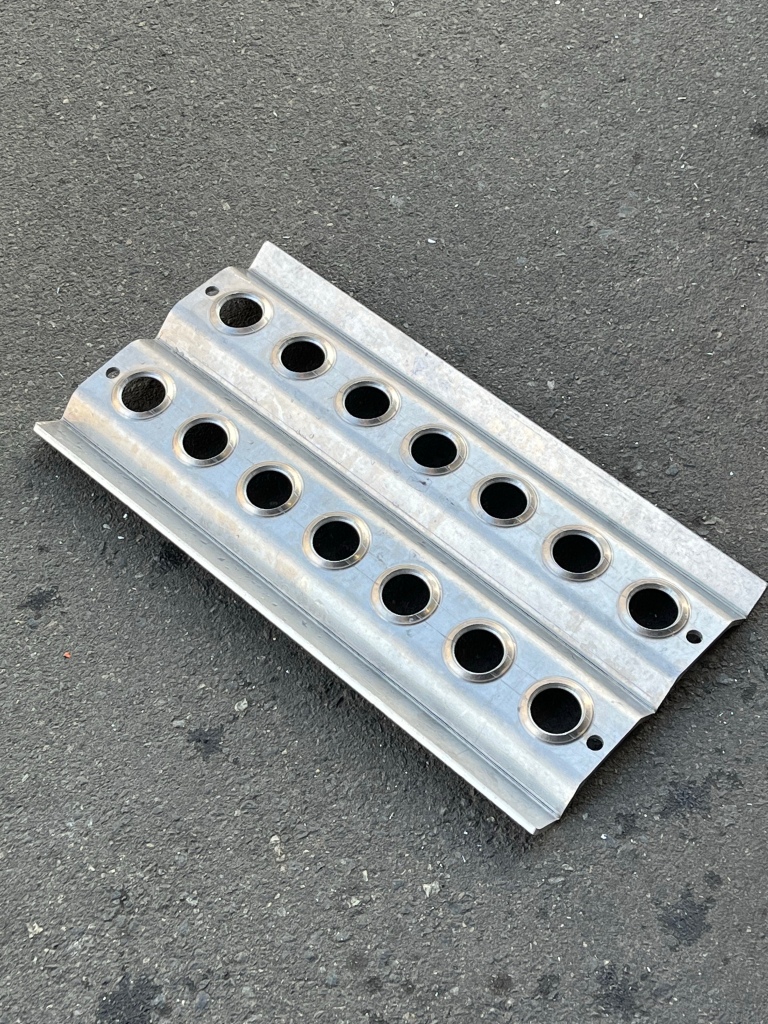
Vanagon – Experiment in aluminum
Posted by albell in metalworking, vanagon, vanagon mods on July 21, 2023
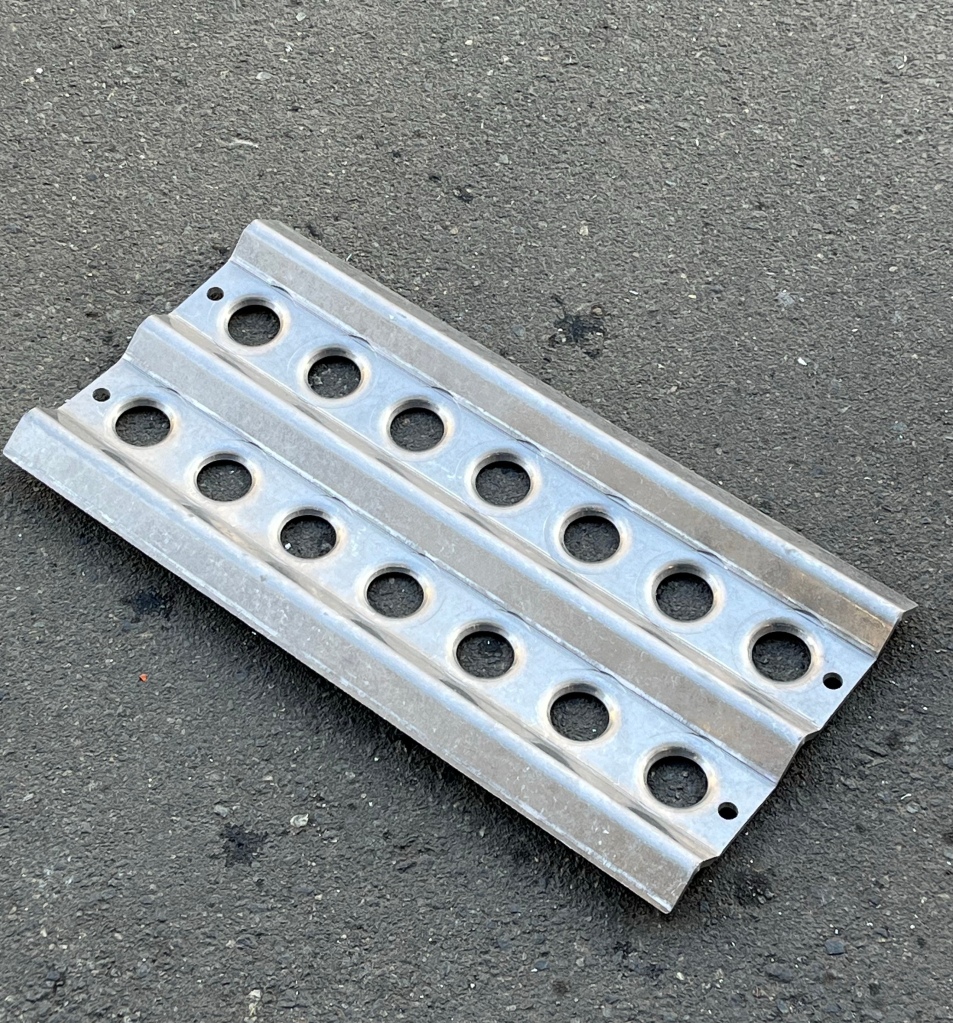
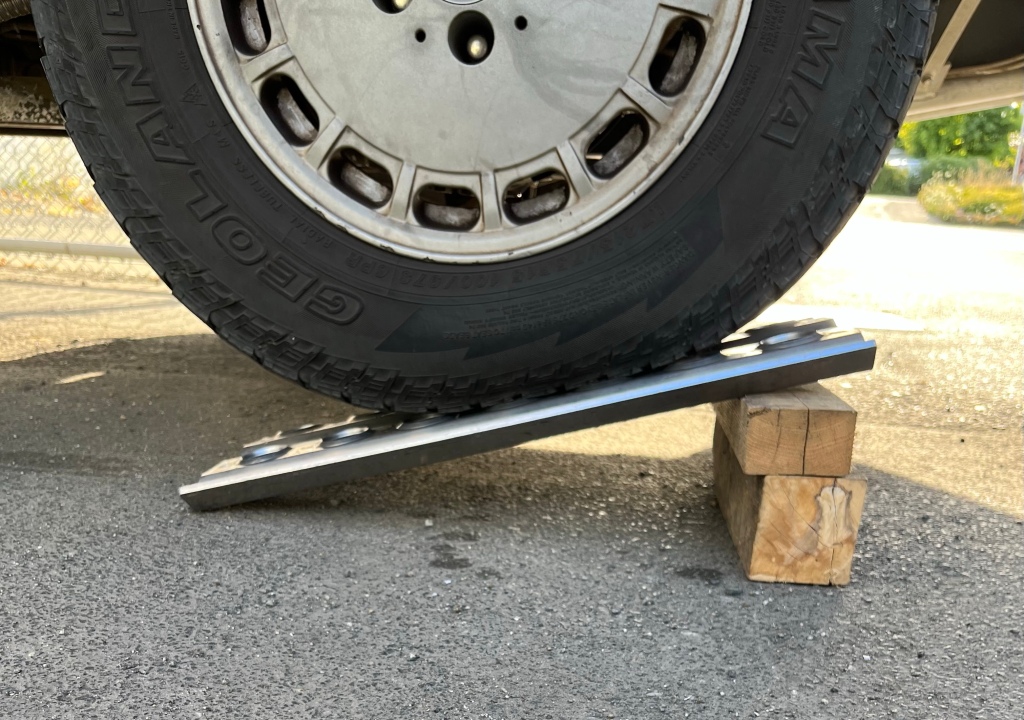
This Friday late afternoon silly project. I want another bridging ladder. I’ve given up on the section of fiberglass waffle board stuff I had been using. It’s heavy, it has large sized grit embedded on top surface ( really annoying to handle) and it really wasn’t thick enough … I think it was only around 34mm thick… would want 40 mm or so.
I thought I’d do an experiment with 1/4” aluminum. Make something about 30“ long and 10” wide.
But I was foiled , weren’t any off cuts large enough ( not going to cut into full sheet for this trial ) . So I scaled down to 22” long.
Ends up being a wee cute little thing. Good enough for a levelling ramp when camping. For scale, holes are 1.5” diameter , and dimpled.
No surprise it’s stiff , short span. I’d like to try again, same width and the Orginal idea of 30” long.
Vanagon – aux switch gear experiment
Posted by albell in vanagon, vanagon mods on December 20, 2022
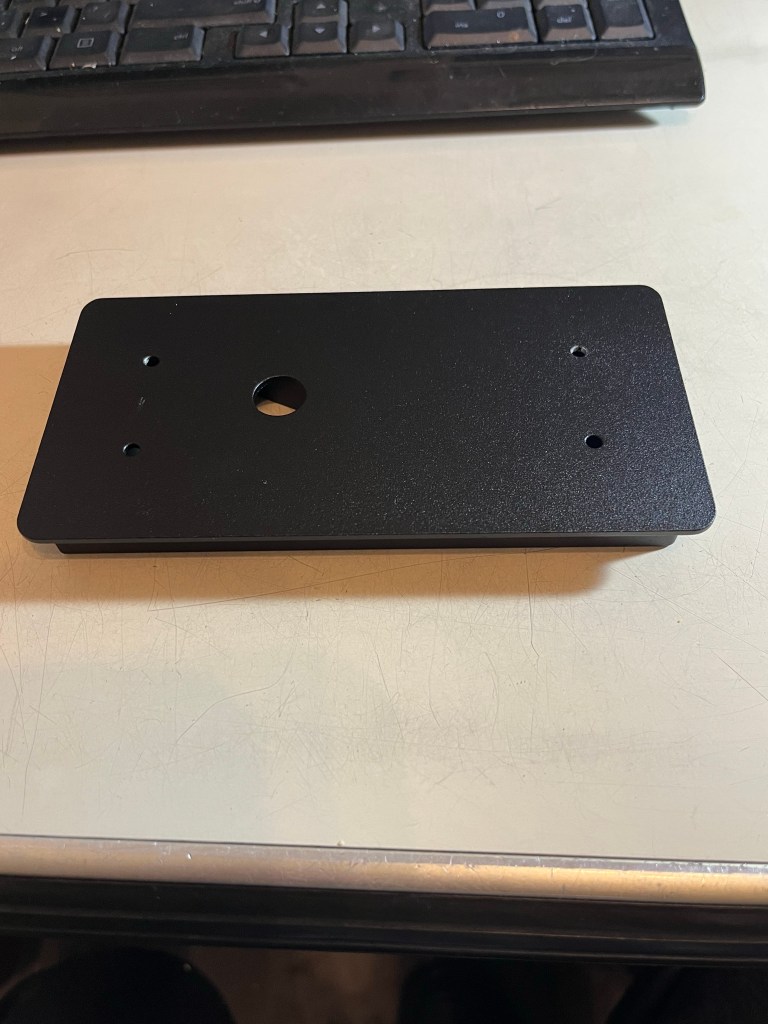
Starting to install one of those remote switch to solid state relay box type set ups. Just got the mounting plate done so far. Aluminum and slight texture powder coat. Not sure what will be controlled by this. You get stickers to go on the switch pads. I’ll show when done.


Vanagon – what silliness is this?
Posted by albell in vanagon, vanagon mods on December 1, 2022
I’ll show finished later . Later has arrived…
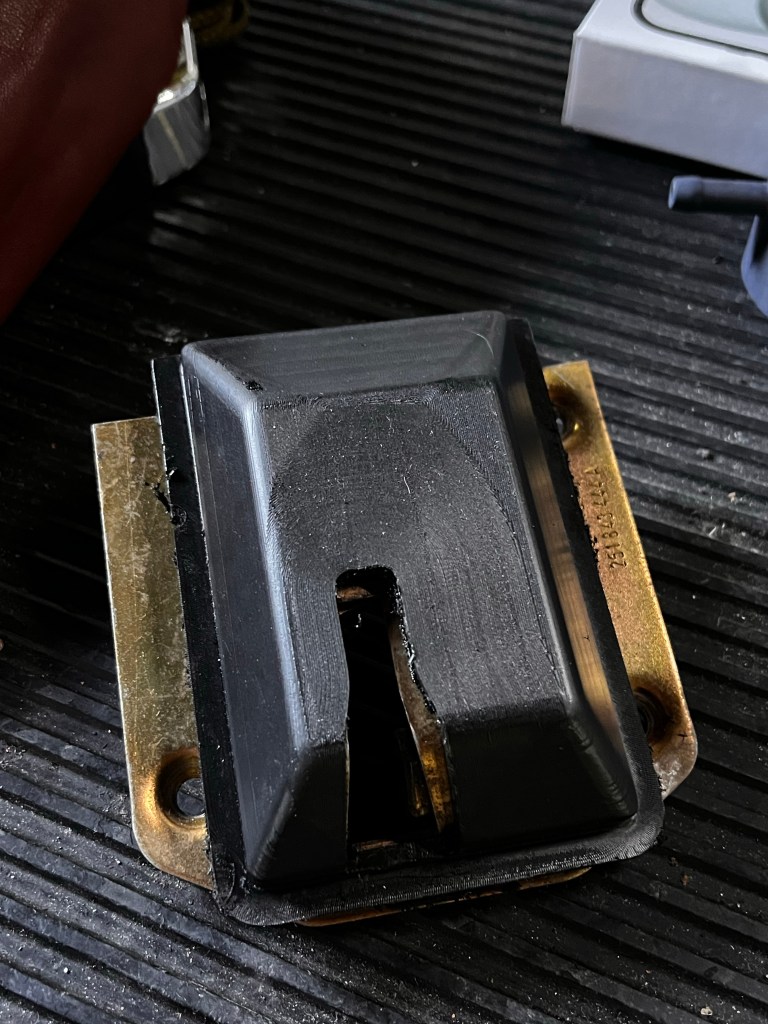
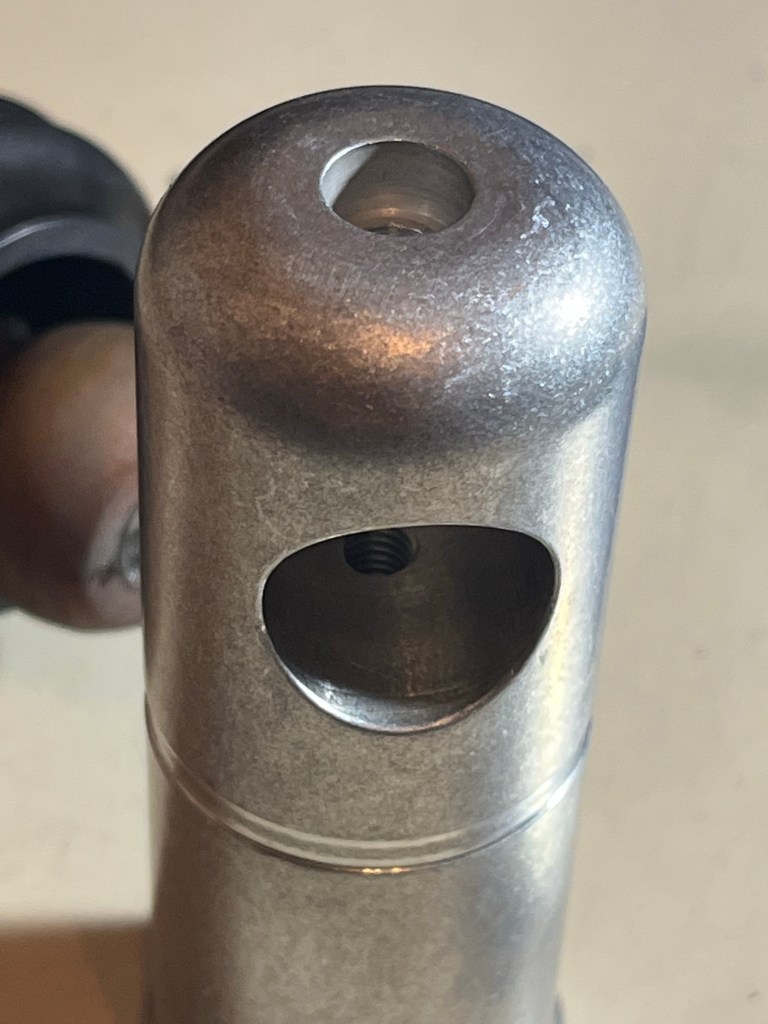
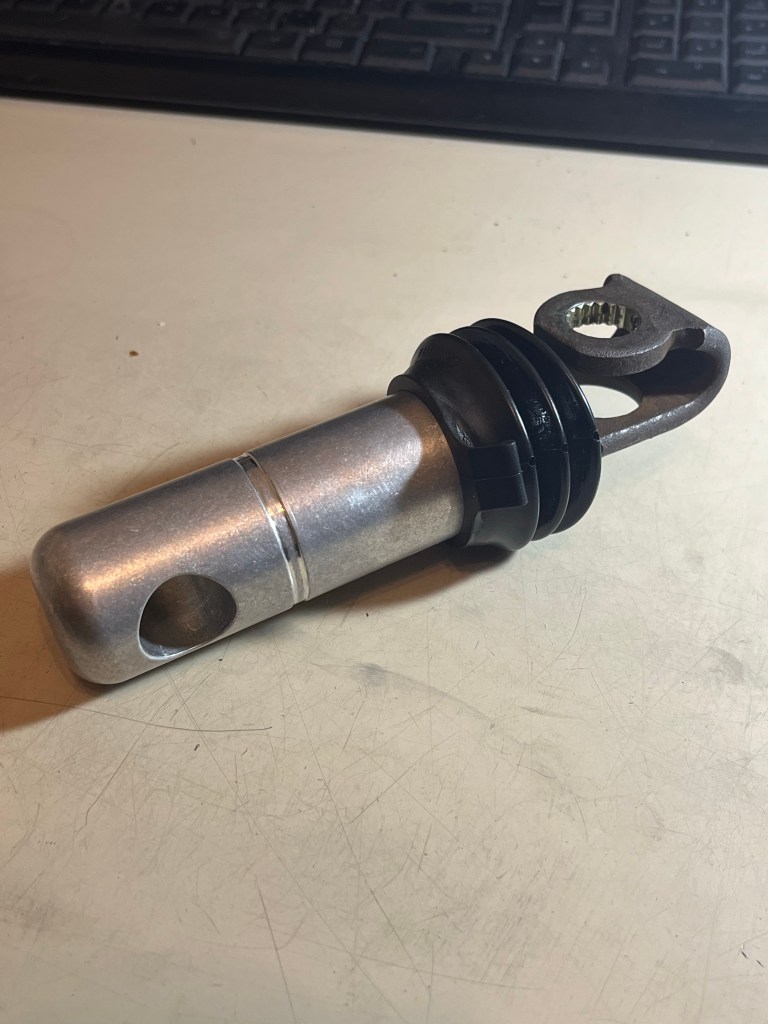
It’s another version of the socket part of the ball and socket linkage back at the transmission. Other versions I made a while back here .
https://shufti.blog/2021/08/08/vanagon-syncro-some-shift-linkage-mods/
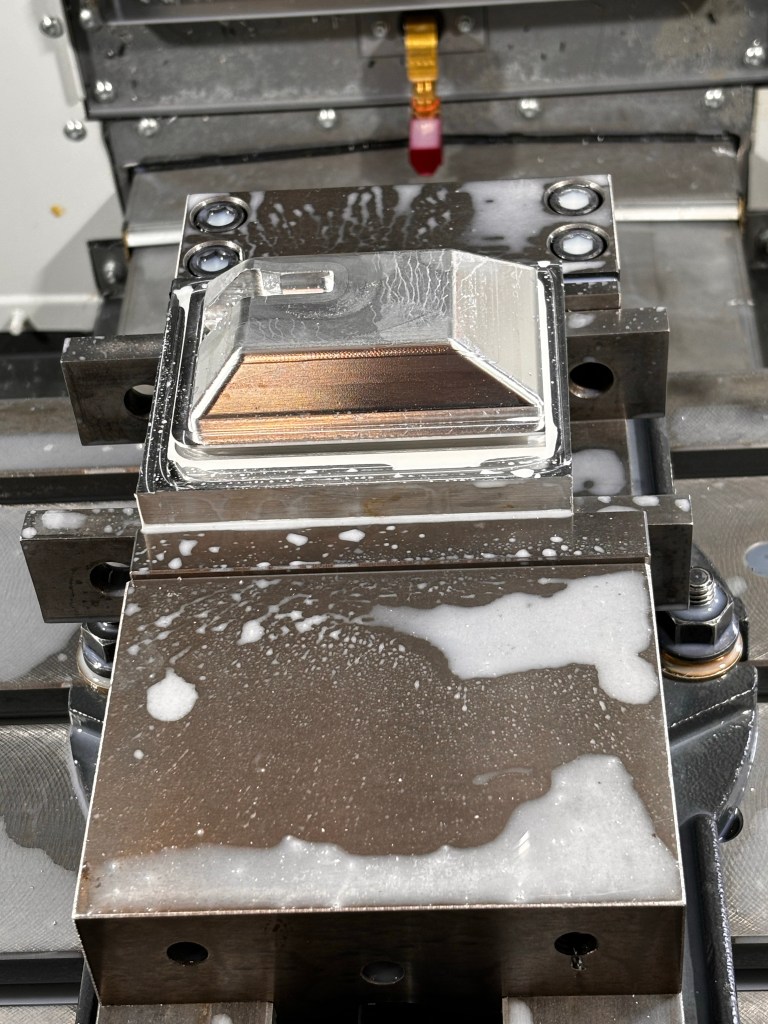
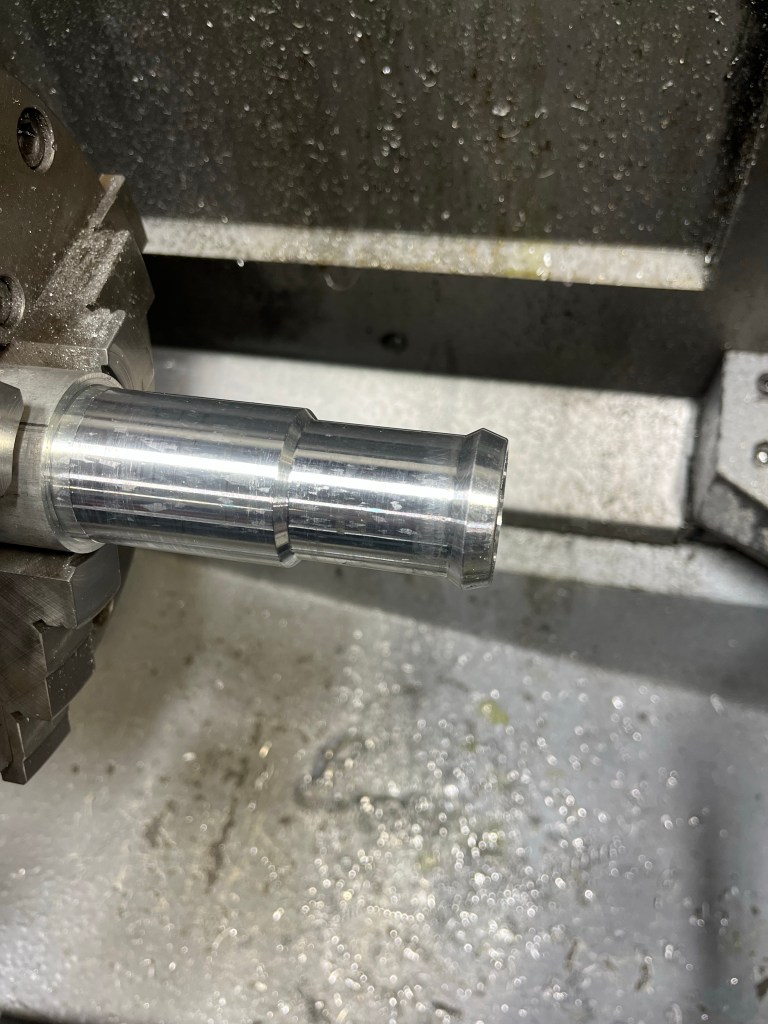
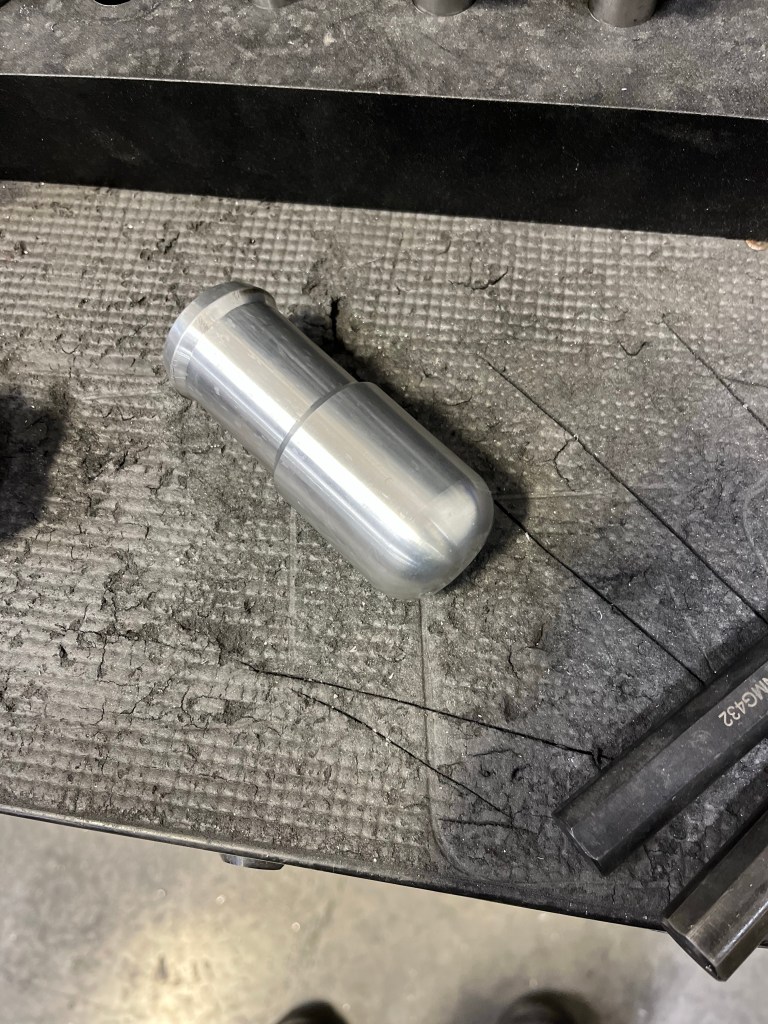
The idea of the spiral grooves is to retain some grease … that’s a tumbled finish on the part, gonna paint it. Bore hasn’t been deburred in this pic. The end has a rim to help keep the boot on.

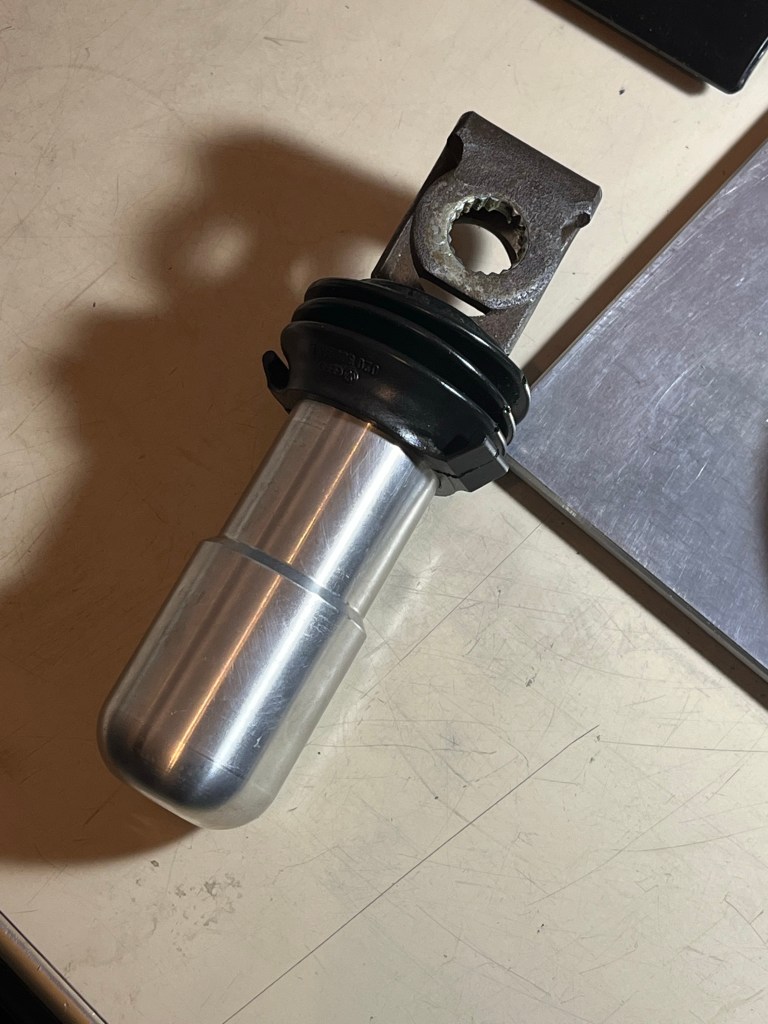
M6 bolt goes up through the shift rod.
End of day today made another, slight changes. Any excuse to use this lathe .
Not finished, but you get idea. More thickness at bottom and a more sexy ridge at top for boot .
There is one thing I haven’t said.. one more step. I’ll show when done.
And done. I’ve done away with the roll pin years ago. The split clamp and bolt better, especially as the shift rod probably worn and the roll pin hole wallowed.


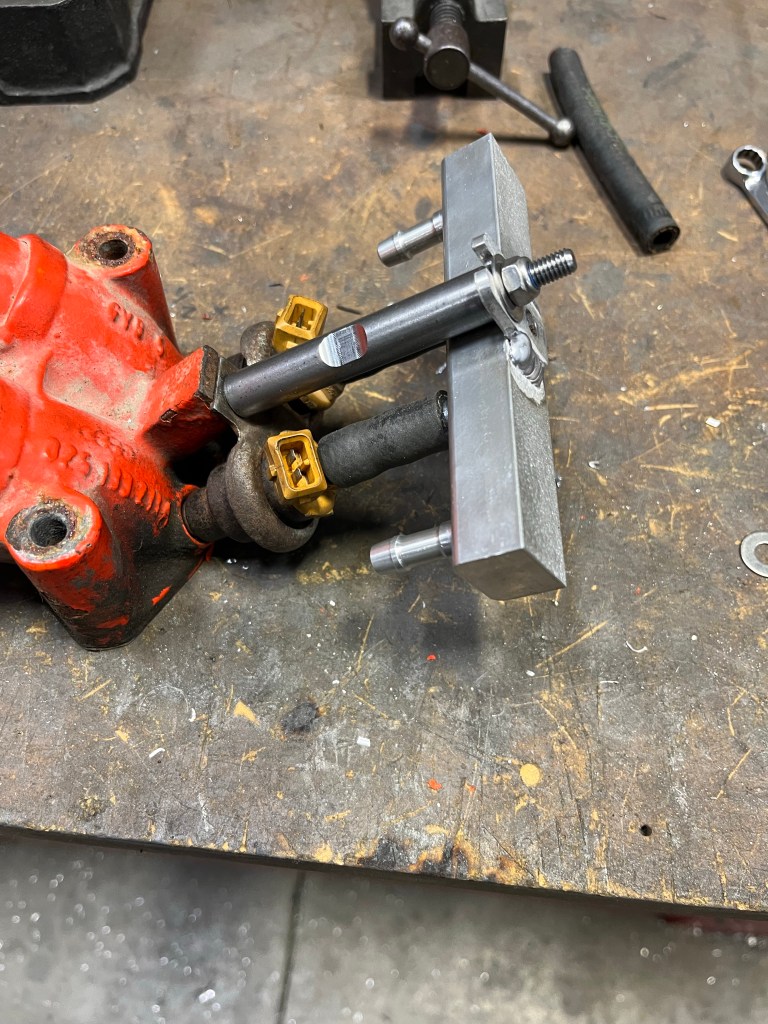
Vanagon – fuel rail fooling
Posted by albell in vanagon, vanagon mods on November 26, 2022
Made a fuel rail a few weeks ago for fun. Trying out a tool and tool path. No need to do this, lots of commercial options. Last Friday I made a support for the rail, fitted up on old injectors and runners. No rubber on the injectors. And yes I have drilled and plugged , but not welded, the rail. Surprise for me is how sturdy the set up is


Vanagon – replaced led strip over the kitchen
Posted by albell in vanagon, vanagon mods on August 14, 2022
Left over from gutter strip replacement. Warmer colour temp. Controlled from same panel of switches as the gutter lights.


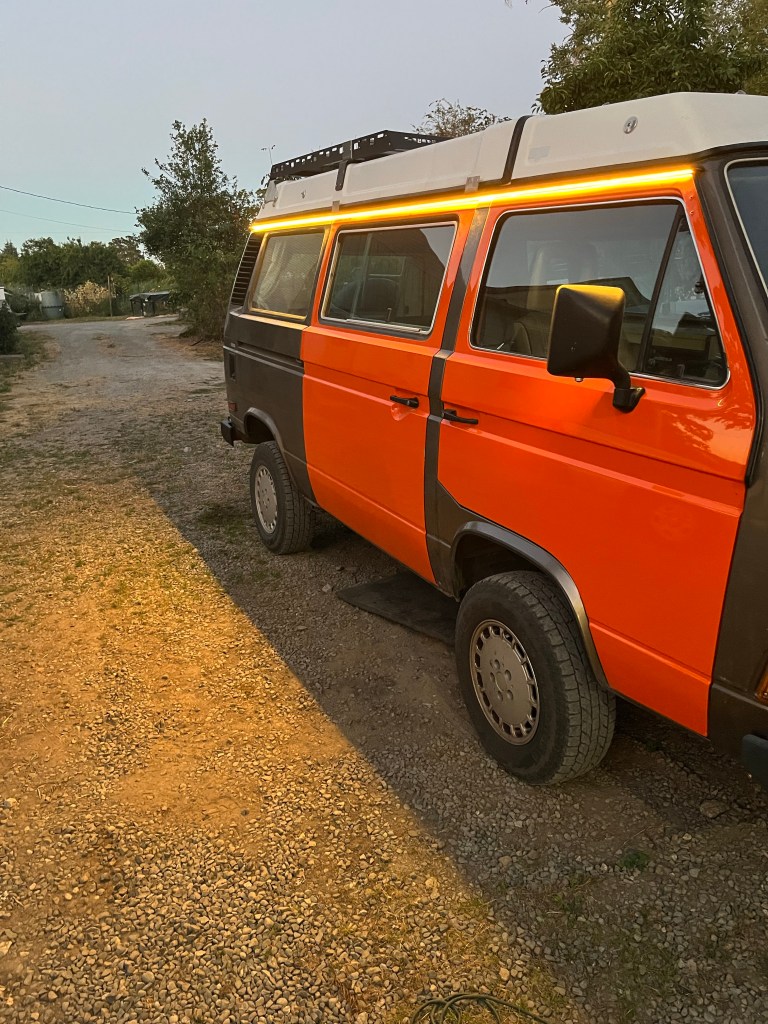
Vanagon – new led strip under gutter
Posted by albell in vanagon, vanagon mods on August 13, 2022
Last year the strip I installed under the gutter ( 6 or so years ago?) partially failed… the forward 1/3 failed to light. I got another strip , this time the kind that looks more like a cob led. That is, looking like one continual led instead of discrete elements. Of course if you look closely you can see the led elements, but the effect is of one continuous strip.
Has the same thick clear coating as the previous. Making it waterproof they say. But I noticed when I took the old one off, water gets into it from the backside, the adhesive side. So I expect the same for this one. Mind you the van is outside all year round, and it is wet in the seasons not called summer 🙂
Pic below is in daylight and the strip on. It’s really not noticeable at all when it’s off.

And at dusk.
Controlled by the same touch to dim switches as before. Two others do the inside led strips, got one left as spare for something.

It’s a handy mod when camping.
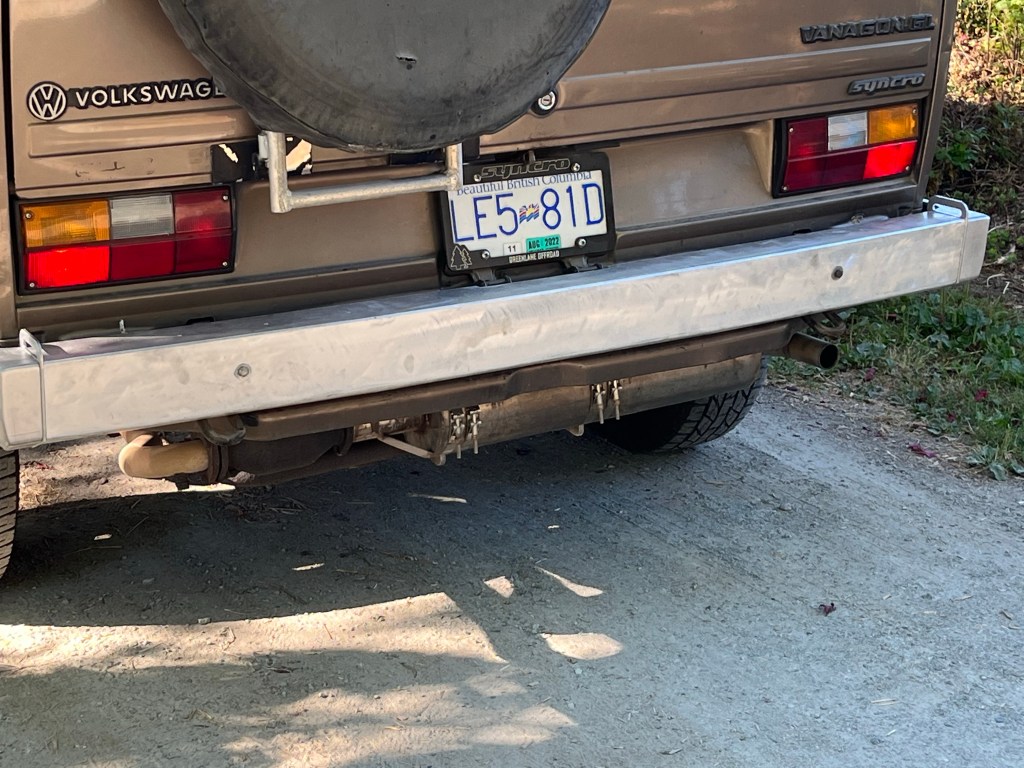
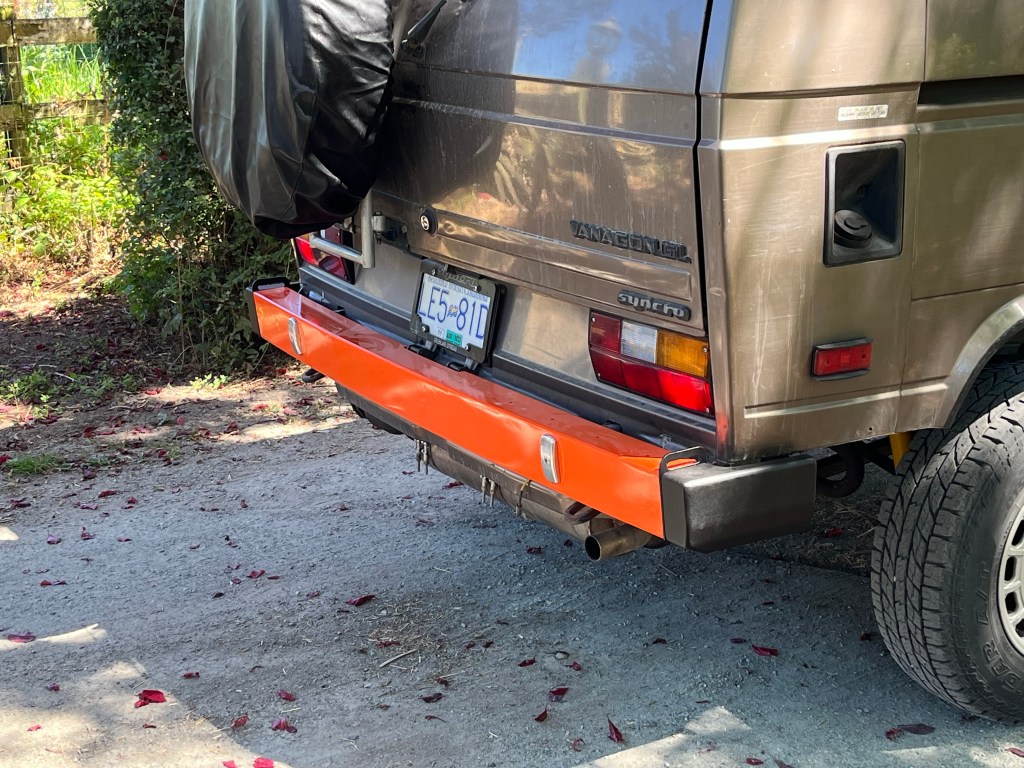
Vanagon – rear bumper done.
Posted by albell in vanagon, vanagon mods on August 11, 2022
Well pretty well done. I can see things I’d like to change in the next one. But it’s ok. Had a bit of a silly moment and painted it orange. That didn’t work.
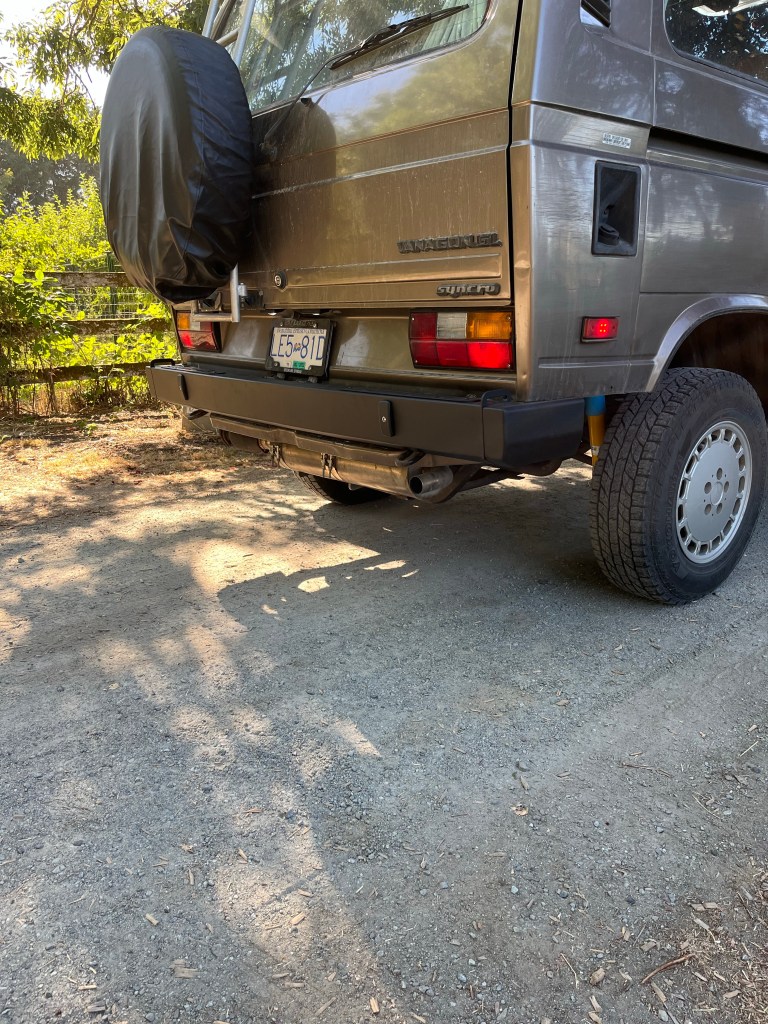
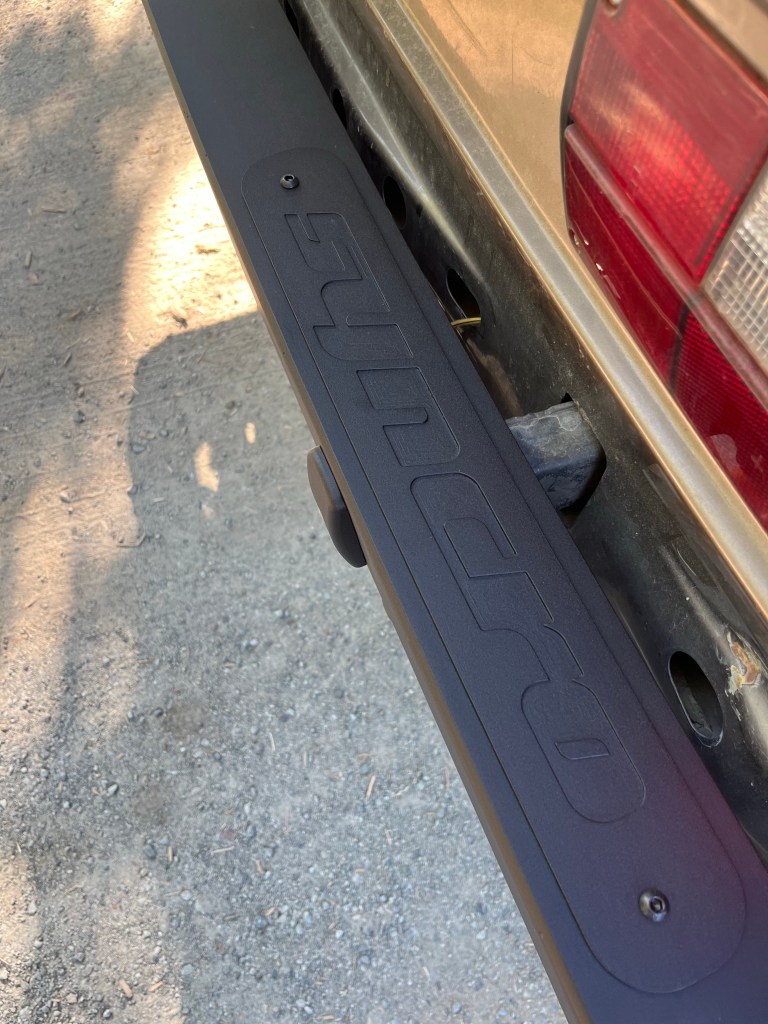
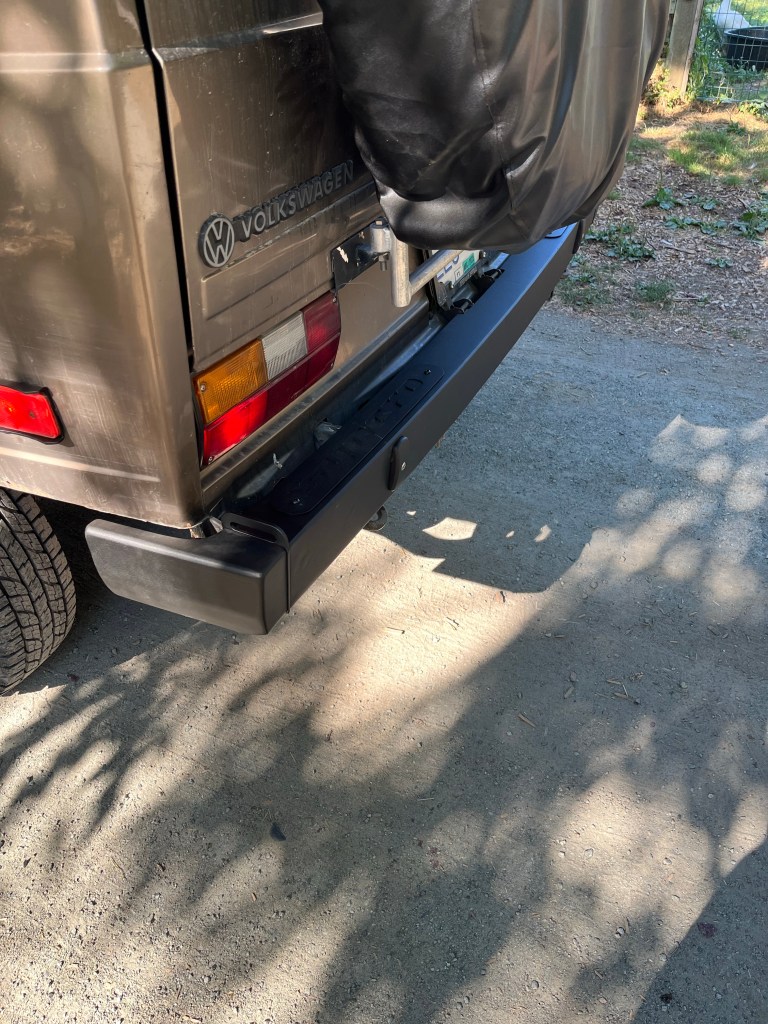
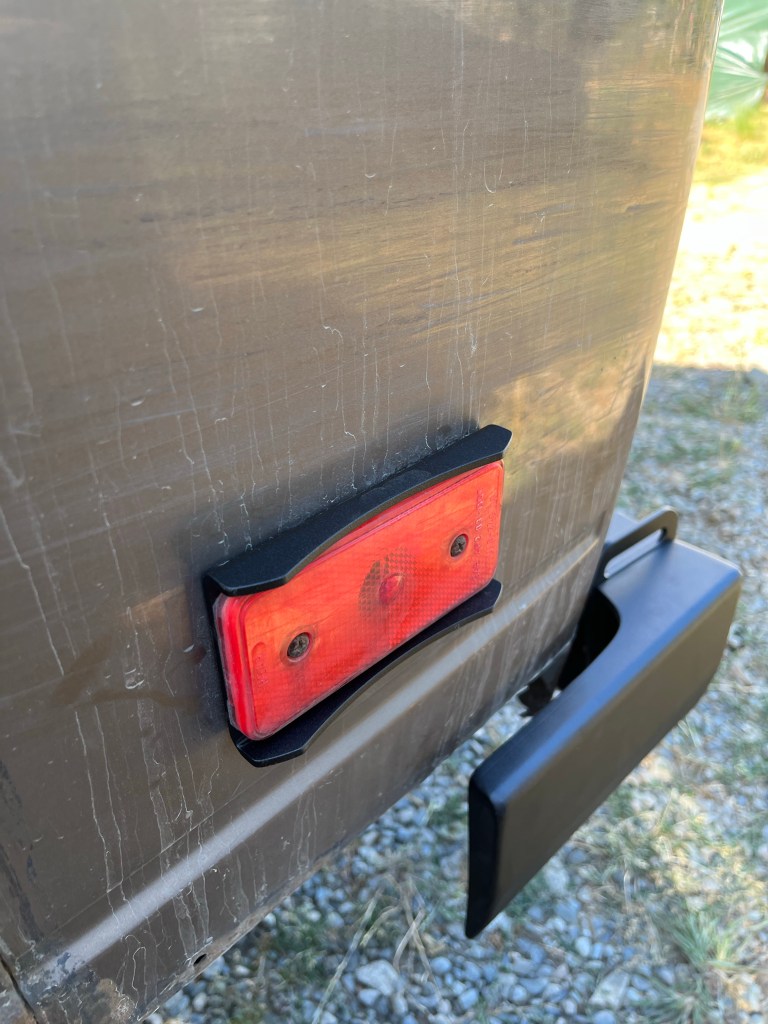
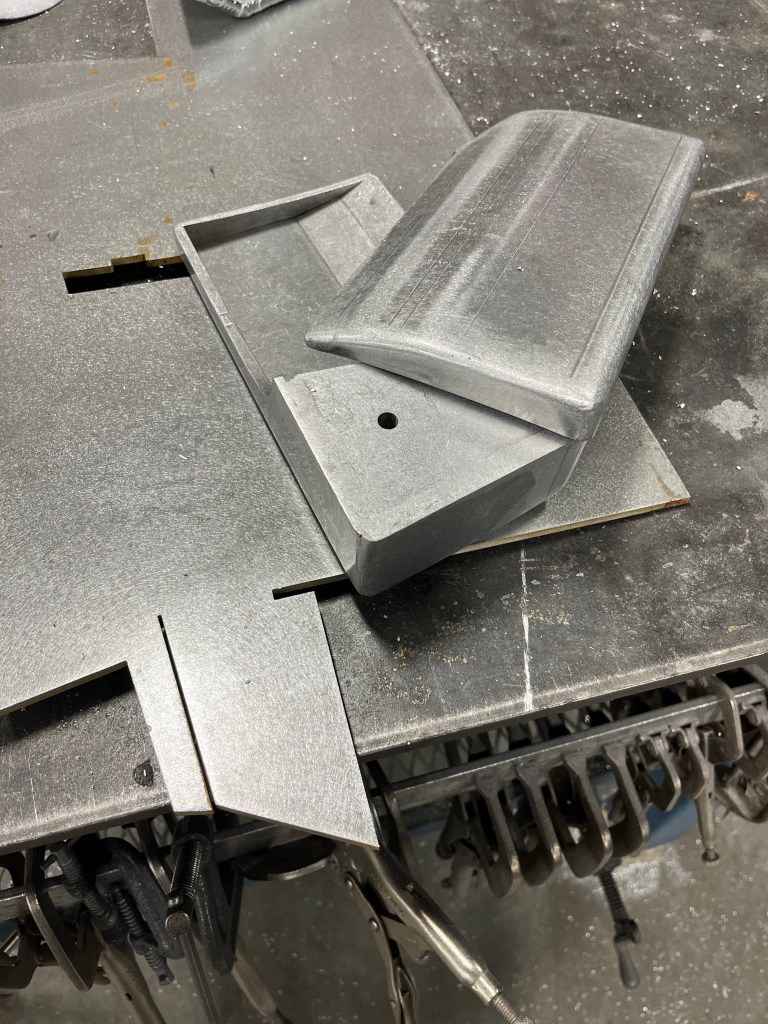
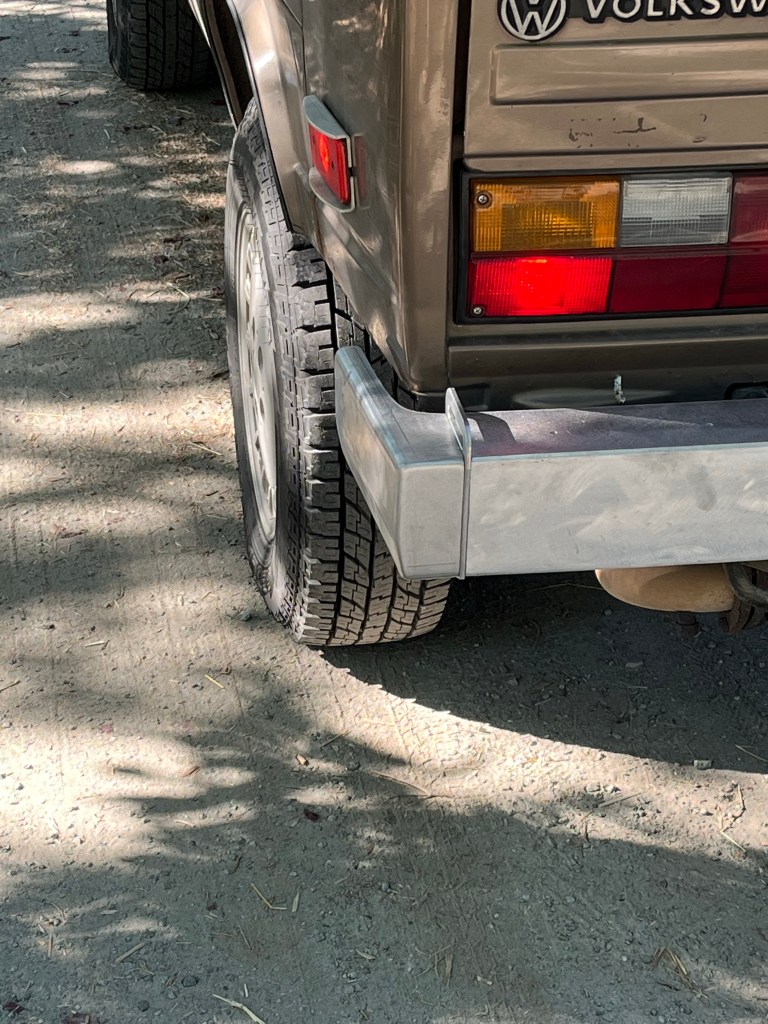
Vanagon – making another aluminum bumper
Posted by albell in vanagon, vanagon mods on August 1, 2022
Rear first, close copy of the stock steel van bumper. This first go round ain’t perfect, but it’s good enough for my own use and next one ( I will be building more ) should be better. It’s 1/4” 5052 aluminum. Having it powder coated this week, slight texture black. You’ll notice I’ve cut some panel from the van , have plans.