Archive for April, 2015
Vanagon – kinda crazy sway bar mod to help install homemade drop links
Posted by albell in syncro, syncro specific repairs, vanagon, vanagon mods on April 25, 2015
This value of this modification to the sway bar is debatable. But hey, don’t let fear and good judgement hold you back from having a bit of fun. And god knows I’m not going to sit here and tell you this is an original idea, I’m old enough to know that someone somewhere has done this before.
I didn’t look forward to installing the sway bar drop links with Whiteline polyU bushing. It can be a bit of a struggle getting the drop link onto the sway bar. Mind you, Chris at T3 Techiniques makes it look easy in his video. By the way, T3 Technique is a place to buy polyurethane bushings and other suspension parts.
http://www.youtube.com/watch?v=7oXY68F8Uwo
I had thought about the notion of cutting the knob end off the sway bar then drill and tap a hole so a thick washer could be attached to replace the knob. But I didn’t like that idea for a few reasons.
So what I did do was this, I welded a 3/8″ stainless steel bolt to the end of the sway bar. Well I should say sploodge welded the bolt on, not pretty.
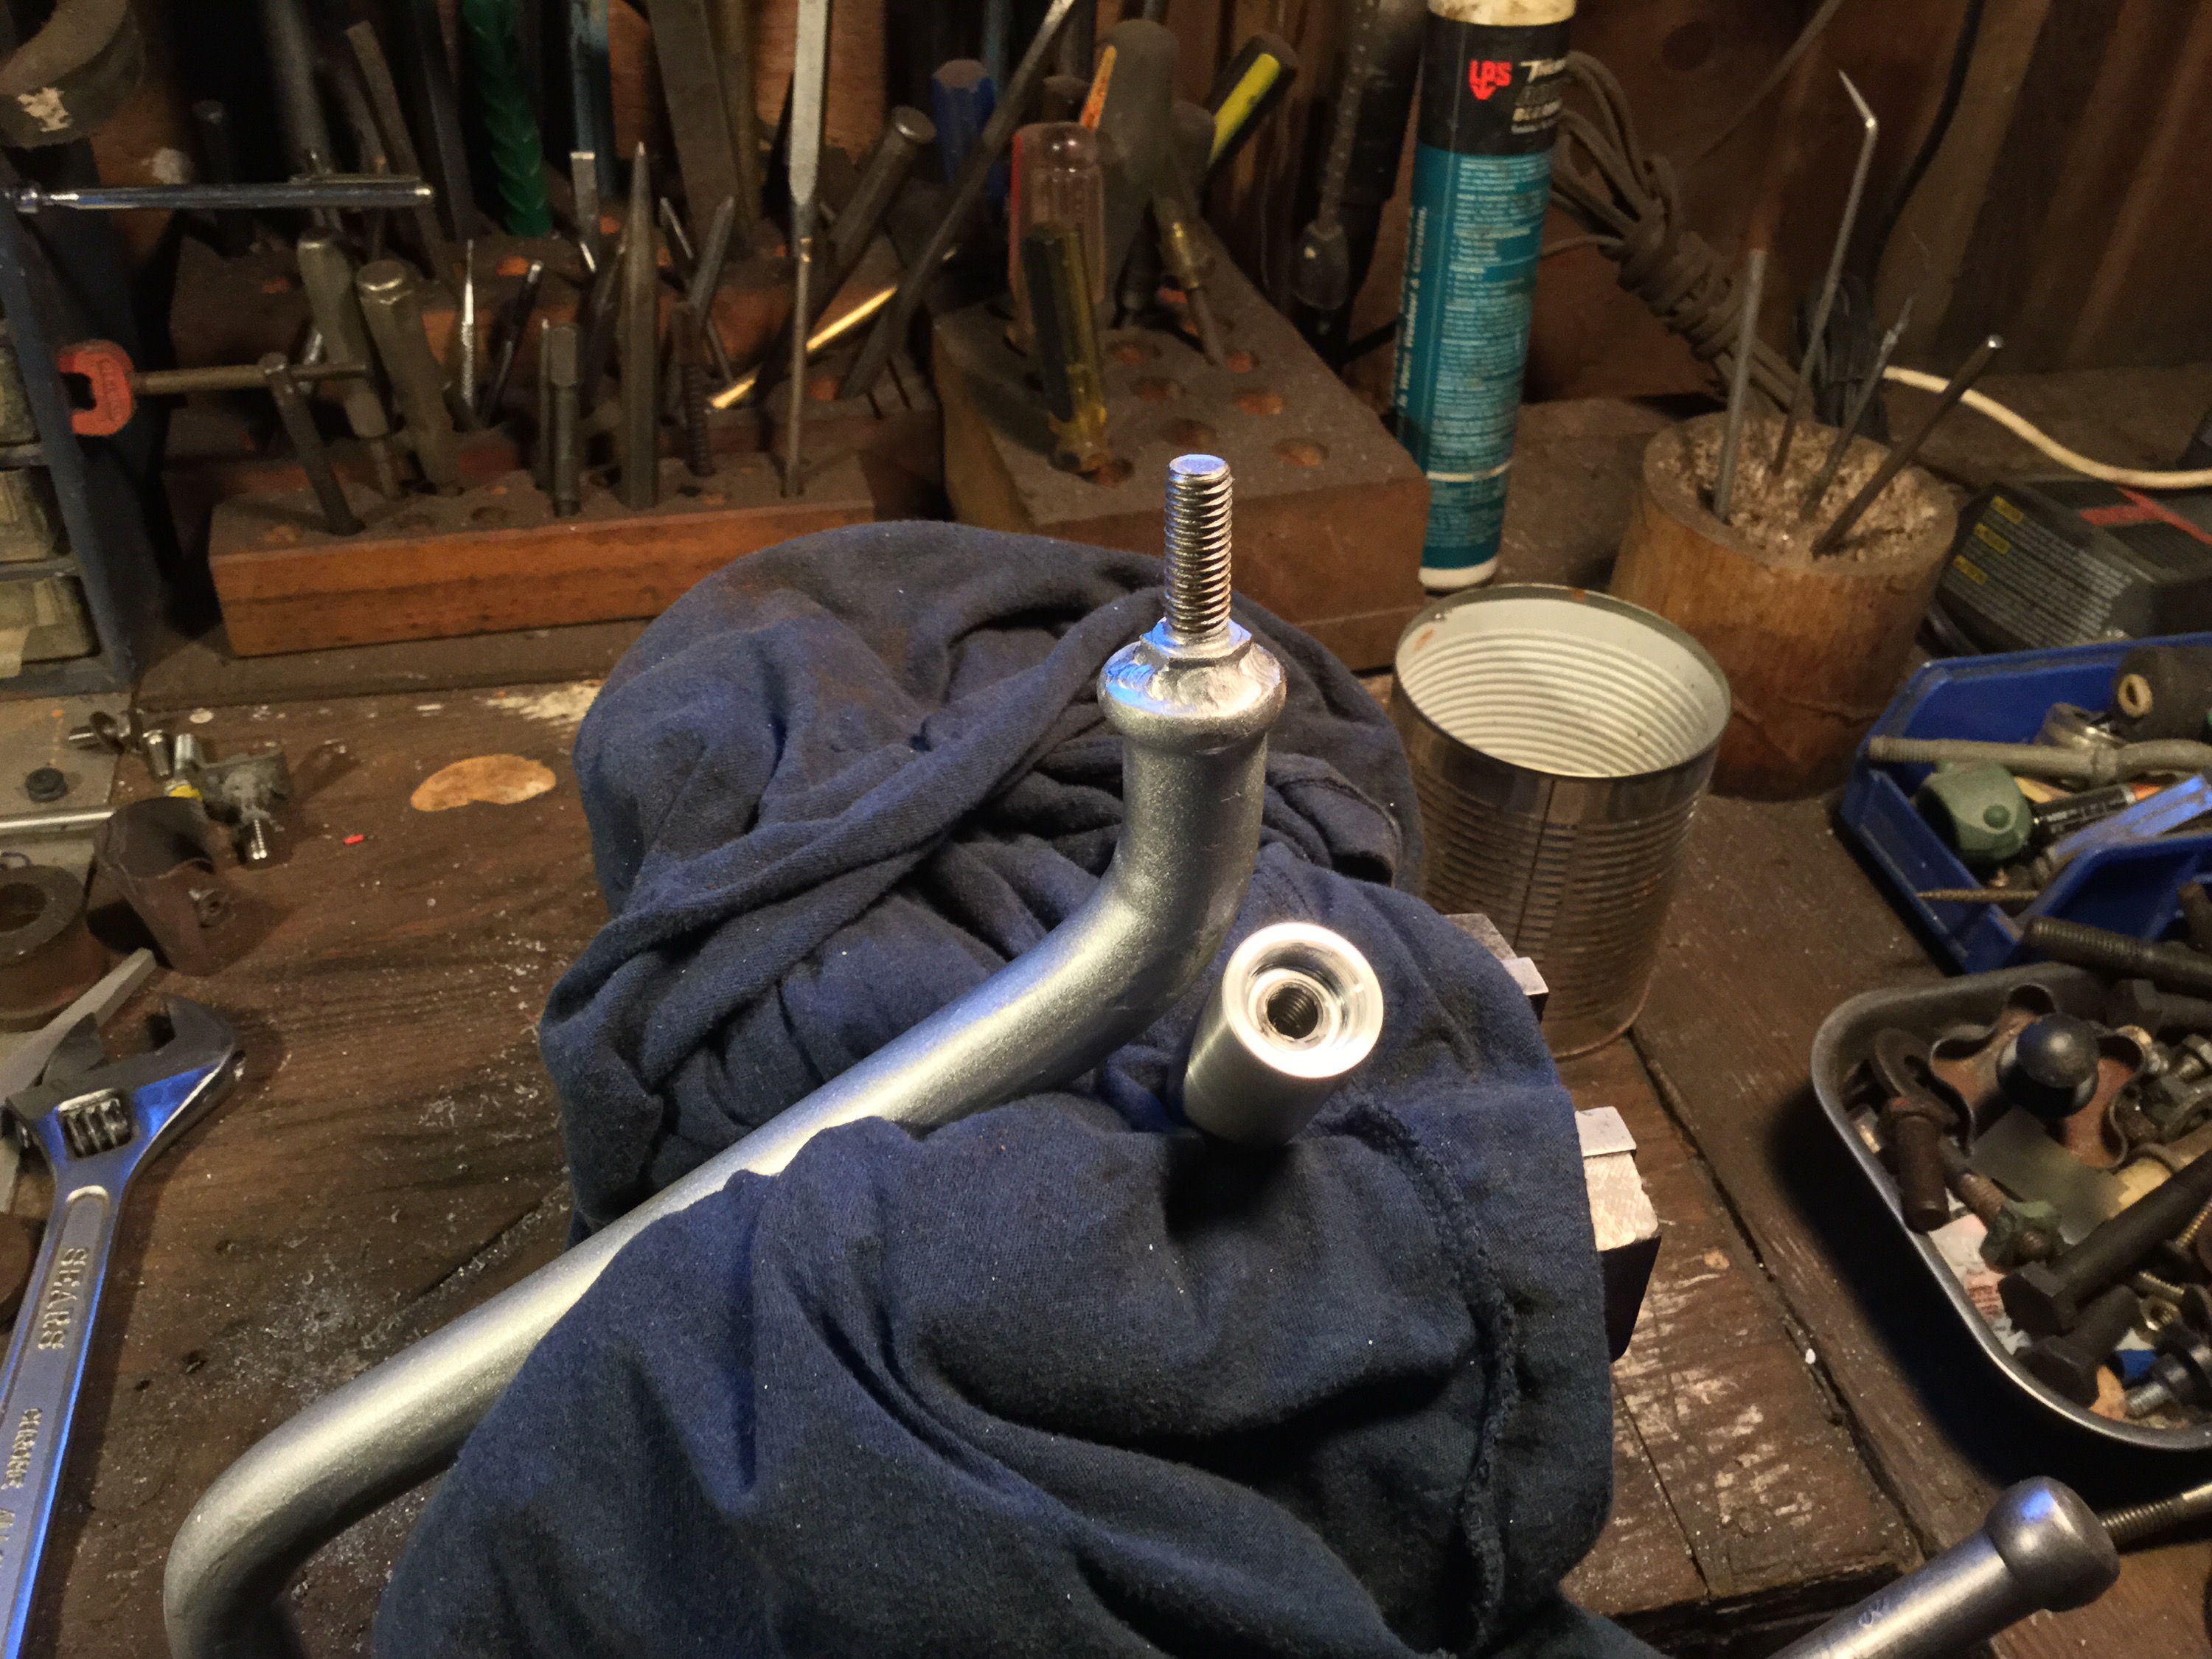
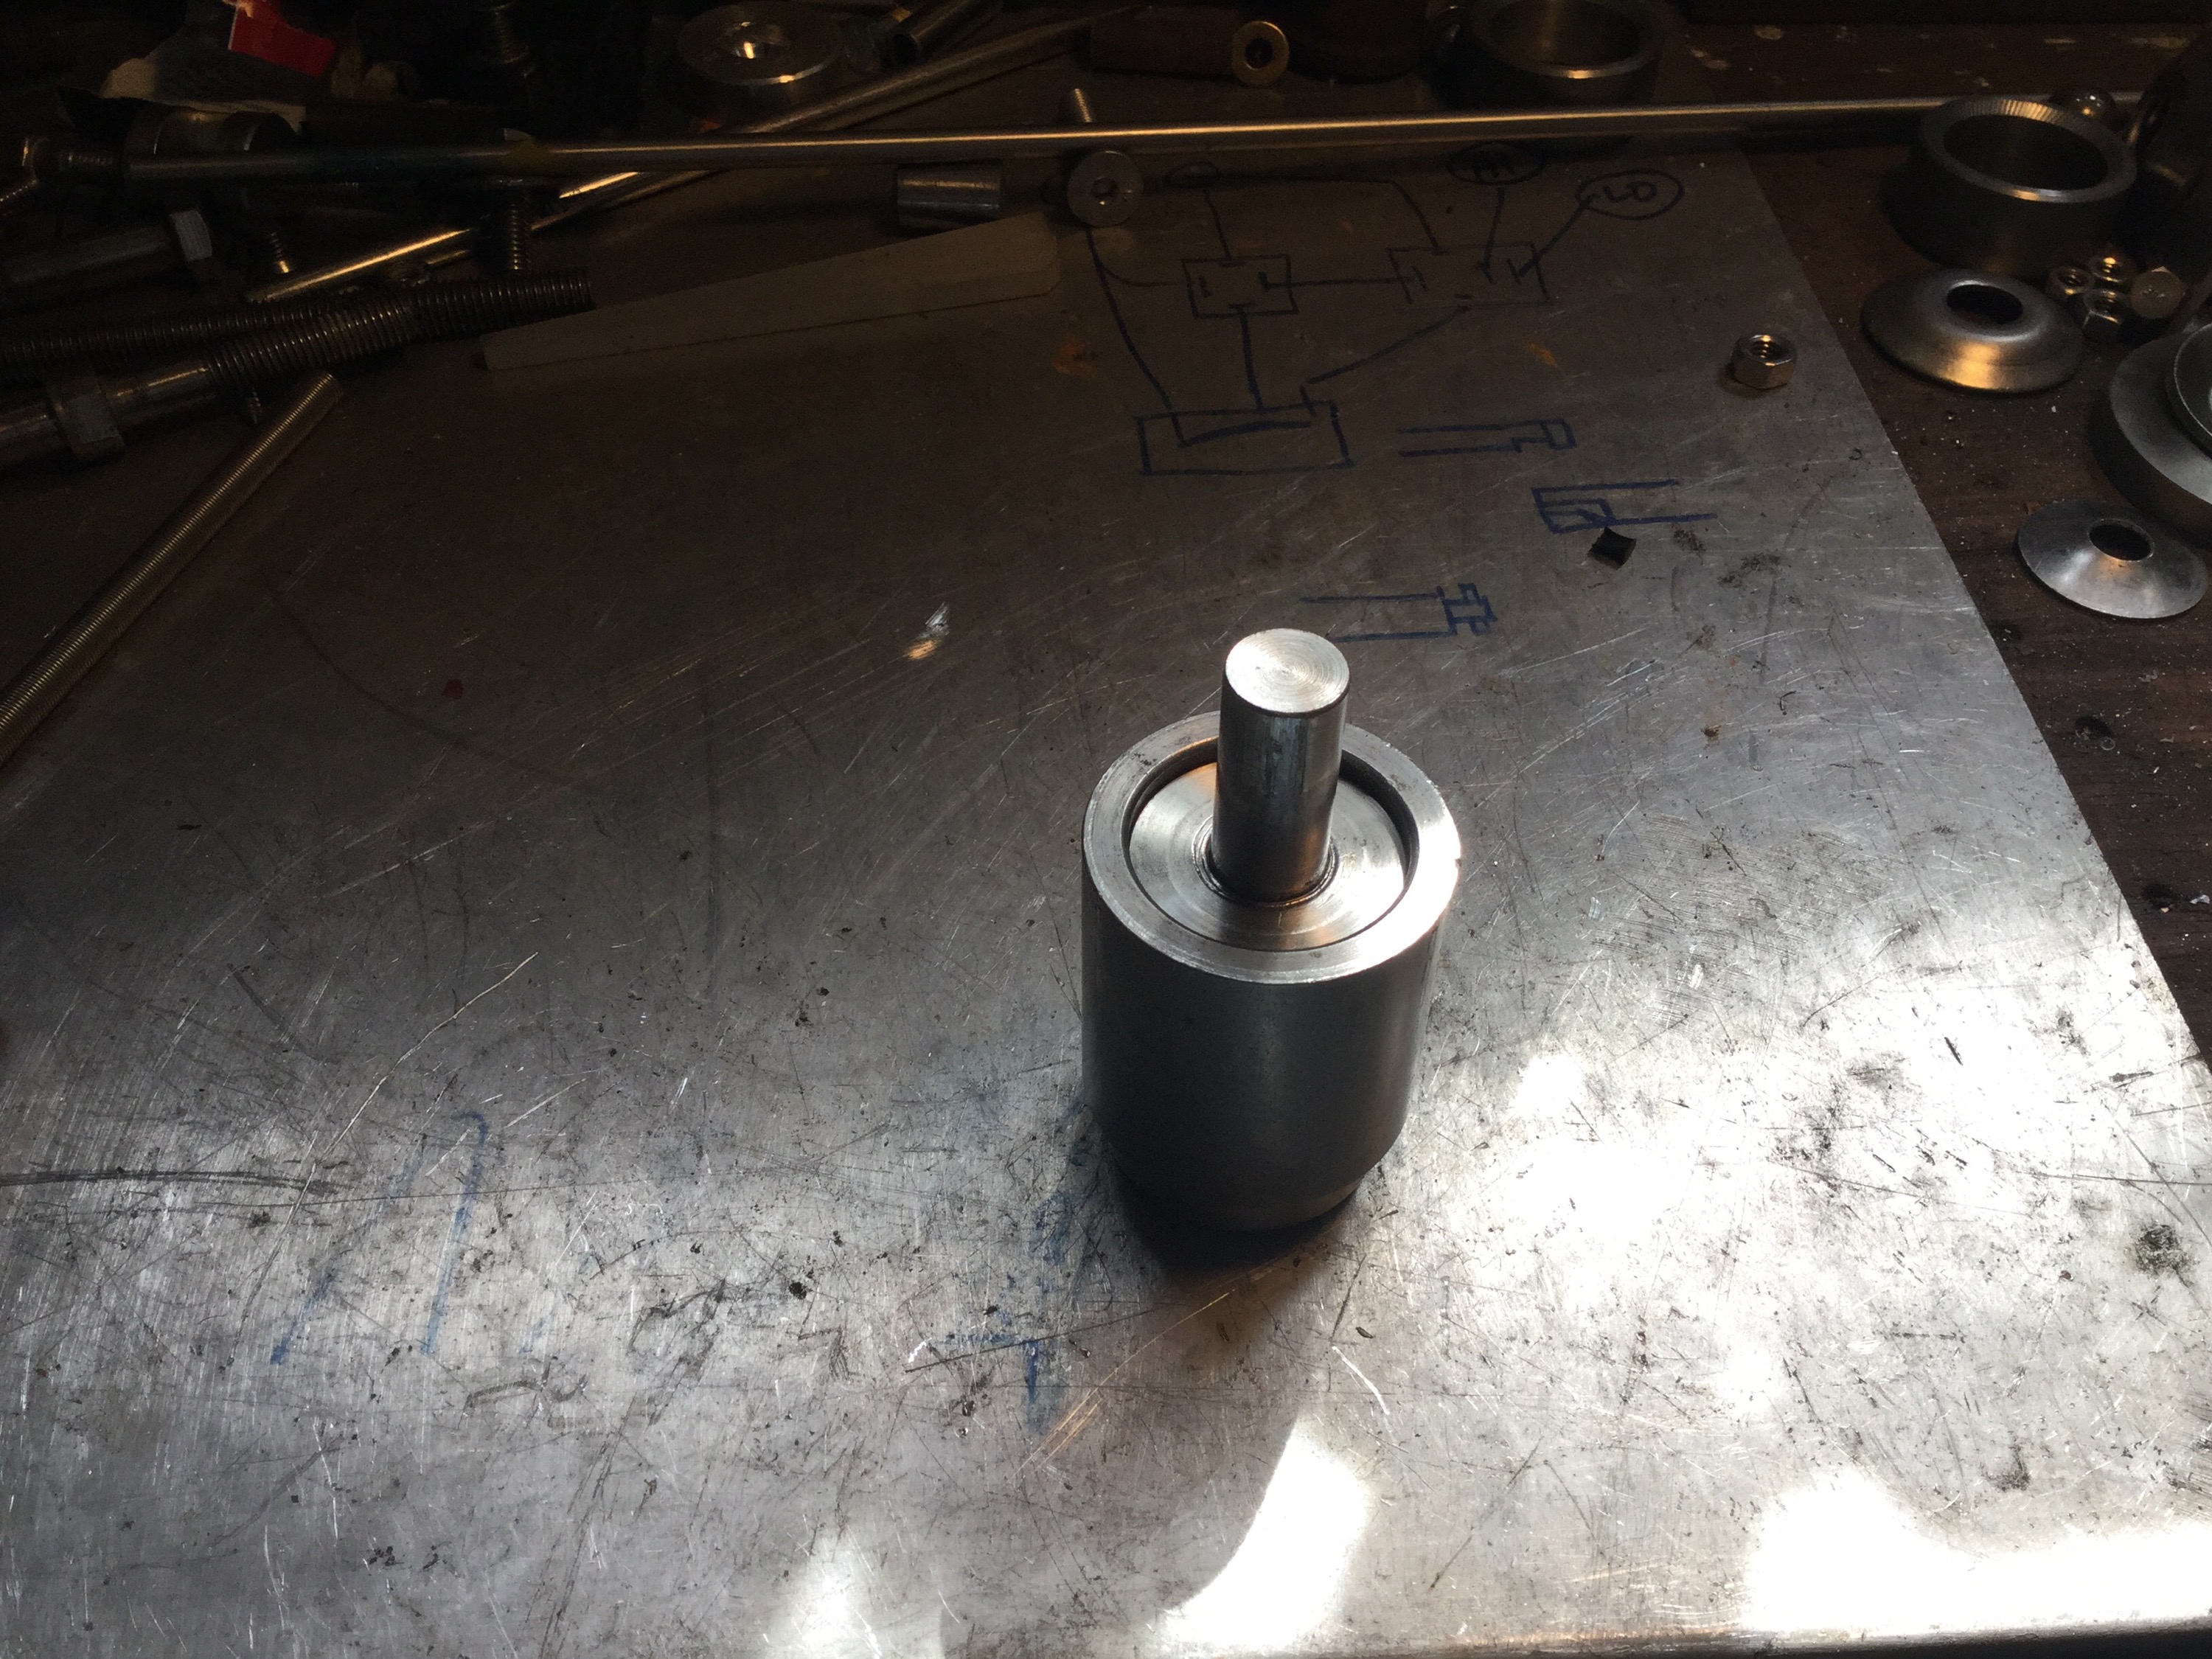
So what eh? Well now I made a bullet shaped tool, tapped for the 3/8″ bolt on the blunt end and tapped for 1/2 NC on the pointy end.

Some tubular spacers, lube, and a nut and the bushing ( already fully seated in the drop link by squeezing the two together in a vise) and hey presto, the bushing and link can be easily pushed on to the sway bar. Hey don’t rely on this pic for correct orientation of the sway bar bend to the sway bar, I was just doing a test run and didn’t take care. I did get it right in the final assembly… I think 🙂


i made a Delrin cap to fit over the exposed bolt. Tidies things up and may help to prevent the drop link coming off the end of the sway bar. This has happend with the softer urethane Powerflex bushings, maybe not as likely with the harder Whiteline bushings I have used, but hey, it’s another justification for this mod.


And of course I scraped the heck out of the paint on the sway bar installing it on the van.
 I guess I should show hey finished drop links. I had machined them a while back, 3/4″ (19 mm) stainless rod and heavy walled ( sorry I forget the wall thickness) tubing which had ID of 1 1/2″ (38mm) very close to to the stock link. Threaded the end M12X1.5, and a section approximately 17mm in diameter where it passes through the drop link bushings. No spacer in this set up, we’ll see how that works out, but is not an original idea.
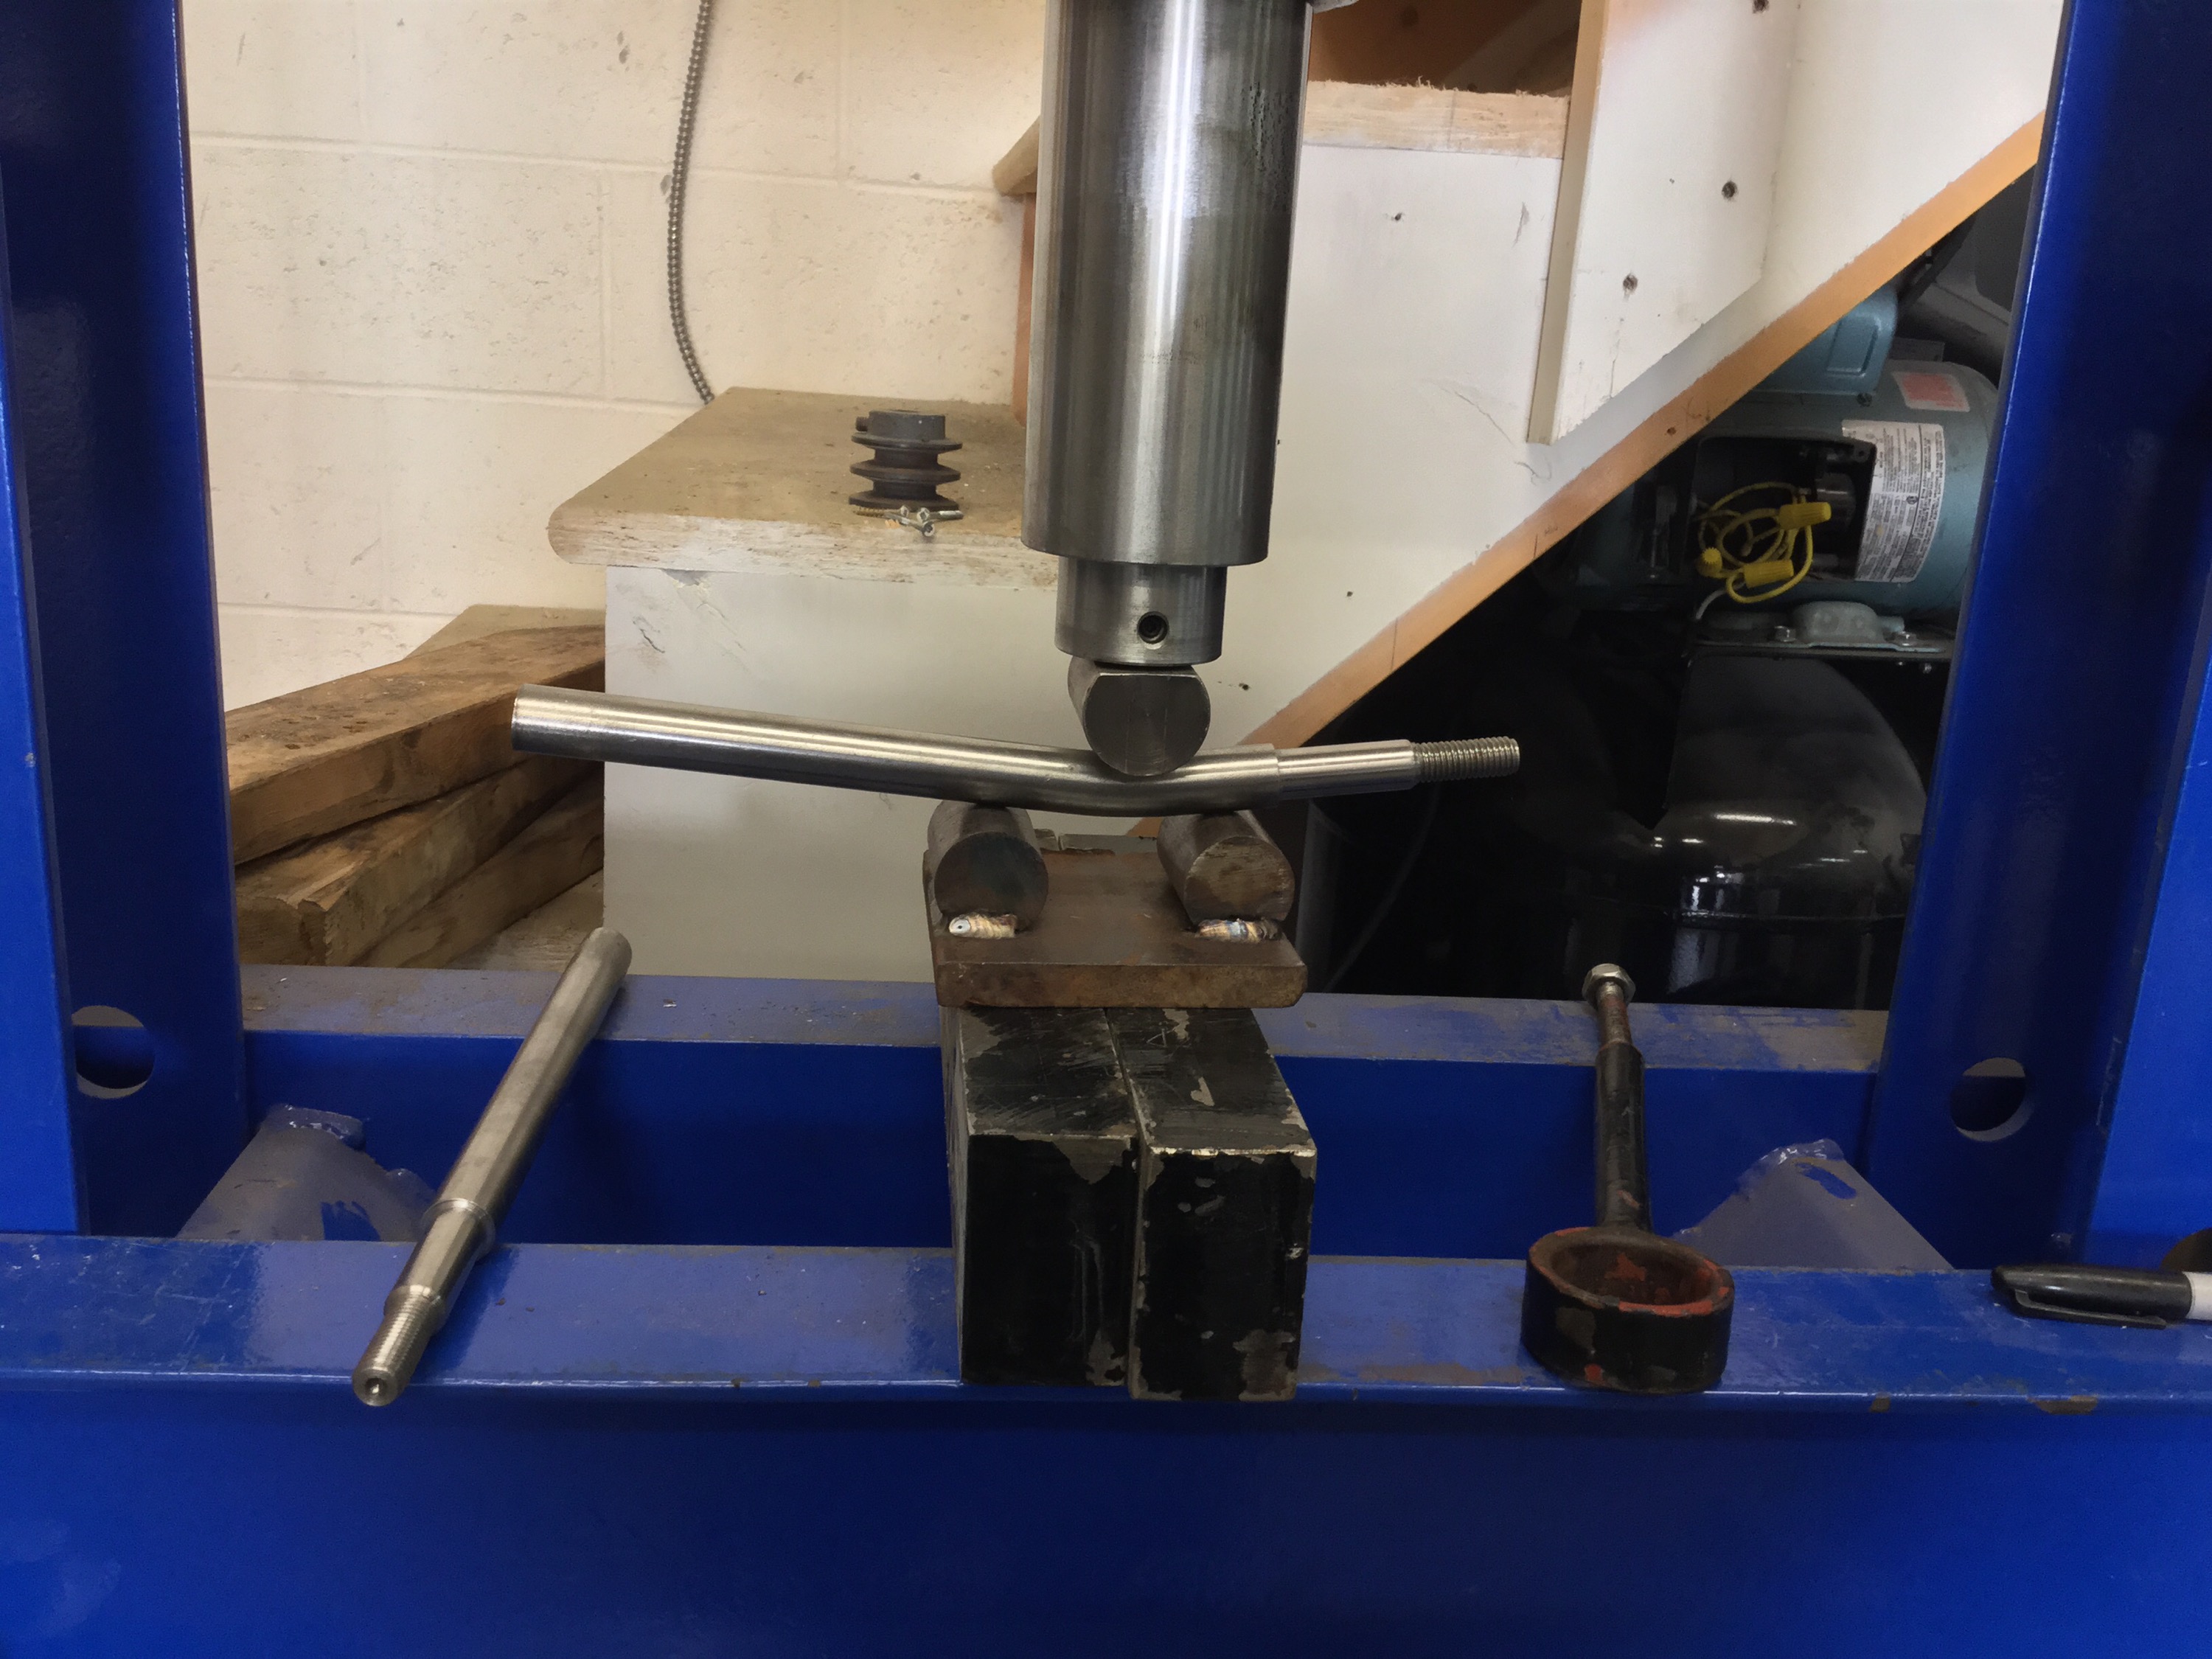
I bent them on a friend’s press using a quickly made set up that does leave some dimples in the bar. I think I took about 8 tons of force to bend them. I was shooting for 4 degree bend, but I went a degree or so more. I don’t think that will be a problem.
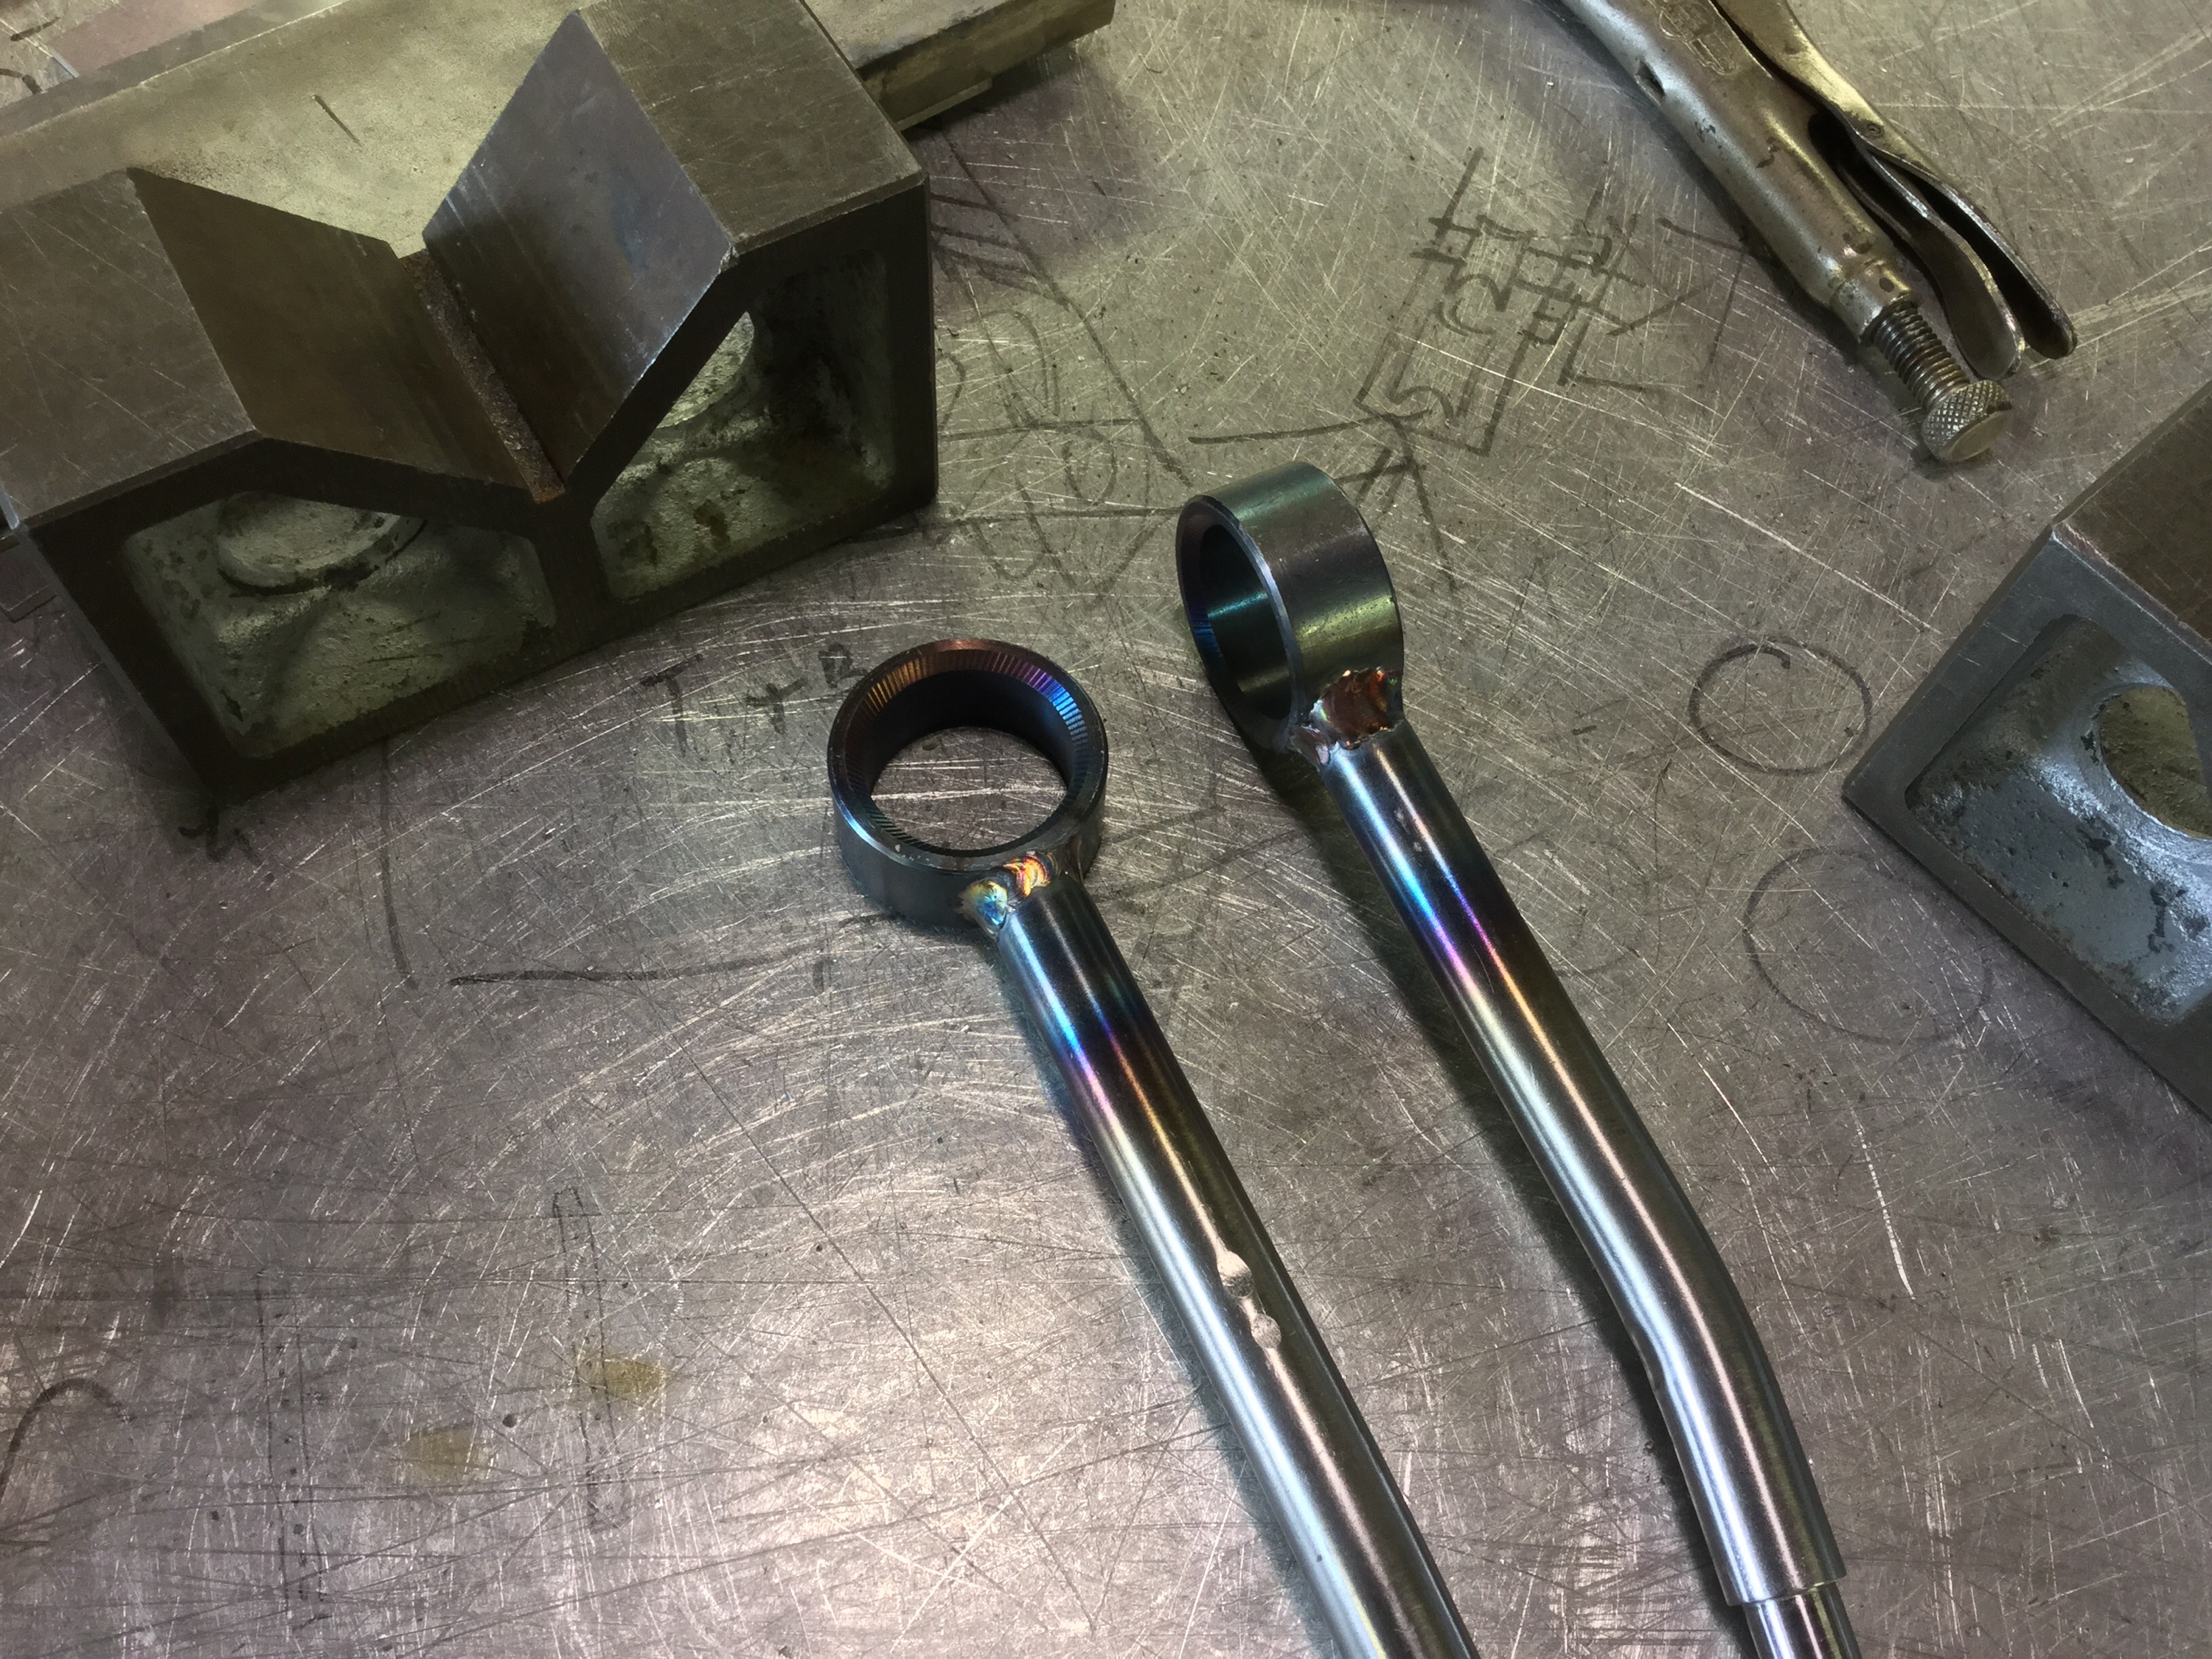
I cut them to length and ground a chisel point on the end. One root pass, then two straddling passes of weld, then I washed over with the torch. I got a bit of under cut on the rod, I could have done better but it will be strong enough. Notice the pattern on the ring portion, patented “Chattr-Mastr” finish on the bevel.


I used the cup washers I made a while back, but welded on a smaller diameter flat washer to the should of the drop link as I was worried that the enlarged hole of the cup washer would get pressed over the shoulder under hard use in the van. I think you might spot that washer in the pic of the sway bar install. I’m happy with these drop links, maybe not in the same league as Burley Motorsport’s, but ok for an amateur.
And another thing, with the bolt welded to the bar it is possible to make some little adapter so one could use a puller to remove the drop link from the bar easily. Ok, that’s a pretty weak advantage of this modification but I’m trying to find other reasons to account for the time and effort.
Vanagon – frustrating sidetrack
Posted by albell in vanagon, vanagon mods on April 19, 2015
Had a really frustrating week, seemed as though everything I touched went sideways. Most annoying was trying to eliminate vibrations in my swing away tire carrier. The latch pulls the swing away tight to the bumper assembly and I am pleased with how that finally worked out, but I don’t like the small amplitude vibration I get on the holder when the tire is attached. I think I am going to weld on a stiffening gusset to the upright and see if that will stiffen things up.
I bought a cheap rod bender from Princess Auto, this one here. It was on sale for 79 bucks. It works ok for what it is, and I thought instead of just bending random shapes while I try it out I would actually make something “useful”.
Well, I tried making a tail light protector and I soon realized that you REALLY NEED TO MAKE A JIG!
I’m showing you the result as a warning, think things out before you start merrily bending stock 🙂

The the tricky part was locating the little stand-offs accurately on the screw holes in the tail light. It’s obvious that the tail light is thicker at the top, but it also has subtle curves laterally and I was trying to match those curves and that made placing the little hollow studs for the mounting screws maddeningly difficult. You can see the nasty welds at those studs, result of tacking, checking, cutting, tacking, checking, cutting…
You really do need a jig.
And I think the guard would look a whole lot better if the vertical cross wires were not welded on top of the horizontal wire but welded to the middle of the section. I’m not going to try another until I make a jig, but even assuming I pop one off without pulling out my hair, these would be fussy and expensive Vanagon jewellery.
Vanagon – Simon feels small
Friend Simon traveling this last week, parked beside white van at Hood River Oregon.


Admin – sorry about blog glitches
The picture scaling issues and inability to to get full sized image when image clicked are my fault. I’m working on fixing it.
Vanagon – attempts at making cup washers
Posted by albell in vanagon, vanagon mods on April 6, 2015
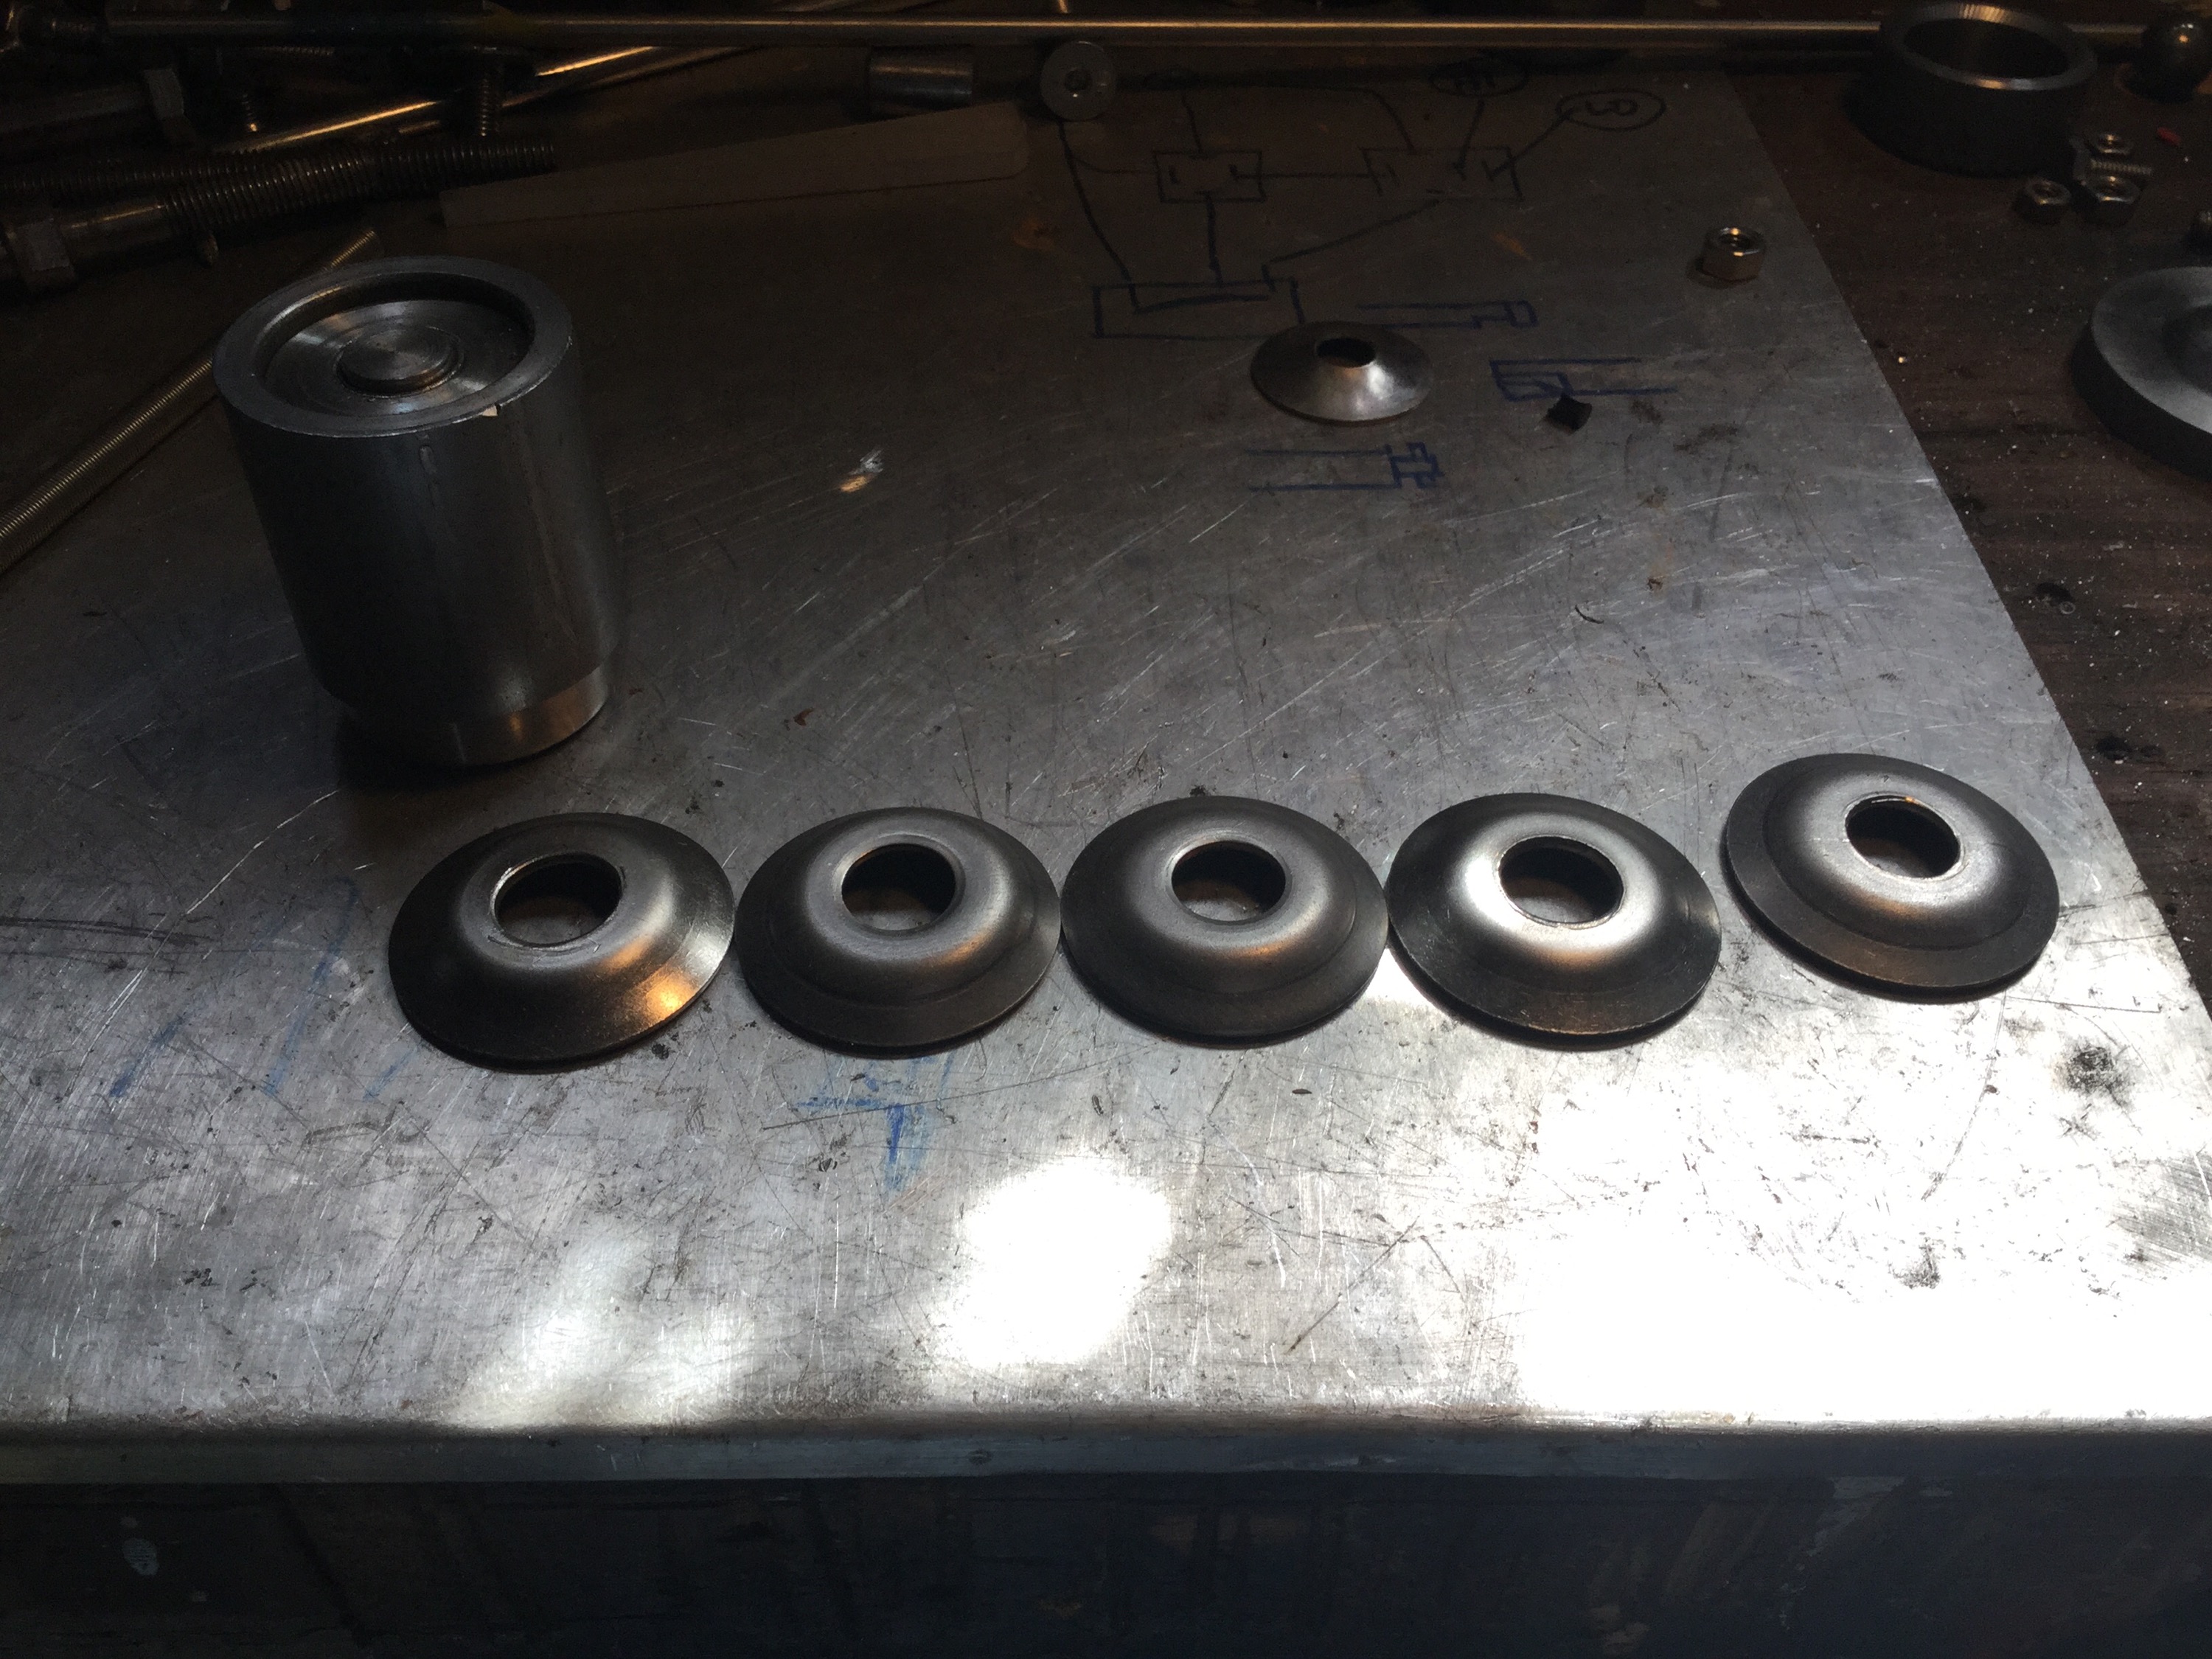
Not quite an unqualified success, but not a complete failure, I’ll settle for that. One of my sway bar drop links broke again and instead of the kind of repair I did previously , I decided to make new ones from stainless and beefier stock. I’ll detail that build when I have them welded up and bent. But I needed new cup washers and rather than buy them ( aren’t they around 13 bucks each?) I thought I’d have a go at making some from 2″ stainless washers. Here are my results.
First I tried pressing a ball bearing into the washer with a socket as a back up. You see on this test washer that it doesn’t make a good profile.

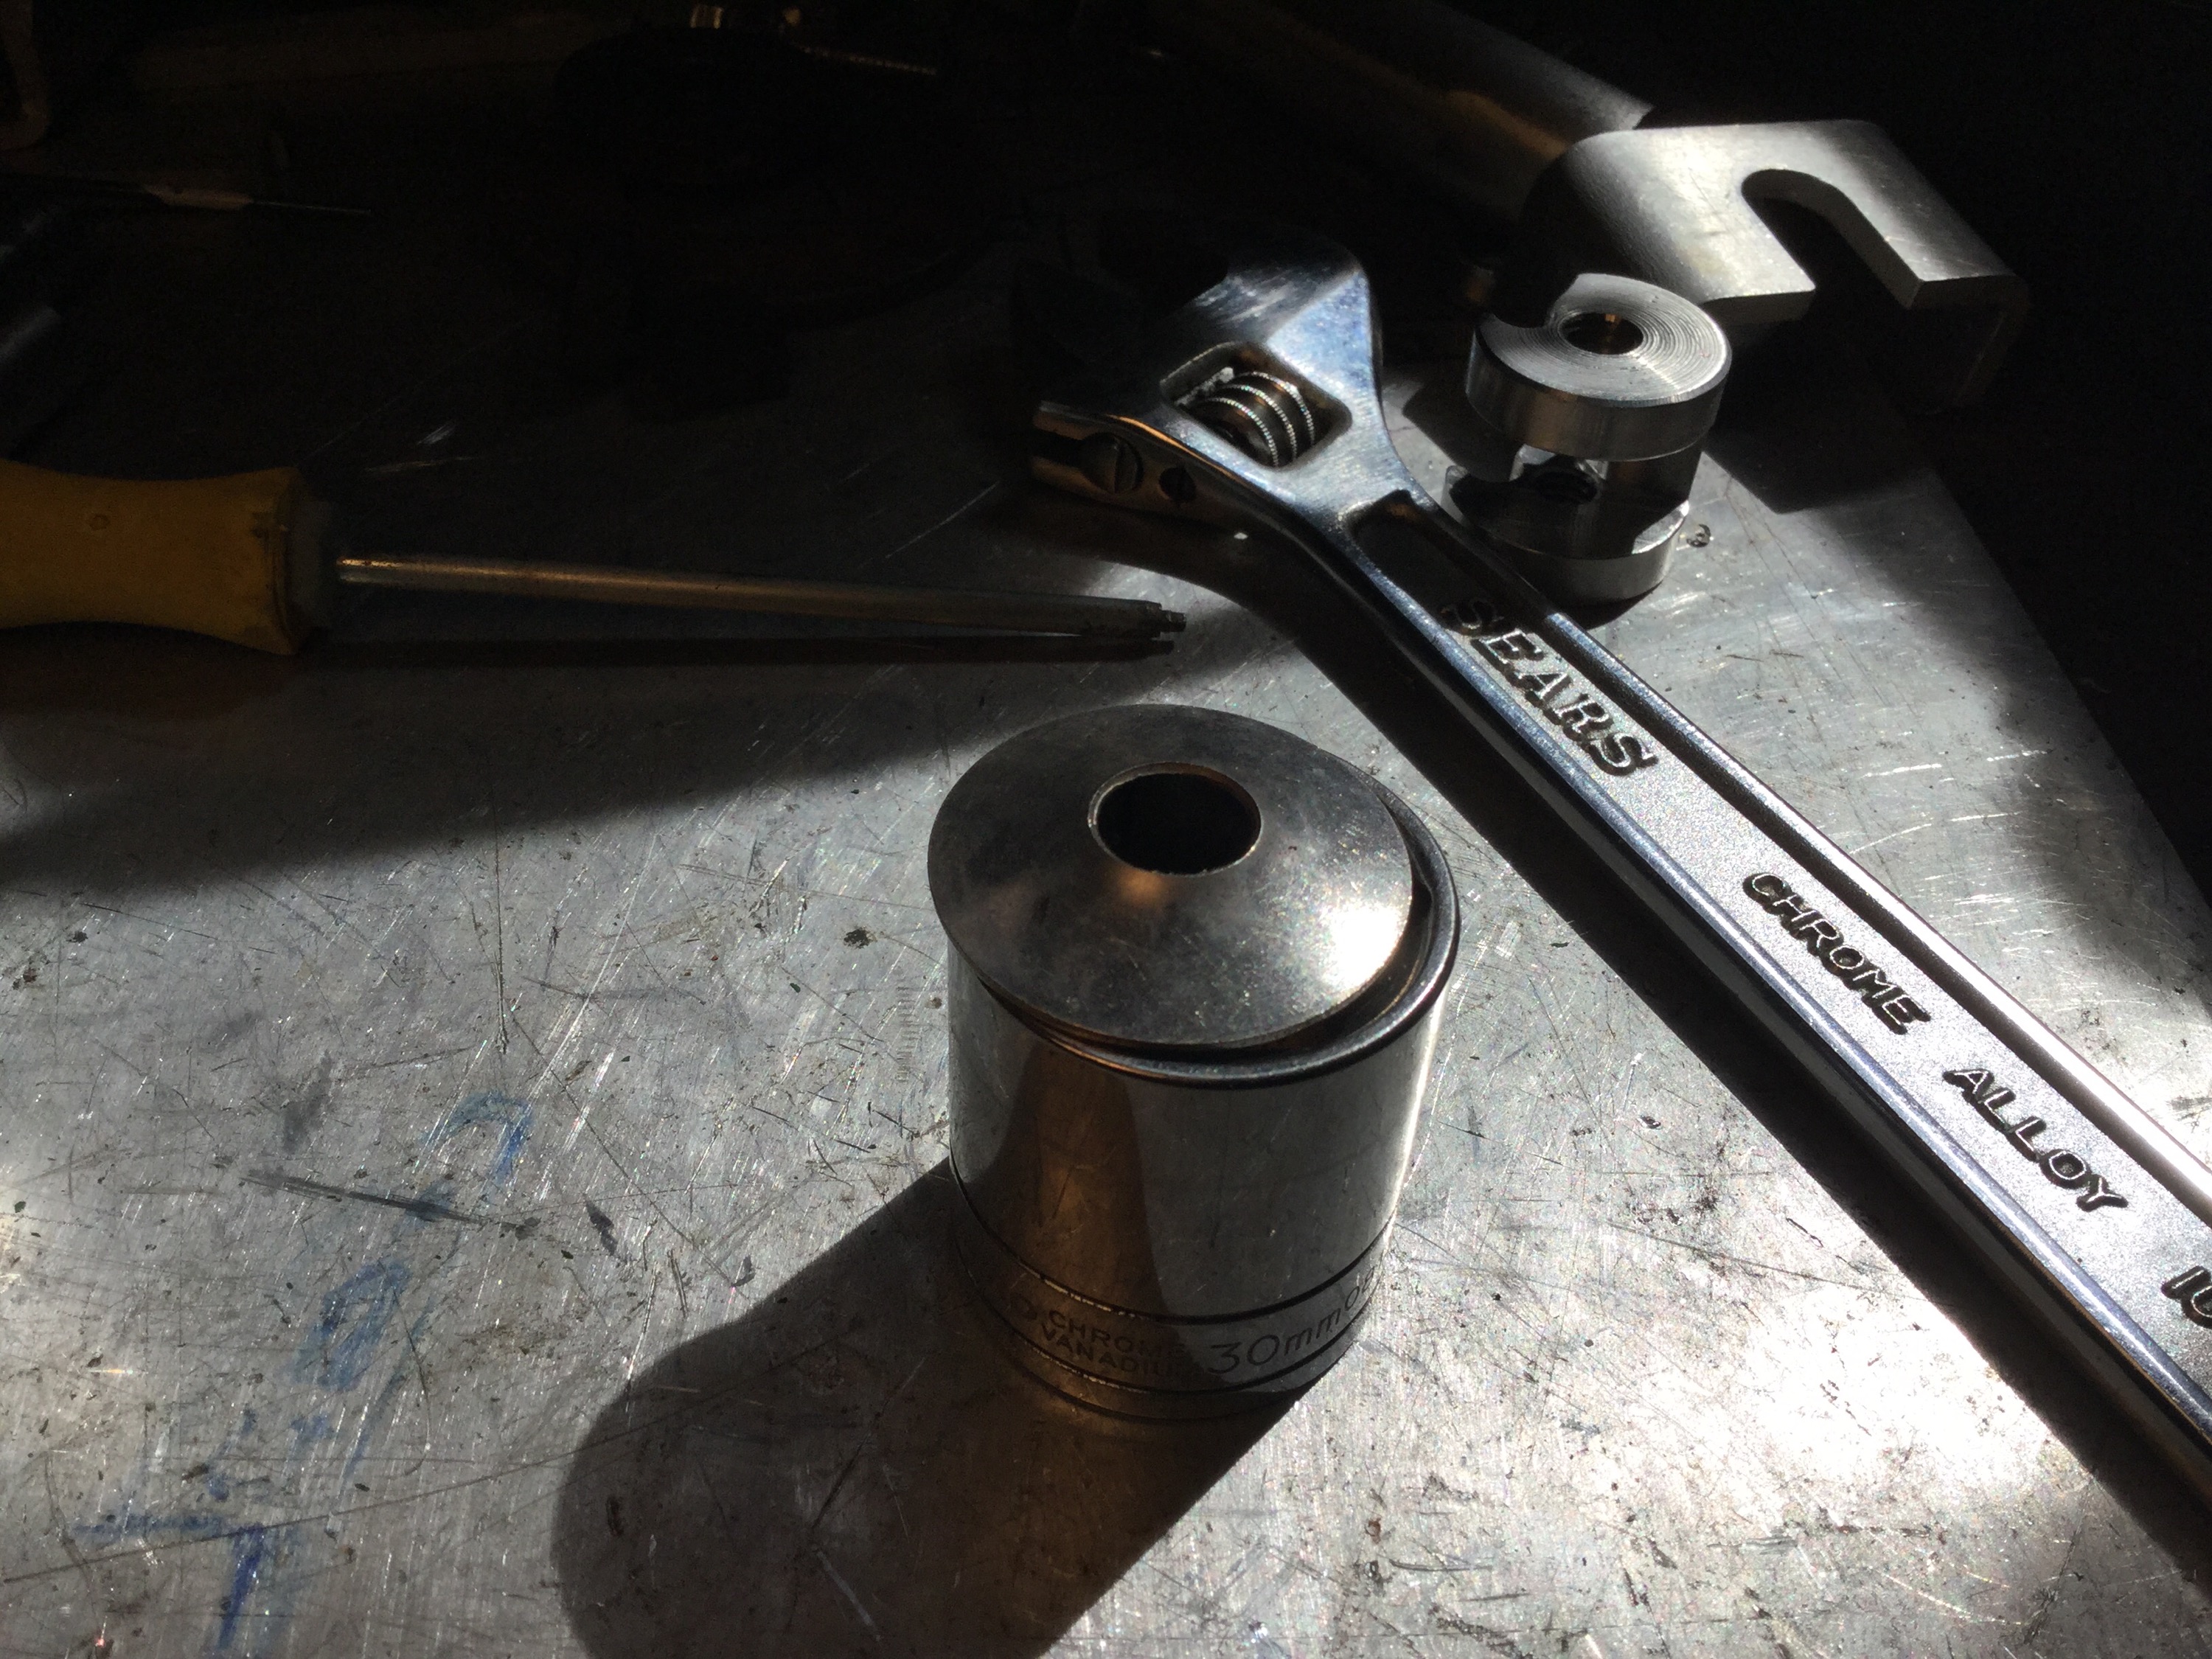
And on the 2″ washer.

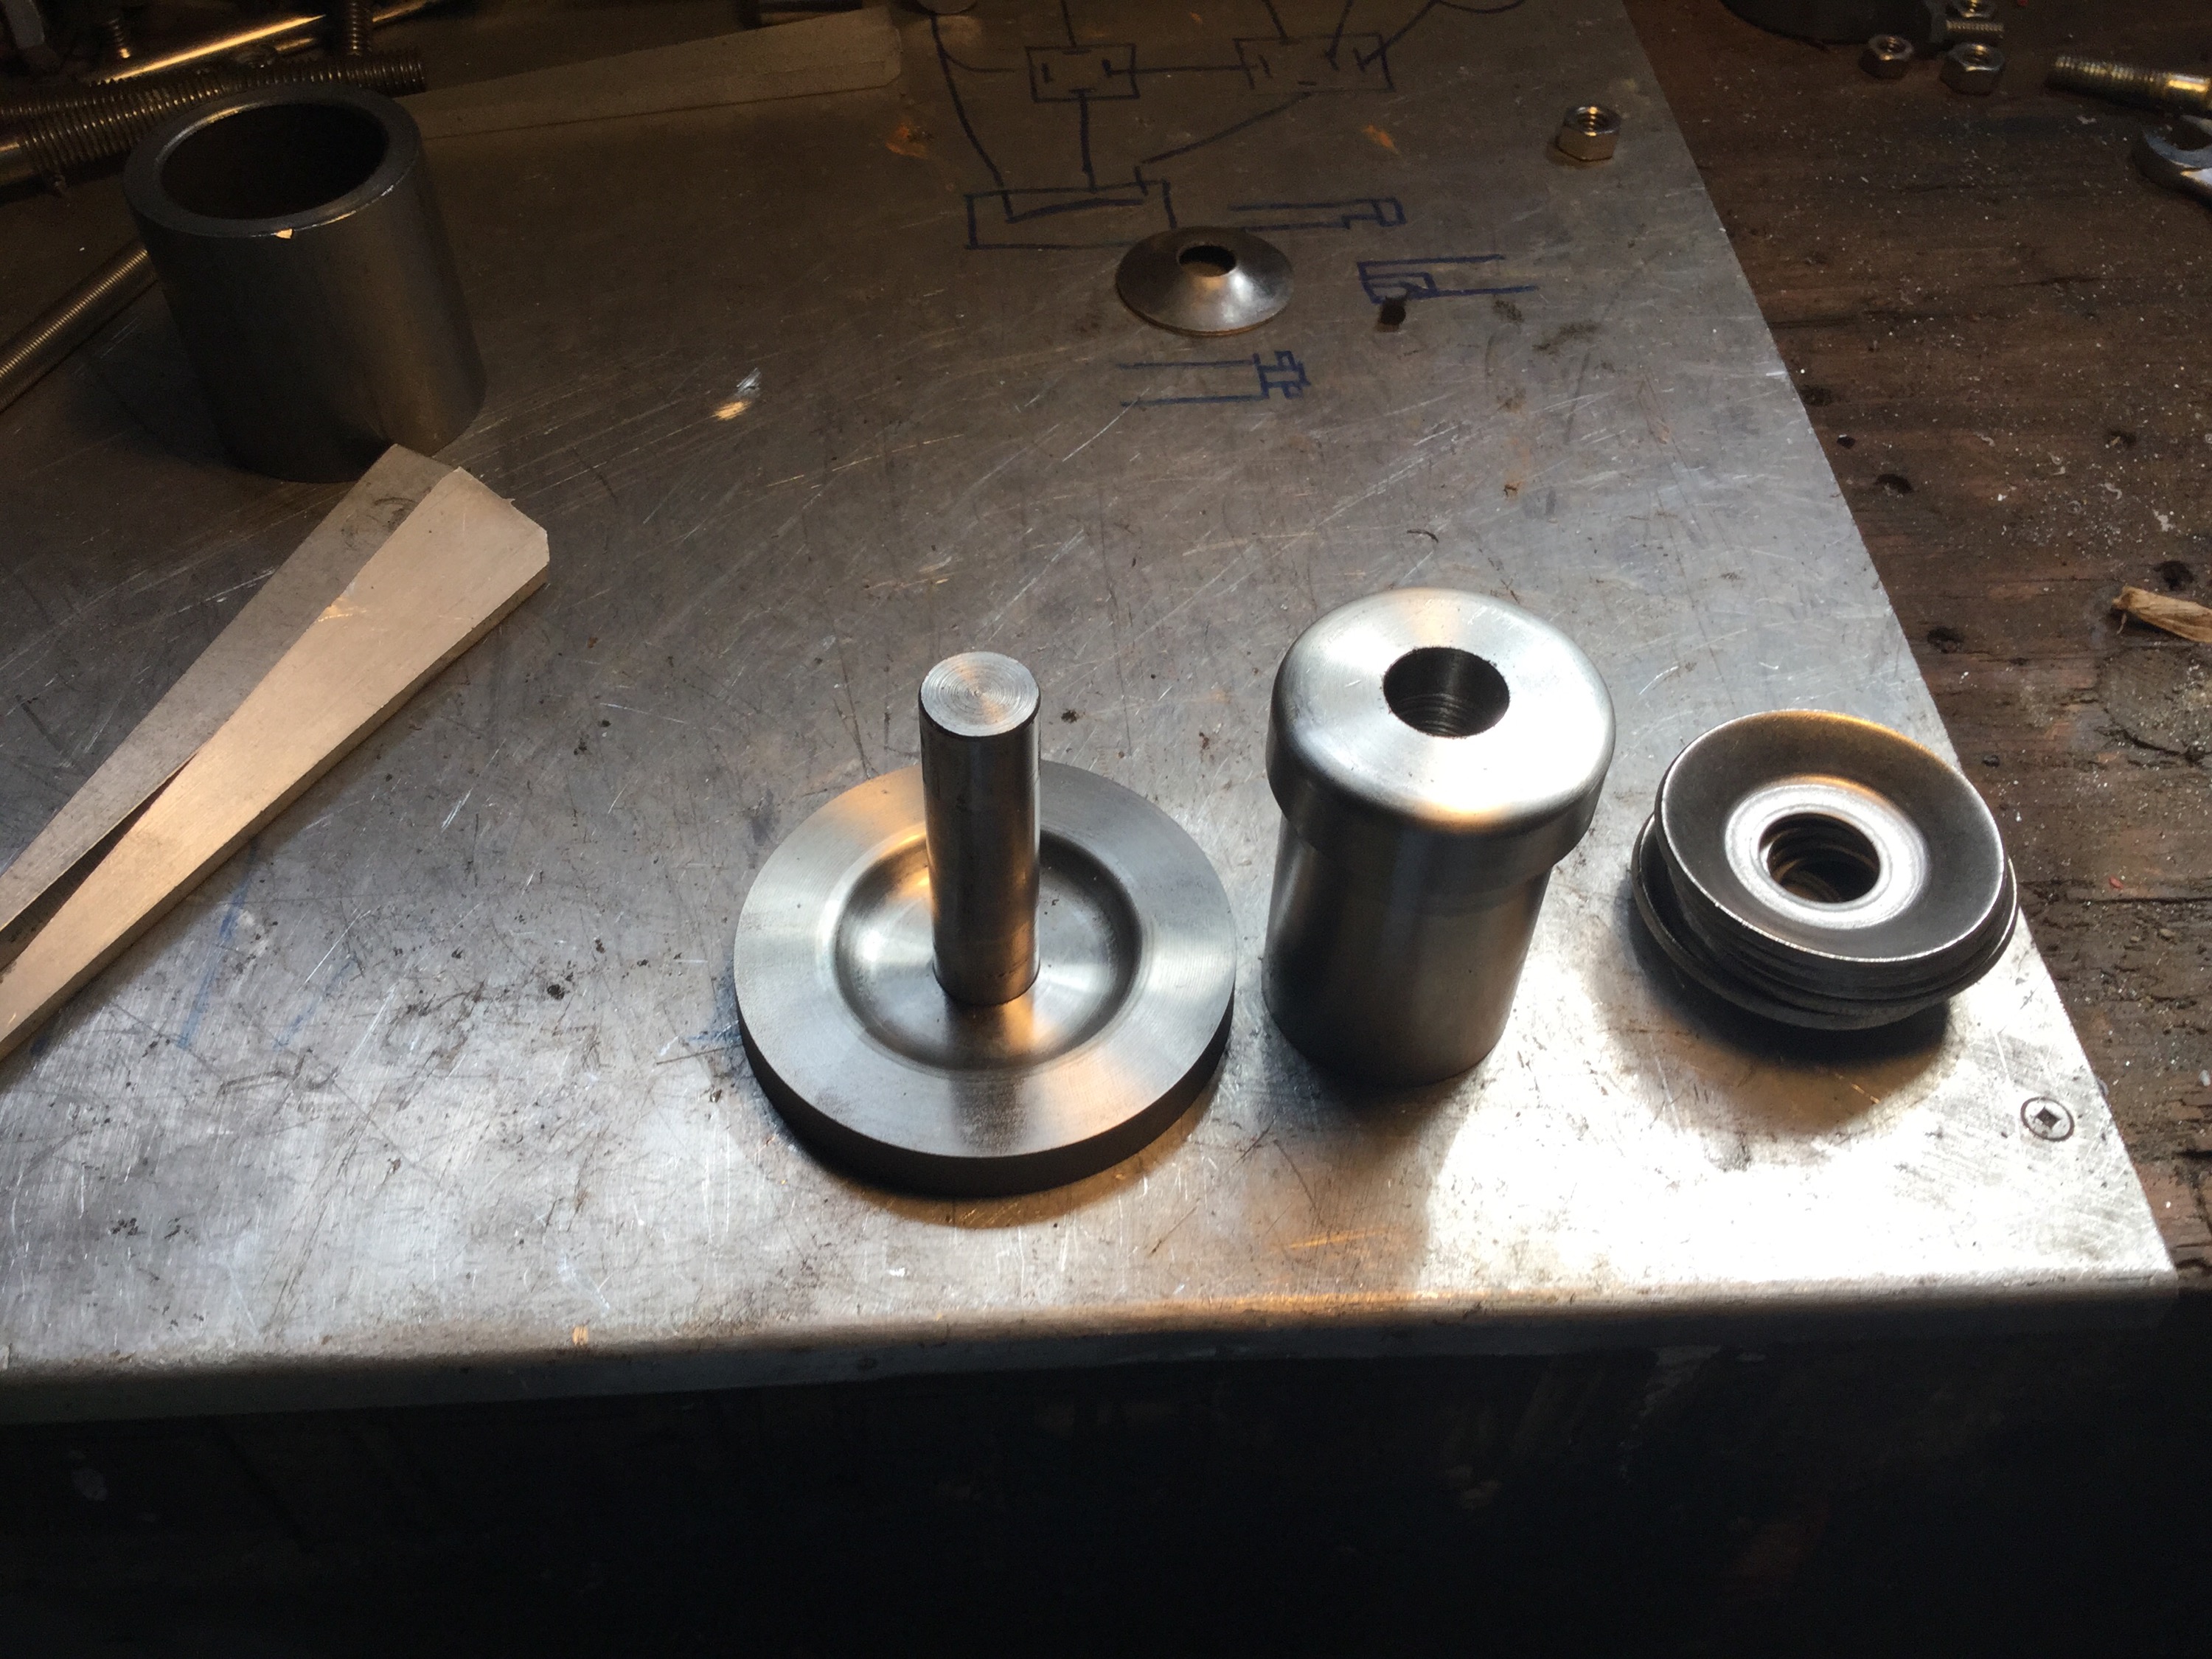
So then I tried a different approach. Pretty self explanatory.


Useda friend’s press,applied between 10 and 15 tons of pressure. I also tried both ends of the male die, but the result wasn’t that great.

So I tried again. A quickly made female die with a rough profile of the shape I wanted, and a not very close match on the male.
 .
. 
Back to the press and…
Well not great either, but I’m going to stop. I’d didnt do any research on how one should make dies for this purpose, i bet I am missing something quite obvious
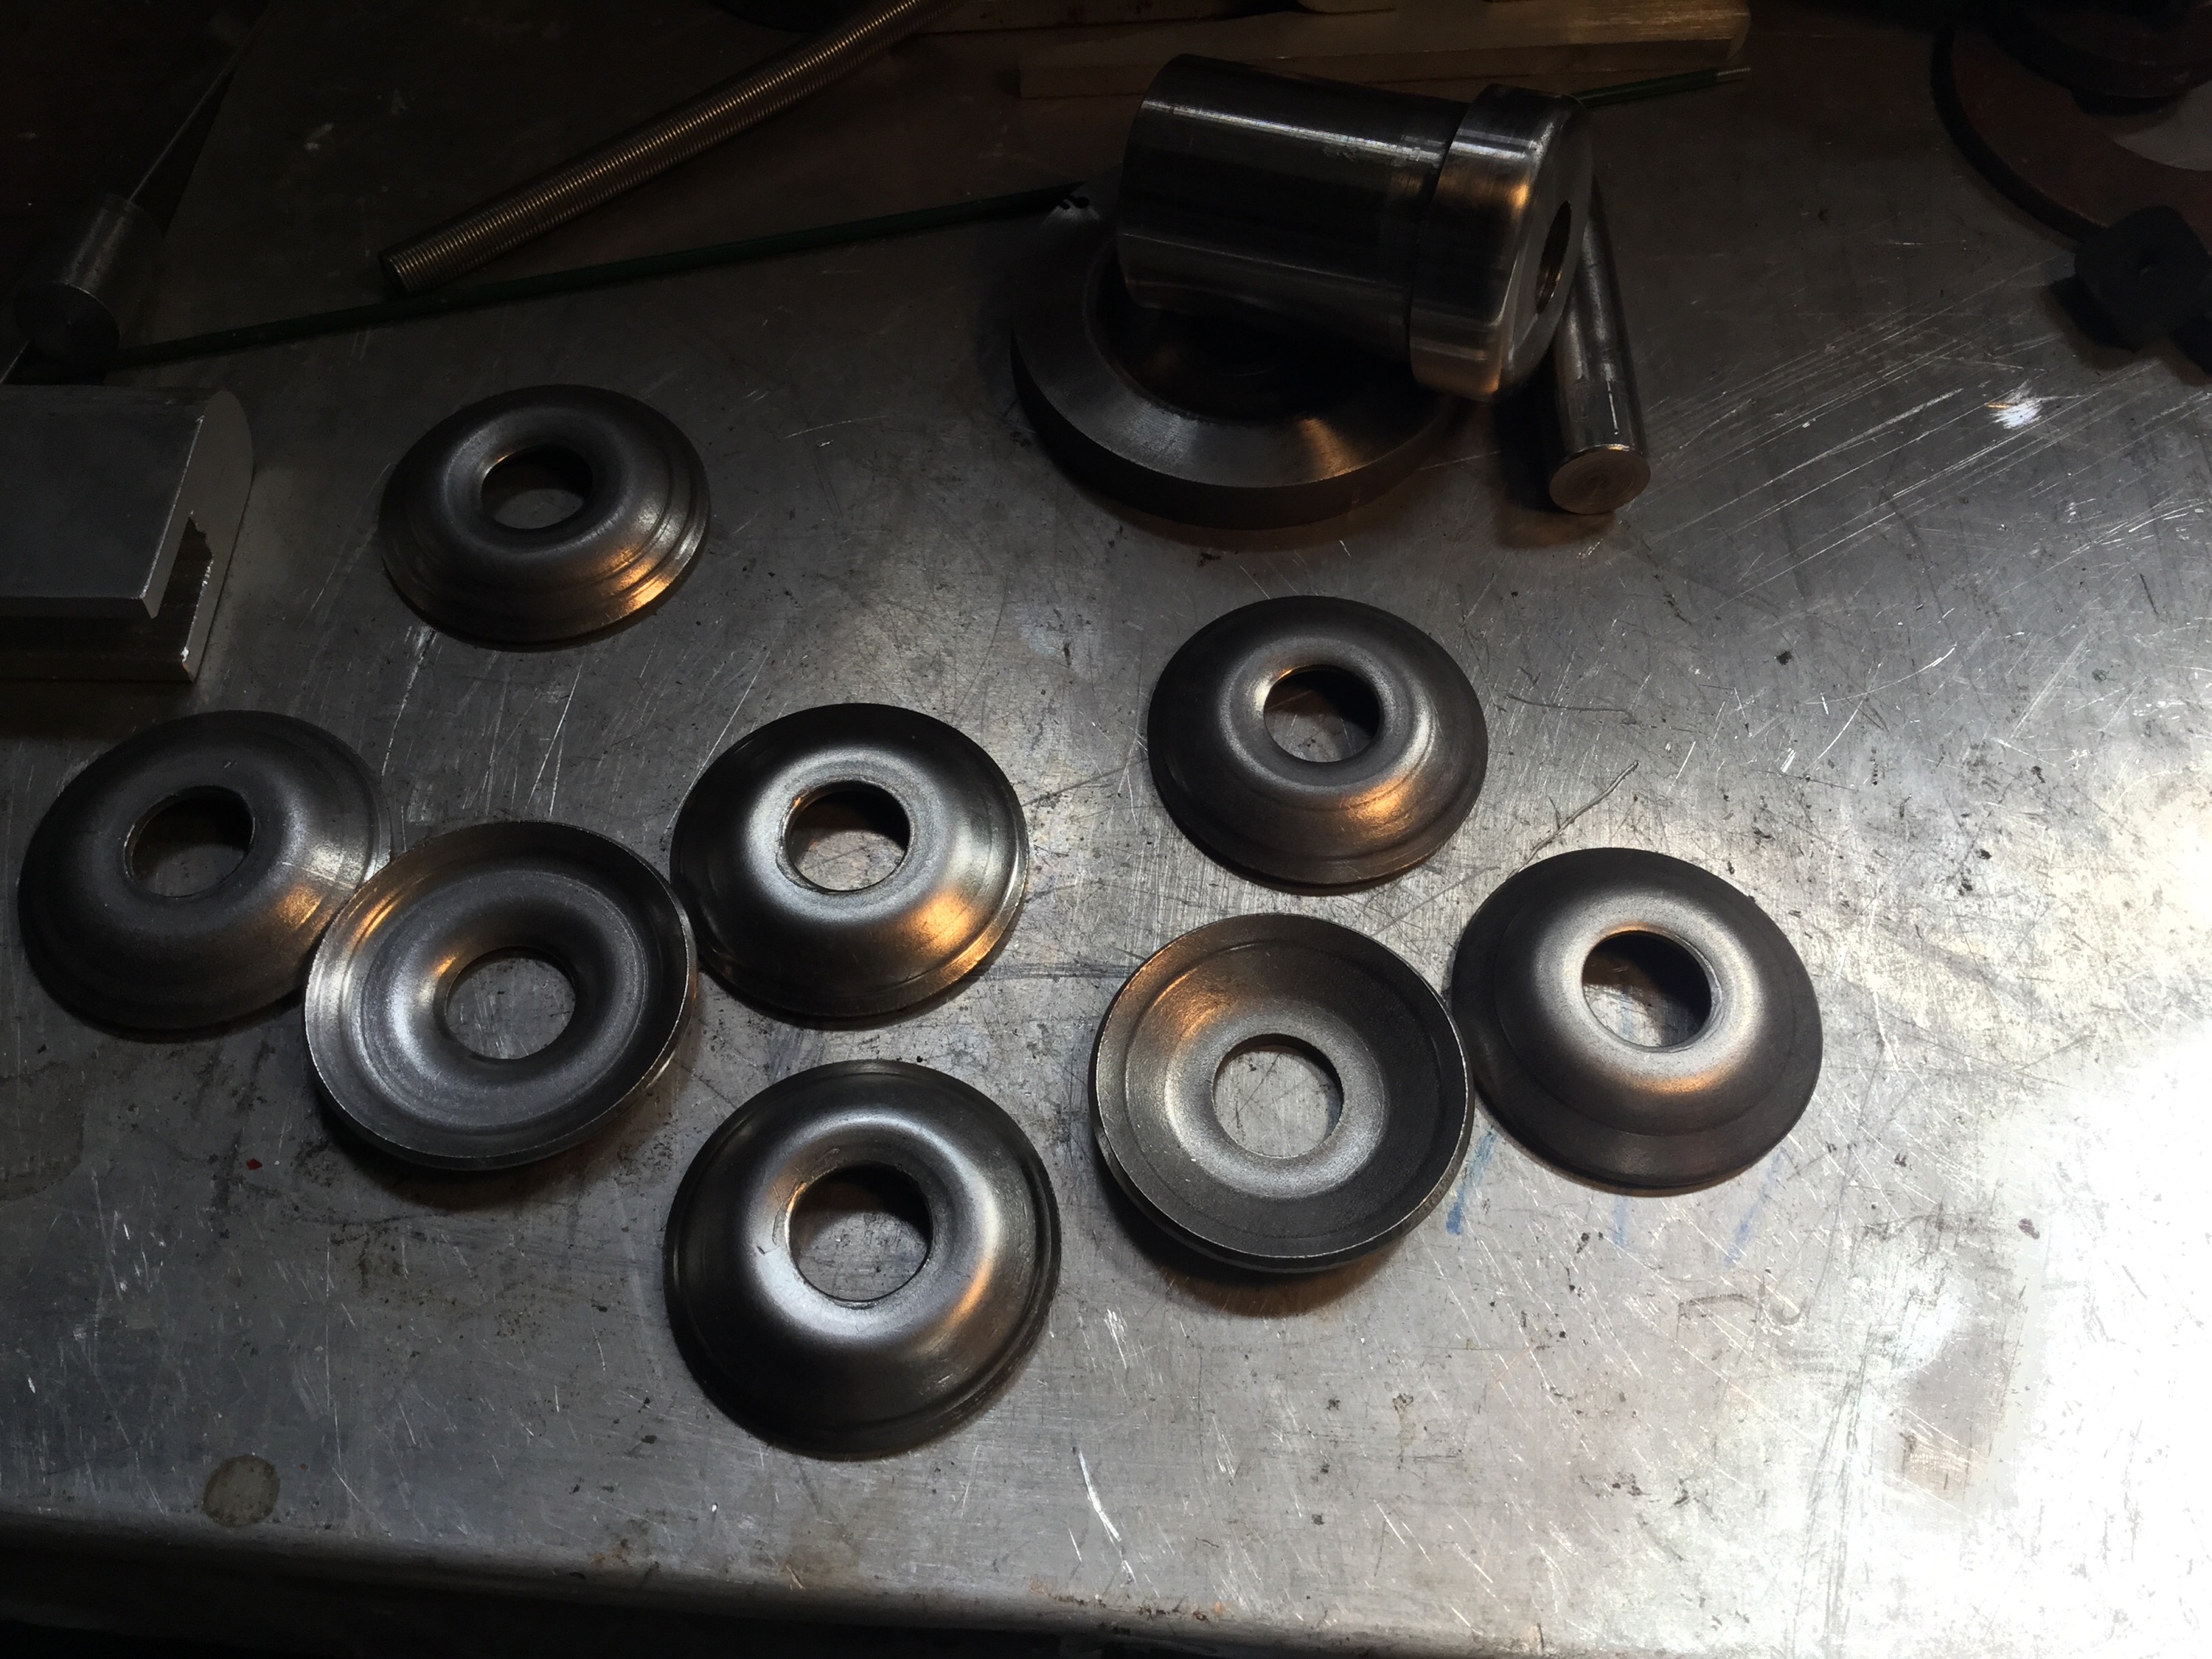
The end of my unfinished drop link.

And with polyurethane bushings and the new washers. Hey, note that I have ground a rough radius on the inboard side of the bushings. This helps them fit into the recess on the lower control arm. No’ they aren’t quite that same as the stock washers. The stock washers have a larger un curved area and turn up more quickly at the edges. But I figure when the bushings are compressed when installed, the washers will make enough contact and still allow some lateral movement of the drop link.

Vanagon – rear bumper, swing away tire carrier latch
Posted by albell in vanagon, vanagon mods on April 3, 2015
As I’m now using geological time scale in describing the progress on my rear bumper build, this latest update comes very quickly after the back up light install.
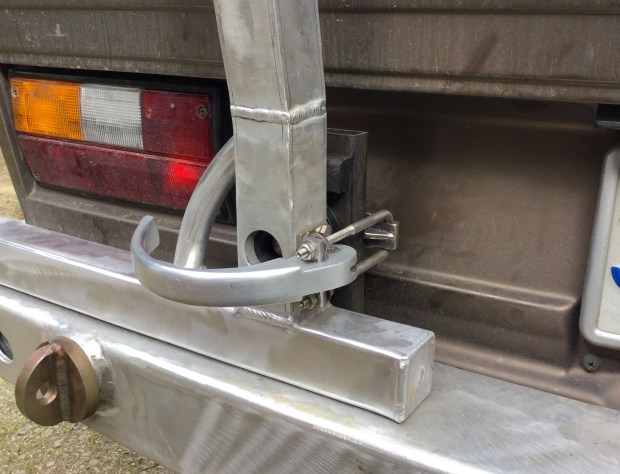
I needed to make a latch that would secure the swing away carrier tightly, but yet be reasonable easy and quick to use. I tried four designs, my designs, conclusively crappy designs. This, my fifth attempt would be my last, next stop would be buying a de staco type draw latch.
I still had the Delrin cone and socket arrangement that was for my first design. The cone and socket does work well to locate the arm to the steel back stop that is welded to the bumper subframe. So I kept that and made a draw latch.
Reinventing the wheel.
But I learned a bit while doing it. It’s interesting how the effective lever arm changes on an offset hole draw mechanism like this. The pivot points, effective distance, changes from about 3/4″ when draw hole ninety degrees from the pivot to zero when draw pivot are inline. This gives great mechanical advantage when closing the latch, and the over centre part helps keep the latch closed.
I occurs to me that describing all this is a bit of a mug’s game. Maybe some of you think that I should have bought a latch and be done with it, a very valid point. Some of you are probably not very interested in some damn latch – just show the finished project, an equally valid point. And some might think I’m boasting about making the darned thing. It’s that last suggestion that bothers me.
You could make the case that writing any kind of blog is a tad egotistical. But believe me, the best thing about writing this kind of blog is finding out that you might have helped or at least nudged someone in the right direction.
Ok, enough blether.
I made the handle from 1″ thick aluminum. Part of some offcuts from the water jet guy. Had a nice curve and I continued the curve ti make the working end. Drilled holes for the pivots, slotted the end for the fixed pIvot ( that attached to a little bracket that was made from some 1/8″ thick stainless, mounted to the carrier with 1/4-20 bolts, helicoil inserts in the carrier).
I turned and milled a bit of stainless to hold the bail ( the moving pivot) and the bail is a bit of 5/16″ stainless rod that I bent into a U shape and threaded the ends.
I used some 1/8″ stainless plate and 1/4″ rod to make the little catch on the backstop that hooks onto the bail.
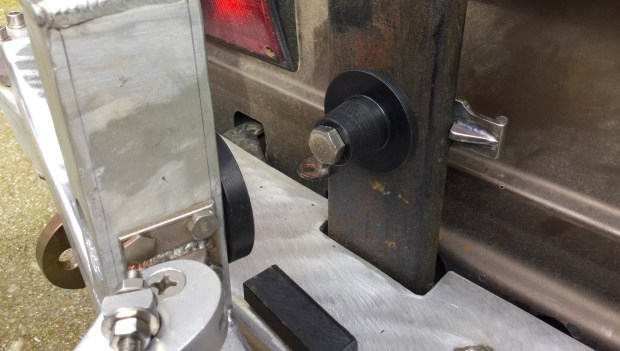
I was worried that there wouldn’t be enough give in the mechanism, so I stuck in some hard rubber washers under the nuts on the bail. You can see them in the first two pics. I found that there was enough flex in the backstop latch that the washers weren’t needed.
Ok, the handle and fixed pivot.


And mounted on the bumper. 
See how I have to use some spacers to match the thIckness of the cone and socket bases to give the upright of the carrier a bigger surface to pull against? I’ll try and make a nicer version of the spacers, maybe one piece.
I have to make a plug for that hole. Also a fair bit of grinding and sanding to be done before painting. But hey, I’m making some headway.
Oh, and I have yet to weld on some sort of tab thing on the end of the handle so I can pin it to that curved tube as a safety or even a lock.
