Archive for June, 2016
Vanagon – Propex heater part two
Posted by albell in vanagon, vanagon mods on June 27, 2016
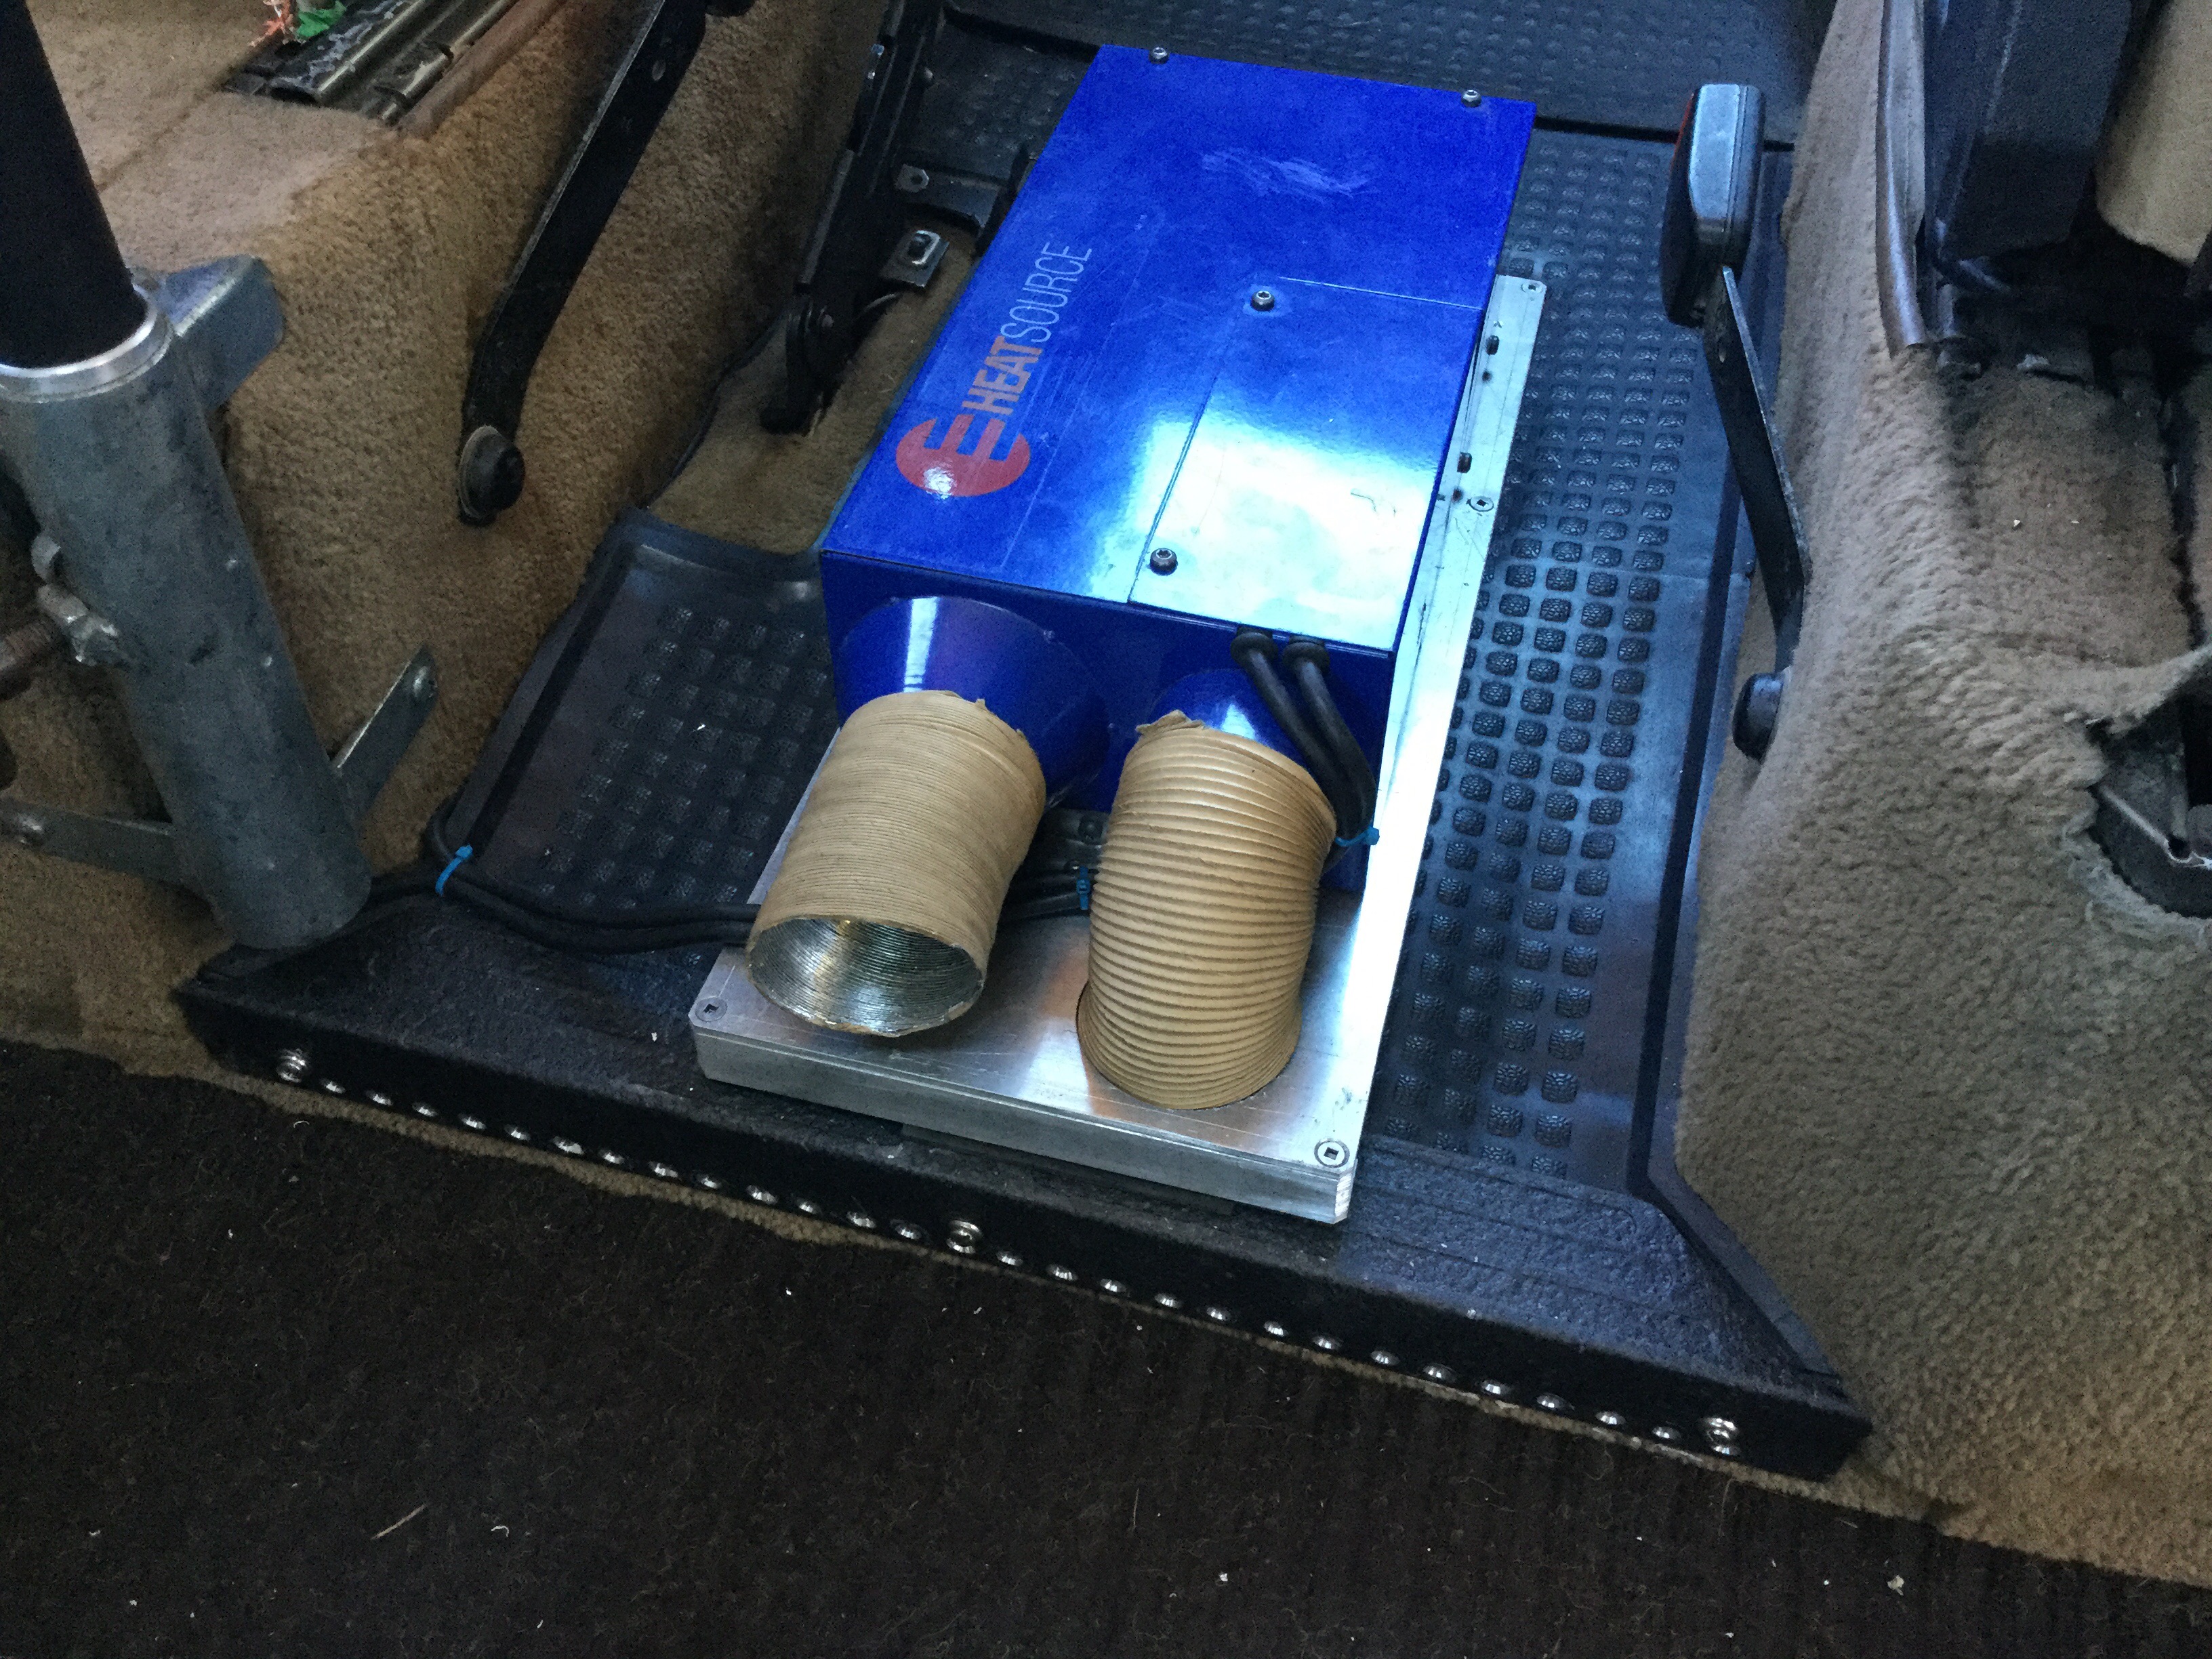
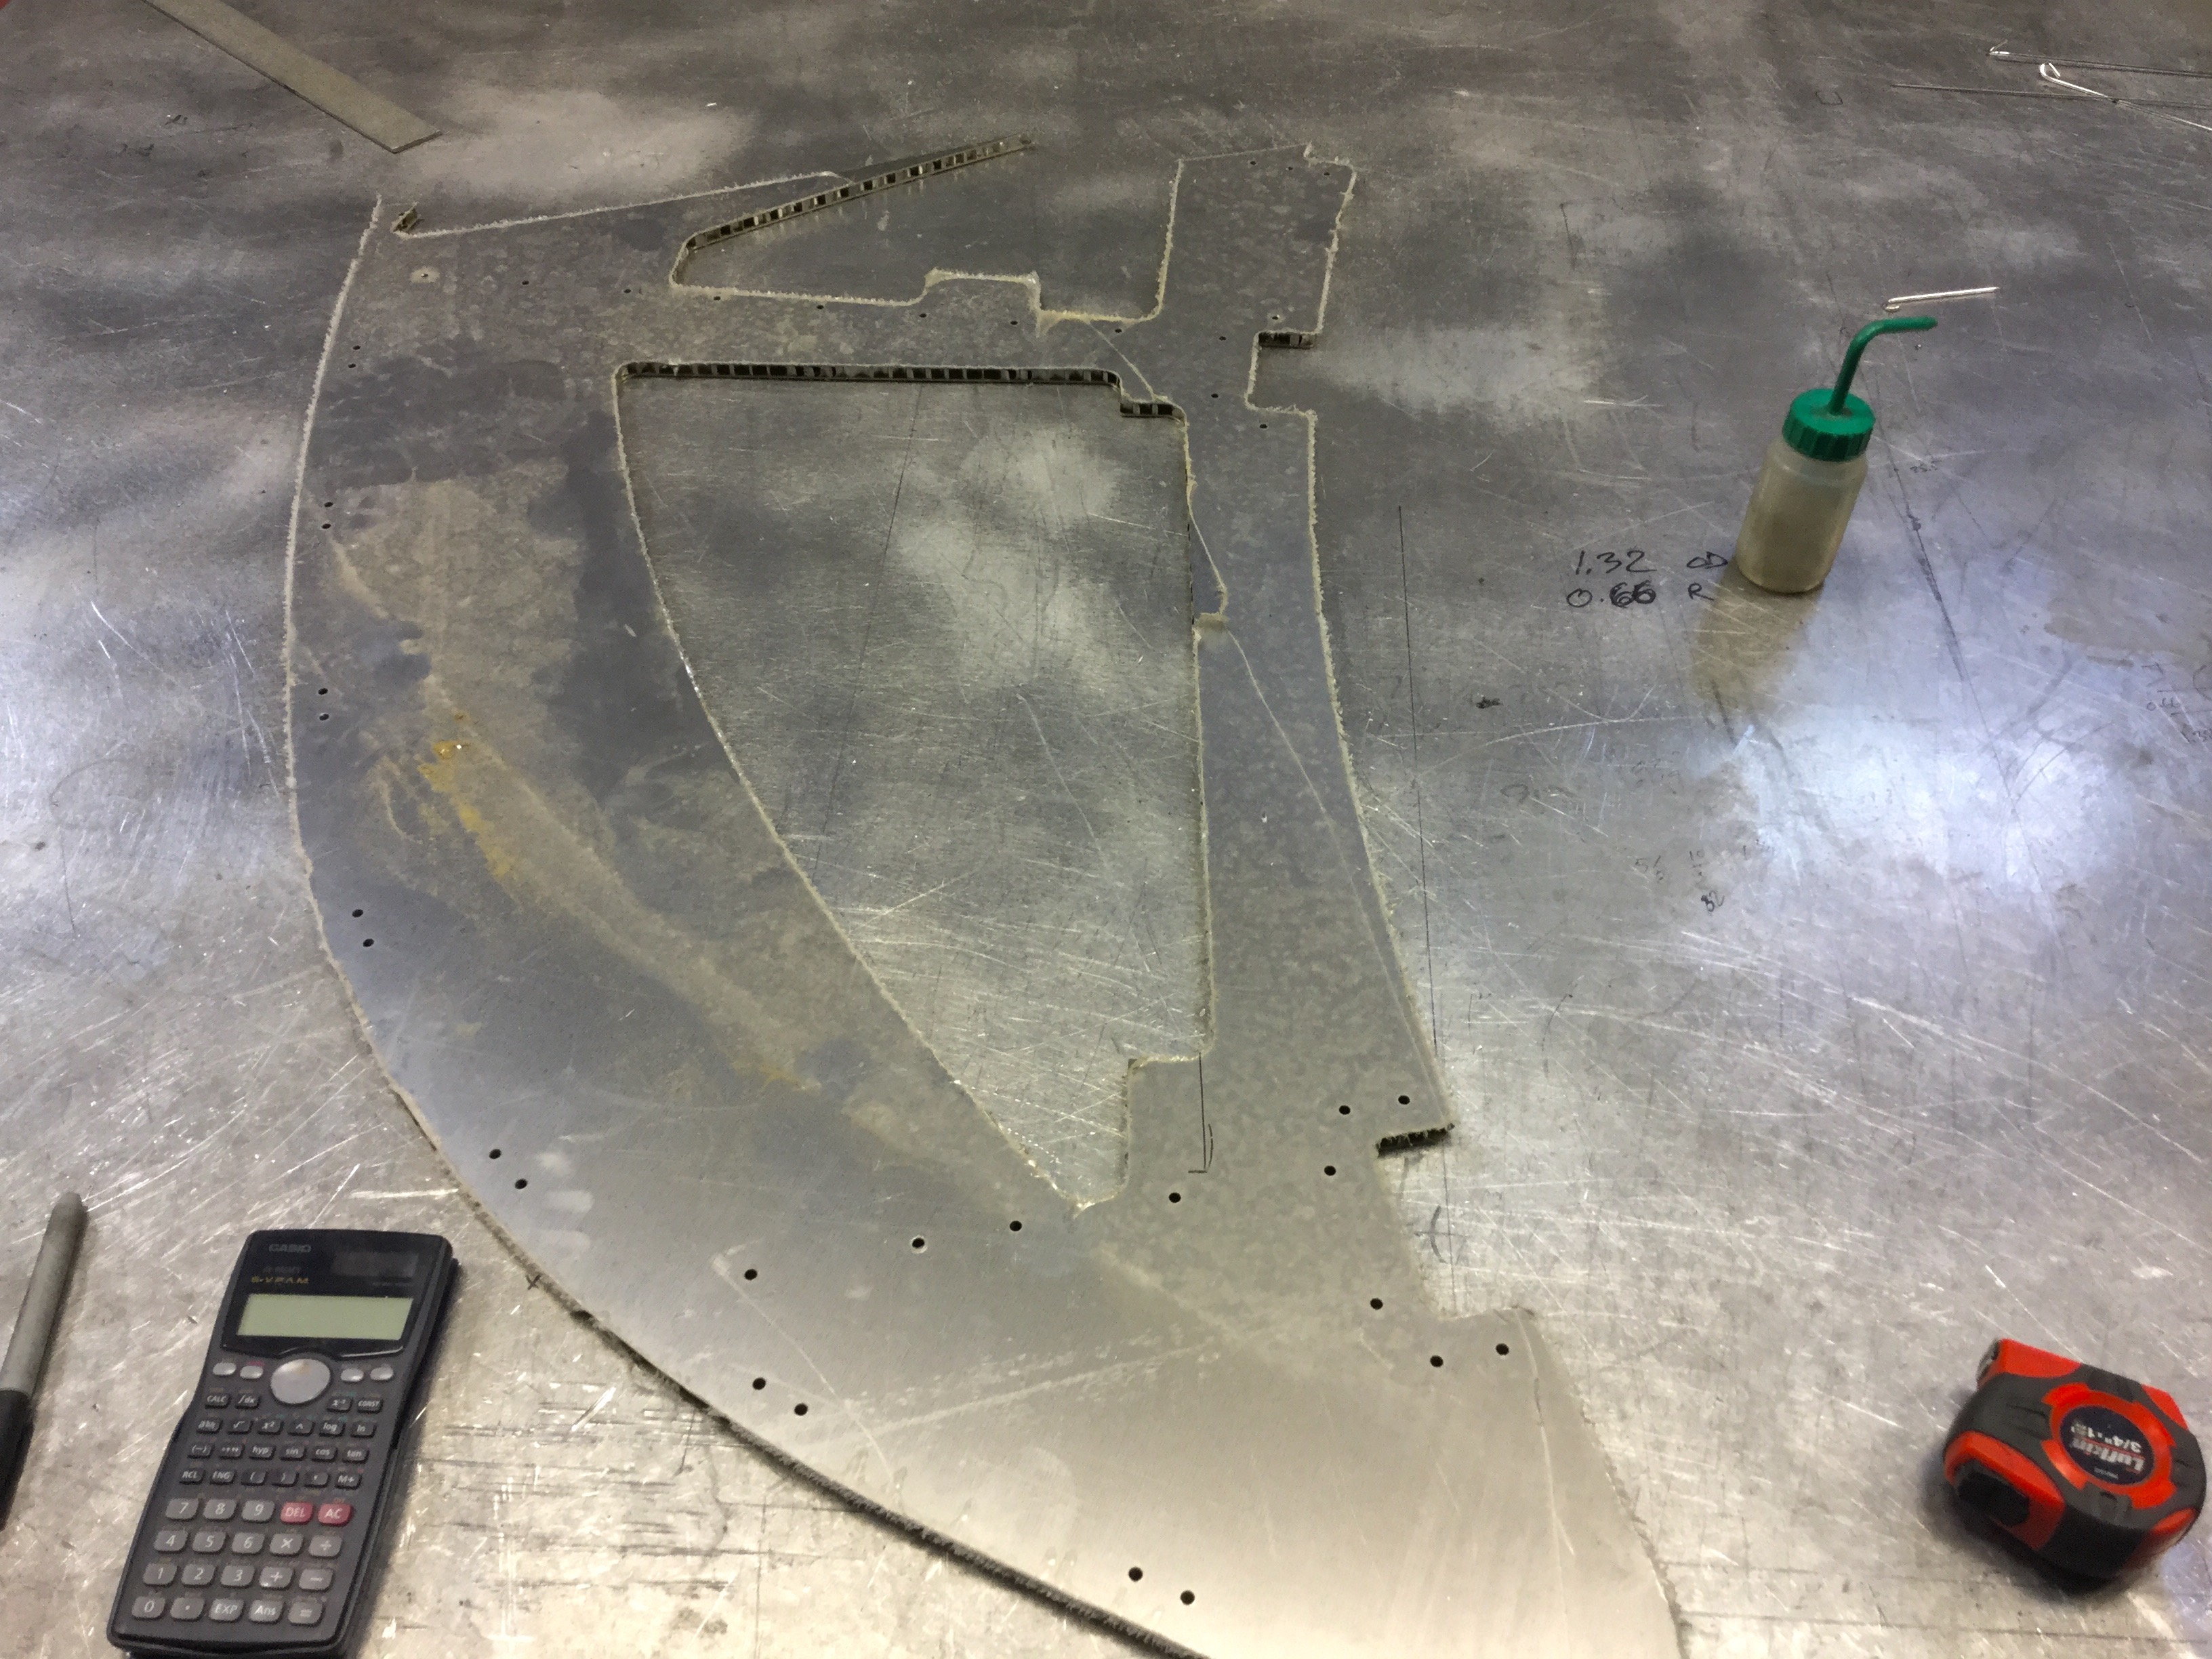
I mentioned before that Simon had installed his heater inside his between seats console. I was planning to do the same but I got sidetracked by another idea. I needed a box to enclose the heater, a barrier between the heater and the console. Once again the scraps of aluminum honeycomb material I got from Donovan at Western Edison popped up. I wanted a box that wild be stiff enough to take someone standing on it and the honeycomb was the obvious choice for stiff and light.
Here it is, just butt joints all round with a fillet of PL Premium polyurethane adhesive holding it all together. Some of the exposed honeycomb I filled with bondo. I scuff sanded it all over.

And then I must have had a mini stroke as I decided to try sticking on some old veneer I have had hanging around for years.

This is the first time I’ve tried veneering anything. Back in the day when I did woodworking as a hobby I was fully into oldtool, split, hew, and plane type of work. Thought that veneer was somehow dishonest. Oh the arrogance of youth.
The bit of veneer I had was not large enough to be able to match grain direction so it turned out to be a bit of a dog’s breakfast. And the corners and edges were not perfect. I hit the corners with sandpaper enough to let a thin line of aluminum show.

Mid century moderne? Late sixties early seventies British speaker style? Drunken Dieter Rams? You might have a better description 🙂
I attached a rare earth magnet to the inside of the box and that really helps to hold the box in place as it grips the heater. Heating air intake is drawn from through the mounting plate and in from the gaps at the rear most part of the plate. The floor slopes away so it turns out that the gap is pretty well equal to the air intake opening.
I could just use the heater as is, but then I would loose the console storage. So I decided to cover up my lovely creation (!) with the console. I took it apart and cut sections out of the cubbies, welded ( hot air and a screwdriver , yeah nasty) the cubby bases back in. Now the console fits down over the box, albeit with less cubby storage room.
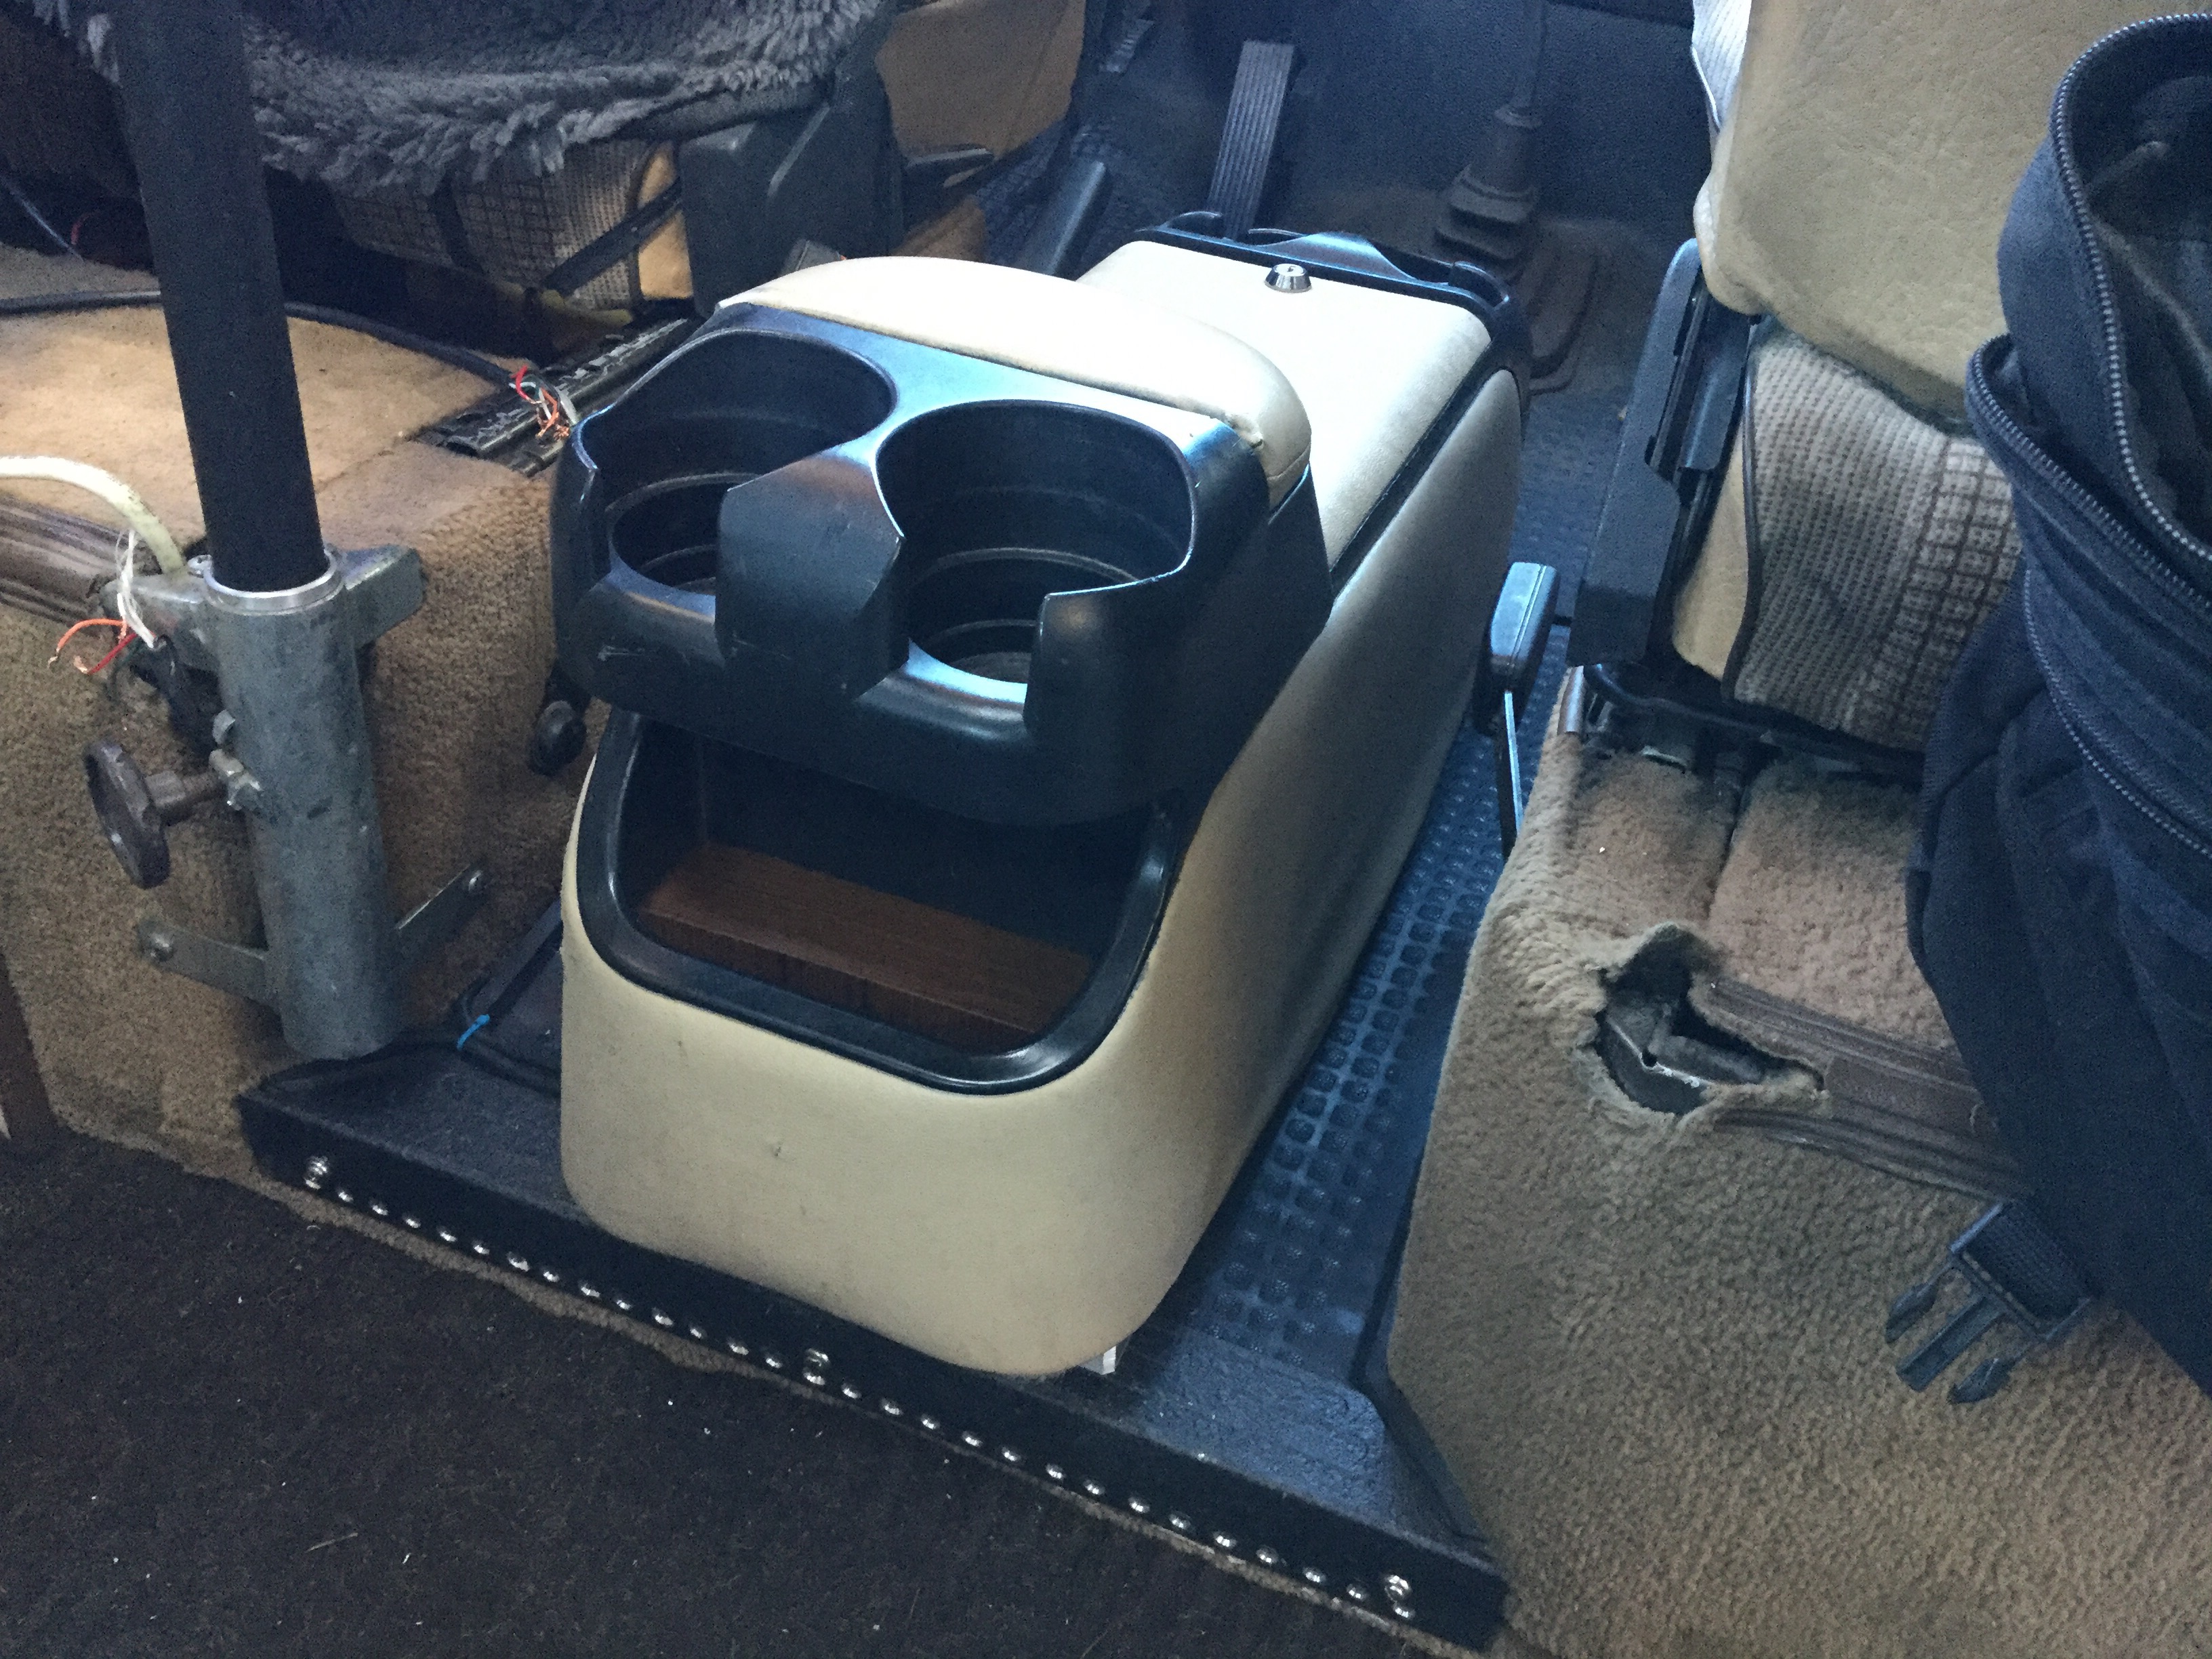

No, the hot air ain’t going to come up out of that opening. I’ll cut out the rear end of the console.
Oh, almost forgot about how the heater combustion air intake and exhaust lines are routed. It’s a bit of a pain to connect them up over the front diff, but the intake comes back down and is secured to frame rail near propane tank.
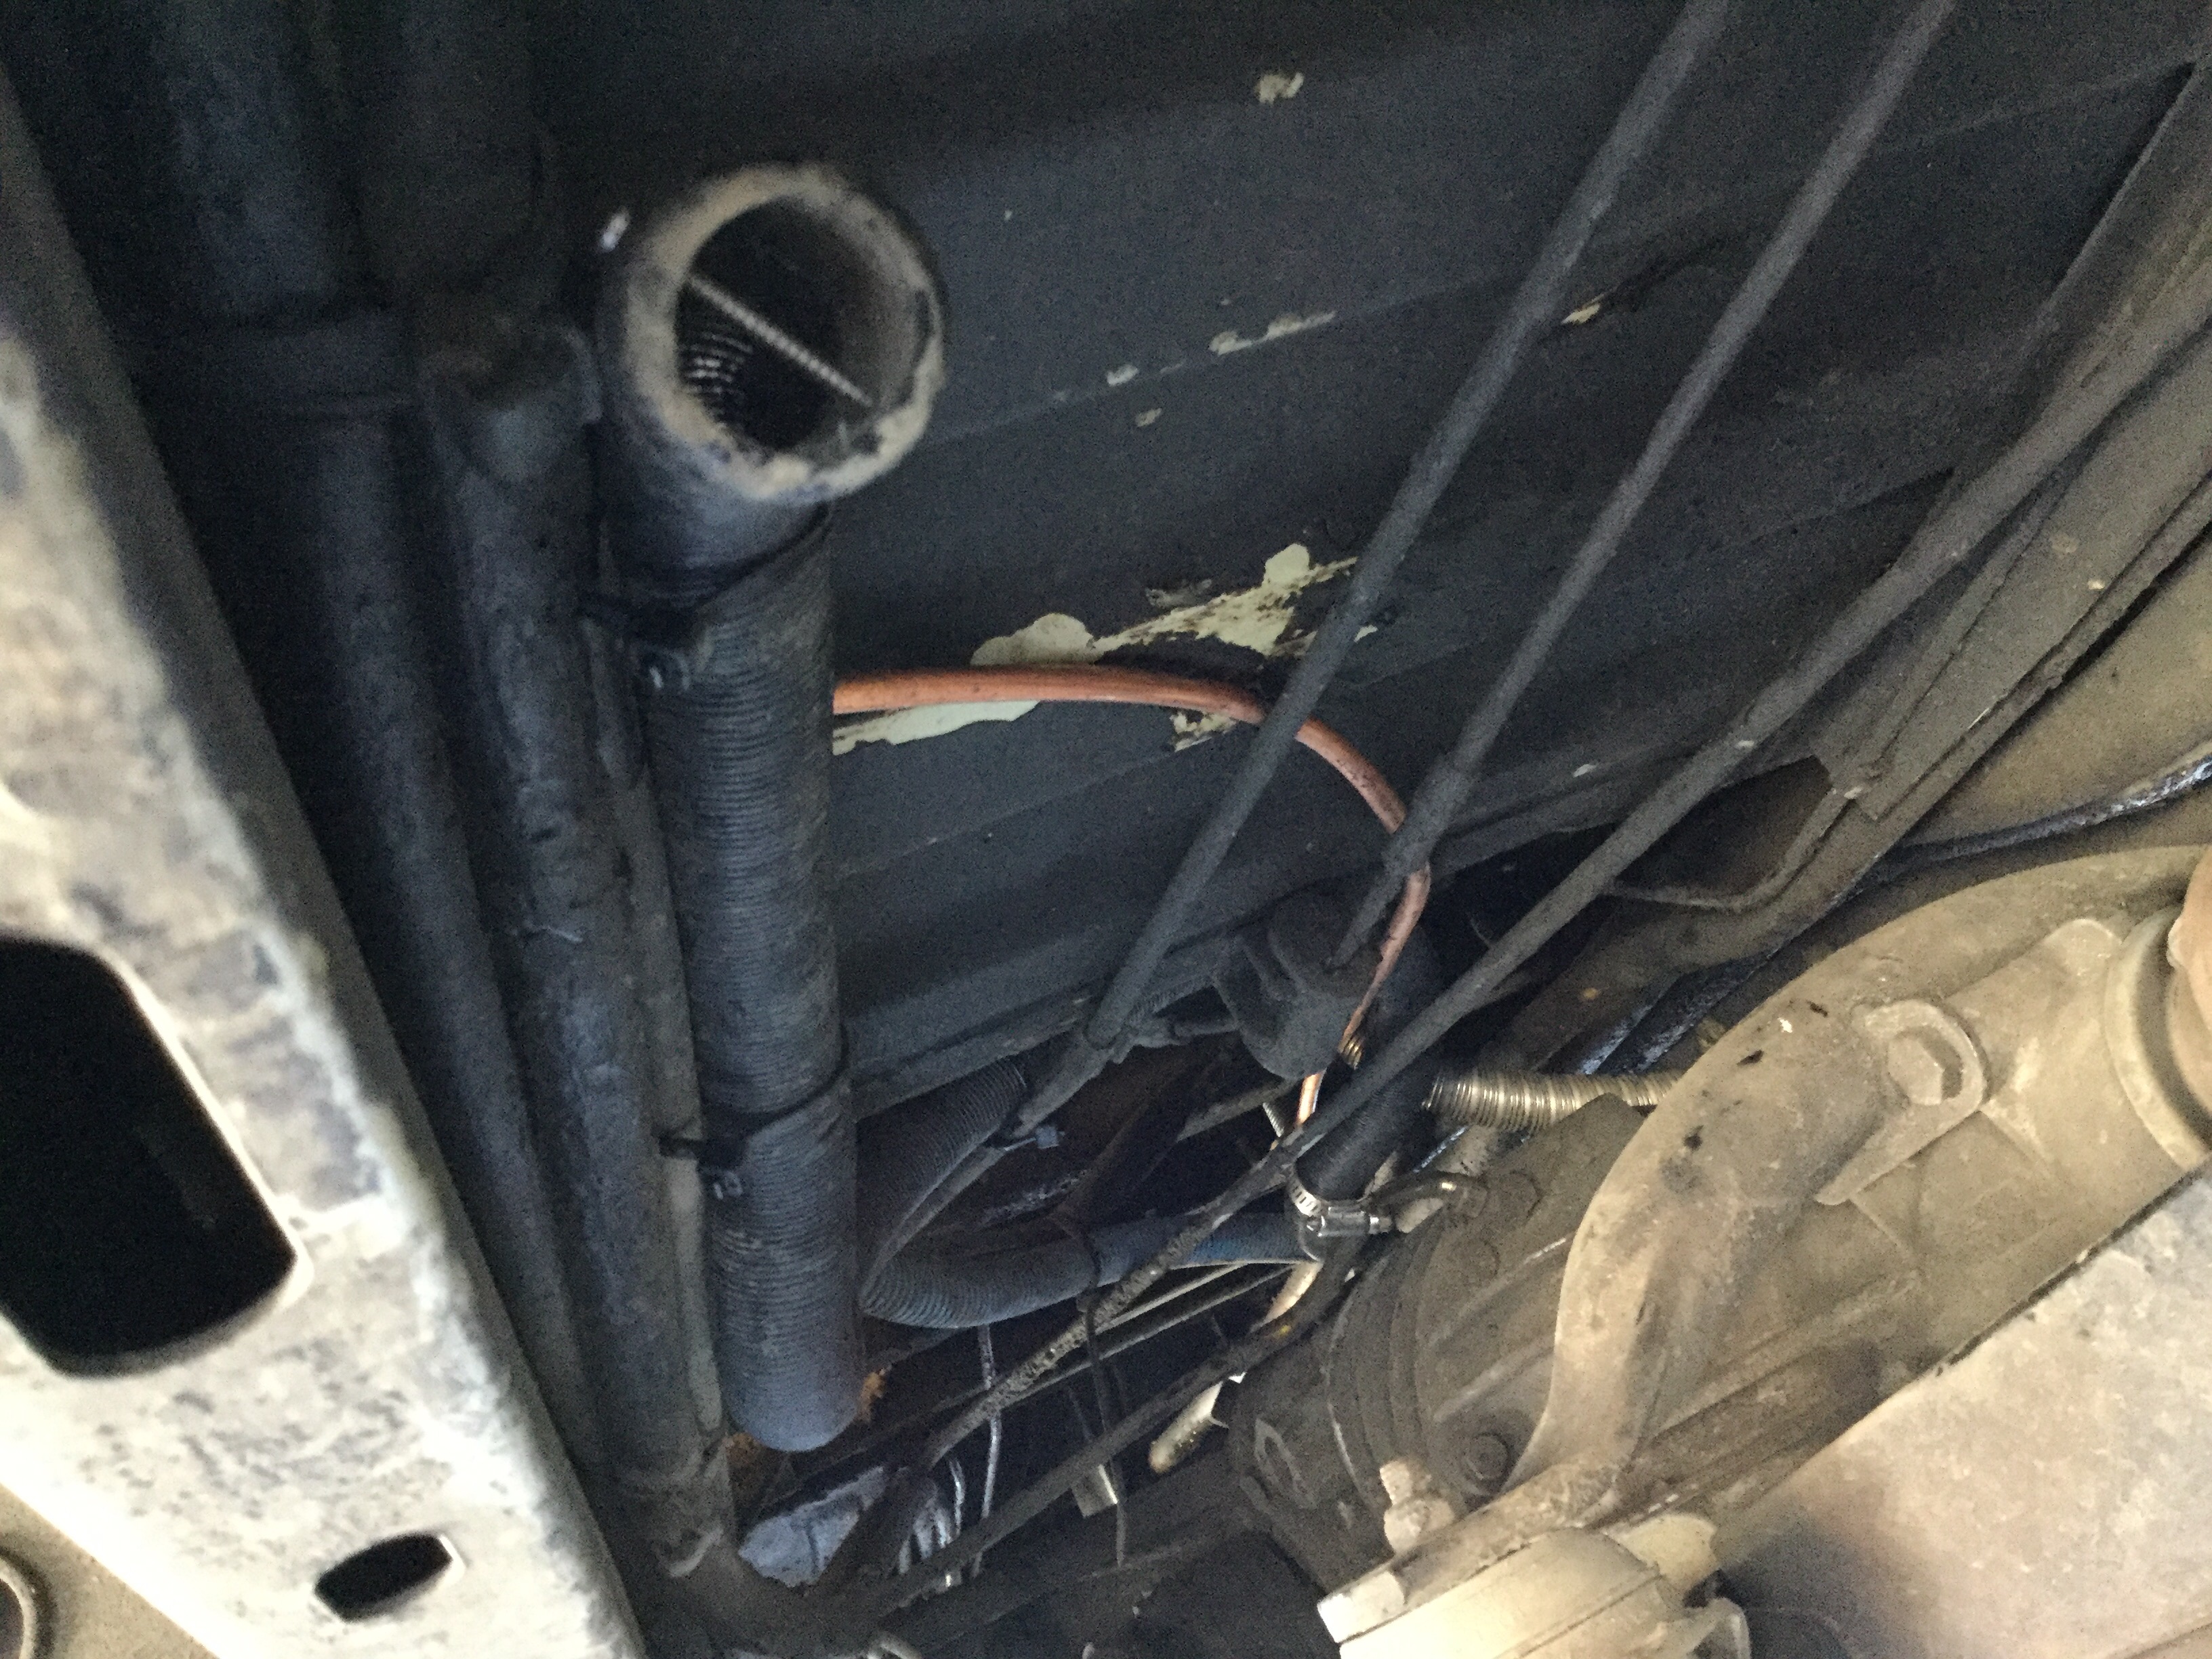
Hey you see the un-secured gear clamp on the black intake line? When I took the pic I hadn’t got that bugger forward and up into place.

And the exhaust line comes back down on the passenger side to end up at the forward edge of my lateral skid plate.
I’m finishing up the thermostat mounting and wiring, and doing the console rear end mod. That’s for the next post.
Vanagon – Propex heater install part 1
Posted by albell in Uncategorized on June 26, 2016
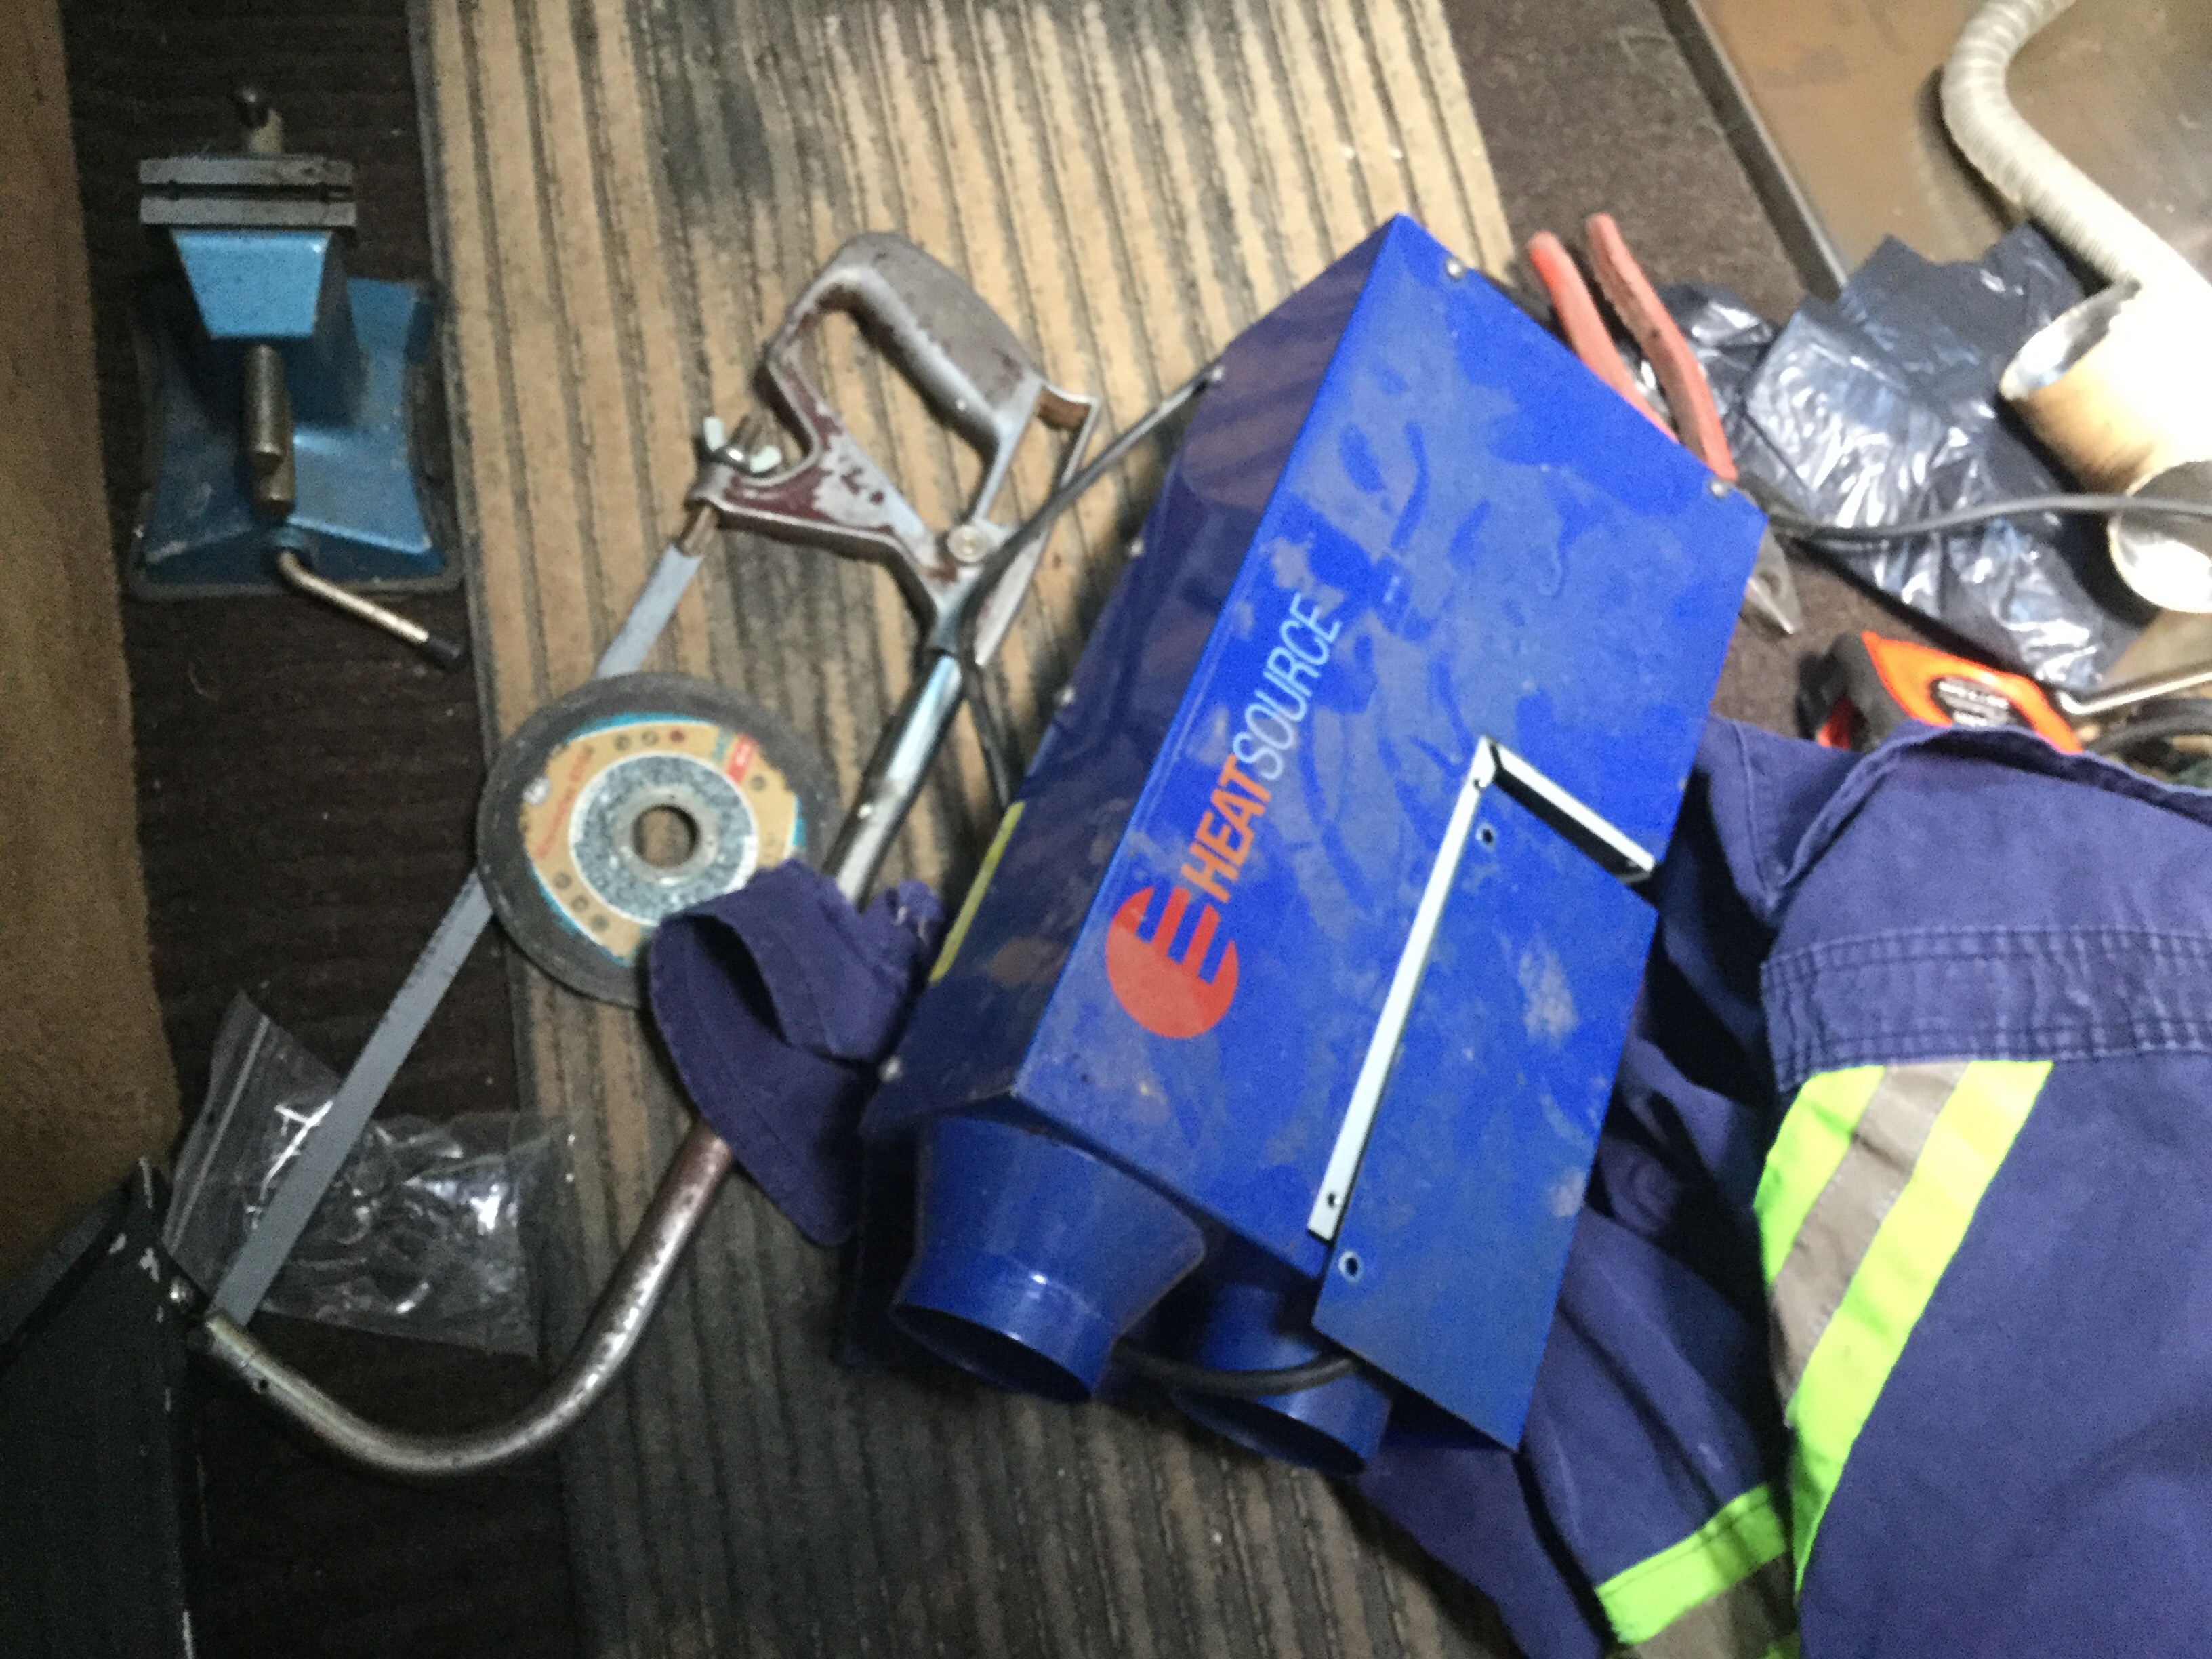
A couple of weeks ago I had time to visit the local auto wrecker. I found a new arrival, a late model Westy that had a engine fire. A sad sight, but on the upside the fire was pretty well limited to the very rear. Under the bench seat I found a Heat Source HS 2000 propane heater. It’s commonly referred to as a Propex heater and it was undamaged by the fire. Well the cable to the thermostat did get burned but everything else was ok. Settled on a price and I pulled the unit along with the intake and exhaust pipes and as much cable as I could get out.
A pic of it in the van, taken so I could send it to Simon and do some crowing.
Simon has the same unit and we mounted his between the front seats, with a hollowed out console over it. It’s worked out very well for him and after a lot of waffling on my part I decided to do more or less the same. Does it go without saying that this install location only works with syncros? The gas tank on 2wd Vanagons precludes this option.
I set the heater up on the bench, supplied power and propane, but no joy. Deader than a fart. I mentioned that the thermostat cable was damaged by the fire, I had cut out the bad part and spliced the wires. But the unit was dead none the less. I emailed Karl at westyventure.com and he kindly, and promptly told me to check out a fuse on the heater unit circuit board. It’s a well disguised fuse and indeed he was right, it was blown. We both agreed that the fire damaged thermostat cable was the cause. I jumped the fuse and the heater fired up.
I ordered some fuses from digikey and they came the next day ( amazing ) and all was well.
Next step was to assemble the parts needed for the gas line connection. The heater came with a 1/4″ compression fitting elbow. It’s 1/4 BSPT into the unit and what I discovered that there are various compression fitting sizes possible for the other end of the elbow. As I said, I had 1/4″, but it could have been 5/16″, 8mm, or even 3/8″. Anyway, I bought some 1/4″ soft copper tubing, a four way connector ( 4 by 3/8 NPT female) , a 3/8″ close nipple and a 3/8″ NPT X 1/4″ compression elbow.
Yes it’s confusing and I don’t think I can say it any more clearly.
Ok, pic of the propane tank end with the new fittings in place.
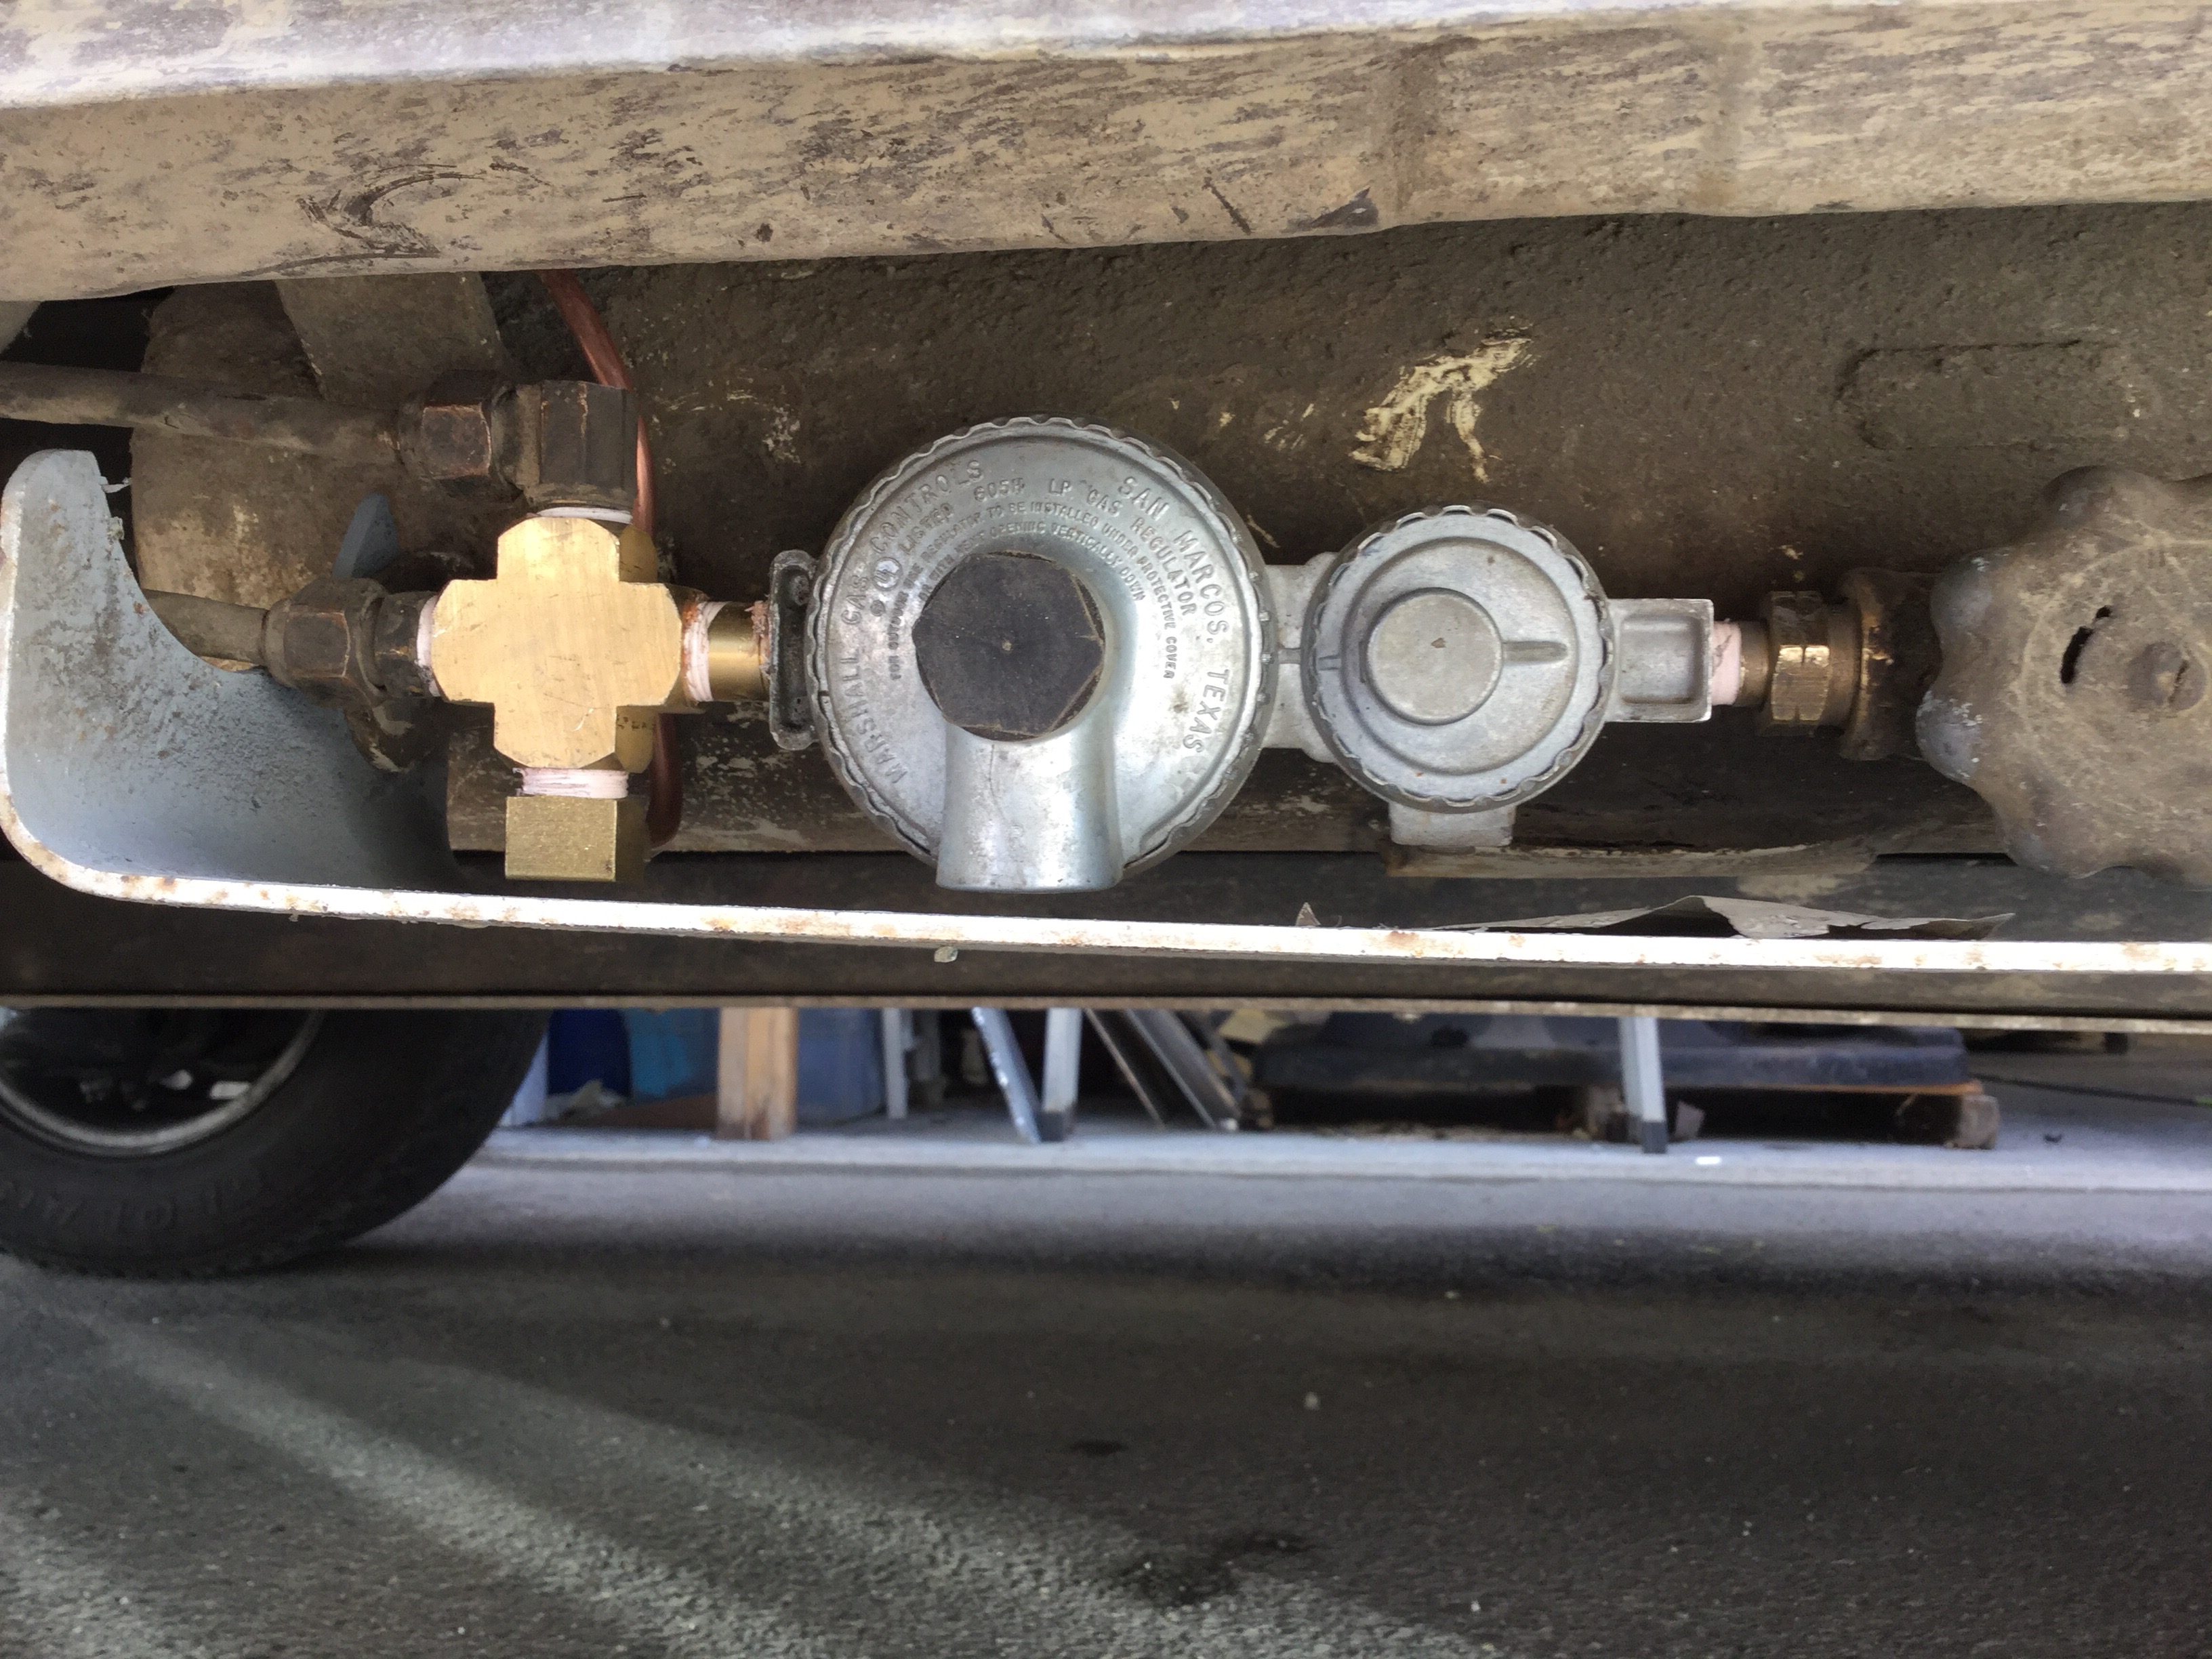
So, you see the new four way connected by the short nipple to the regulator. It replaces the stock three way. The stock plumbing to the stove and fridge connects the the four way pretty well in the same orientation they did with the three way. The new elbow barely makes it at the bottom of the 4 way connector. You might be able to see the copper line running vertically behind the 4 way.
I led the copper up to the floor then between floor and fram rail. That’s the sink drain there. The 1/4″ copper makes it in that tight gap. I don’t think anything larger would.
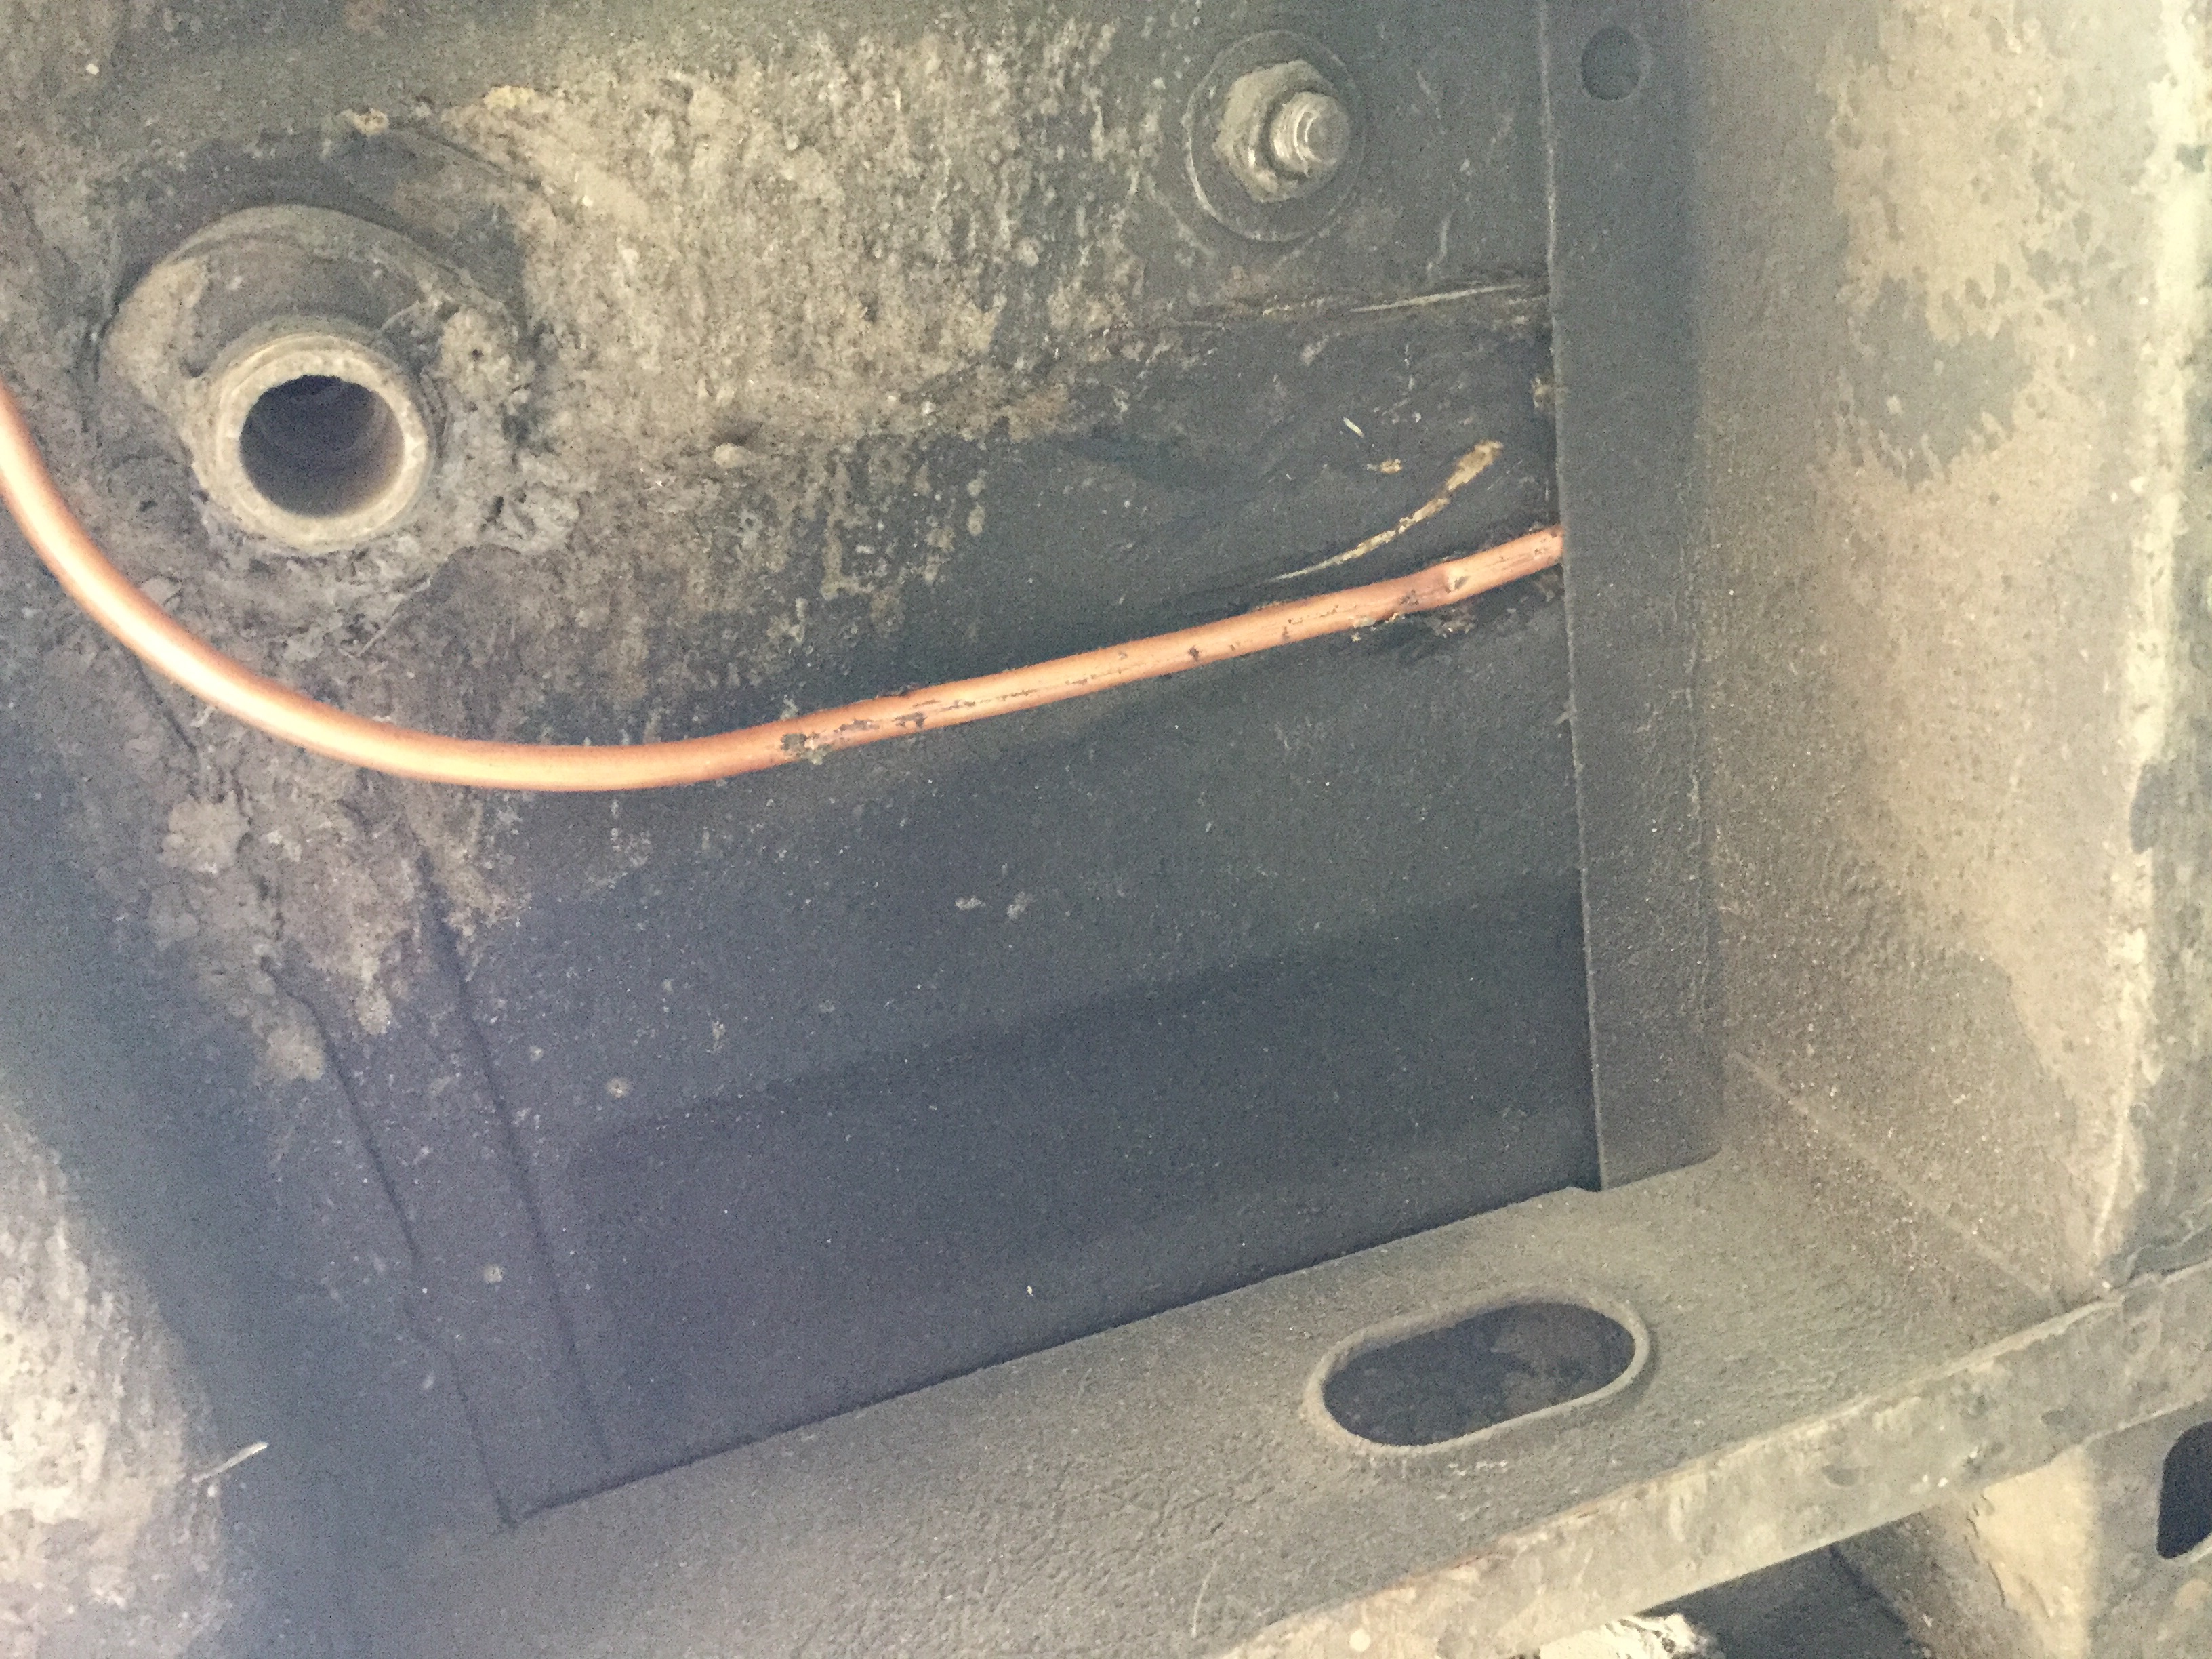
Them it runs up forward.

Yup, to reach the area above the front diff and below the passage way between the front seats. Used my magic hammer to make the holes.

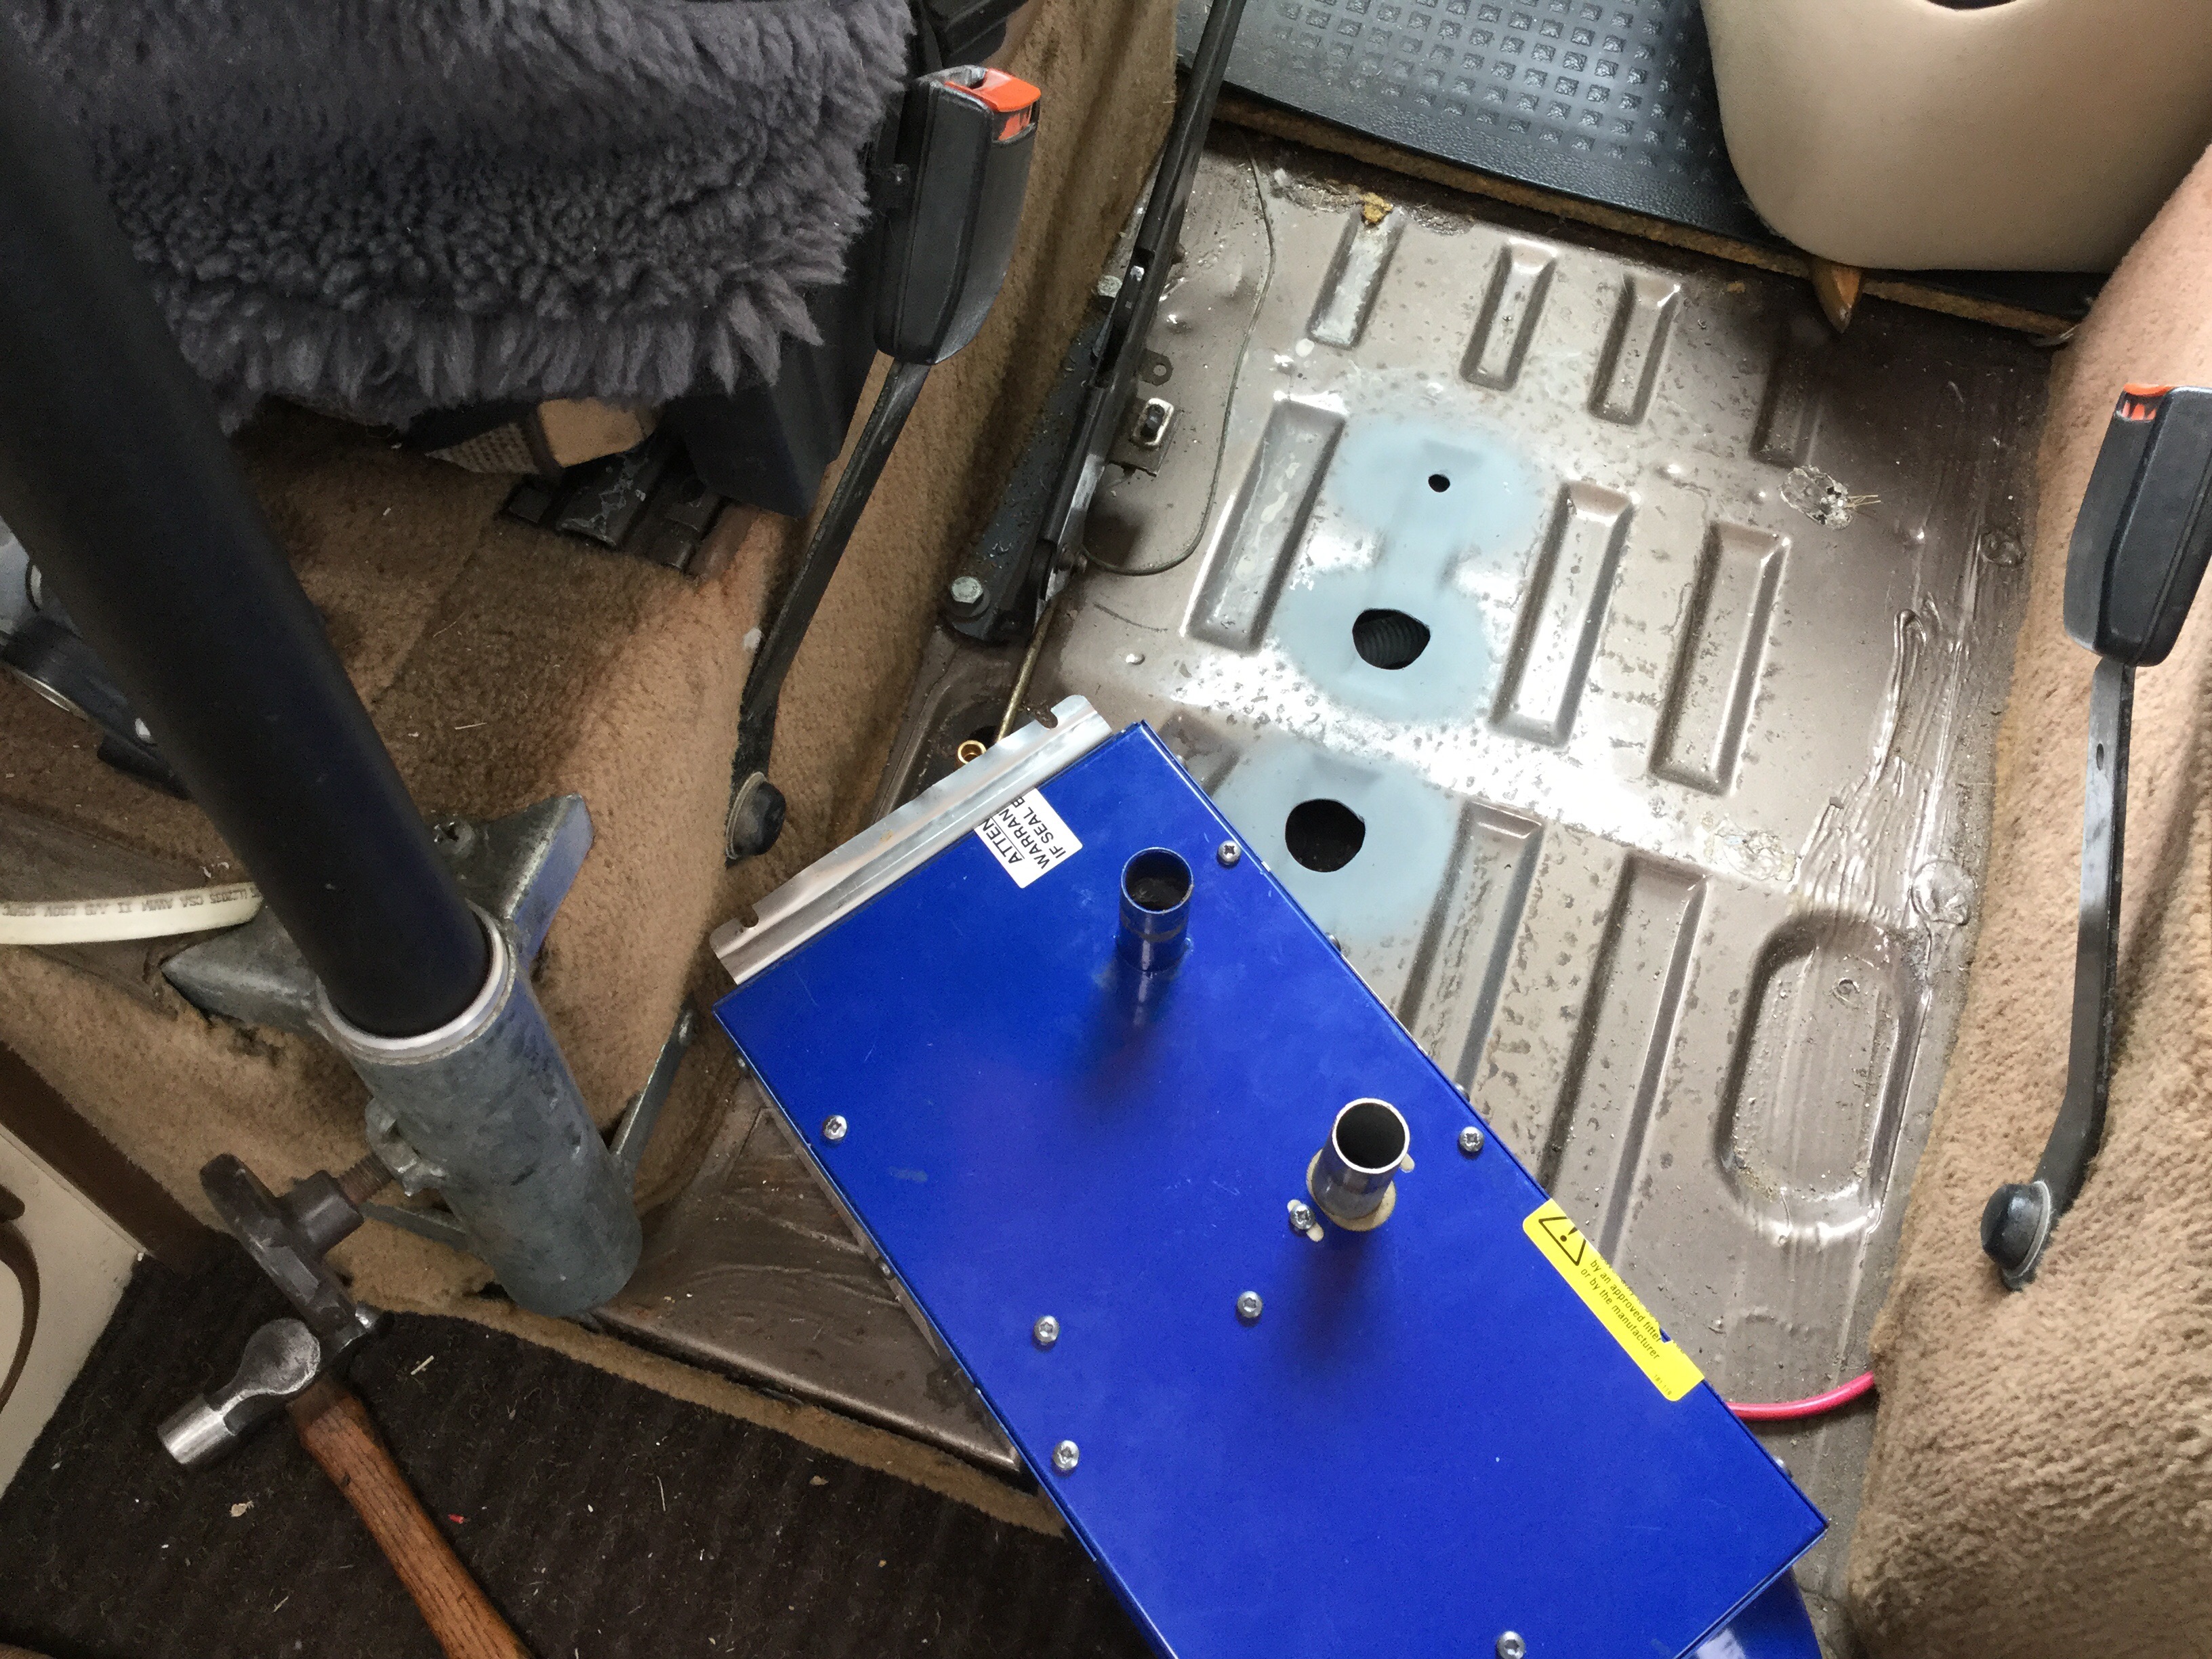
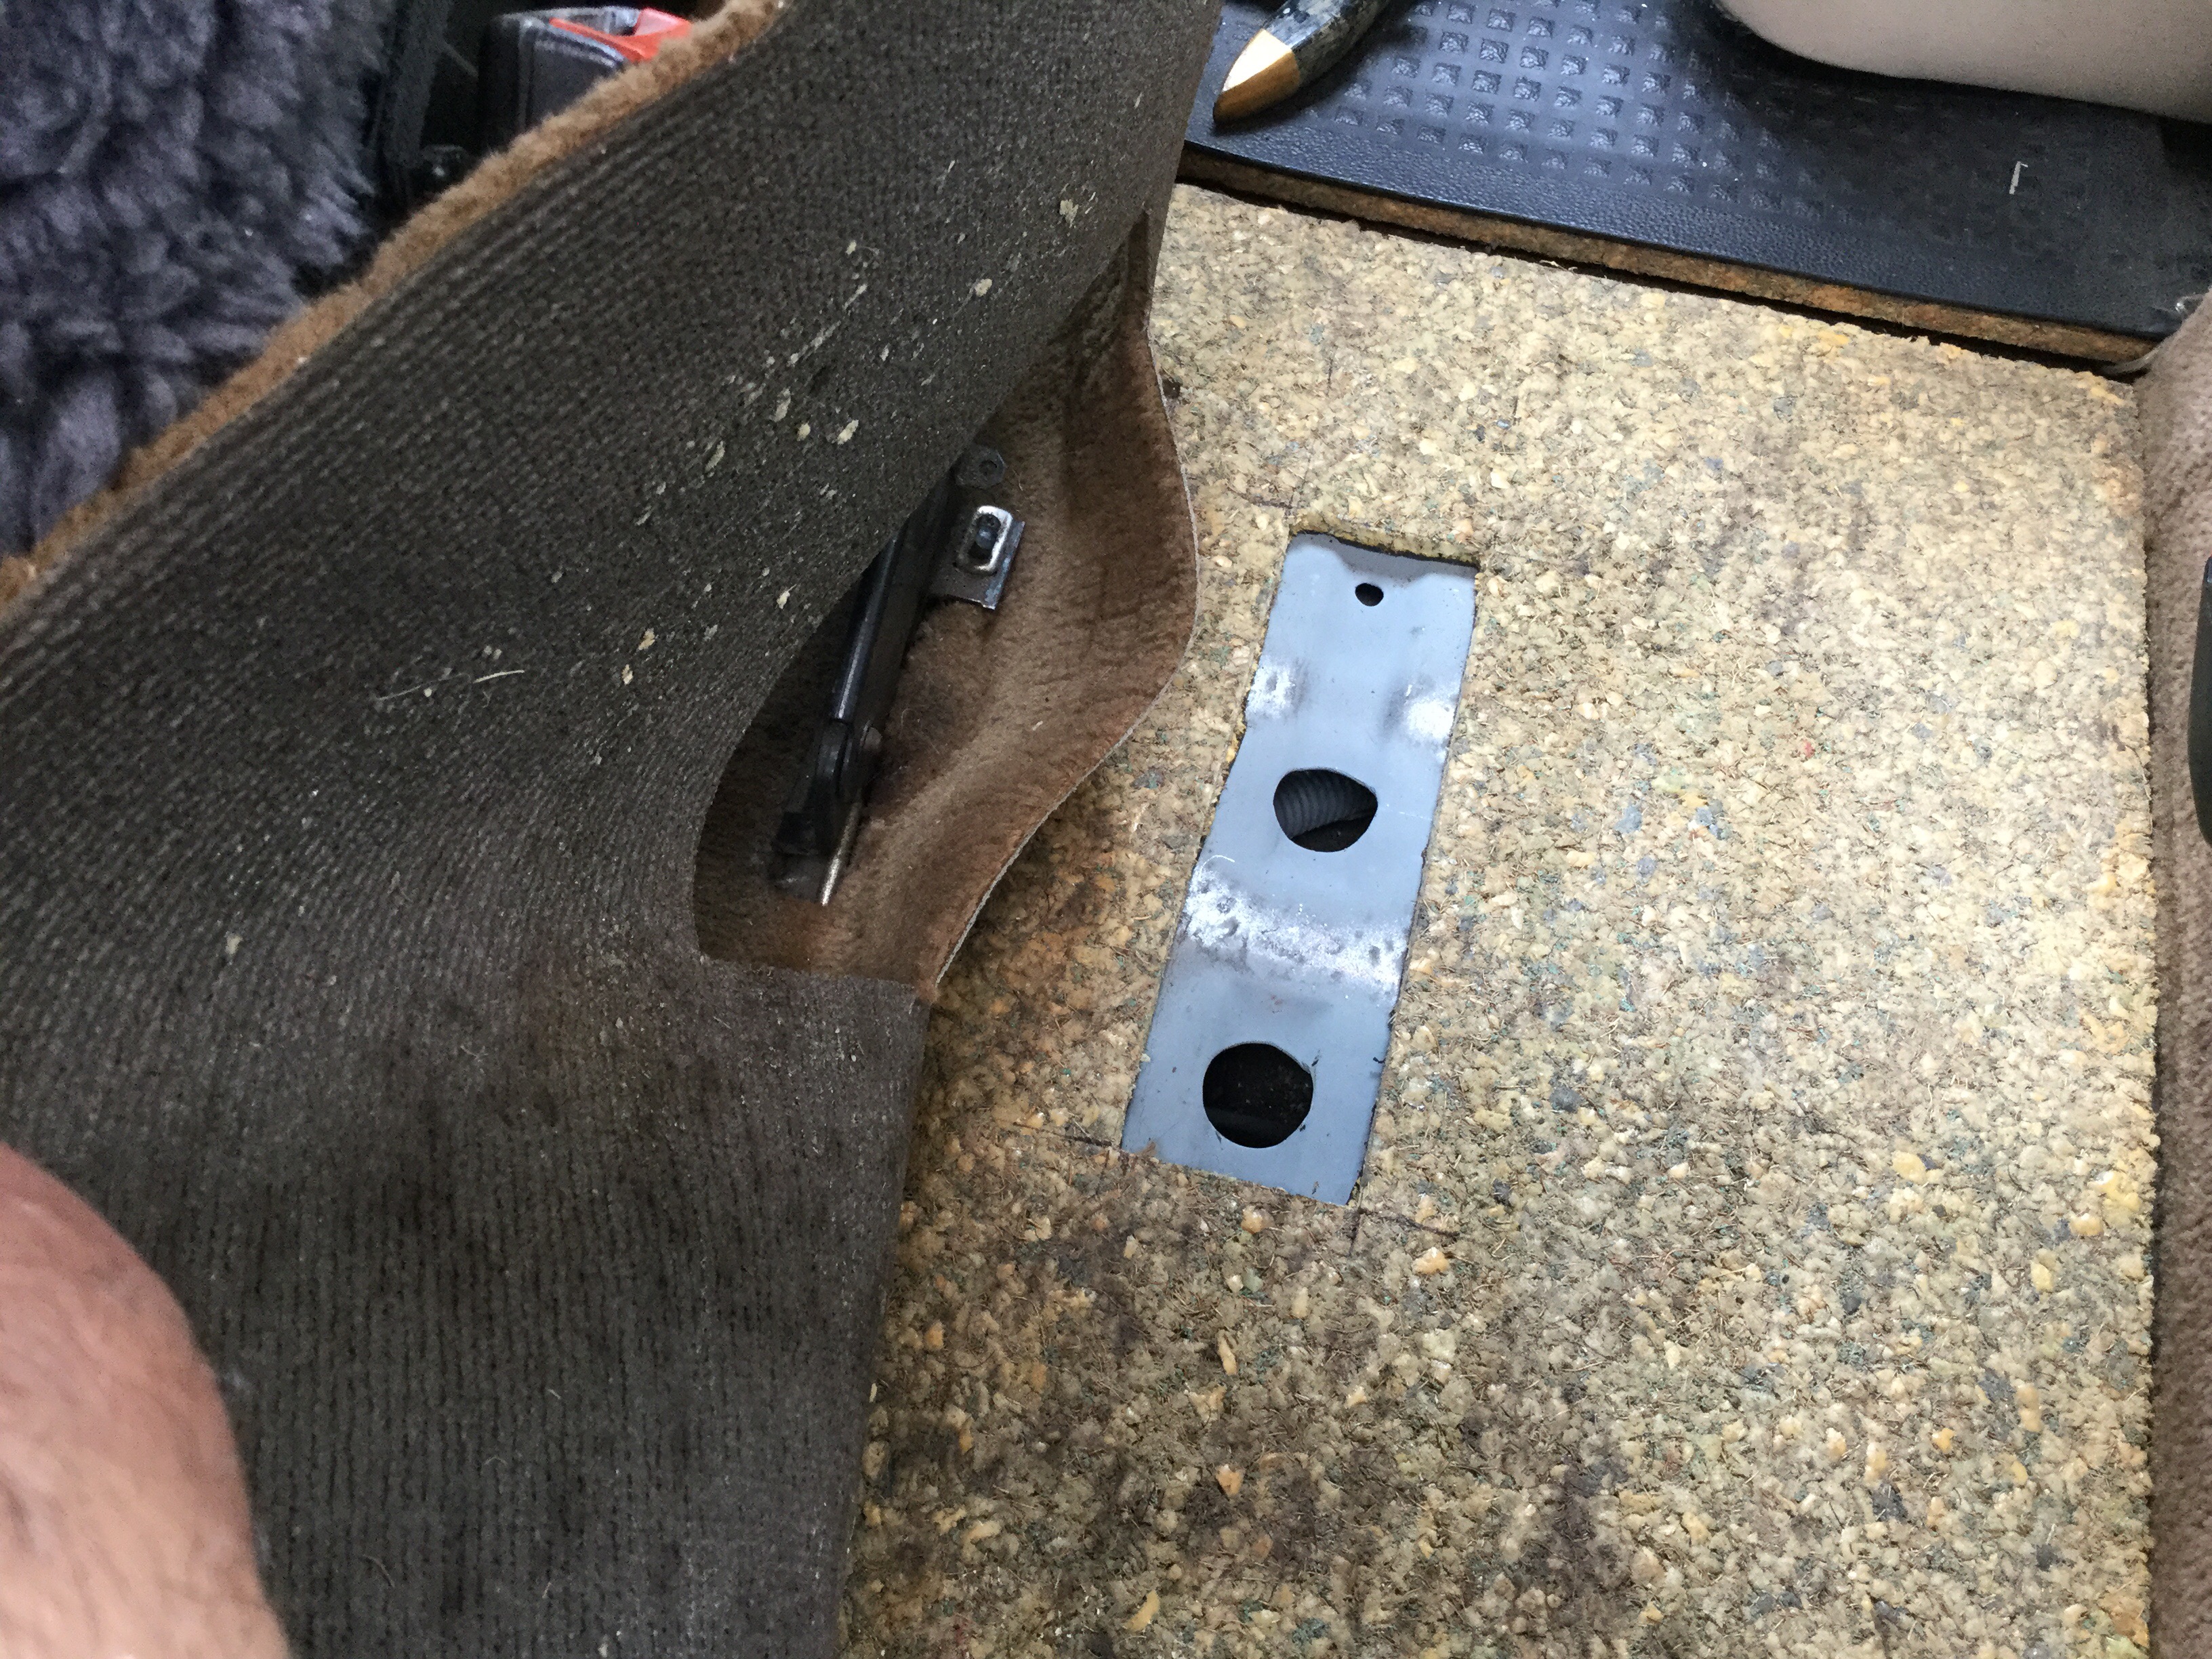
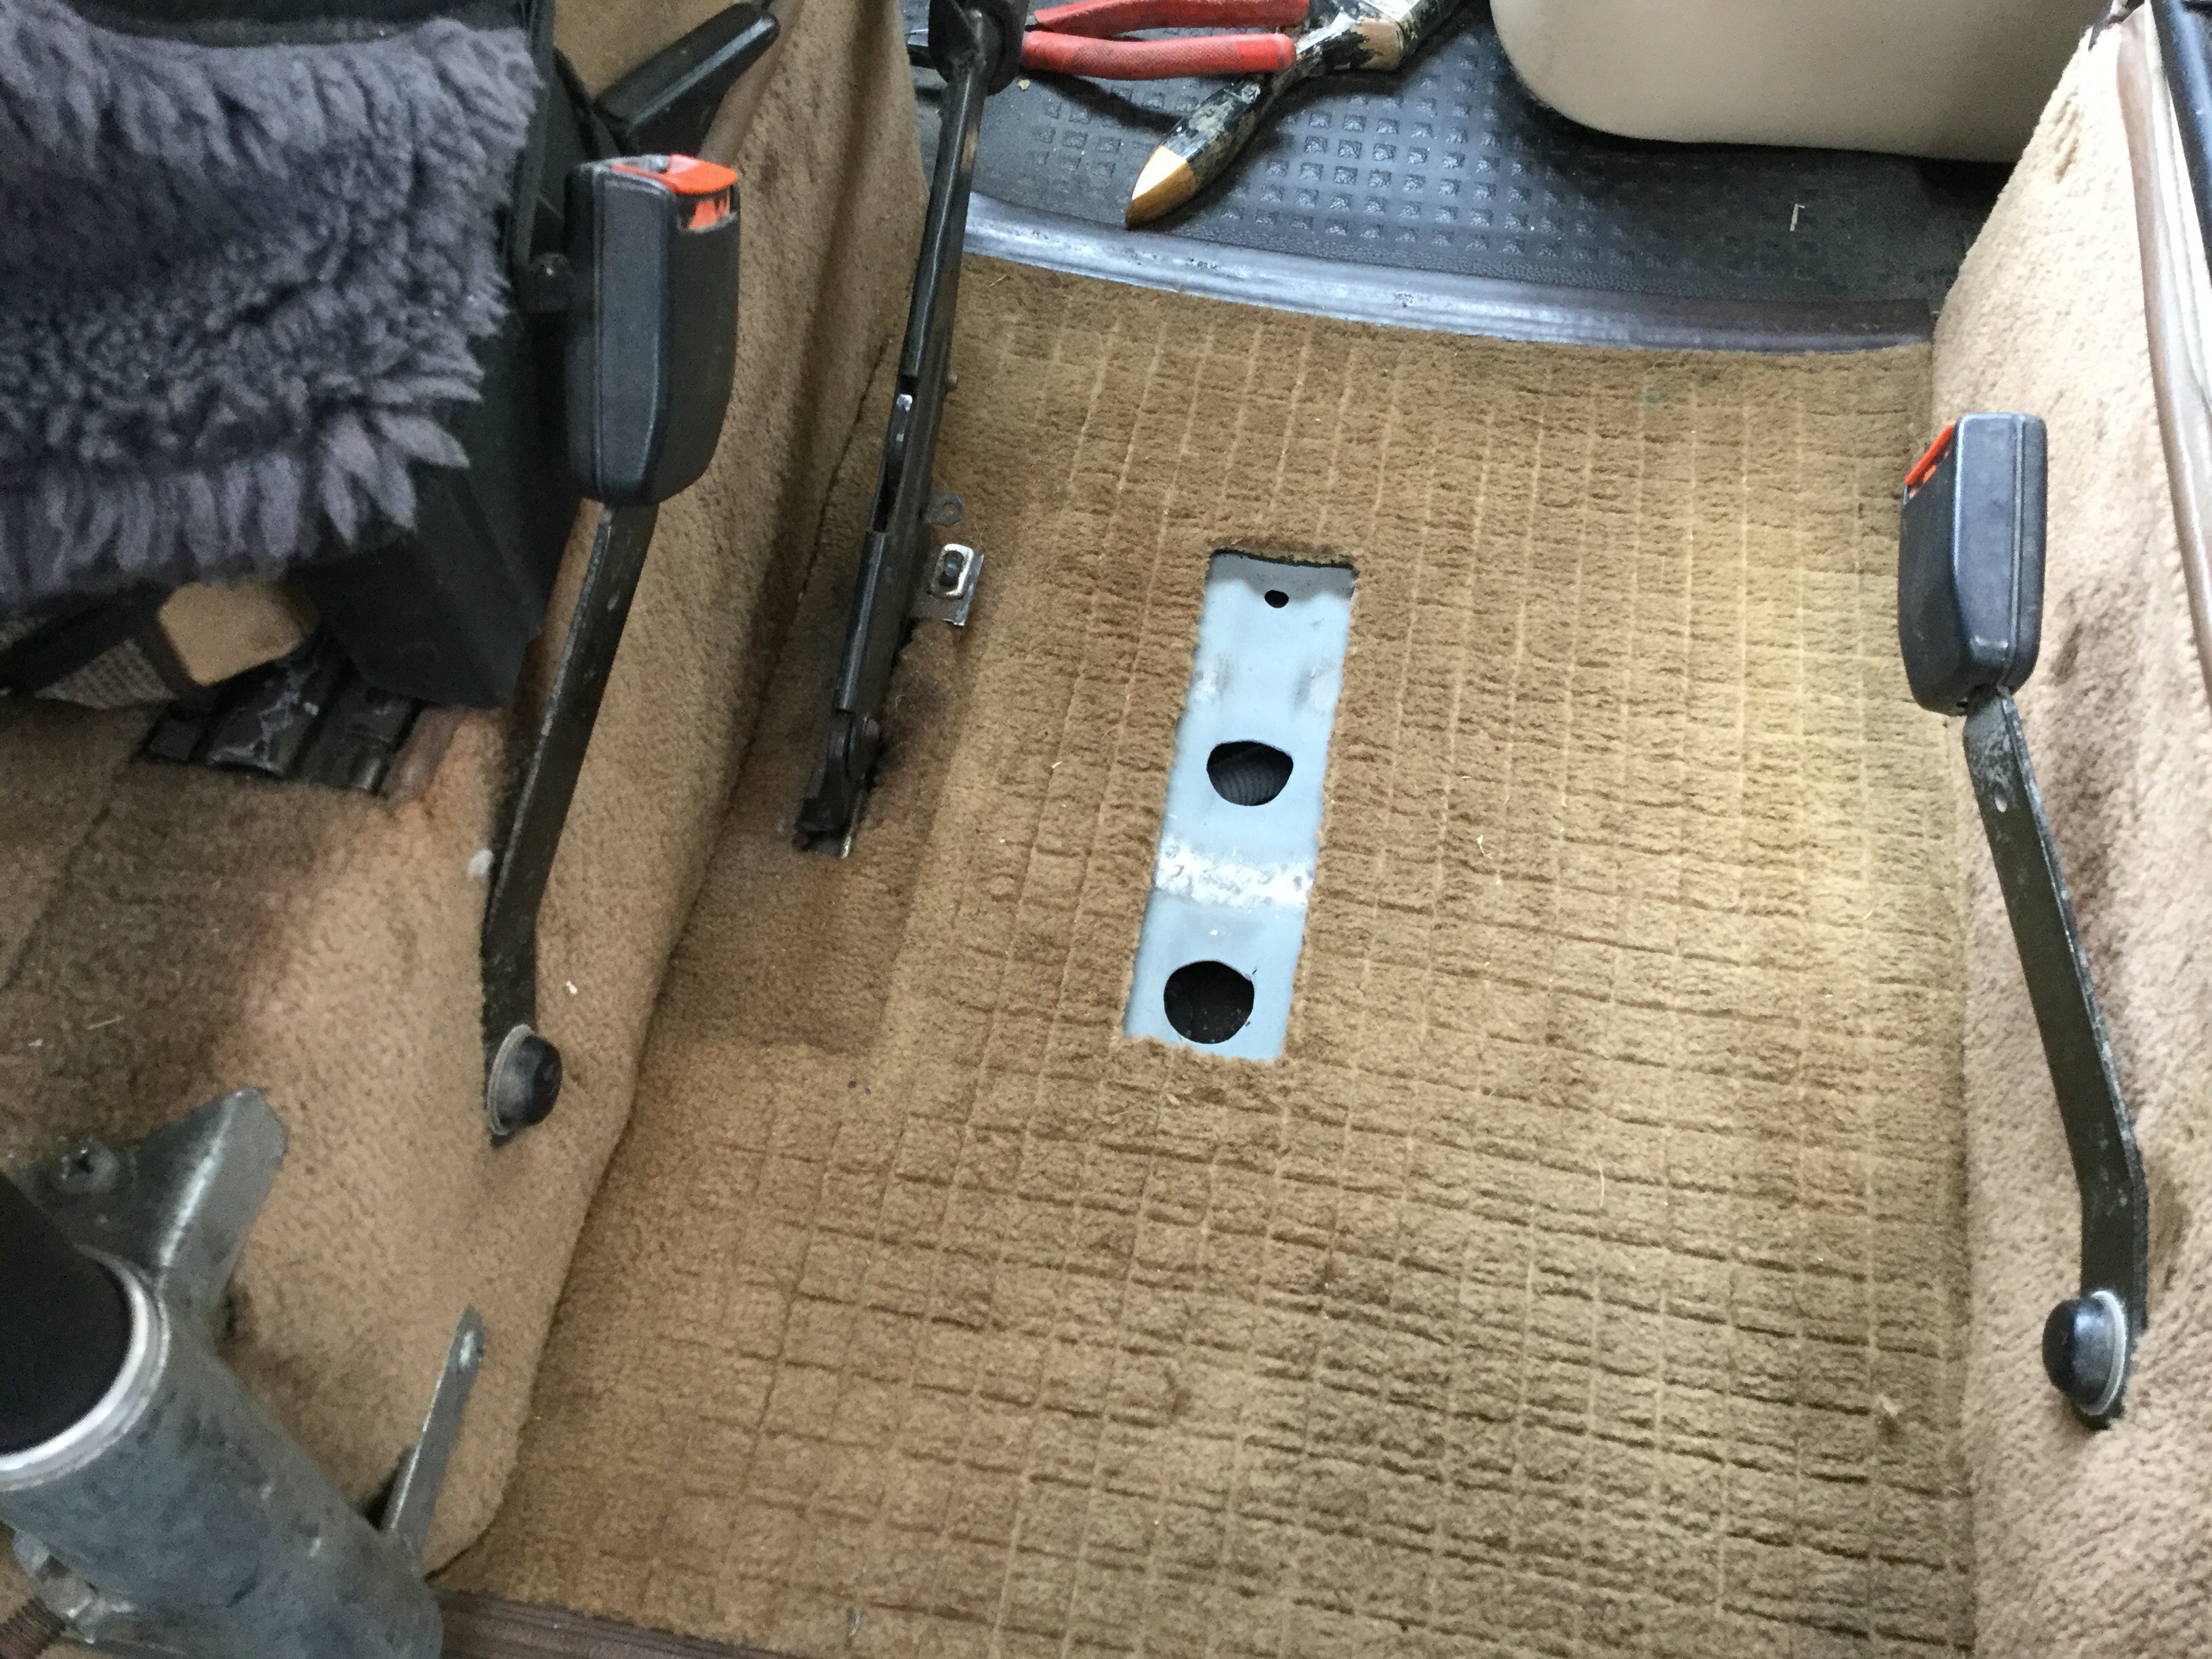
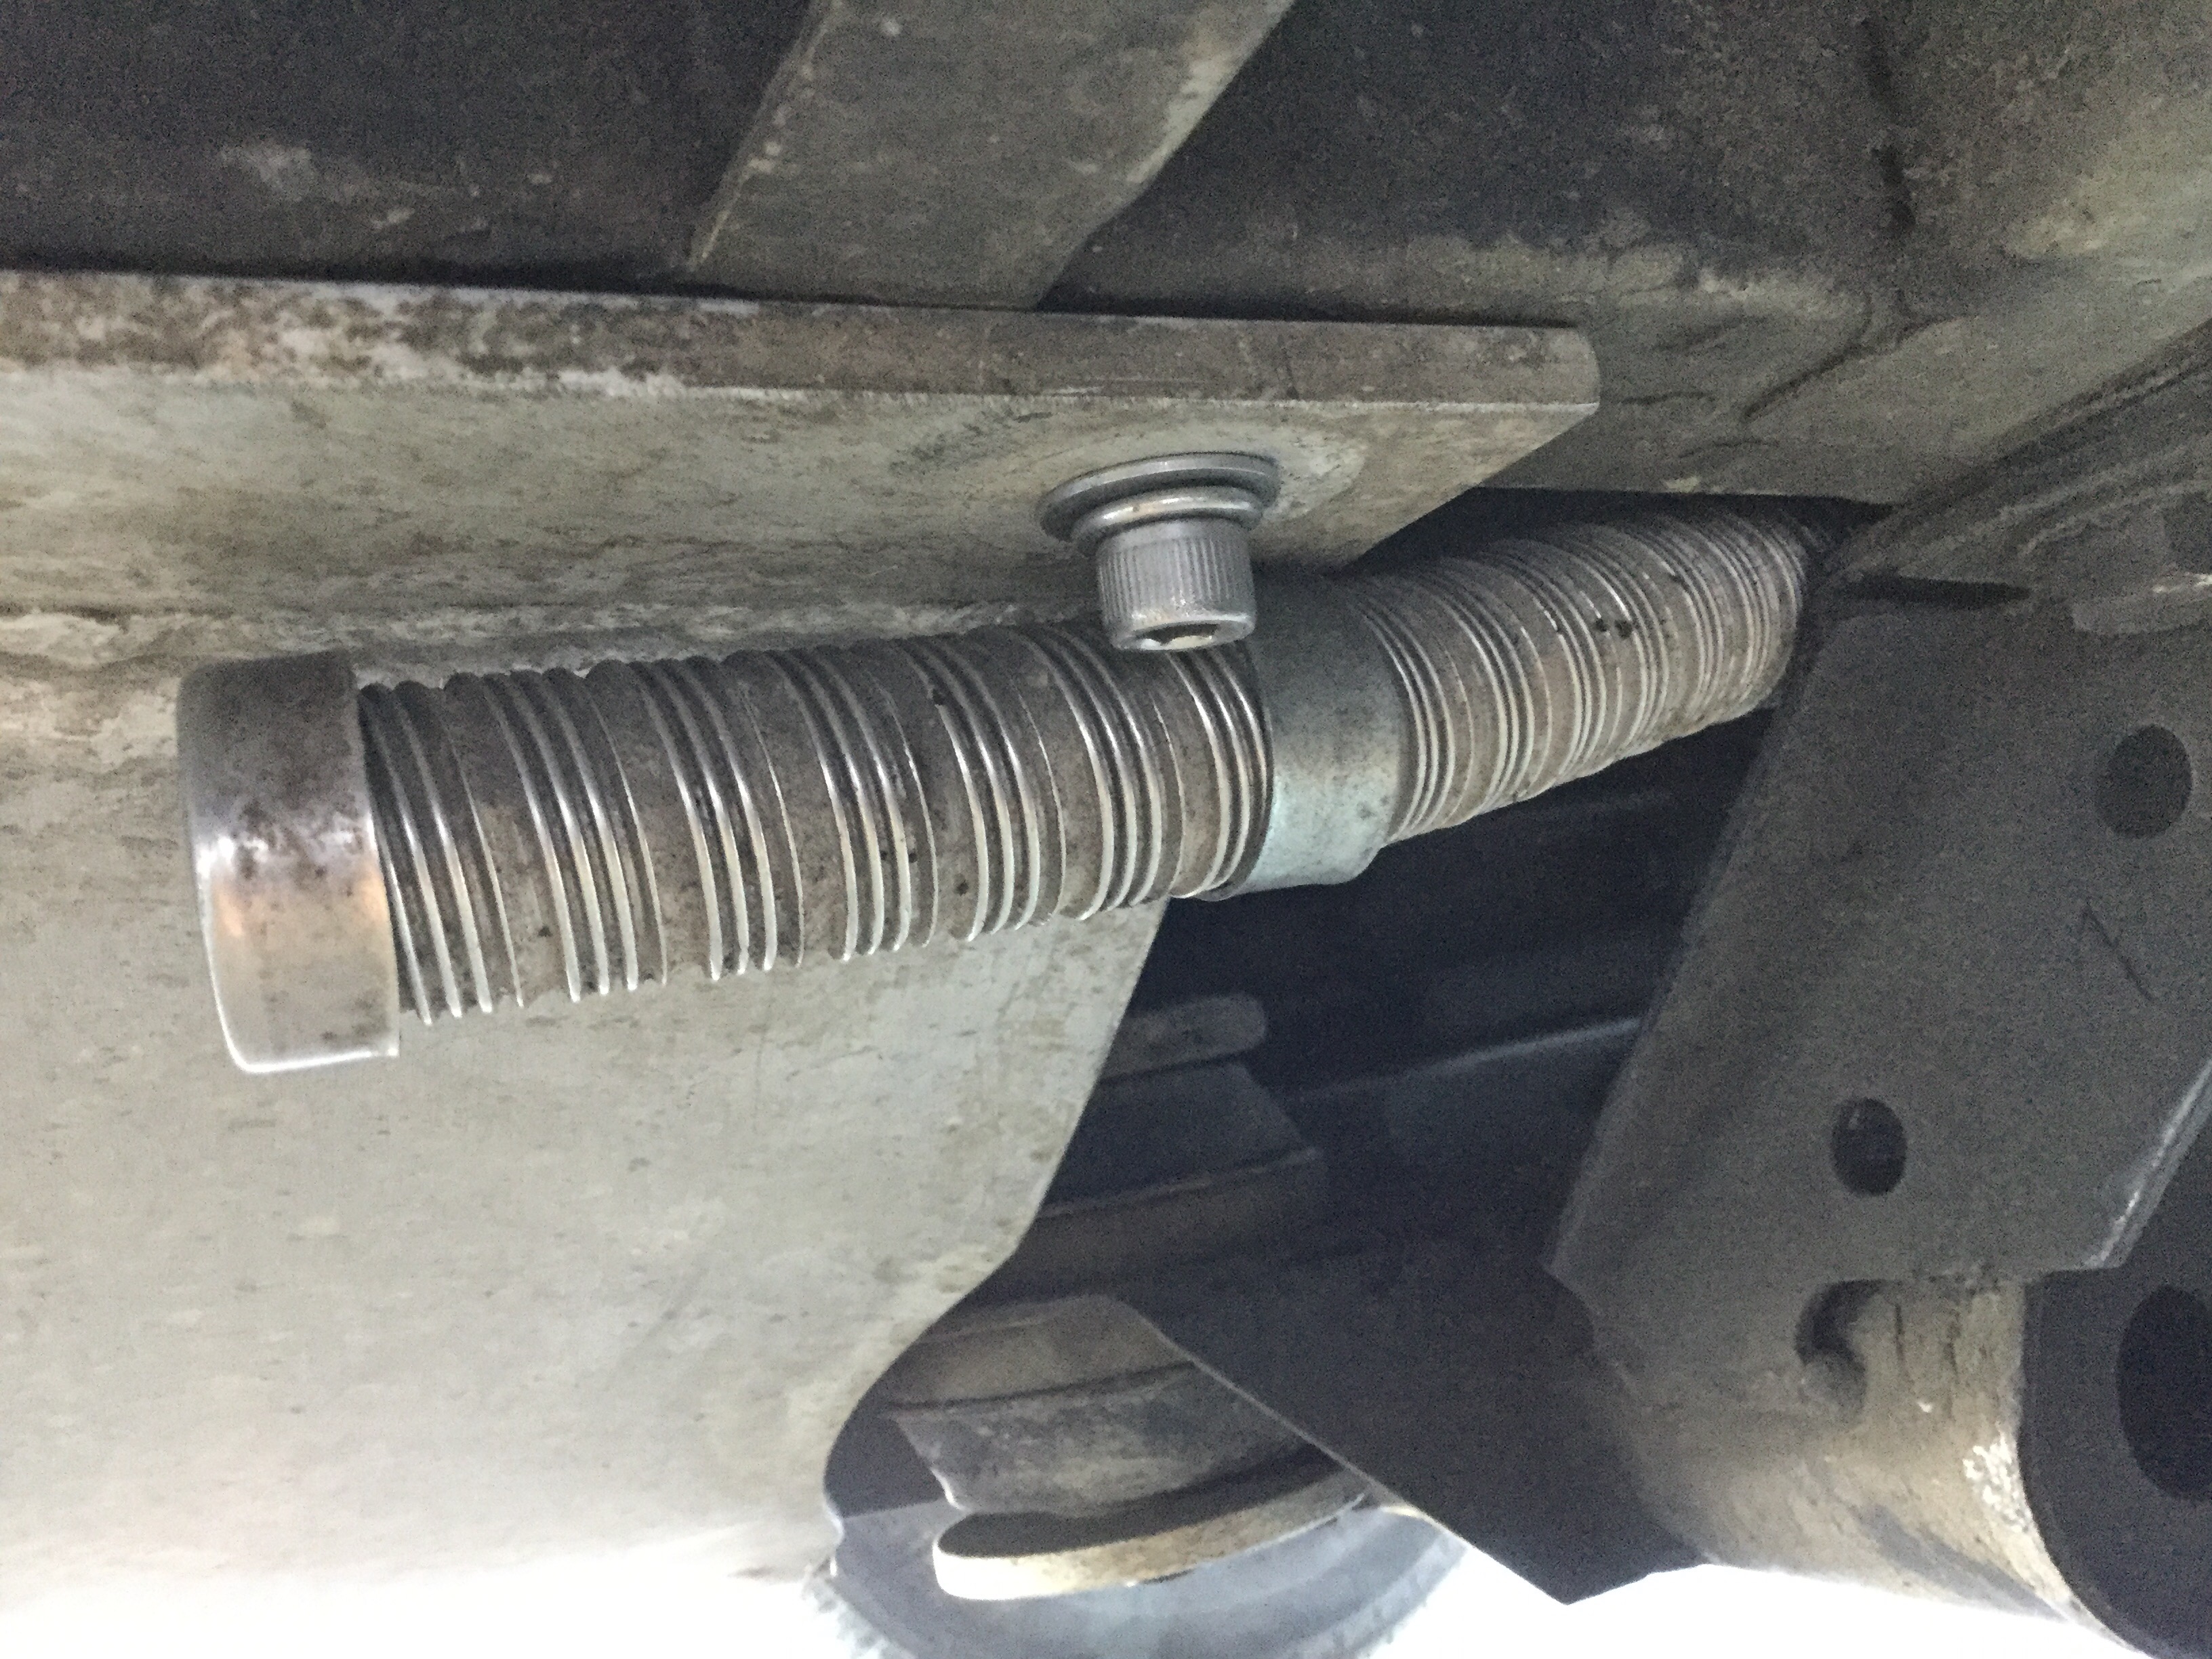
And because of the carpet and the rubber mat (latter not shown yet) and because the floor slopes, I made a base from 1/8″ aluminum for the heater to sit on. It’s supported at the rear by some 1″ C channel.
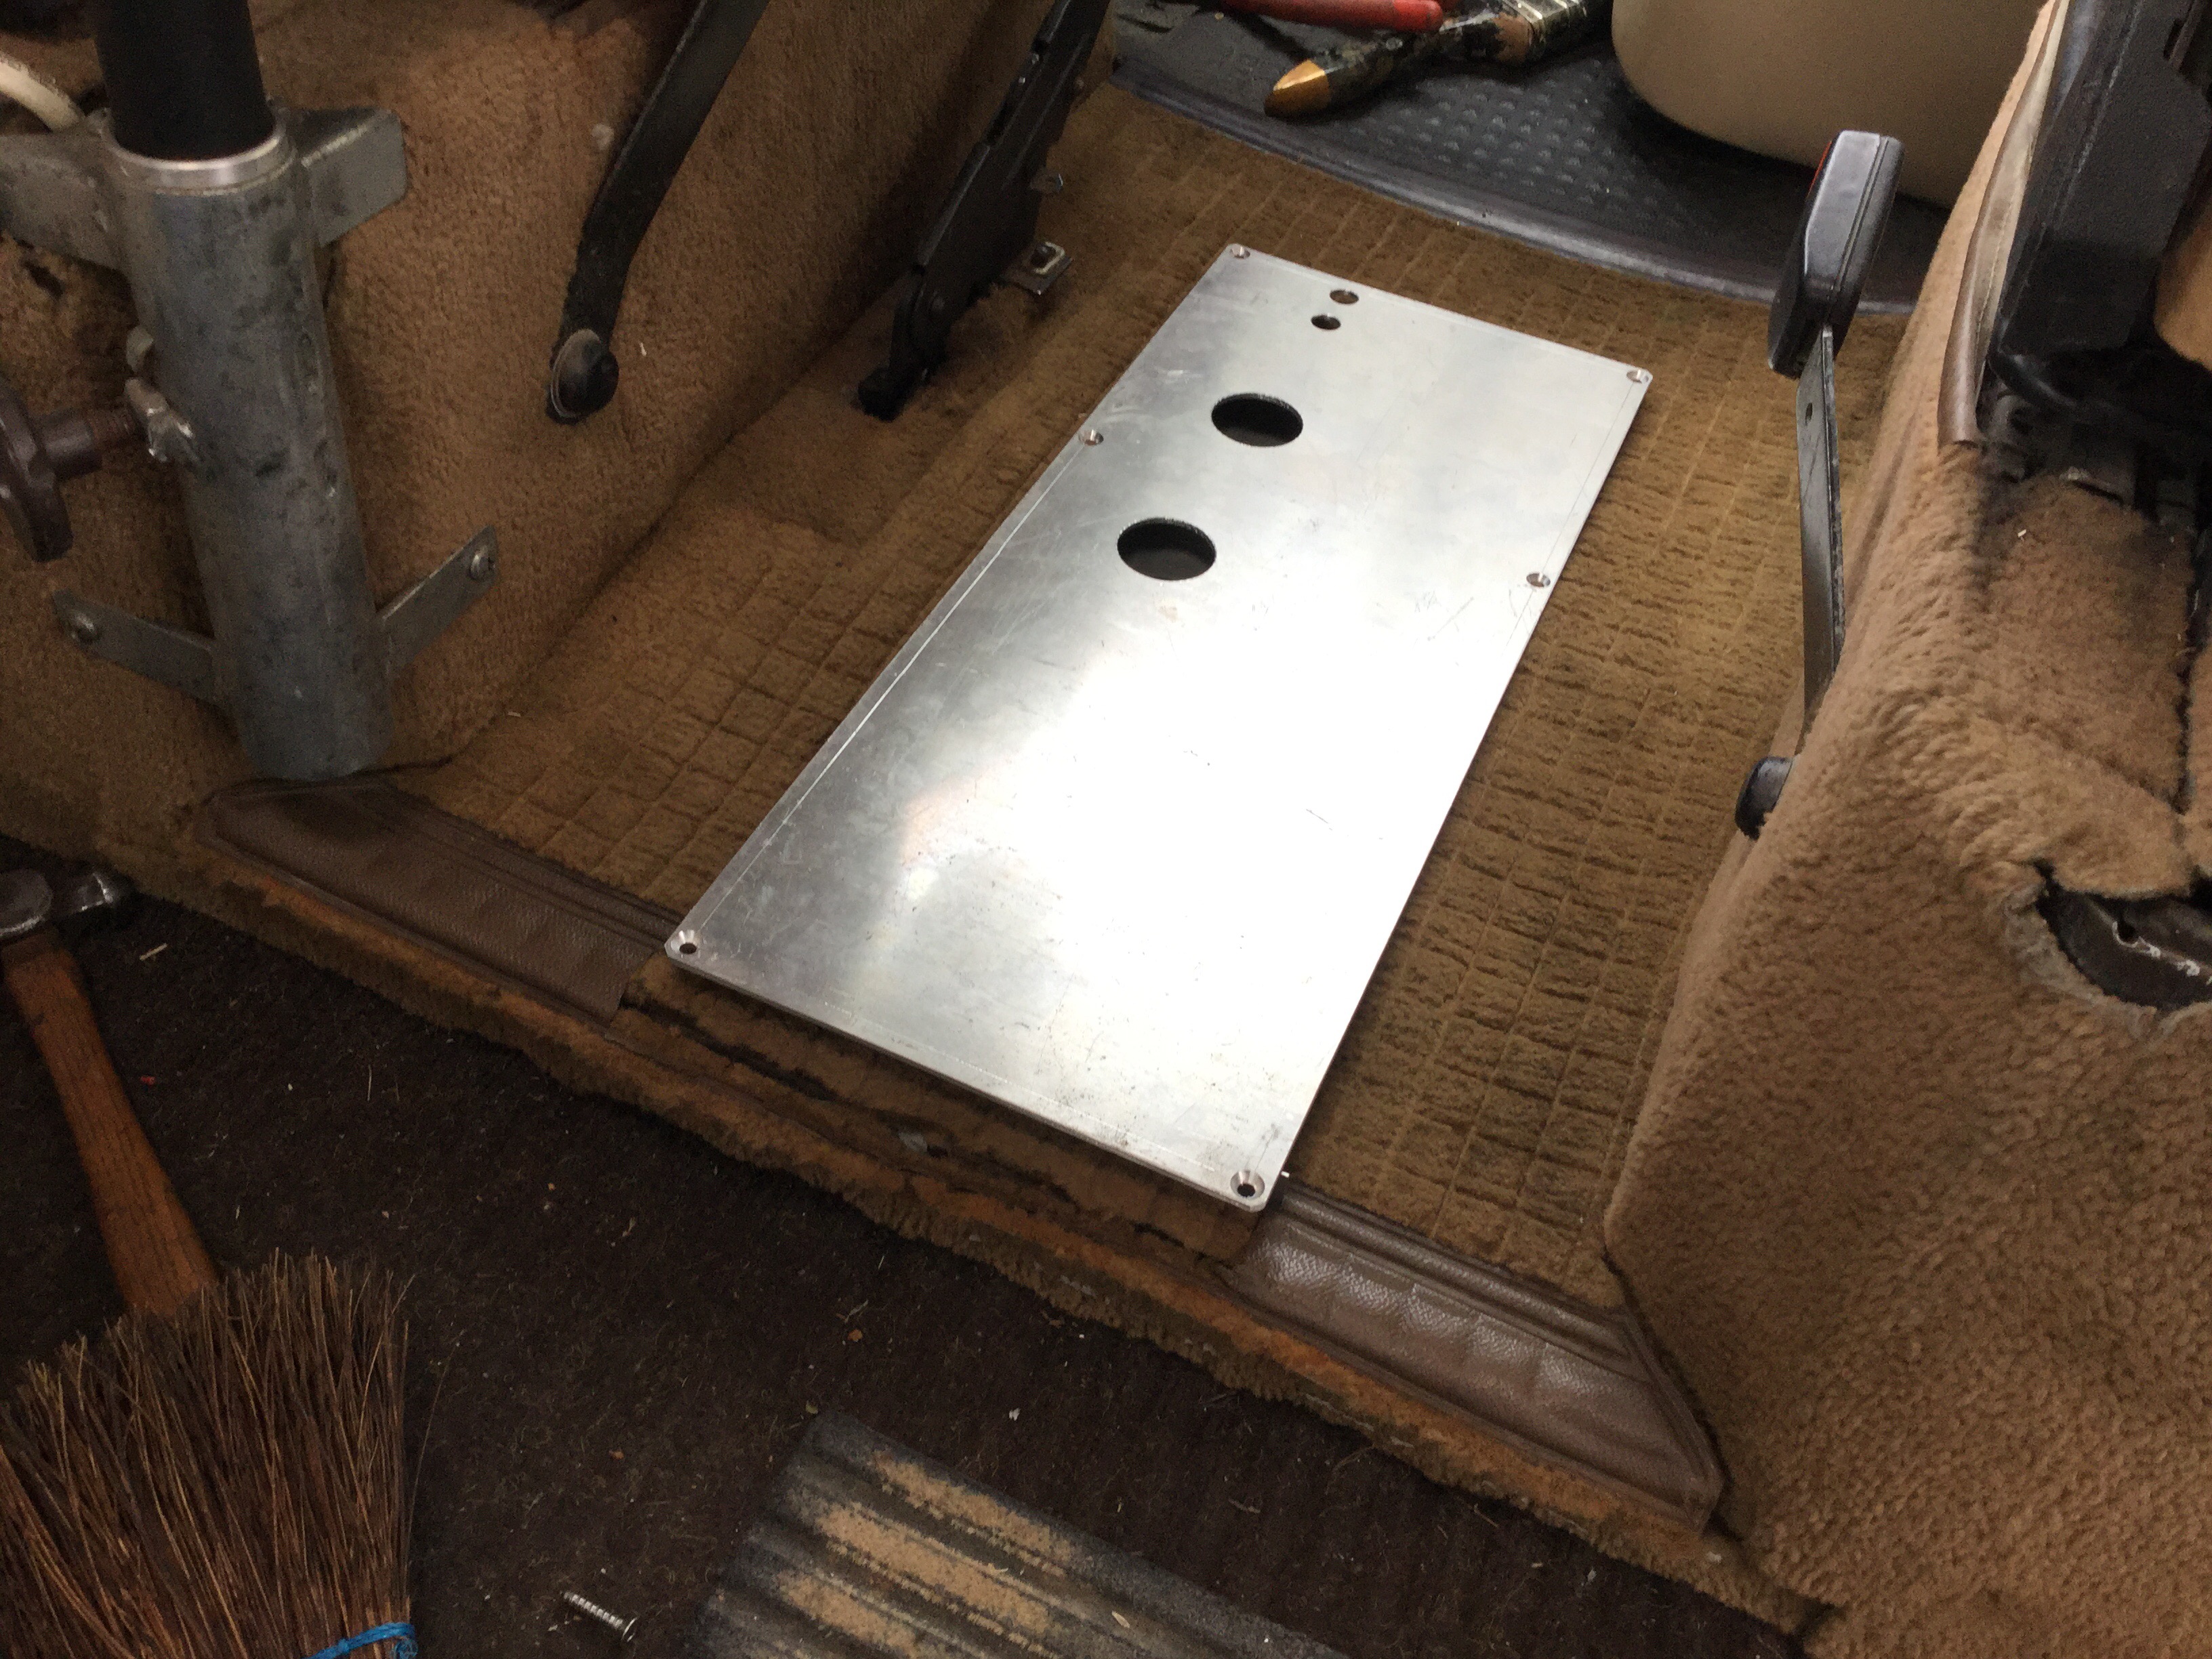
And because the heater is not sitting directly on the metal floor, I stuck in a pair of aluminum tubes. Sealed with high temp silicone, and the ID is a close fit for the intake and exhaust tubes.

It wasn’t easy making all the connections, I got the heater in place and connected.

In the next part I’ll show how the intake and exhaust tubes run, and how I prettied up the heater.
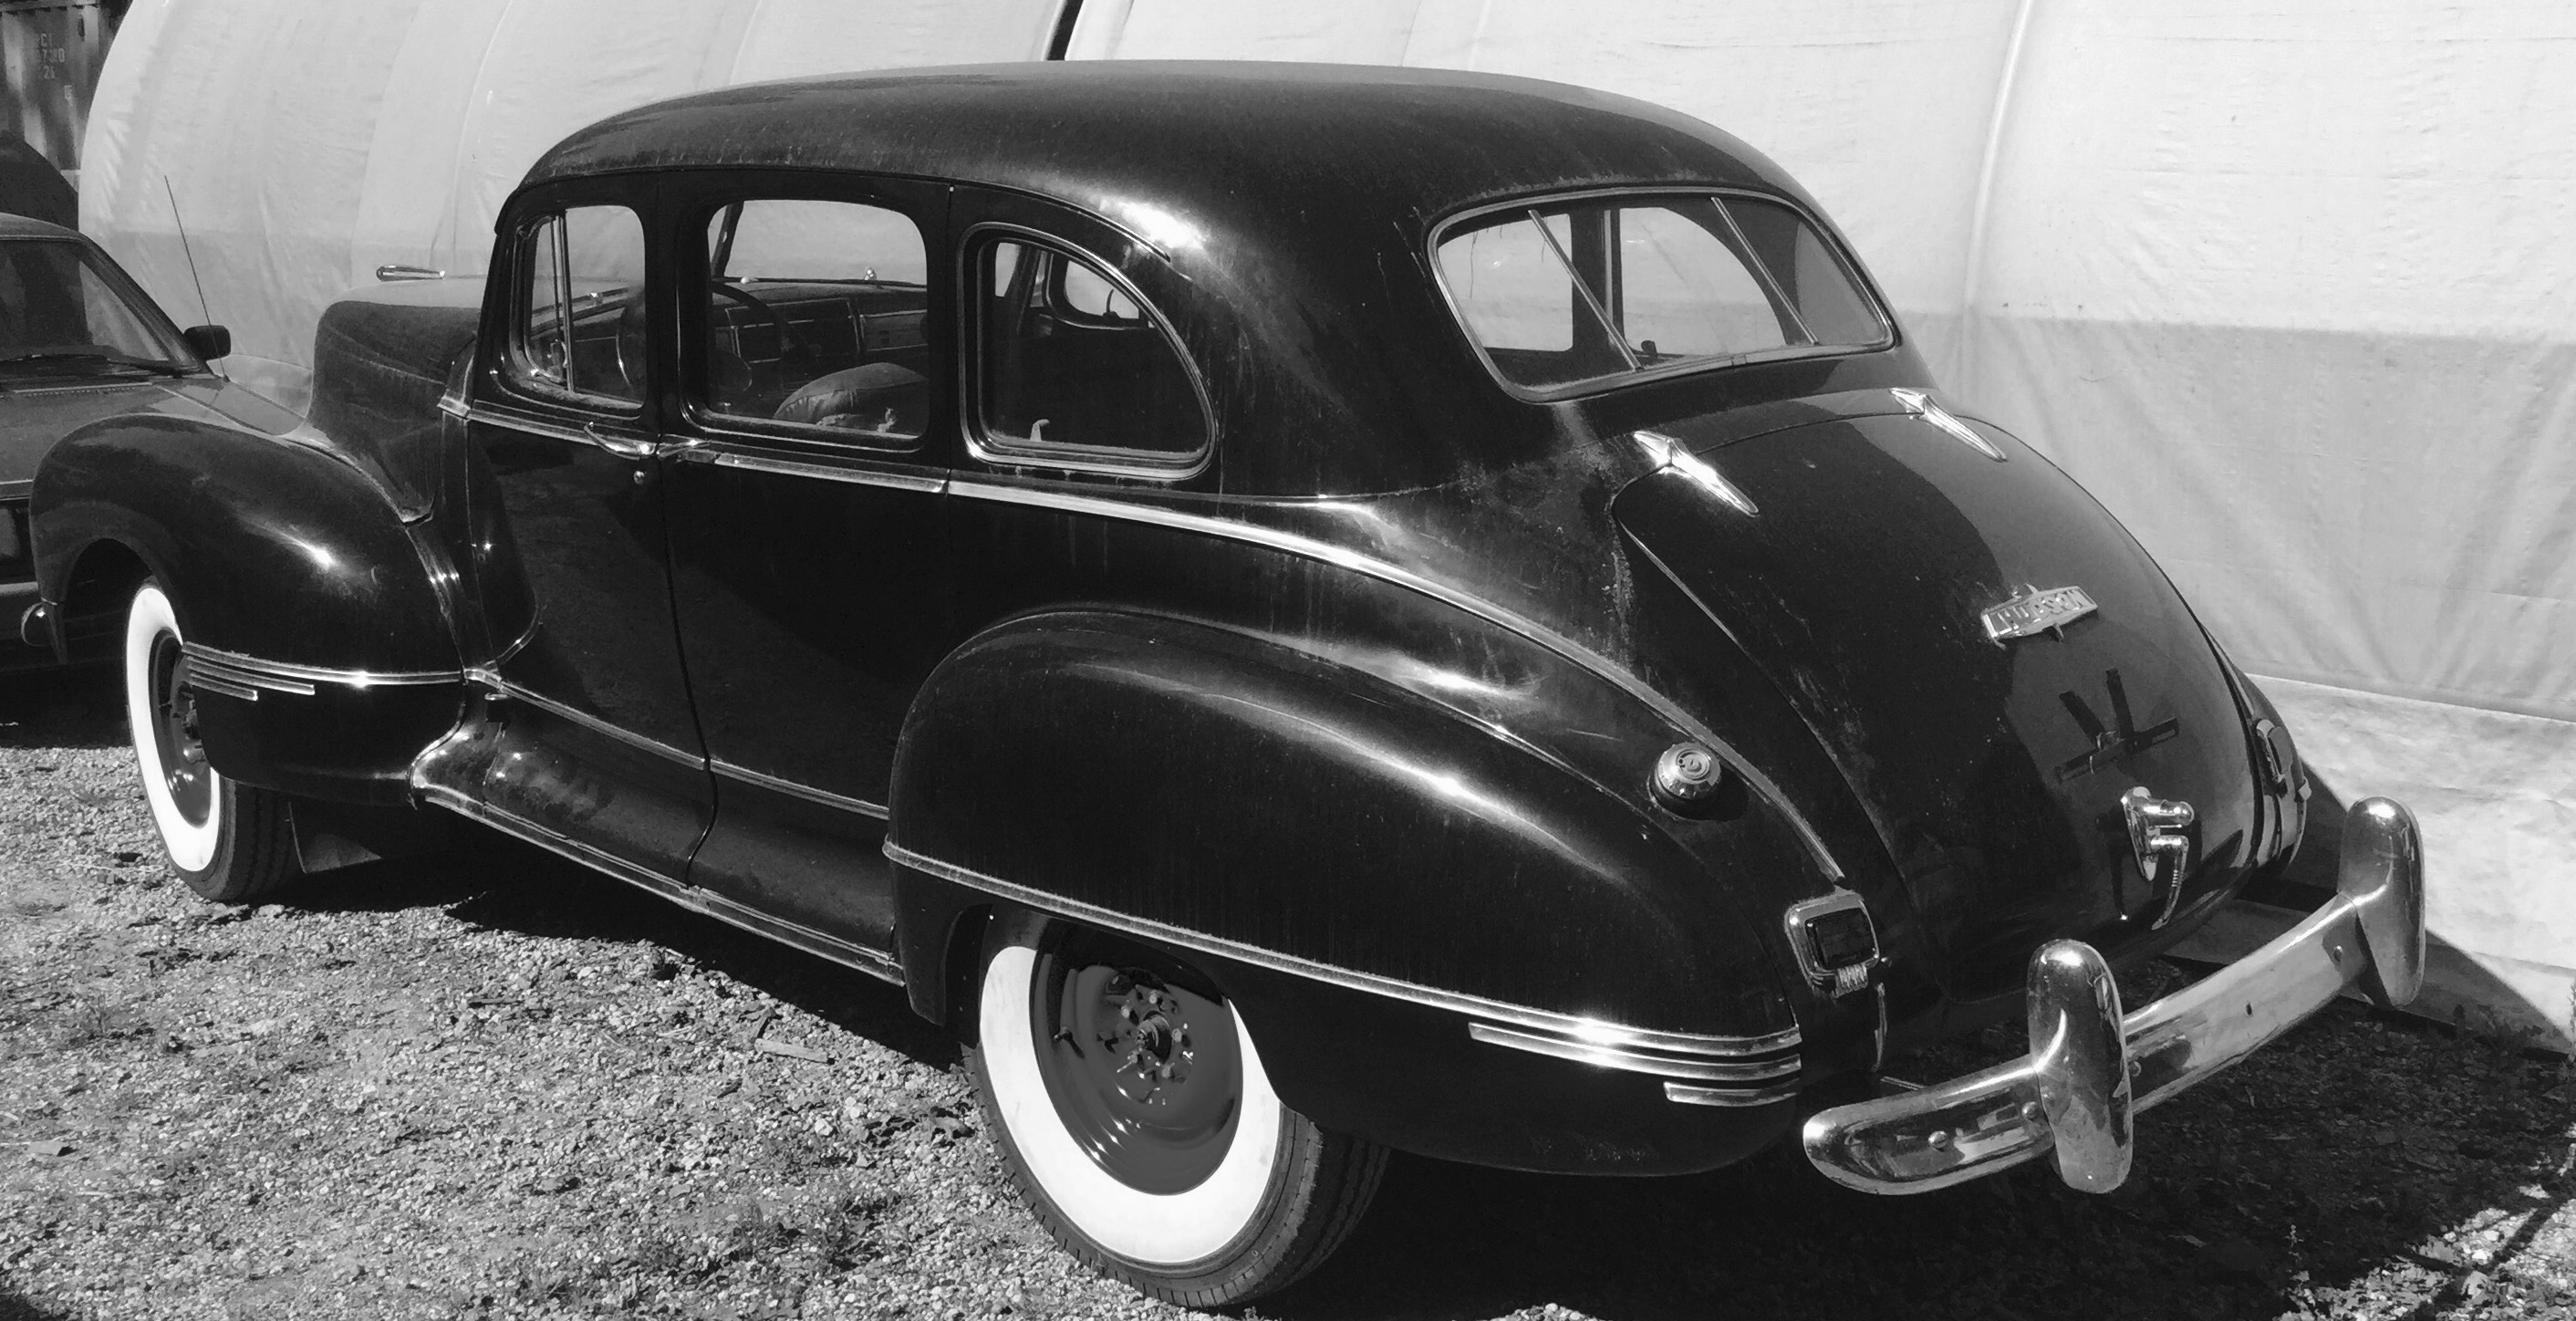
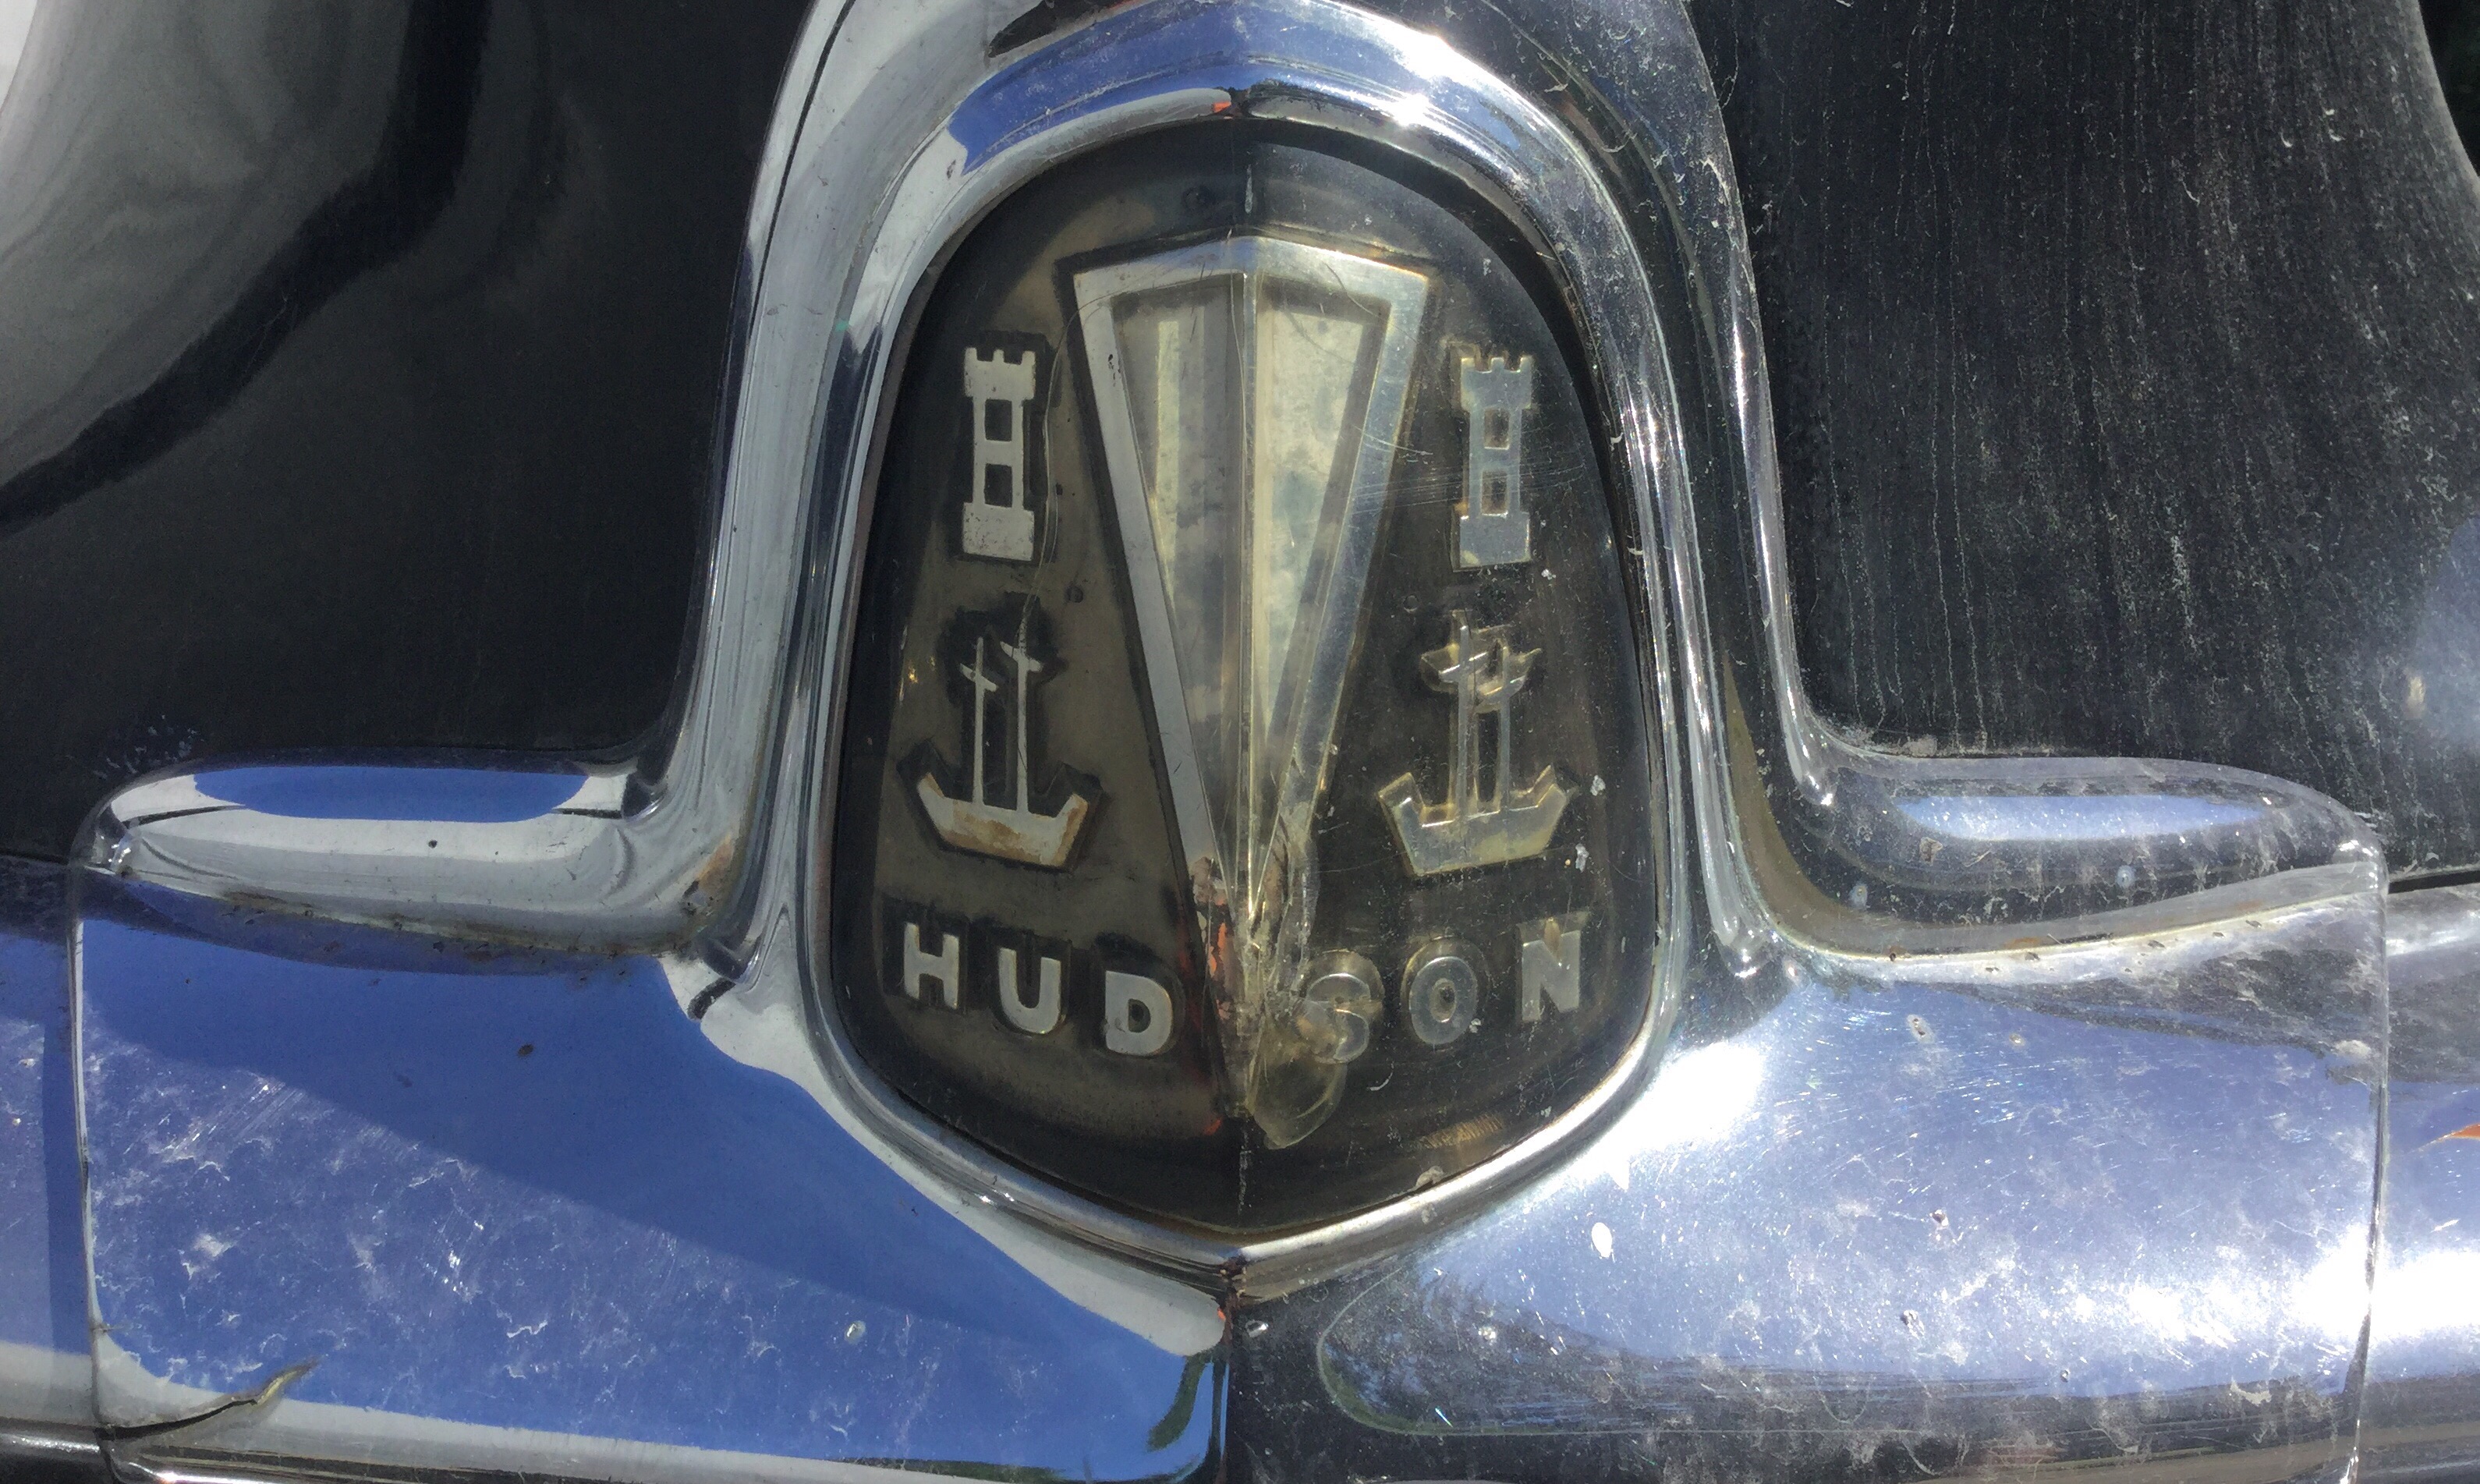
Hudson sedan
Posted by albell in other cars on June 25, 2016
Good friend Thomas can’t stop buying old Hudsons.


Nice little toaster
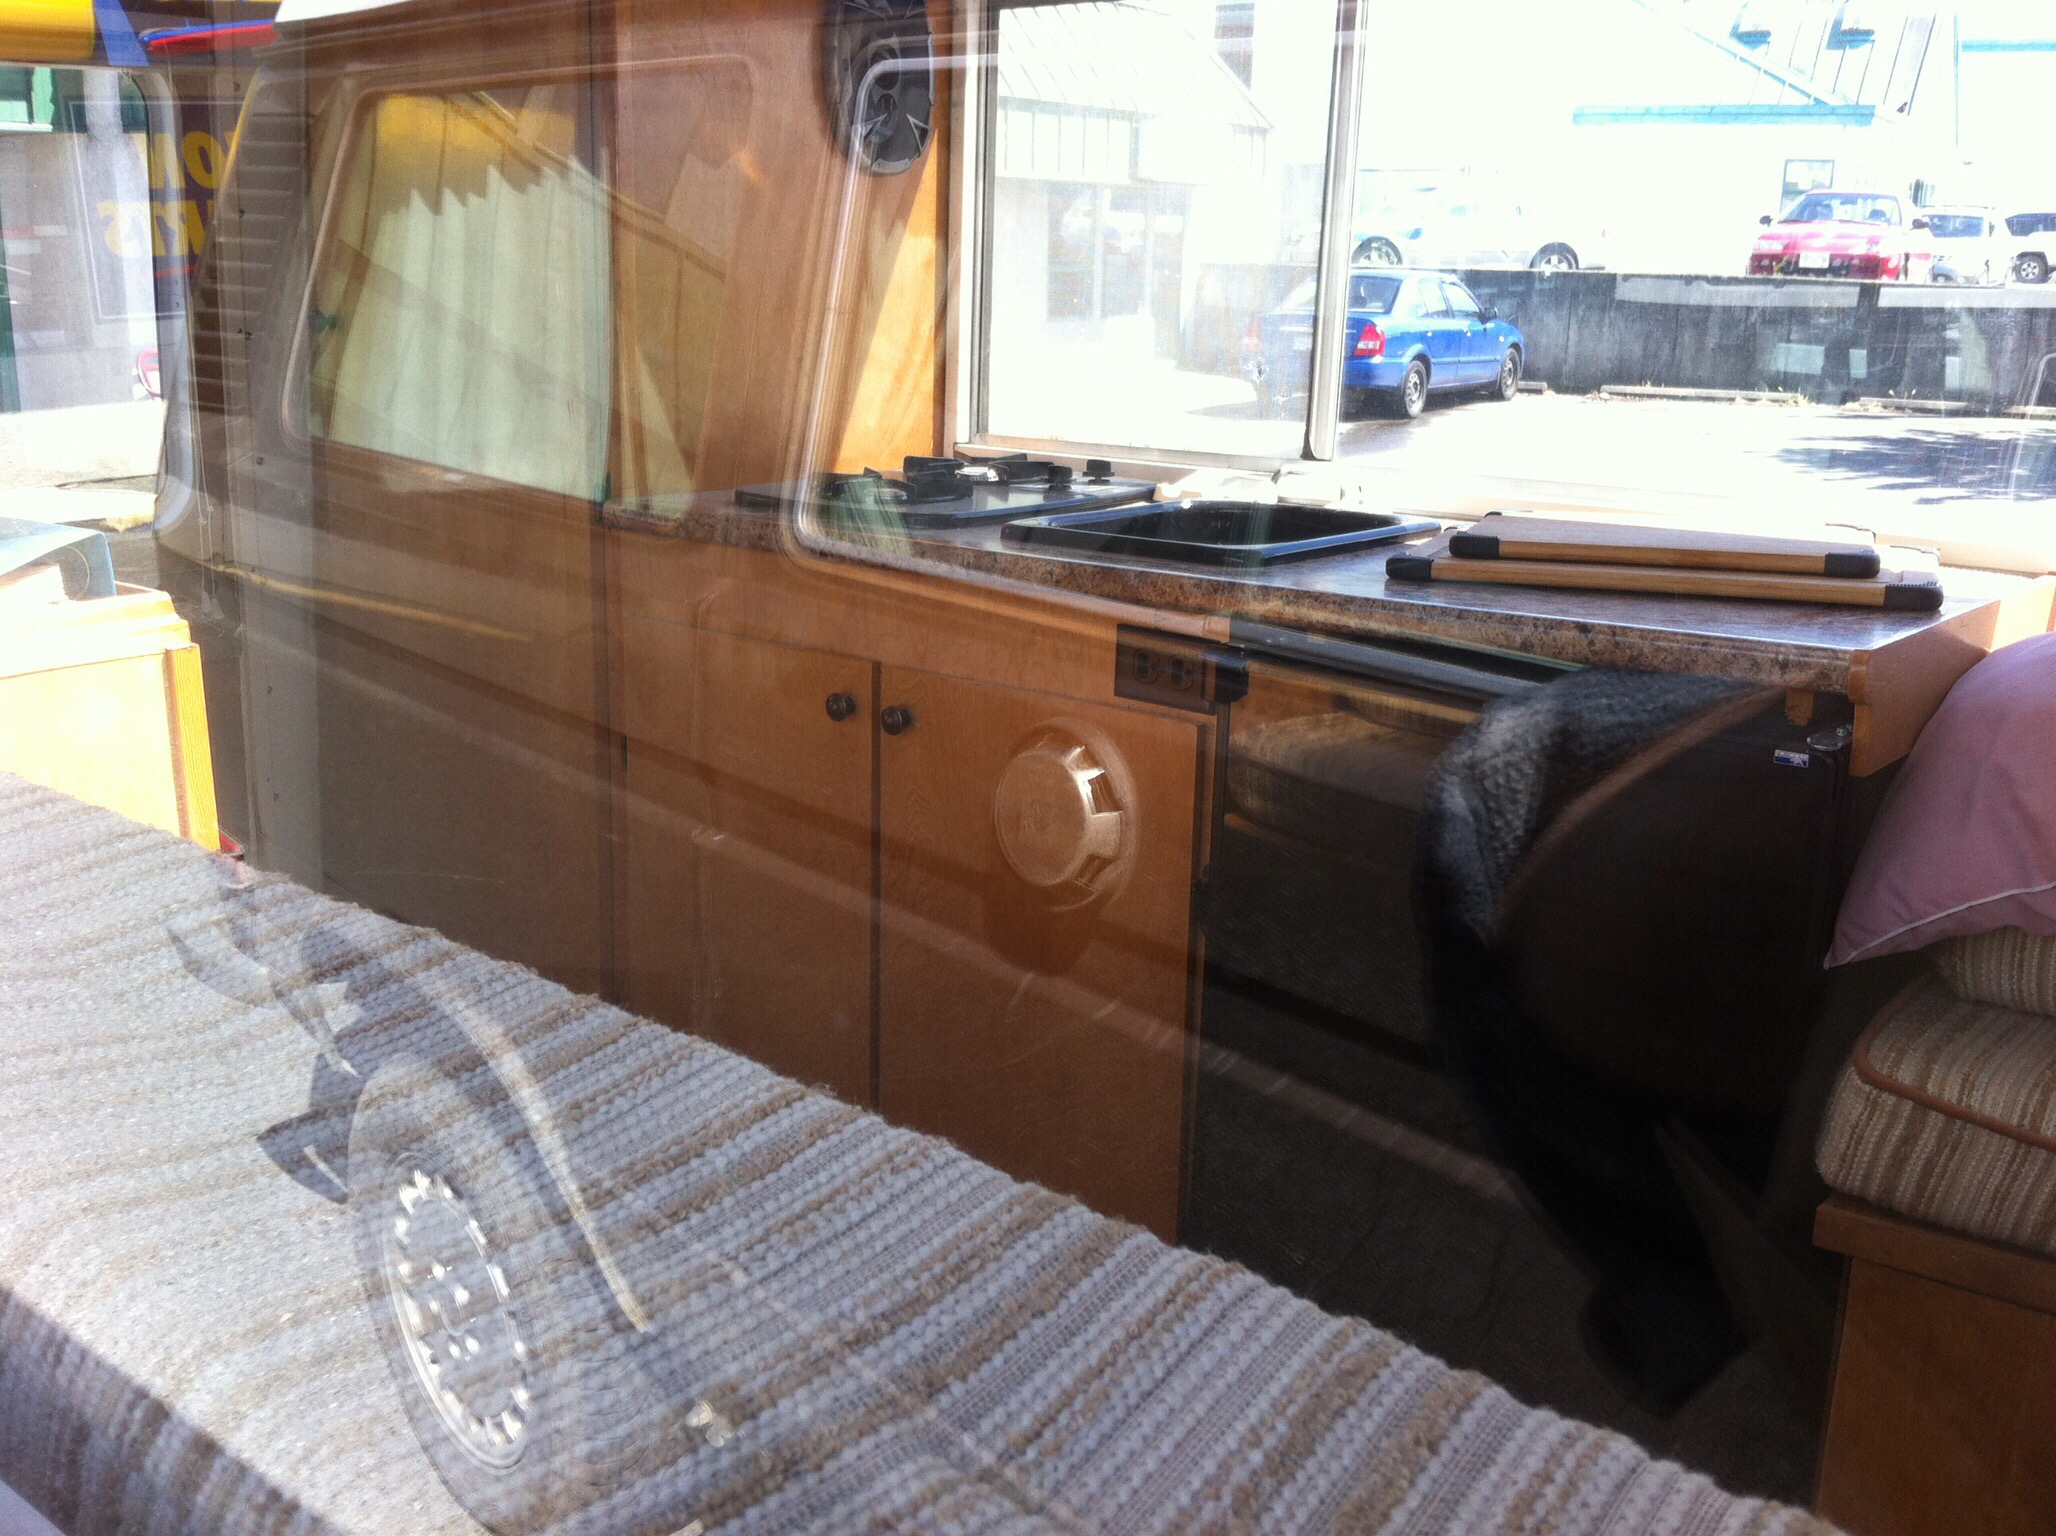
Posted by albell in other cars on June 23, 2016
Seen the other day. I remember Commer vans from childhood in Britain. Even as a kid I thought they looked funny, wheels too small, too tucked under. This one is in amazing shape, and the camping layout is quite nice.
But still, looks like an ice cream van to me.


Vanagon – rear shelf support
Posted by albell in vanagon, vanagon mods on June 16, 2016
The interior cabinetry in my van is pretty tired. Don’t forget it’s from my old 82 Westy, I swapped it all into my 86 tin top syncro when I converted it to a camper. One of the more distressed parts is the rear overhead shelf. The laminate is cracked and the entire span was sagging. Doesn’t help that I carry and axe and other heavyish stuff up there.
So I cut some 1/8″ thick aluminum plate, drilled holes for screws and milled larger ones to reduce a bit of the weight and give it some visual interest. I also drilled a hole to mount one of my new led dimmer switches ( same as the ones I showed in recent post). That switch replaces one that was mounted to the wall. It controls the strip of led lights attached underneath the shelf, right at the rear edge. You can see the edge of the aluminum U channel that the strip is mounted in right below the new support.
I’ve used Robertson head sheet metal screws to attach the plate. I hate Robertson headed fasteners, yes it’s irrational, but I hate how they look. I didn’t have anything else on hand, but I’m thinking I’ll replace them with oval head Phillips machine screws with nuts on the inside.
Should I paint it? I don’t know. Maybe just some more rubbing with maroon scotchbrite and some wax.

Vanagon – new led strip light dimmers
Posted by albell in vanagon, vanagon mods on June 12, 2016
I’ve modified my led light set up in the van a little since last update here, one change was to move the strip above the sliding door to a higher position and to contain the strip in a channel and add a diffuser cover to it. And the other day I replaced the dimmer switches with what I think are much nicer units.
Got them from Banggood, link here.
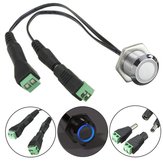
Annoyingly, I didn’t get the nut on the threaded shank shown in the the image. Looks to be a M20 x 1 thread. I managed to cobble up retainers to hold the switches in place.
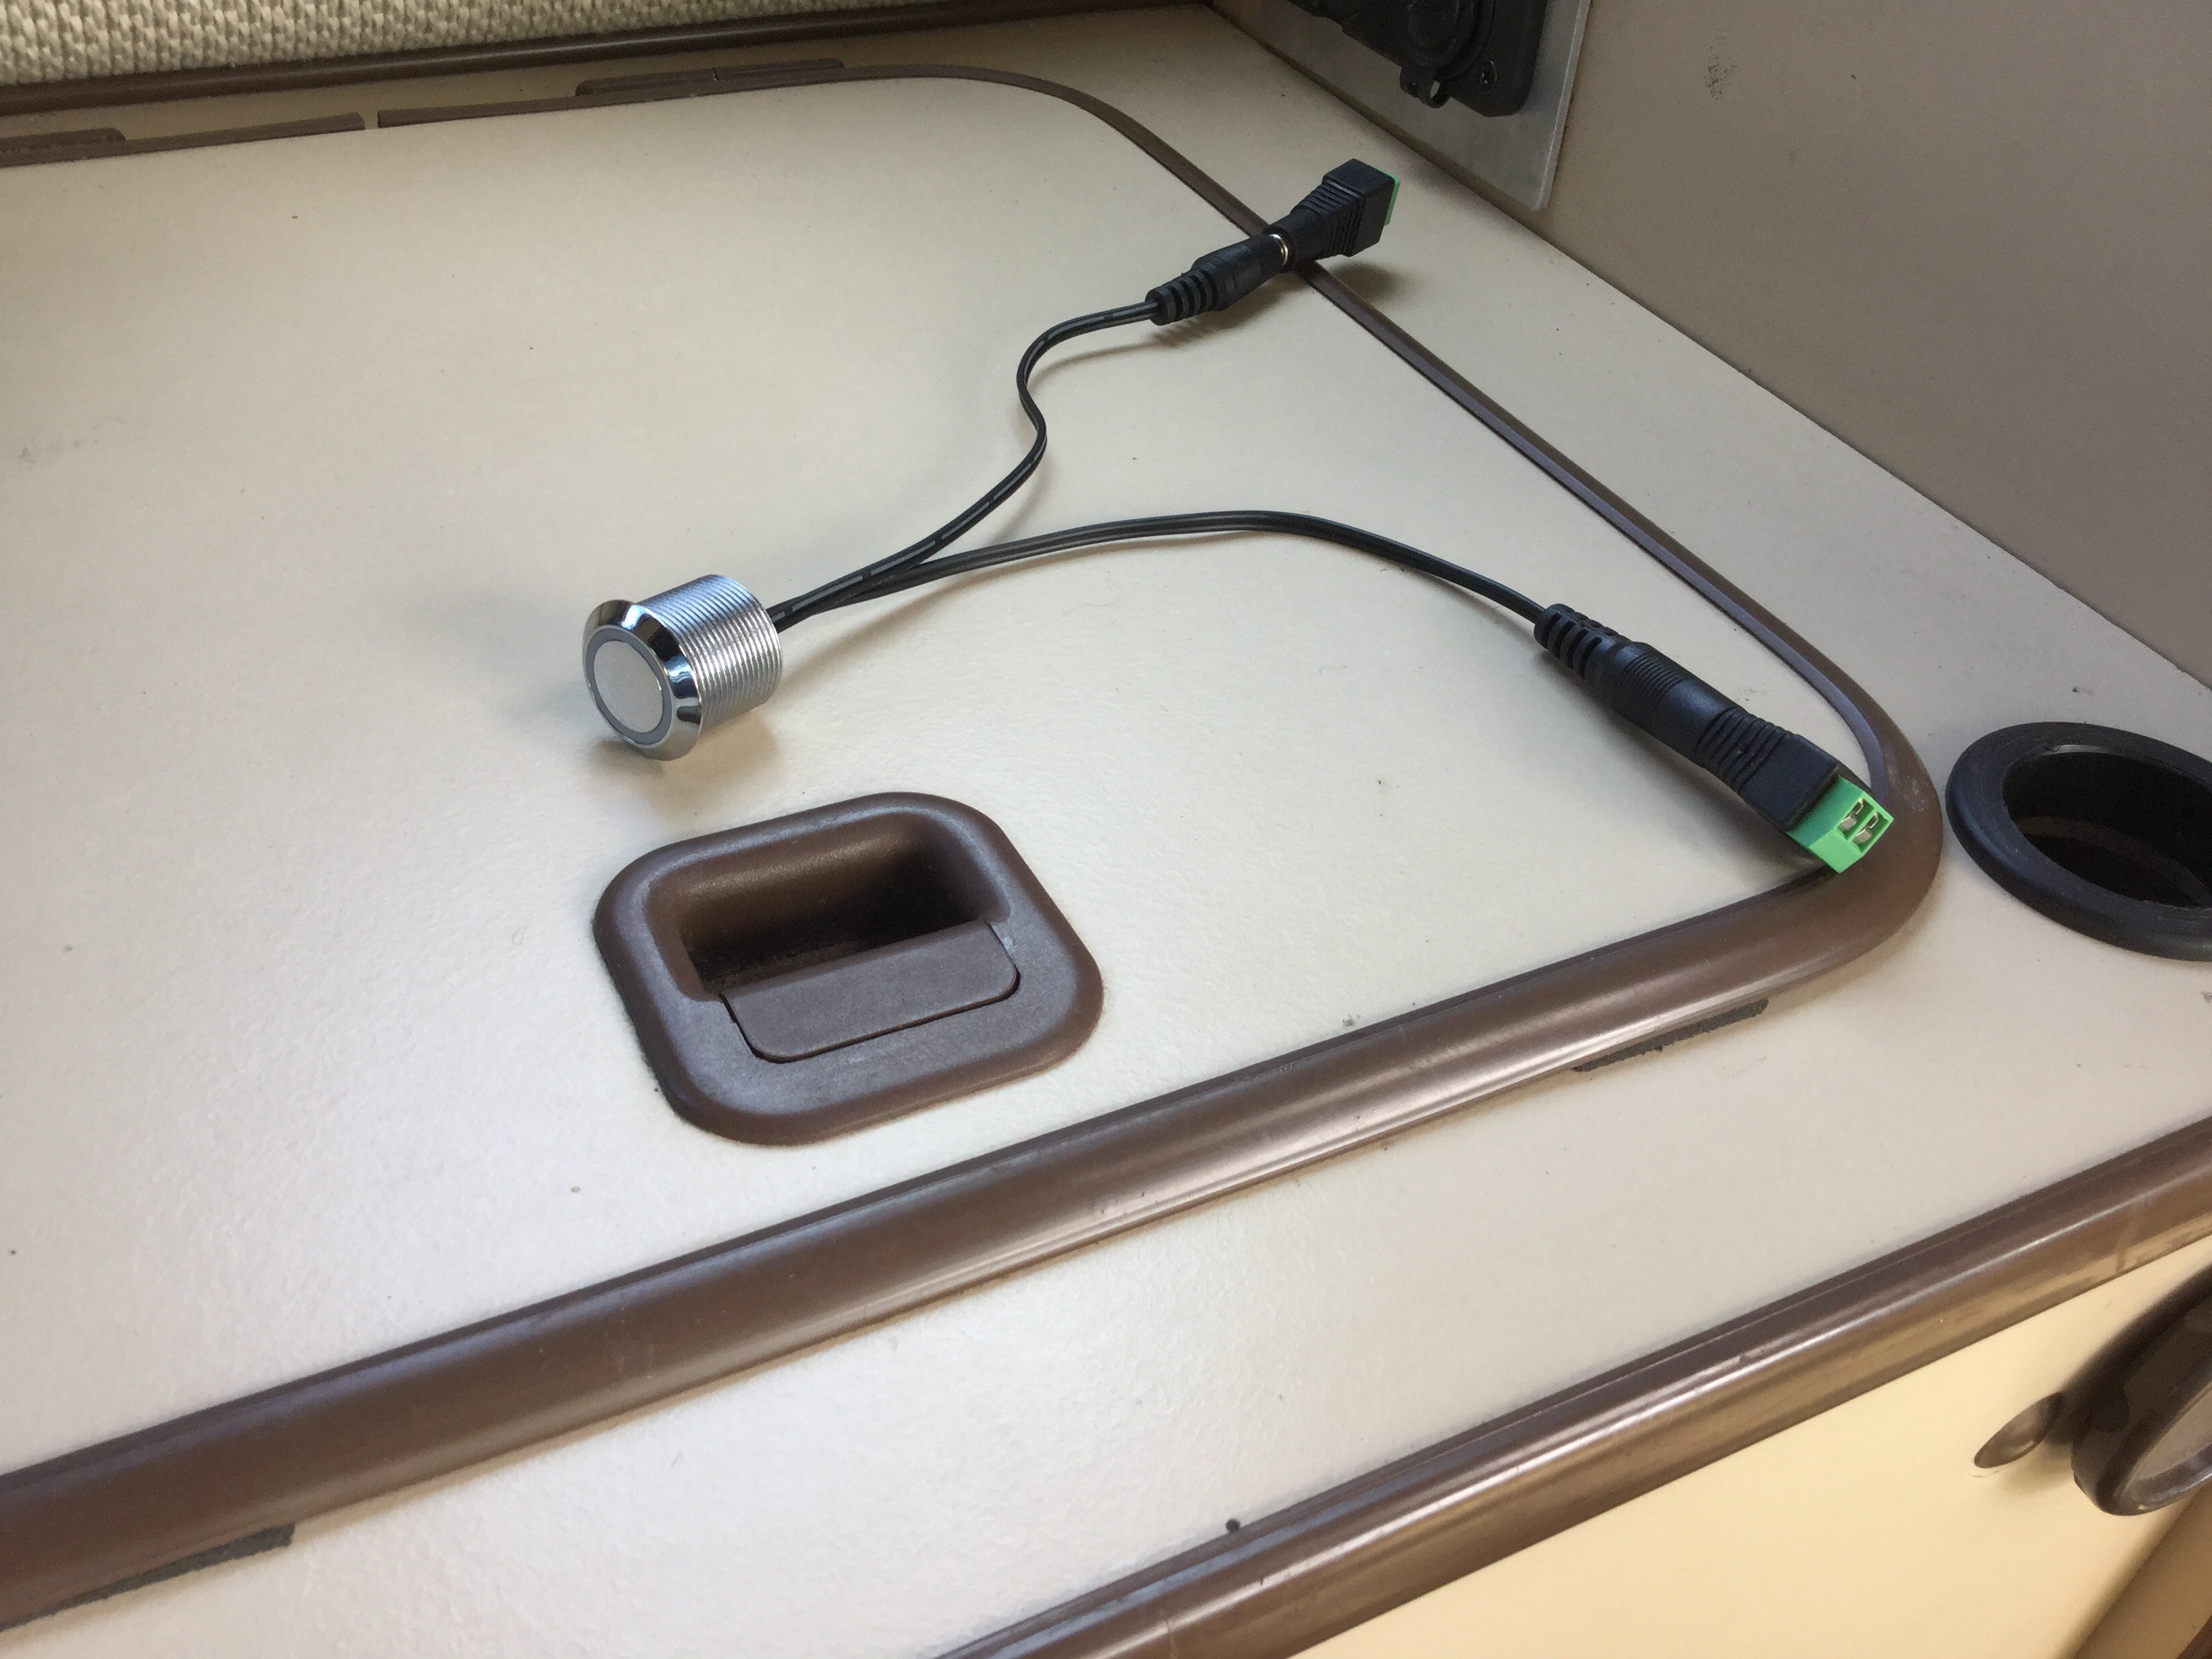
Made an aluminum mounting plate and mounted that to rear most air vent. Switch action nice, light touch turns on or off, long hold dims or brightens. Blue glowing ring so you can see them in the dark. I tried measuring the current draw for the glowing light, I got 2.5 mA reading but the number crept up to 11 mA after a few seconds but then dropped back to 2.5 when I touched the switch. Must be something to do with the capacitance switch gubbins. The blue glow is not bright enough to be obnoxious.
They are made from plastic, chrome plated, but they seem to be good quality. They did come with the connectors as shown, the same type I had to buy separately for the old switches.
Only 2 switches wired up so far, one for the strip above the sliding door ( can see that in the pic) and the other fro the strip above the kitchen. The two spares for future lights.

Mods – quick and dirty solar panel stand
Posted by albell in vanagon mods on June 8, 2016
Friend Donovan at Western Edison let me have some scraps of 3/8″ thick aluminum honeycomb material. One of the bits was large enough to cut out a simple tab and slot stand for my solar panel. As crude as it is, it worked well enough on our trip last weekend.
The panel is an older model Siemens 75 W unit. Good friend Dave gave it to me last year. He bought a pair for an ungodly low price. And just last week he gave me the other one ( he was toying with me). So I have two of these panels and that’s forcing the issue of whether to mount one on the roof. On last weekend’s trip I had one on the stand and one sitting on the luggage rack, might be better to have one on the roof racks at least during the summer, I don’t know. Btw, they both connect to the same charge controller.
I never planned on having the solar and battery set up I have now. To be honest it’s way more than I need, but it’s interesting to play around with the set up in the van.


Trip – warm and clear weekend in June
Posted by albell in trips, vanagon mods on June 8, 2016
Last weekend was quite warm, but unlike later in the year there was no fog or even haze in the west coast. The air was clear enoug that you could make out the buildings on Tattoosh Island.

Again, just to bug Simon, a shot of the super useful “Swellegant” table mod.

