Archive for May, 2015
Vanagon – big battery installed
Posted by albell in vanagon, vanagon mods on May 24, 2015
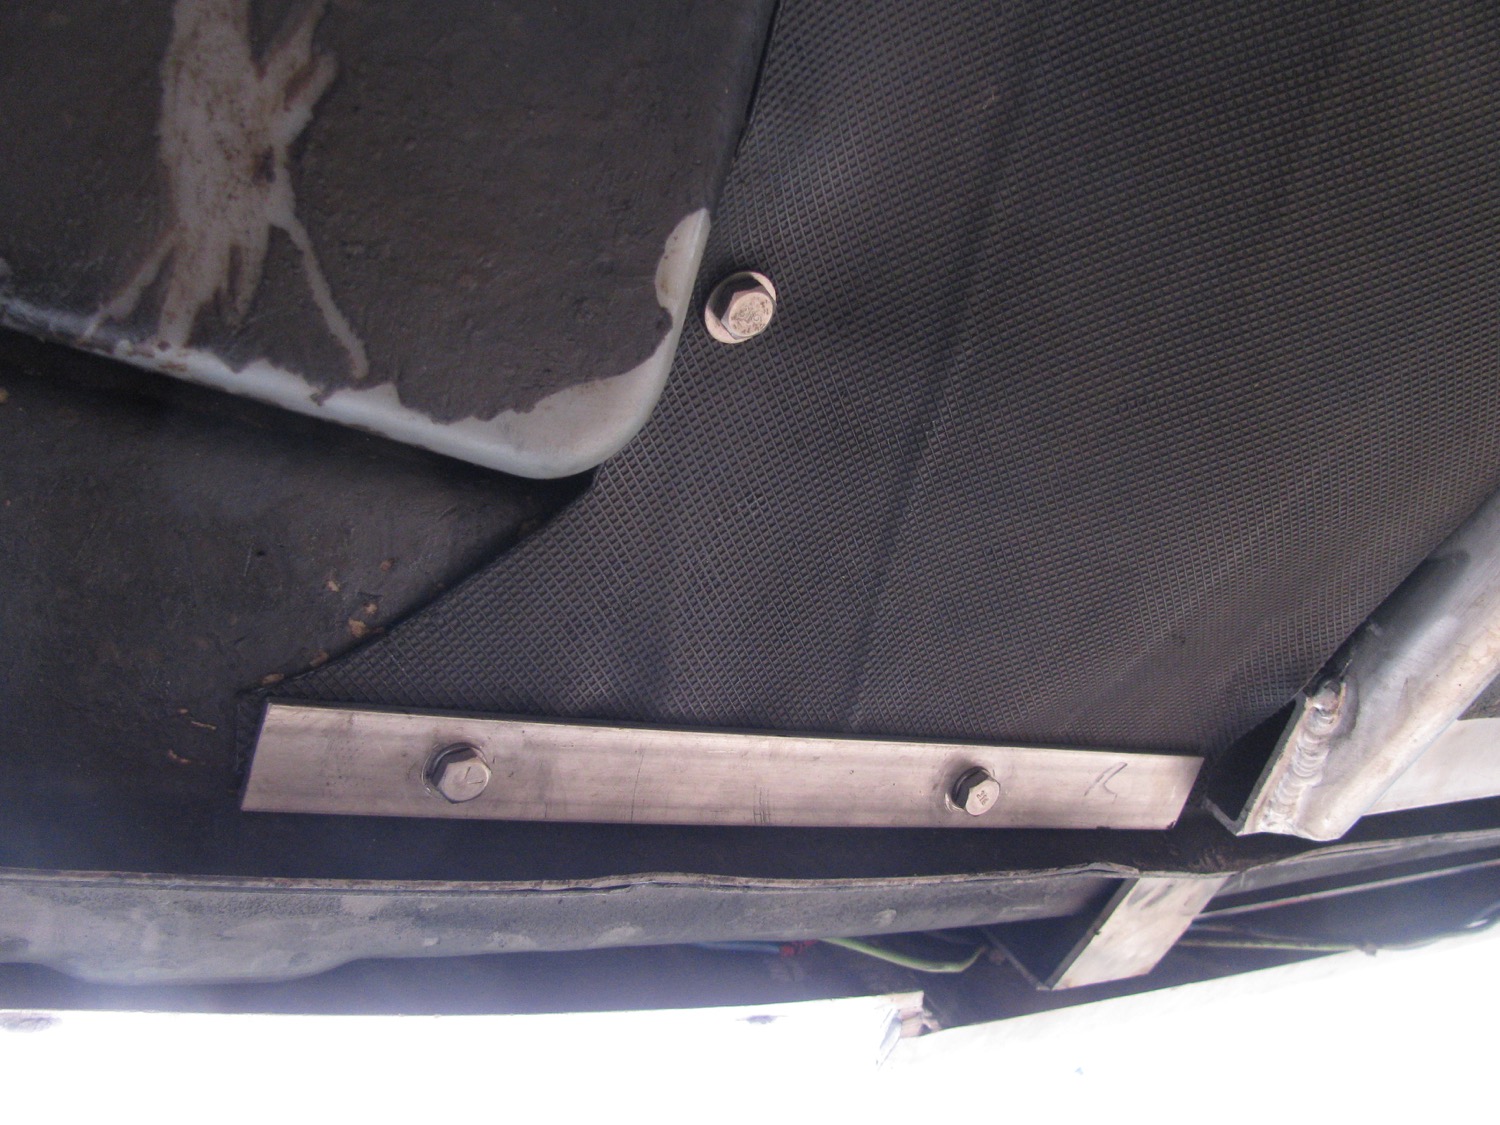
It took longer than making a baby but I finally have my big battery installed. I got this Northstar 200 AHr battery some time ago, I think I mentioned it in this blog post. The size and shape of the battery made it seem like it would fit easily under the rear seat but it just doesn’t ( without taking up more space than it needs, if that makes sense). I toyed with the idea, and went as far as making brackets, of mounting it up under the van between the door sill and frame rail but no, that didn’t look right. So I settled upon the admittedly dubious spot of where the spare tire sits. A couple of problems with this placement. Number one is that I now have to find a spot for the spare tire. Ah but what about my much talked about swing away spare tire carrier? More on that at the end of the post. The other dubious characteristic of this battery location is that it places 128 lbs forward of the front wheels. I’m a little worried that it might make a difference in how the van negotiates dips and ditches in logging roads. Skipping a head a bit, I have had the battery installed for a week and I really don’t notice any driving different on paved roads. I made a carrier for the battery quite a while back, crikey, it was a year ago, since then I welded in some locating brackets that the battery fits into, and some tabs on the side tubes for supporting brackets. The brackets are made from 1X1/8″ stainless and I bent them to fit to the van frame rails. They are secured to the frame rails by 5/16″ stainless bolts that I will someday change to 8 mm. The bracket to the tab connection is done with 1/4-20 bolts and instead of nuts I used stainless ring nuts. The rings are to secure nylon straps that cross the battery and hold it very securely to the tray. Ok, some pics of it installed. First pic taken from driver’s side, one stainless bracket not fastened. Gives you the general idea of how the battery lies. 
And on the passenger side. You can probably make out the red nylon hold down straps going up over the battery.
.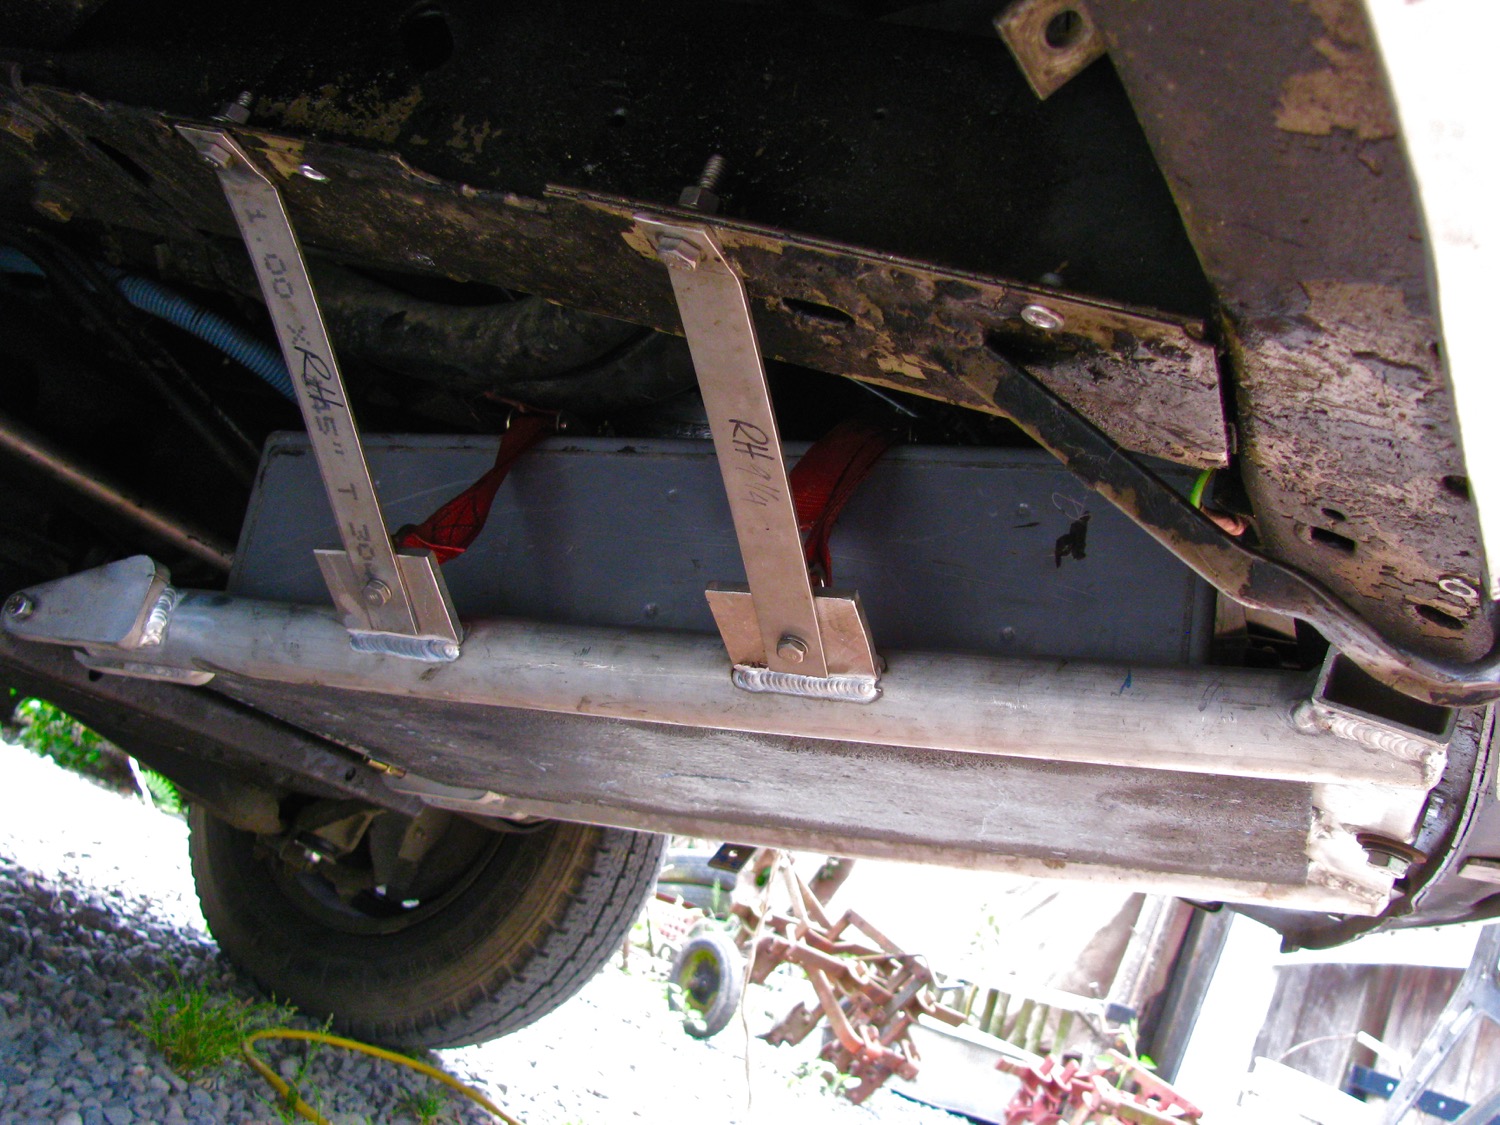
I had thought of making aluminum side splash plates but I was dissuaded by the changing angles and company curves needed so I used some scavenged treadmill material. I installed 1/4-20 riv nuts in the existing holes in the van frame and bolted the treadmill material.
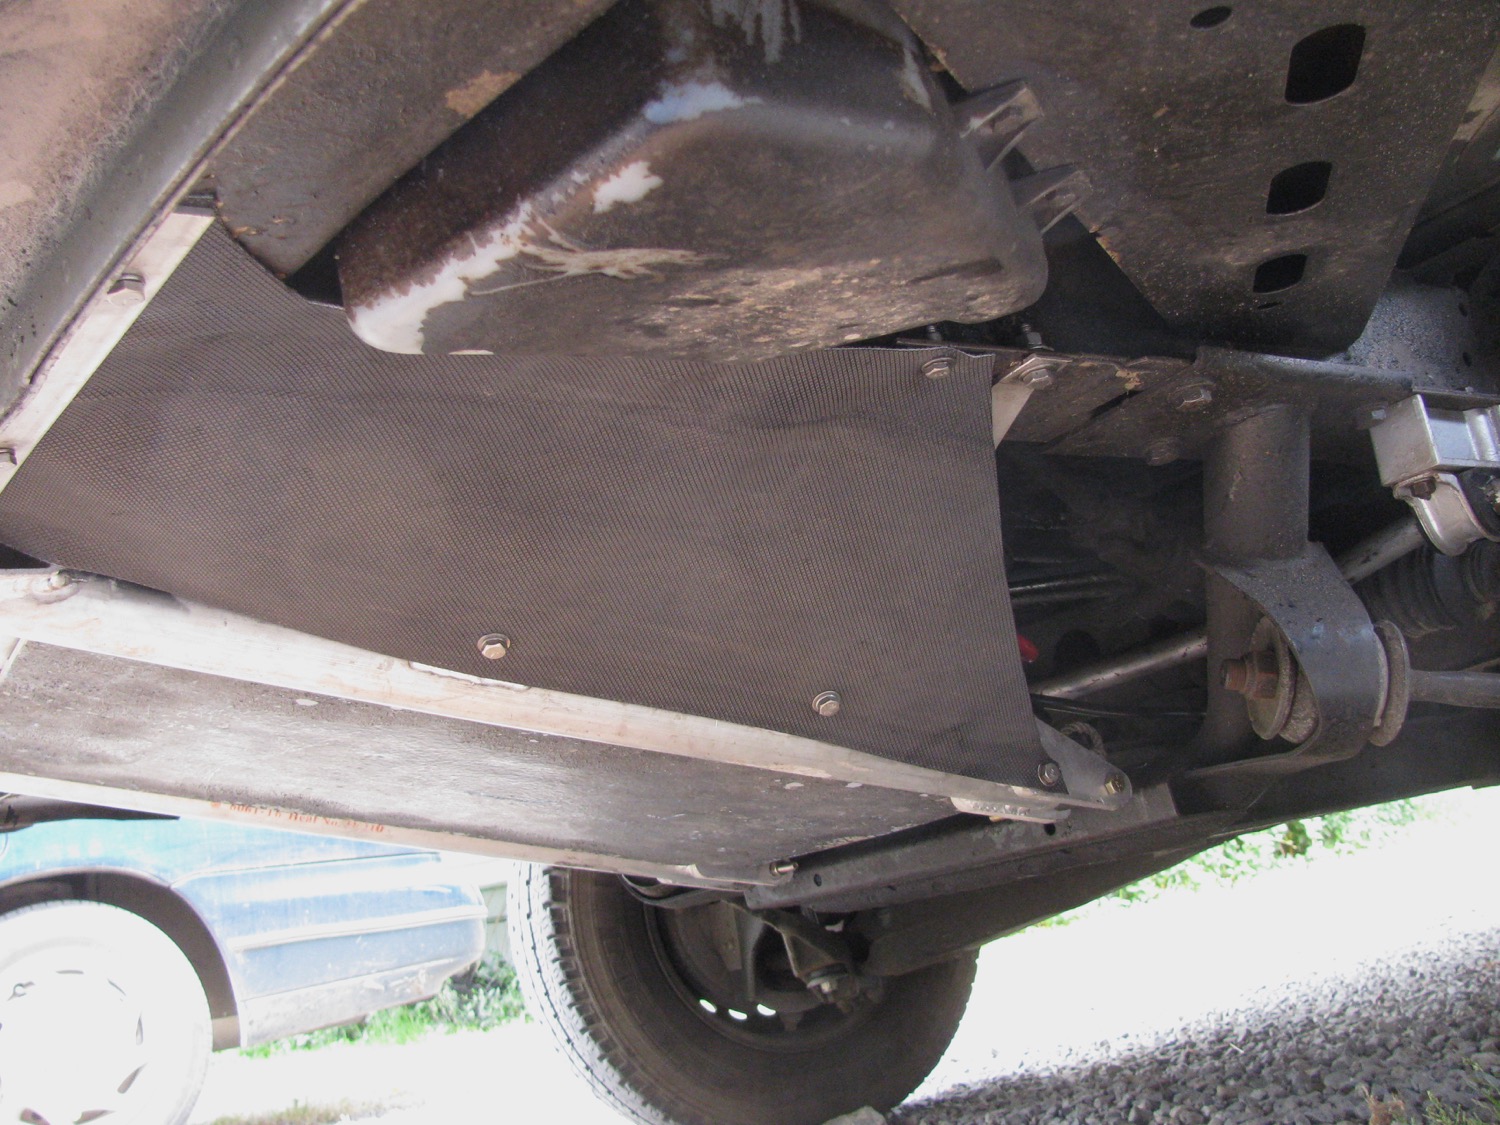
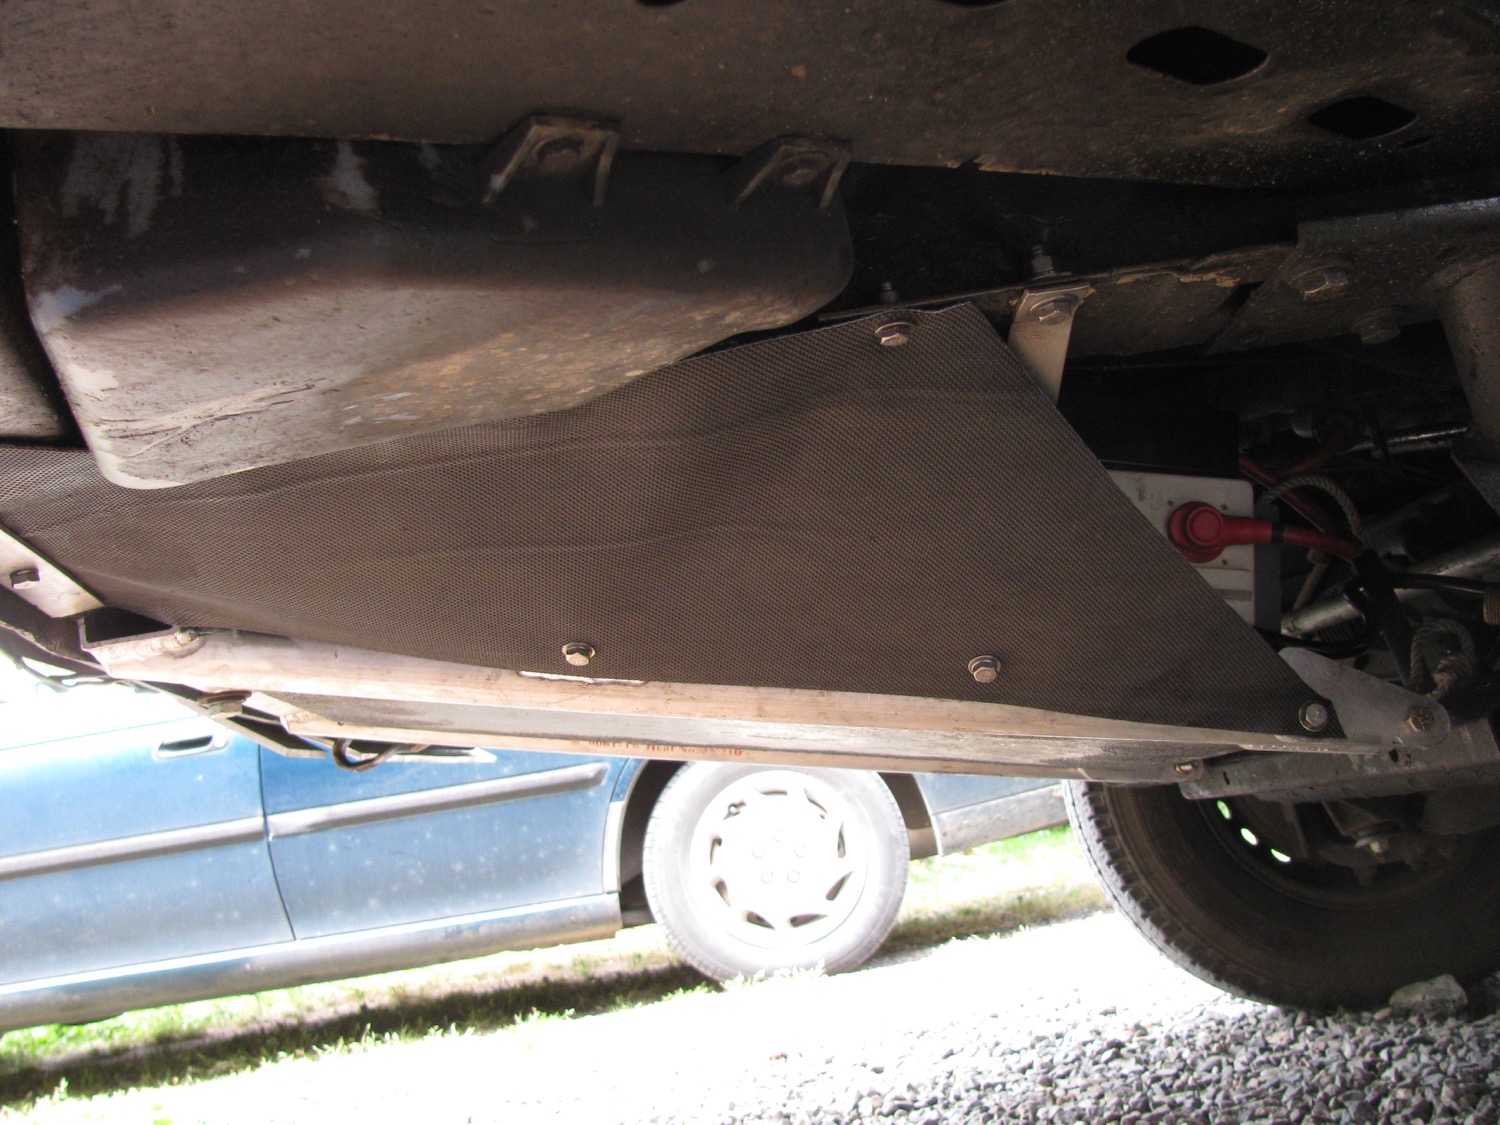
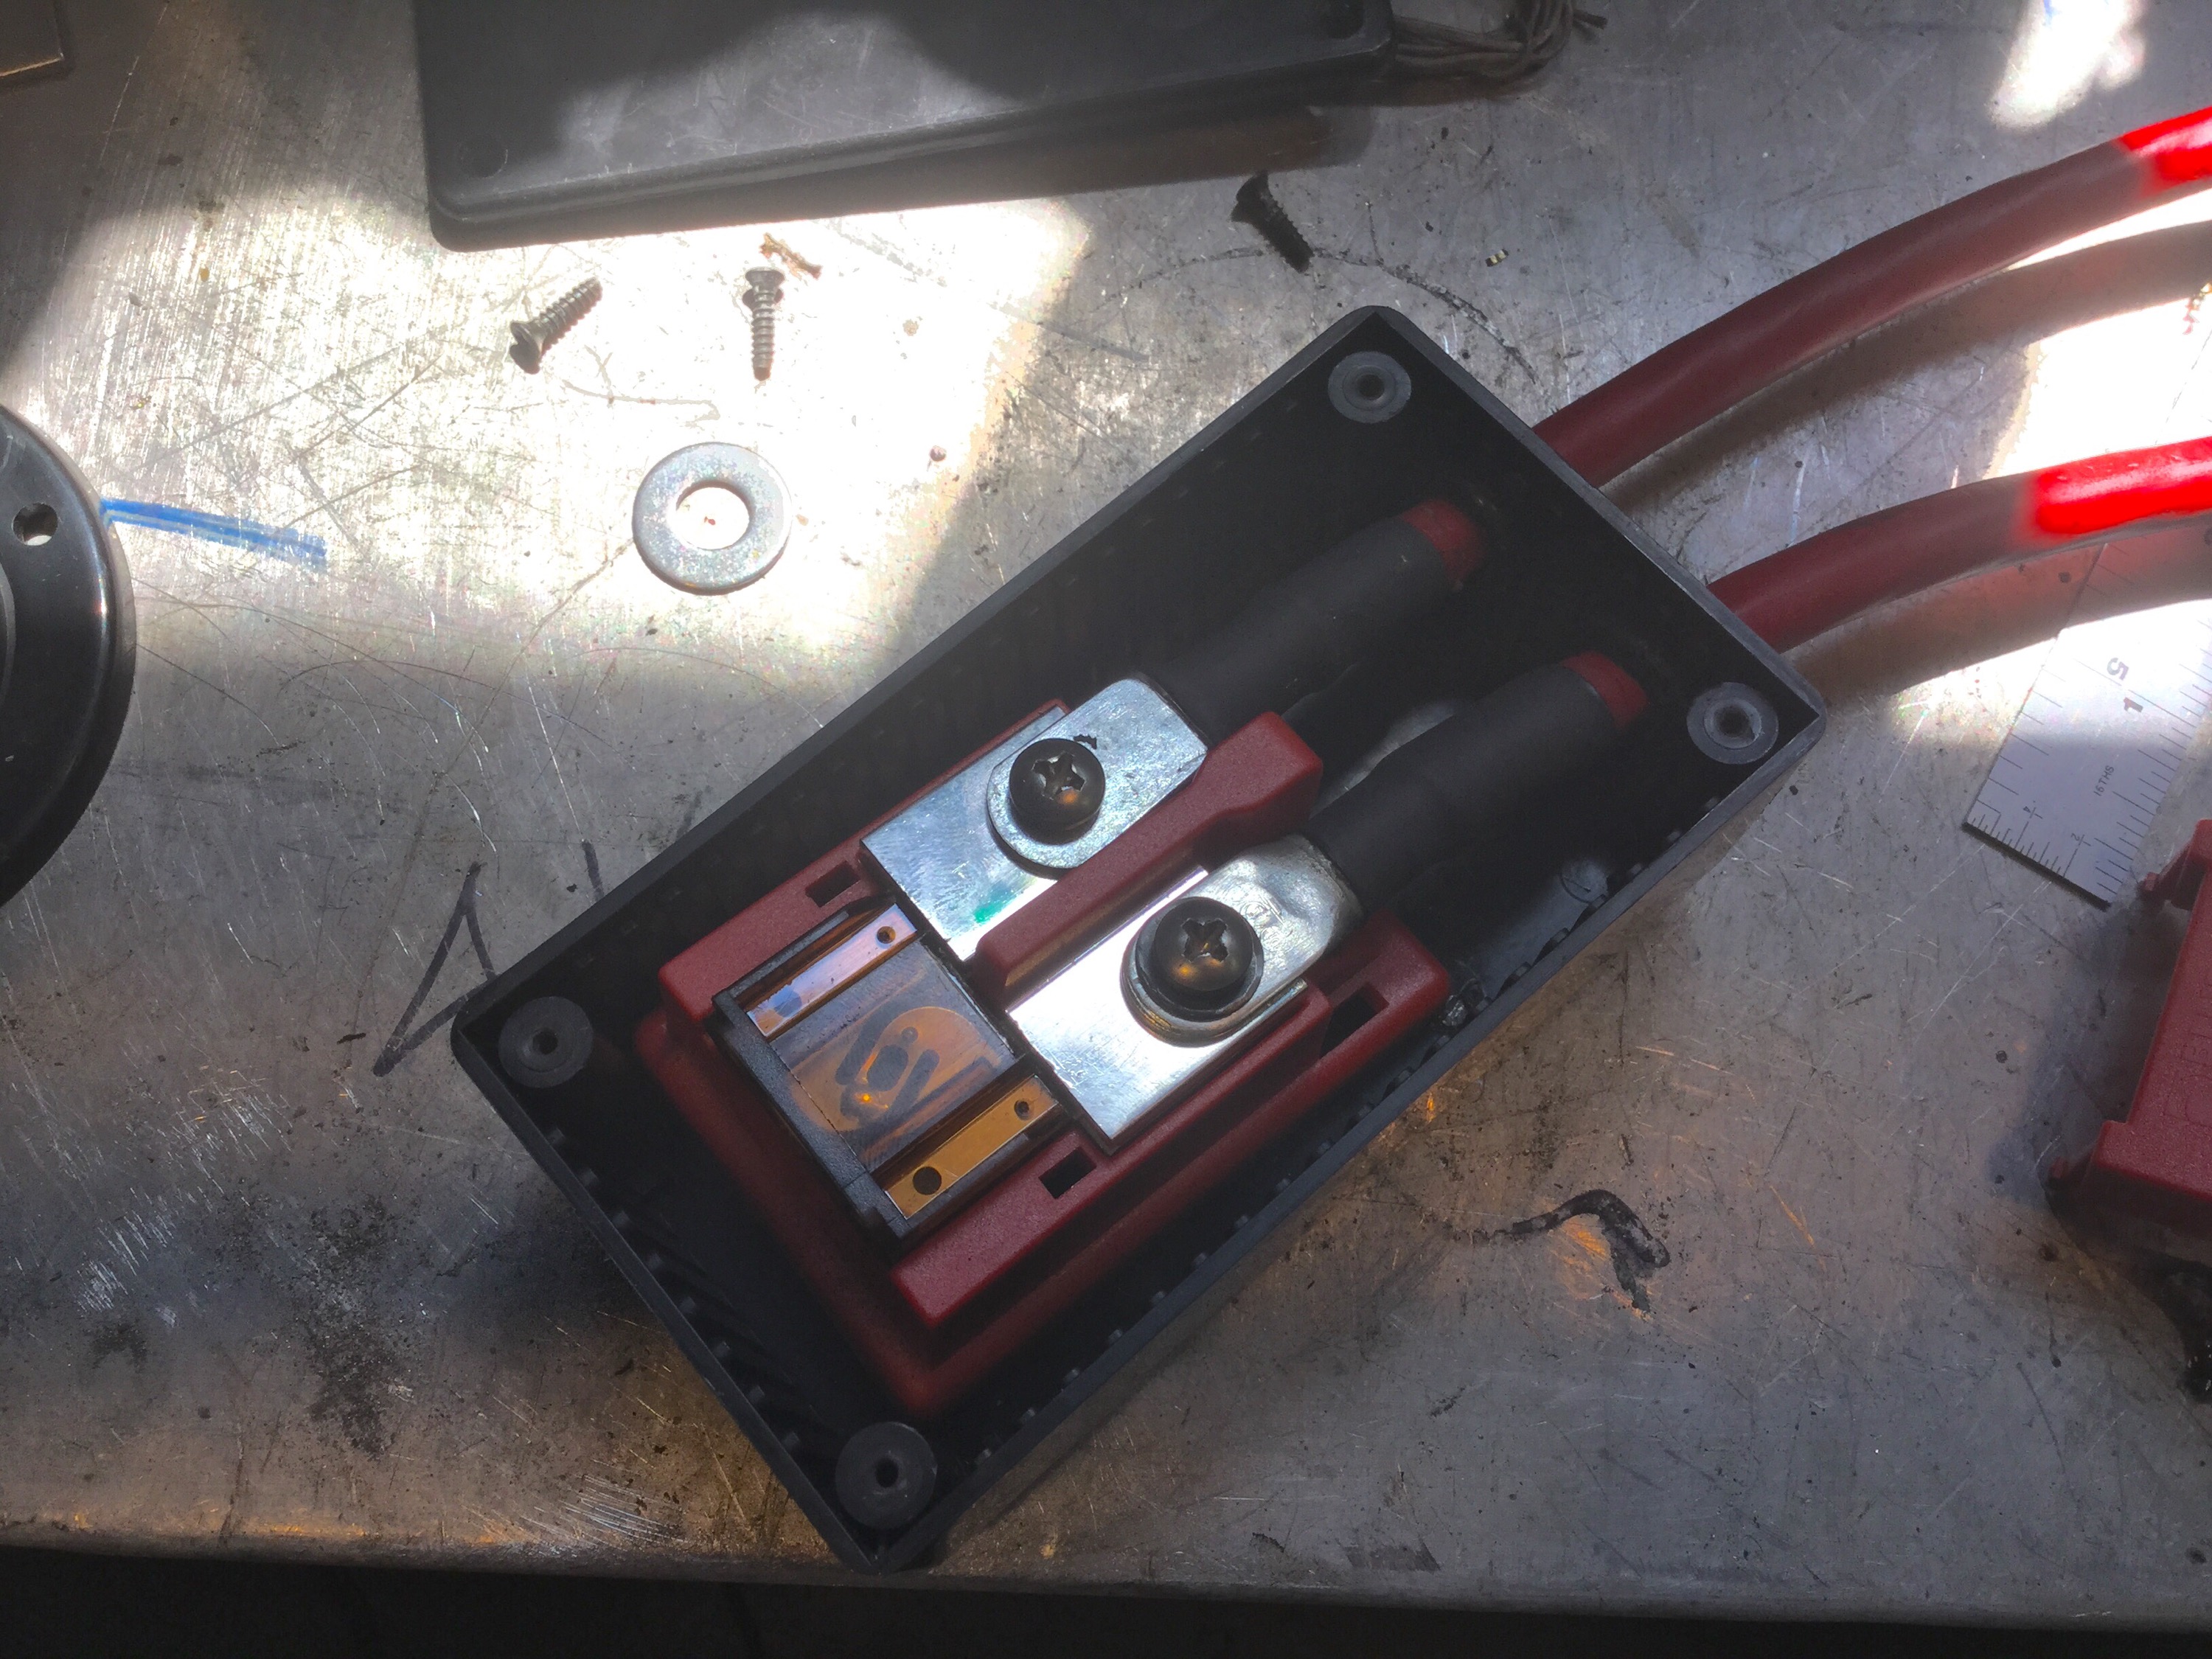
It’s not great but it’s not bad. It’s just there to reduce water splashing on the battery. Not shown in the pic are tubes leading from the battery vent up over the battery and on up to behind the front grill. When I did that I was thinking I was clever, I thought that leading the vents up high would prevent water getting into the battery if I happened to go through a deep puddle. But I found out later that the battery vents have a valve in them to prevent water ingress. A note on the wiring. I ran a short length of 4 gauge wire from the negative terminal back to the bolt holding on the transverse member supporting the front differential. On the positive terminal a short length of 4 gauge comes off the terminal and up into a black box (attached by Velcro) on top of the battery. In that box is a Blue Seas Maxi Fuse block, with a 70 A fuse.
Update: in the comments Marius wondered about battery cold weather performance. Here is a graph I found in one of Northstar’s documents .


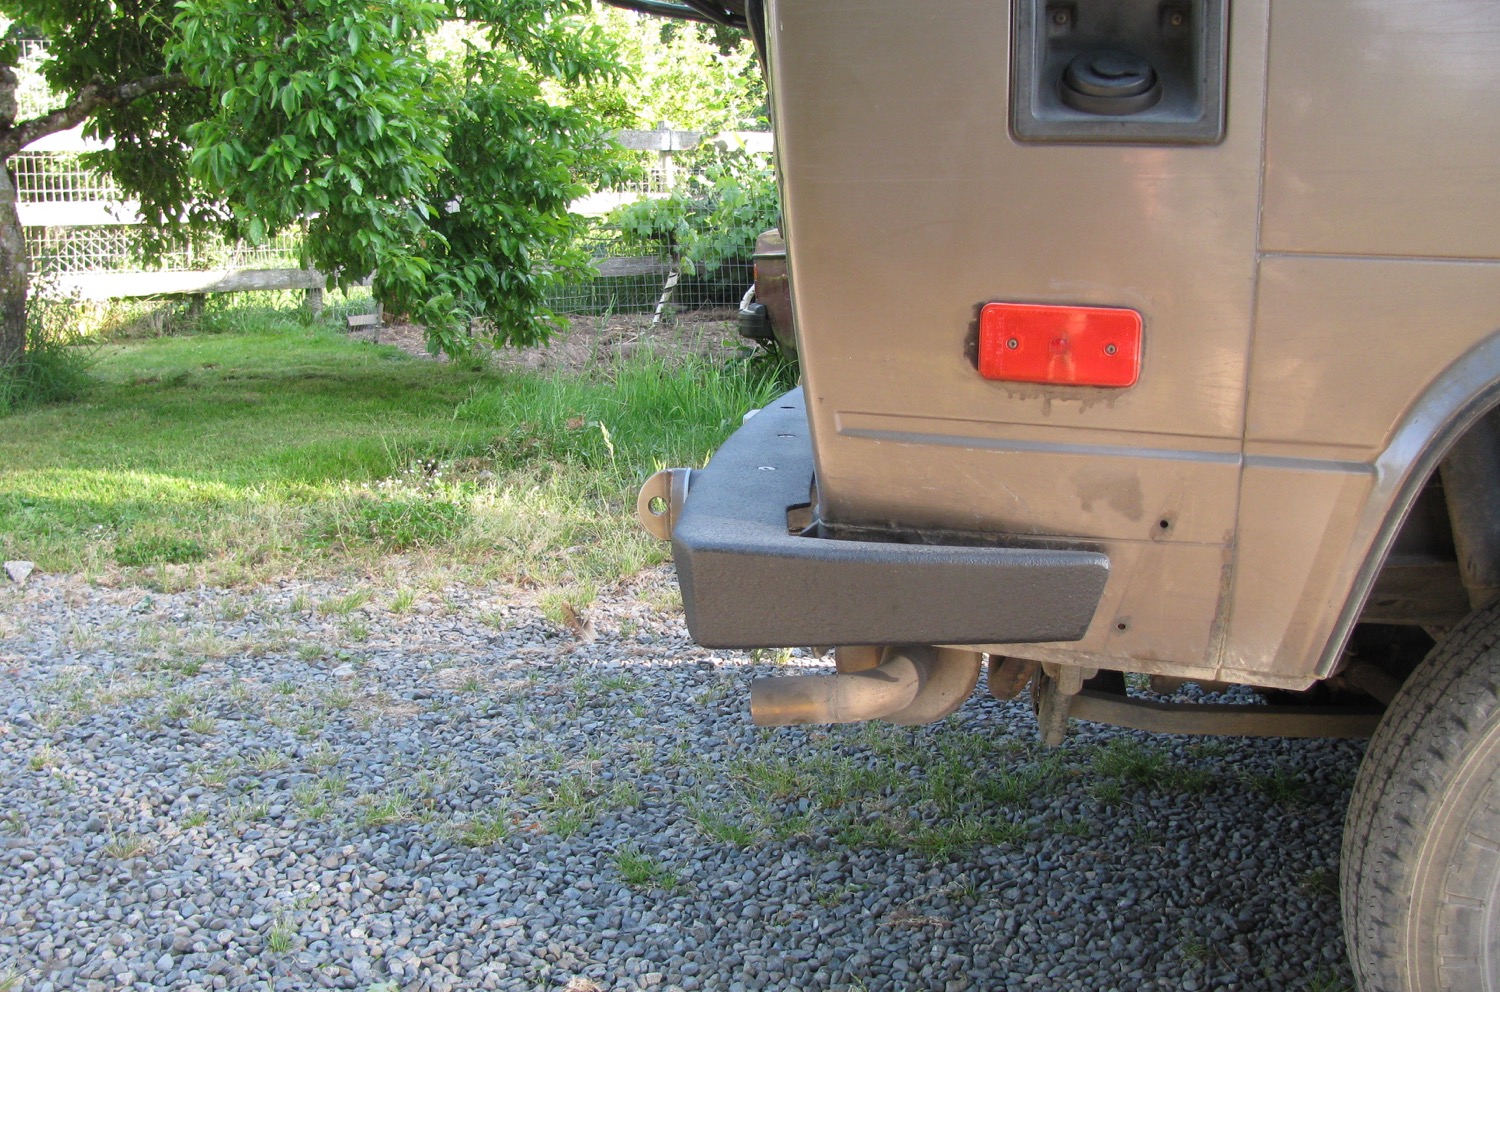
 Then out of the box and through some plastic sheathing and a sealed bulkhead fitting into the battery compartment behind/under the driver’s seat. Then it continues on to connect with my Blue Seas ACR. I’ll write more on that when I tidy up the wiring, I’m going to change the auxiliary power distribution layout there. I was surprised and pleased to discover that when all is bolted up tight the stainless straps from the tray to the frame seem to support the entire weight of the battery. The bolts at the rear, where the tray hinges on, have no weight on them. So that pretty well sums up the installs the battery. As mentioned I will post more on the auxiliary power distribution set up when I finally fix the positions of the various components. So… The spare tire, where does it go? It’s time for a confession, I couldn’t get my swing away tire carrier to work the way I wanted to. I’m not going to explain all the things I tried, and I did try a lot of things. But I could not get happy with the rigidity of the set up. The tire vibrated in the carrier when I smacked it with my hand. It bugged me no end. I finally lost my patience and removed it, cut out the hinge from the bumper and welded the bumper back together and painted it. I’m going to make a hatch mounted tire carrier, don’t laugh… Yet. In the meantime I’ve pulled my old Paulchen rack out and I have the tire bolted on that.


And the bumper… well its ok, but I’m not ecstatic about how far the end caps stick out, oh well maybe I can say it provides better side protection and its Mk I. And i still have to paint the tow loops and the receiver hitch.


ATA – Early summer Beaver report
Posted by albell in aircraft, around the airport on May 20, 2015
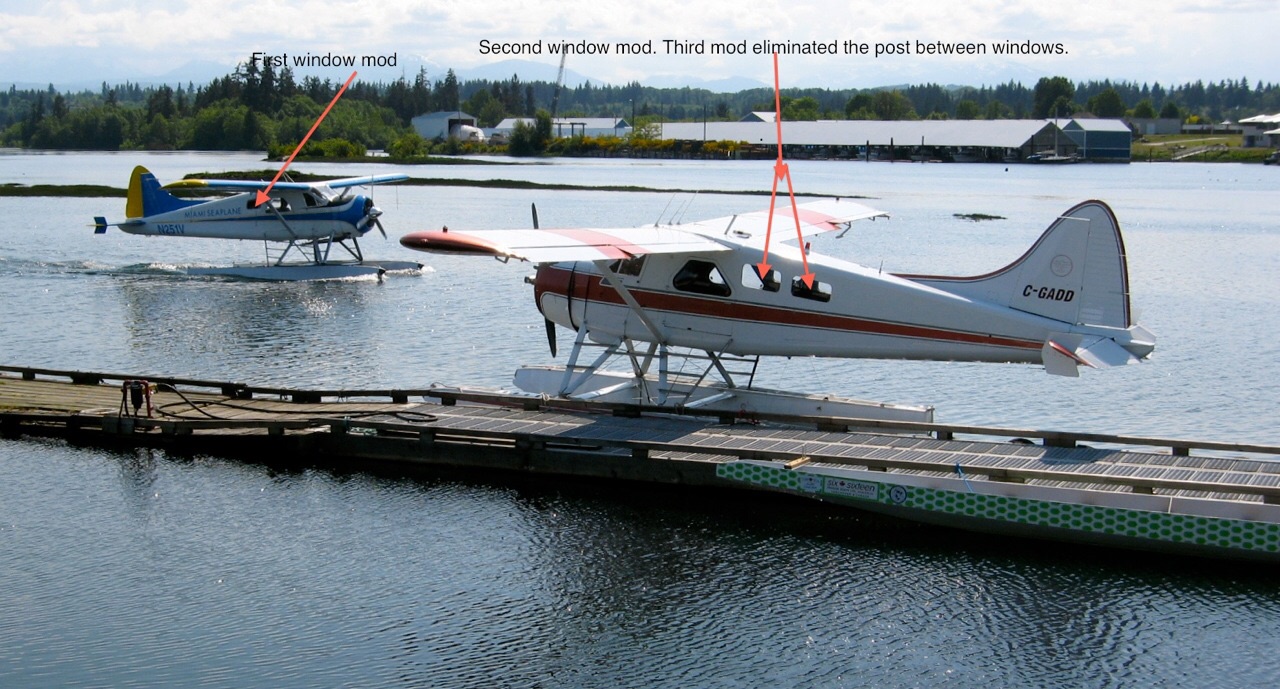
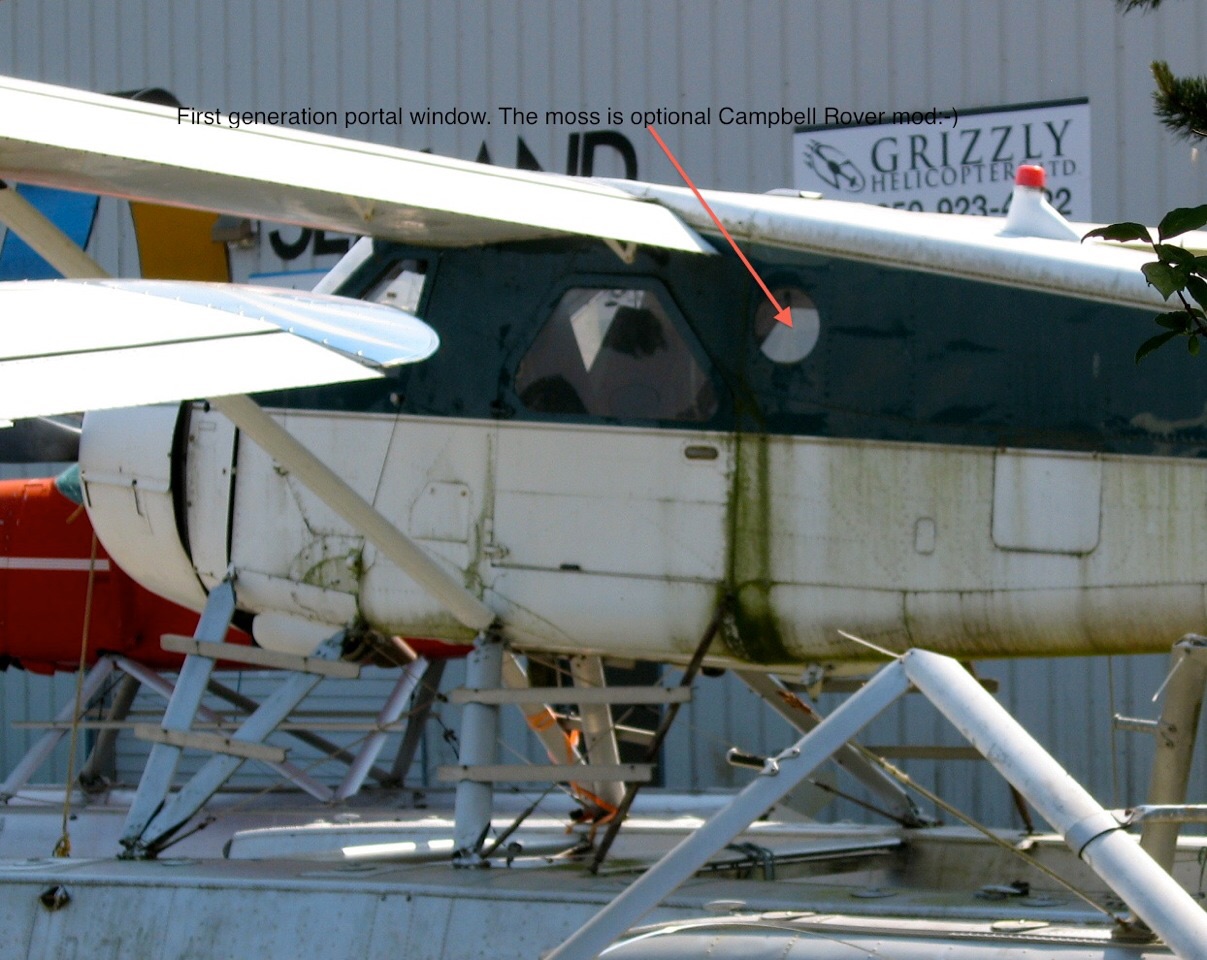
North Island correspondent Phil Z. sent some pics of Campbell River Beavers with focus on cabin windows.
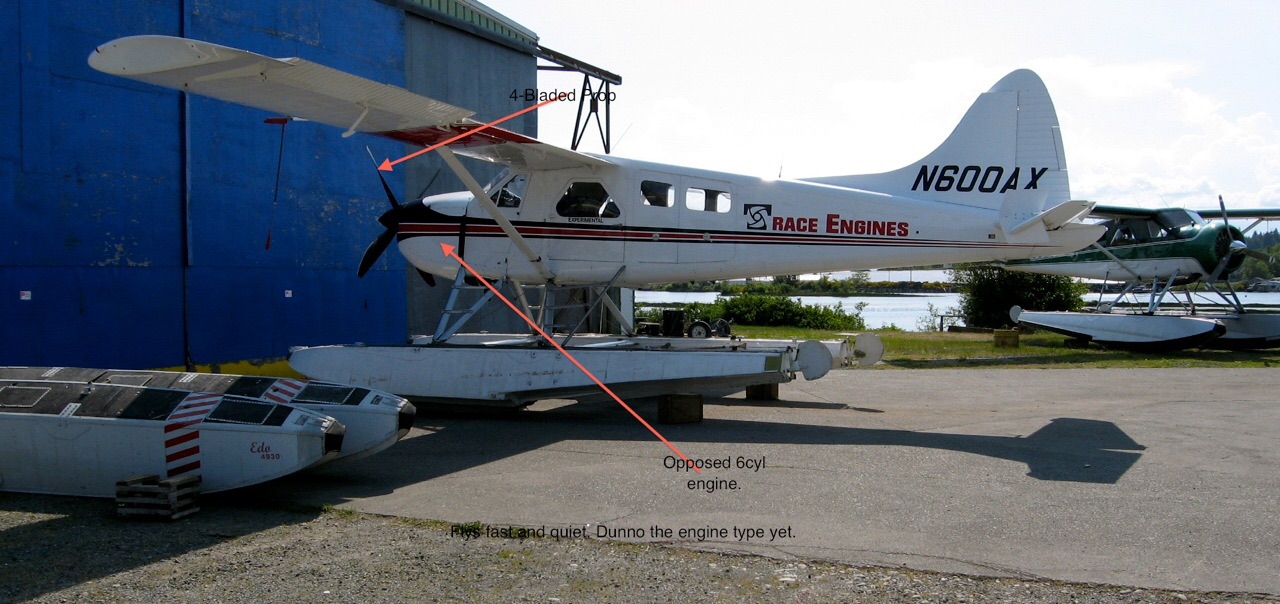
Uodate: Phil writes that this is a turbo V8 engine in Beaver pictured above. More info here
http://www.sealandaviation.com/blog-entry/first-trace-beaver-flight-floats