Archive for April, 2012
Vanagon – coolant temp sender wire repair and another broken hose
Posted by albell in syncro specific repairs, vanagon on April 24, 2012
Is it good or bad luck I am having?
About the same time I discovered that leaking coolant hose I mentioned in this post, I noticed that my coolant temp gauge was not working – no needle movement nor did the warning LED flash upon start-up. I had been mucking around with the cluster a fair bit and I thought that I had either broken the circuit foil or had a bad connection at T14. But examining the dash did not reveal any problems. I finally tracked it down to a bad connection at the female spade connection to the temp sender back on the thermostat housing. The insulation on the wire was very brittle for about 2″ up from the spade, and the connector itself felt a little limp on the wire. It has been worked on before, that is not a stock spade connector.

The copper was corroded, and you can see the discoloured insulation which pretty well corresponds to the brittle section.

I cut back the wire to where it was flexible and spliced in a new length, plus a new spade connector (section of plastic insulation was cut out to allow the spade to slip on the temp sender).

Here is the brilliant location of the temp sender, exposed to heat and road splash.

And the new connection made.

So after that I was mucking around looking at things in the engine compartment, engine running, when I pushed on the hose that runs from the upper coolant crossover tube to the narrow steel tube that runs around 3 sides of the engine compartment. The hose split and coolant rapidly spat out. Yes, that is steam in the picture.

Te previous owner had used fuel line hose, and it was hard and brittle.

I had some spare hose to make the repair, and I think my van is really trying to tell me to go over all of the hoses and replace. I got the message with the previous leak, but nothing like another nudge in the ribs.
Vanagon – eccentric stub axle?
Posted by albell in syncro, syncro specific repairs, vanagon on April 22, 2012
(note: holding stub axle by the splines was an error duly pointed out by David in the comments. Axle re-measured and post updated.)
I was complaining to Phil Z. about my wheel bearing failure and he suggested I have a look at the stub axle. So I chucked it up on the lathe, holding it by the splined outboard end (was careful to have the chuck jaws positioned correctly on the splines) and then I measured a couple of things.
Where the outboard bearing seats had 0.009″ runout.

At the inboard bearing seat I measured 0.015″ runout (sorry, fuzzy pic slipped past me).

Where the seal rides, 0.020″.

The face where the CV joint mates had 0.010″ runout.

I did not measure that outer edge of the CV mounting flange as I thought eccentricity there was not important as the cv is aligned by the bolts.
And here is a quick vid of the assembly spinning.
What does all this mean? How does a new stub axle measure up? Was this runout the cause of my bearing failure?
Addendum: Crow eating time. David’s points about where I was grabbing the axle (splines) was correct. I re-measured runout with axle held by outer bearing seat.
Runout at inner bearing about 0.005″.

At seal, 0.007″.

Flange face, 0.002″.

Looks a lot better in motion.
So there, no smoking gun after all.
Vanagon – cooling system leak
Posted by albell in syncro, syncro specific repairs, vanagon on April 20, 2012
Bloody vans eh? No sooner than I fixed that wheel bearing than another problem bites me. Last couple of days I had been noticing a slight whiff of coolant when I got out of the van. I couldn’t see any leaks, inside or out. Then yesterday I noticed that my coolant overflow tank was empty and even I could not ignore the fact that I had a real live leak somewhere. I topped up the tank and fretted about expensive repairs. Today after a short drive, the smell was much more pronounced and I did find the leak. Thank the Vanagon gods that it was a hose leak, short section that runs from the thermostat to the lower of the two crossover pipes at the front end of the engine.
This pic from above does not show any wetness (the bad hose is the lower, thick one). Update: I think it is this hose featured at Van Cafe.

But from below, you can see the marks of a leak.


I had to remove a bracket that holds the remnants of the Webasto coolant heater system to get at the short hose, and remove the bell housing vent to get it out of harm’s way (syncro bell housings are sealed to the motor and a vent is provided that leads up somewhere above the gas tank). No surprise I suppose when I broke the plastic elbow when removing the bracket, so it goes.

With the bracket out of the way, I could get at the hose. Off it came and time to look at it closely.

Just a pinhole really, but big enough to piss away 1 litre of coolant in about 30 minutes of driving. I had some used hose that I took the chance with, and I got it back in place. I had a closer look at the broken vent elbow, it was plugged solid with some sort of crap.


Then I made a jury rigged repair to the vent elbow using some silicone tubing, stainless tubing, and a bit of stainless wire wrap.

Yeah, I know, this hose leak is a not so gentle reminder that all of the cooling hoses on the van are old and tired. The thing is, I have it in mind to swap in a different motor so I’m being a bit cavalier with this old wasserboxer.
Vanagon – getting that 46 mm wheel nut off
It occurred to me that I should have mentioned how I removed the 46 mm castellated wheel nut off the rear wheel in the last post about the bearing failure. The nut is on there good and tight, Bentley says to torque it up to 360 ft lbs (for the 10 slot castellated nut, the older 6 slot nut was torqued to a lesser value, something like 285 ft lbs). I don’t have the heavy duty air tools that would handle this but I do have a 3/4″ drive, imperial socket that fits (1 13/16″ – handy metric to fractional imperial chart here), corresponding tommy bar, and a 3 ft section of thick walled steel pipe. You can apply a lot of twist with this set up and can even get a fairly good idea of torque applied if you know your weight and where about on the pipe you are applying it. You know the drill, 100 lbs of weight one foot from the axis of rotation is 100 ft lbs, same weight two feet out is 200 ft lbs. You loosen the nut before you jack up the van, and have the handbrake on. But the other day when I was doing the bearing job I had a dickens of a time getting the nut off without the wheel turning and the van moving, and it was impossible to loosen the nut on my parts van as the transmission is out and the free end of the axle was just hanging in space. I did try the slug wrench mentioned in my original post on wheel bearing replacement, but it did not budge the nut.
So how do you stop the wheel from turning when you are grunting down on the end of the 3 ft extension? Well, you have to jack van up and support it securely on good jackstands. Remove the wheel, and use the lug nuts to secure some sort of metal bar to the brake drum. I have lots of scrap bits of aluminium around, so I used some 1/8″ 3/16″ thick angle. The angle bears on the ground stopping the hub from turning. Here is a snap taken today when I pulled the drum and hub off the other rear wheel to have a look at the brakes. Not very clear in the pic, but there are 2 lug nuts holding the angle to the drum. Note also the old house jack supporting the socket extension.

This really worked, no drama, no movement of the van. Used the same technique when tightening the nut.
Oh and here is what I wanted to look at. With the hub out of the way I could see the gubbins clearly and I wanted to be sure all the brake springs were installed correctly (I *think* they are). Plus I wanted to pull off the threaded adjustment bar and clean it up so that it would actually adjust (I hate the Vanagon rear brakes).

Vanagon – rear wheel bearing redux
Almost exactly a year back I replaced the bearings in right rear wheel, but a couple of days ago I noticed some play in that wheel. I thought more play than there should be (i.e. none to a teensy amount). So I pulled the bearing housing and this time taking the driveshaft and CV joints with it. That meant CV joint to transaxle connection detached. I had a spare assembly, all greased up and ready to go, was from my old ’82 westy and still ok.

Got it installed ok, never really a fun job. Then I had a look at the one year old rebuild. I had the notion that maybe the bearings might be loose in the bearing housings, but no, they had to be driven out with some effort. The outer bearing looked fine, but the inboard bearing looks discoloured.

And it feels slightly rough when spun. So what’s the story? Did I not lube it enough during install? This picture from then looks like I did not put much grease into the bearing, but what you see is the stuff I had smooshed into the bearing, more lube was put on after the bearing was in place.

Maybe I did screw up, wouldn’t be the first time.
Update: looking at the bearing again, I’m not so sure it overheated. It looks more like corrosion on the outside of the outer race. Still puzzling.
Addendum: I cleaned up the CV joints on the axle I removed and one joint is ok, the other is on its way out. I have to admit that I had not serviced the rear CVs since I bought this van a couple of years ago, it really should have been done. The grease was a bit dry on both joints, and one showed signs of impending failure (Ed. jeez, that sounds a bit over dramatic).
Outer race removed.

Expected and acceptable wear.

One of these balls is not like the other ones.

Inner race, would this erosion spread?

You kinda wonder if tri-annual repacking of CV joints is the way to go, or just replace them every seven years or so. It is a bit of a chore getting the axles off, and more of a chore cleaning and repacking. CV joints are about 90 bucks a piece here, I don’t know what is the best strategy.
Vanagon – front door speaker mounts
Posted by albell in vanagon, vanagon mods on April 5, 2012
Update: I painted the mounts and grill. Blog post here. I think the paint holds the grill mesh in a dome shape better than no paint.
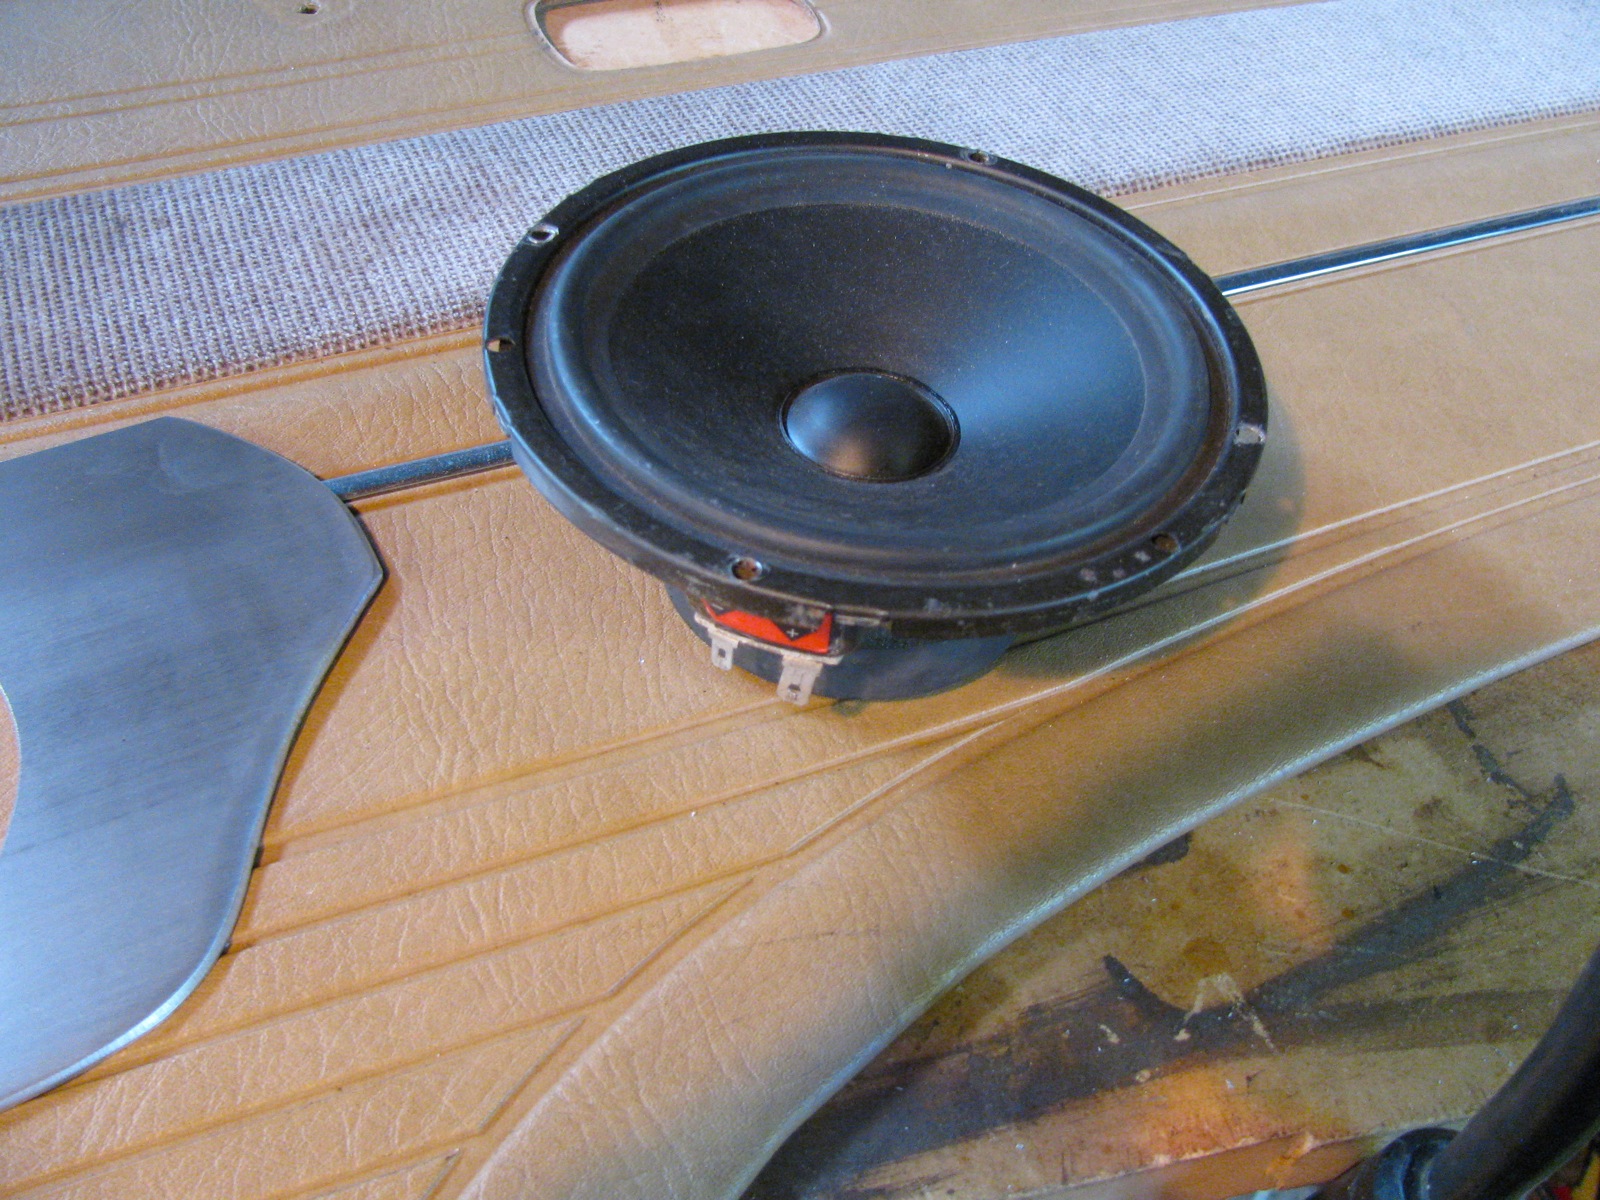
The door cards on my ’86 syncro were falling apart down where the previous owner had installed 6″ Boston Acoustics speakers. Really, the entire door card is pretty tired and warped but I chose to just do a quick and dirty reinforcement around the speakers. I used some scrap 1/8″ aluminium sheet to cut out a plate to stiffen the bottom of the card, some 1/2″ plate was turned down to make new bezels for the speakers, and some stainless steel mesh to make new grills.
It turned out more rugged utilitarian looking than elegant, but much better than before. Oh btw, there are tweeters behind the stock speaker grills up higher on the door. The crossovers are tucked up under the dash.