Archive for January, 2014
Ecoque portable grill
Posted by albell in other, vanagon mods on January 1, 2014
Quick review of a Christmas present.
Over the years I have tried making various portable grills to use on van camping trips. I wanted to have something that would burn both wood and charcoal briquets. The dual fuel requirement is for the times when there is a campfire ban or when there ain’t any wood around to burn. The gizmos I made did work, more or less, but there was a lot of room for improvement. Mind you, I never found a commercially made grill that I thought would work any better. But there was a charcoal only grill that really intrigued me, the Pyromid grill.
Clever design that folds up into a small package, made of stainless steel, used little charcoal. But production ended some years ago. Then last year I noticed that Mountain Equipment Coop were selling something that looked exactly like the Pyromid called the “Ecoque stainless steel 12″ portable grill“. Turns out it is exactly like the Pyromid, the patent had been sold and the grill is reborn. I wasn’t subtle in my hints and my wife gave me one for Xmas.
A couple of days ago I gave it a try out, a dry run so to speak, no food cooked.
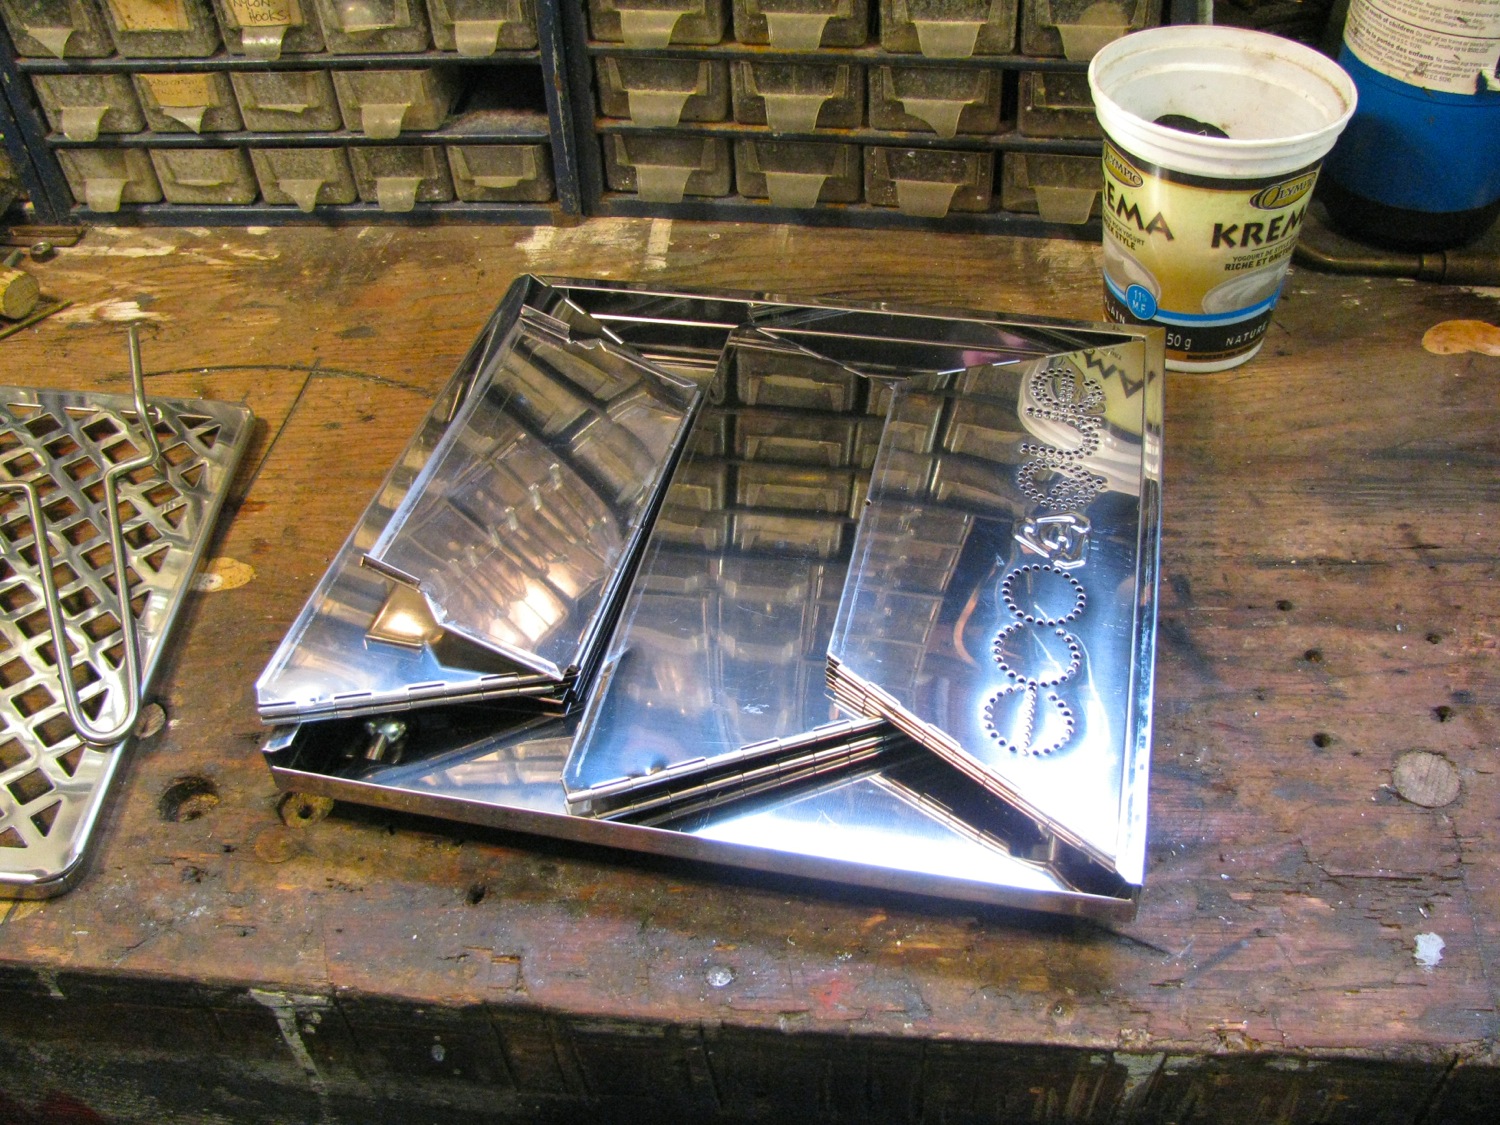
Bag containing grill and a package of foil liners (more about those liners later). Bag is about 12″ square, 2” thick (just spit balling those numbers).

Out of the bag.

Everything nests into the base nicely.
Base with legs unfolded.
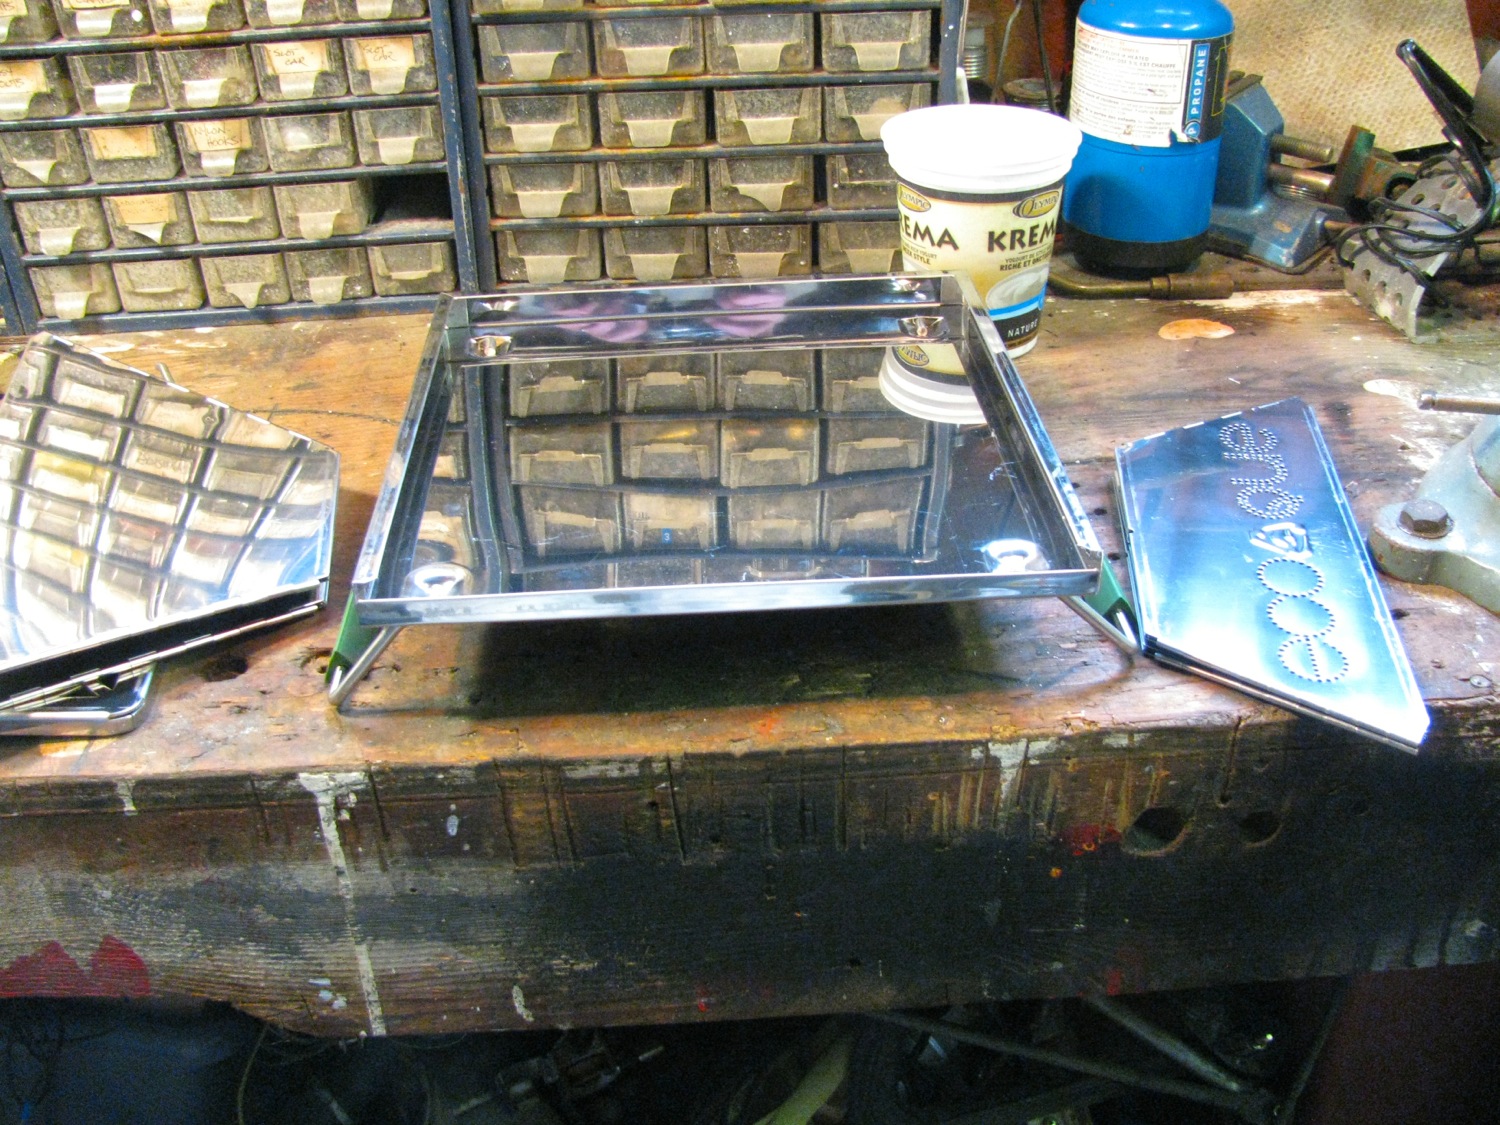
Bottom section unfolded and positioned on base.
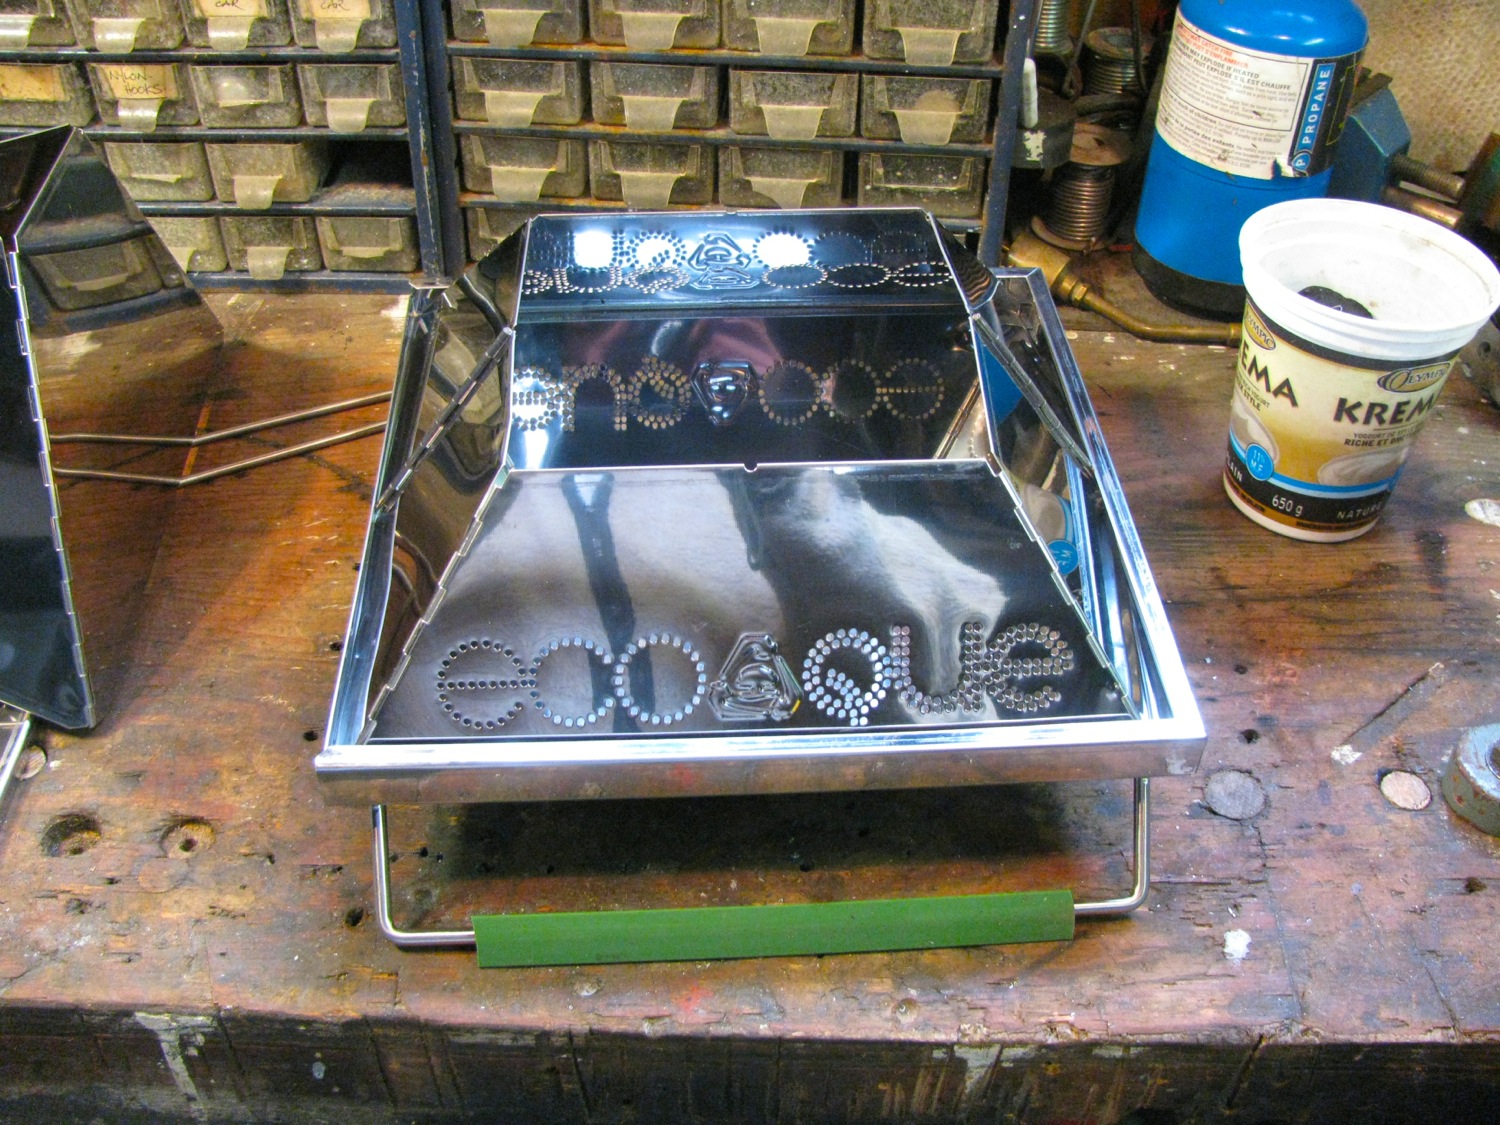
Next section unfolded and positioned. Note: this section should have been placed 90 degrees (rotation) from how I have shown it. More on that later.

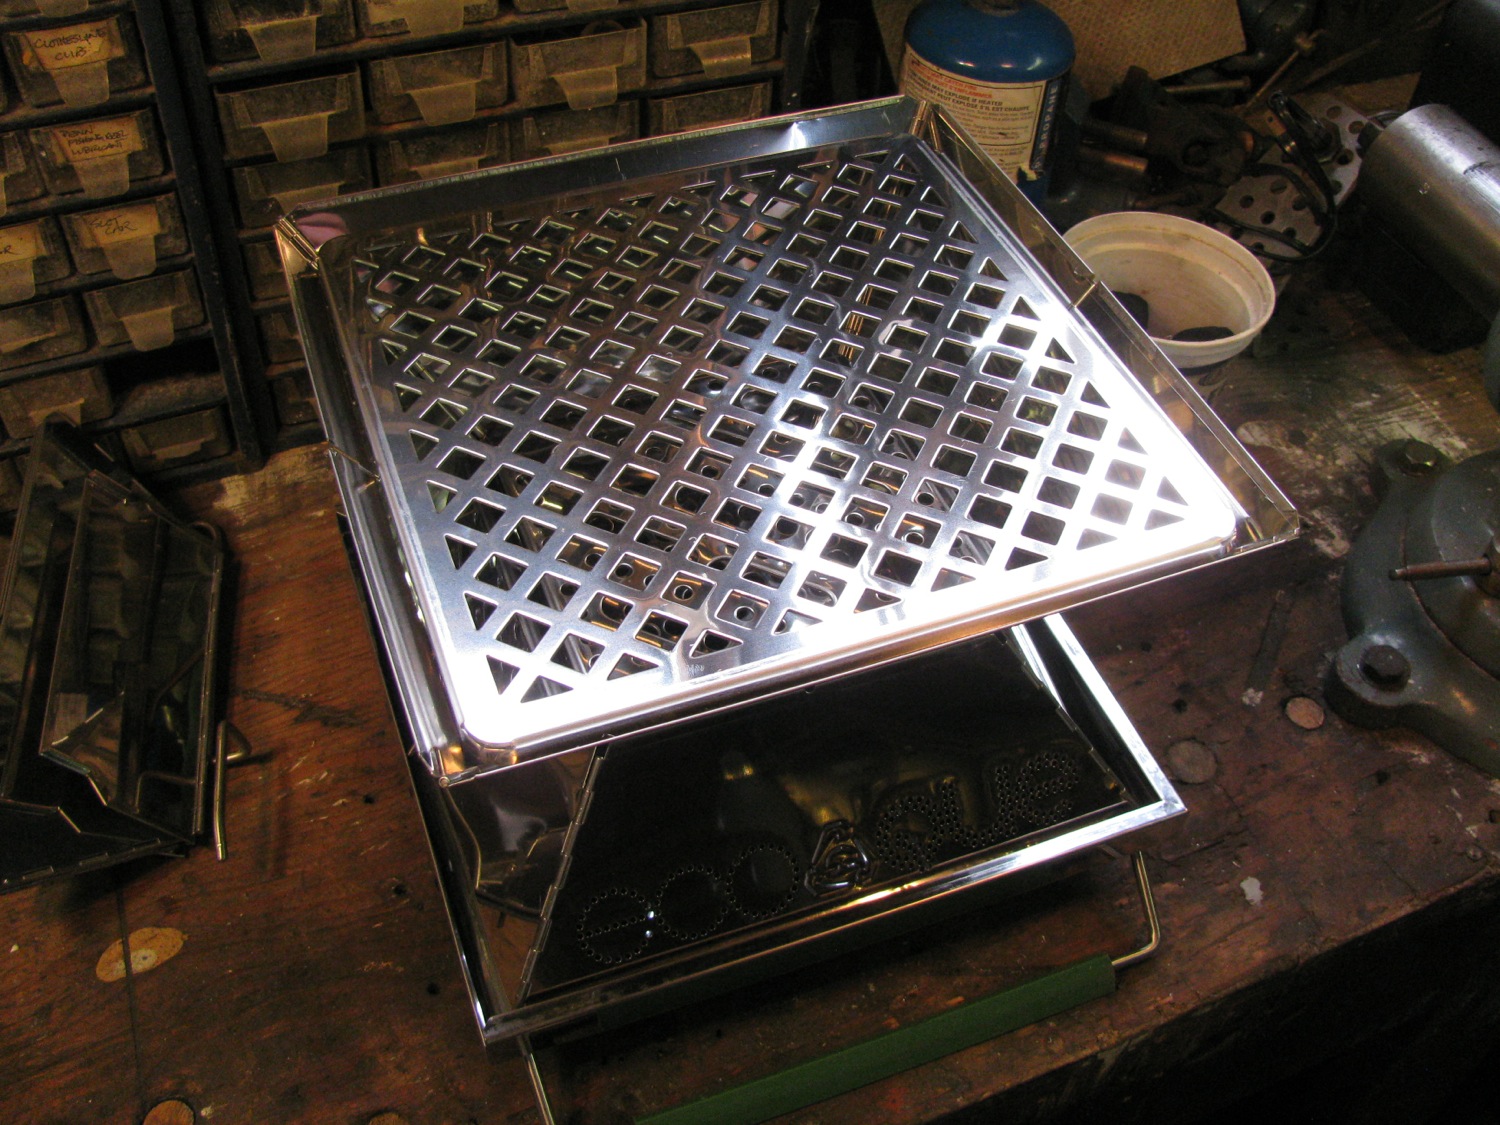
Lower grate dropped in. The instructions say you can place briquets here for a low heat setting. Otherwise this is where you put the firestarter cubes/sticks. Yes, you need to use some sort of firestarter.

And here is the main briquet grate.

Then the cooking grill.
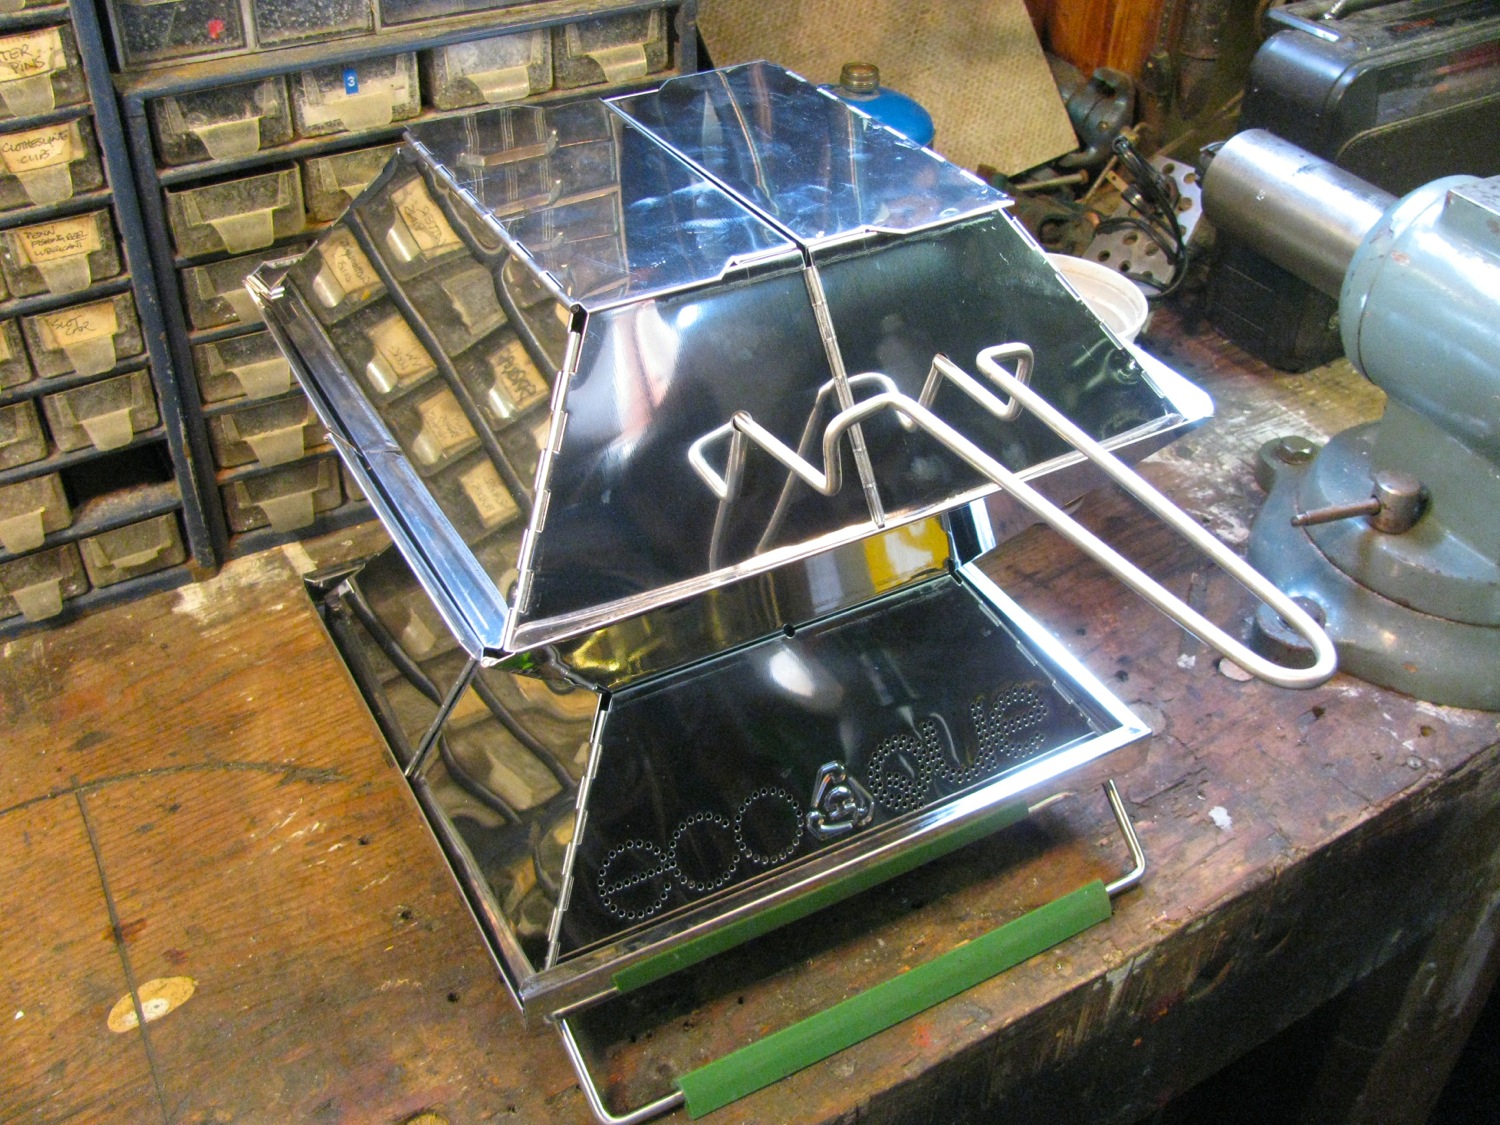
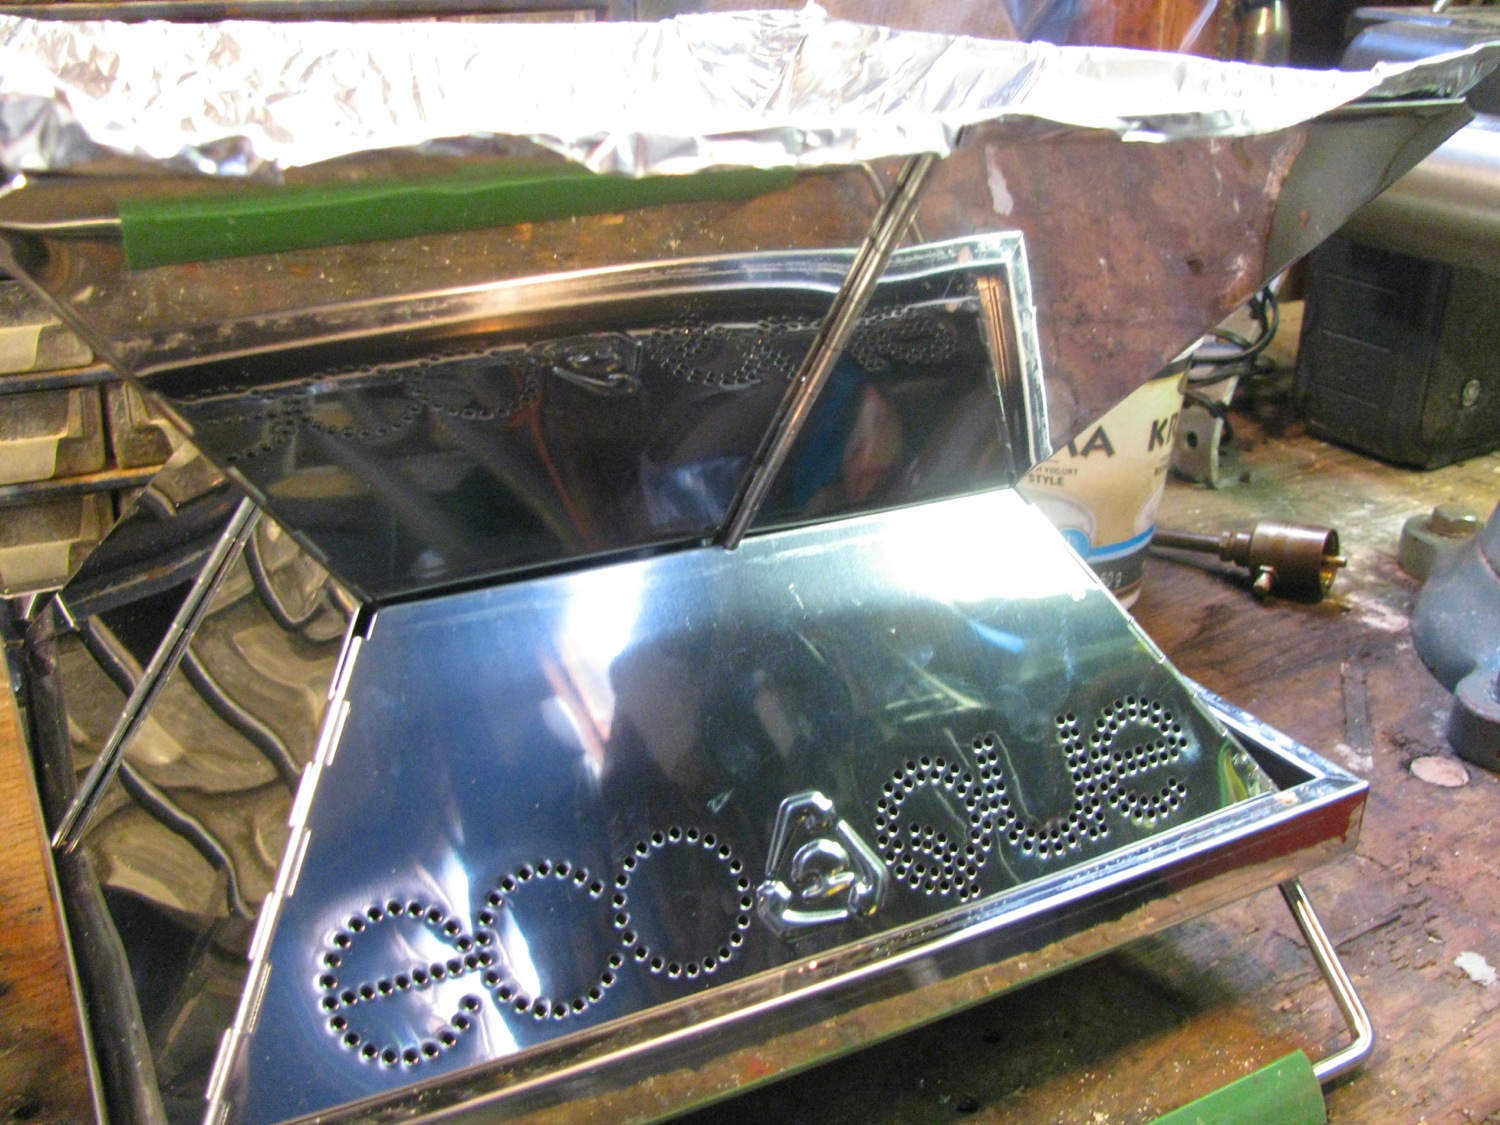
And finally, a hood. Makes it into a little oven, the top is made up from two hinged parts, can be closed or open.

Lifter fits the hood and the internal grates and grill.
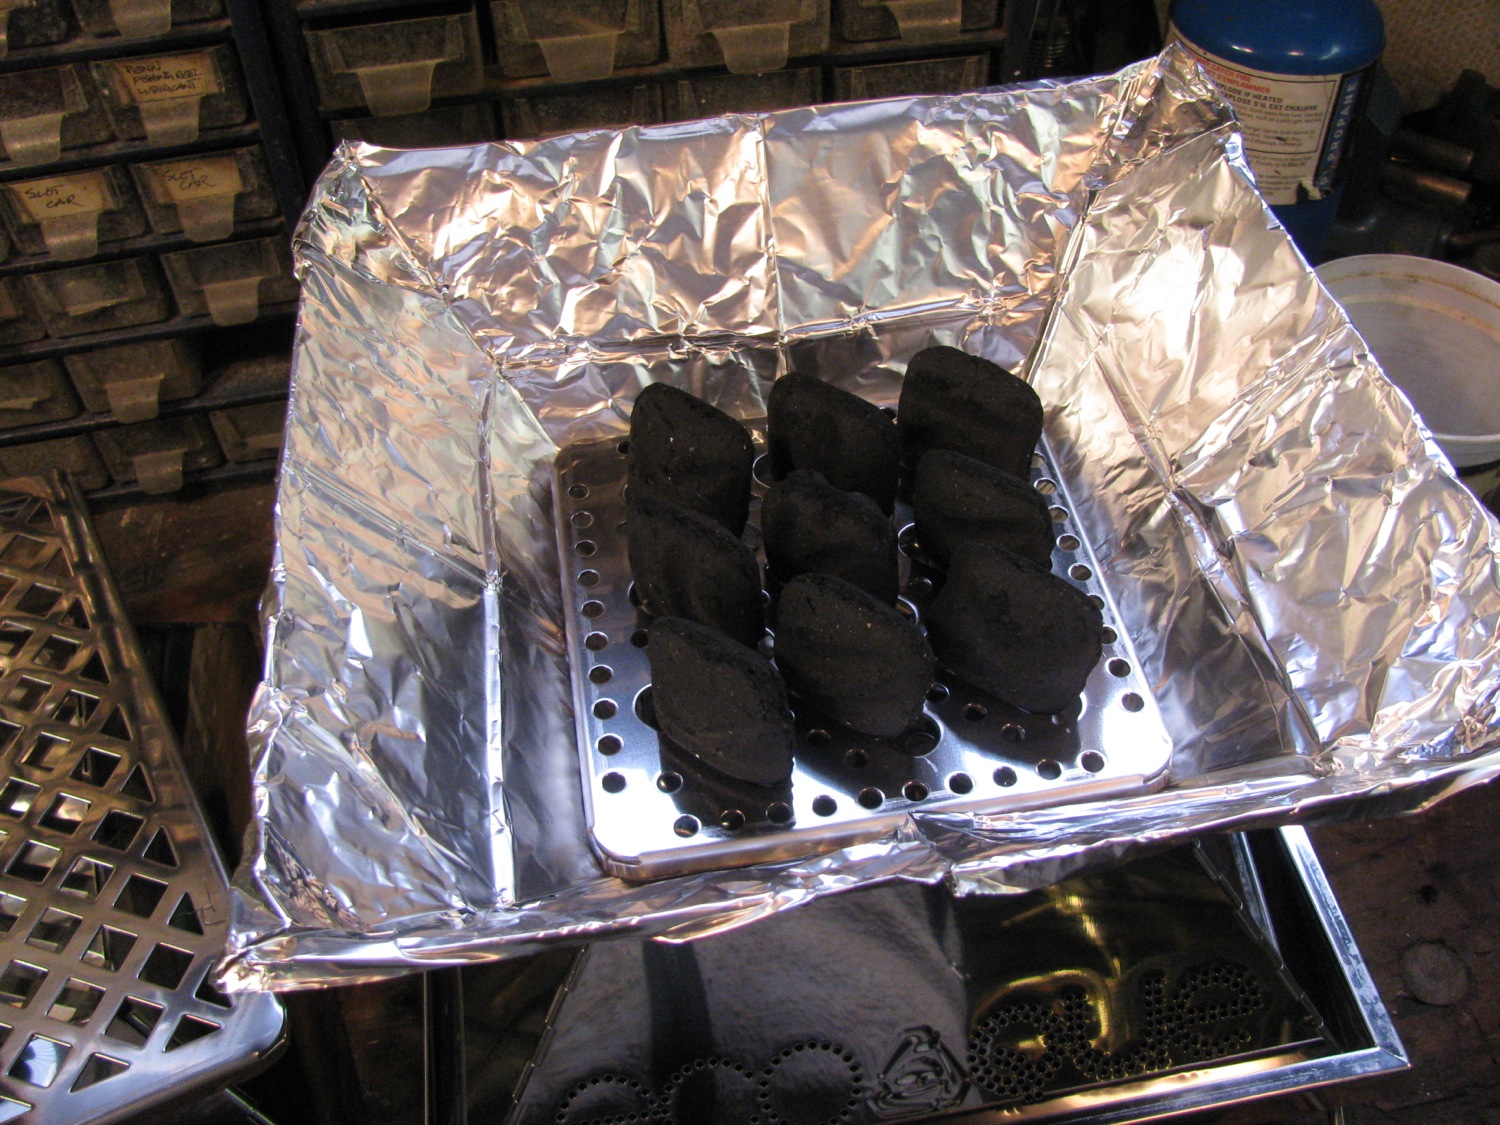
A package of foil liners. Just made from heavy gauge alluvium foil, you don’t have to use them it just makes clean up easier.

I’m going to try the high heat set up. Nine briquets set on edge in slots on the grate.
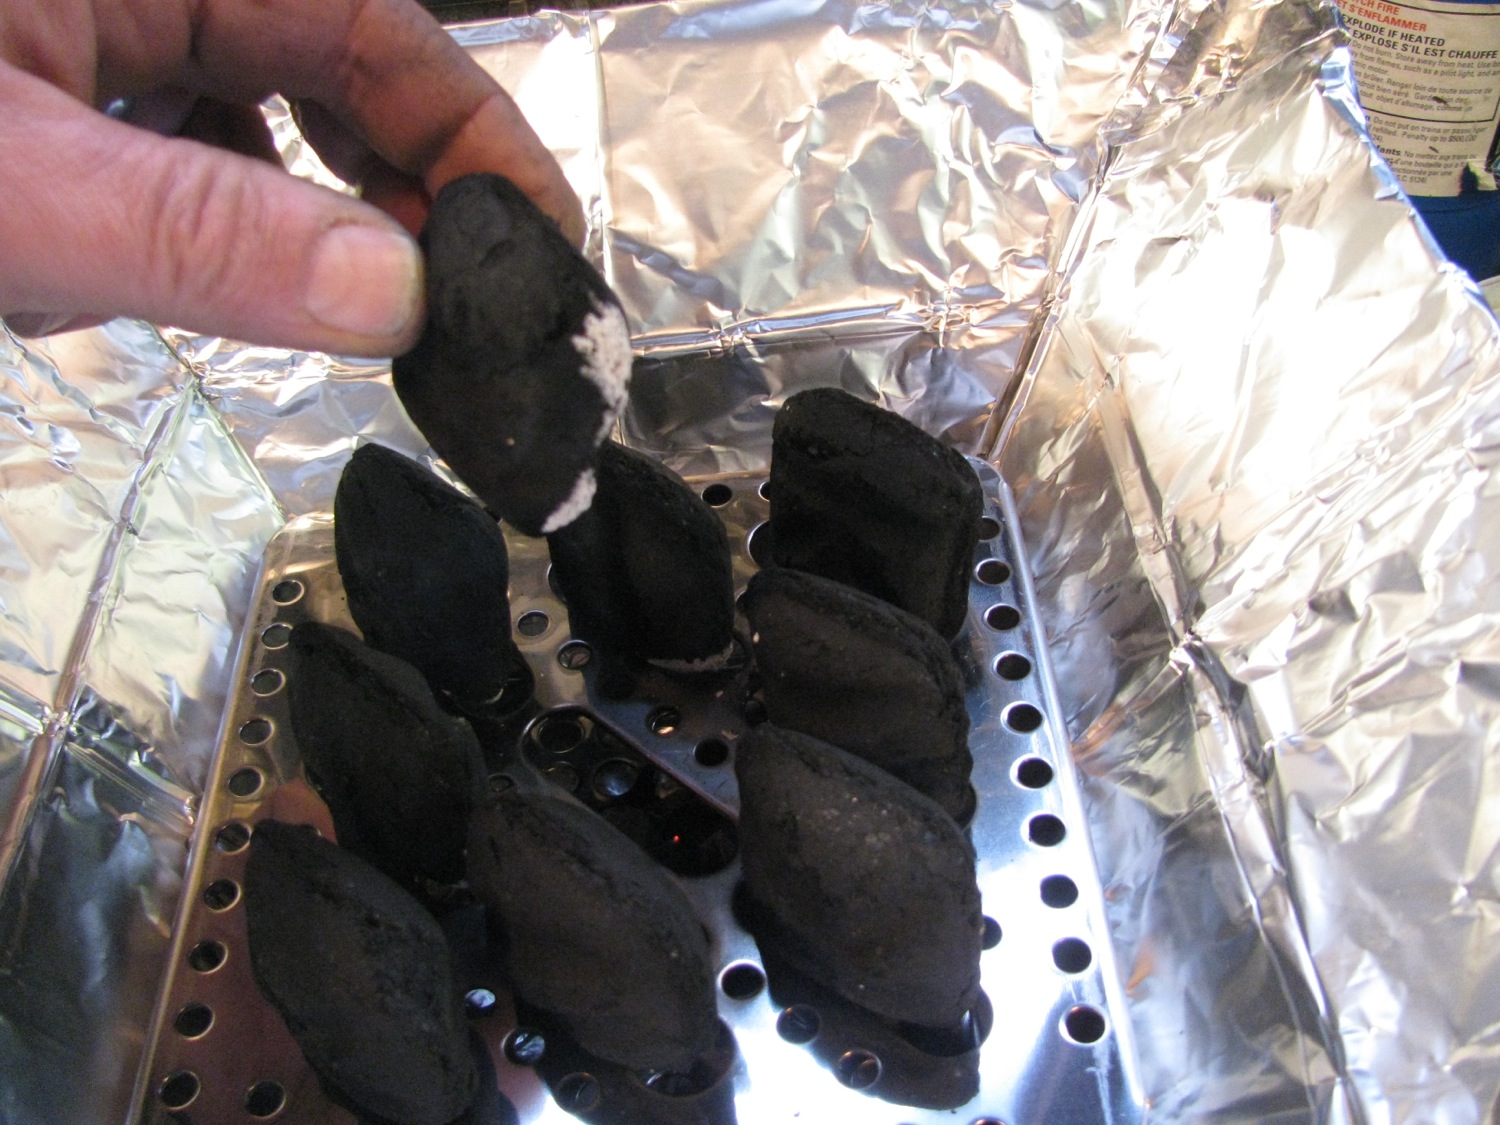
I didn’t have any starter sticks/cubes so I used a small bit of Varsol soaked paper towel on the lower grate, then the charcoal grate put back into place. After about 5 minutes the briquets looked like this.
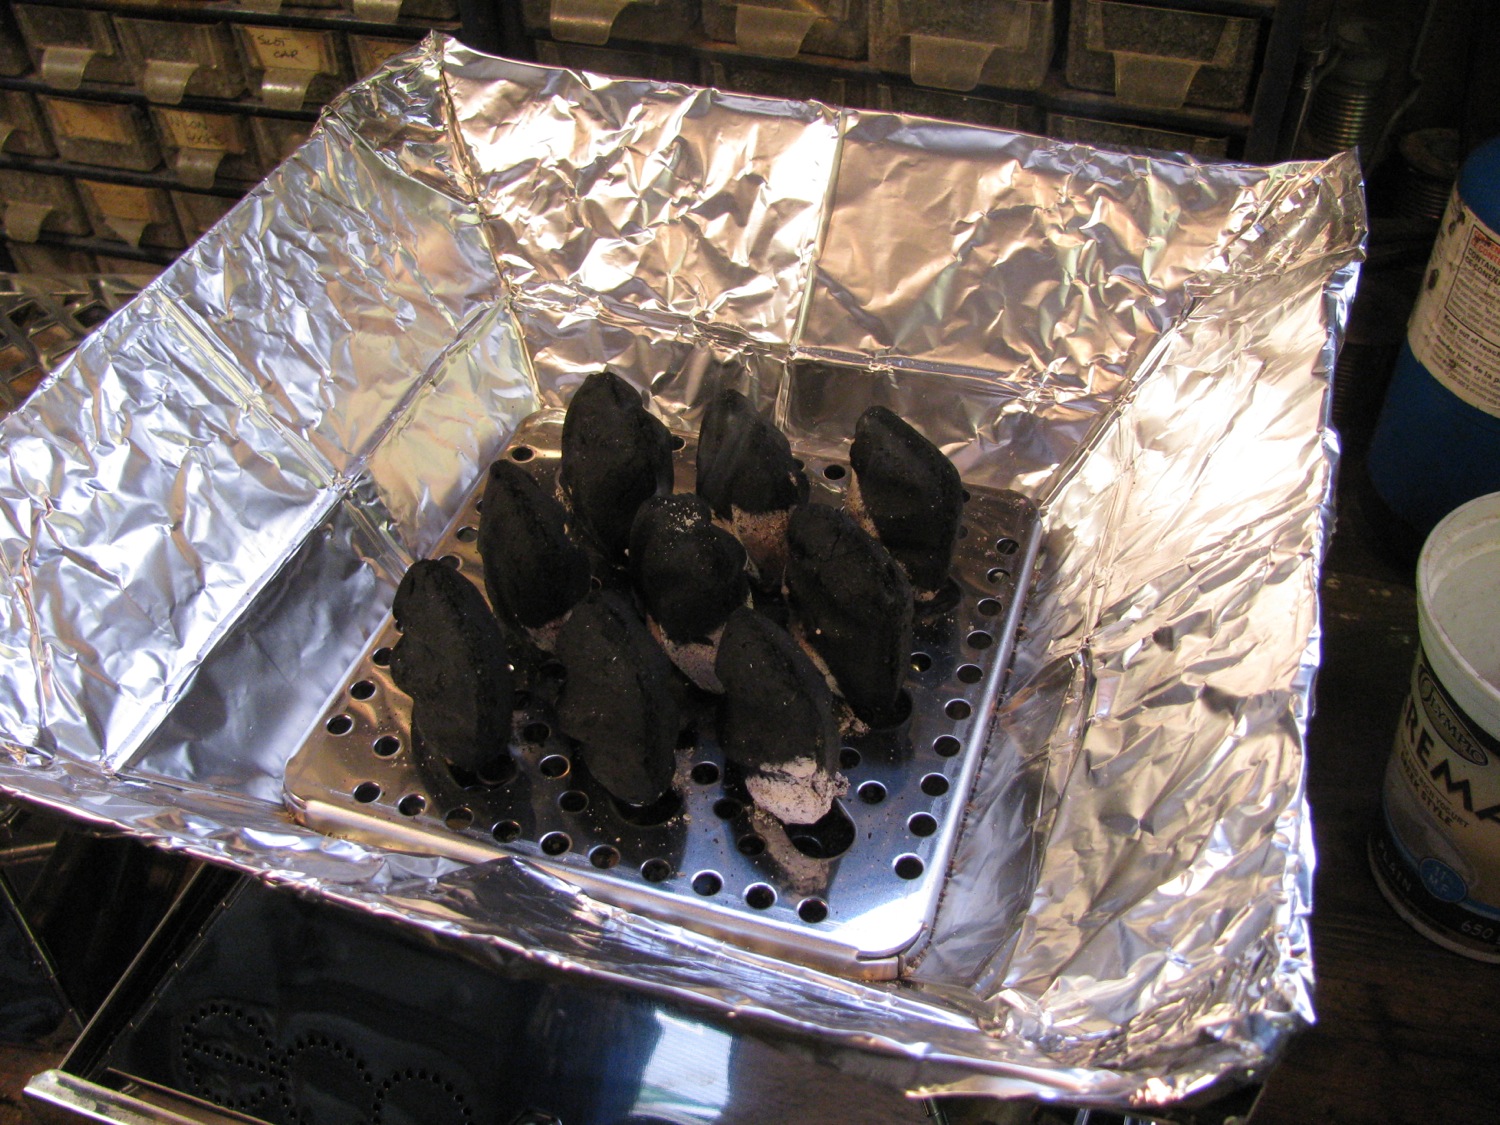
And after 15 minutes.
I mentioned back at the start that I had the 2 main sections placed incorrectly. This picture shows how the hinge on the upper part is now correctly aligned with a notch in the lower section.
Around 25-30 minutes after lighting.

I can hold my hand 1″ above the grill for about 2-3 seconds before I yelp.

Hood on with one door open.

I stopped the experiment at this point, grabbed the briquets with tongs and doused them in water. I’ll probably with until we go on a camping trip before I cook anything on it. So far I like it, very well made and it gets hot the way I like it. I suppose I am not 100% pleased just because you need to use some sort of firestarter to get the coals going. Not a big issue, I’ll make some fire cubes.
Oh one other thing, I have heard (Al K.) that the original Pyromid could be modified to burn small bits of wood. I’ll be looking into that.
