Archive for October, 2017
Vanagon – LED headlight H4 bulbs, next chapter, Part 1
Posted by albell in vanagon, vanagon mods on October 17, 2017
Last winter I installed some LED H4 bulbs into my e-code lamps. Here is the link to the last update about them. If you haven’t read that post, and the original install post referred, and you want to know my reasoning behind trying the bulbs, I urge you to go read them.
Oh and another proviso, I bought both the original and these new versions from Banggood. They weren’t given to me. My opinions about the bulbs are not influenced by any freebies.
So why did I buy new bulbs? There are three reasons. First one is I was not happy about the radio interference they caused. The interference affected weaker fm stations. It was annoying. Secondly, I wasn’t satisfied about the high beam projection. The beam seemed to get lost at distance. On the other hand the low beams are so good that I didn’t need the high beams as often as I did with halogen bulbs. Again, please refer to the post linked above for more on beam patterns. The third reason for trying another set was that these bulbs come with optional gel filters, yellow. I was curious about how they would work.
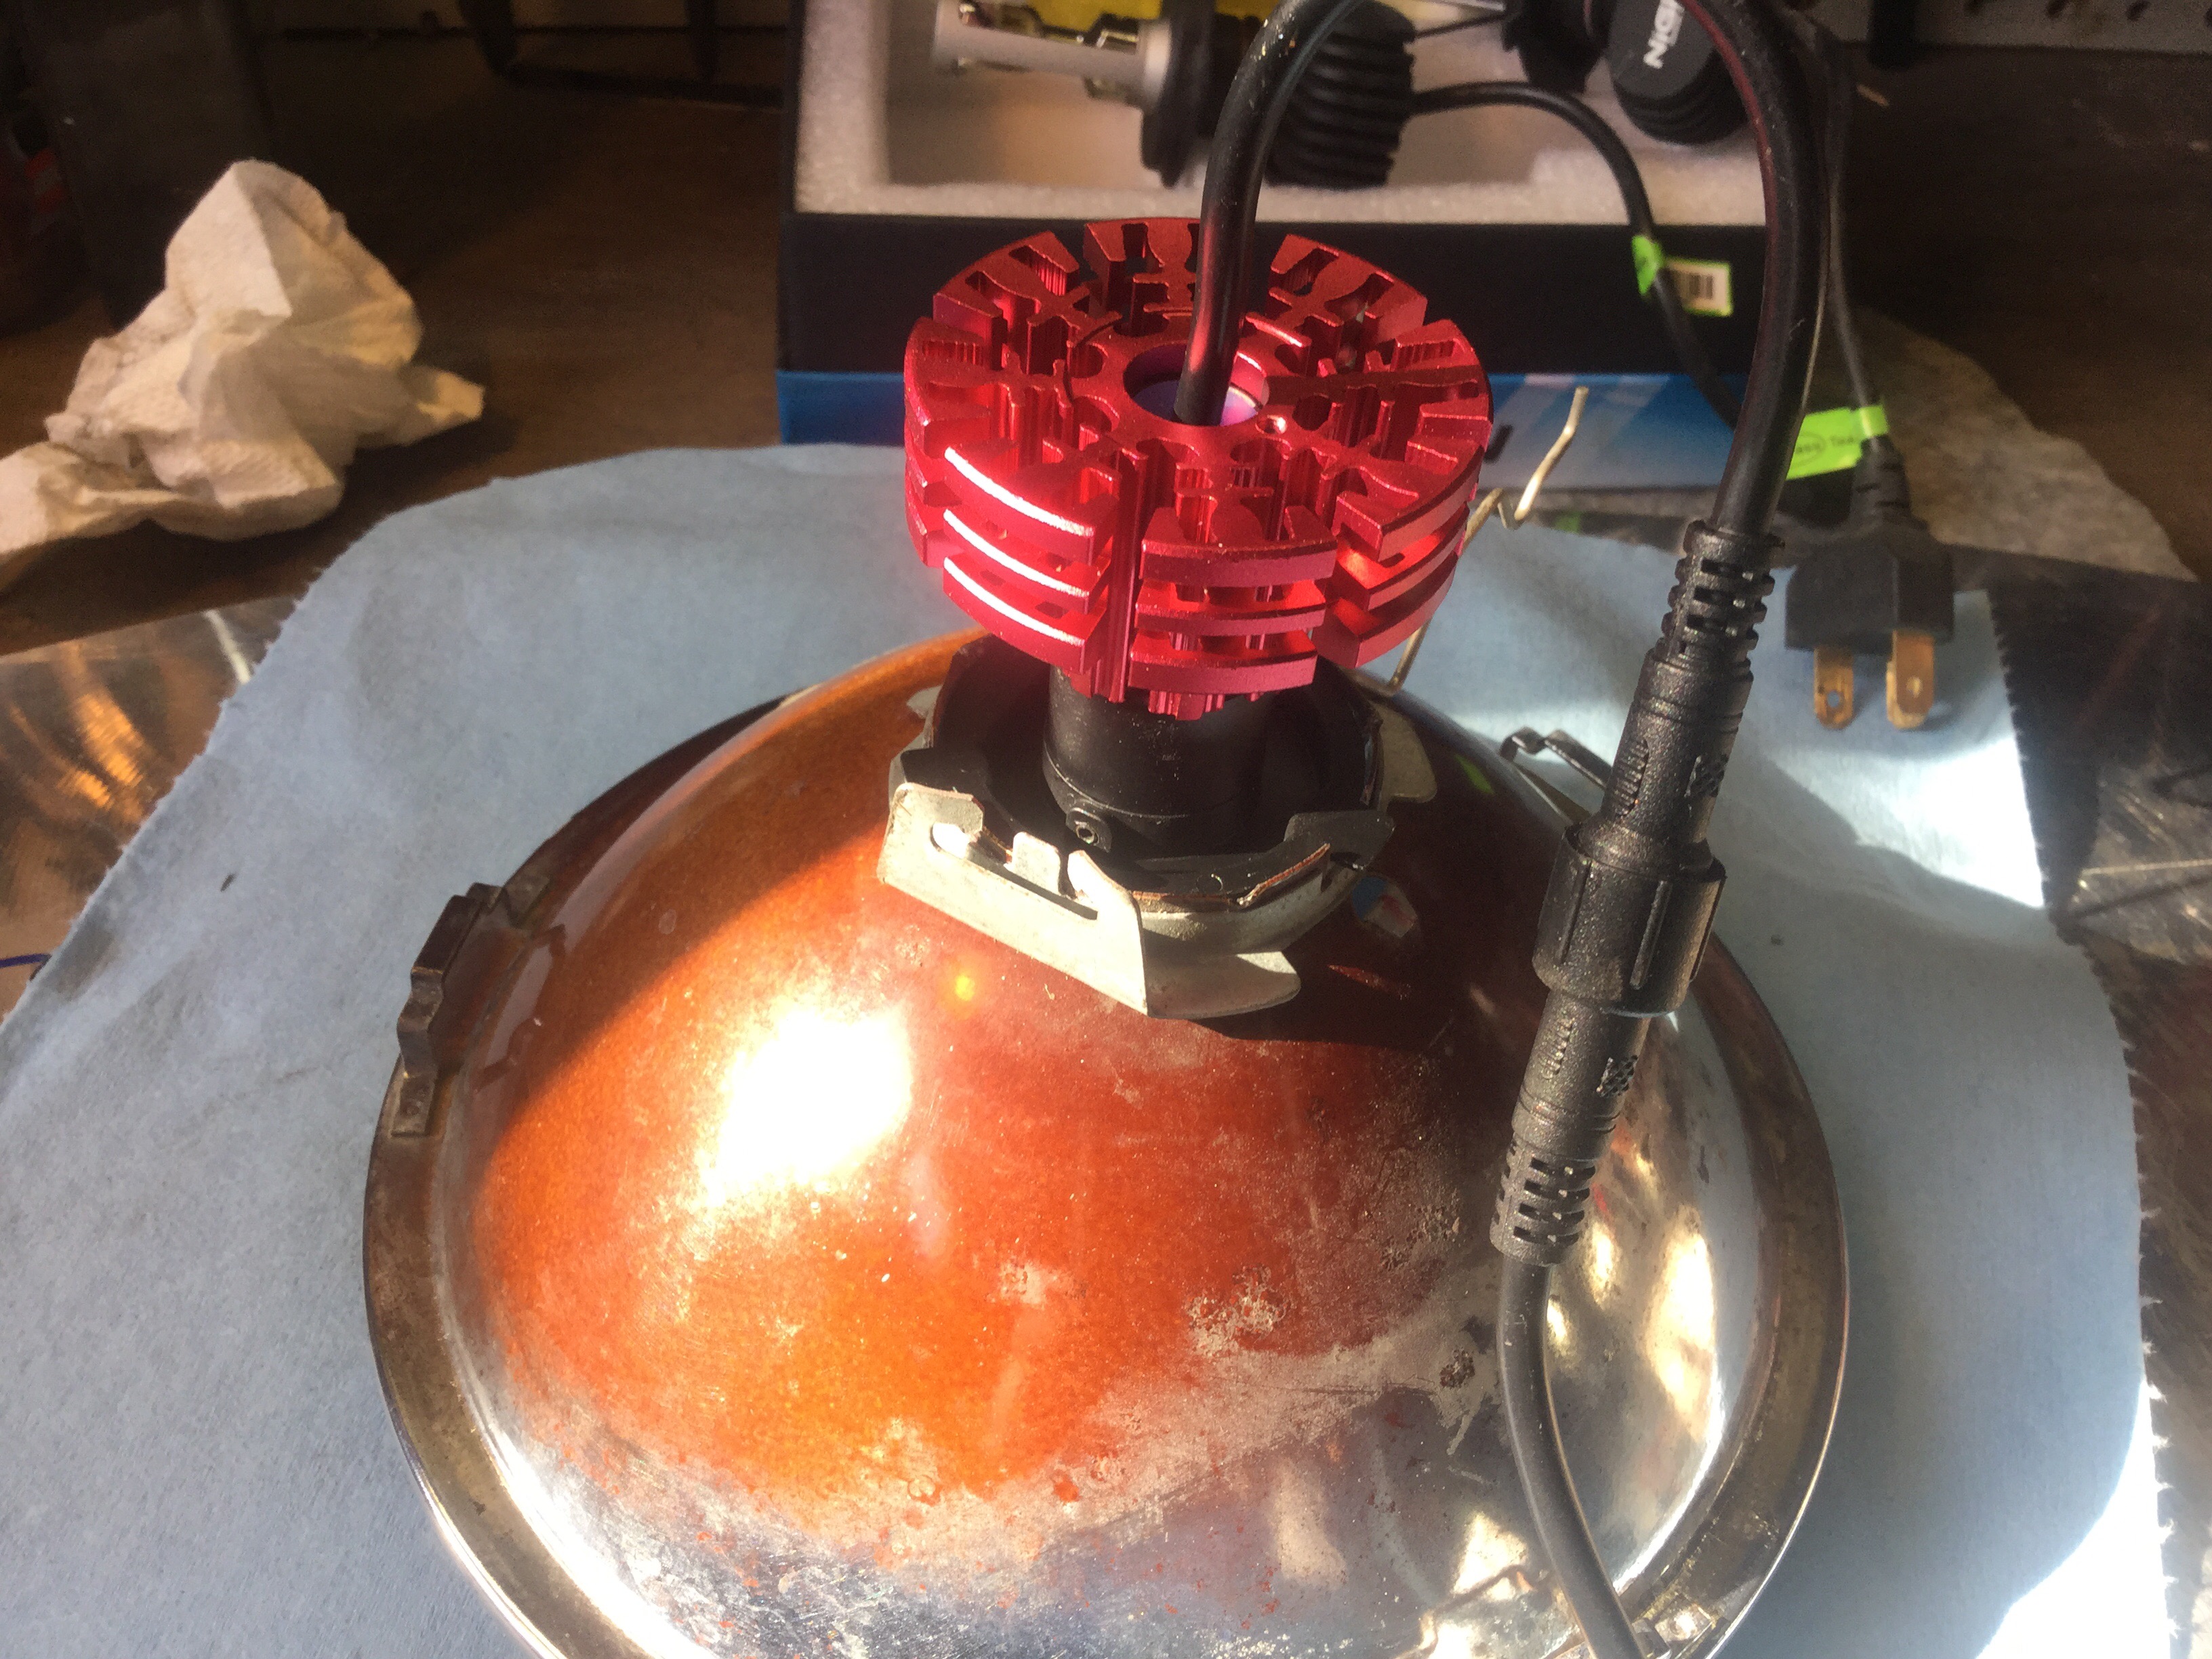
Ok then, here are the new bulbs, and here is a link to the product page. Link fixed, sorry about that.

Packaged pretty well.

Similar to the older model ( on the right ) but with some important differences.

Right away you see the heat sink is different. I think that the older bulb has some electronics in the base, the new ones have a separate box of electronics. And notice the difference in the led element, size, number, and orientation.

I’m going out on a limb and say that the newer bulb has the LED elements arranged to more closely mimic the filament positions in a halogen H4 bulb. Interesting that the elements are smaller and fewer but the bulbs are advertised as 30W each compared to the 25W of the older bulb.
The new bulbs have a metal box in the power line. I was surprised it was metal, made me hopeful that the radio interference issue might be fixed. Popped the cover to have a look.

Components are potted, only a cap showing.

I was impressed, I started to think that these bulbs were surprisingly well made. The power line has a very positive and o-ring sealed connection. This probably eases some installs, makes no difference in the van.

The filters, according to the instructions, are self adhesive and applied to the glass tubes.

I’m holding off on the filters for now, but I did install the glass tubes. The end of the bulb unscrews and the tube slips down and seats against an o-ring.

O-ring wasn’t in correct position in that last pic, but here we go fixed.

Another interesting feature is the rotationally adjustable mount. The three tab base is held in place by two set screws, and it can be rotated. There is a degree ring on the base and a witness mark on the bulb body. I did not change the orientation, I’ll wait for some night testing to see if it’s needed. I’m only guessing right now about what effect the rotation would give.
Time to pop them into the lamps. The older bulbs thicker bulb body didn’t let me install those rubber boots, but the new ones did.

Here is new bulb without boot.
 If you remove the three tab mounting base you can push on a boot and then reinstall the base. The boot is everted here, makes it easier to get at the set screws.

Keep the boot rolled back and carefully get the retaining wire bails clipped in.

Then pop the boot.

Ok, so I actually installed one lamp last night. Right away I saw that the beam pattern on the garage wall was tighter, both low and especially high beam. The radio interference problem was still there, grrr.
But today, with both bulbs in, the interference problem has disappeared! Yes, that’s right, weak fm stations now back on the menu. I’m really chuffed about that.
Next to do is swap one of the old LED bulbs back in and do a comparison, take some pics etc. So far I’m really pretty impressed by the build quality of these bulbs, especially for Can$64.
Vanagon – alternator voltage regulator re-brushing
Posted by albell in vanagon, vanagon mods on October 1, 2017
During the summer, on a camping trip, the alternator failed. The brushes on the voltage reg finally wore out. I had a spare (used) voltage reg on board and the swap got us going again.
The failed regulator was an adjustable unit I bought way back in the early noughts. It got swapped over from my old 82 westy to the Syncro in 2011. It had been working perfectly all this time and I really liked the ability to up the voltage output a little to overcome any voltage losses in the wiring up to the battery and also to give my batteries a good charge.
I think the reg cost around 35 bucks back then, haven’t checked the prices these days. Might not seem cost effective to repair it, but I wanted to. Hey why not? What’s the point of other folk posting how to do it…
Local automotive electrics outfit, Brian Roberts, sold me a pair of brushes for 8 bucks. Just $8, a little solder, flux, and time, and the reg was fixed. I wasn’t very good at documenting the steps but here we go.
The new brushes look like this, carbon-like with a braided copper pigtail. The spring is the old one, no problem re-using.

Old brush…

To get the old brushes out, well originally, under the solder, the metal is formed into a tube which is crimped onto the pigtail, soldered, and trimmed.

I found that merely melting the solder didn’t release the pinched pigtail. So I drilled it out. That meant when I inserted the new brush and pigtail I had to hold the braided pigtail…

Pigtail with spring fed up into the brush holder on the reg, haemostat holding pigtail so brush projects fully but doesn’t come out. Then, flux (rosin) and a good strong iron.

Was hoping for a better blob, but it’s ok.
And the iron? This old Weller, it’s a champ with this sort of thing.

Same thing with other brush. Then trim the excess copper

So that’s all good. Hey just as an aside, clean up shiny, all the contacts on the reg and also on the alternator body.
Acesss to the lower machine screw holding the reg to the alternator is fussy in the stock wbx. An intake runner impedes screwdriver.

An offset screwdriver does the job, albeit slowly. But beware, if you didn’t disconnect the battery then you can hit the hot stud on the alternator with the driver. The angry pixies make you jump. Foiled a second attack with heat shrink on the driver. But the pixies managed to nibble one end, see?

Oh, btw, adjustment of the reg is done via little screw.

Dialed mine up to 14.65 V at alternator. But I’ve noticed that the voltage will drop maybe half a volt or so when the alternator heats up. Btw, the multimeter is pretty good for $15, banggood. Auto ranging, back light, big display, AA batteries rather than 9V. Still have the protective film on display, it’s not a thing with me, just forgot.

