Archive for June, 2014
Vanagon – syncro clutch slave cylinder replacement adventure
Posted by albell in syncro, syncro specific repairs, vanagon on June 21, 2014
Seems to be a real busy time of the year for me, just the time to put a new slave cylinder into the old syncro. It had been leaking for a few weeks, but it still worked the clutch. I procrastinated replacing it until I felt like hurting myself.
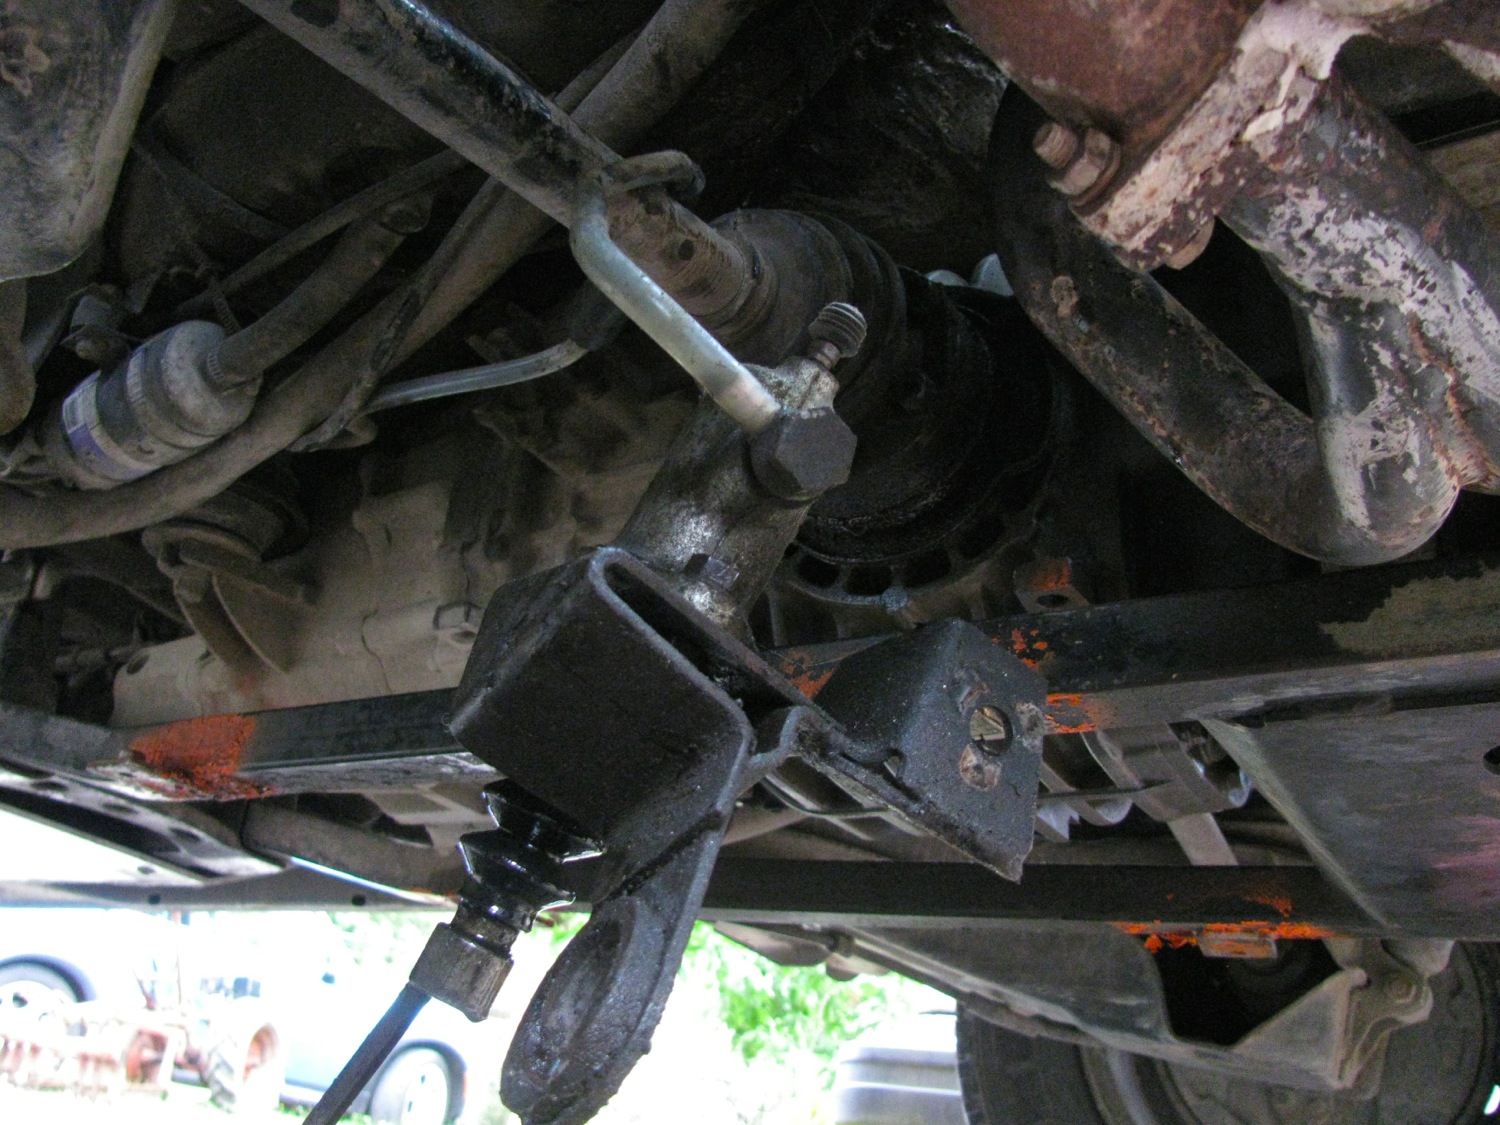
I’ve swapped in a slave cylinder a couple of times on a 2wd vanagon, I4 powered ones at that, and it was not that bad. But the stock motor in the syncro makes access to the bolts holding the slave to the bracket really painful. The rear most bolt is somewhat accessible front he engine compartment but the nut for that bolt is pretty well hidden by the bracket. A good fix for that is to weld that nut to the bracket so you only have to deal with the bolt and no need to hold the nut. The front bolt is somewhat easy to access, from under the van. I tried to get those bolts off, but I couldn’t. I even bent a wrench to get it in there, but no luck. I had heard that some folk take the bracket and cylinder off as a unit and that means taking the actuating arm off the shaft that goes in the bell housing (and moves the throwout bearing). There is a cir clip on the end of the shaft and theoretically, on a brand new van, when the clip is removed you can slide the arm off the shaft. I don’t see how you can do that easily on any van that has seen any kind of use. The arm is on there but good.
I had a spare arm (and shaft) so I decided to grind the arm off. I used a steel burr on a die grinder. Yes I chewed up the shaft, I got sloppy. But I didn’t do enough damage to make the replacement arm a poor fit, still went on tight.

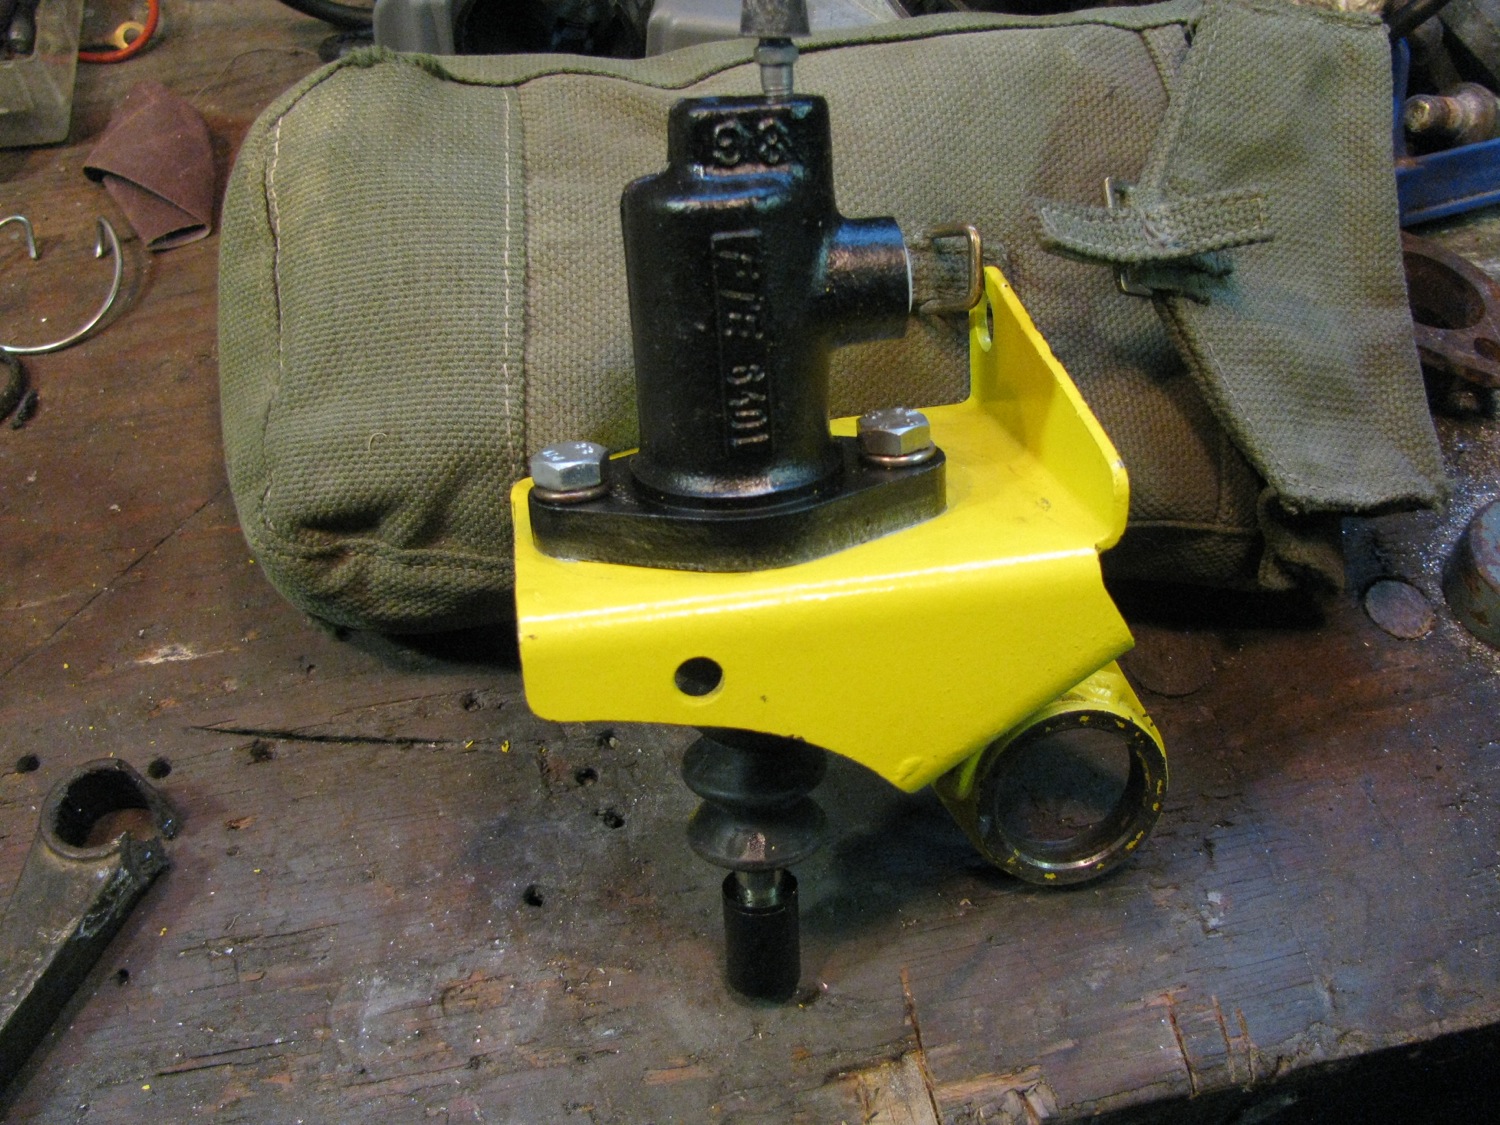
I tagged the bracket too.

The arm.

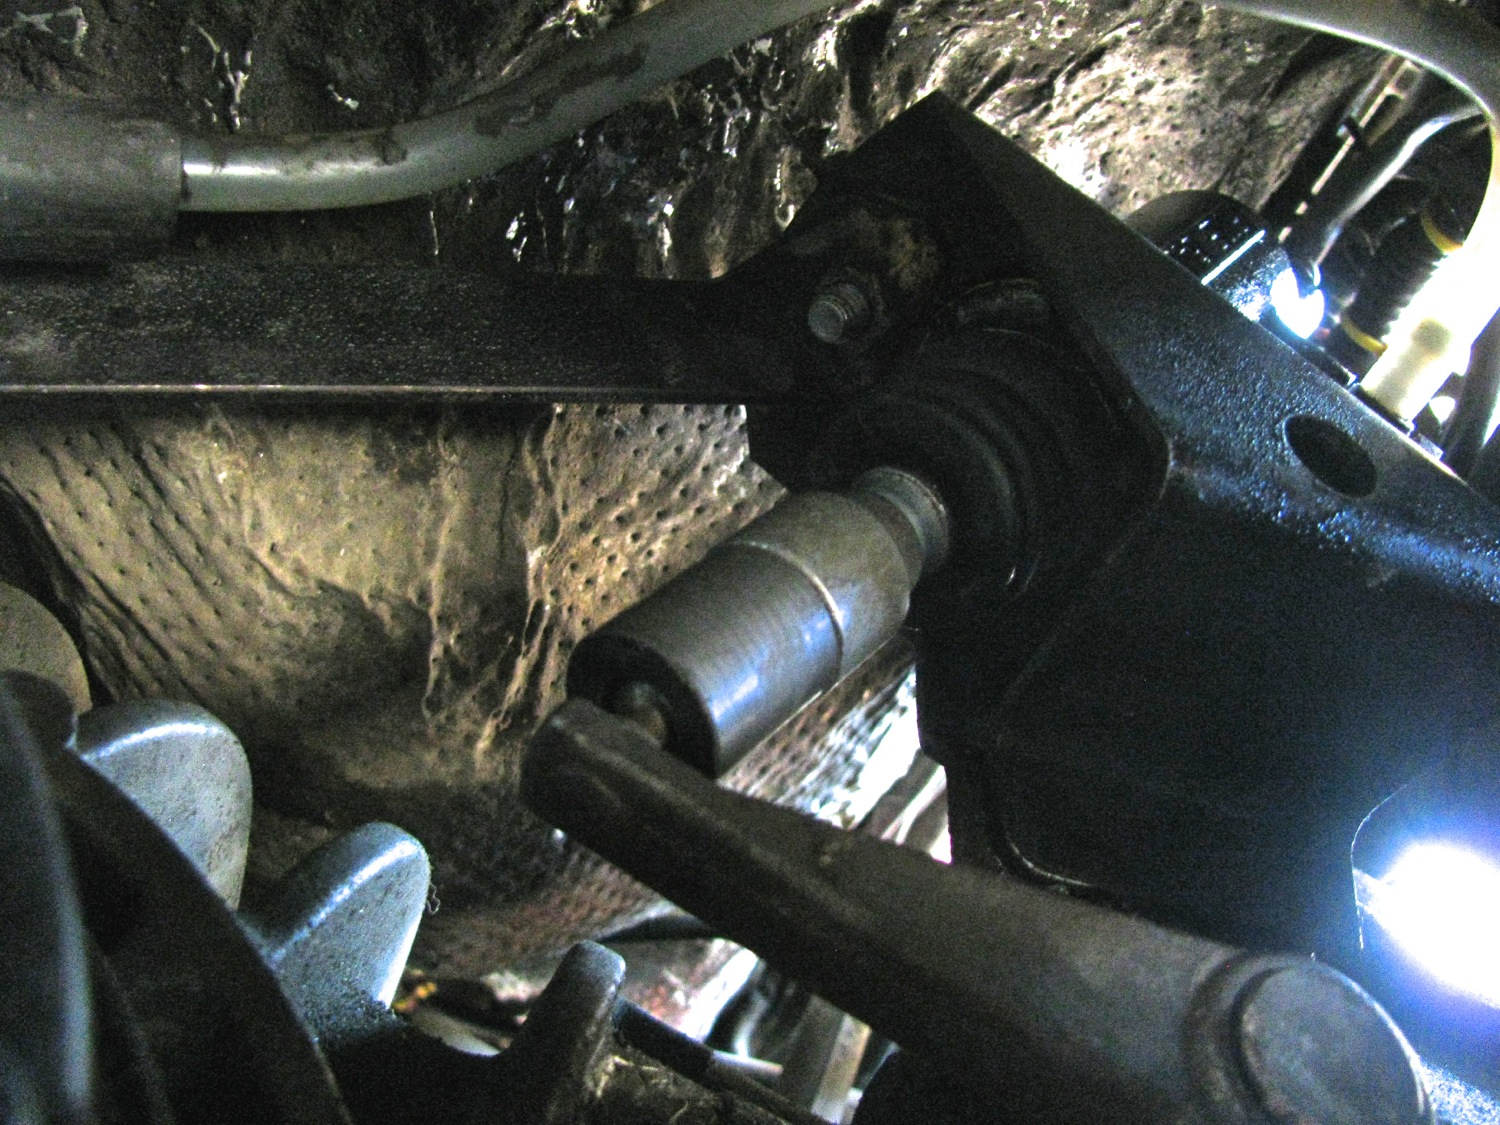
Now it was just a case of removing the 13mm head bolt on the bracket support strut and the 17mm bolt holding the bracket to the bell housing. Then you can ease the assembly down and let it hang by the hydraulic line. Great thing here is that the syncro has a flexible nylon line to the slave (and banjo bolt) rather than the steel line of the 2wd.
I had the new, FTE brand, cylinder already to go, bolted to a spare bracket. A bracket from a diesel vanagon… yes, you know what’s coming.
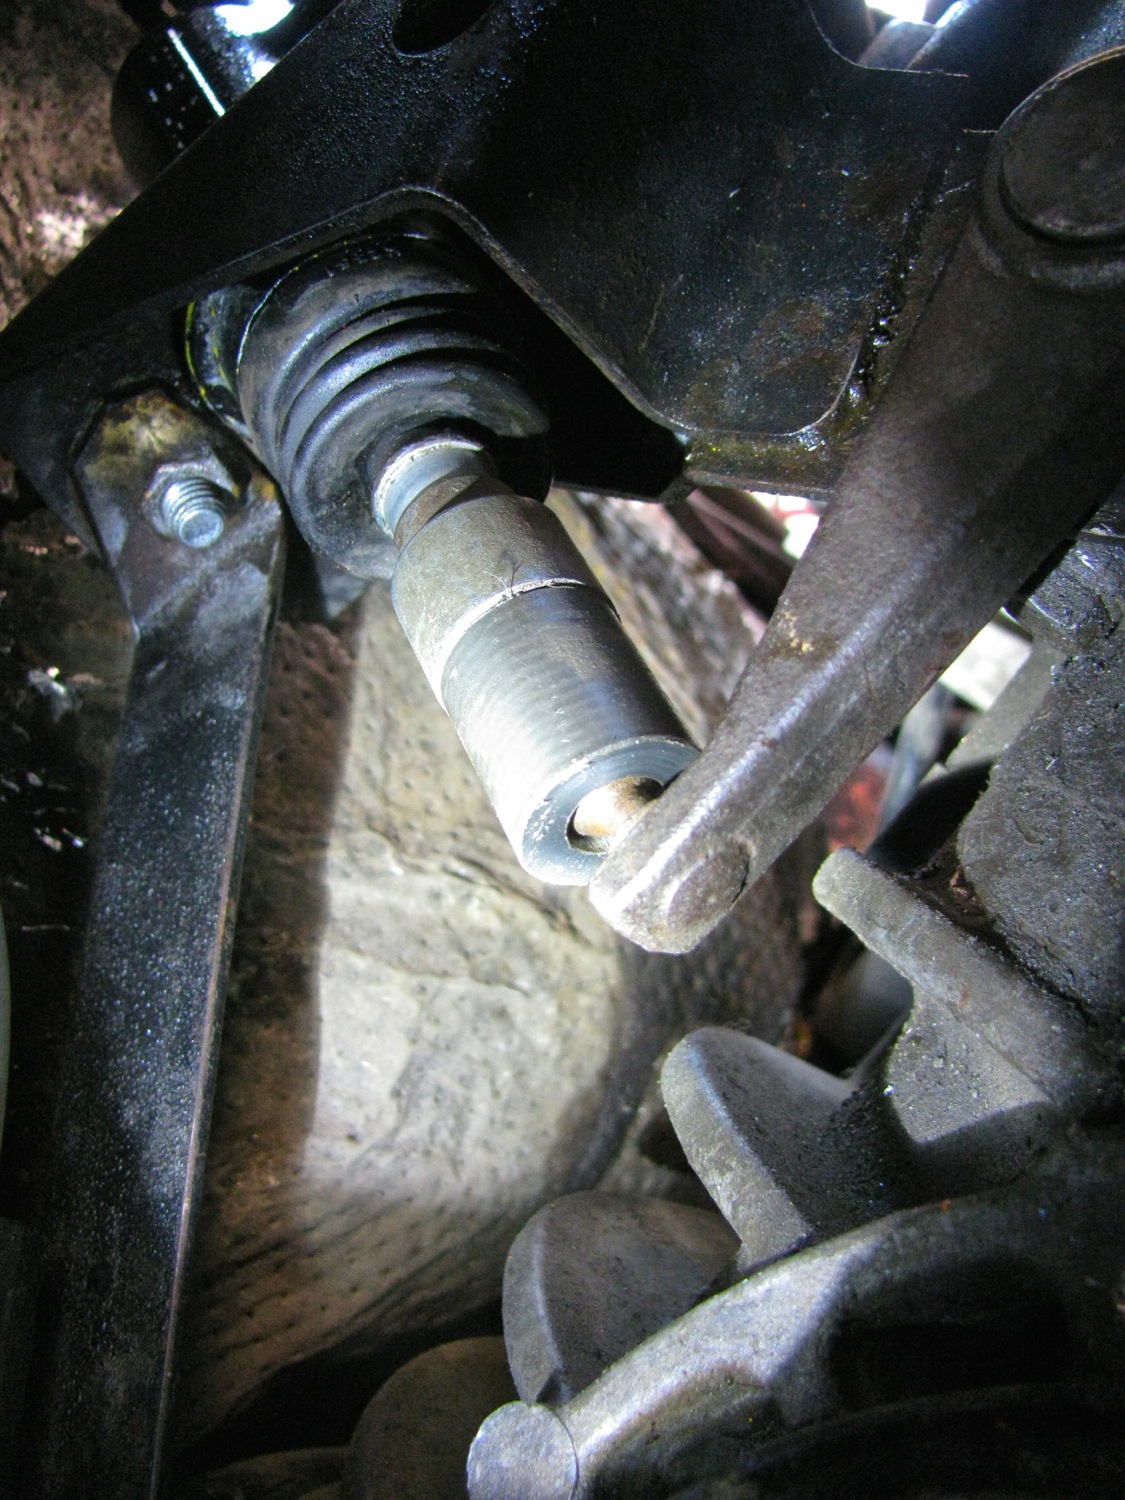
I had welded the two nuts to the bracket, here is a pic of the front nut. Yes, you know what’s coming.

Quick with the swap over and now bleeding with the cylinder hanging.

And up it goes into position… except I forgot the support arm is held to the bracket by that front nut which I had welded on. Doh, what a bonehead, ok off it comes with the zip disk. Right, up again with support arm attached…except it didn’t fit. The support arm would not line up with the bolt hole in the transmission. Son of a bitch. Out it comes, let’s compare with the old bracket.
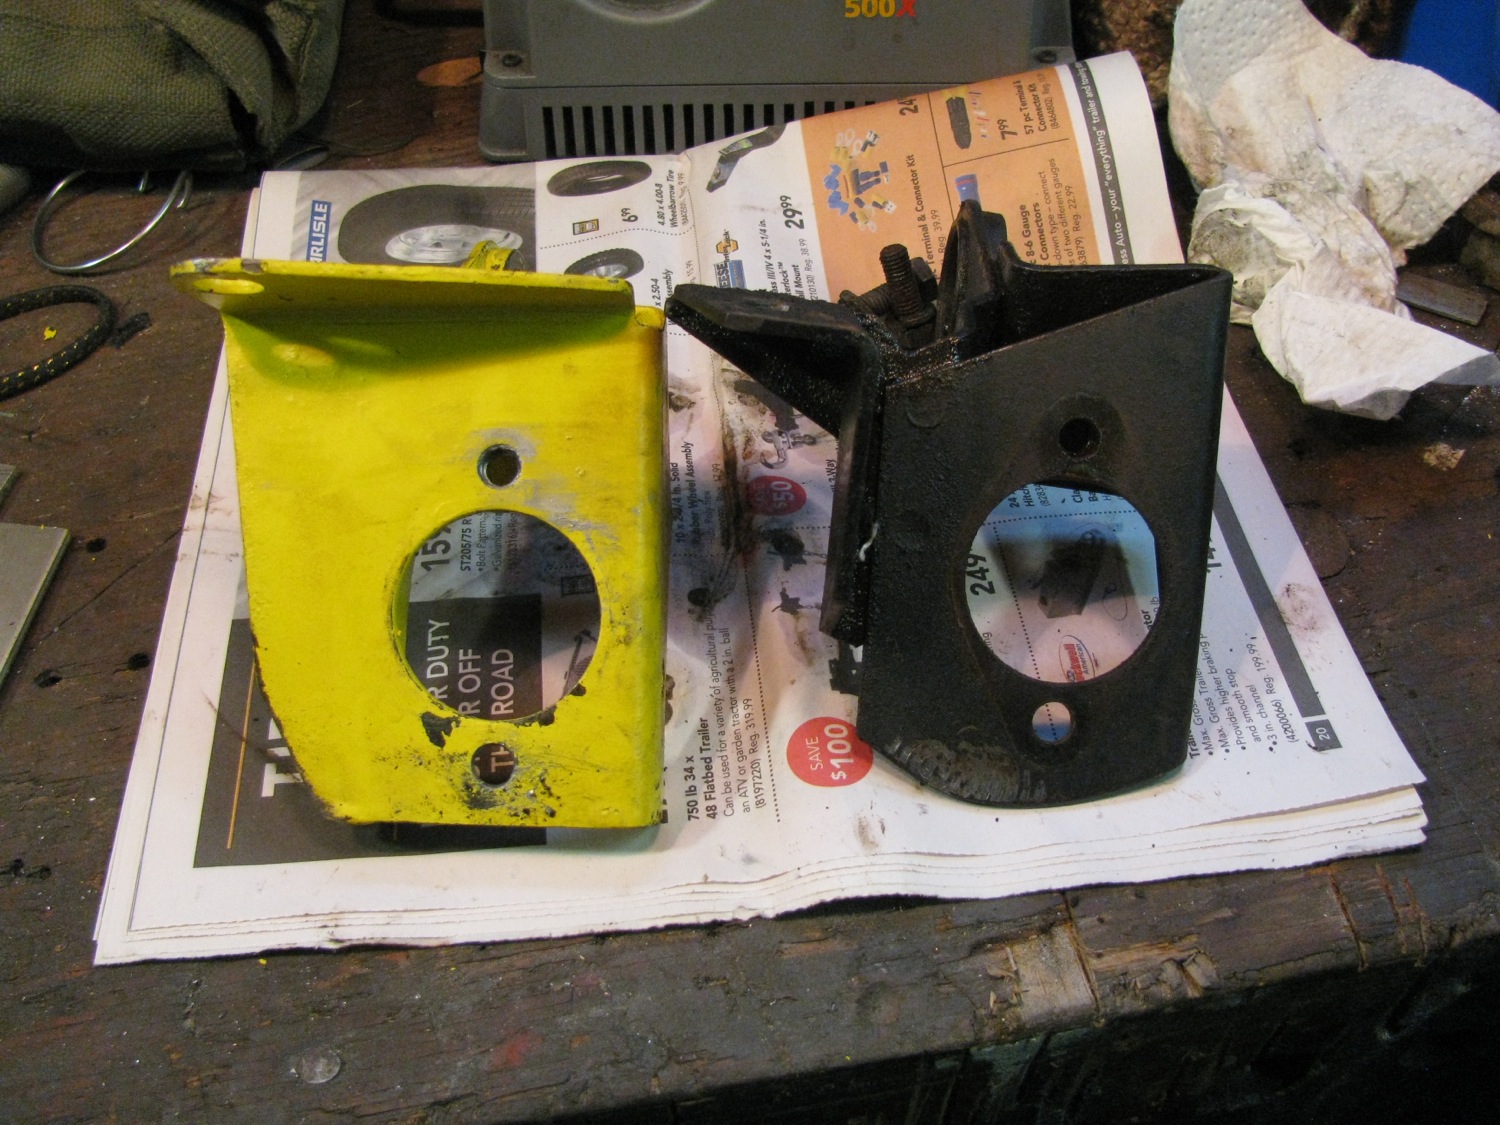
Gee, whaddya know? They are different. It takes a special kind of bonehead to assume a 2wd diesel vanagon bracket would be the same as a wax syncro bracket. I am that special bonehead.
And, to add insult to injury, after cleaning off the muck from the bracket I could see someone had brazed on the rear nut and had brazed on the nut to the support bracket. So i could have removed the slave by itself after all. Well, no, not really. The bolts were in there real tight. Even with the bracket held in a vise I had to grunt with the spanner to remove the bolts.

Righty oh then, back to the van to install new slave and old bracket combo. All went well, replacement arm on shaft, cir clip in place, slave bled. I tried the clutch pedal. The friggin pedal stopped hard about 2″ above where it should stop, no clutch activation. What the heck was going on?
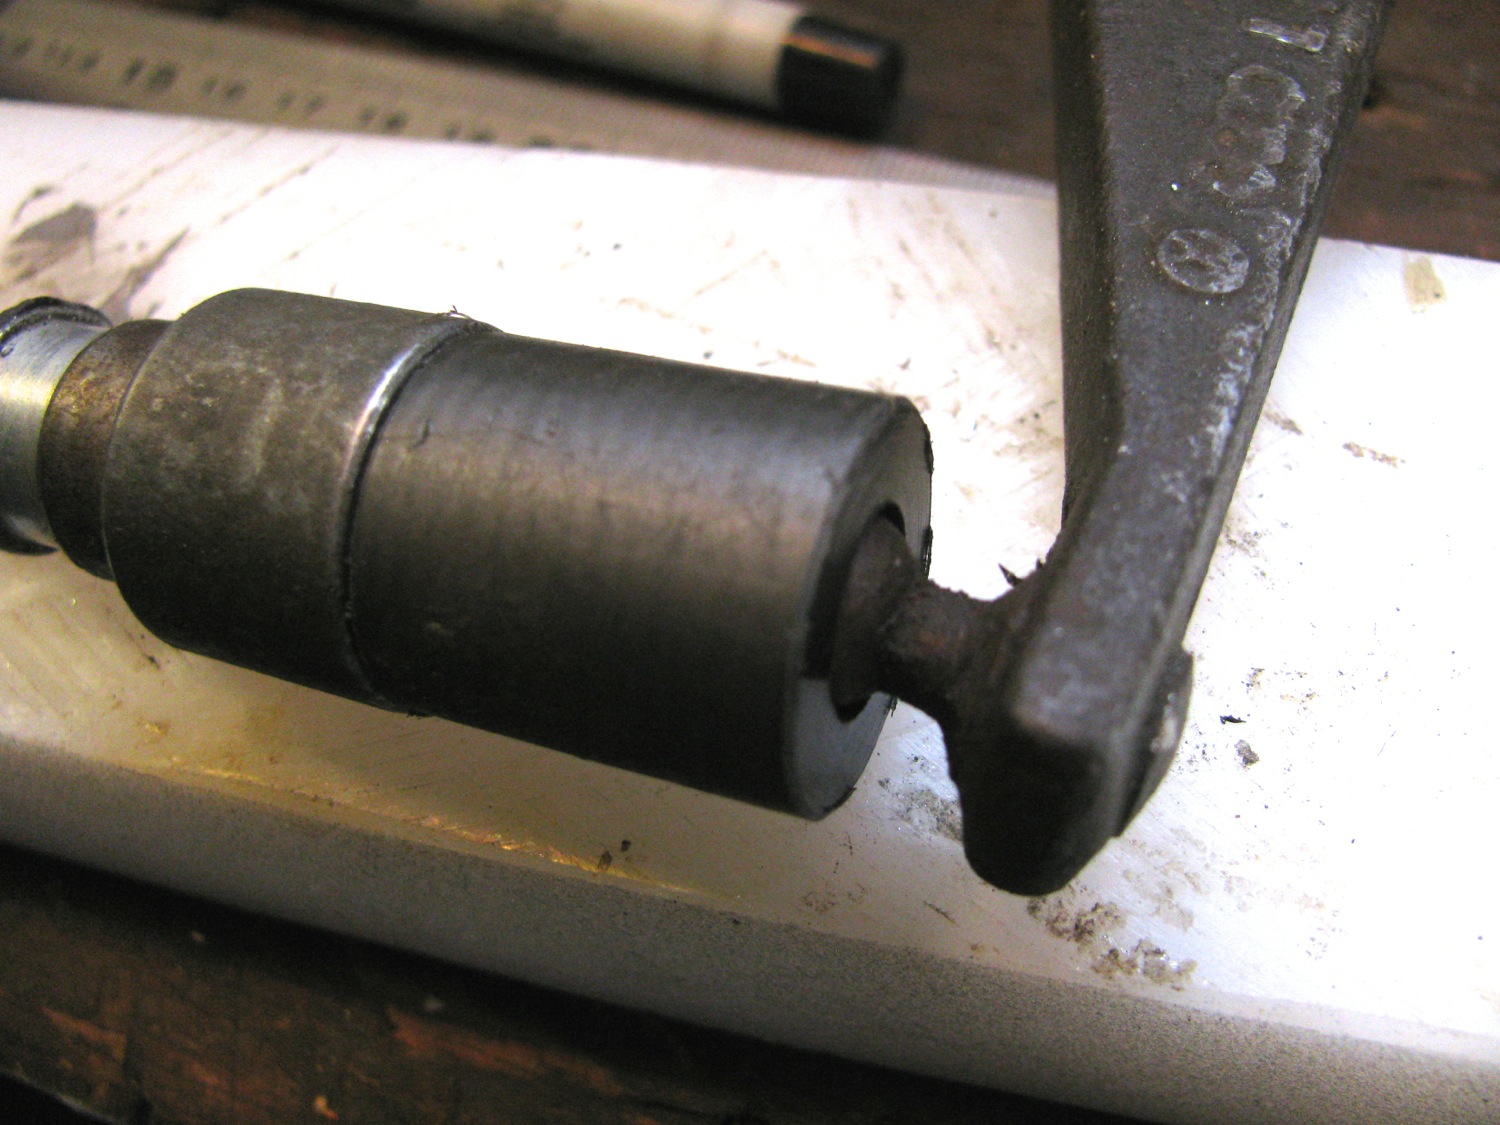
The arm would move when the pedal was depressed, but only a little way before the pedal felt like it was hitting metal. I pulled the push rod from the slave and compared it with the one from the old slave, it had a longer effective length. New push rod at the bottom of the pic.

With the rod removed the clutch pedal would not move, with the shorter old rod the clutch pedal would move down a bit, with no rod and the bleed screw open on the slave the pedal would press down full range. Can you guess what was up? I couldn’t at that point. I talked to Dave the mechanic, we both were stumped but were leaning to an internal problem, perhaps the throwout bearing retaining springs had come adrift. Looked like a tranny pull. I was so desperate that I looked on the Samba and found something interesting, here is the thread. Now I had some hope, so I quickly made a bit of an extension using the old rod (I removed what remained of the plastic that was inside the metal cup end) and some polyethylene.


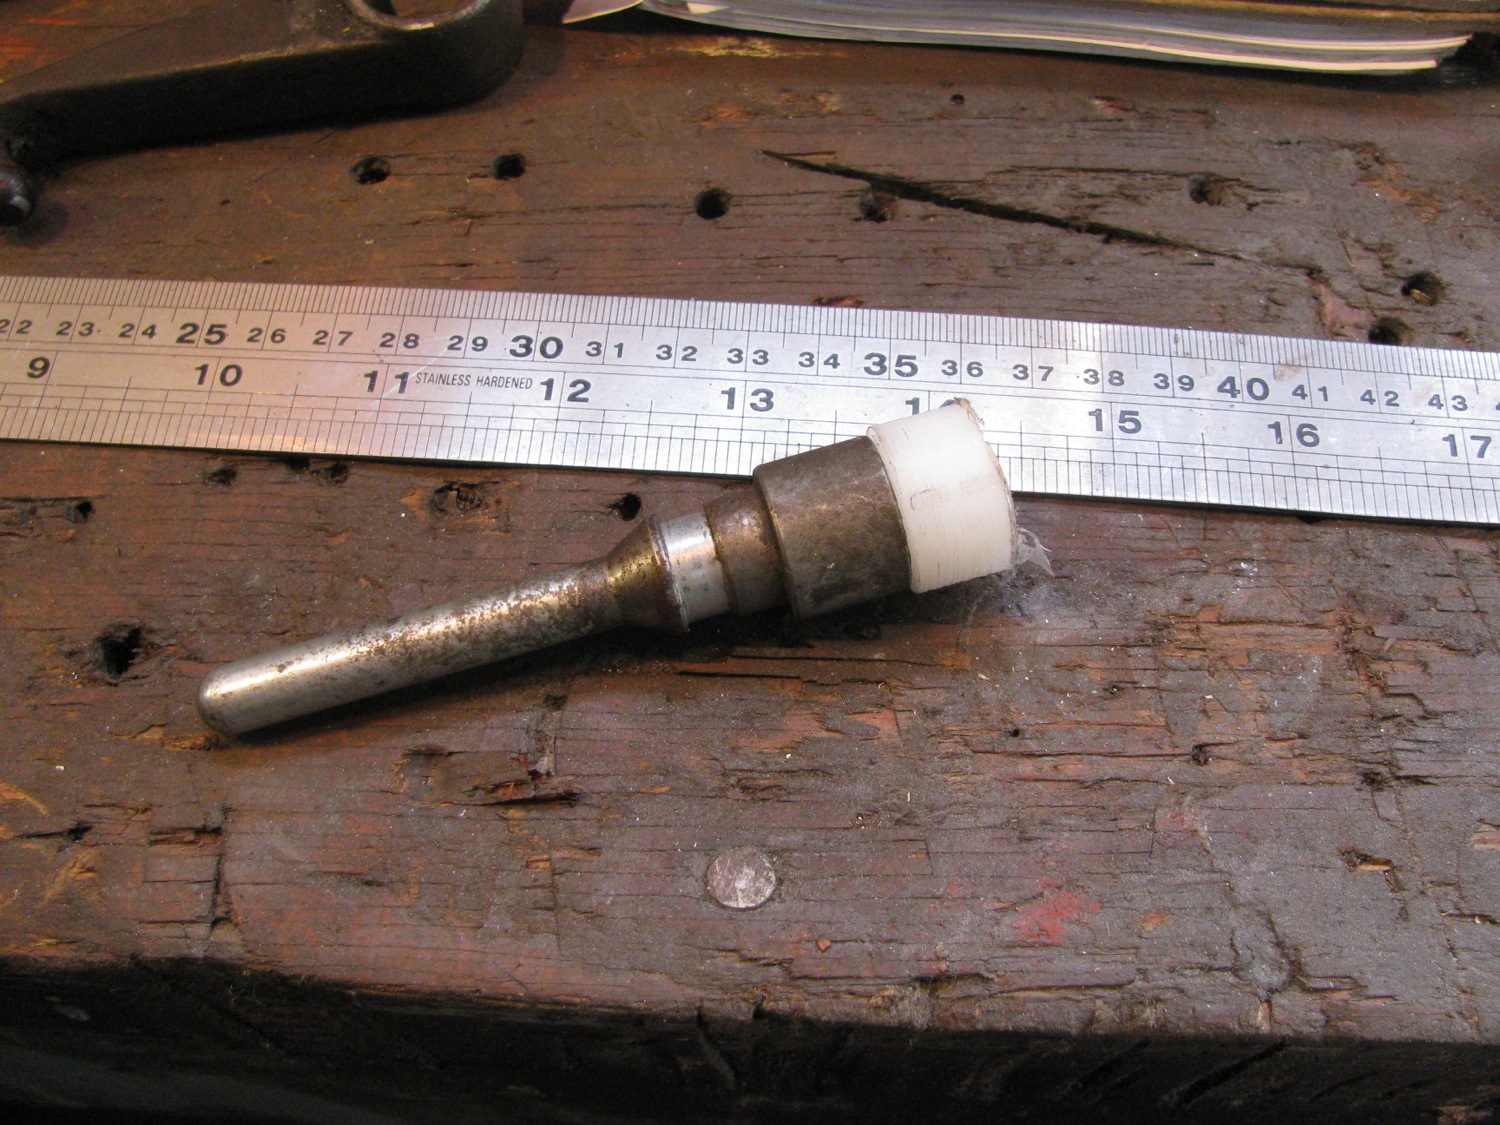
I made a hole, stepped hole, to mimic a socket to engage the ball on the lever arm. I installed it and yes, more pedal travel. Not quite enough so a made another using some Delrin rod. Here it is. BTW, it is a press fit into the metal socket.

And, yes, success. Clutch works just like it used to, perfectly. Man, I was relieved. The modified pushrod had overall length of 112mm, socket in the Delrin was 4-6mm deep giving an effective rod length of 106-108mm. That’s 18-20mm longer than the new FTE push rod.
So what the heck was going on with the new slave? As I didn’t want to take it out and measure I can only guess that the new slave had a shorter piston stroke than the old one. And even with a longer push rod it was not enough to fully activate the clutch. And before you ask, I did have the slave cylinder properly installed in the bracket. I wonder if the syncro bracket locates the slave higher from the arm than the 2wd bracket?
Trip – finally out for an overnighter
What with one thing and another we haven’t got out for a vanagon camping trip this year until this last weekend. Was just a quick overnight trip to, once again, the Port Renfrew area. Here are some pics.


Marine cloud started to move in around 5 pm. By sunset it was at our camp (654m elevation).


Cloud in the valleys next morning.

Finally, a bit of a bumper project update. You might notice i have the unfinished aluminum bumper on the van during this trip. It’s on and off as I fiddle with things. My most recent fiddling was making some tow hook brackets. These will screw onto the bumper where the steel framework for the hitch attaches to the van. The brackets are made from some 1/2″ stainless steel disks, 3″ in diameter. They were water jet off cuts. I cut one disk in half, drilled a hole in each semicircle. Two disks had a hole drilled in them and I cut the head off a pair of M16X1.5 bolts and welded them into the holes in the disks. I then welded the semicircle parts onto he disks. Picture shows one with a shackle attached.

