Posts Tagged syncro
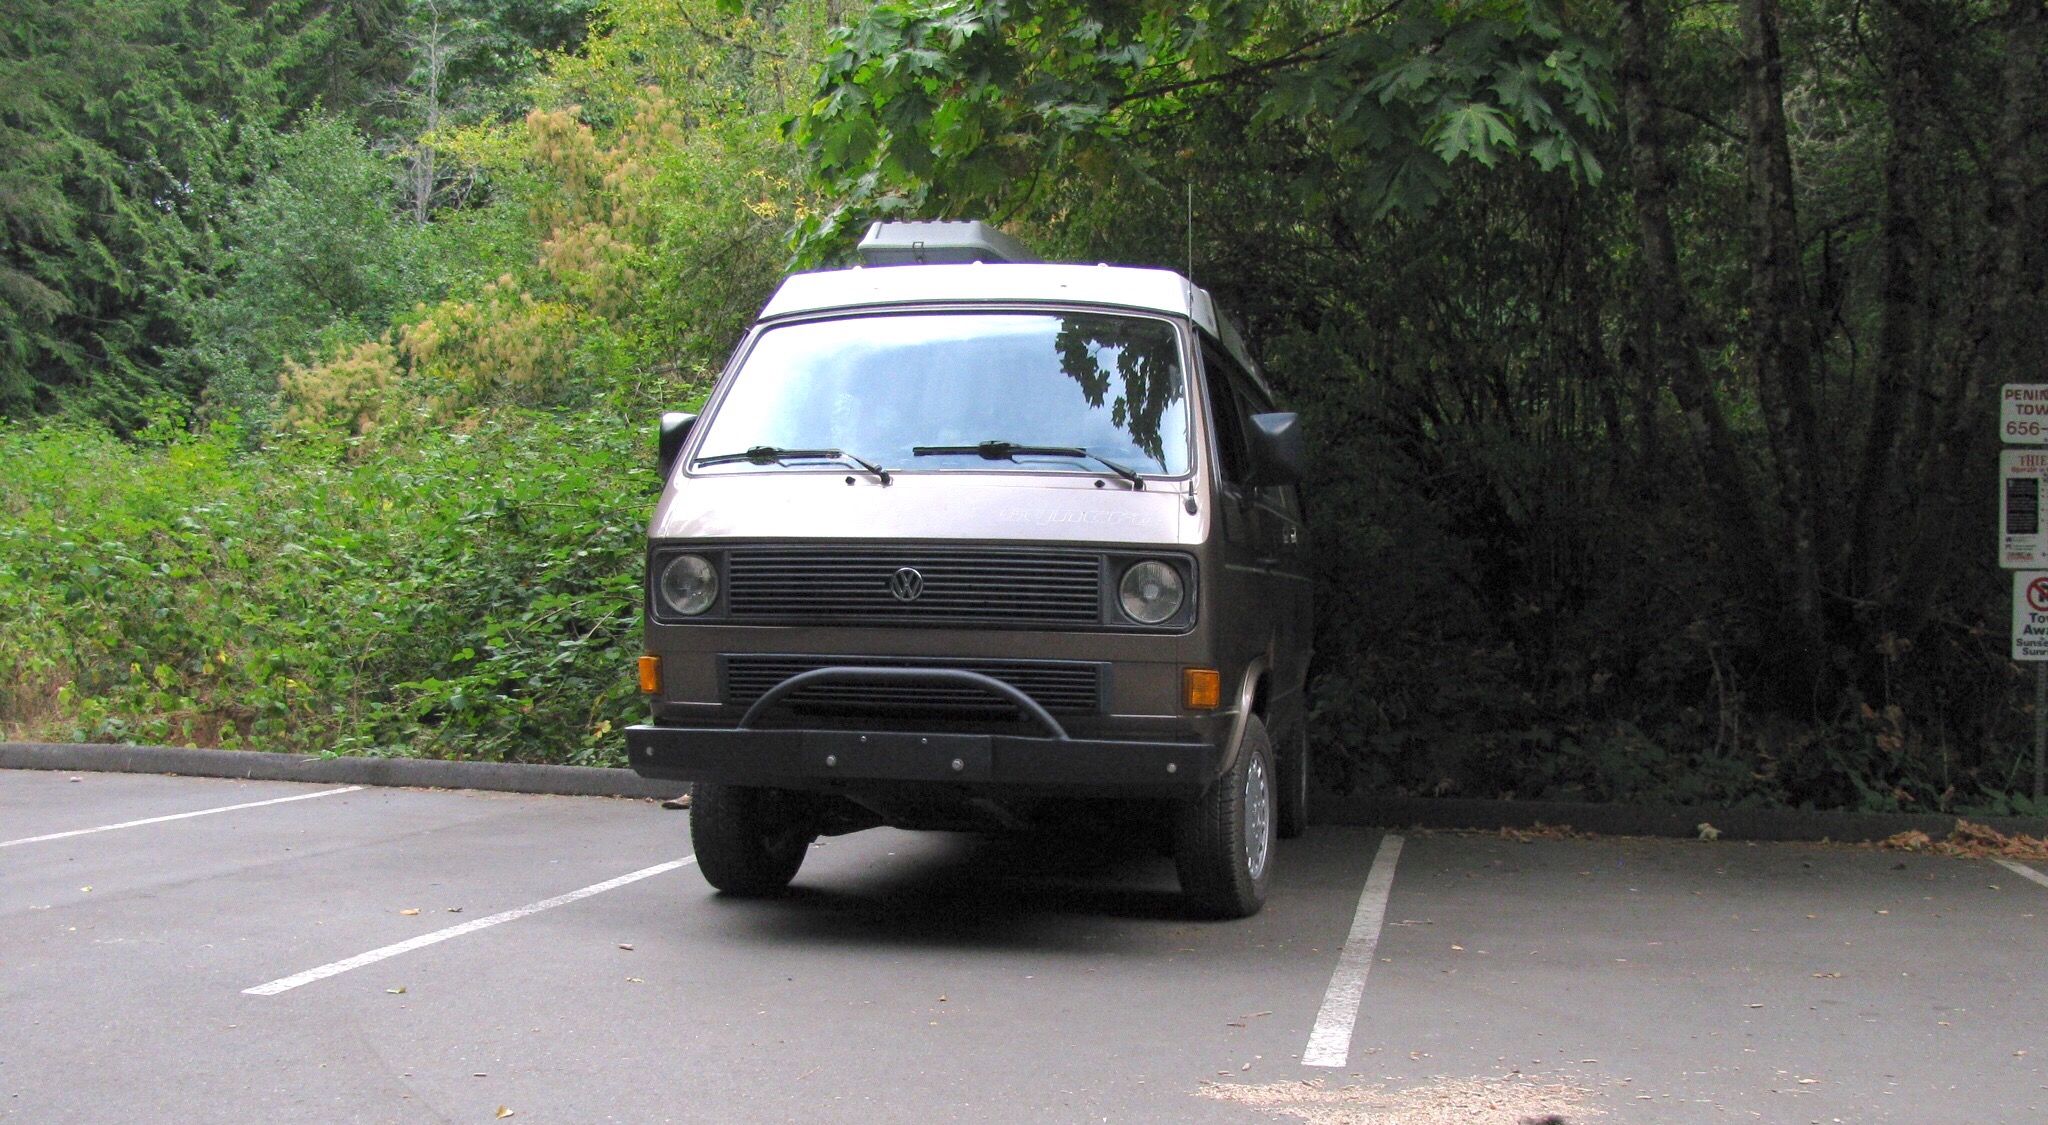
Simon’s syncro Get-Away-Van
Update: it is for sale, samba ad here…. link
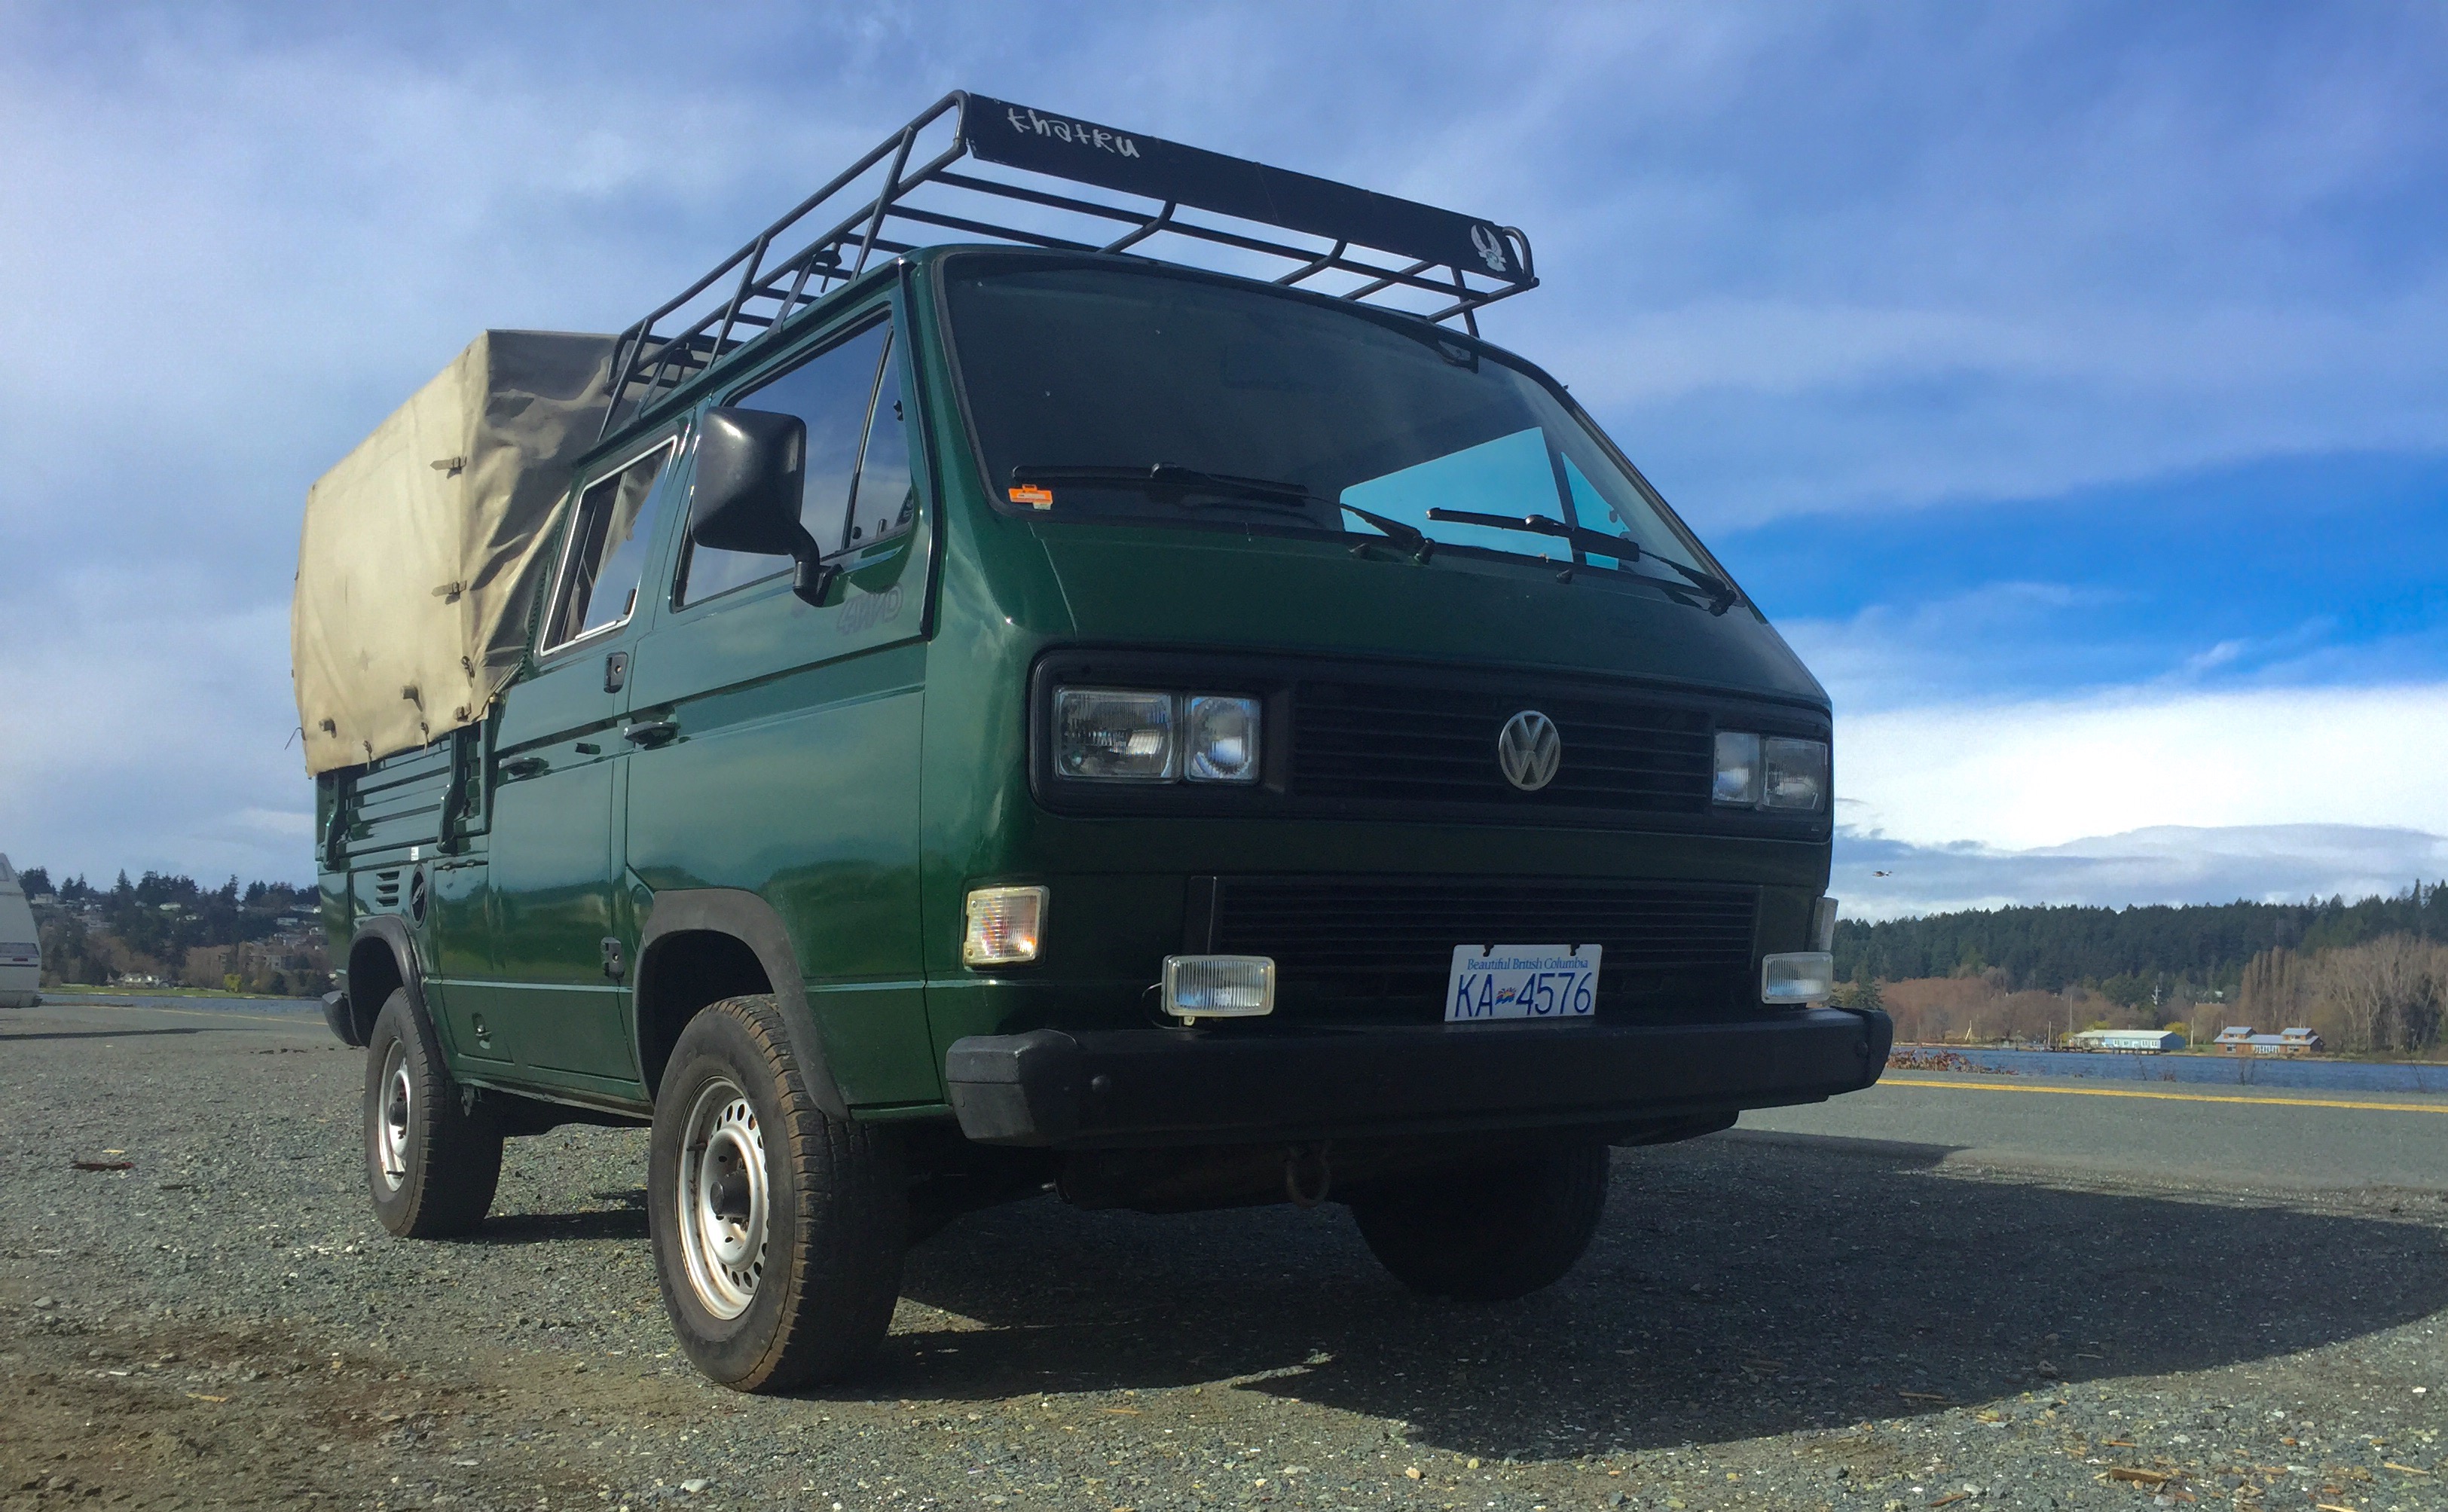
Washed and waxed, and I think up for sale soon. Only 88,000 km (55,000 miles), correction 84,099 km (50,459 miles) body, transmission, engine, all in great shape. I’ve driven it and honestly, it drives very smoothly. I wish my van felt half as good.


Some pics from Simon’s trip
Some of the pics Simon sent from his last trip.
Simon writes:
“We had a great time, through Washington, Montana, Wyoming, Idaho, Oregon, Washington, and home to the island. Altogether maybe 5000 KM? (I wasn’t tracking it). Only a couple of minor issues with the van; my electric locks went funny one day into the trip and so I disconnected them and went manual for the rest of the journey, also my window wash nozzles weren’t spraying, figured out it was a kink in the line at the pump, had a fun time fixing it with a lighter and a golf tee in cold campground in Yellowstone.”


Trip – fogust in the Klanawa valley
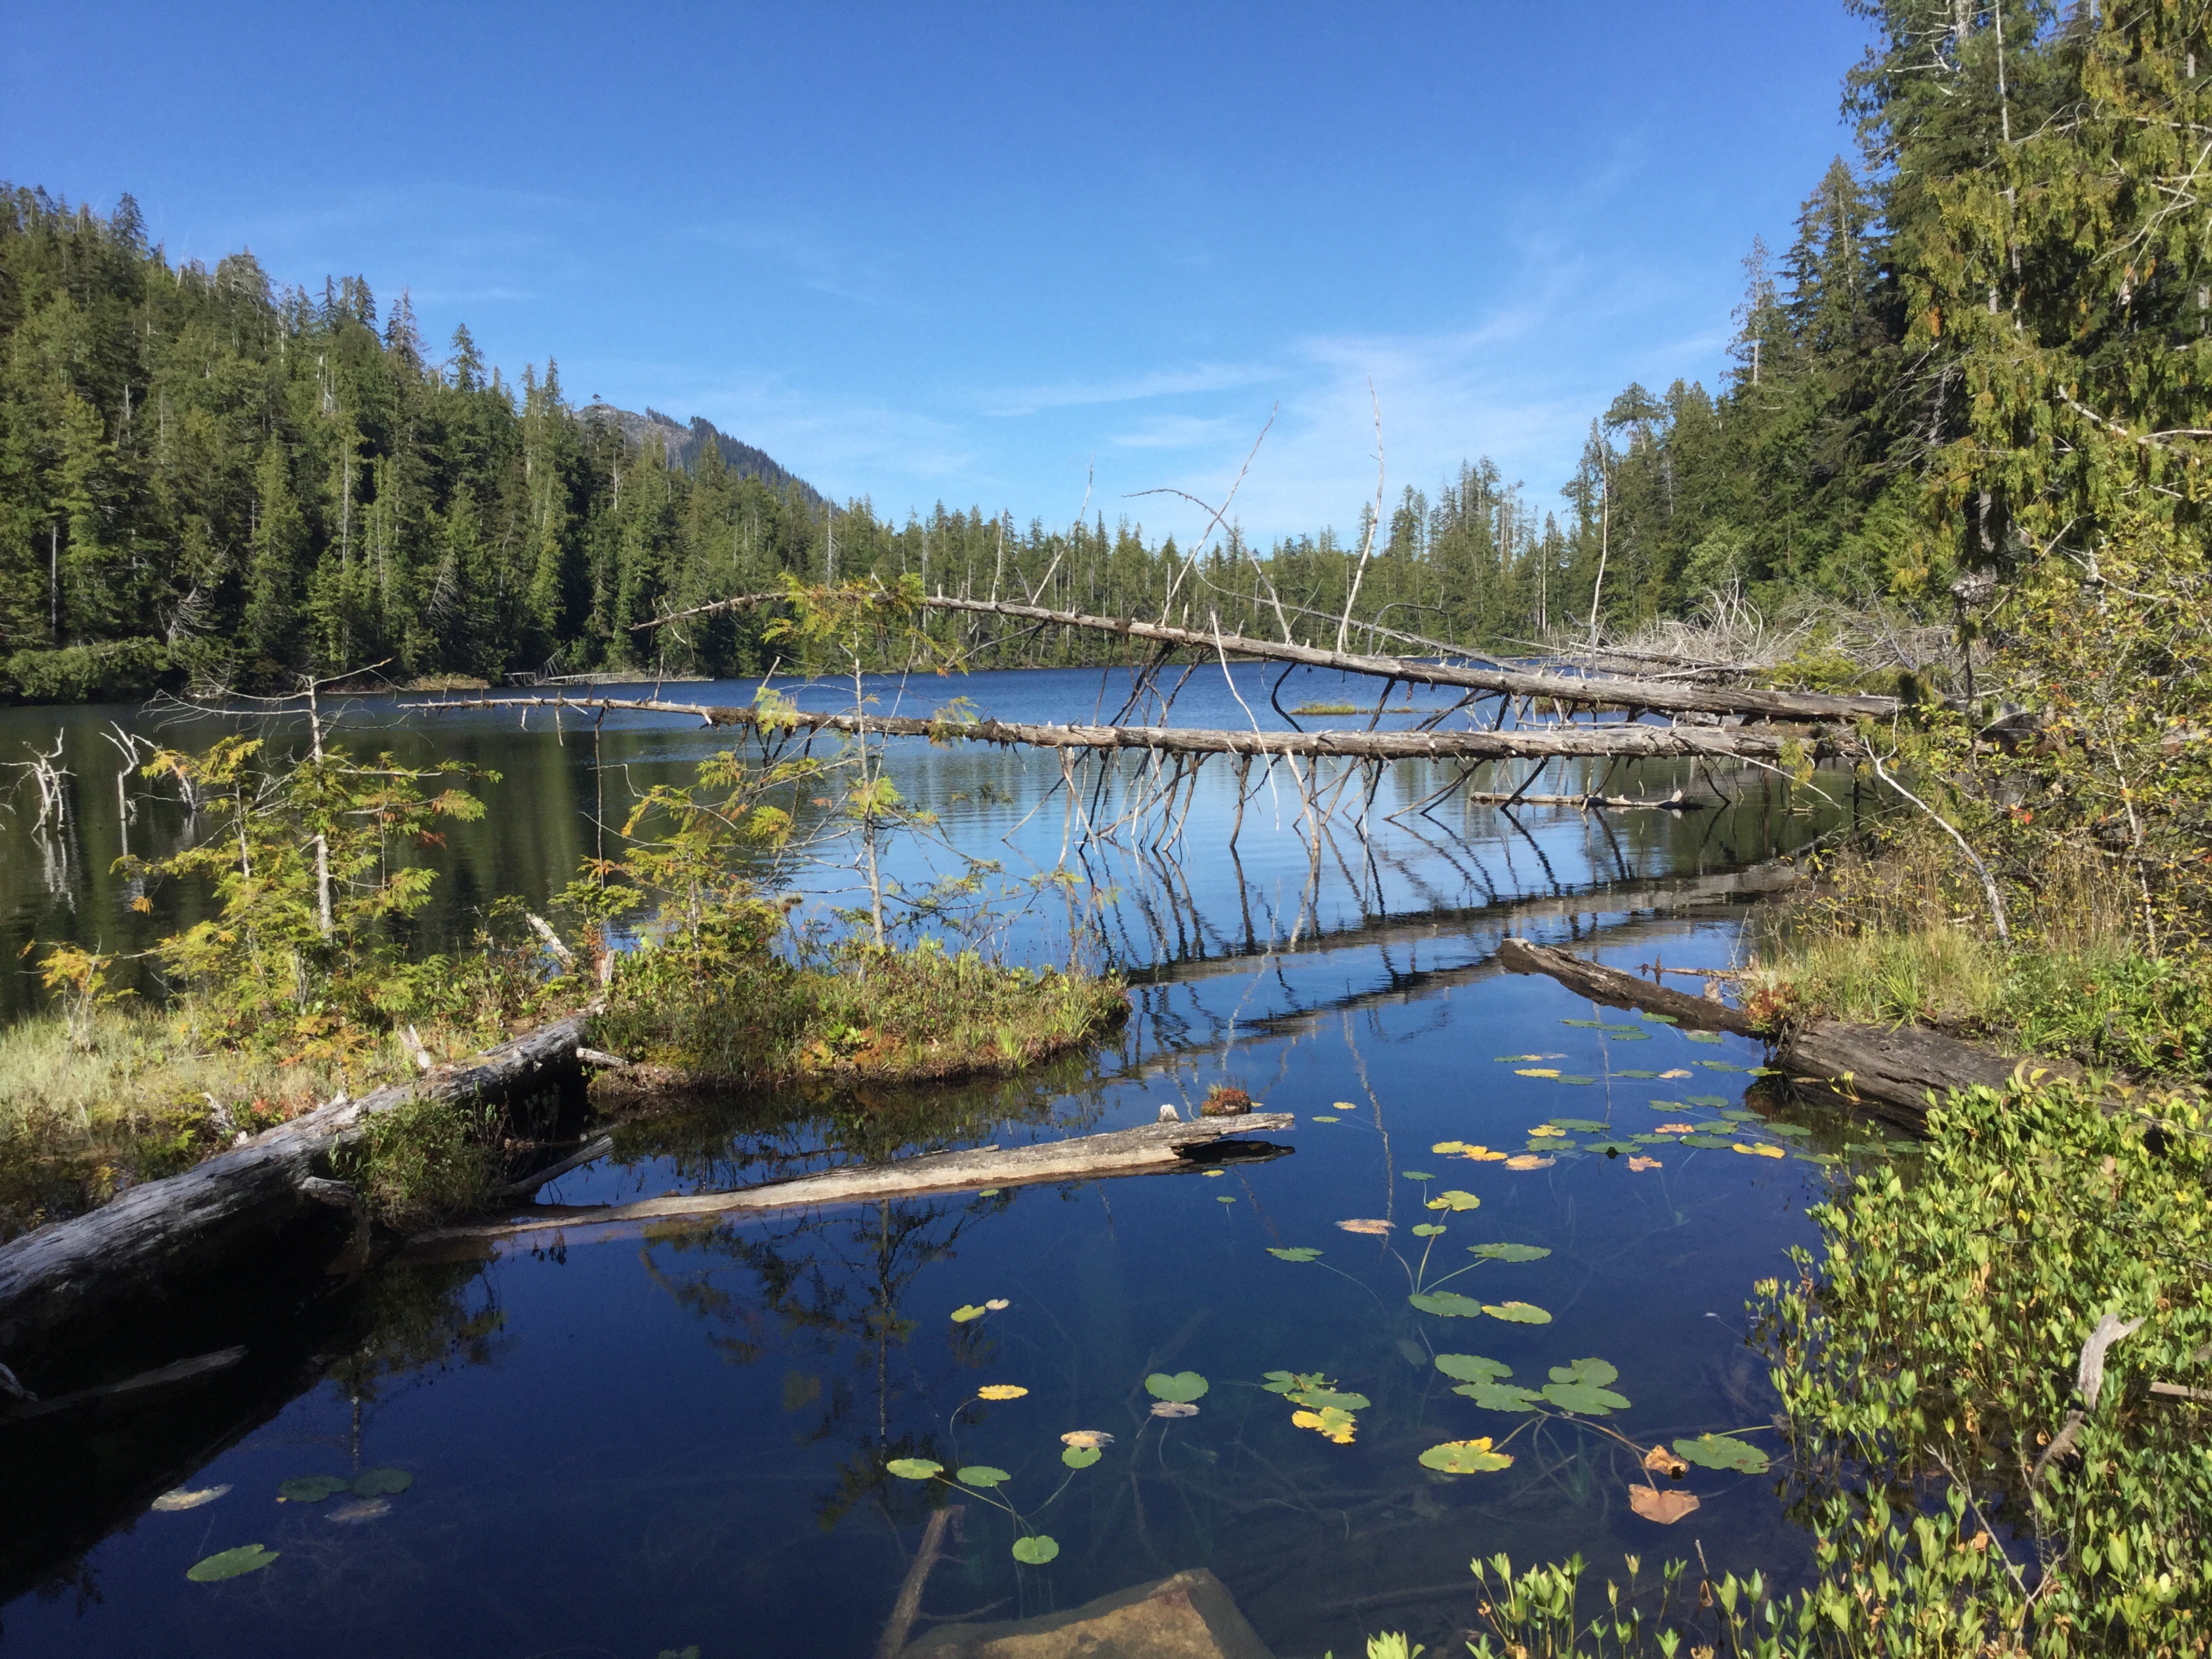
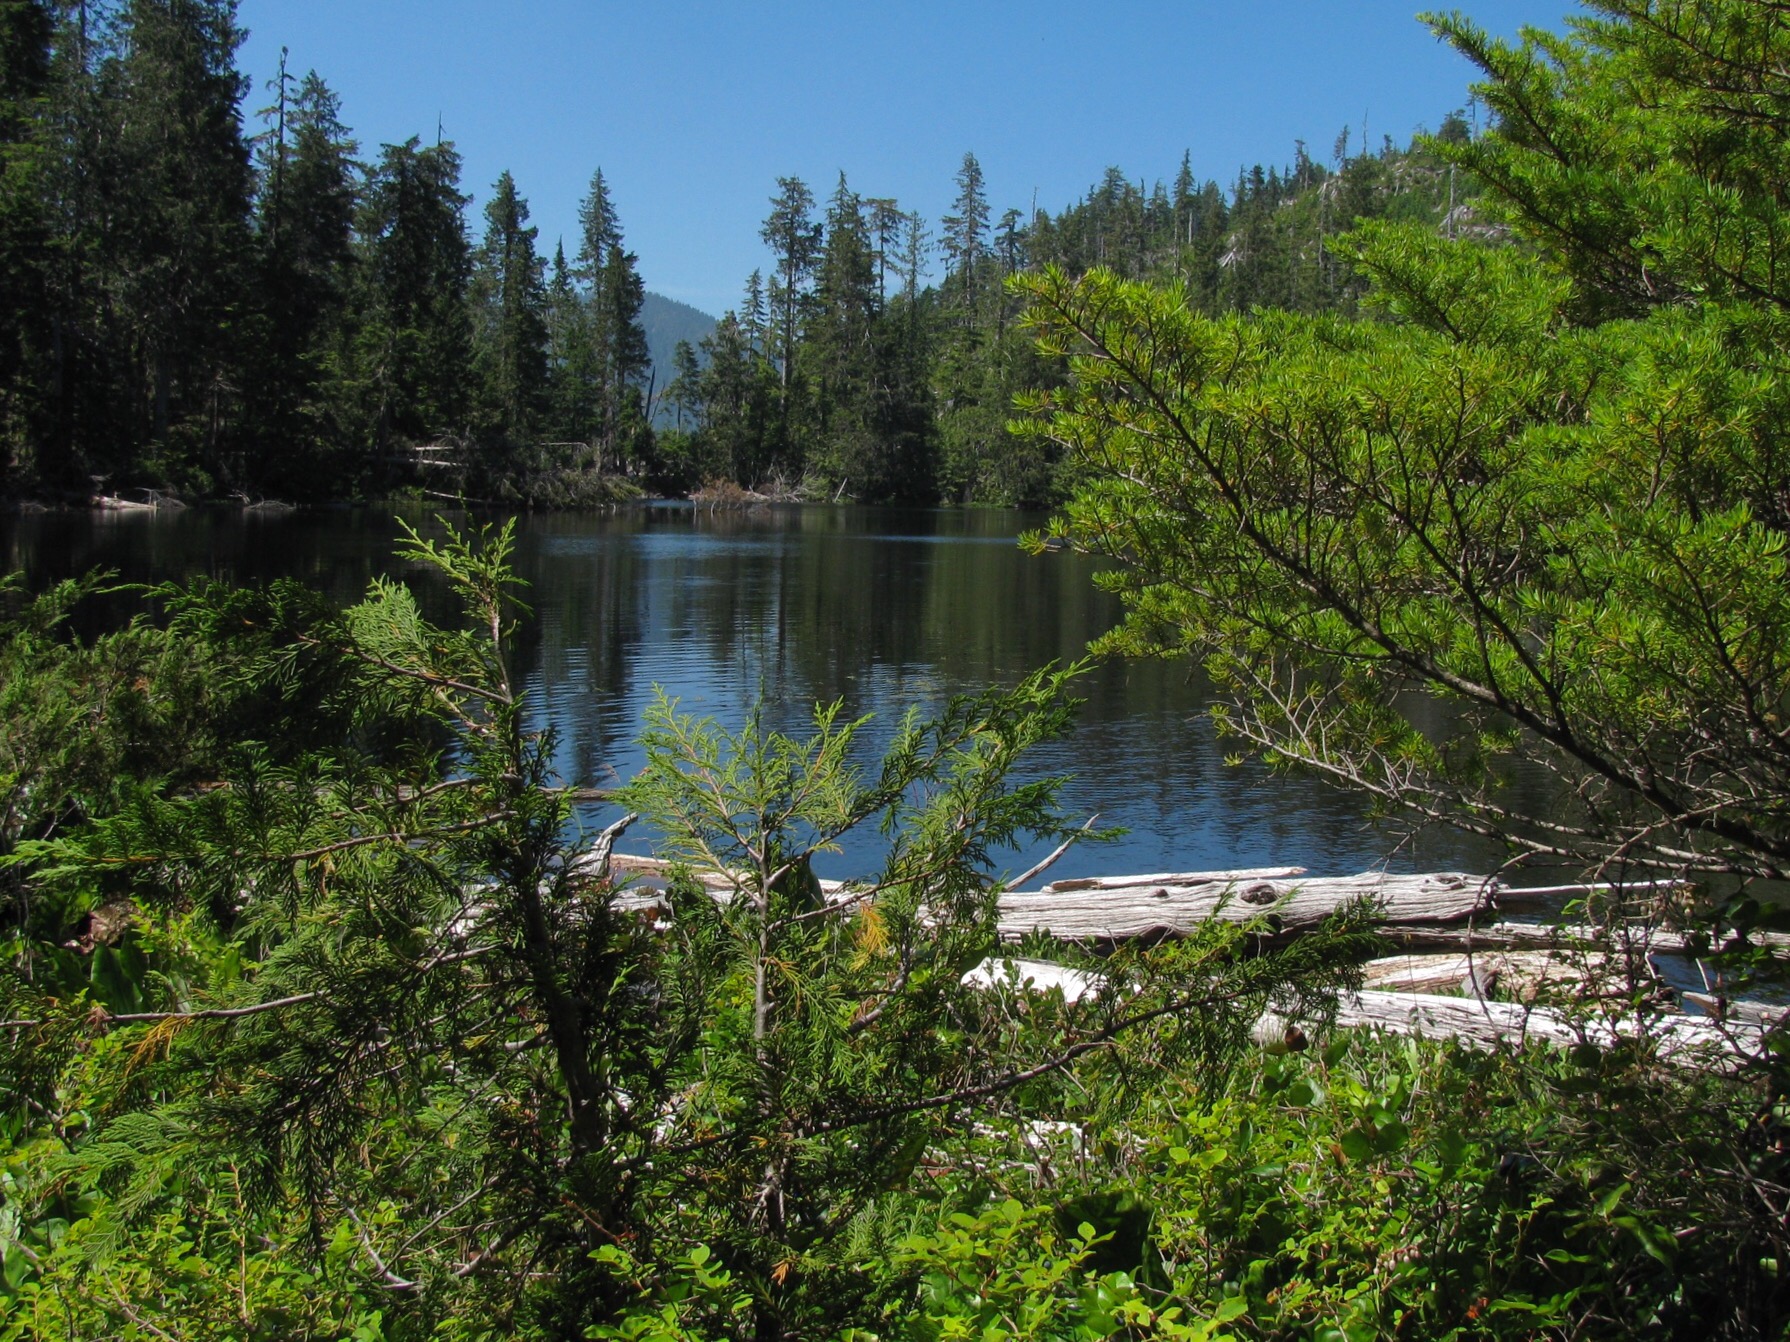
Quick report on a four day trip into the Klanawa valley here on Vancouver Island. It’s the main east west valley between Nitinat watershed and the Alberni Inlet. We like this watershed despite it being extensively logged, you don’t meet many other travellers and it has a few special spots. We’ve exported this area a few times, “Klanawa” and the search box on the right will bring up previous posts.
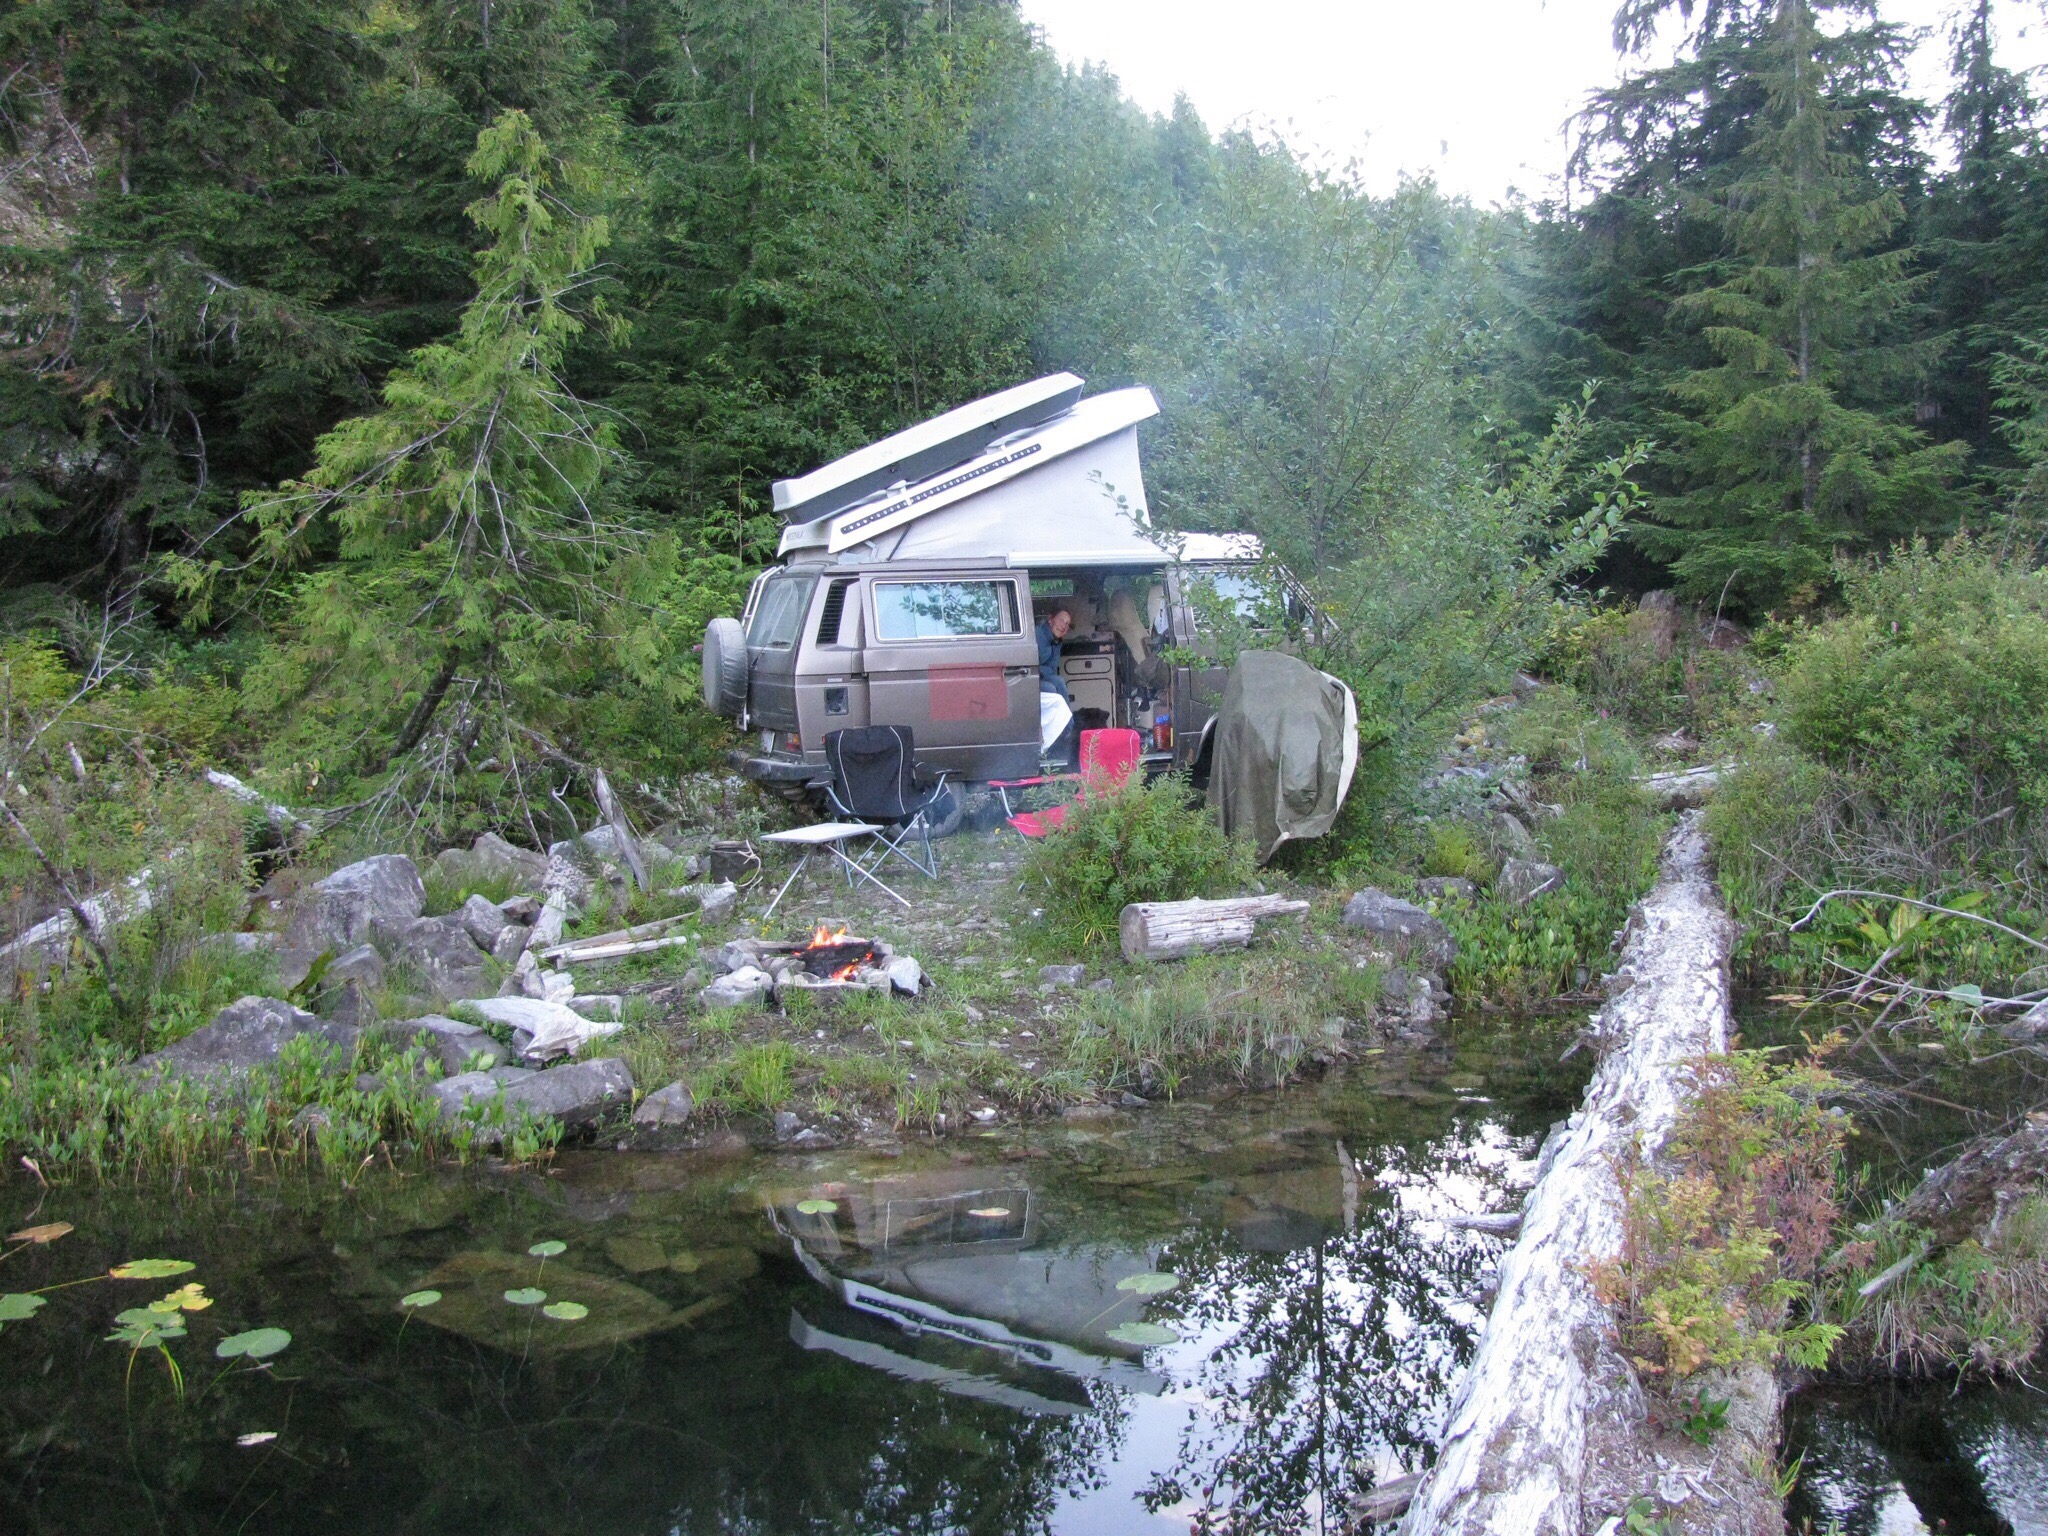
First night was at a small lake. You have no idea how good it felt swimming in that lake after the 3.5 hr hot and dusty drive. Ok it’s hyperbole, but jeez it felt good.

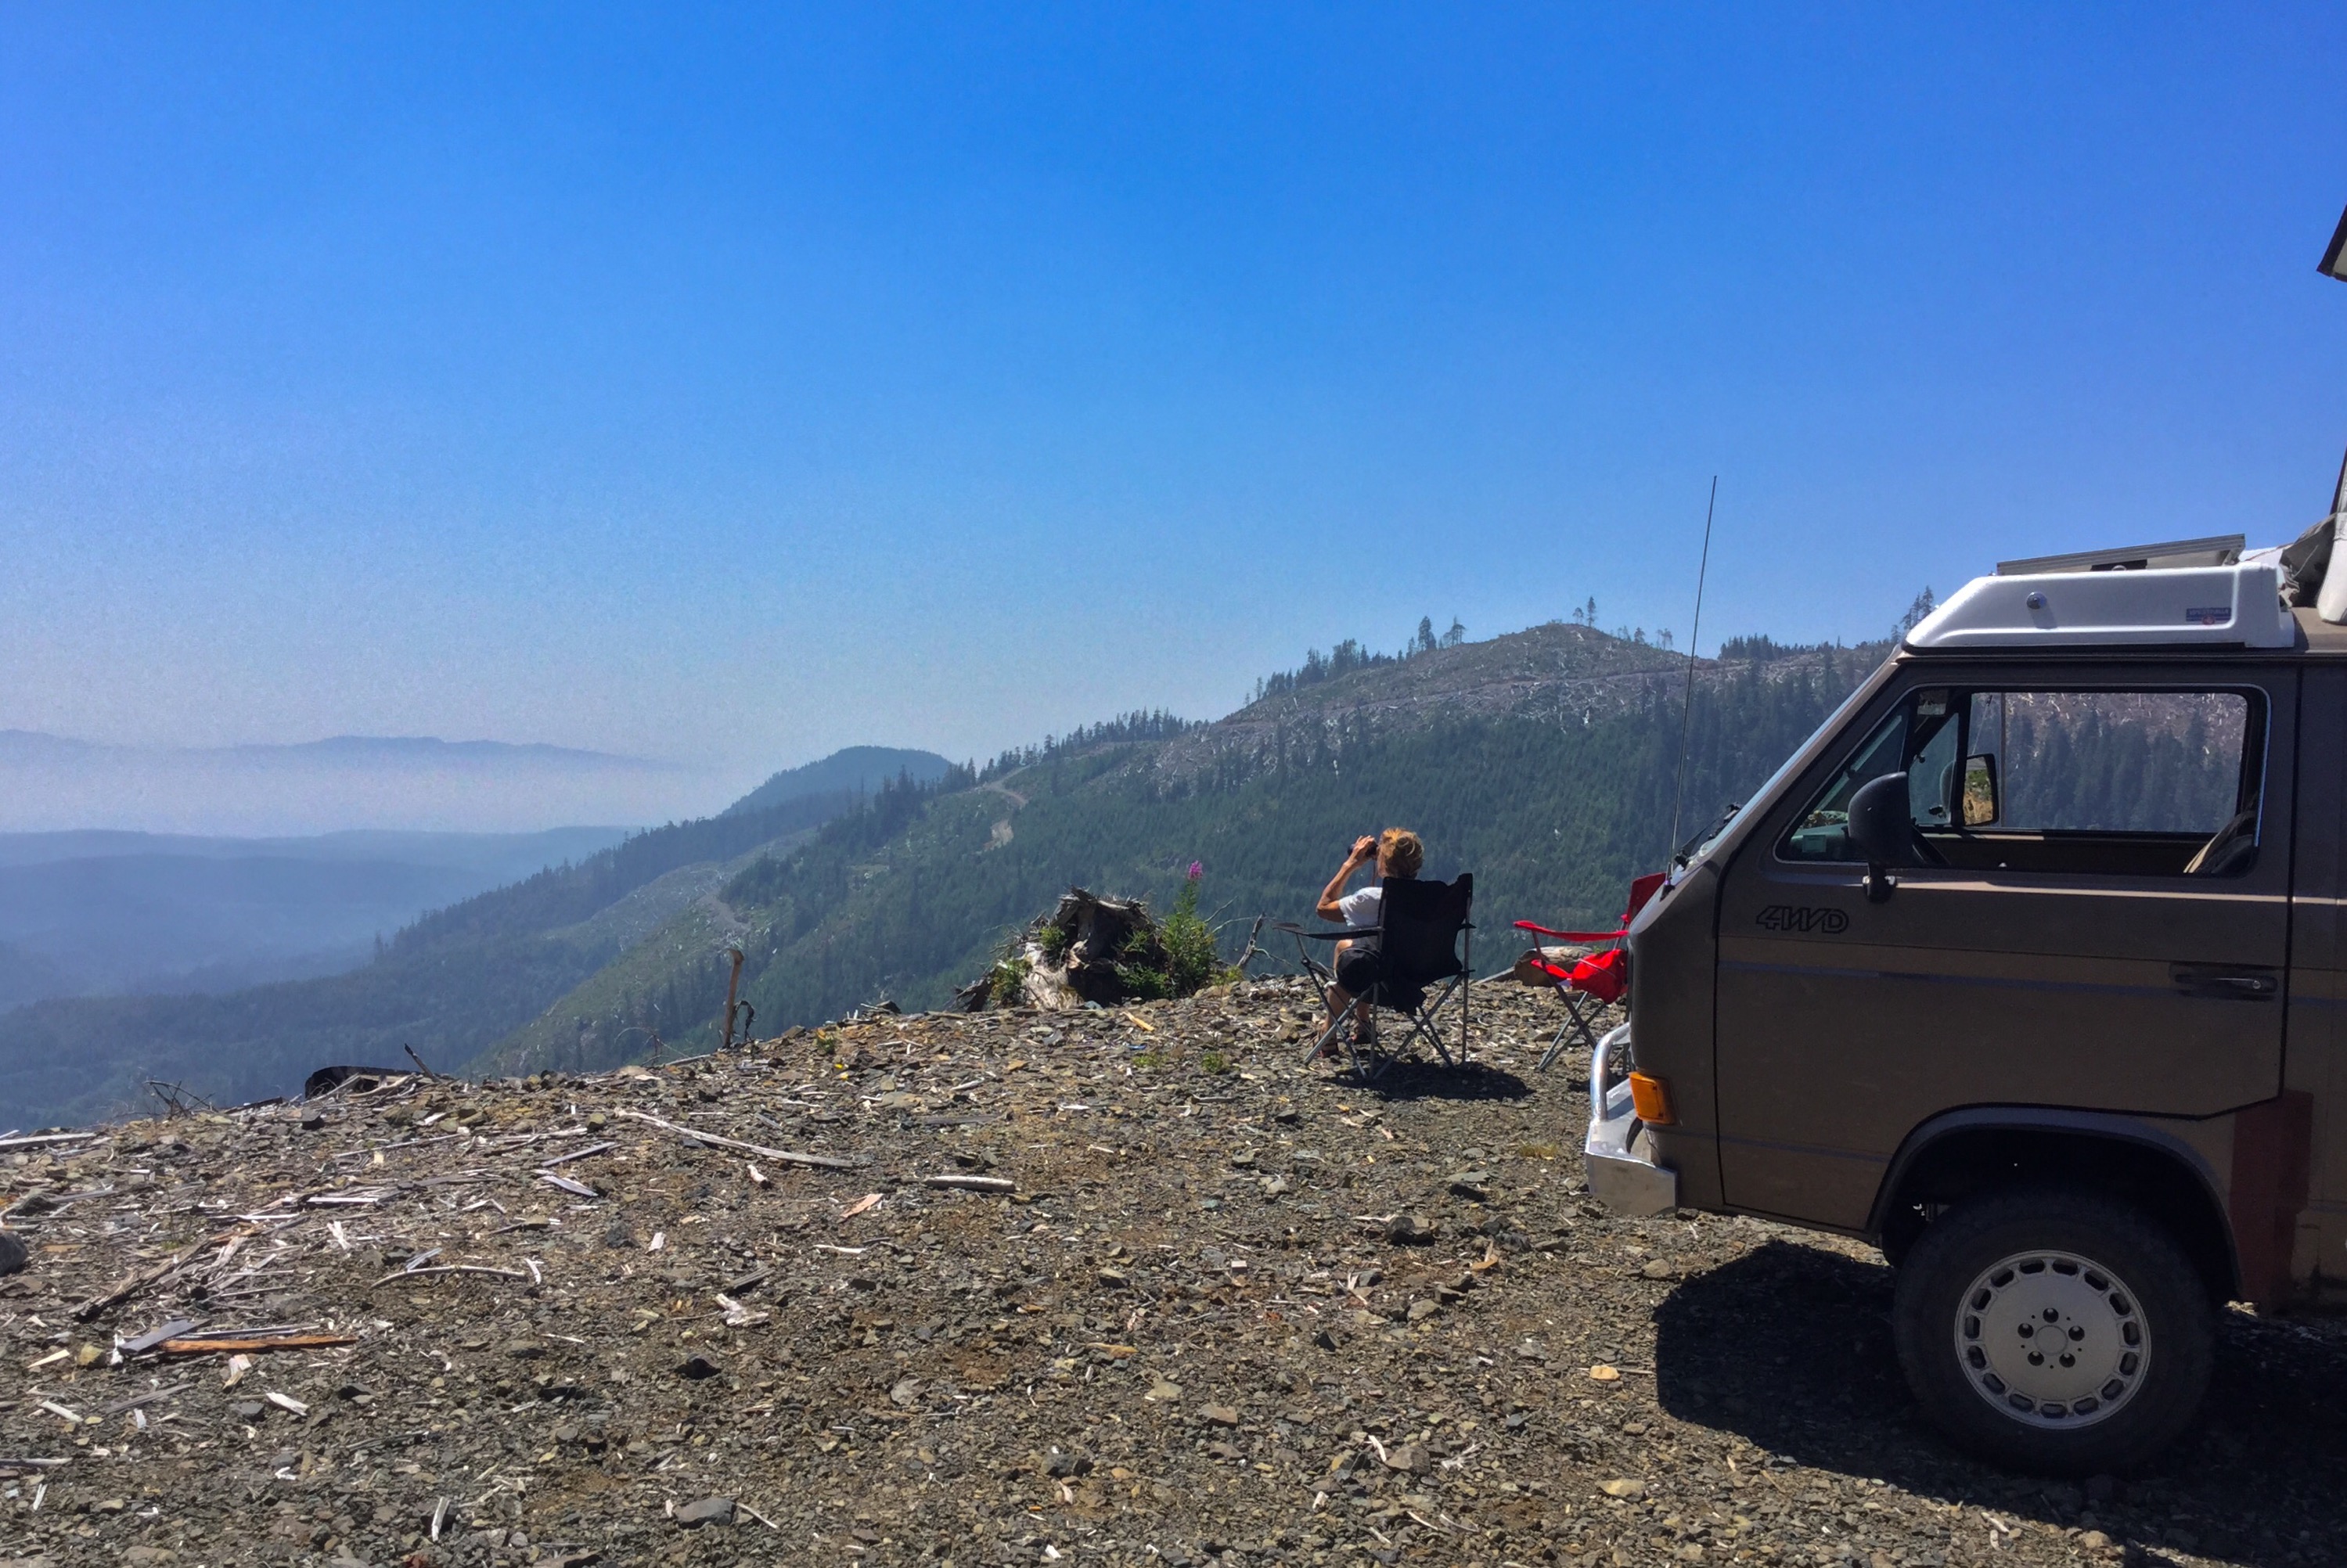
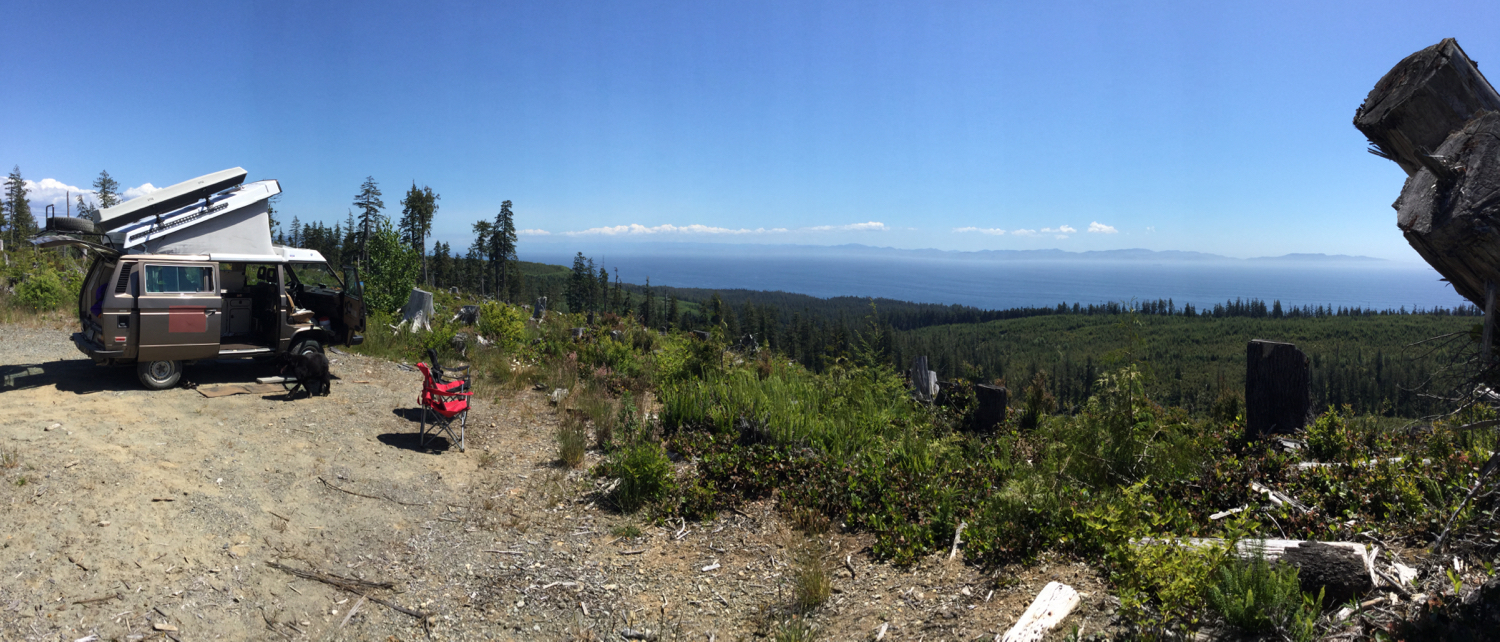
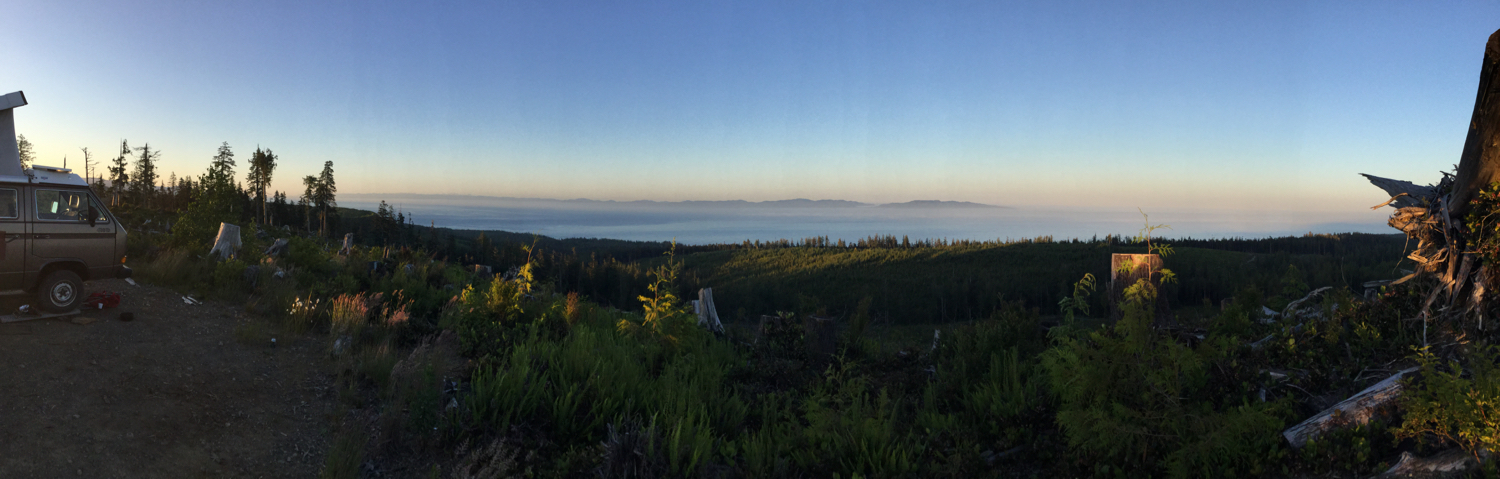
I shouldn’t have been surprised, but the fog from the Pacific was thick the next morning. Dripping wet and chilly. So off we went further west into the fog and found a hill to climb out of it.
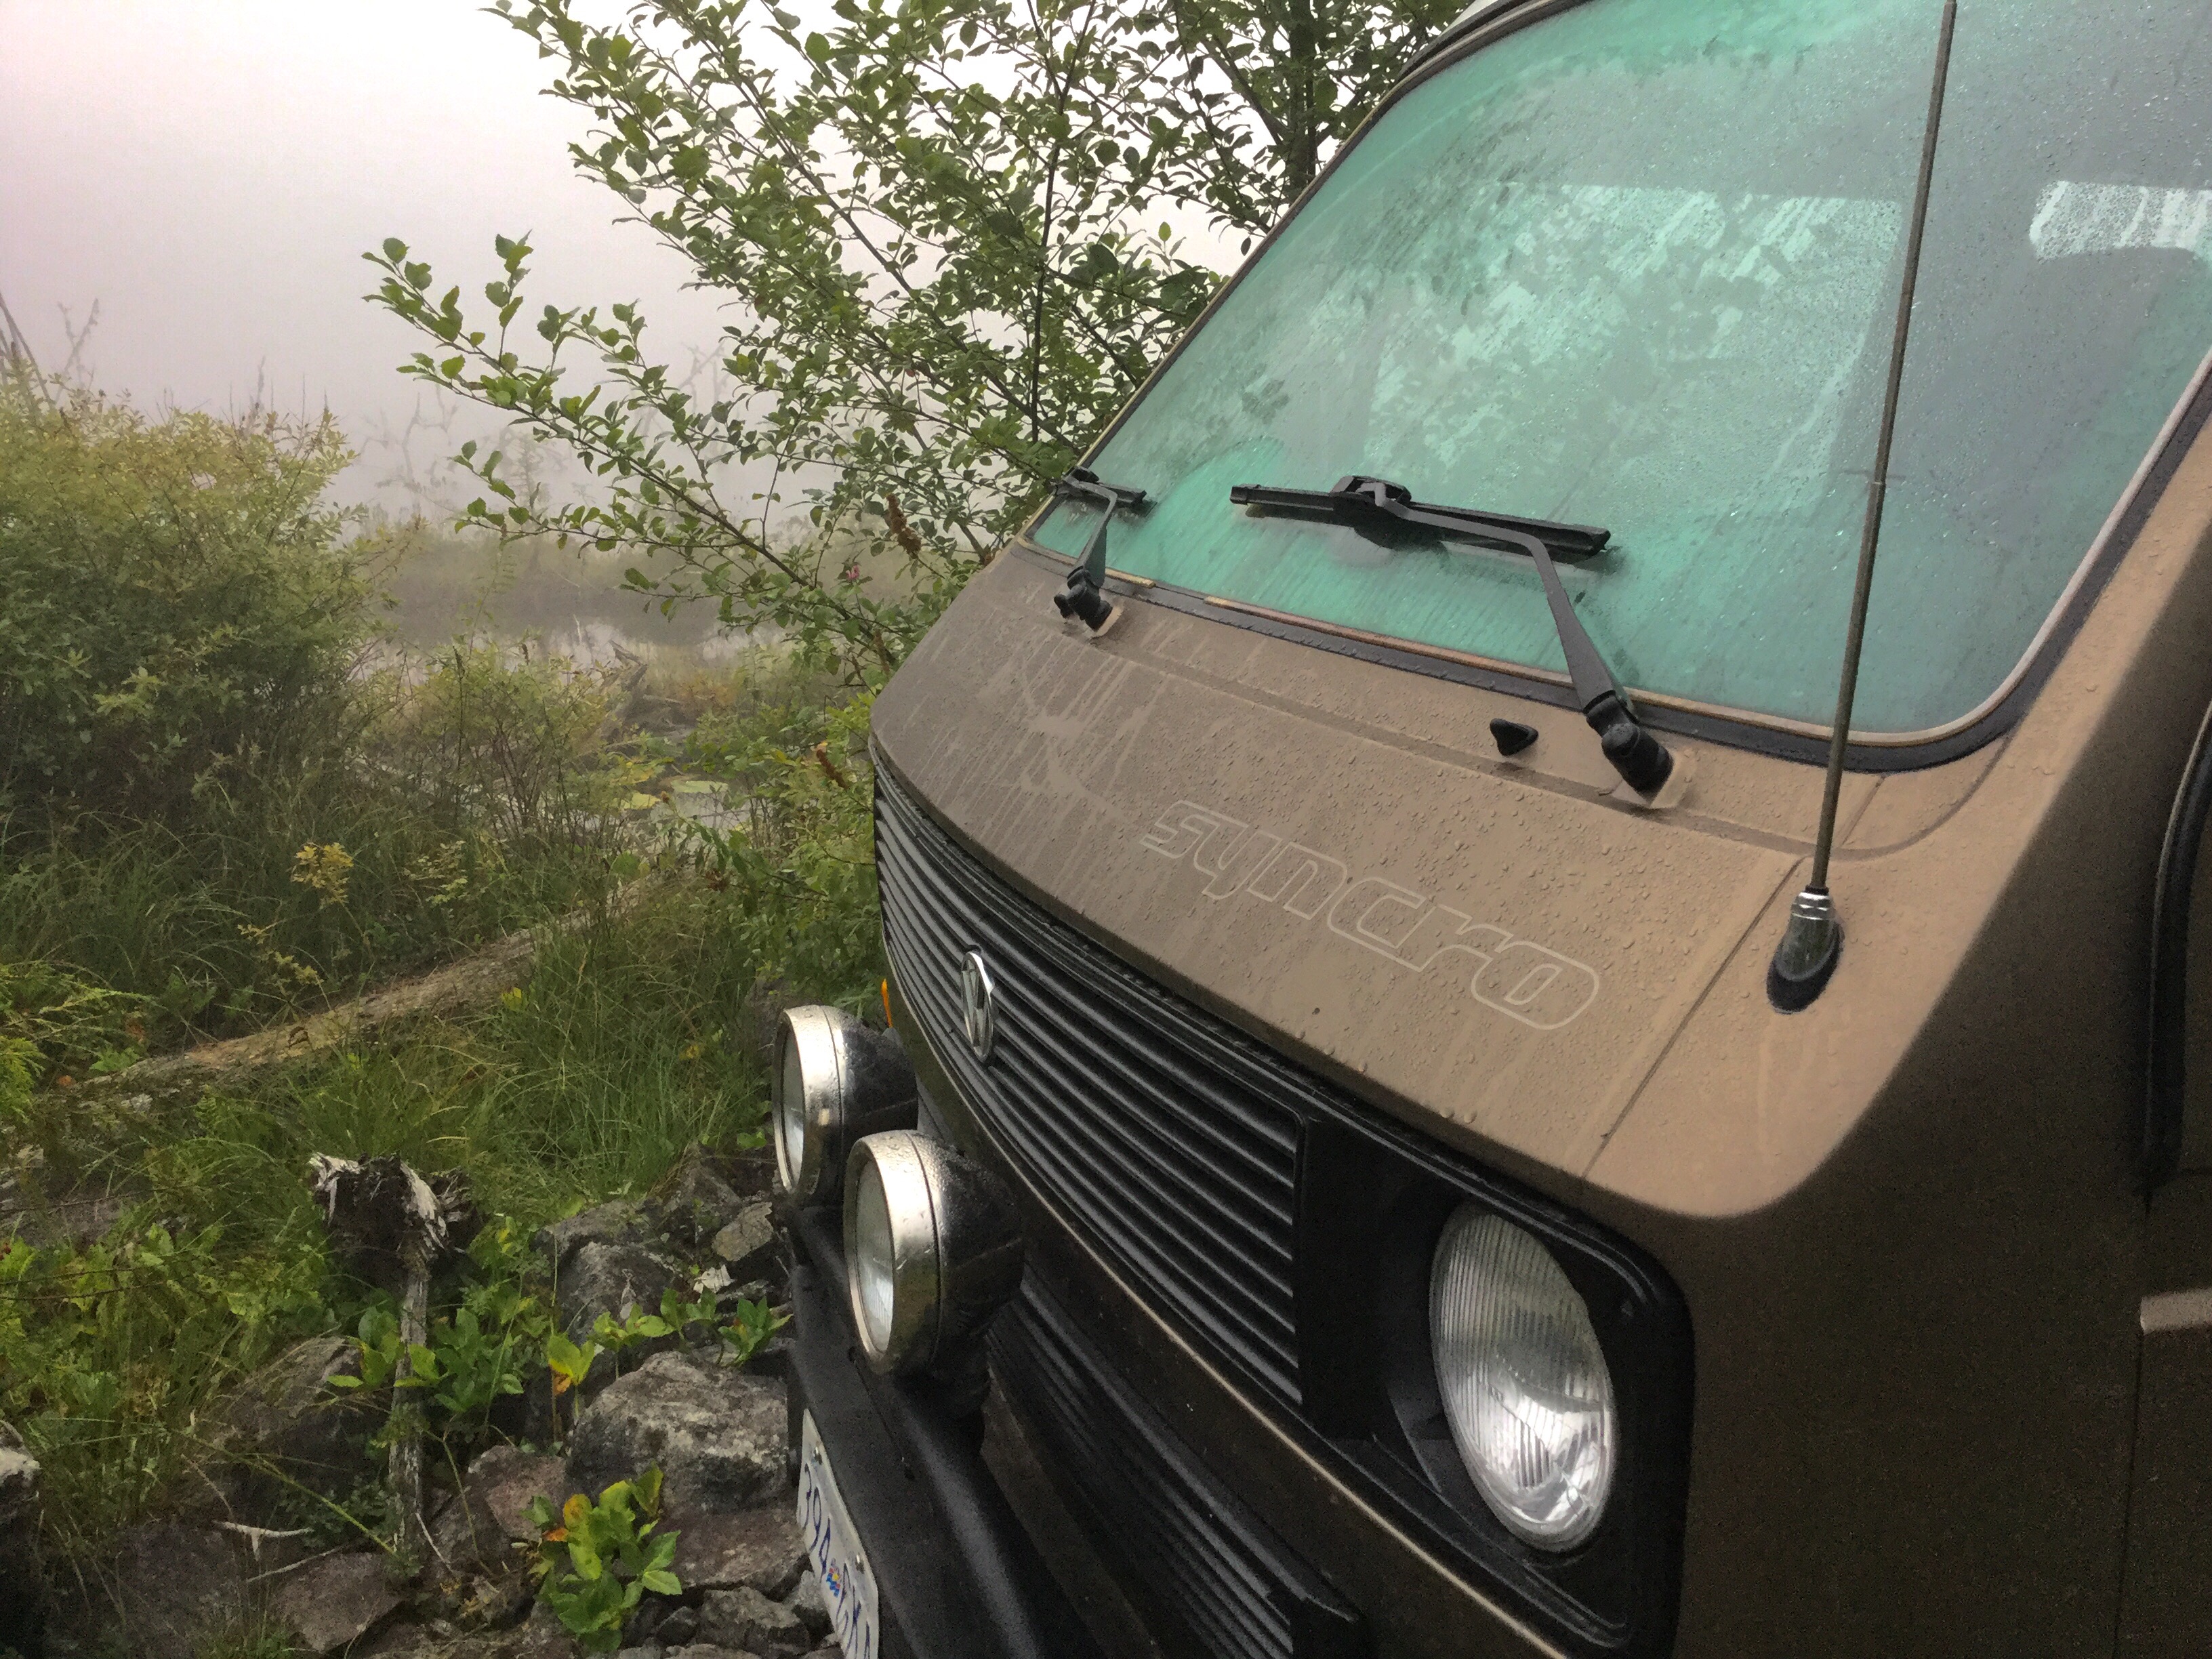
About 450 meters elevation we broke through the fog.

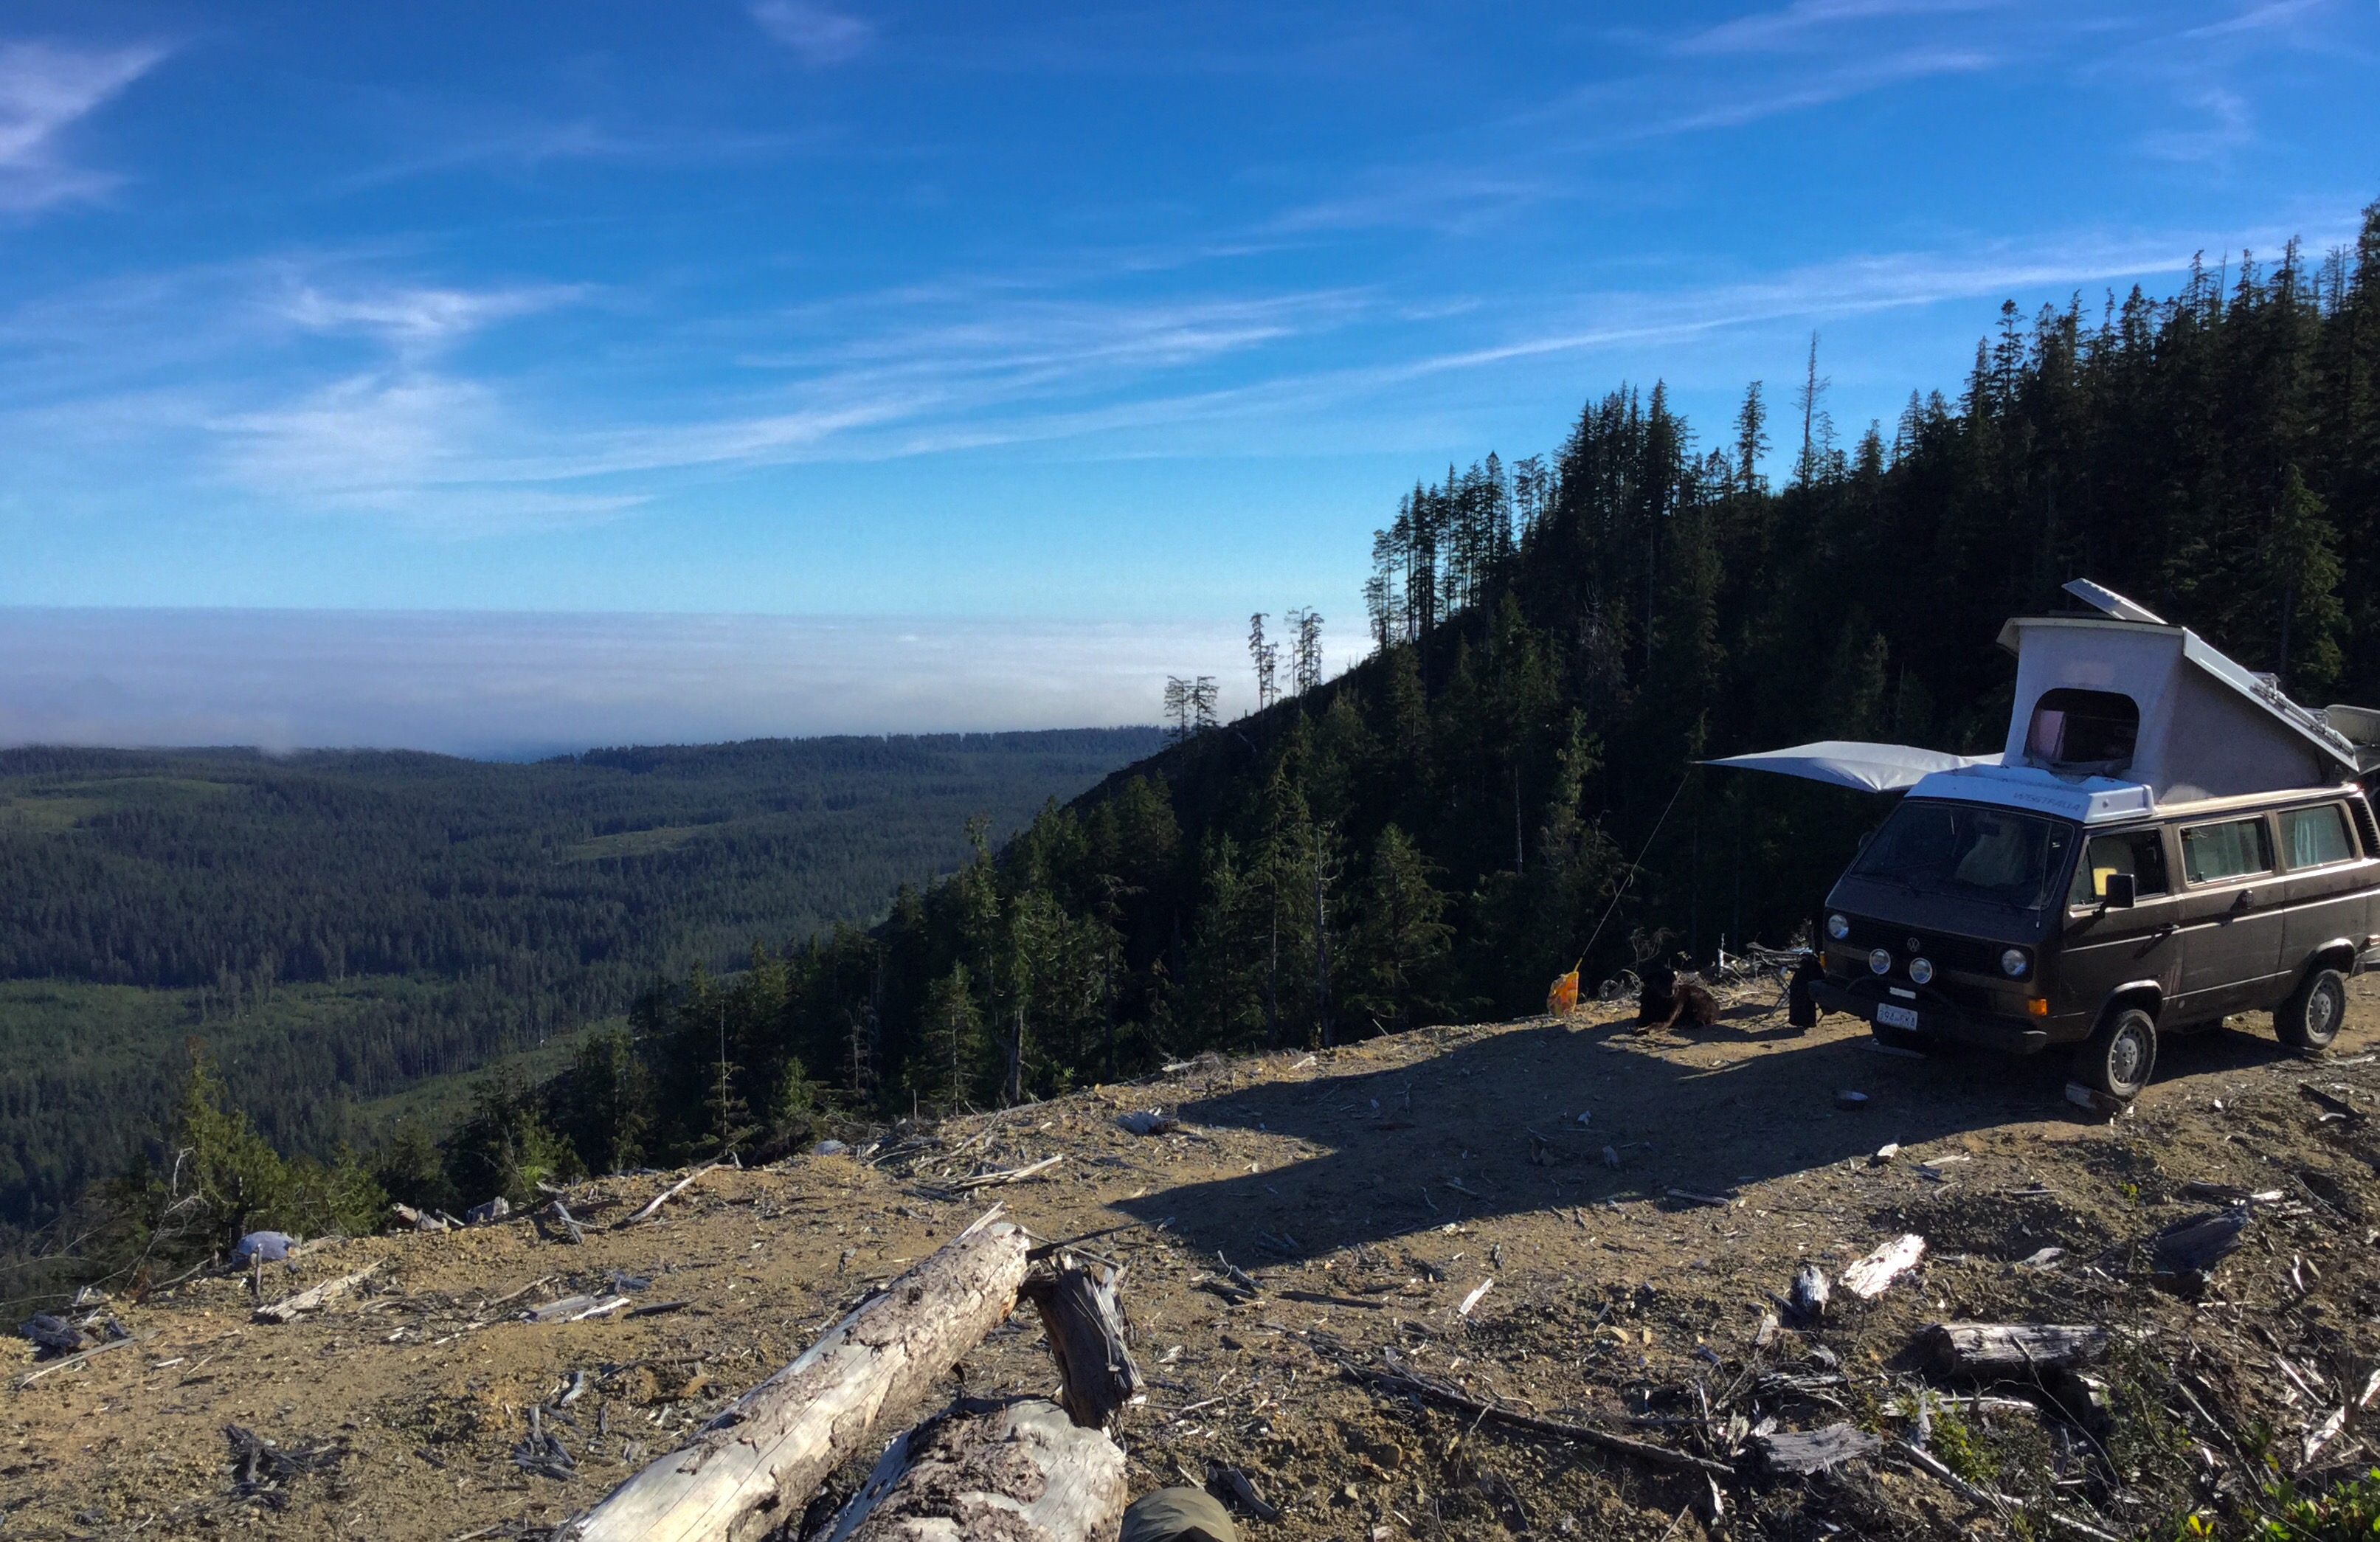
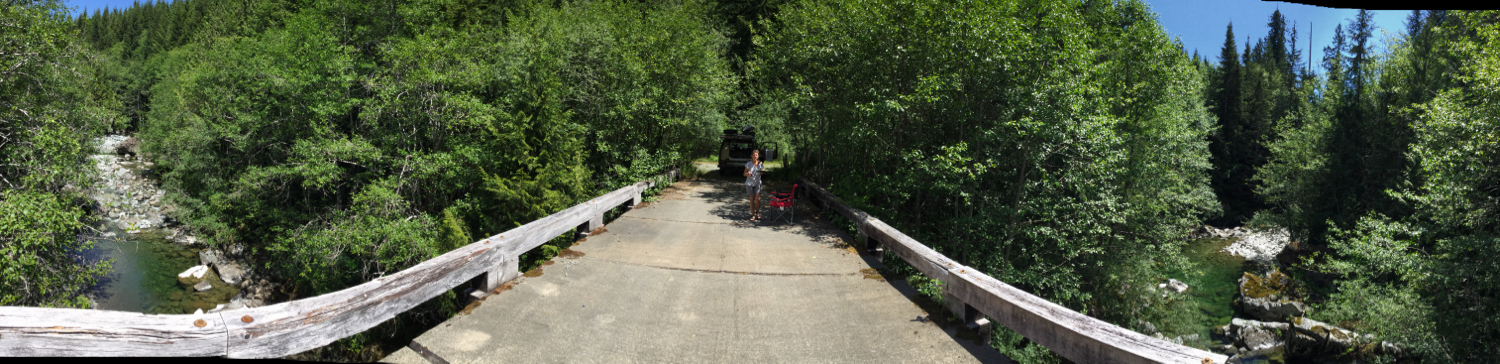
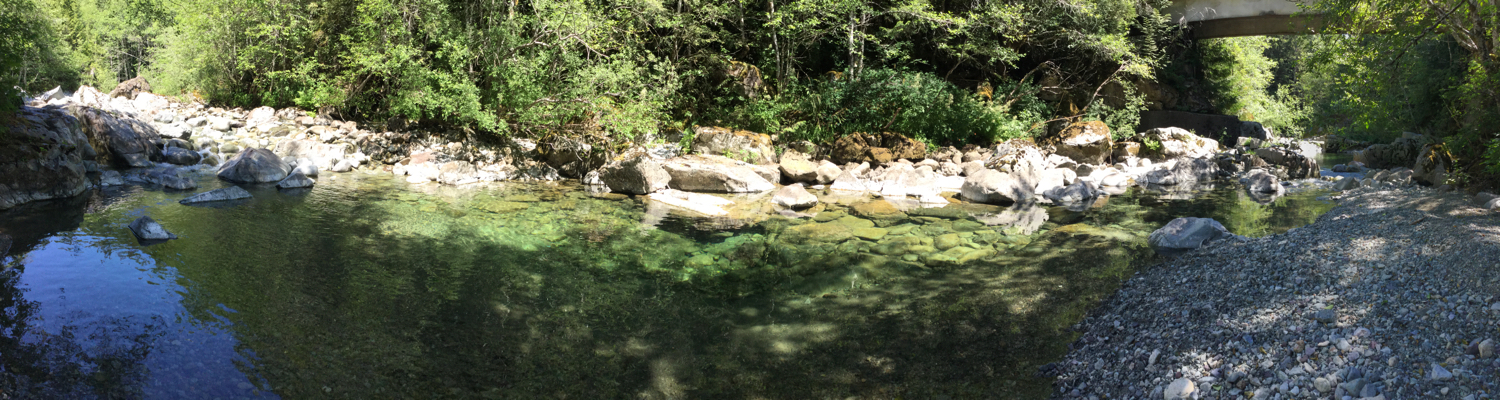
We parked on the side of the hill, facing south. By about 2 pm the fog retreated back to the coast. We got too hot, drove down to the Tsocowis river/creek and cooled off. This creek never seems to warm up, its not head numbing cold but it’s not “let’s just float around and enjoy life” warm either.

Than back up the hill and set up for the night.
The road went a bit higher but no better southern view up there. Spot the van?
Yup, the fog/cloud creep back in the evening.
We smelled propane that day, I tried (soapy water) to find the leak. Somewhere at the tank I thought. No luck at detecting it. Ran out of propane during that night. Sheesh. So on Monday we packed up and drove into Bamfield to fill up with propane. Also took the guard off the tank and was able to get a bit of tightening on one fitting. Or maybe it was the spit valve leaking? In any event the leak didn’t re occur. Thought about staying at the campsite at Pacheena Bay, but decided to go back to our spot on the hill after some unsuccessful exploring for the other perfect spot. Do you get the idea we like high places with no one else around?

Yup, fog back in the morning. Actually I forget which morning.

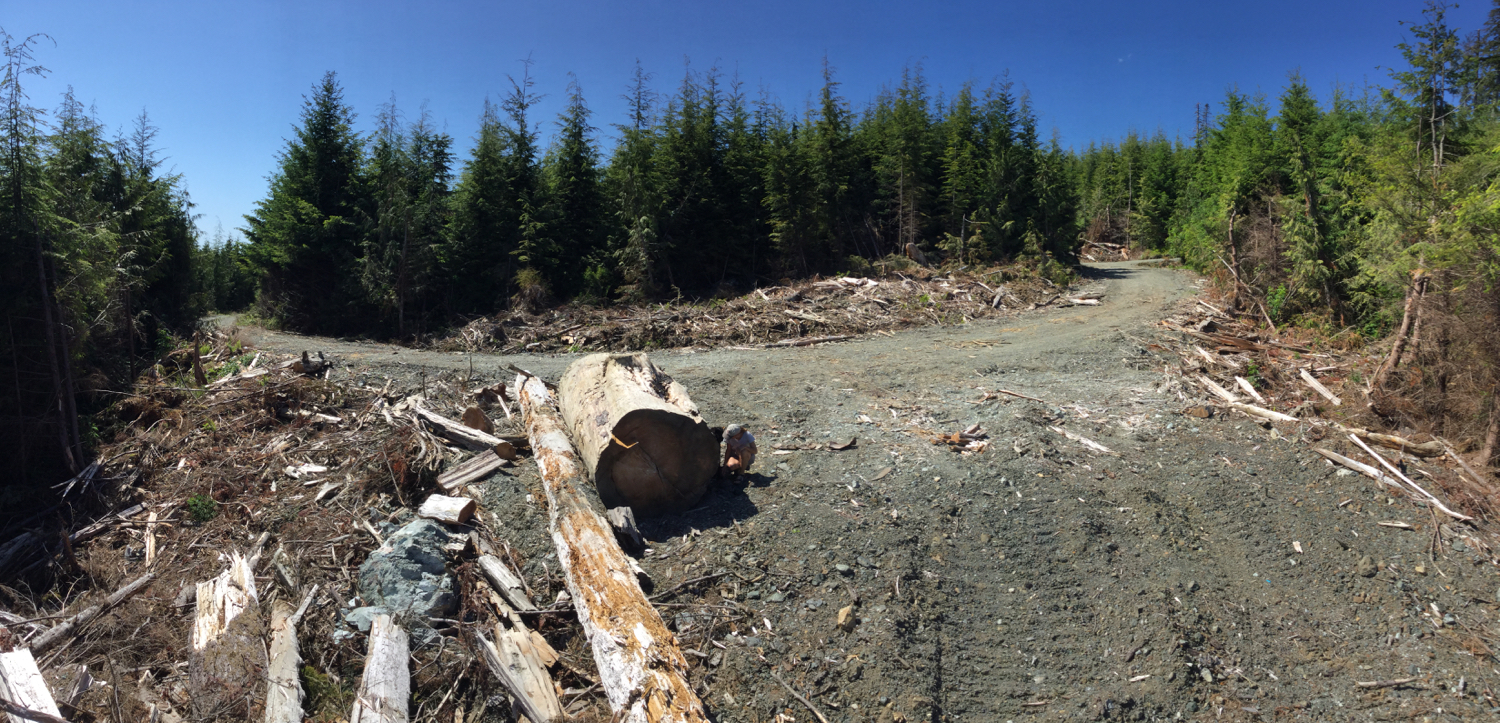
Next day we drove back down into the clouds ( to be honest, the entire valley cleared up around 12 pm). This shot gives you an idea of the maximum grade of most of the roads. I think this is about 18, maybe 20%. Sometimes you find it steeper, and often it’s quite a bit steeper around the switch back corners.

Well that’s it, short report. To be honest it all seems much of a muchness and pretty dull stuff. But the pics don’t do justice at all to how spectactular the area is, and really how much fun it is to explore.


Trip – last weekend
Weather great, didn’t get lost, only one thing broke* on the van. The main logging roads were rougher than usual, seems that a lot of the gravel has gone and the bigger rocks underneath are exposed. It’s like driving on very rough cobble.


*a leak on the fresh water line from the new pump to faucet. Manifested itself by a little drip under the sliding door. Didn’t do a field repair, the leak seemed to be in part of line behind the fridge. Wasn’t bad enough to go to all the bother of pulling fridge. But at home, pulled fridge, and I lifted the entire floor (to get it dry). Found the tiny leak at a section of hose that ran adjecent to the fridge combustion chamber. It’s my fault, I secured the line back there with tie downs but too close to that chamber. I’m guessing that the new water pump made enough pressure to weaken the hose that was softened by the heat. Was just a pinhole leak, but still…
Vanagon – Prague syncro high top
My son is traveling and I have been bugging him to find me some T3 action. He was in Beirut and I thought he might get lucky and find one there. Nope, but he came through with this nice syncro high top in Prague.
I very much like the sticker on the front door, “syncro Czech team”.

A quick sketch of Canadian version 🙂

Or the over used syntax…

And one for Simon 🙂

Vanagon – those boring wheels on the van
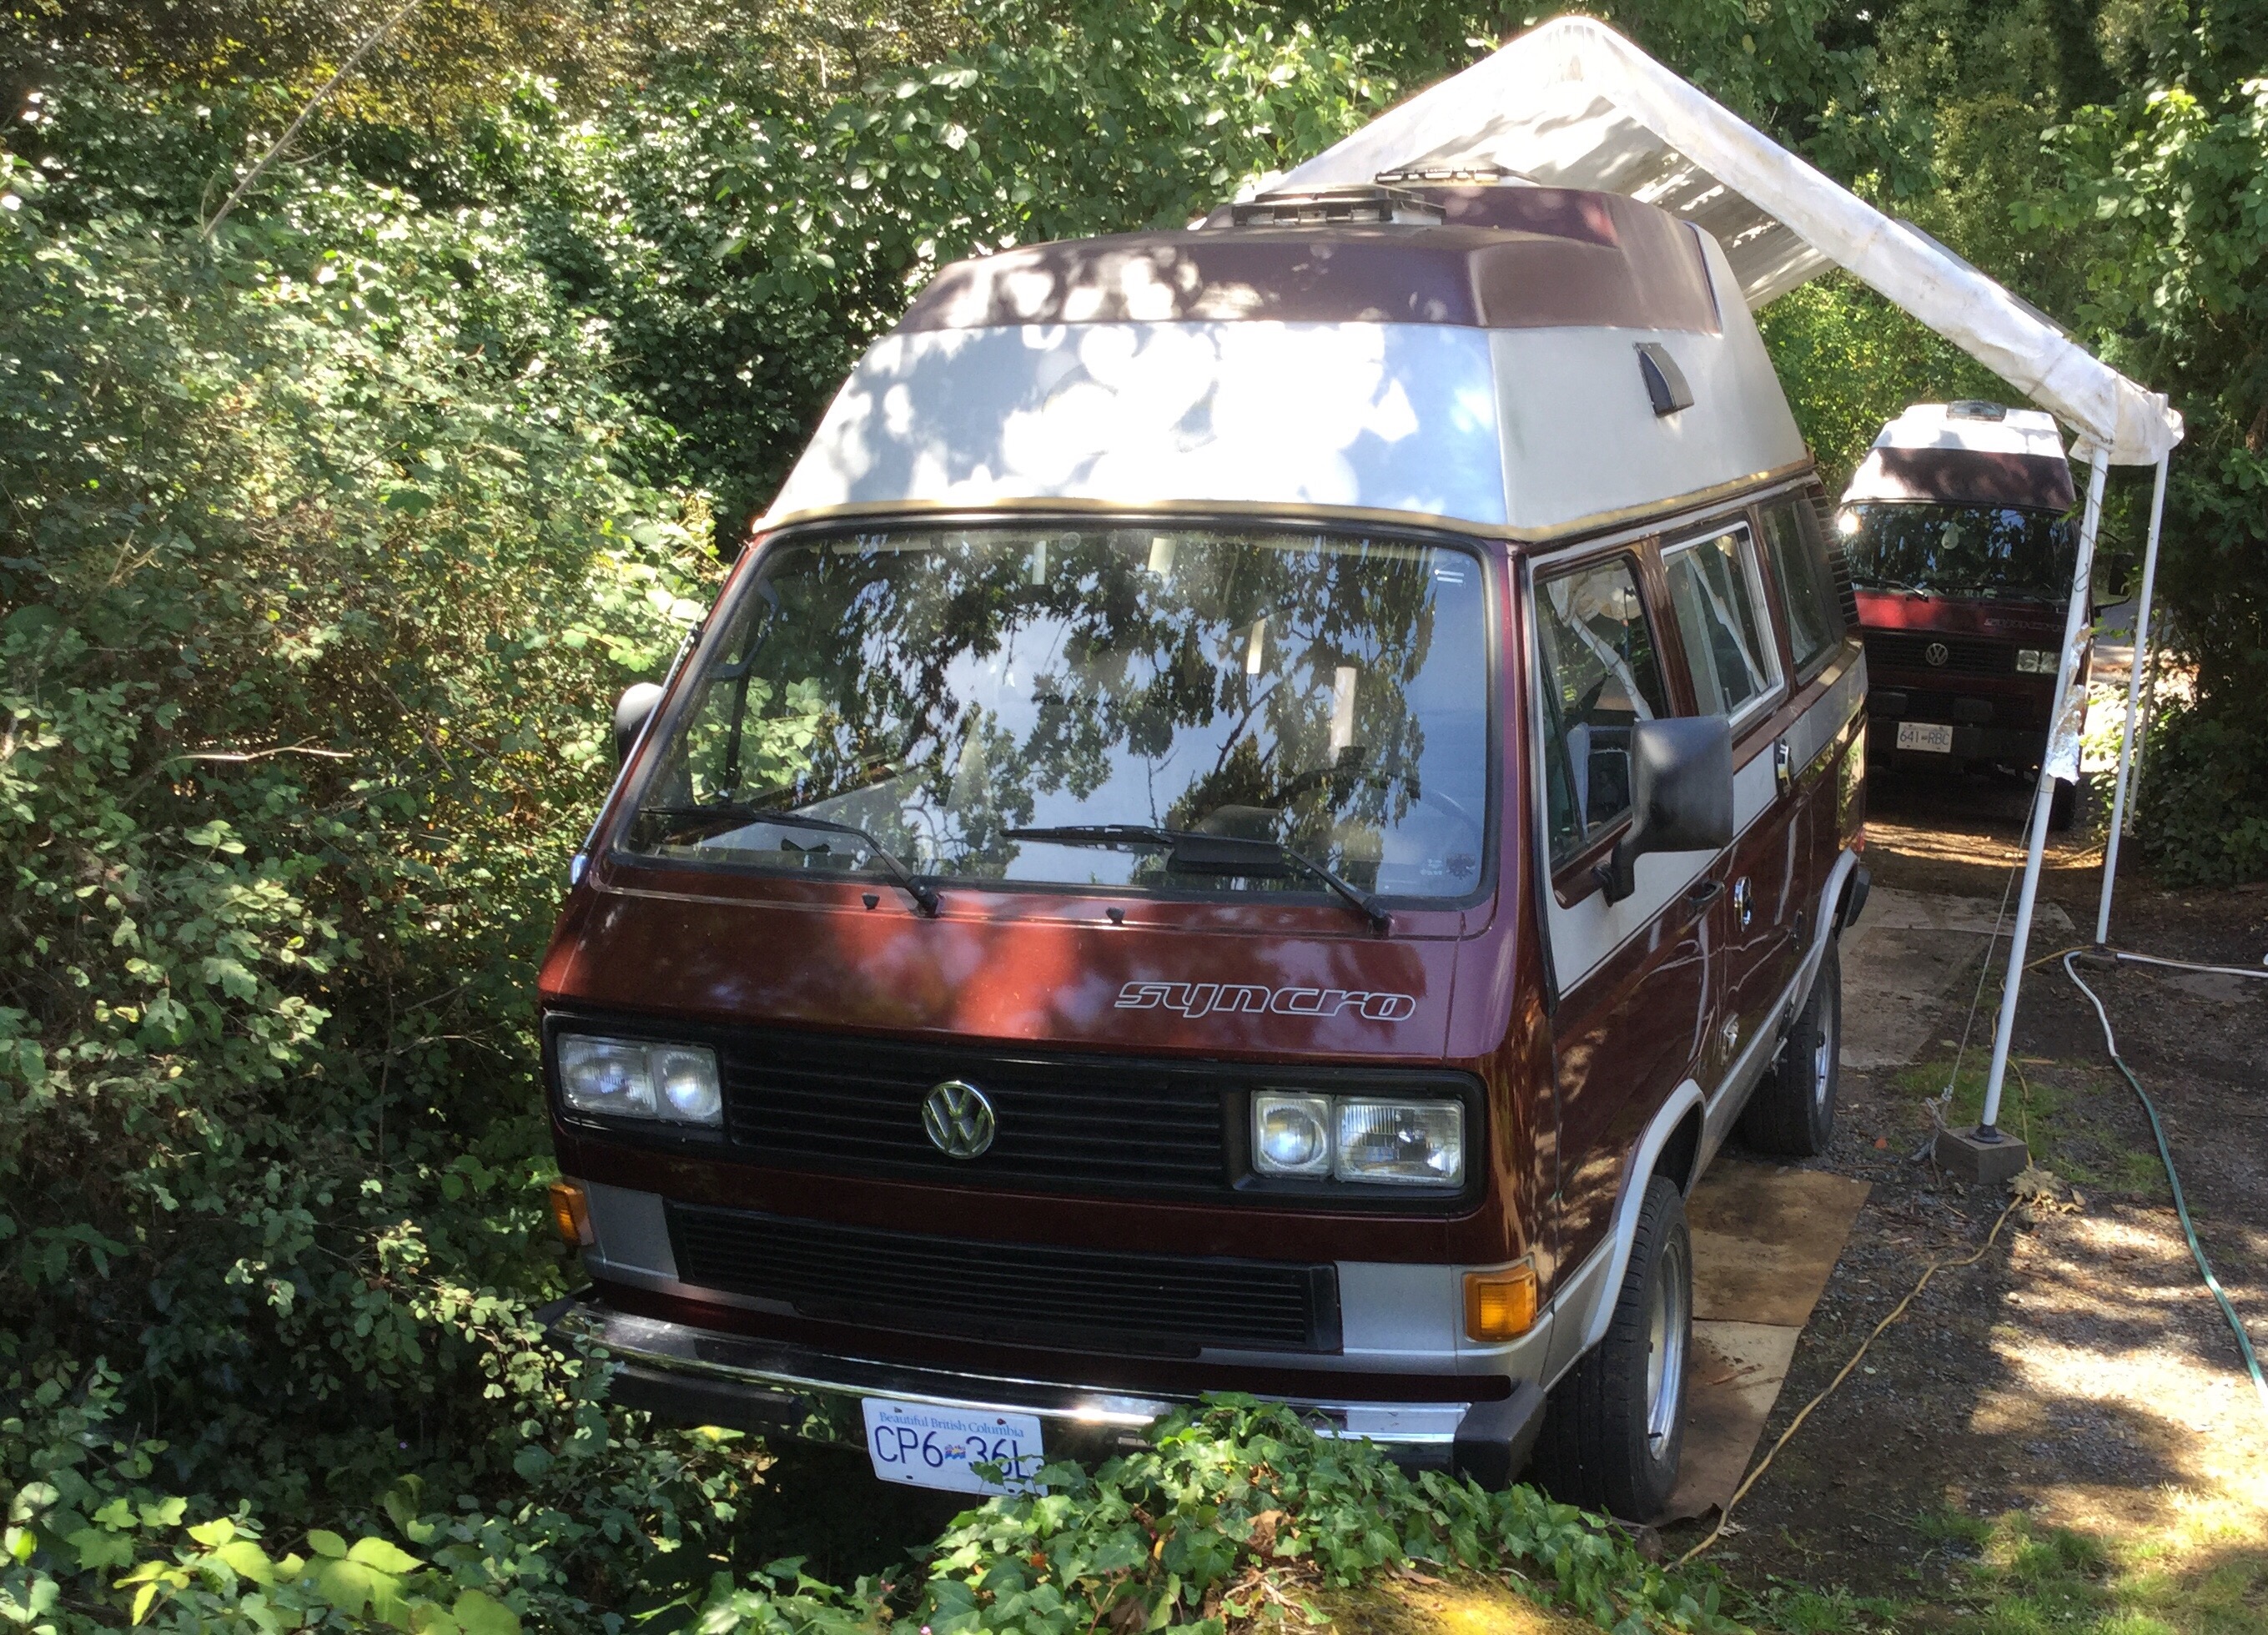
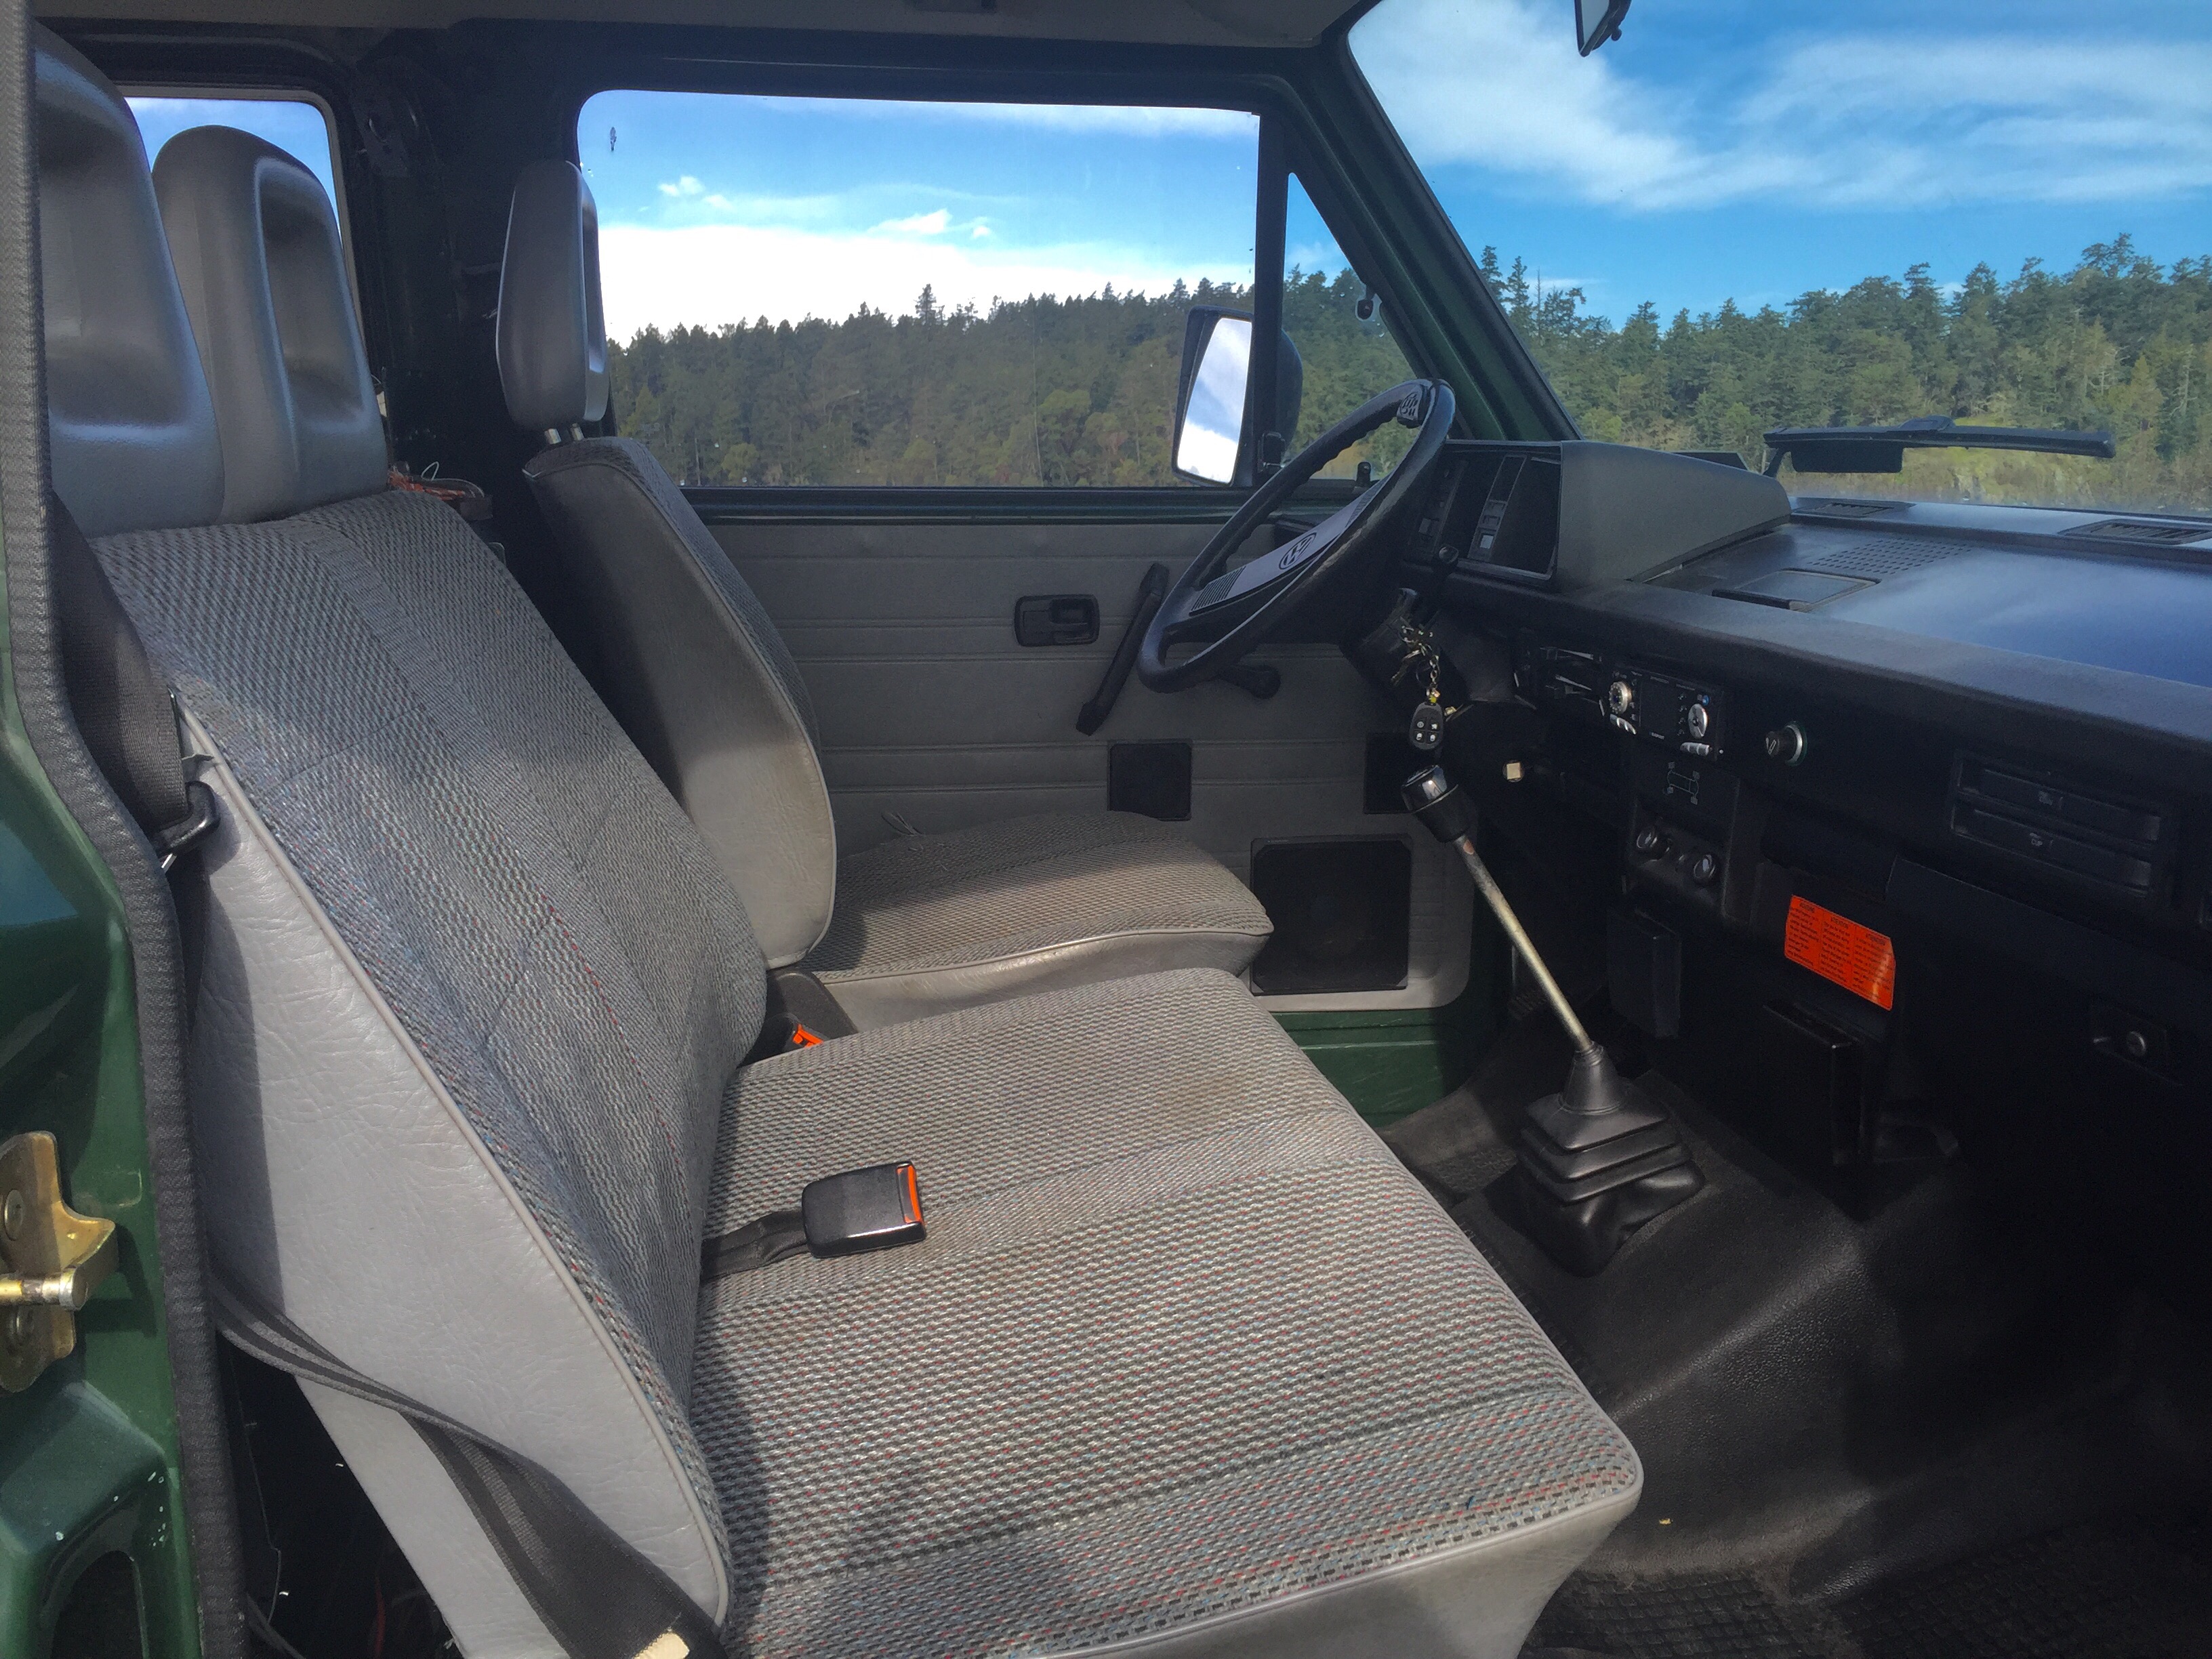
Yes, this is Simon’s latest find. 88 syncro high top. Getaway van conversion, done over on the mainland (BC). I’ll have more to say about this van and pics of the interior when Simon is finished tidying it up. It’s a good looking van, and only 82,000 km. The bored out wheels look ok on it, but we both agree it needs about an inch of suspension lift to perk it up.
Yes, it’s the same Fiberglas hightop that we put on Simon’s other syncro. If you had to have a hightop, and you don’t have access to the sexy European models, I think it’s the best looking option.

Vanagon – making a new roof rack
Posted by albell in syncro, vanagon, vanagon mods on May 28, 2016
I get these ideas sometimes and for better or worse I follow through. Even though I have been using a perfectly good Thule rack system ( the type that has pads that sit of the roof top and hold down clamps that grip that black rail thing I installed for the purpose), the airfoil section aluminum spar material that was lying around the shop was too tempting.
Here’s the old Thule rack.
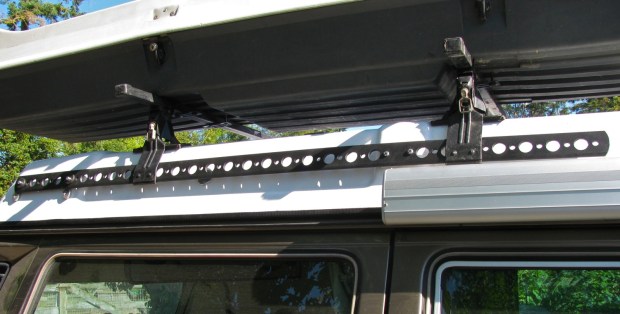
It’s the type of spar material you see used as spreaders on sail boats. This version is pretty stout, 1.5″ at thickest and a chord length of 5.5″.
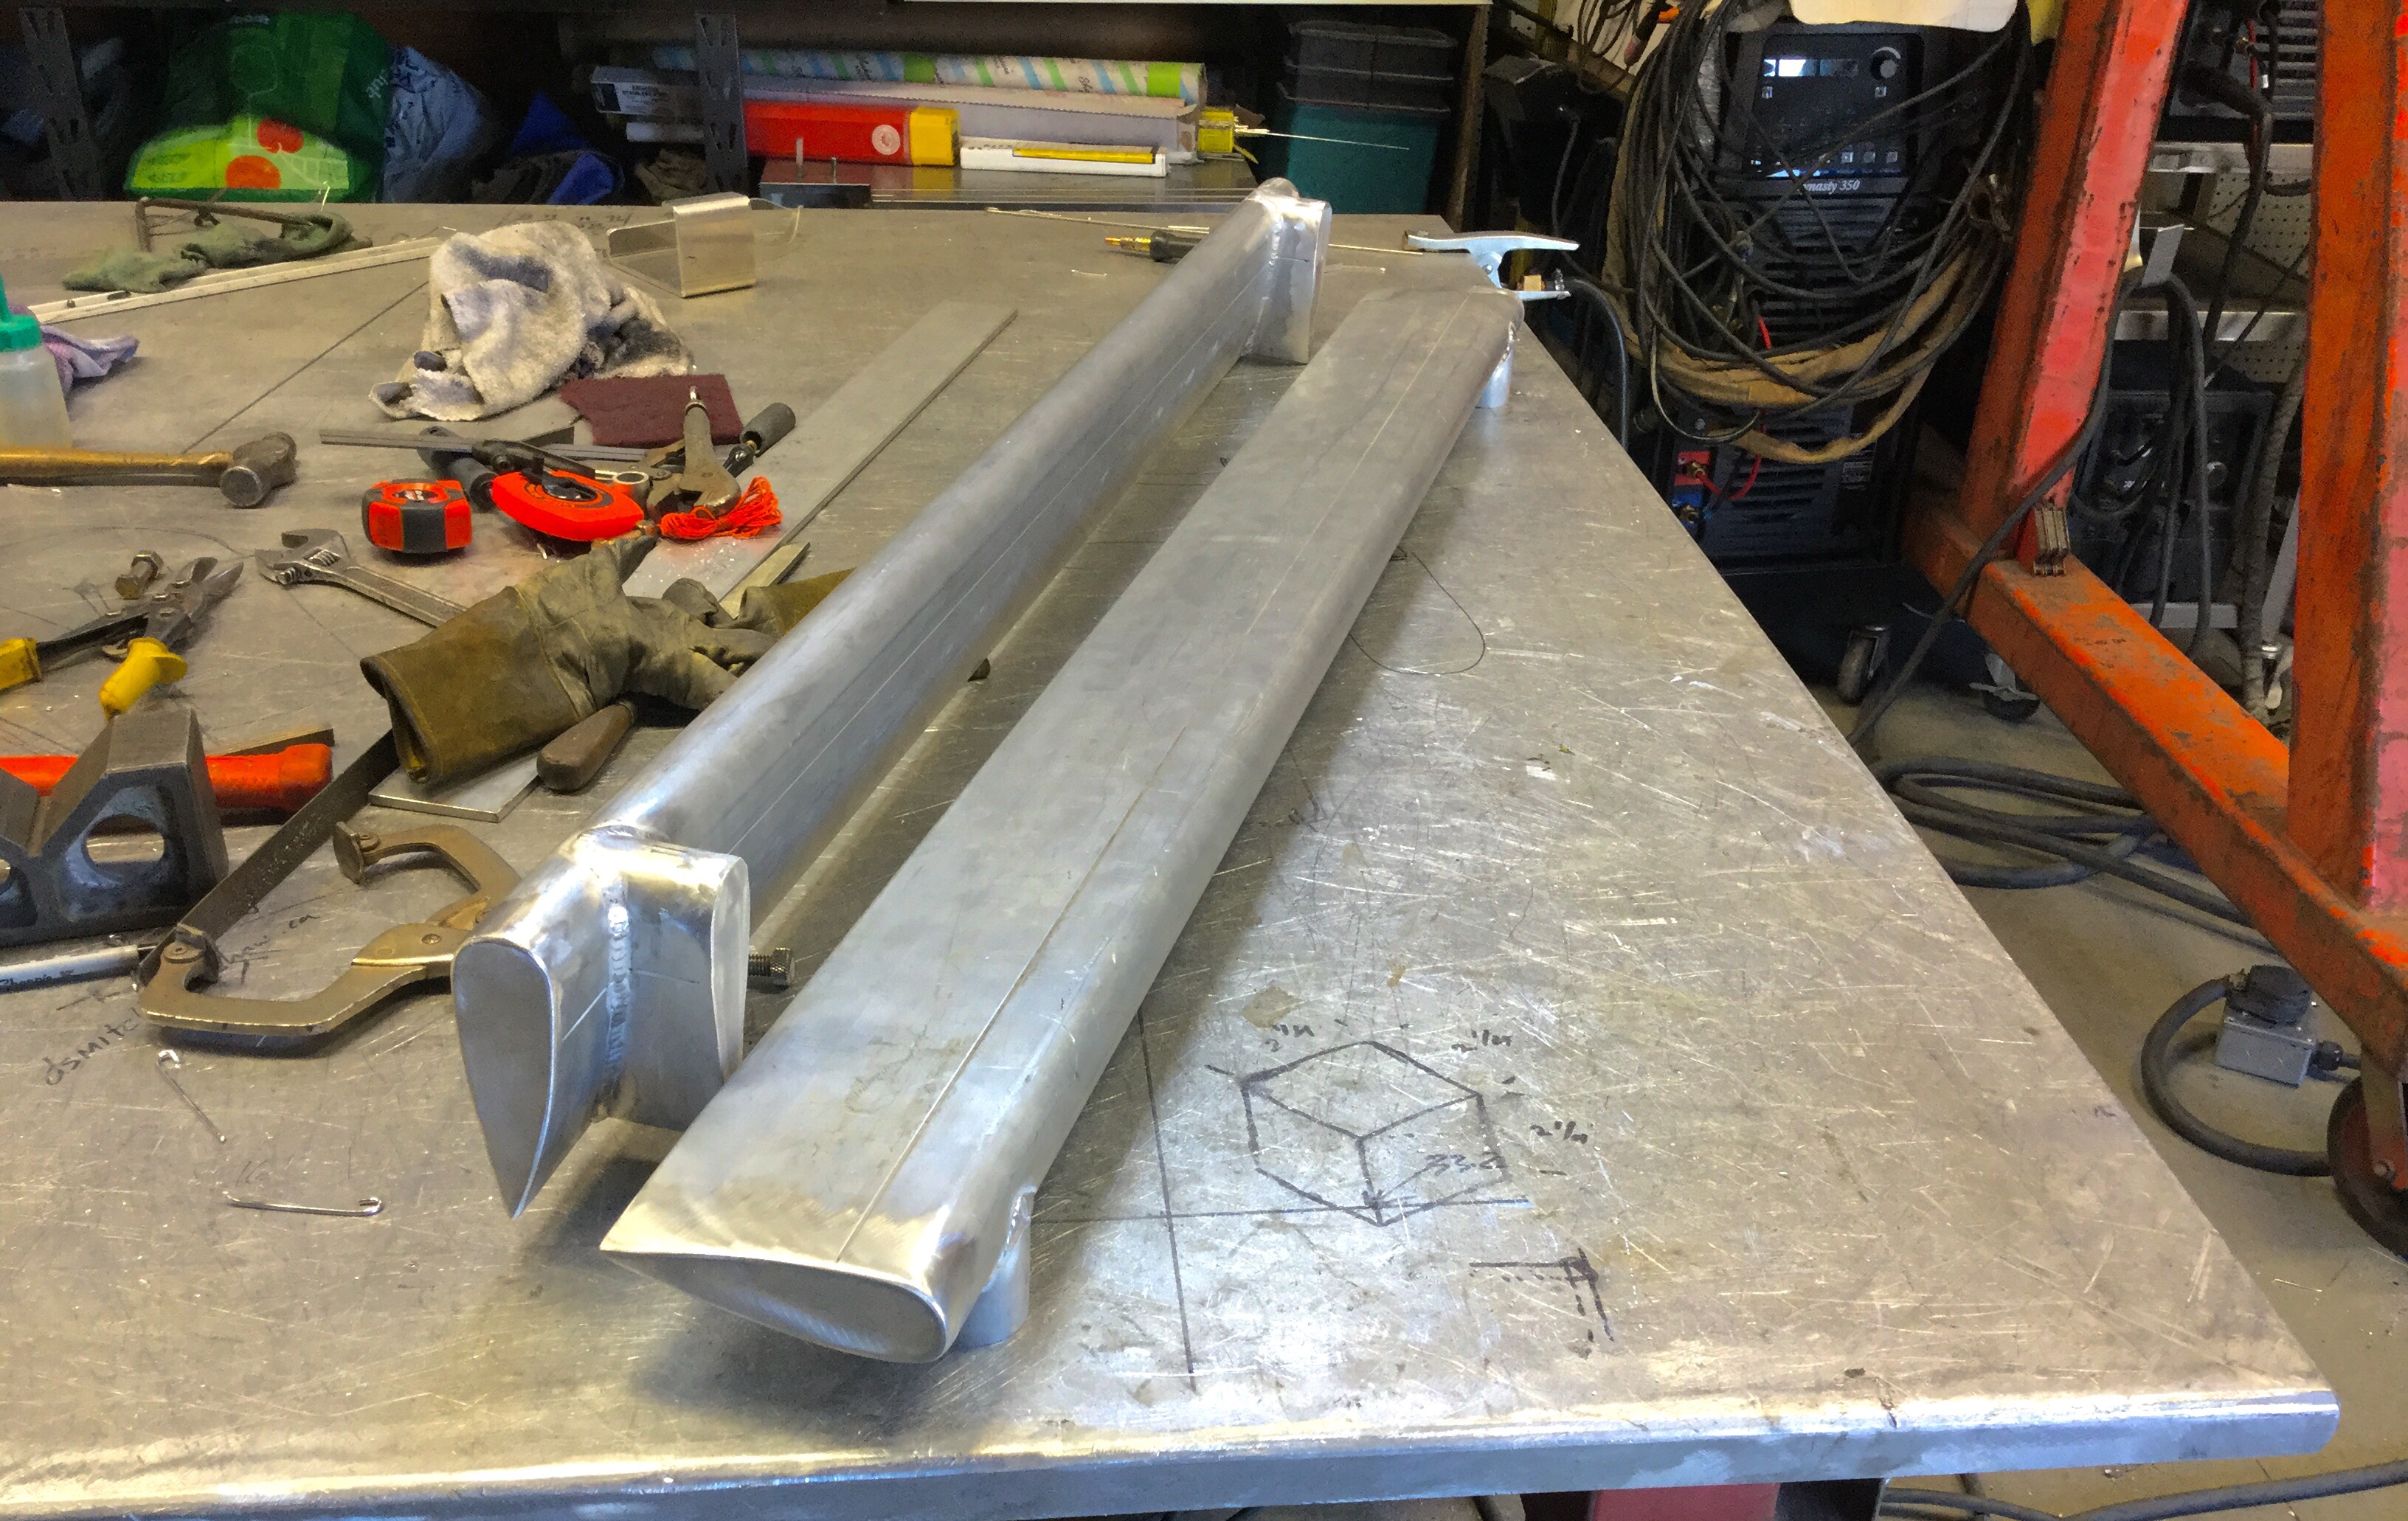
The idea was to have two racks and not have them wider than the pop top. And the Thule ski box I use would be attached directly to the rack, not using the stock U bolt set up.
I cut the spars to 53″, and cut some shorties to act as pedestals. I coped the short bits to fit the airfoil section and welds them to the cross pieces. I also cut out some 1/8″ aluminum sheet and used that to close up the ends. This pic shows one with end closed, the other still open. You can see the slightly thicker section of the spar in the open end. All my attachments go to that thick section.

I glued some rubber sheet to the bottom of the closed in pedestals/feet later.
That groove running along the lenght of the spar falls pretty well on the middle of the thick section. On one end of the soars I drilled and helicoiled holes for the Thule box attachment. On the other side I used some 5/16″ riv-nuts as anchor points for eye bolts in case I need lash points for some future thing. Blanked those holes off with plain bolts for the time being.
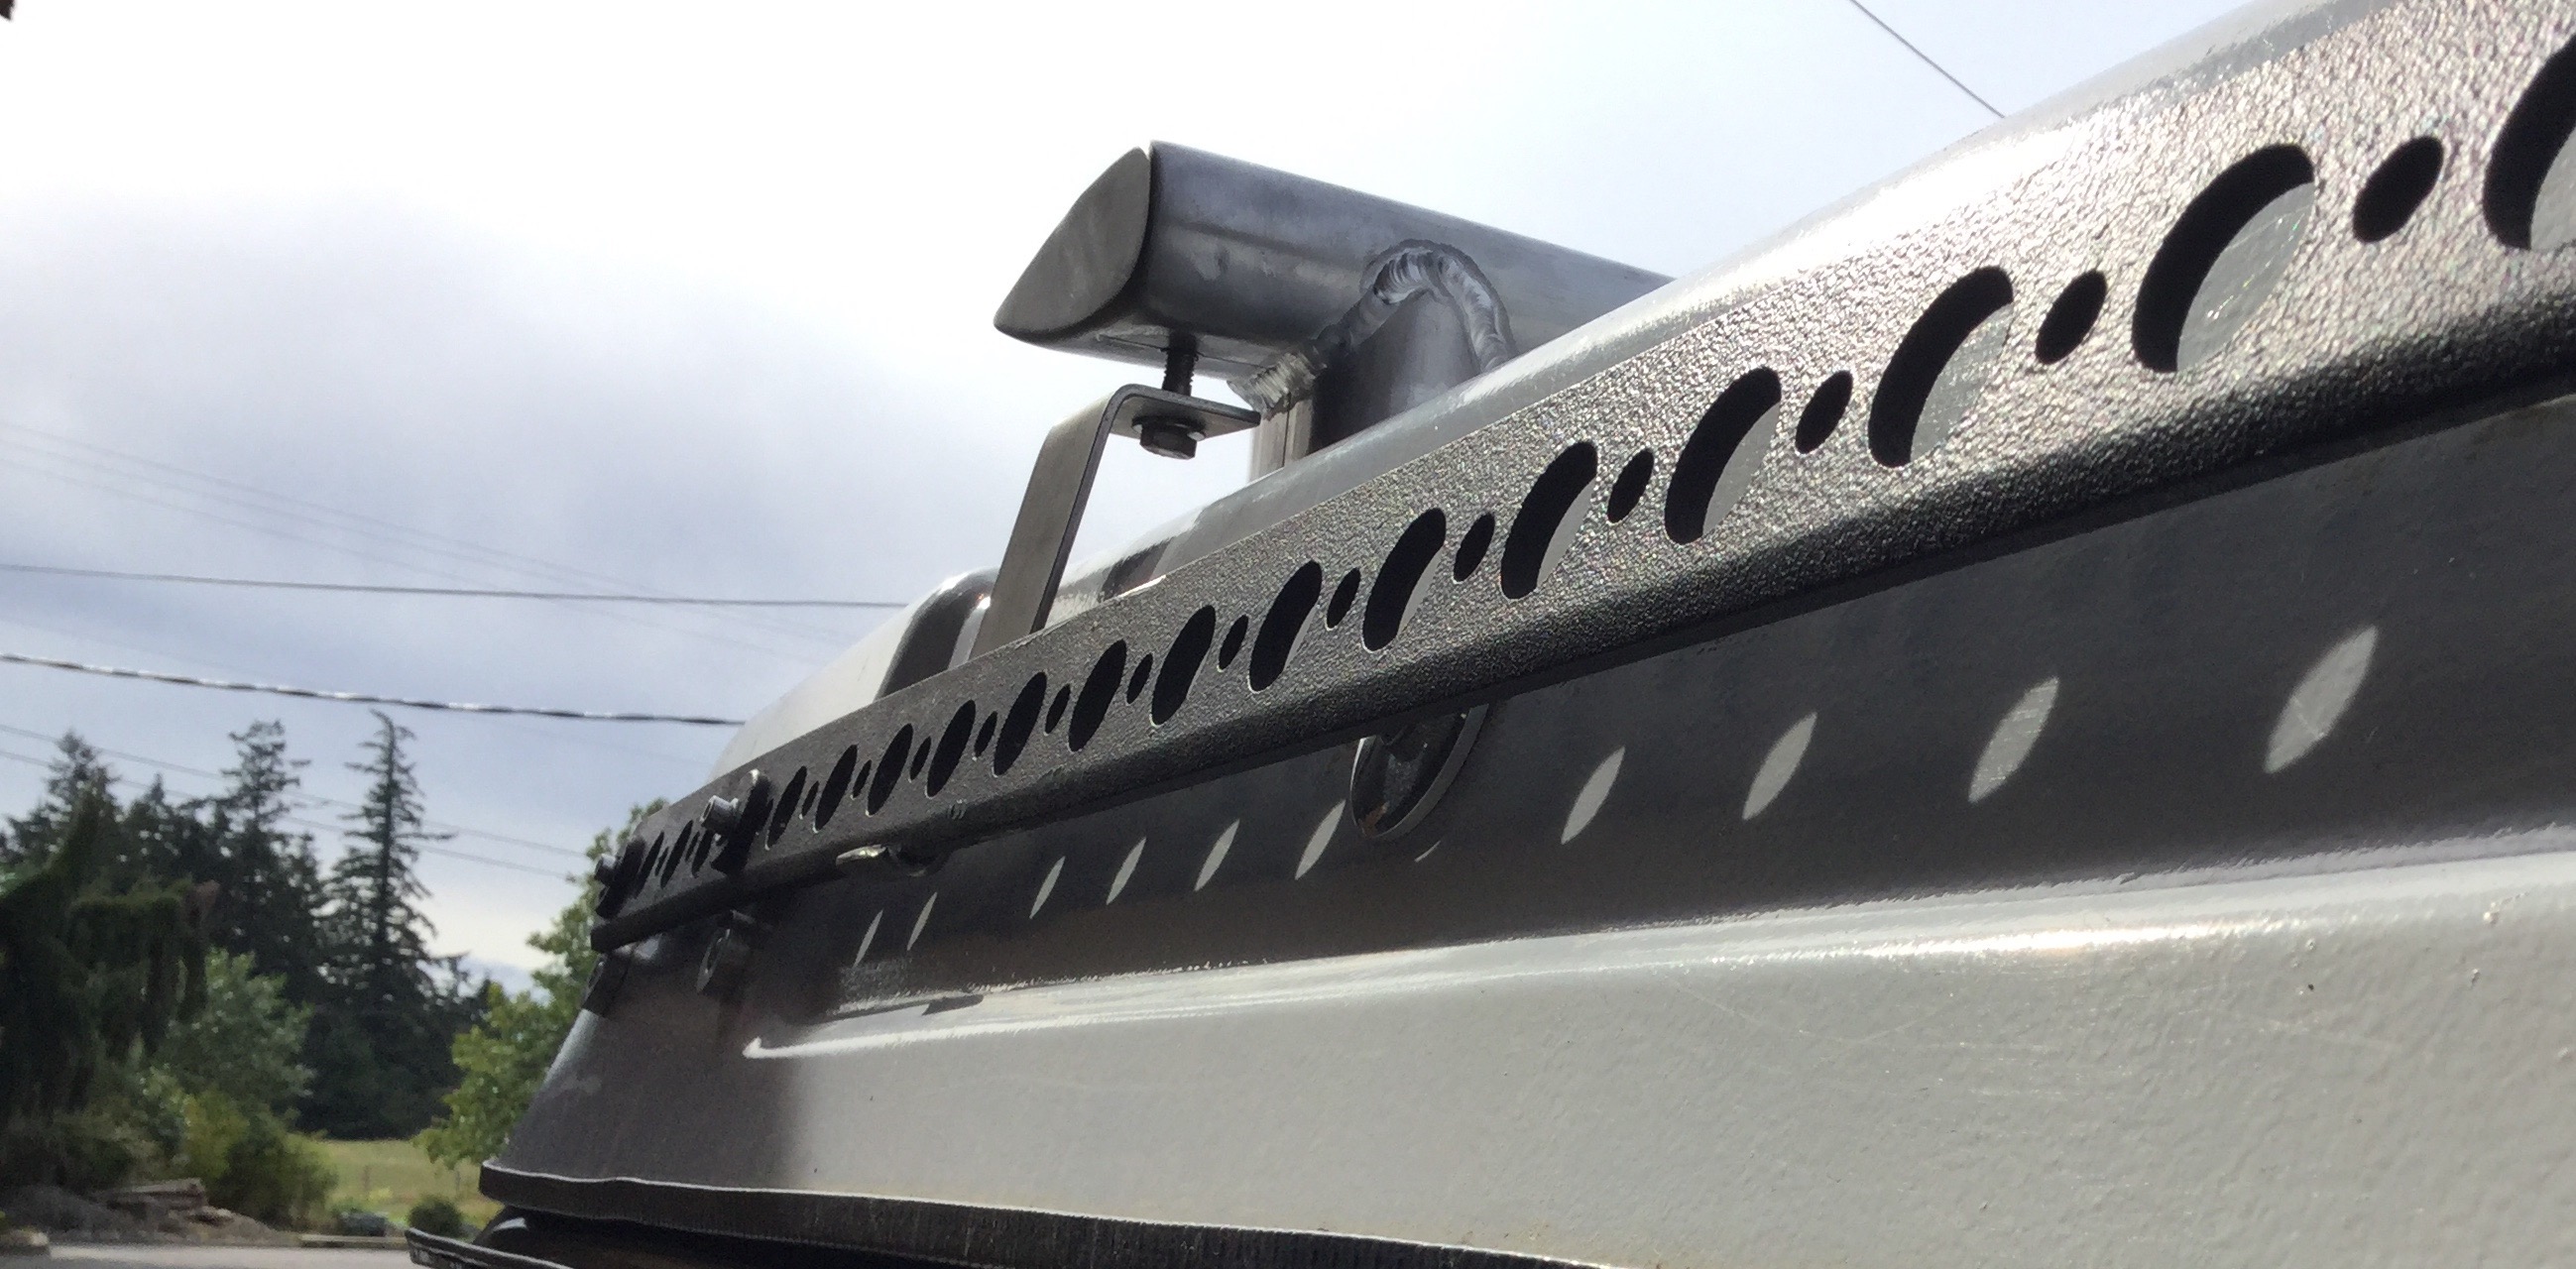
And this is how they sit on the van.

The hold down mechanism took me a while and I ended up with a simple, if a little clunky, solution. For now the stainless brackets hook onto the rail, but when I am happy with the position of the racks I’ll bolt them to the rail and cut off the hook end. It’s a 5/16″ bolt attaching the bracket to the spar (helicoil in spar), I know it looks sort of week, I think it’s strong enough. It certainly pulls the rack down hard to the roof. Later you’ll see that I put in short sections of rubber hose to cover the naked bolts and make that part look less flimsy.
I am planning on painting the rack white, same interlux briteside one part polyurethane I used on the pop top itself. When it’s painted I think the rack will blend in with the roof, take away the raw industrial look.
It’s funny, the box still looks like it tilts towards the centre of the van. The cross spars are level, maybe the box itself is warped.


It’s not that bad looking, try to imagine it painted white. The painting will happen when the weather warms up, maybe this week. Oh and one more thing, the new rack lowers the box an inch or more.
Vanagon – still testing the 7 rung tire carrier
Posted by albell in syncro, vanagon, vanagon mods on May 7, 2016
I didn’t deliver it to the customer when he wanted, I wanted to test it out in my van for a spell. I’m sure it’s annoying to be told you can’t have something yet, but hey, I’m the boss 🙂
So the experiment of many rungs, what do I think? I think seven are too many. I mean there is nothing wrong with that many apart from maybe it looking a little busy. And the extra rungs are useful for lash points. The wheel carrier unit is remove able and can be shifted a couple of inches to one side of the rungs if so desired.
Here are the pics, I still have a little fussing here and there to do, some radii on sharp corners etc. That lanyard hanging from a rung is some 1/2″ Spectra line, using it as a safety back up to the wheel. It’s not needed, it’s just me being conservative. And of course the carrier is on the wrong side of the van, doesn’t matter for testing purposes.
And I’m thinking, I’m thinking of cutting the bottom rung and verticals to just below the bottom hatch attachment point.

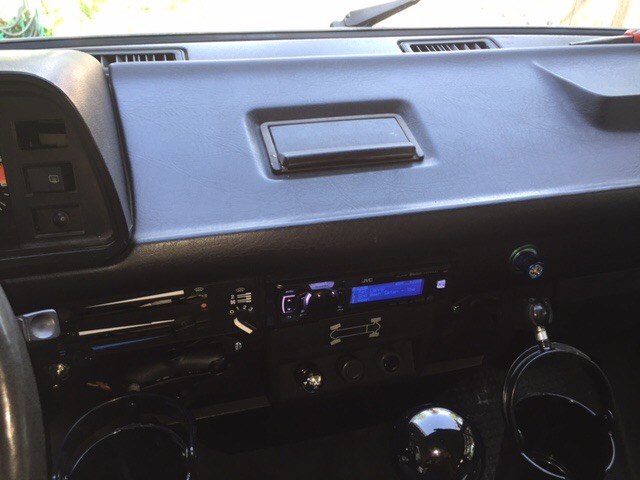
Vanagon – Nathan meets very nice syncro tin top
Posted by albell in syncro, vanagon, vanagon mods on April 16, 2016
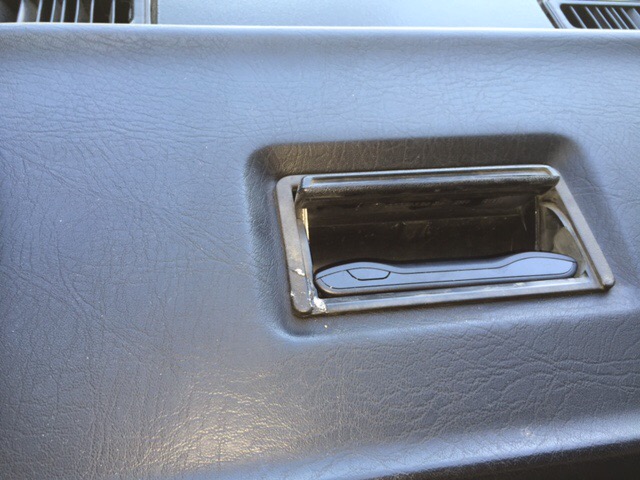
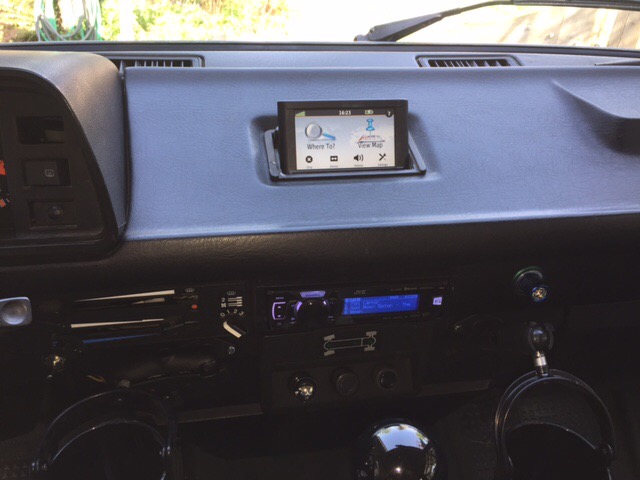
Addendum April 16, 2016. Very nice install of Garmin Nuvi 44LM in ashtray, pics at bottom.
Pics sent to me by Nathan, he met local owner of this really nice blue syncro tin top. The pics tell the story.


Vanagon – Nathan’s new wheels
Posted by albell in syncro, vanagon mods on April 14, 2016
I think they are 16″ Mefros. I’ll have to ask about the tires. Certainly looks perky. Hey, and note the tire carrier 🙂

Vanagon – small led light bar
Posted by albell in syncro, vanagon, vanagon mods on April 12, 2016
I’m getting a lot of guff about this light bar.
“oh it’s so cute”
” hey you know the front of your van is starting to look like you”
” you call that a light bar?”
And then I get this, not for the sign, but Bender’s face.

And this.

But the best one is this.

Yup, that’s it.

It’s this light bar from Banggood.com
54W 18LEDs Car Work Light Bar Spotlight White Projector Lamp
I chose it for its small ( yes, I chose small) size, had decent reviews, and had IP68 waterproof rating. It’s also a spot rather than flood beam pattern but saying spot does not imply that it is a carefully focused beam. My thinking was that I wanted a spot beam to project down trails/logging roads. And also I was pretty curious about these light bars. And god knows you see a lot of them on burley trucks around here. Multiples of the smaller ones, long ones that almost span the width of the truck, on bumpers, above cabs, you know the scene.
I mounted the light bar to what I call the light bar on my bumper ( getting confusing now ), power wire routed internally, ground wire attached to bumper. And I noticed that it’s missing one of the M3 socket headed cap screws on the face plate, sheesh.


Couple more pics of the ludicrous look.


Back to the wiring. Ran the power wire up into the dash, to a relay and fuse, and it’s switched on the second position of my fog light switch on dash. That’s why you see the aux lights on in the pics. They are on the first position of the switch.
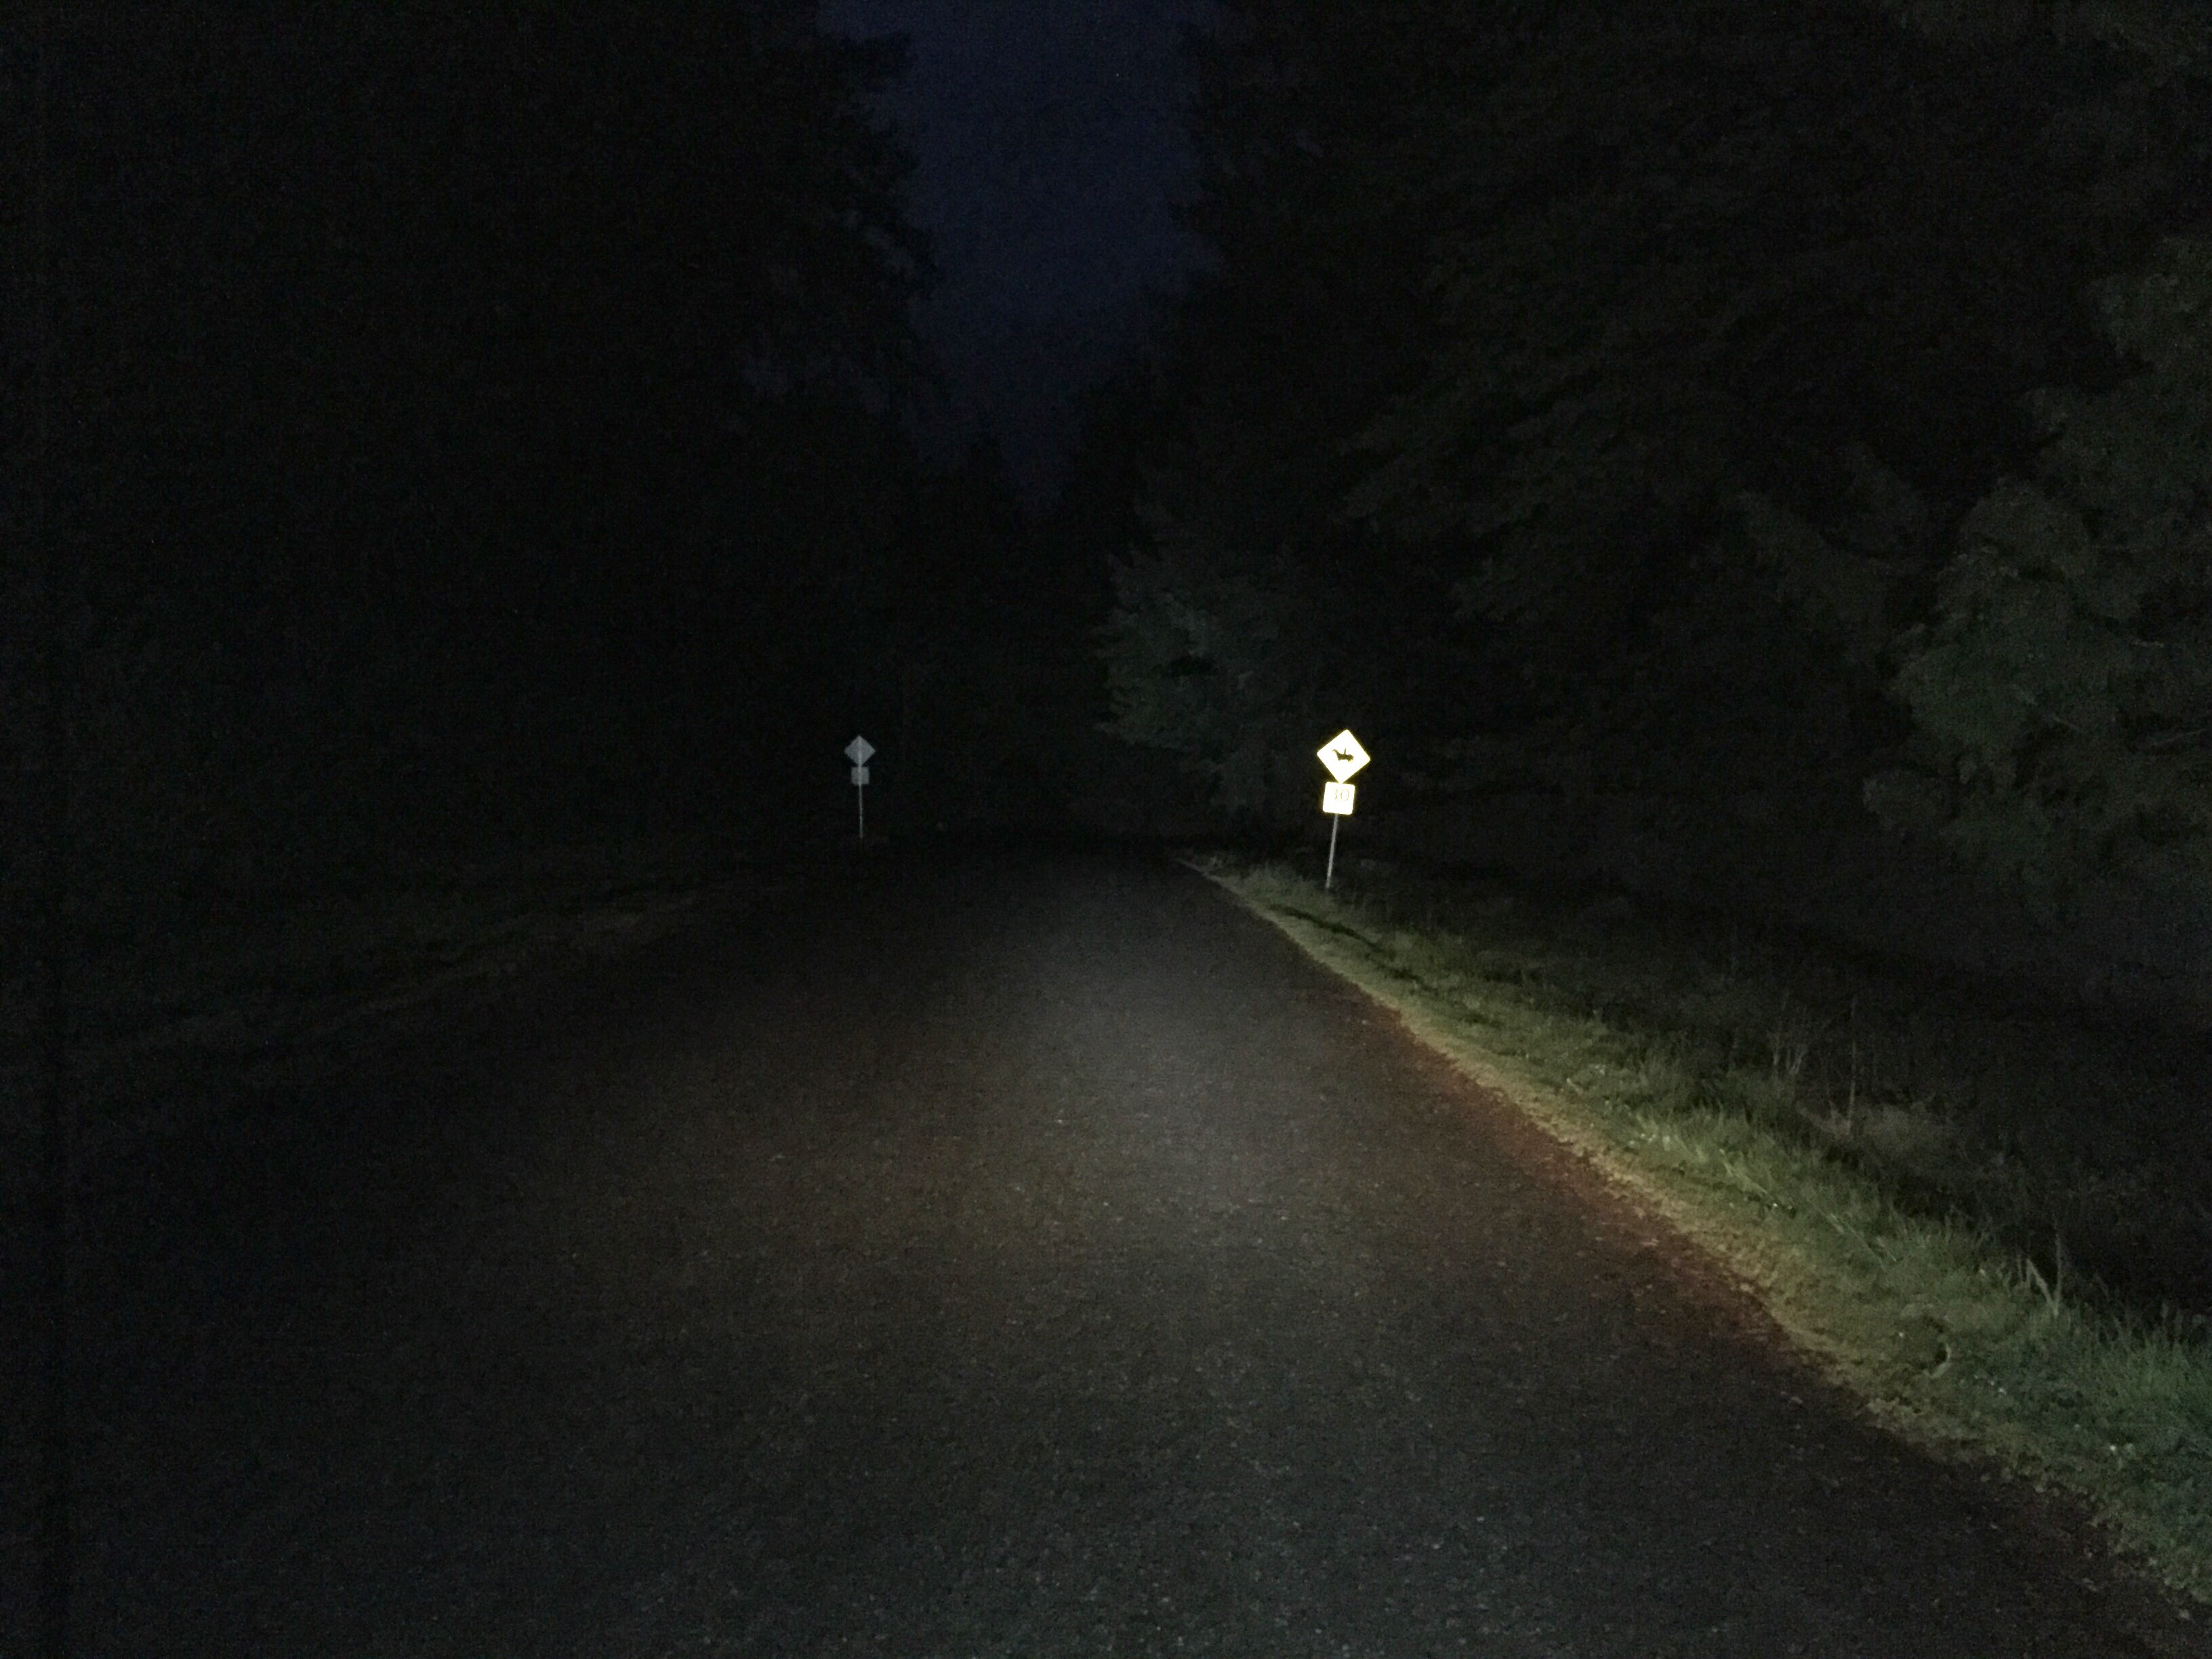
So how bright is it at night? It’s bright but not life changing bright. I took some pics but you know how that works, never really gets things right.
First pic is the aux lights alone. These are tired 55w bulbs and I have aimed the aux lights low and a little bit to the right. The aiming is little bit of an attempt to catch any suicidal deer.

And this pic the led light bar and aux lights on. The led bar could be aimed a tad higher. It’s hard to believe from the pics but you could drive easily with this light combo.
And in this pic I’ve added my main lights (high beam).

Am I happy with the light bar? Well yes, it’s fine. Good old high quality halogen spots would beat it, but for the power draw and the price I think it will do what I want it to do .
Vanagon – Simon’s Doka
Some nicer shots of the Doka, taken by Simon. Notice the gun racks.


Another tire carrier
Posted by albell in syncro, vanagon, vanagon mods on March 6, 2016
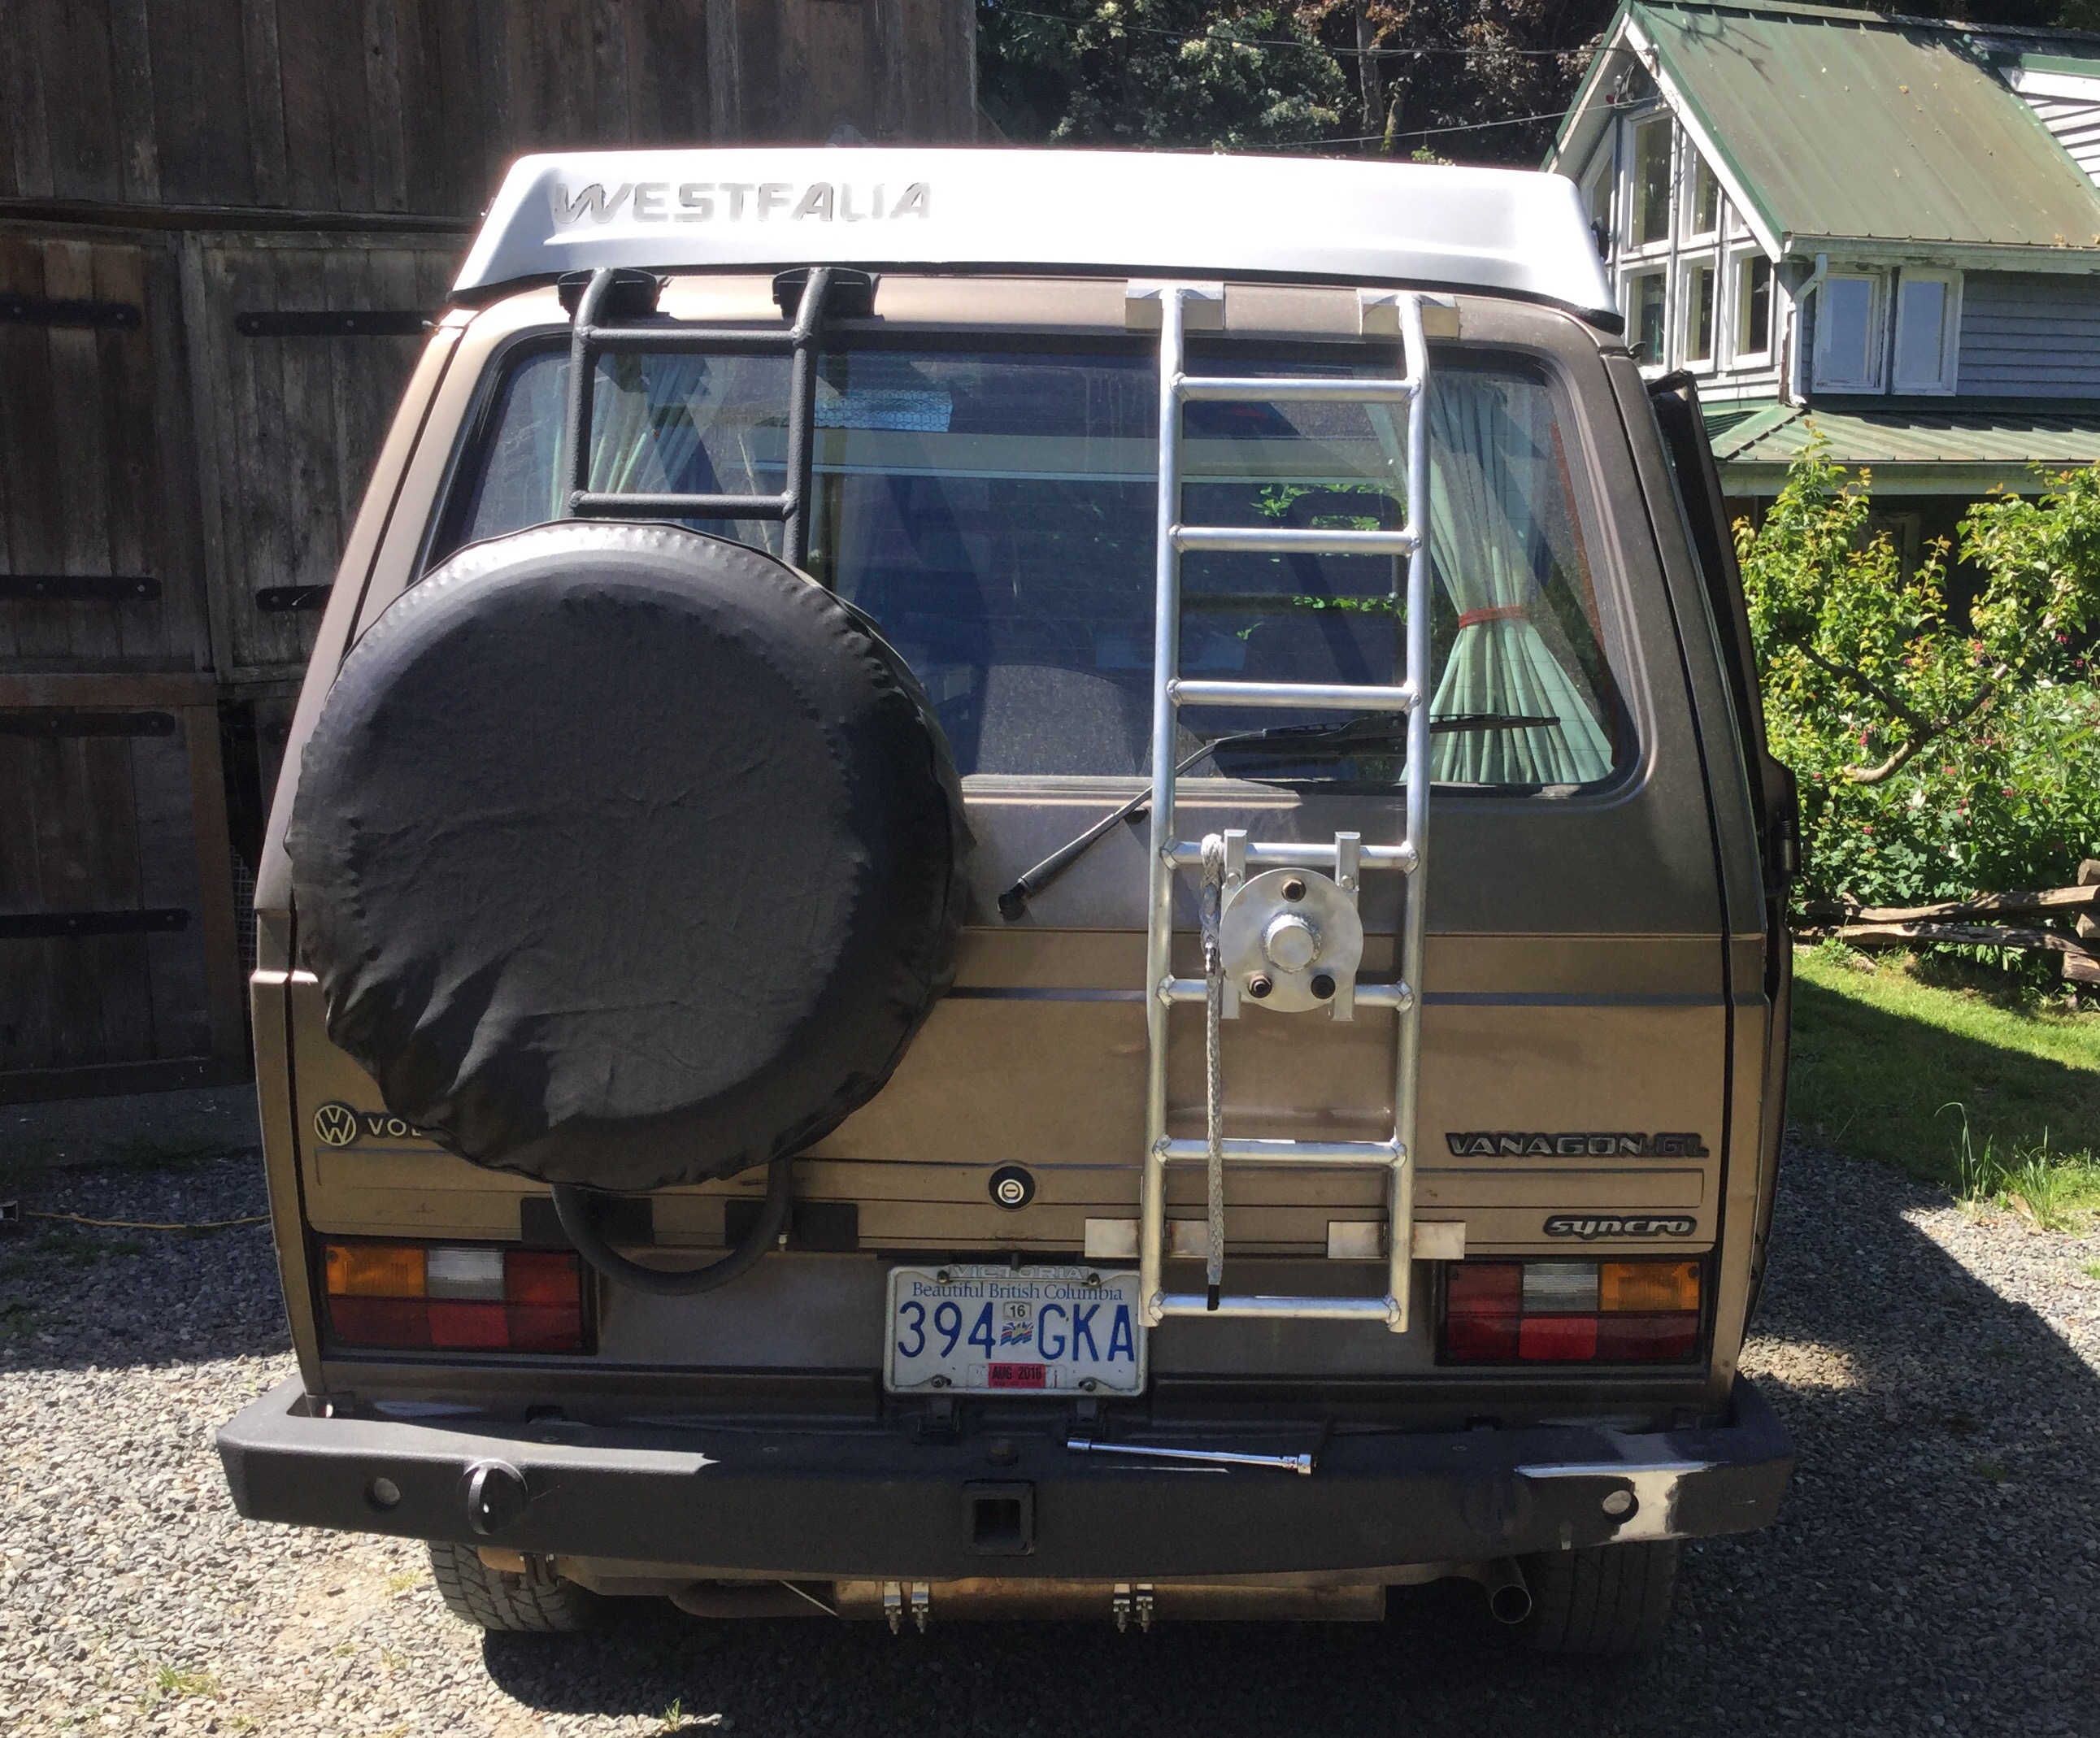
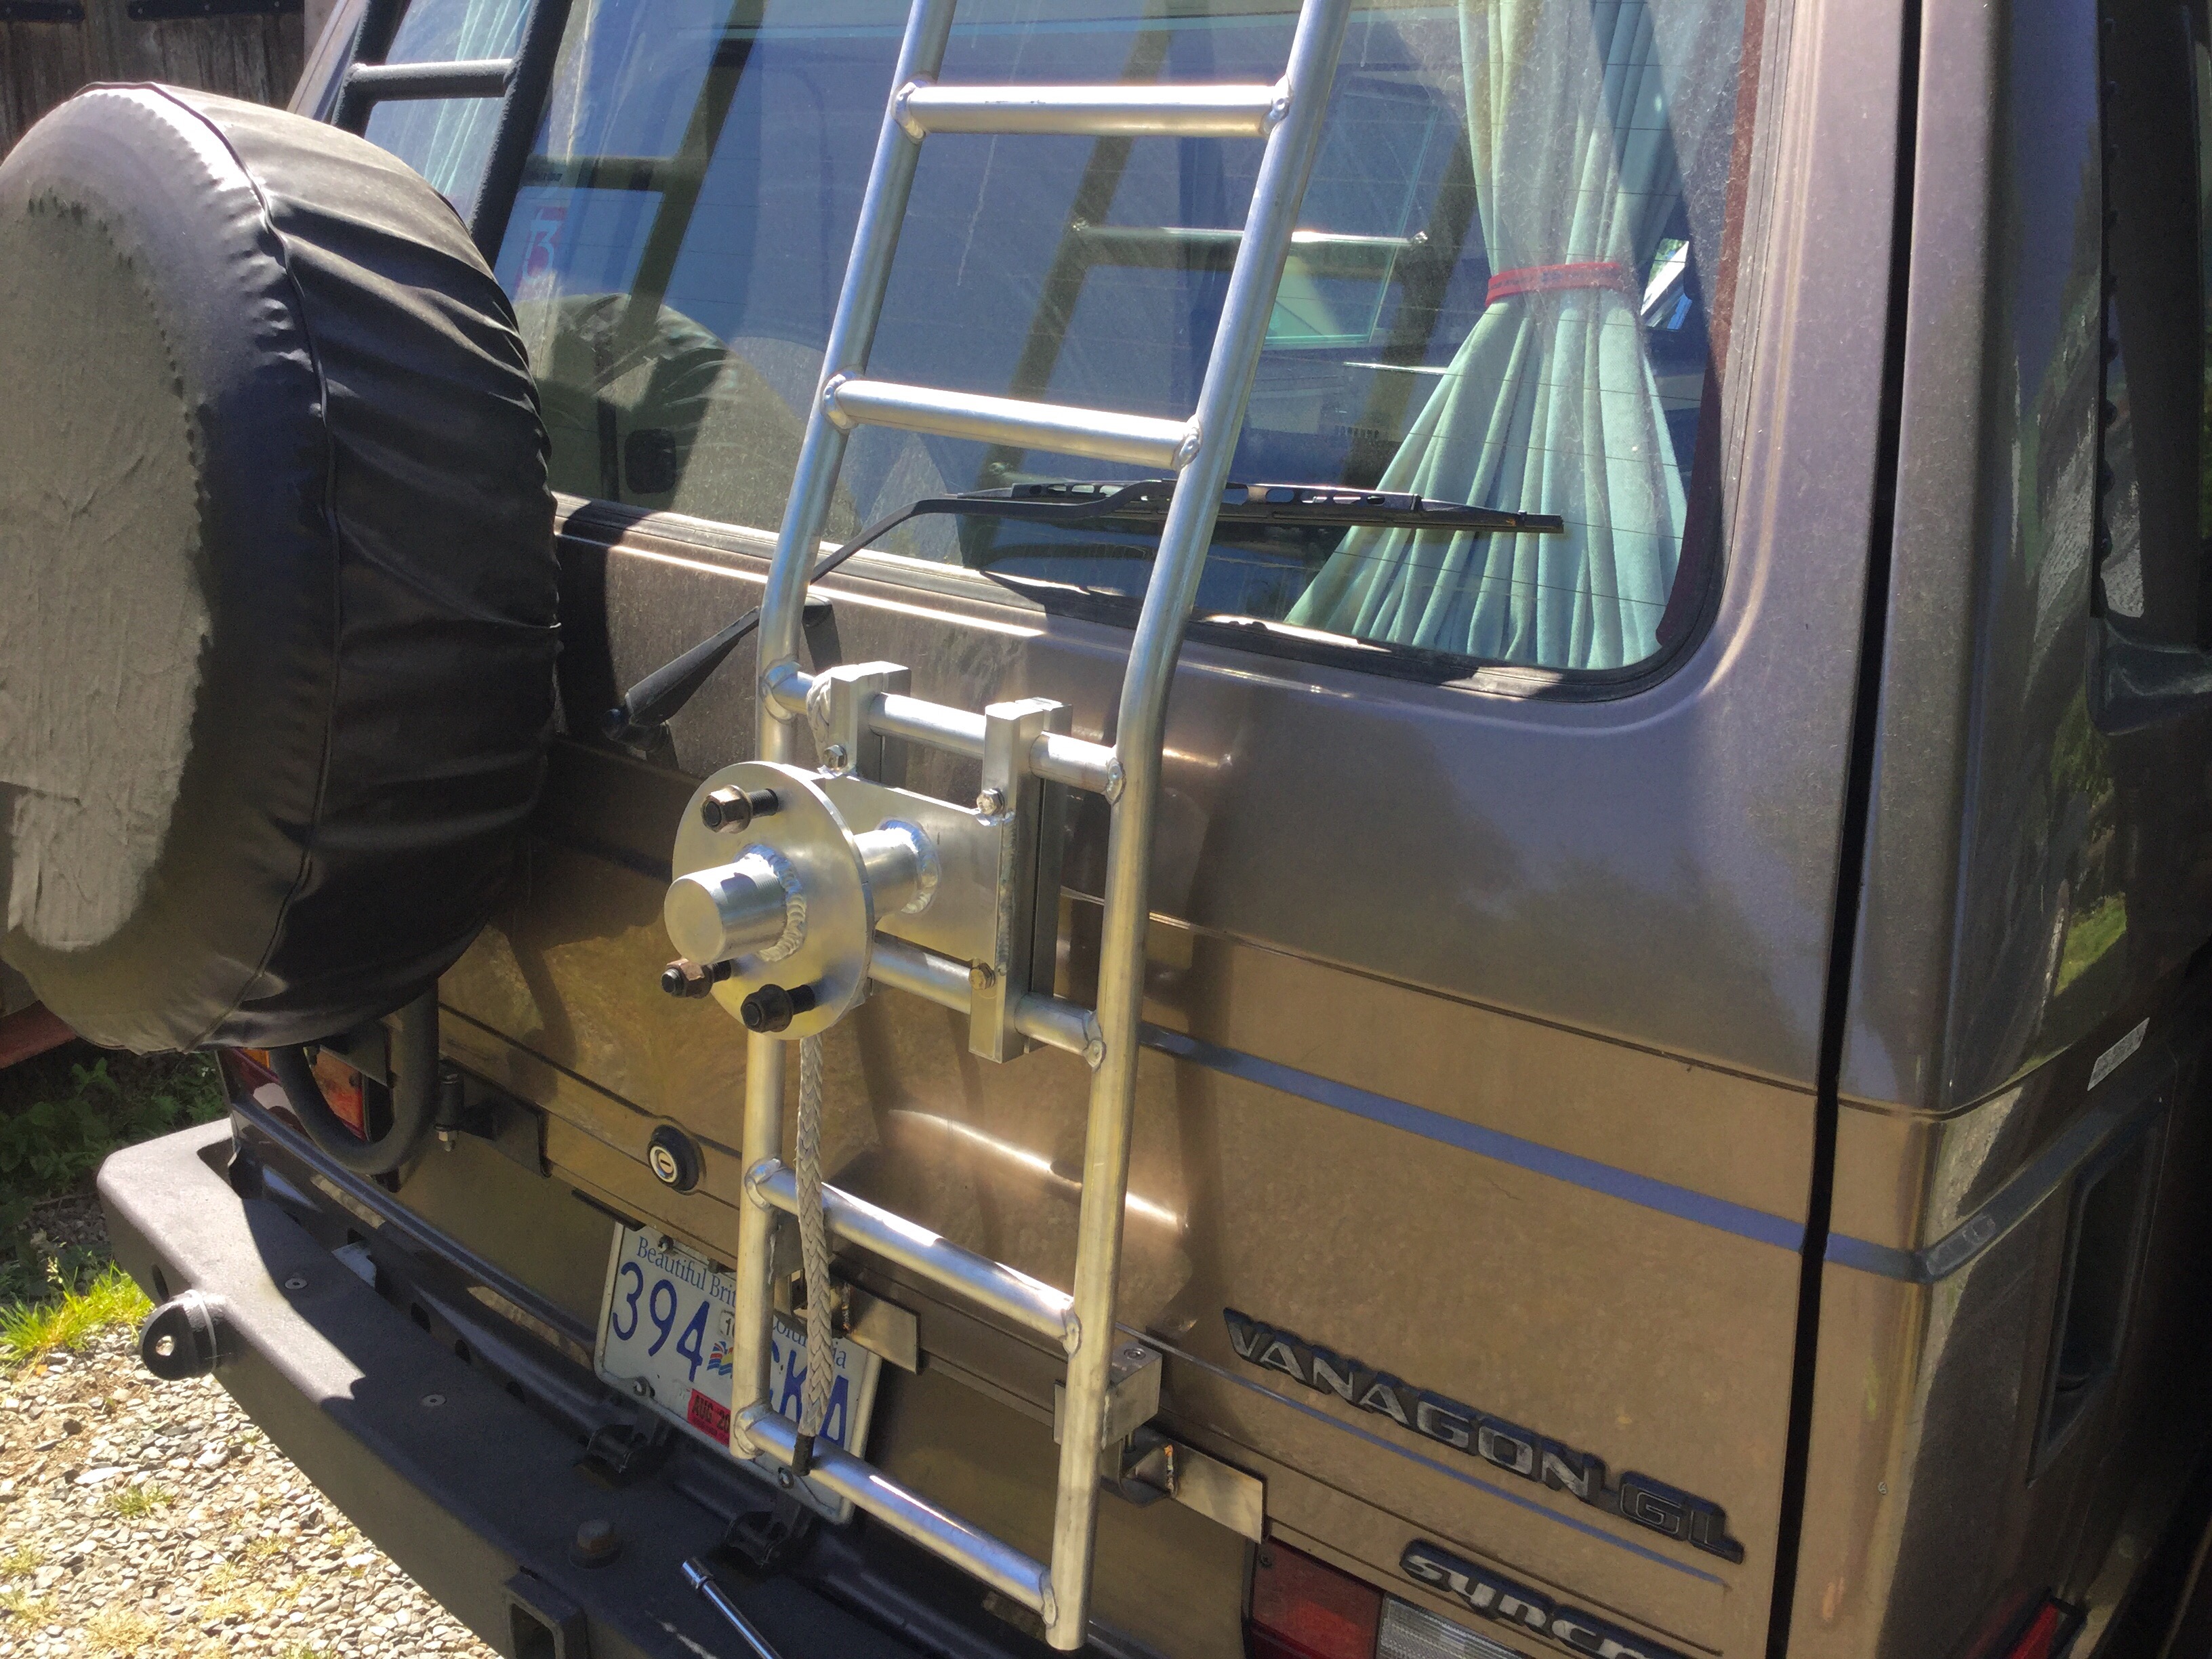
Made another carrier, for good friend Simon. Some changes made from my original. I think I have a much better hatch grabbing arrangement at the bottom. Little forward pressure on the door panel but lots up vertical grip. Tire is very solid to the ladder and the ladder very solid to the hatch. Also I repositioned the tire placement to be about 3″ lower than my original so less intrusion into the rear window.
Having the tire on the hatch is a compromise. You do need to have special hatch struts to make opening the hatch an easy process. Simon has a pair of very beefy 1250 N struts that raise the landed hatch with no effort.
The top hangers and the bottom grabber assembly is made from 0.120″ thick 316 stainless. Bolts are stainless. But the lug nuts and the mounting studs are steel.
I’m going to make some more, with some further refinements.
During the build, comparing tire placement with my original ladder.

Ditto.

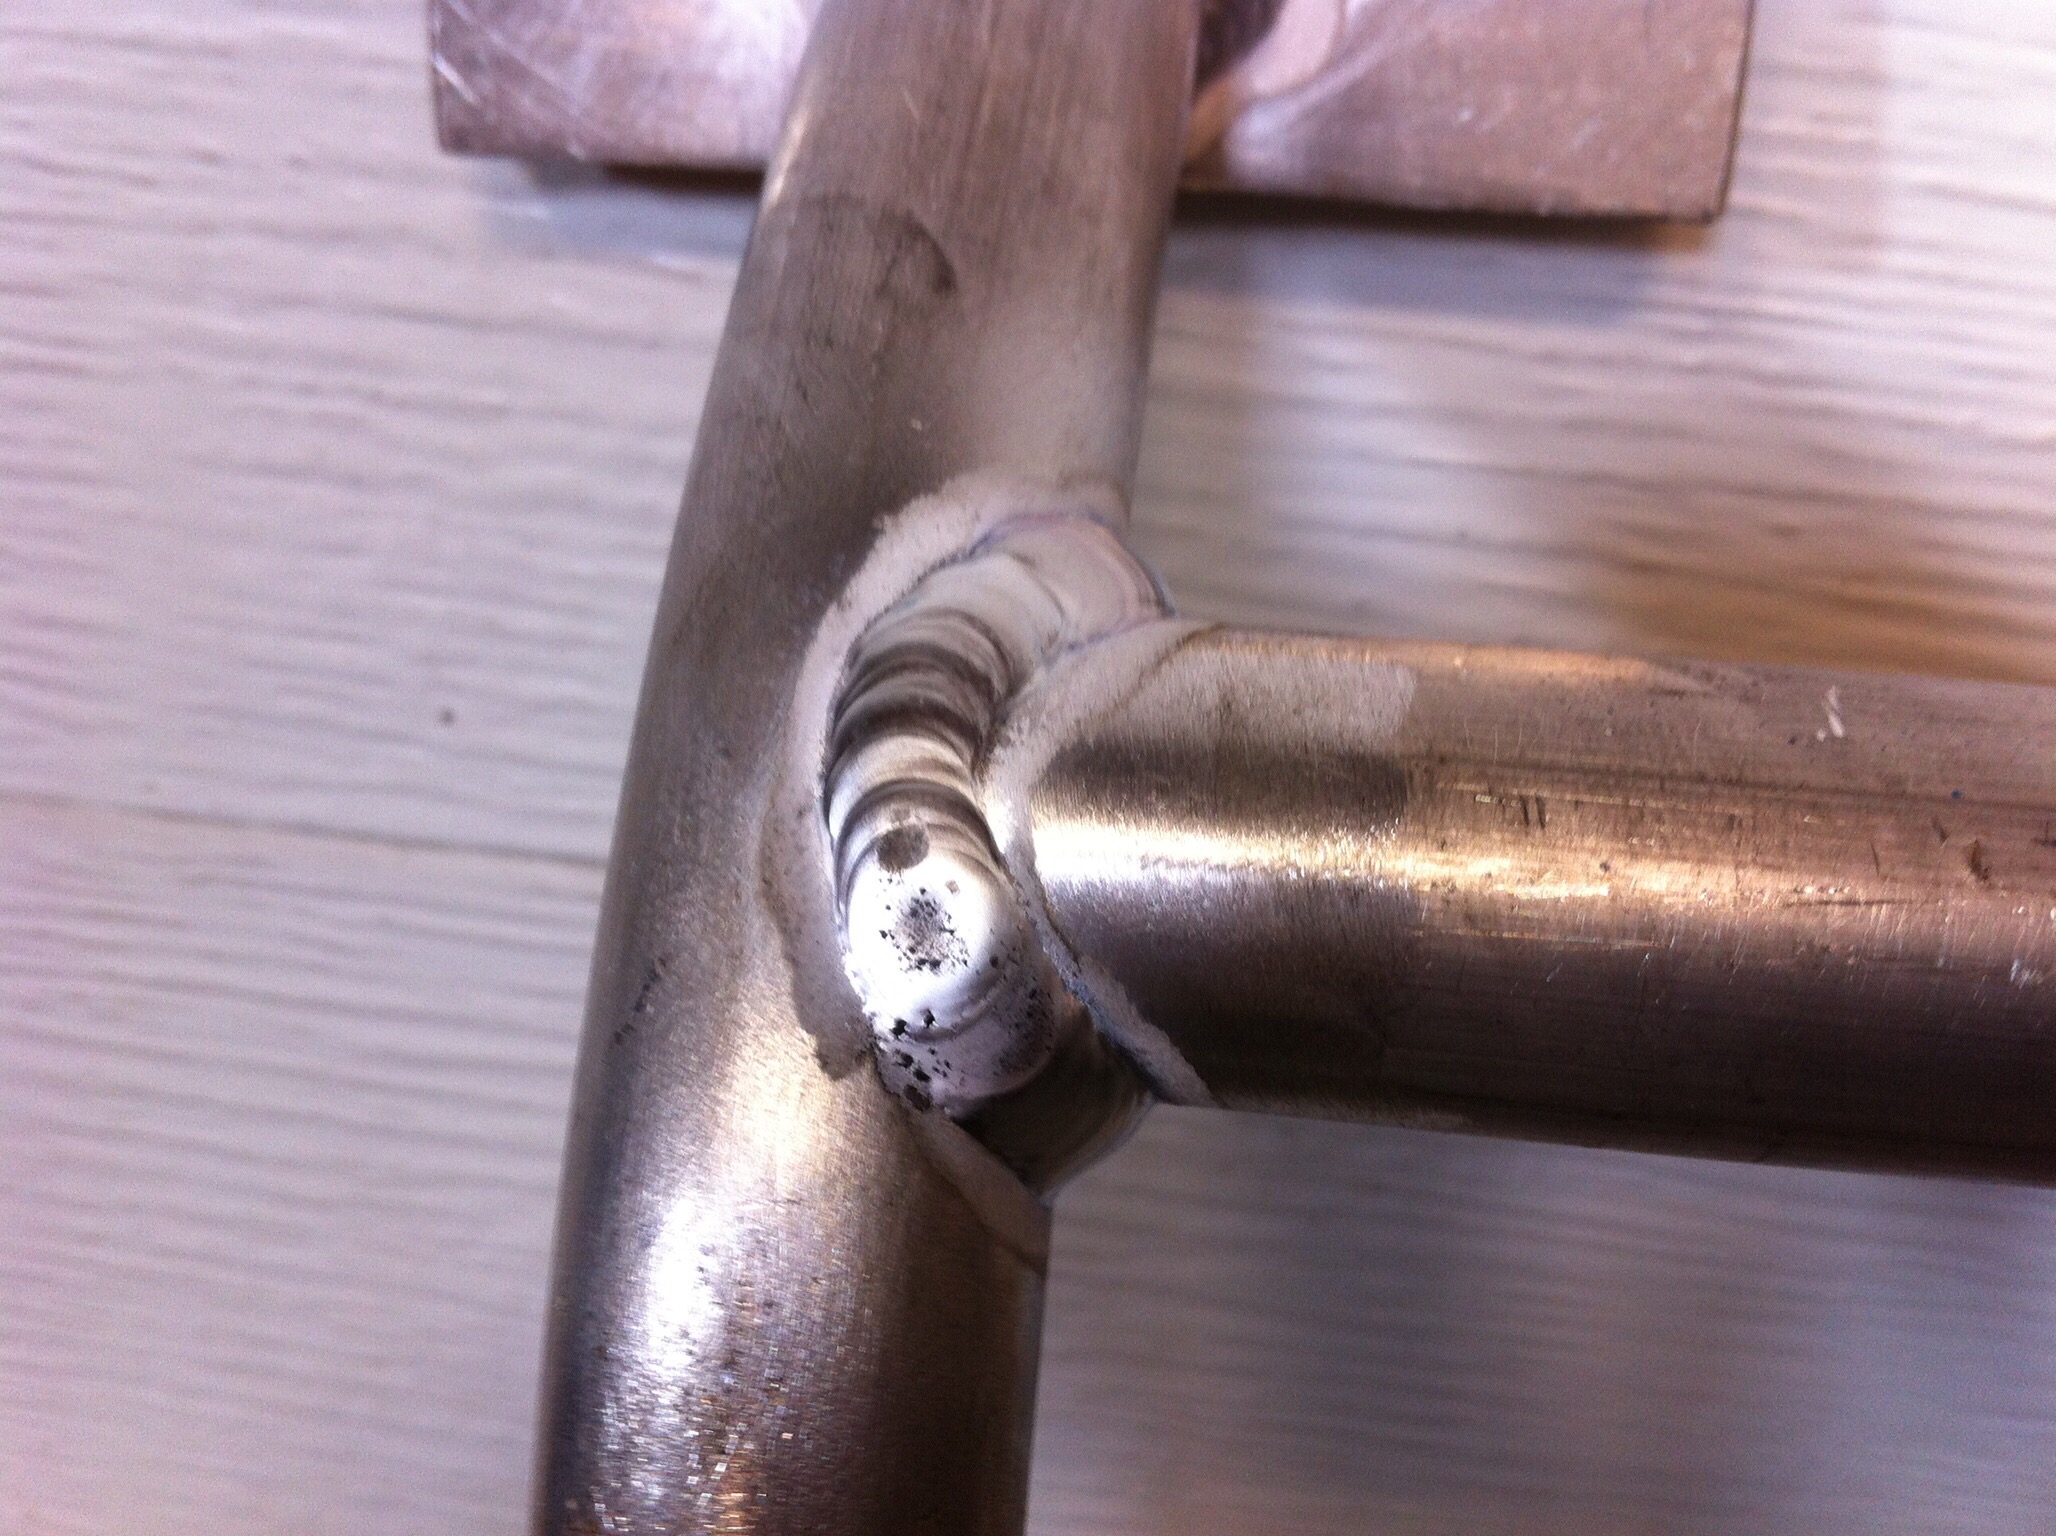
It’s 1″ tubing, 1/8″ wall thickness, 6061 aluminum. Joints coped and tig welded.
On Simon’s van. The stainless steel hangers and bottom grabbers have been painted, but the ladder itself untouched. Simon is going to paint it later.

It still works as a ladder with the tire on. Step up from the RMW bumper onto the tire.


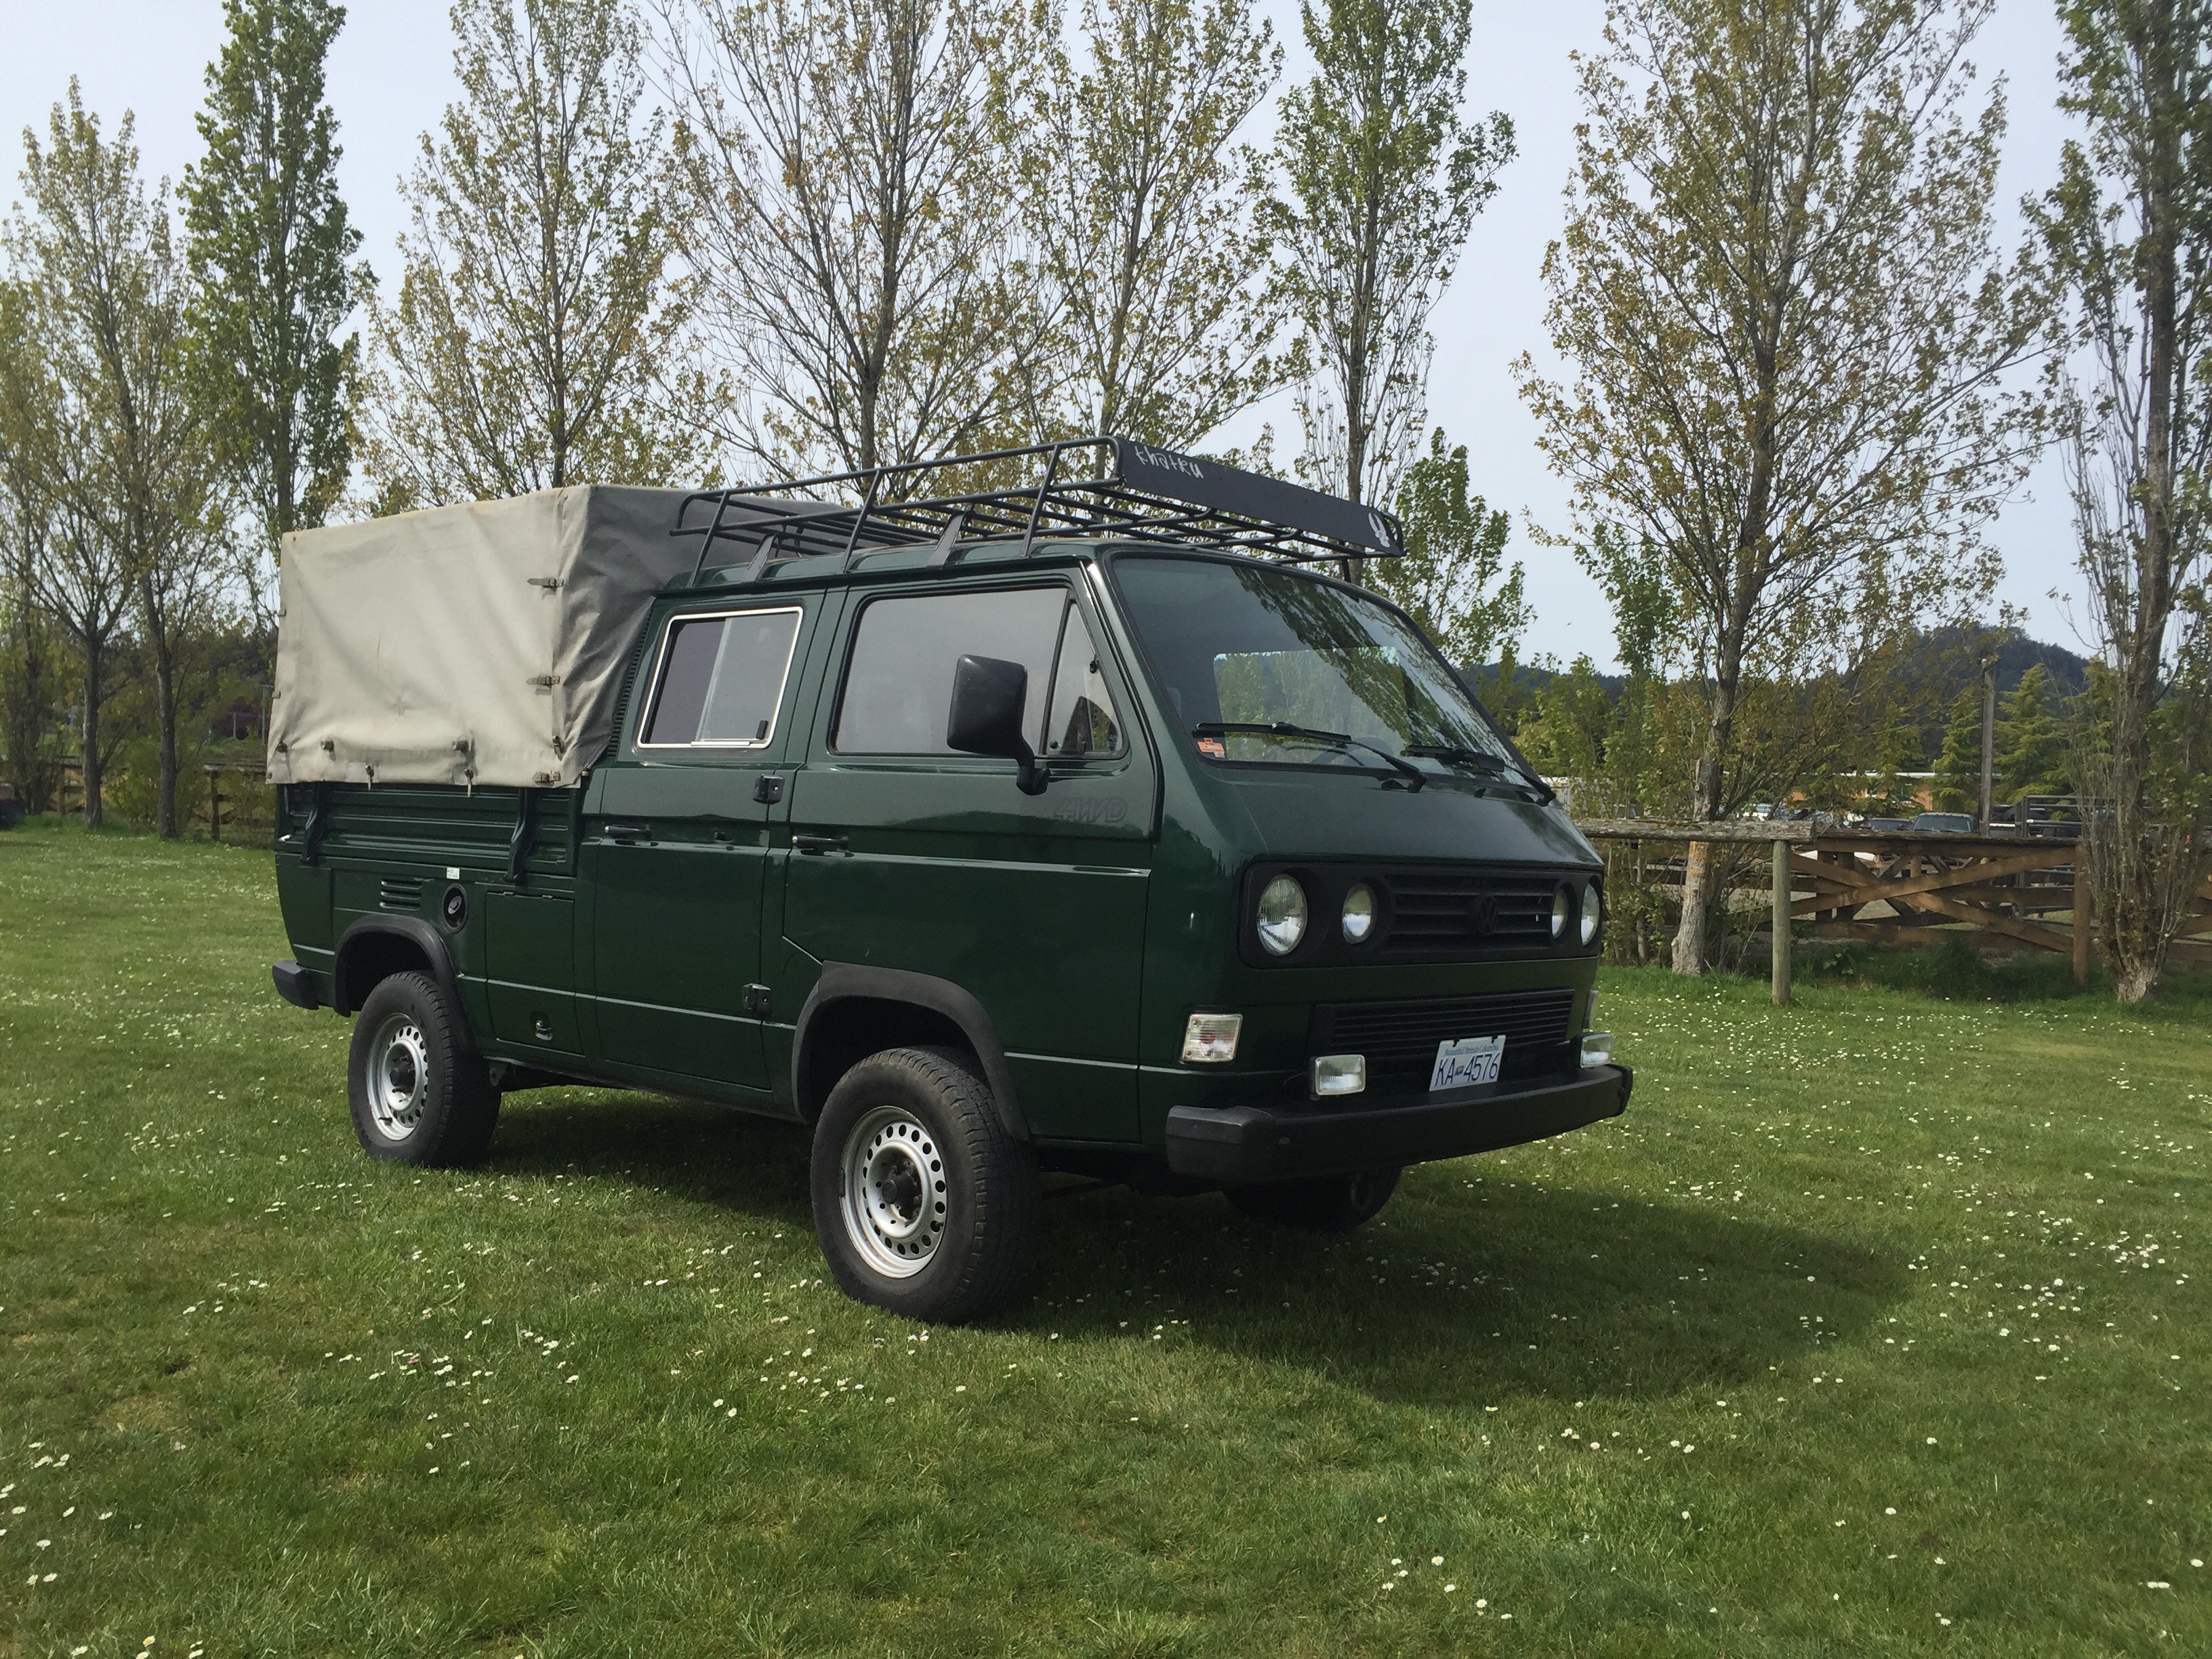
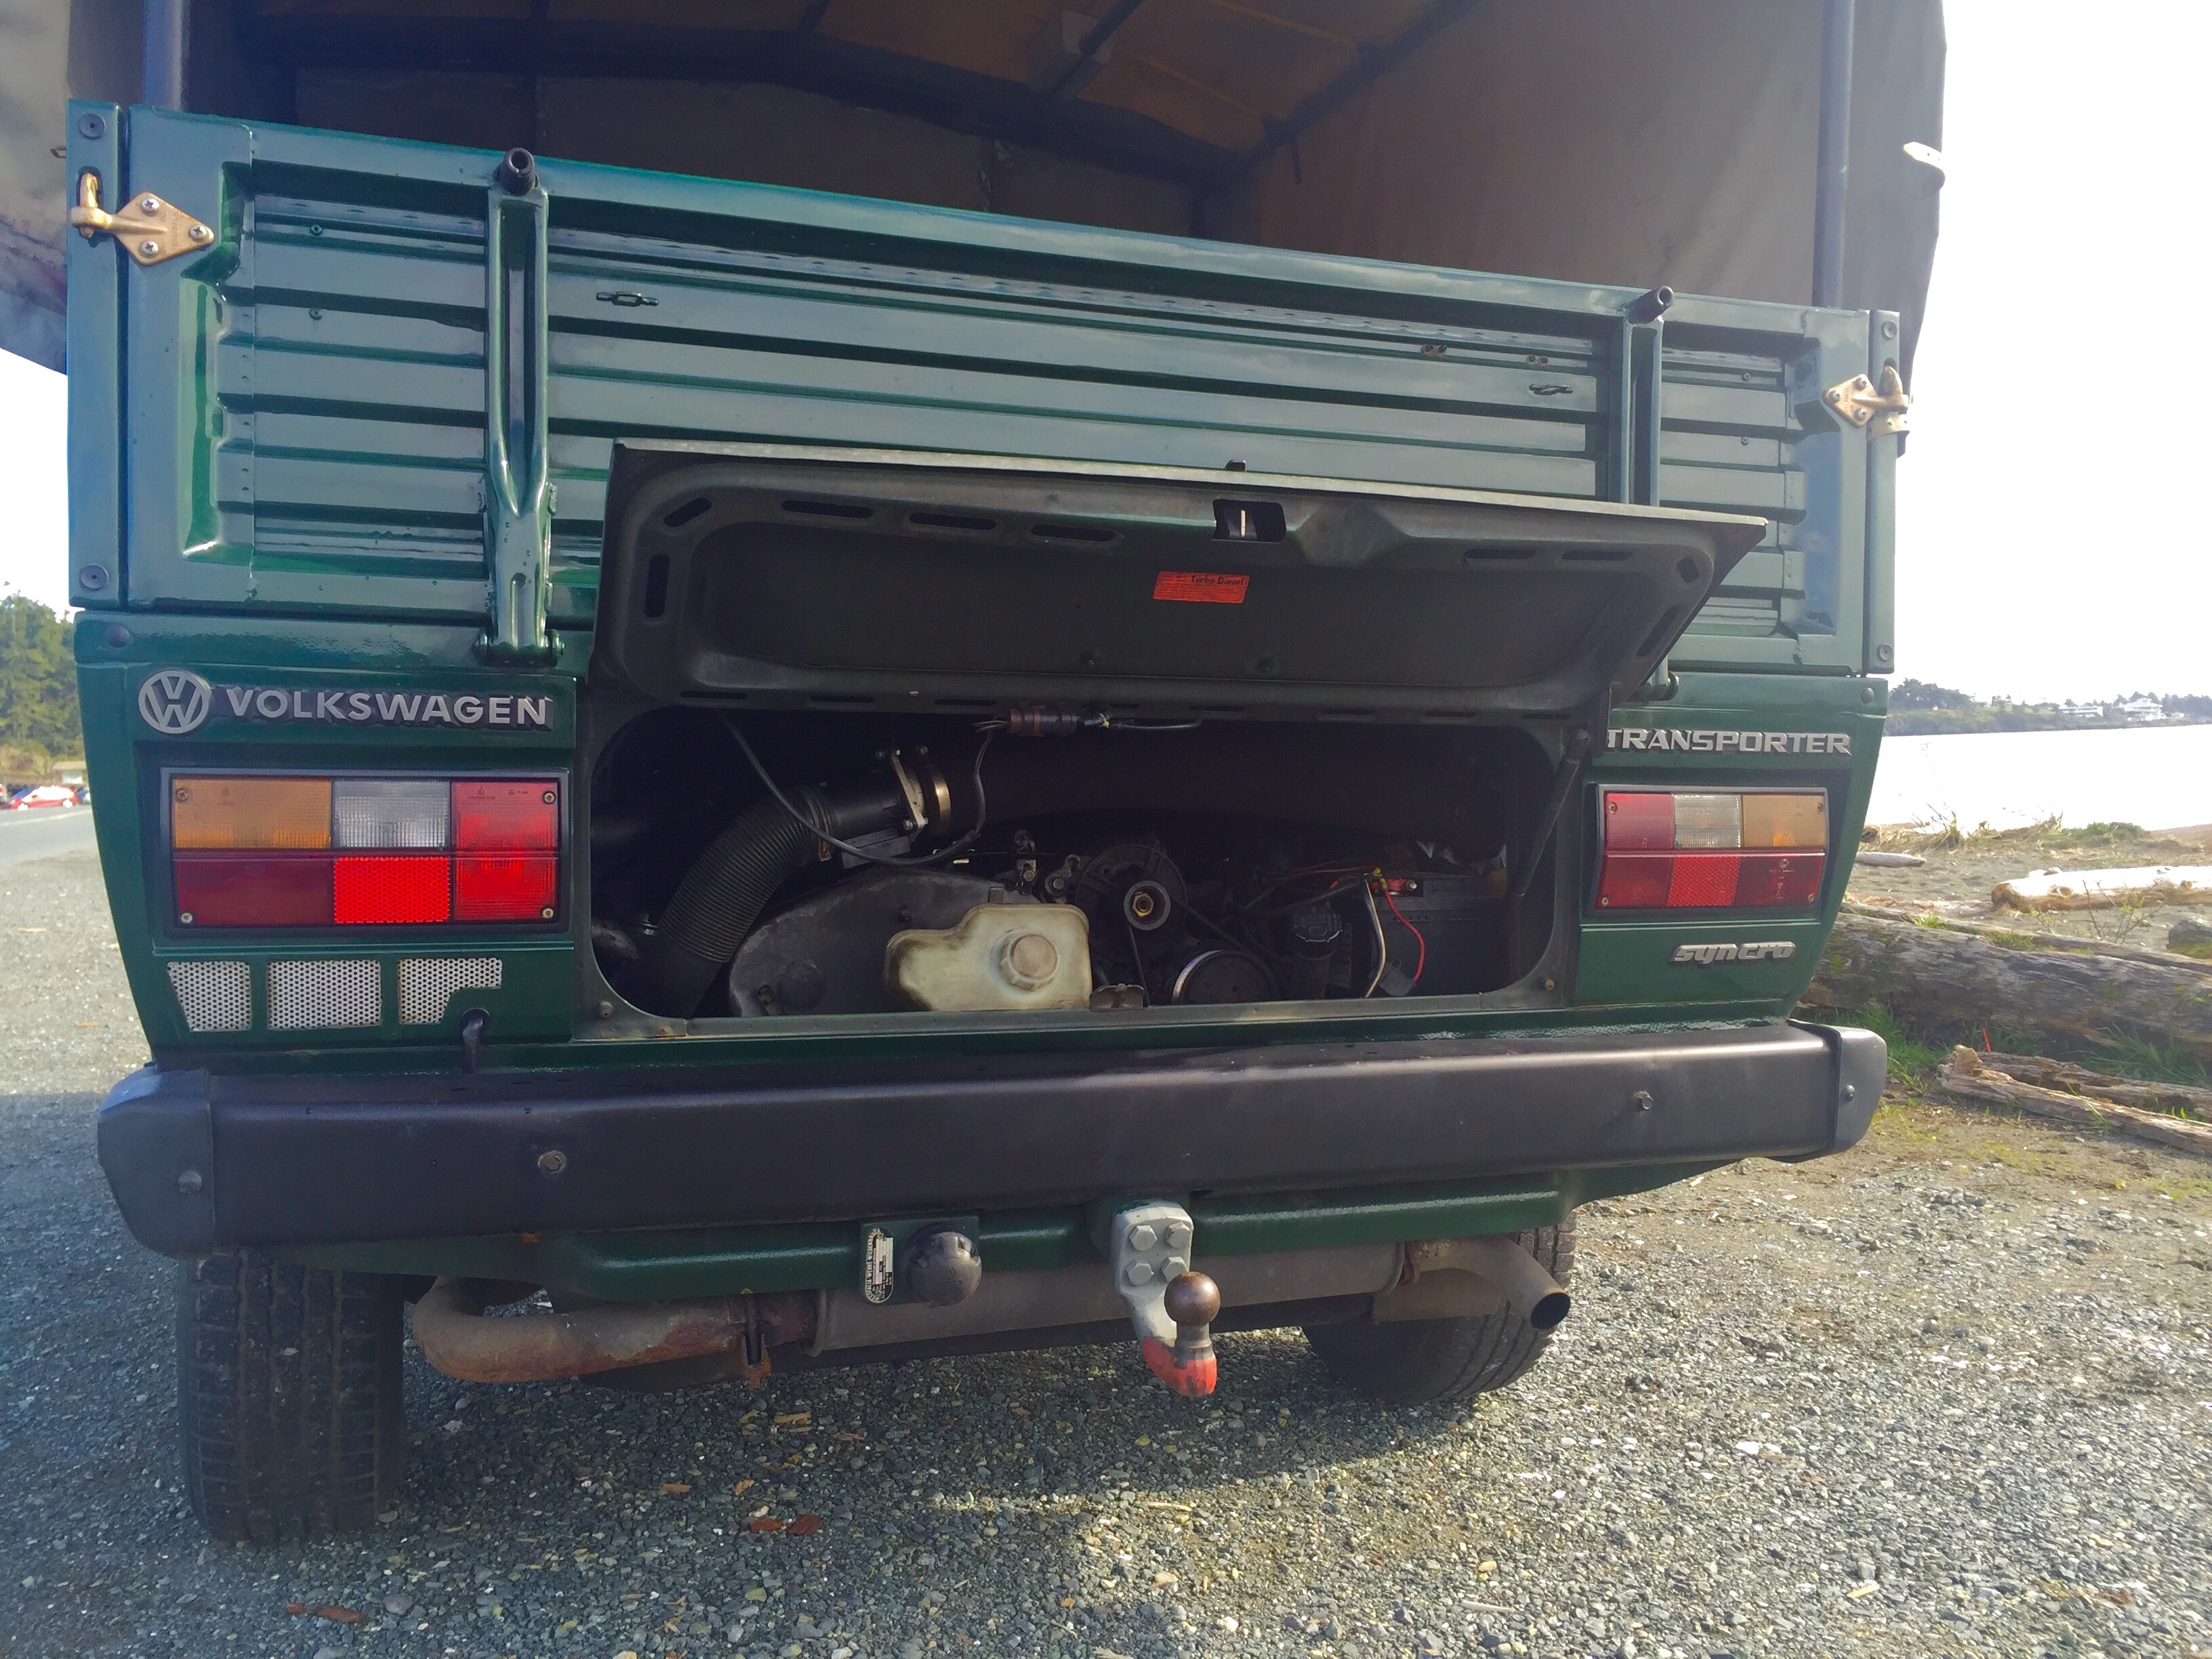
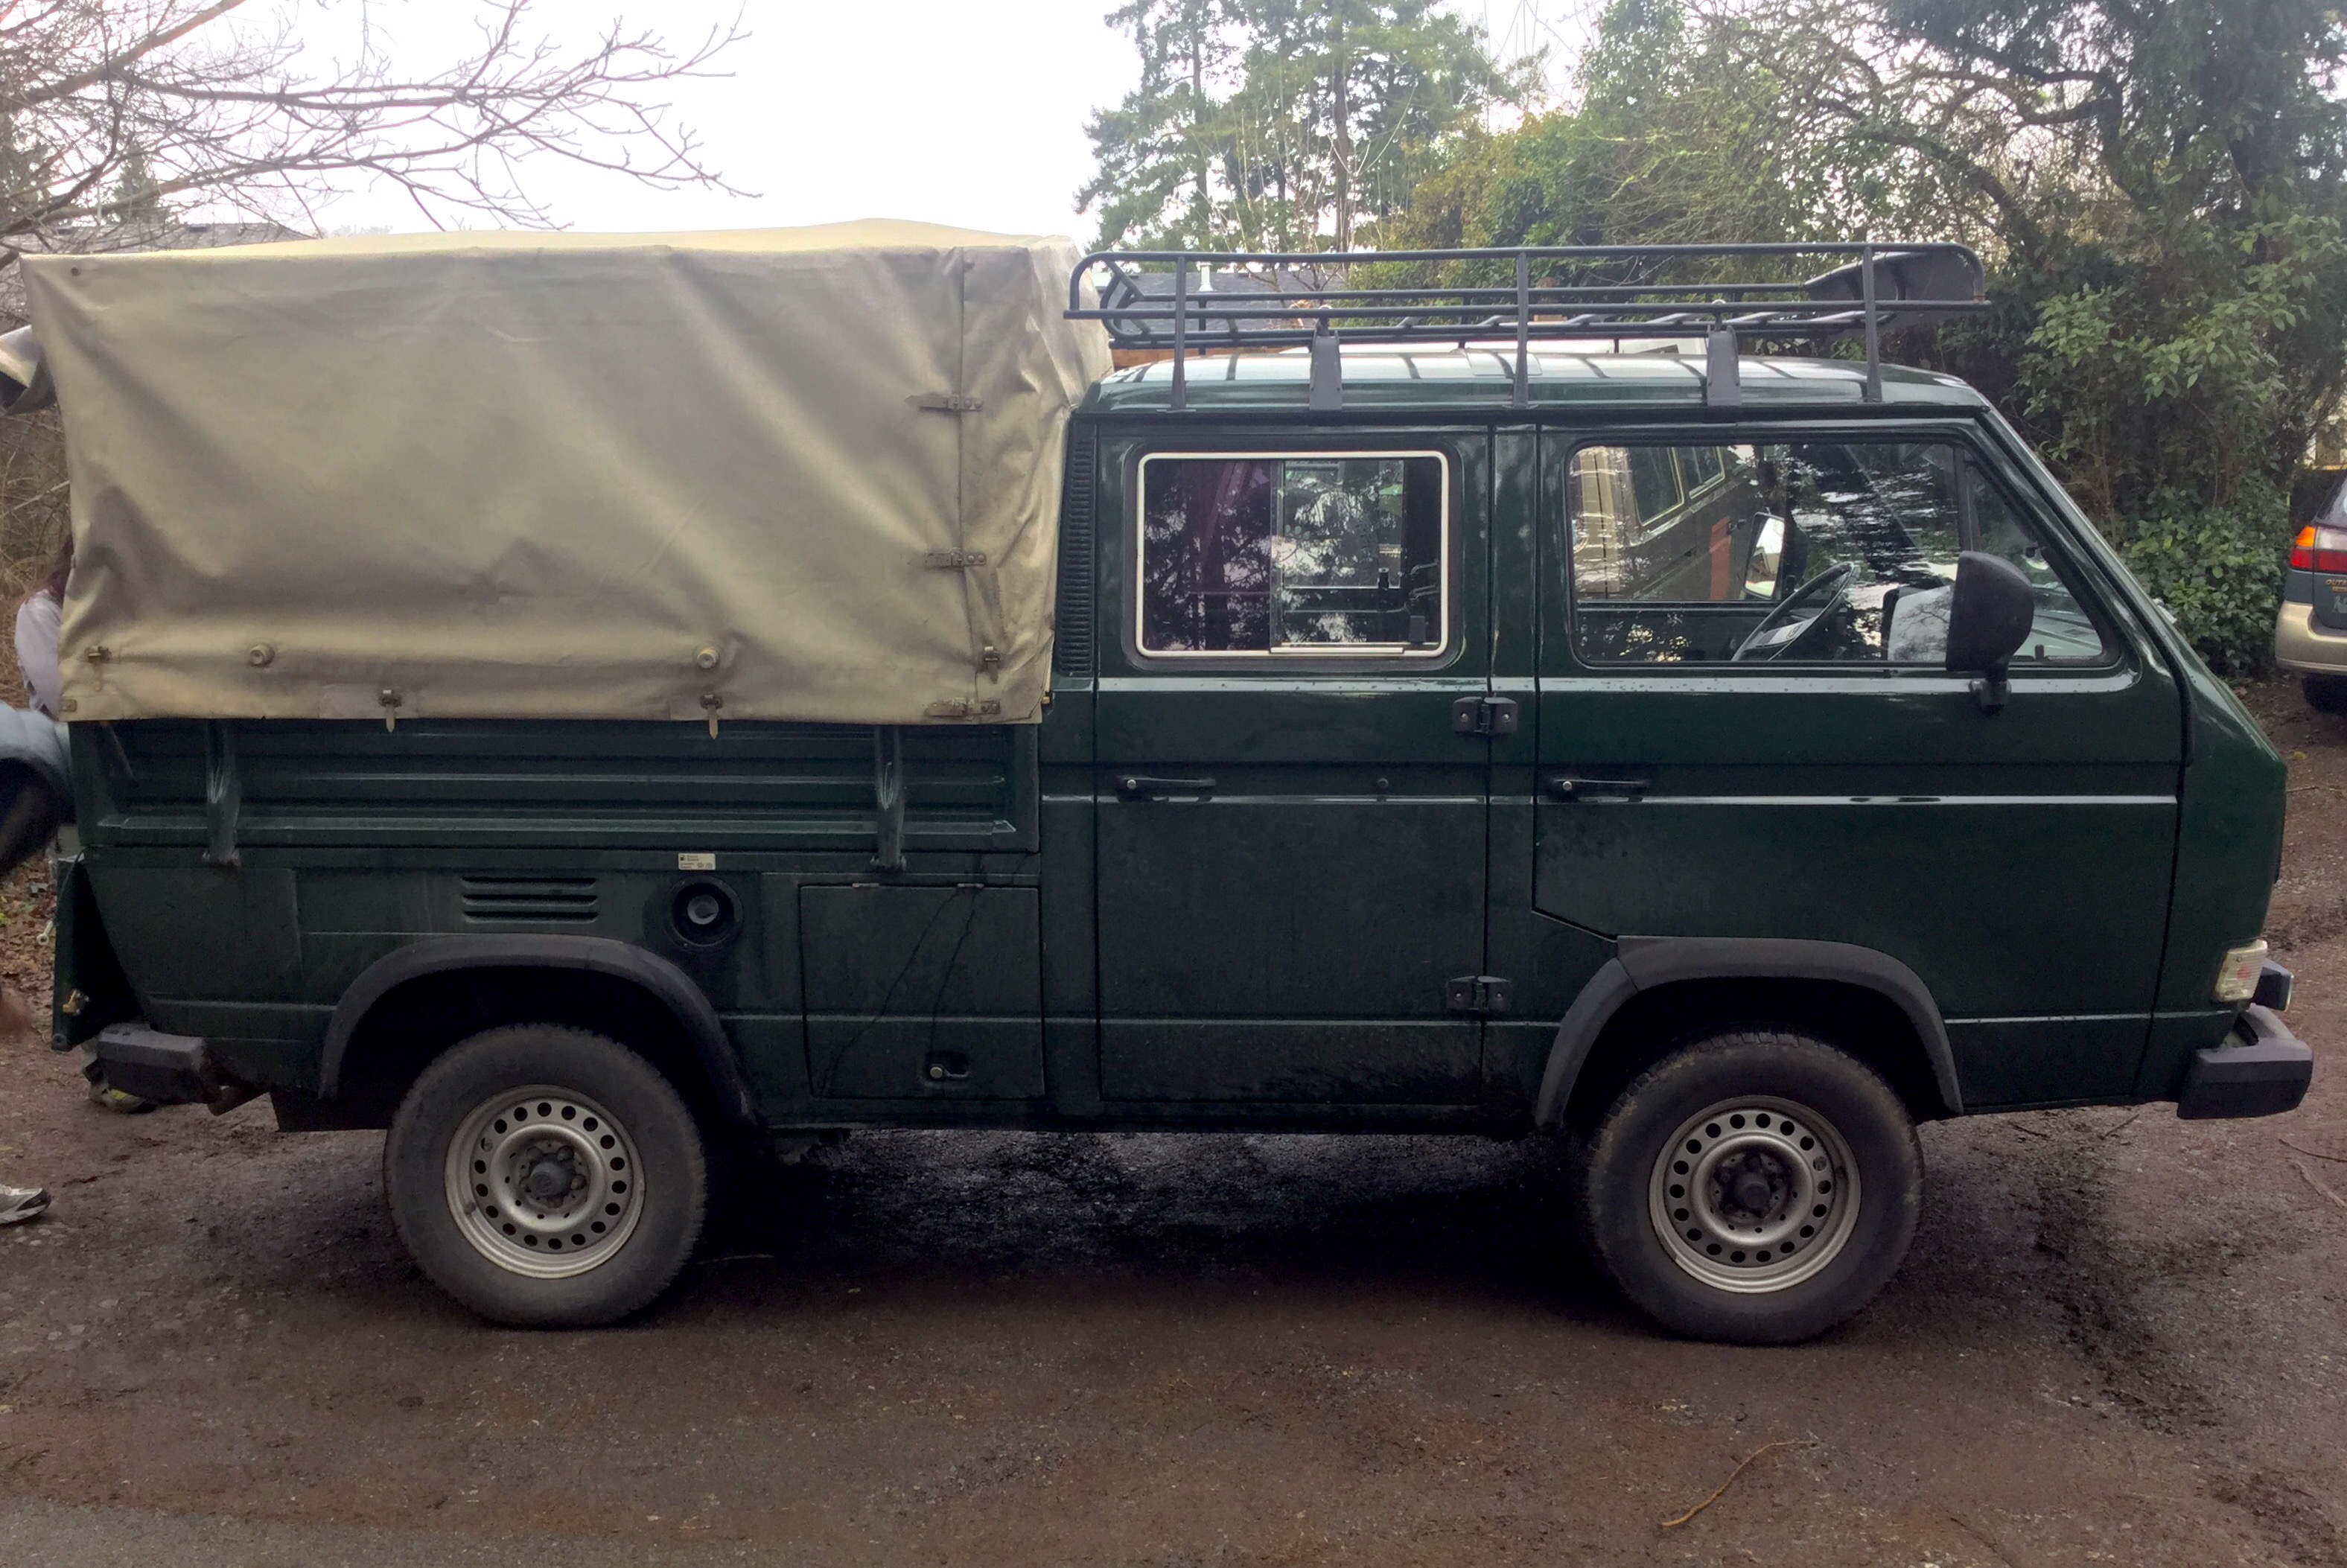
’89 syncro Doka
Good friend Simon just bought another syncro. It’s a private import 89 syncro doka that we believe was a German border guard vehicle. The jx diesel has been replaced by a 1z tdi, it has both front and rear lockers, 15″ wheels, rear cabin heater, and some rifle racks.
The van drives so very nicely. First time for me to drive a tdi powered van and it’s quite impressive. In fact, it feels more powerful than the subie 2.5 Simon has in his syncro Westy ( but that in part is due to the lower gearing and lighter weight of the Doka). The Subie is probably better for higher speed highway driving but on the trail the diesel is the champ.
Westfalia hitch. 
Vent for turbo inter cooler. 


Vanagon – syncro starter repair
Posted by albell in syncro, syncro specific repairs, vanagon on December 10, 2015
Tuesday morning the van turned over slowly, but did start. I had to drop by a couple of places before getting to work, and on the second stop the starter died. Nothing, no click, no movement. Did a rolling start to get to work and there I checked out things ( connections, battery) and decided the starter was kaput.
I have to admit that the starter had been acting up on occasion for the last 6 months or so. Occasionally it would spin but not engage the flywheel. I agree, I should have known better.
As luck would have it, workplace close by my work had a hoist and it was free. The owner let me use it and later that afternoon I got it up on the lift.
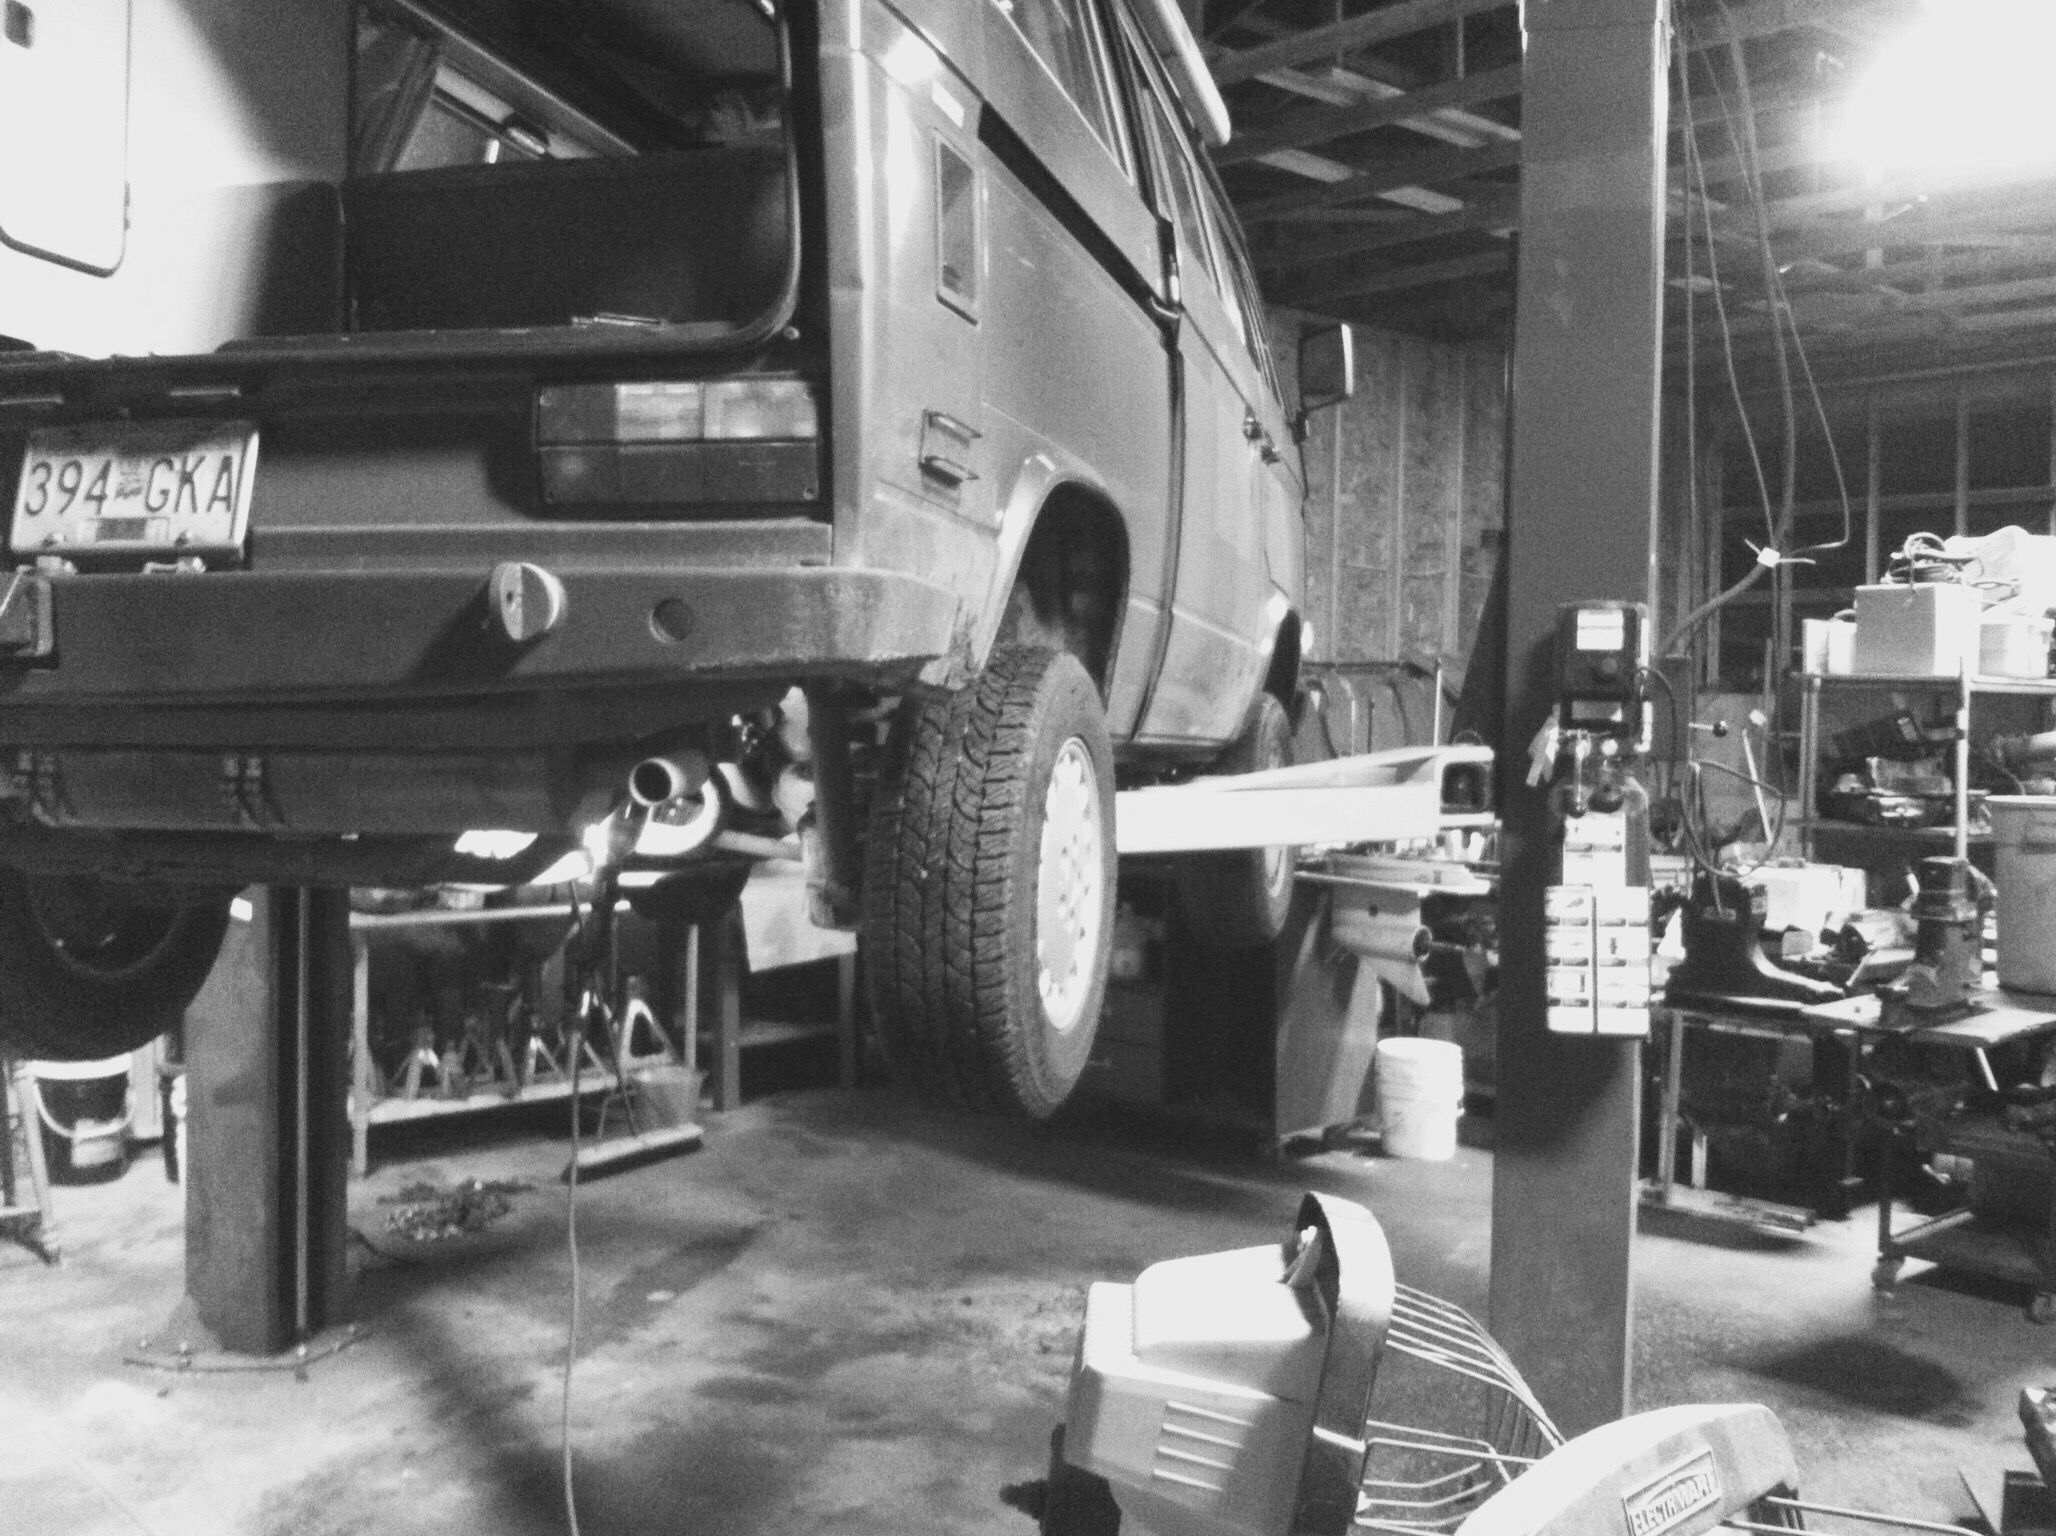
I really wasn’t in the mood to document the job, but I did take a couple of pics and while things are fresh in my mind I have a couple of notes about the job.
Bentley does a fair job of describing the procedure, and there are a few threads on the Samba with additional tips. This was the first time I had taken out a stater in a syncro with engine in van, and I had to use both sources.
Battery disconnected
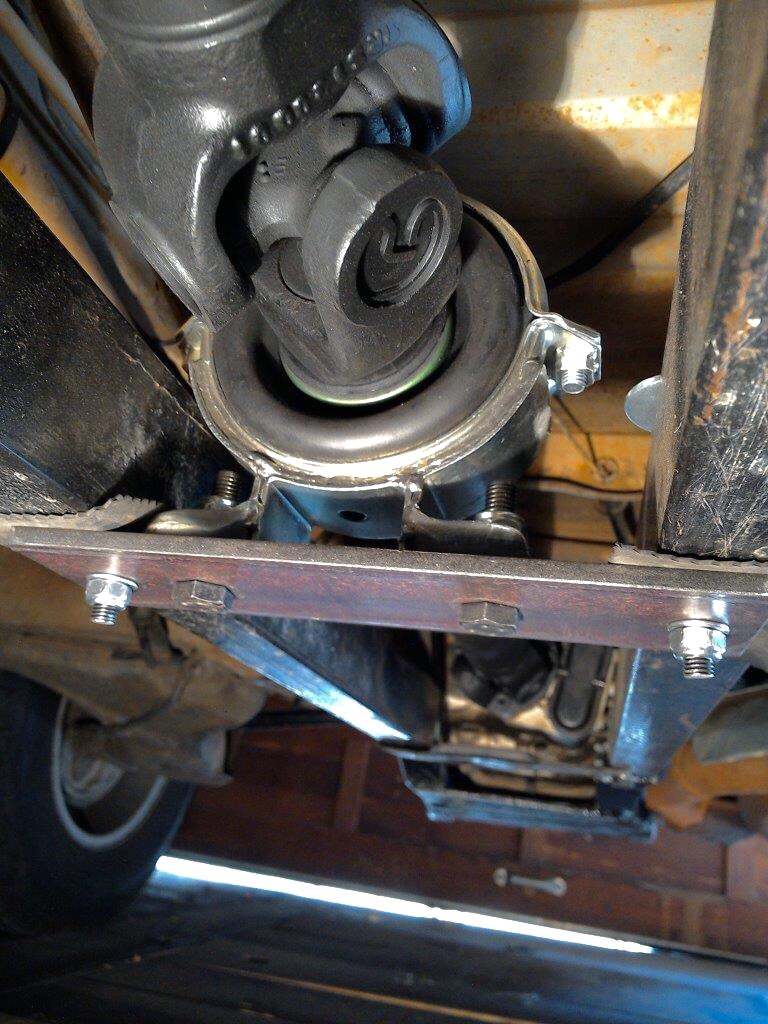
Van still on ground, S boot on air intake and air filter removed. To get access to the upper starter bolt.
Upper bolt for starter mounting removed. 17mm wrench size on nut on engine side, hex key on transmission side (forget size).
Van lifted
Driveshaft disconnected from transmission. I found the boot ripped so I took driveshaft completely out. I had a ready to go spare axle assembly and I felt chuffed about that. This kind of preparedness doesn’t happen very often
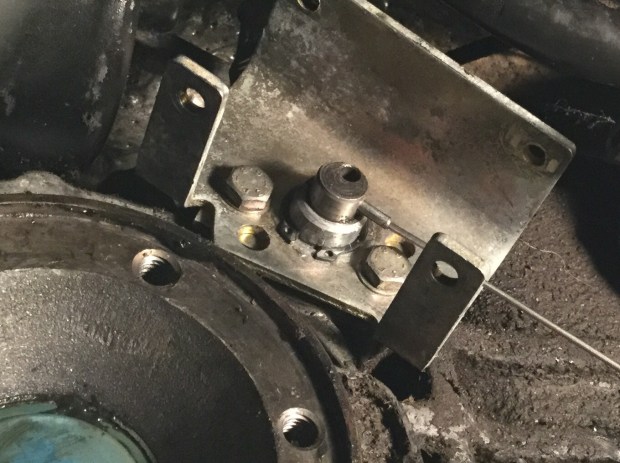
Diff lock actuator. Now this is a little bit of a bear. I found the nuts that Bentley said were welded to the bracket weren’t. Also found that the rubber sleeve covering the actuator shaft was a section of heater hose. So there was no pushing that up to drive out the roll pin, I cut the hose off. You can sort of see the cut hose in this pic.
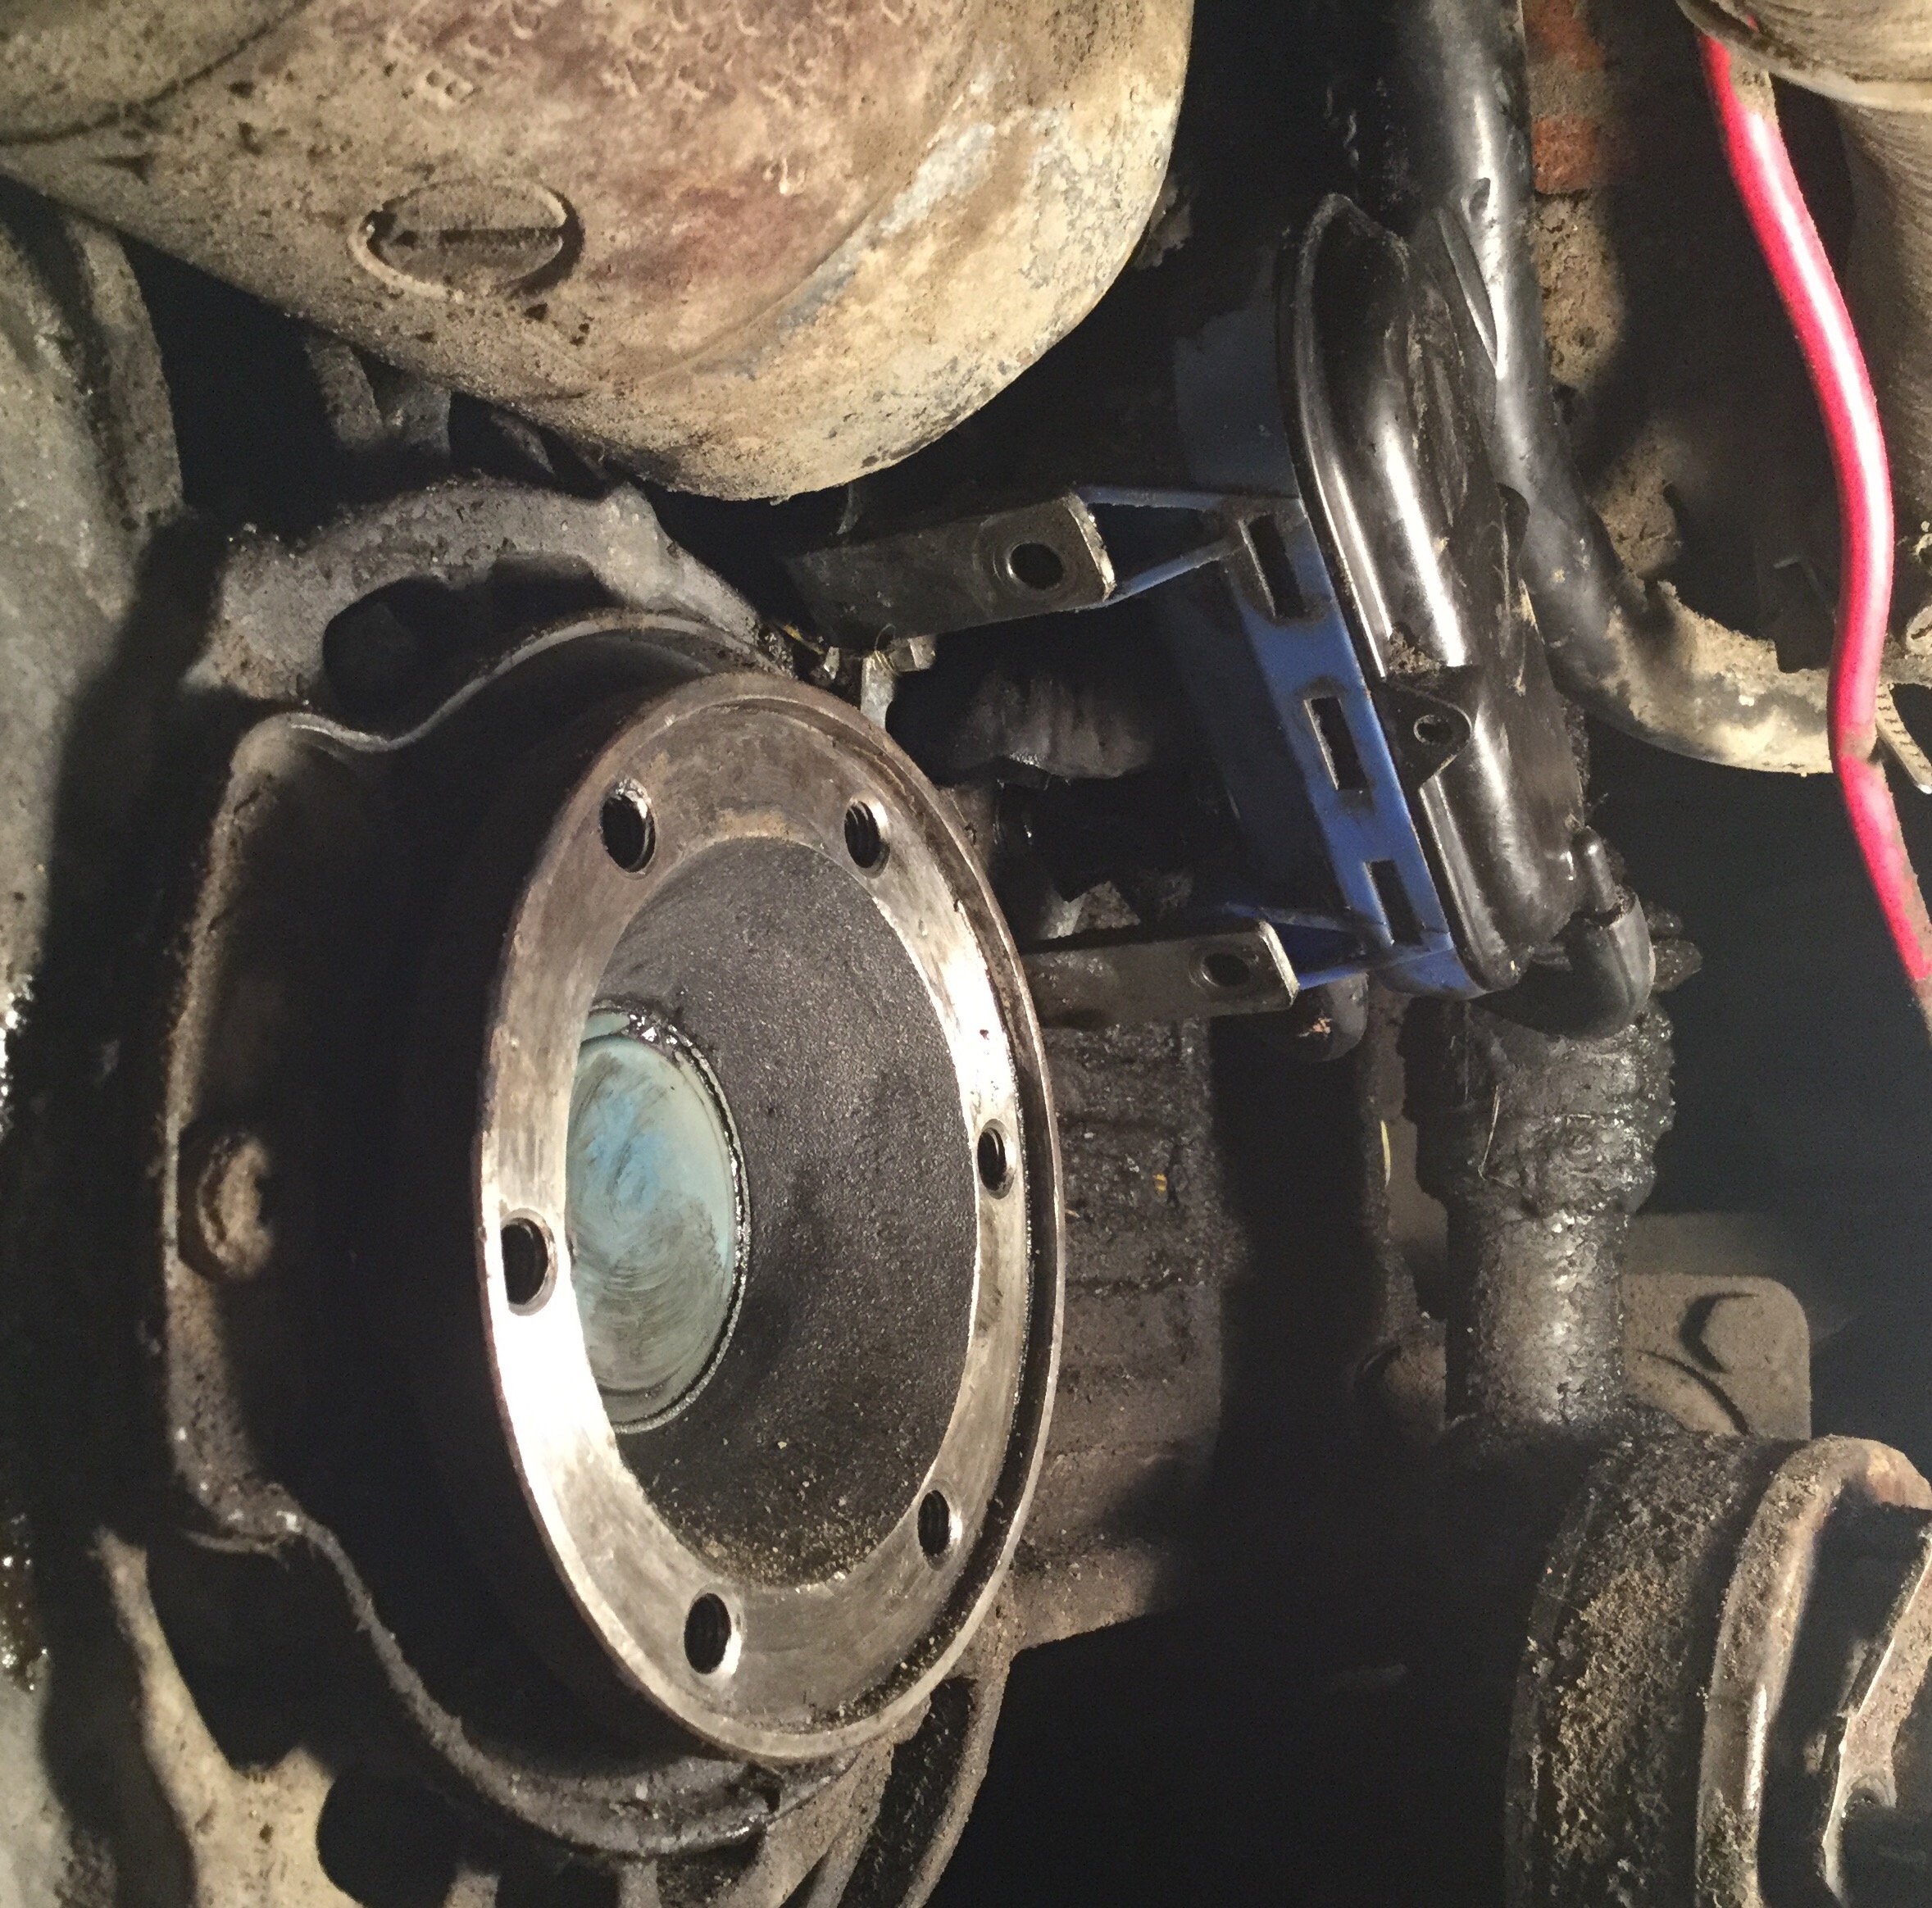
Driving out the roll pin wasn’t as hard as I expected. Room is limited in there but I managed to do it and leave the roll pin still actuator shaft.
Now the lower starter mount nut, and the jiggle and wiggle to get the starter out. Once the gear end was out and it dropped down a bit I could remove the electrical connections. Took the starter to the bench, took apart the solenoid. Look ok I guess, it would retract under power if I gave it a helping push. Removed one end of the starter and, well, have a look.

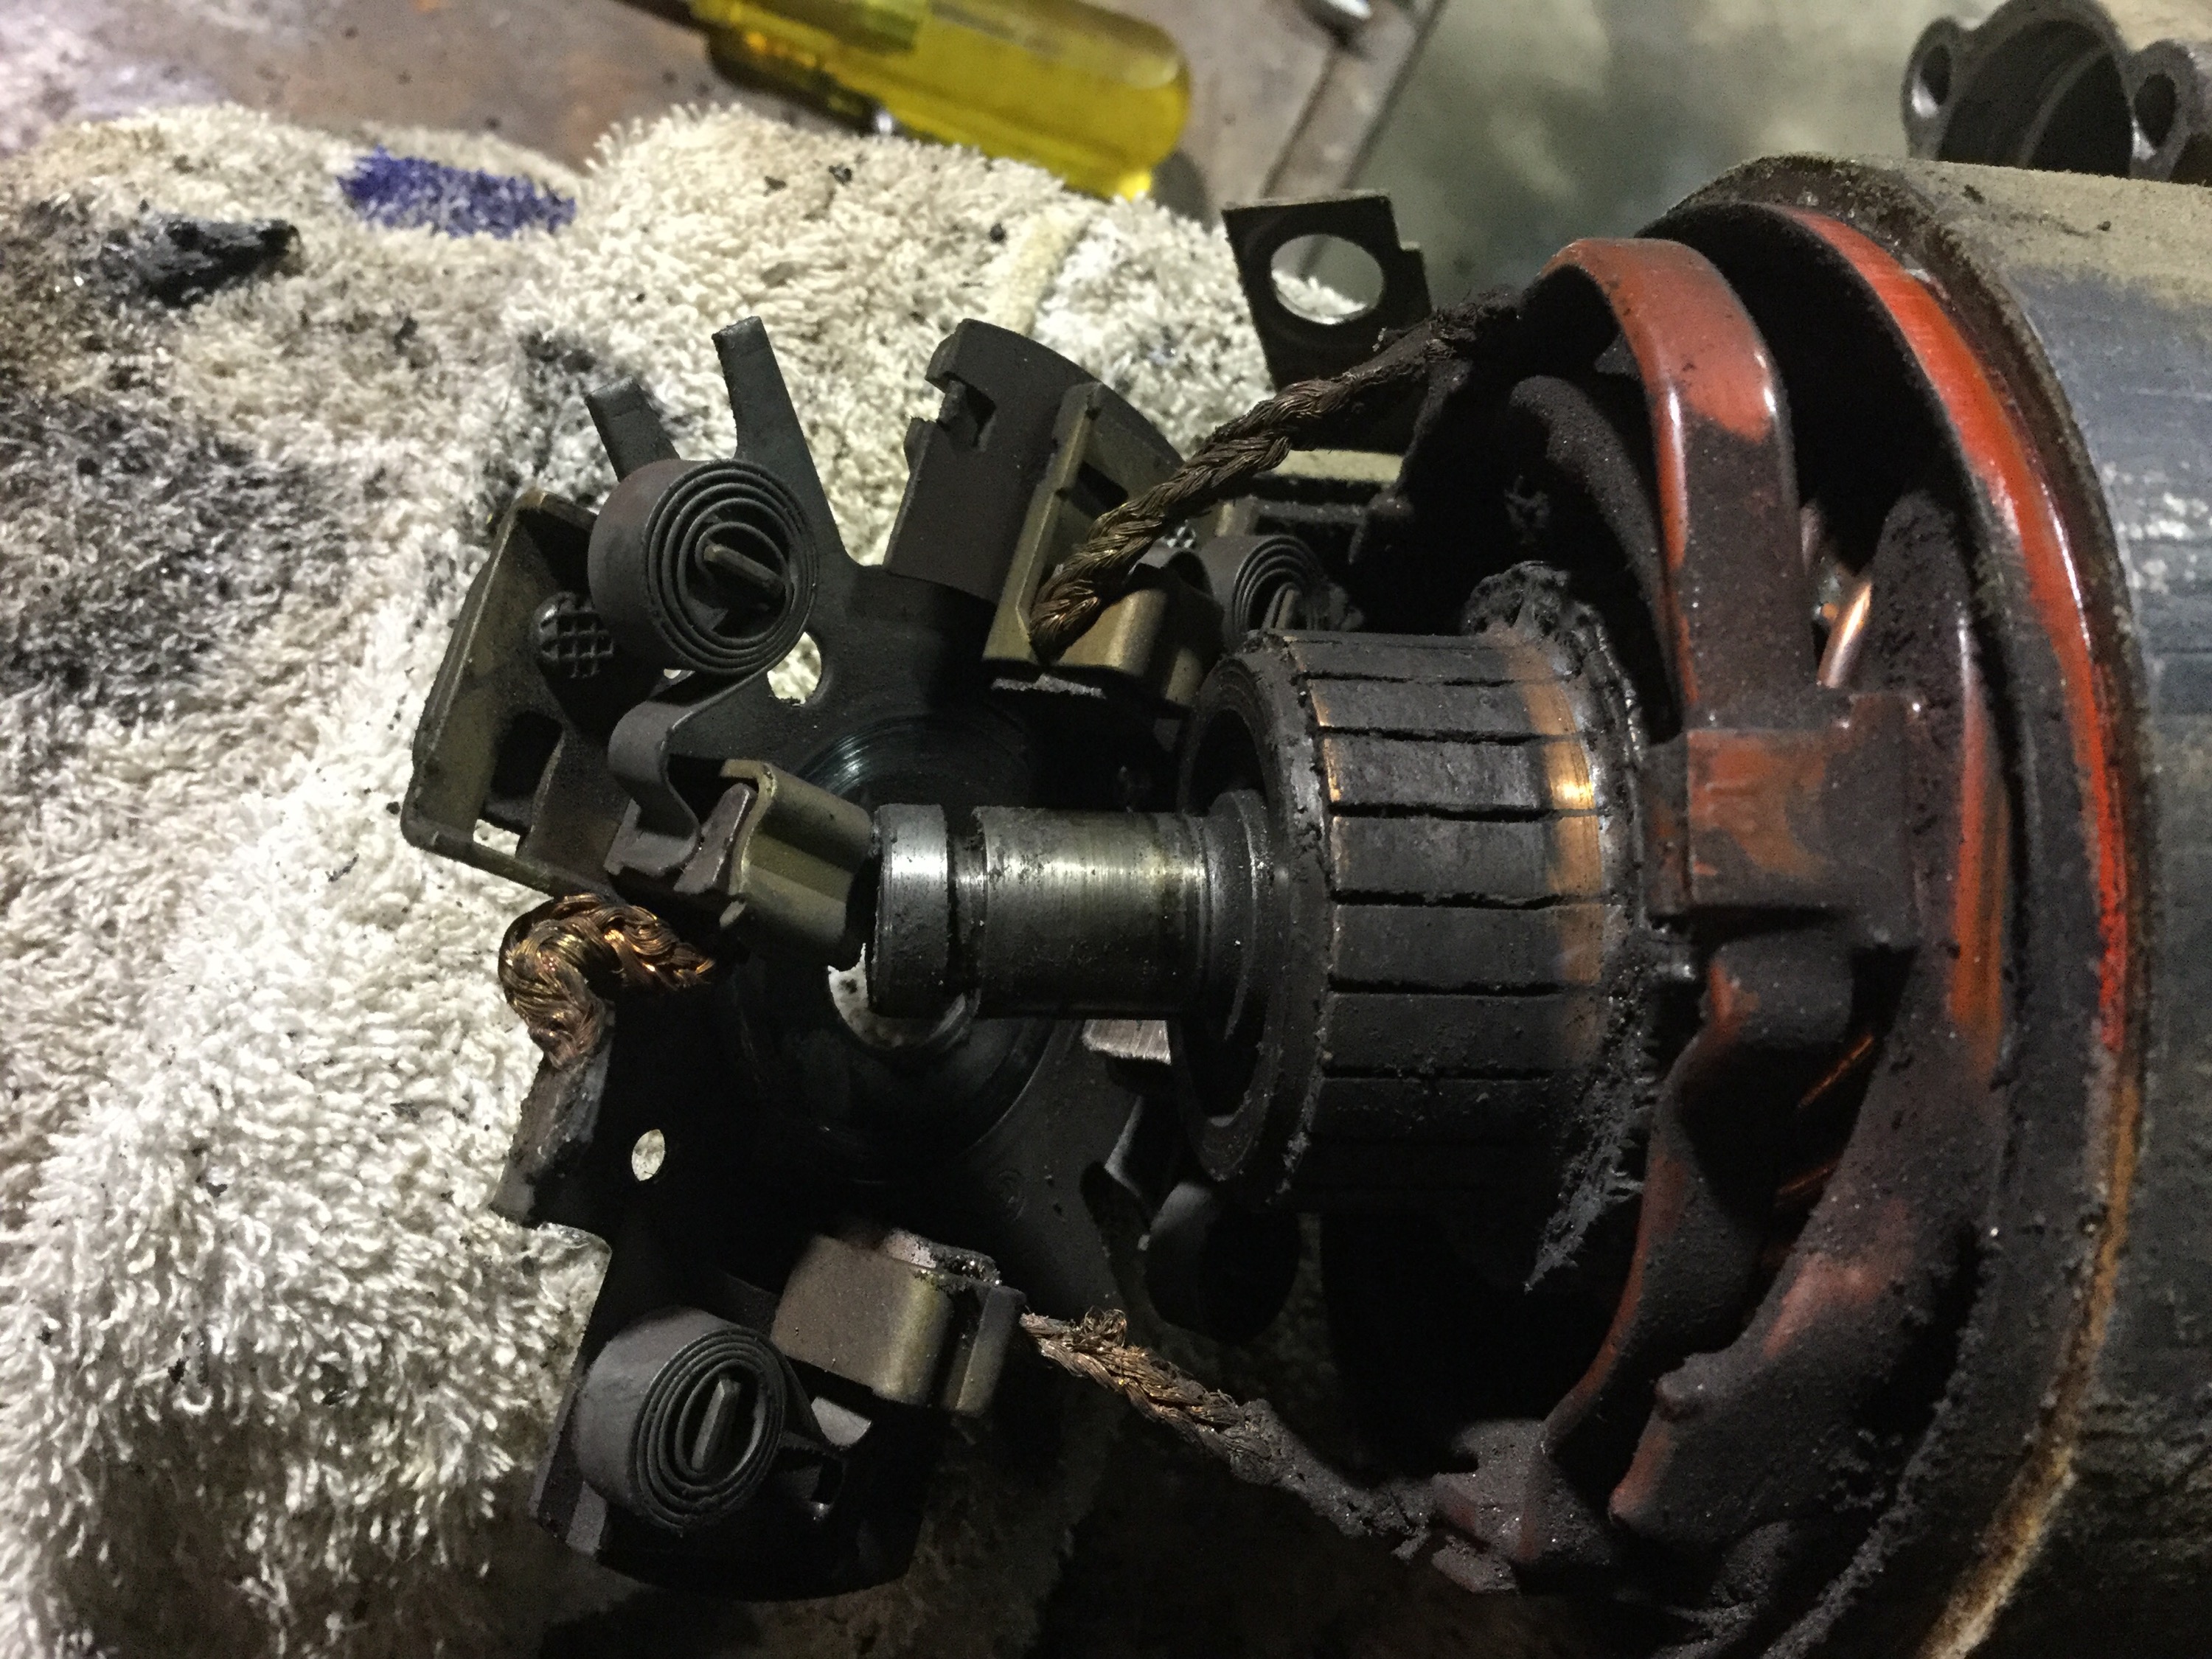
Brushes worn down to a nub. Commutator burned, dirty, ugly.
Next morning took starter to rebuilder in town. I can’t really explain why I chose to have it rebuilt instead of buying new (or factory reconditioned, whatever that means). Starter would be ready that afternoon.
Back out to work. Had some time to swap in my spare axle, but left transmission end up attached.
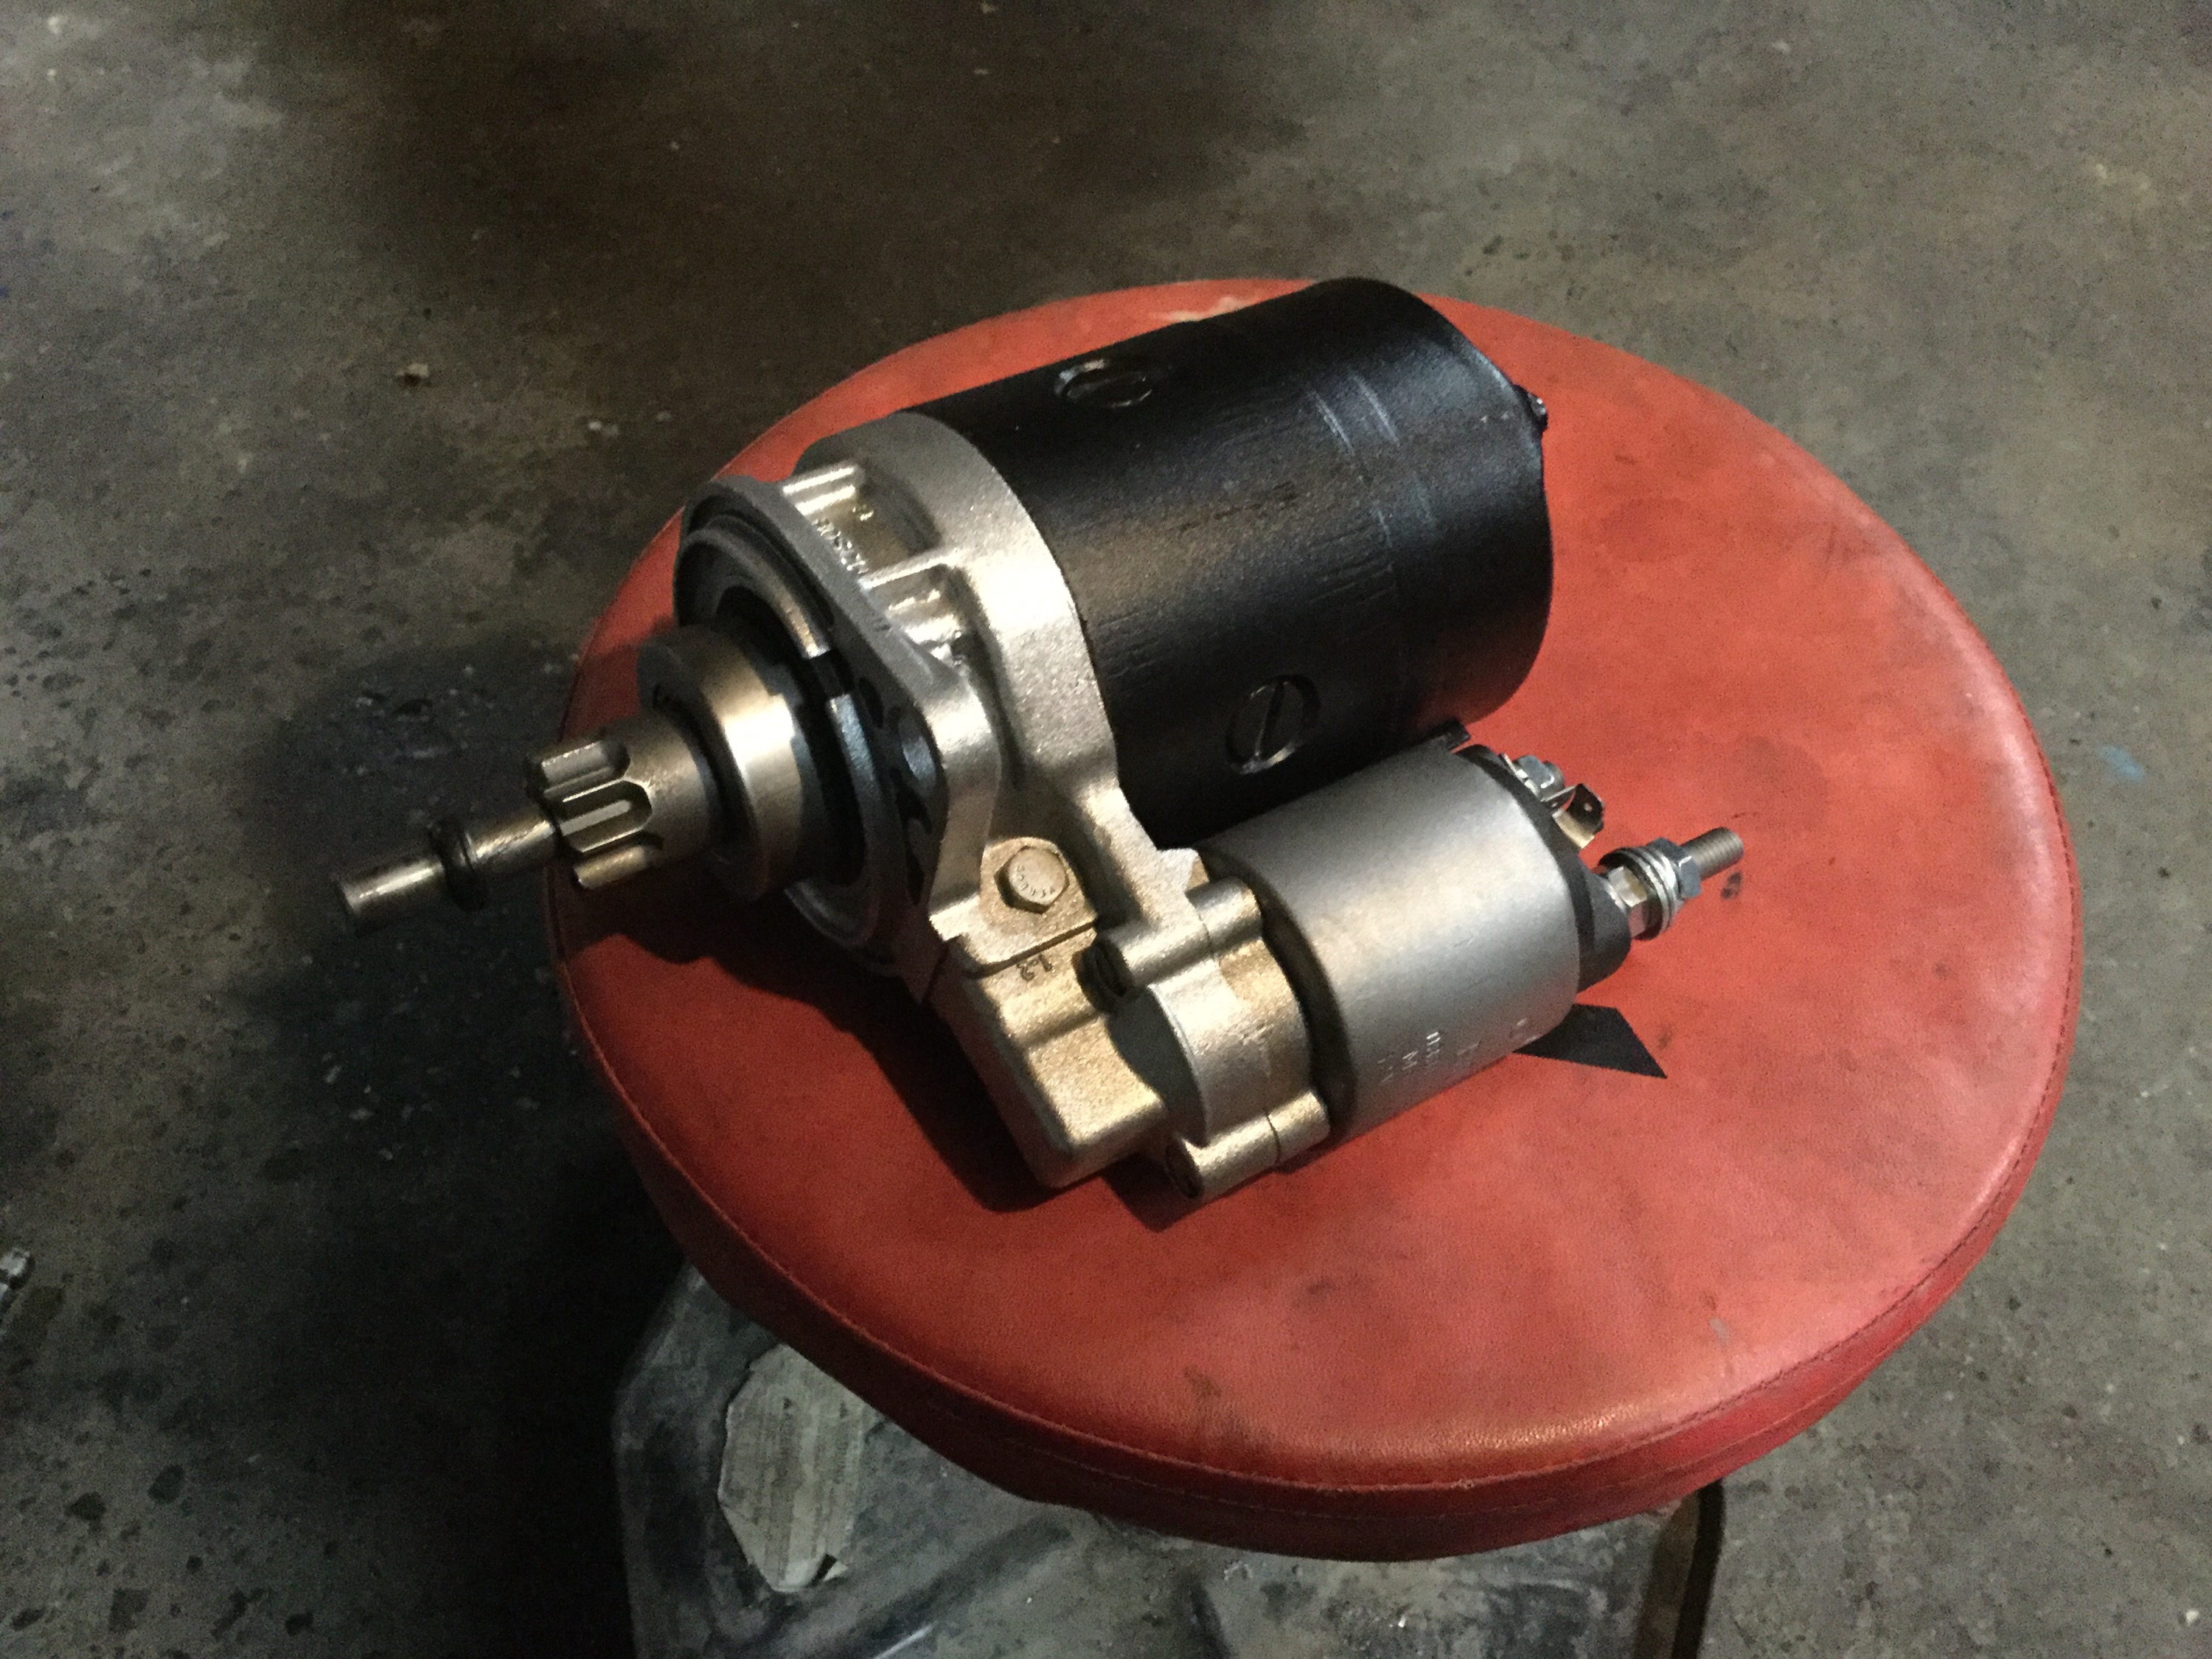
Back to town for starter. Labour charge CA115 ( 84/hr rate), parts 43 bucks. New solenoid, brushes, drive gear, commutator turned, armatures checked. Looks brand new.
I really don’t like how the signal wire is attached to the solenoid by a spade connector. So I soldered on a female spade connector, then crimped and soldered on a long pigtail to the spade. Heat shrink and silicone grease. Pigtail will lead to a relay in the engine compartment that I installed a few years ago.

Diff lock actuator boot – well I copied what the previous owner did and used some hose. Polybraid stuff this time with a little window cut into it so the roll pin could be driven home. You know, the acuator shaft was pretty clean when I removed the hose so I figured it worked well enough to do same.
Getting the roll pin back in is a little tricky. What helped a bit was threading the roll pin onto the end of some stainless welding rod. It fit nicely and fetched up on the ID stamp of the rod.

Pic shows the idea without the clutter of the vacuum gizmo and the home made boot. The wire allowed me to get the roll pin in and engaged, then I could remove the wire and tap the pin home with small punch and hammer.
I replaced the starter bushing in the bell housing. Used a 7/16″ tap and screwed the tap into the old bushing and as the tap bottomed out in the hole the bushing screwed up on the tap and out. New bushing was a bronze, oilite type bushing so I soaked in oil before hand and gave it a bit of pressure between fingers with bushing filled with oil. Fingers on open ends. I thought getting the bushing in place would be tricky so I made a quick install tool from some brass rod. Rod turned down to fit snugly in the bore of the bushing, shoulder on the rod, and the turned down section just a little longer than the bushing length so I could feel the entrance to the hole. That worked out pretty good.
Acuator in place, starter then wiggled and jiggled up and into place. I used sealant on the mating surfaces. I made the lextrical connections when the starter was partly in place. Oh, forgot to mention, made a new wire from big stud in solenoid to alternator.
Inner cv joint connected
While van was on lift I decided to rotate tires. Noticed scraping noise on rear drivers side wheel. Pulled drum and found the adjustment lever had broken and the spring dangling. The broken bit was still in drum. Have no idea how that happened. So off comes the shoe, some prep on the metal, and I welded it back together.
Then van down to the ground, upper starter bolt installed, all the other mess in engine compartment cleaned up, the new wires from the started connected.
And yes, the starter worked. Jeez, much faster than before. My starter was dying a slow death.
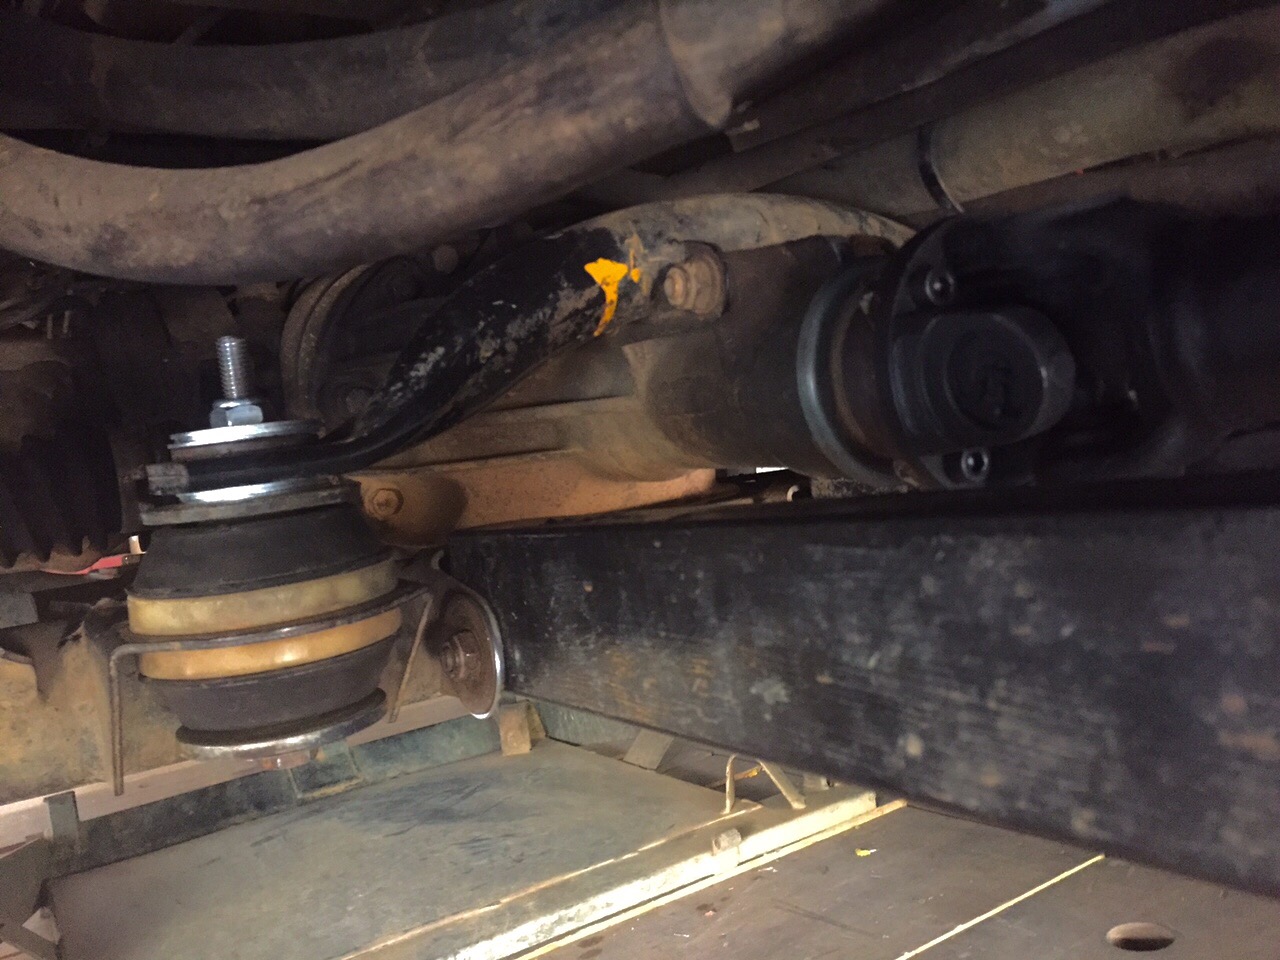
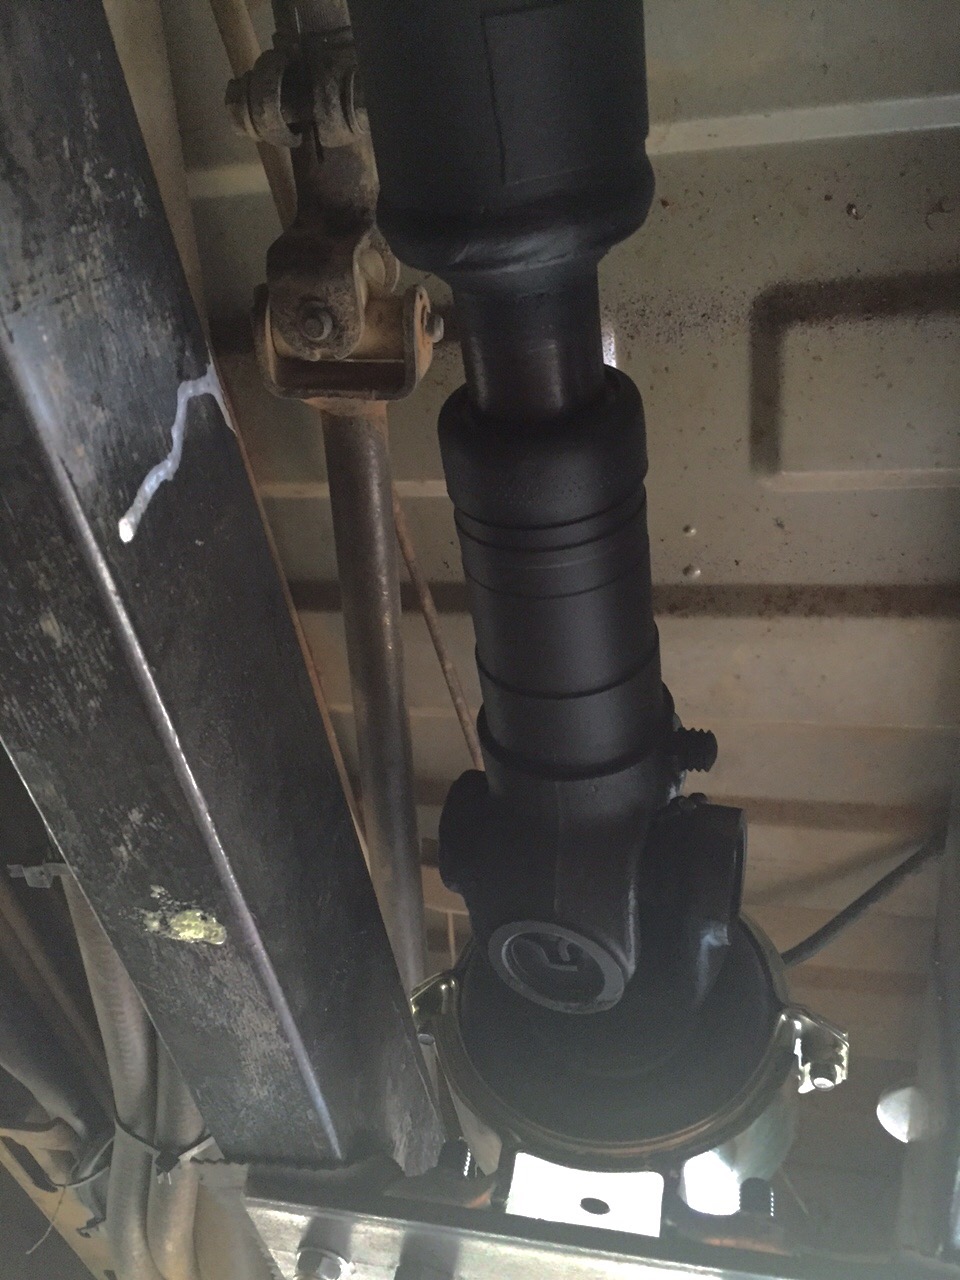
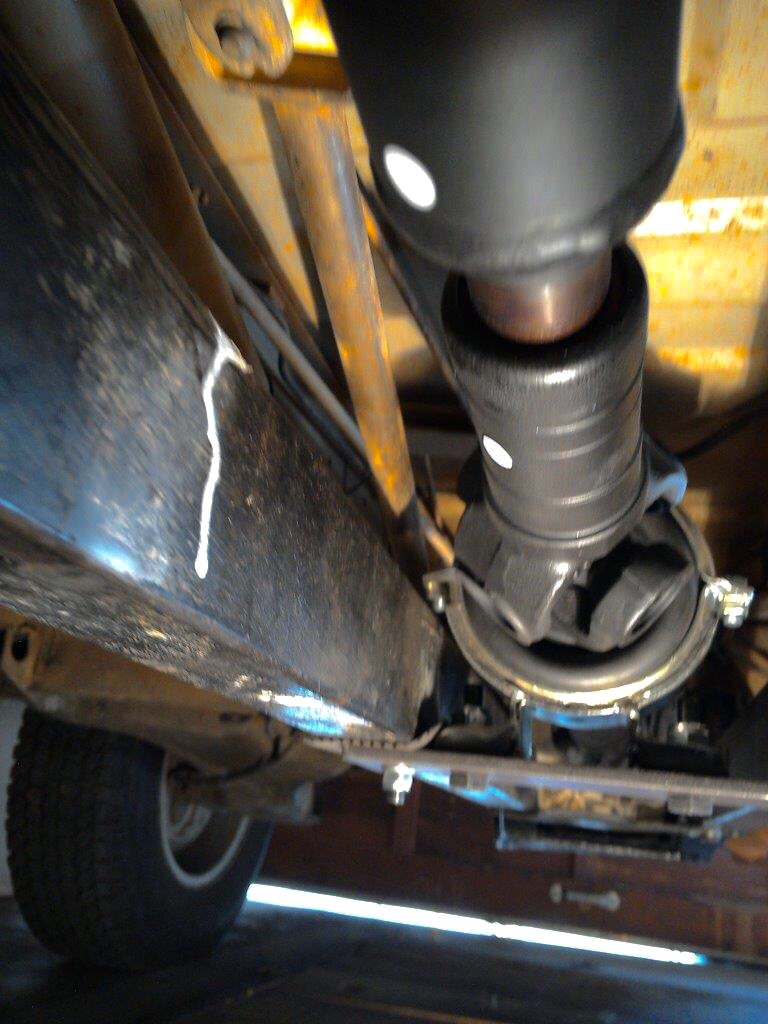
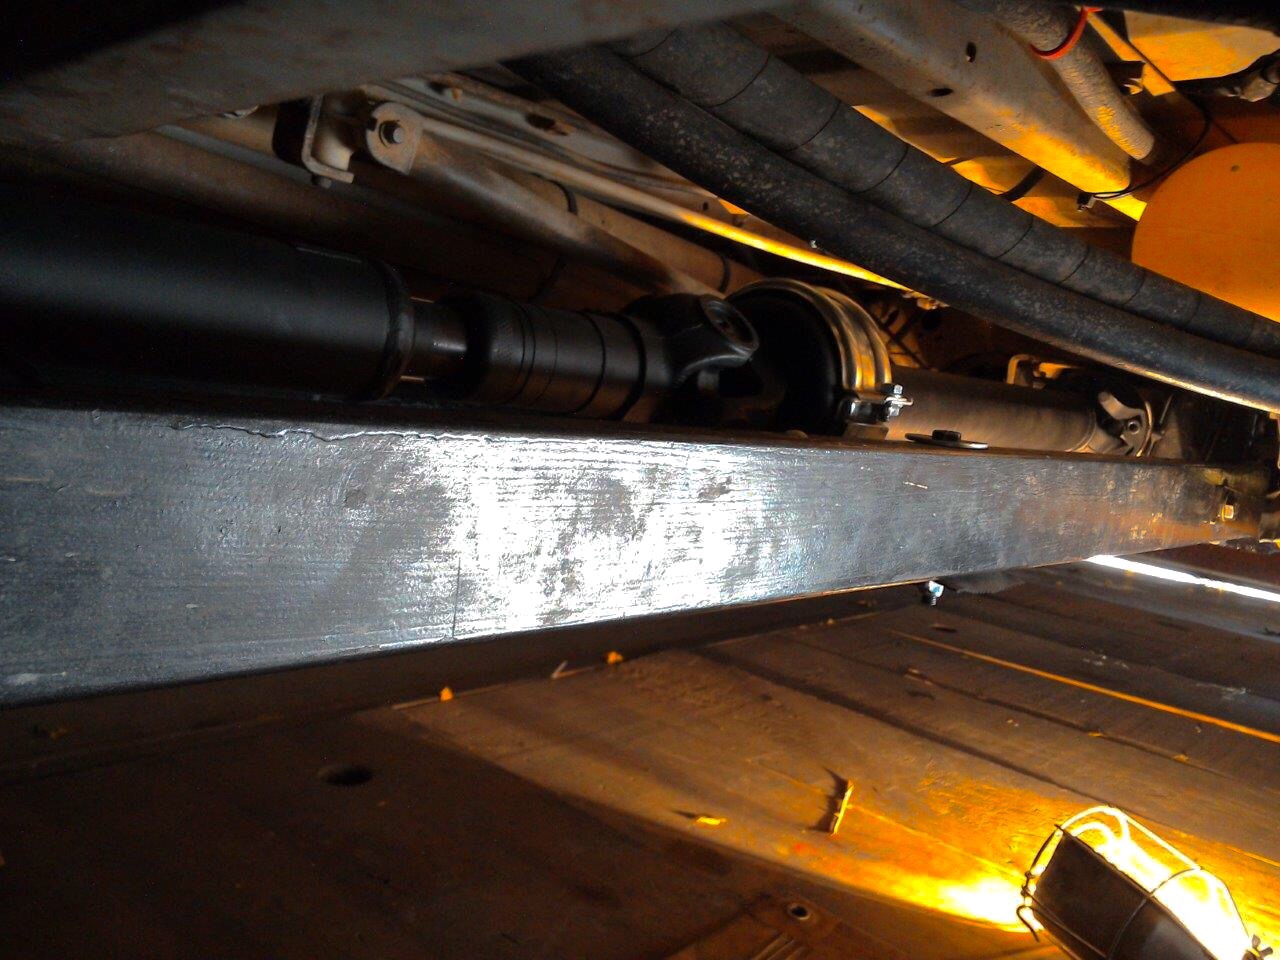
Syncro – propshaft with intermediate bearing support
Posted by albell in syncro, syncro specific repairs, vanagon mods on November 22, 2015
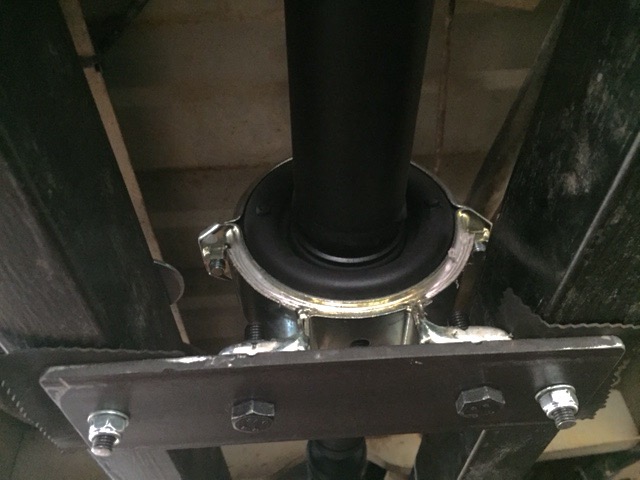
John B. sent along some pics of his new propshaft. He was having some difficulty in getting the stock set up running vibration free so he went this route.
Due to some errors on my side, I can’t find his emails where he described the set up. Until I get that info I’ll post the pics as is.


Addendum.
In reply to Hans’ comment about CV jointed prop shaft. A couple of pics. First is the flange of my spare propshaft. Approximate measurements make it a 74mm bolt hole circle, the recess is 47mm diameter and about 2.5mm deep.
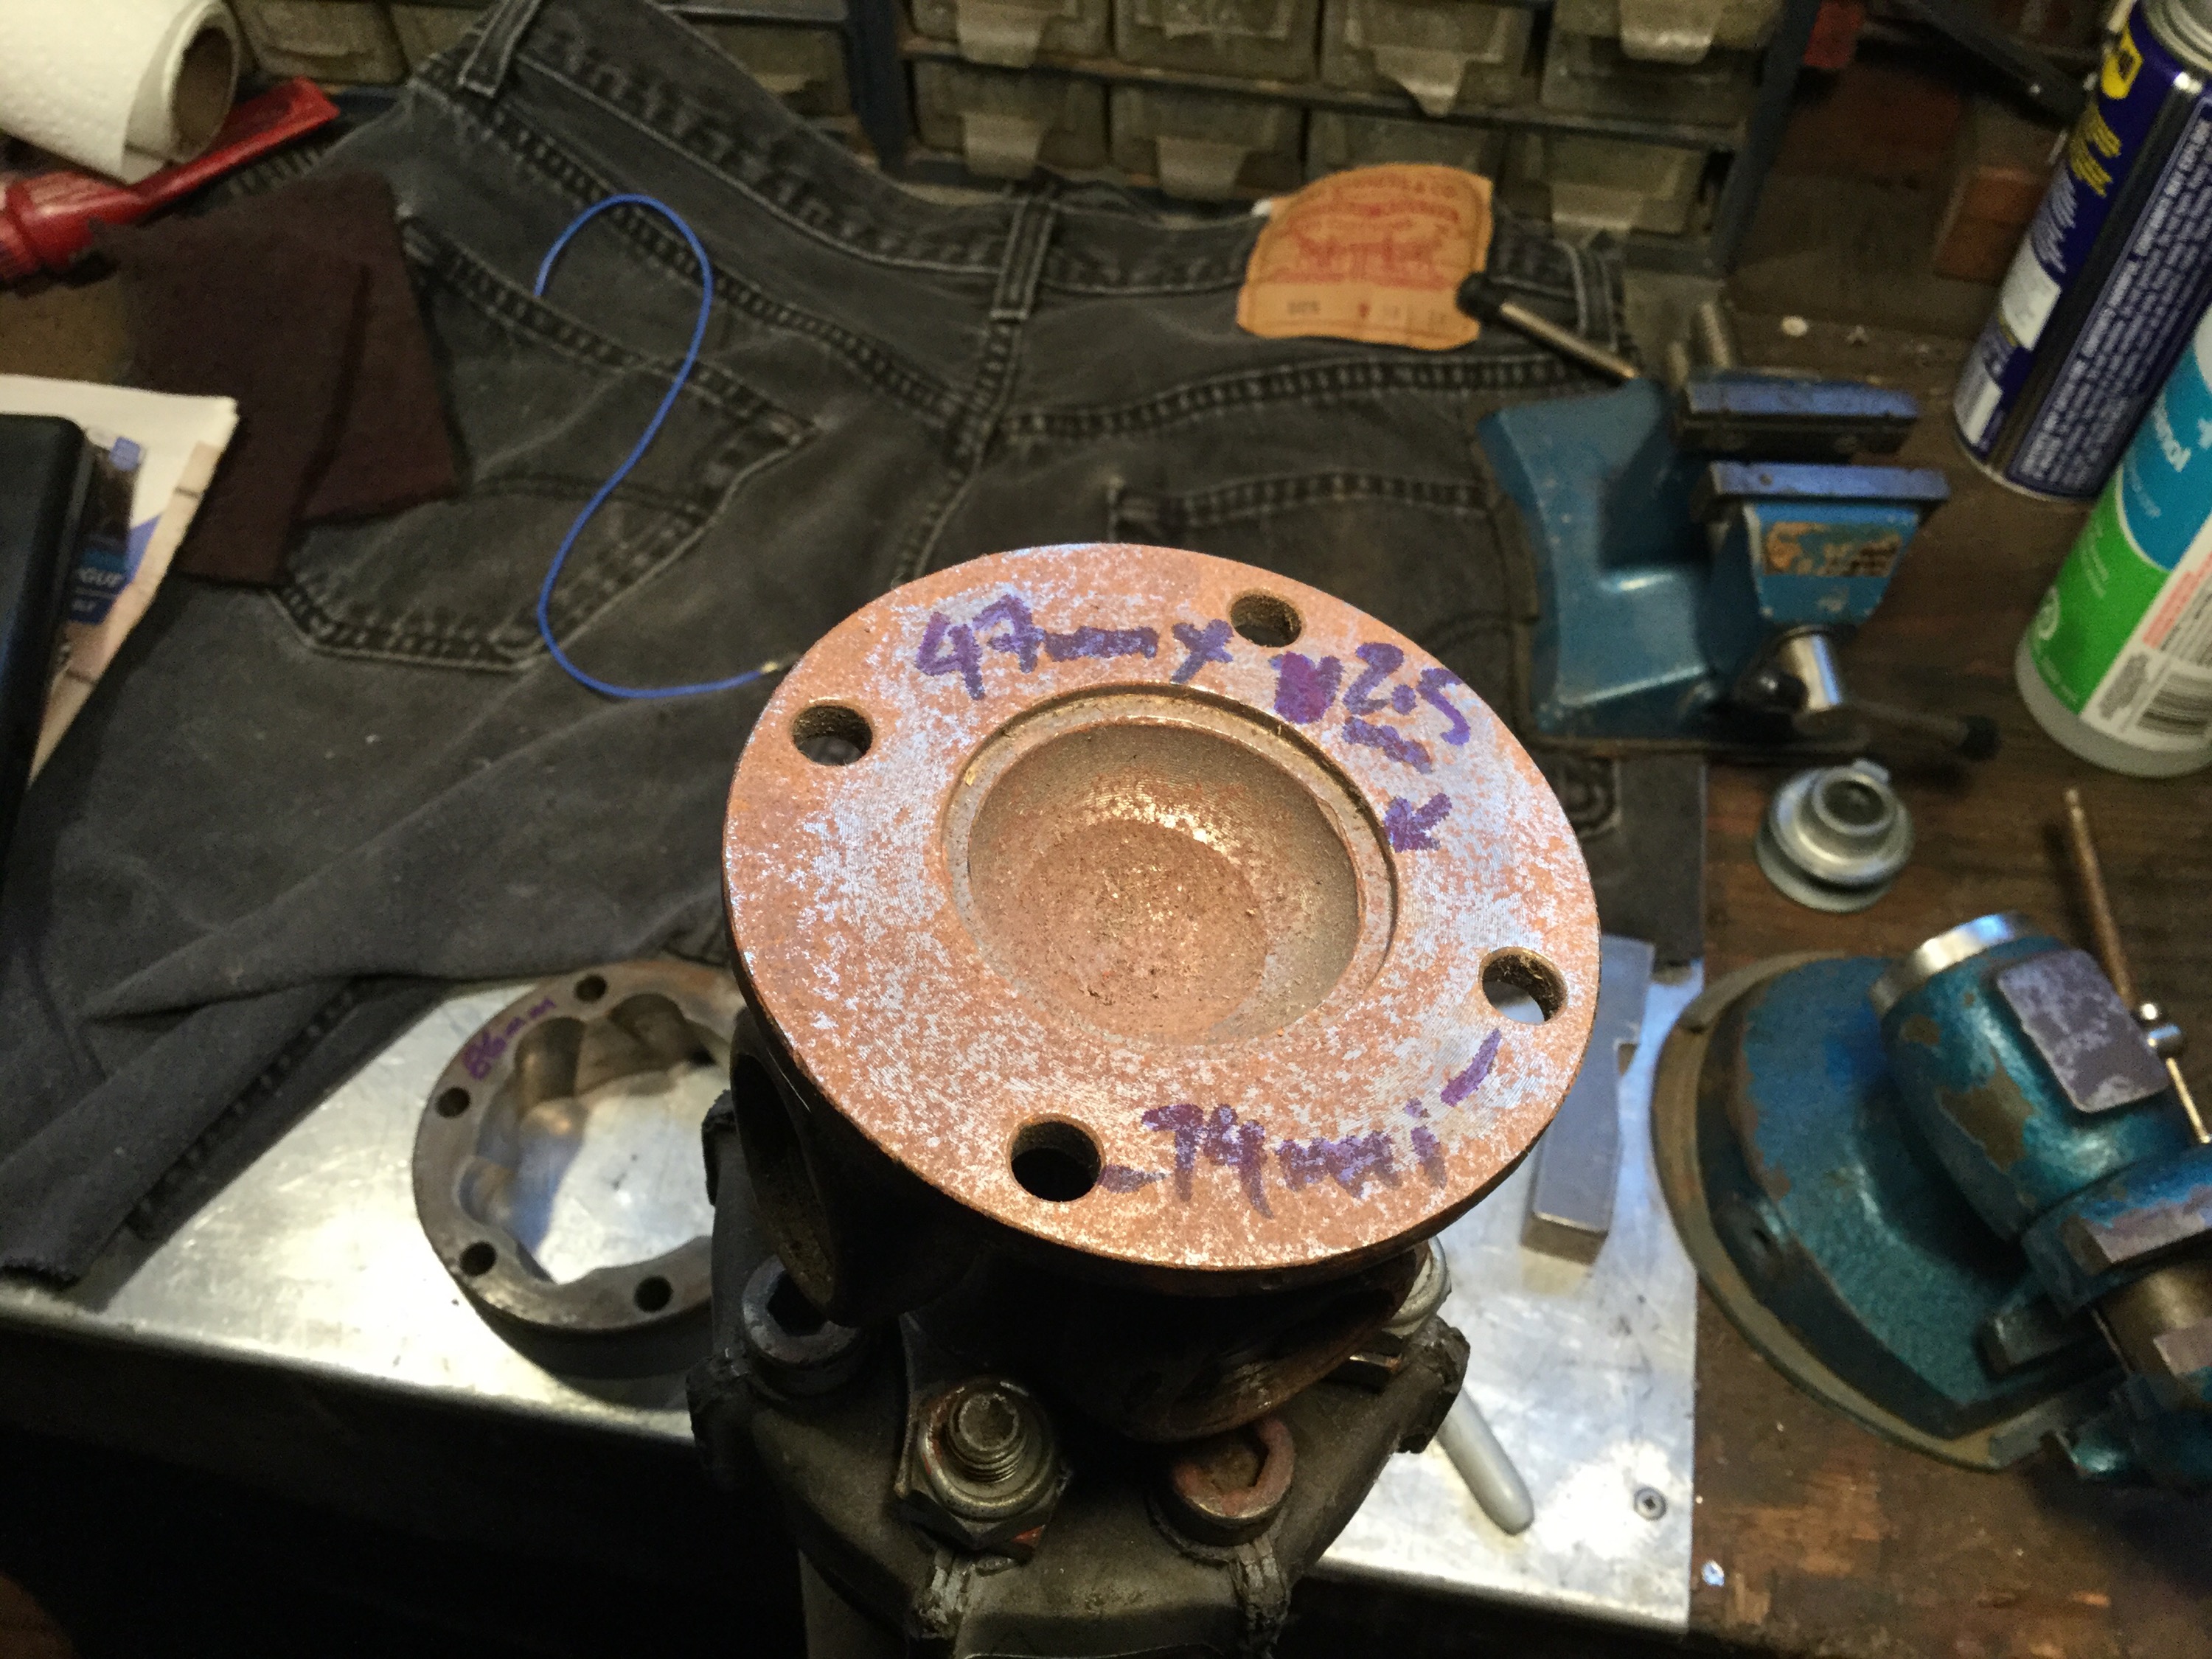
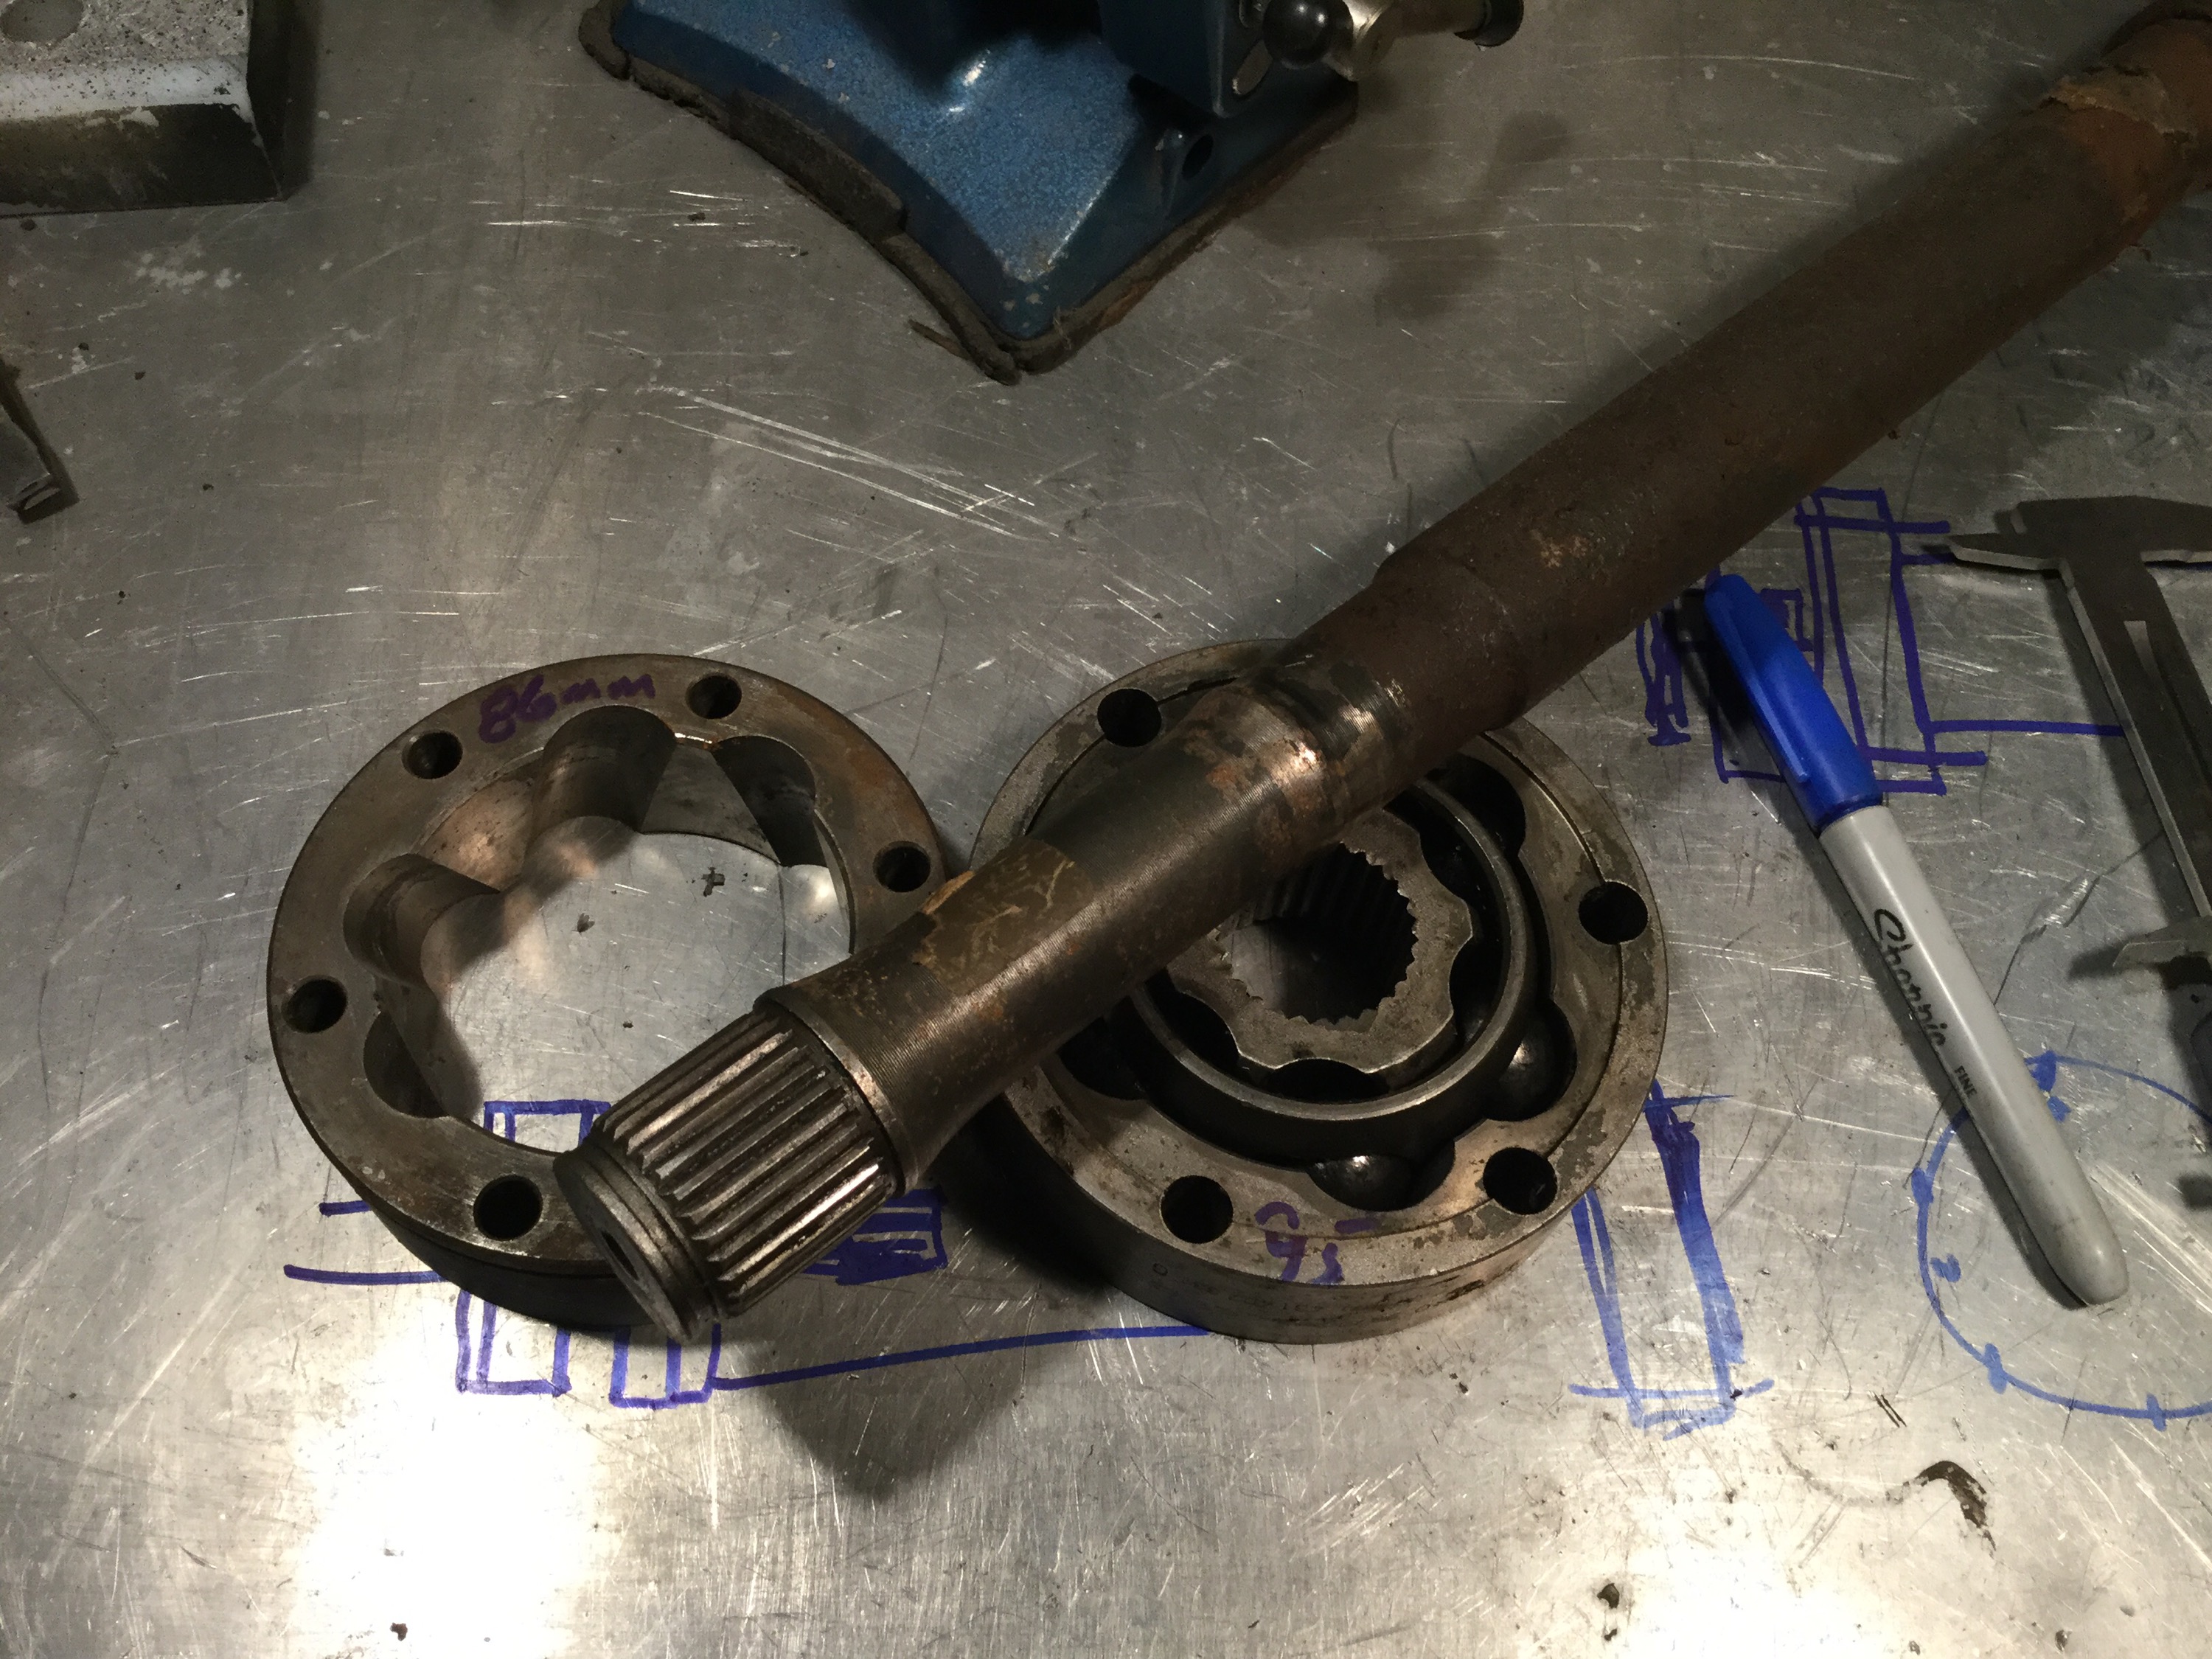
Stock 100mm diameter cv joint has a 6 on 86mm bolt hole circle.

A 108mm diameter CV joint, has a 95mm bolt hole circle.

I have the half shaft for that 108mm diameter CV joint. One could imagine cutting the spline section off and mounting it to a flange that mimics the stick propshaft flange, then the slides connecting to the 108mm diameter CV joint bolted to the propshaft. I hope you understand this is all just free thinking, just for discussion.
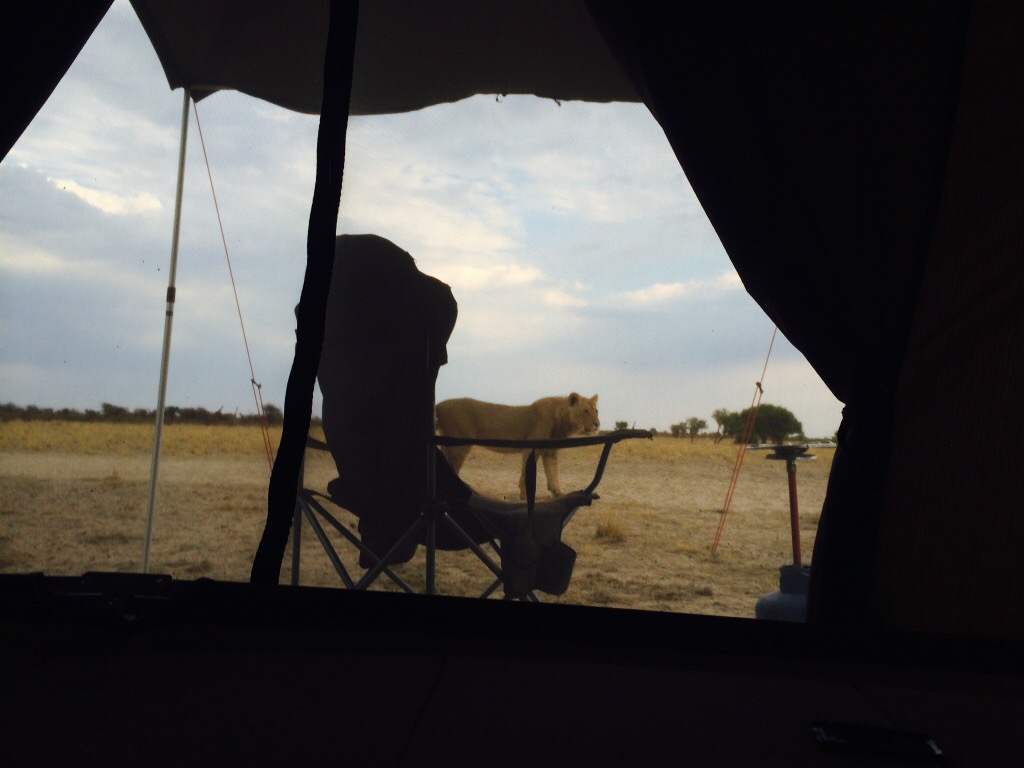
Syncro and lions in Botswana
Some more great shots from John B. in South Africa. Pictures a friend of his took while in Botswana.


Vanagon – soft shackles on tow points?
Posted by albell in syncro, vanagon, vanagon mods on July 30, 2015
It might be a good idea, it might not. 1/4″ Spectra soft shackle to be used on the rear tow points of my bumper. On this example I have yet to trim the tails, I need to give the shackle a good pull first. one nice thing is that they pack into small spaces unlike a steel shackle. Note: 1/4″ Spectra has breaking strength of 6,000 lbs. tests have shown a soft shackle doesn’t decrease strength (infact, it can be 175% of single line strength). But, 5/16″ Spectra tests at 9,000 lbs, might be better to use 5/16″.
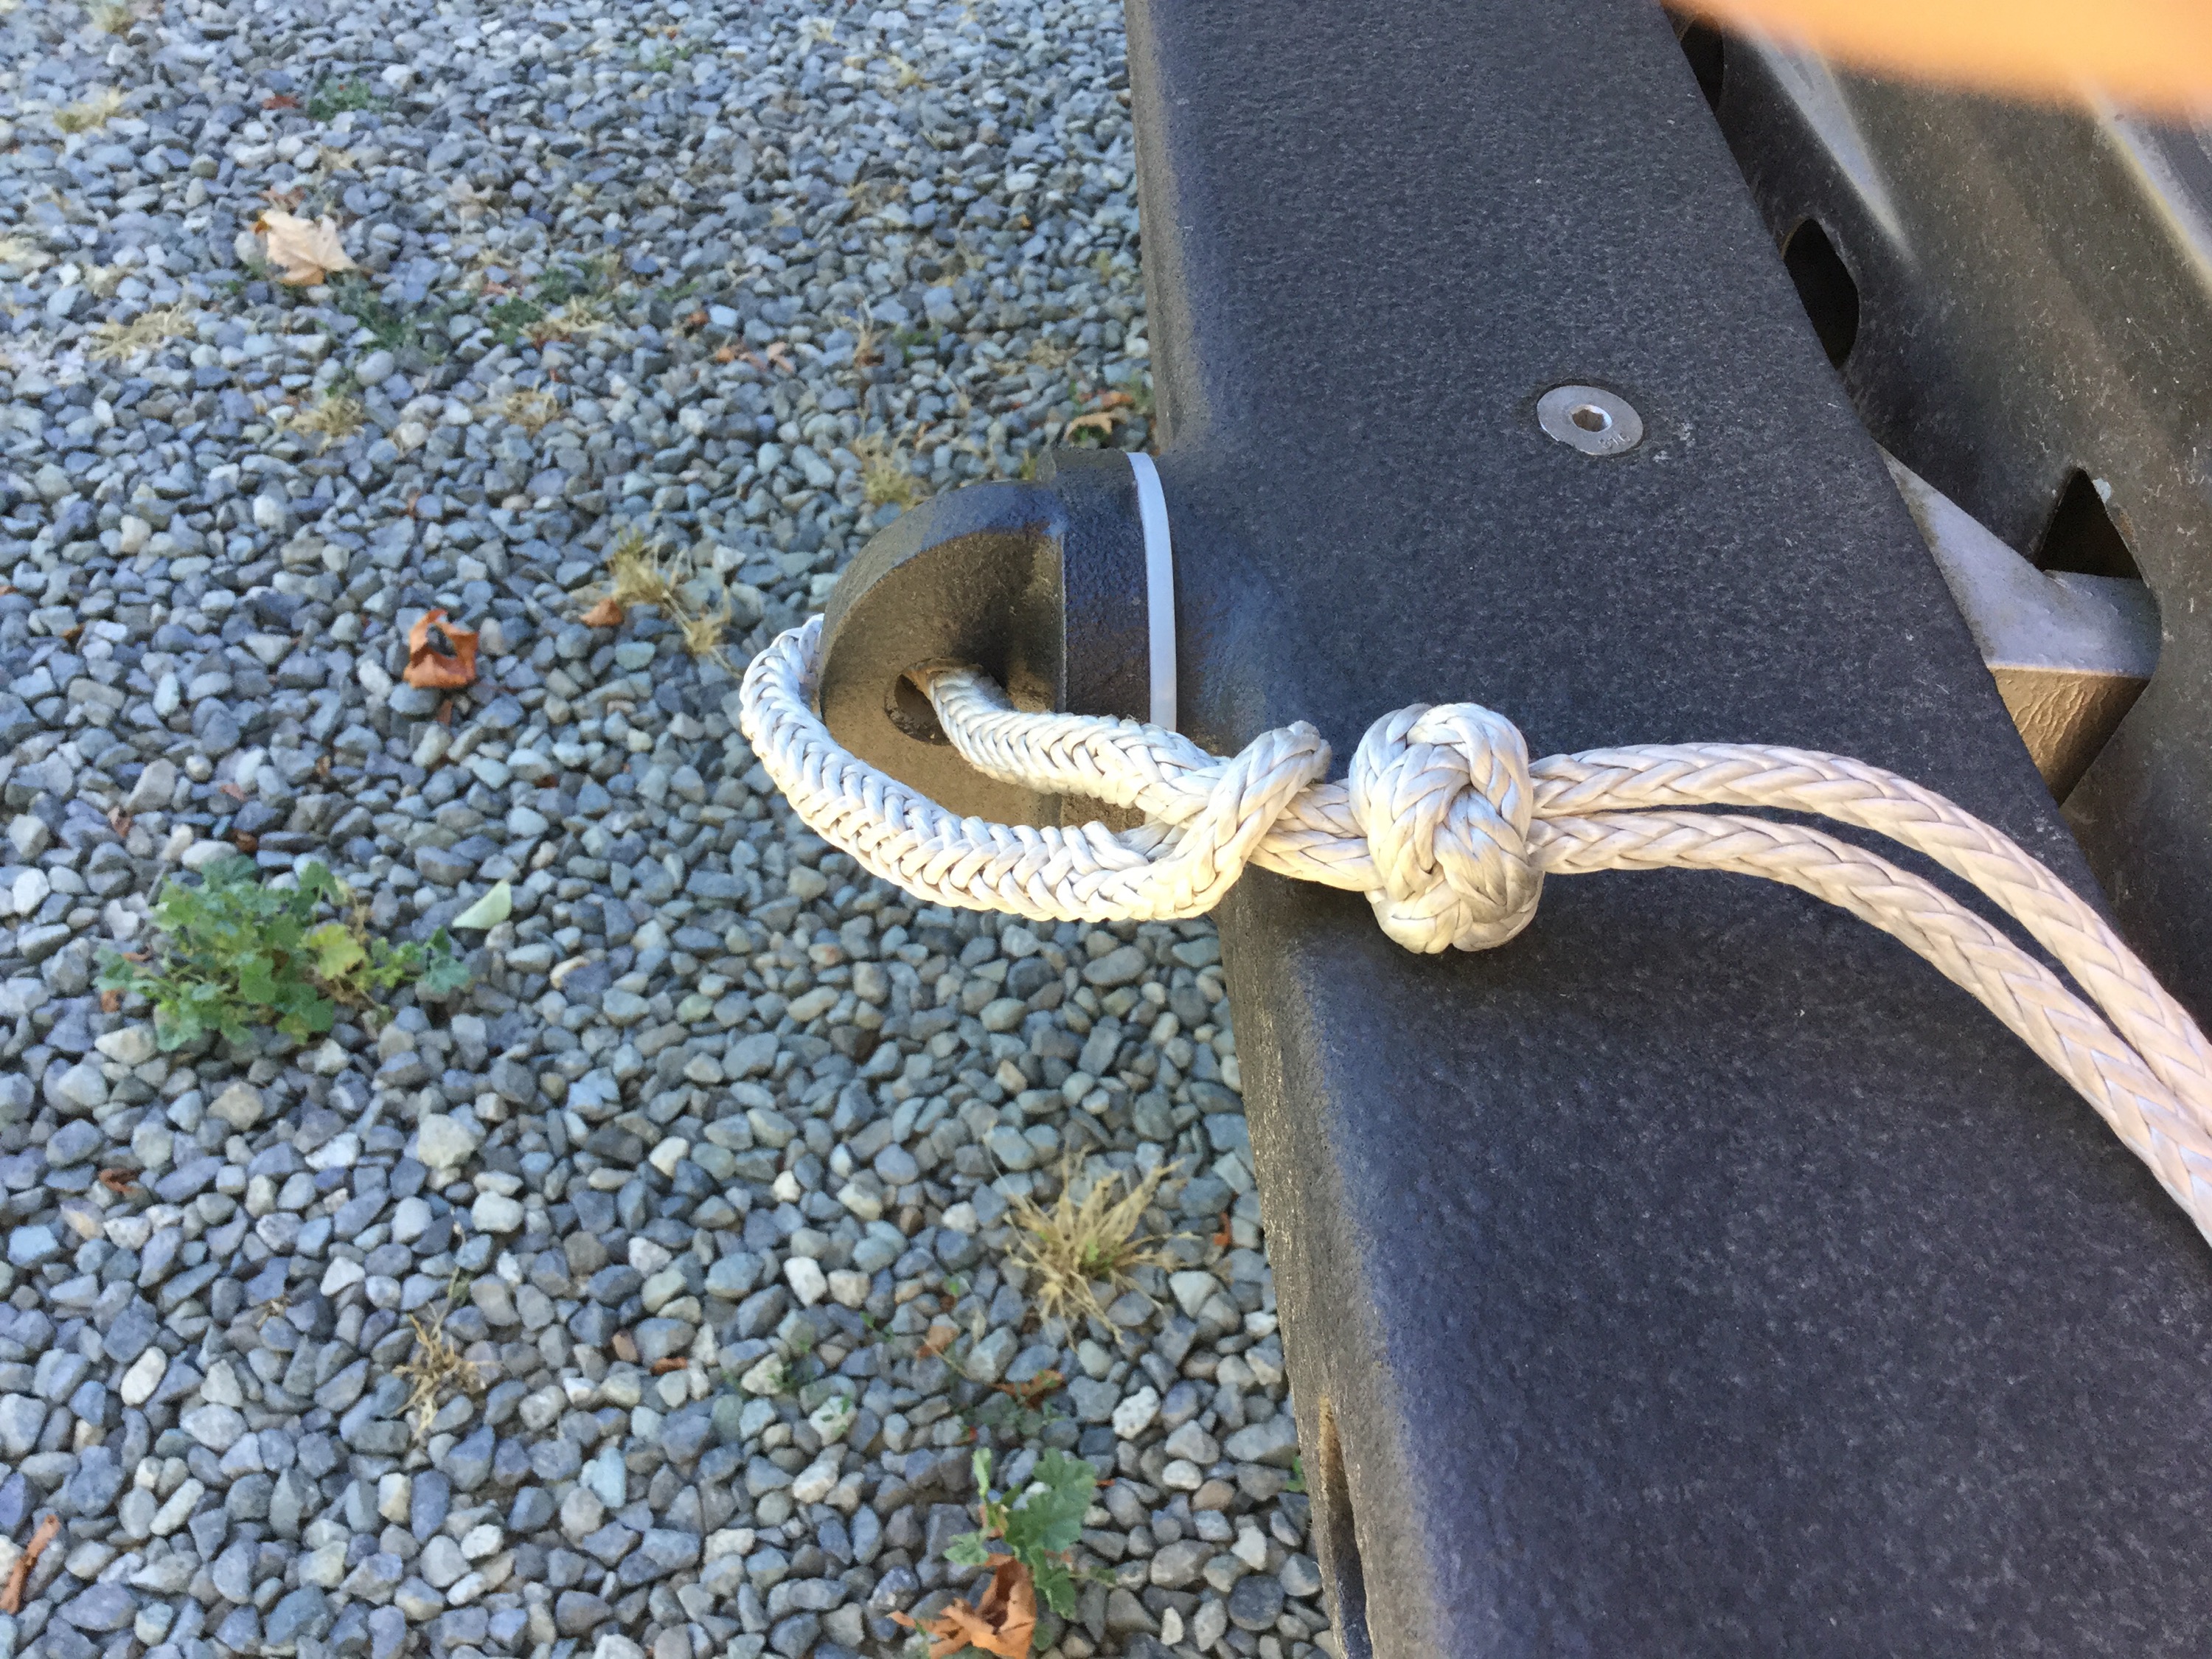
Here is link to instructions to tie this particular style.
Vanagon – front bumper build pretty well done
Posted by albell in syncro, vanagon, vanagon mods on July 22, 2015
I’ll get better pics and notes when I wire up the auxiliary lights on that light bar.


Vanagon – hatch mounted spare tire carrier
Posted by albell in syncro, vanagon, vanagon mods on July 12, 2015
Last spring I finally gave up on my swing away tire carrier project. I couldn’t get it stiff enough for my liking. I’ll post something about that fandango and my new front bumper later. The stock location for the spare was taken over by the big assed battery so I have been using a paulchen rack to carry my spare. I really didn’t like that and last week I made a quick and dirty aluminum ladder type rack to carry the spare. I’m going to give it a bit of testing before clean up and painting, then I will post more on construction details etc.


Trip – Cor, what a scorcher!
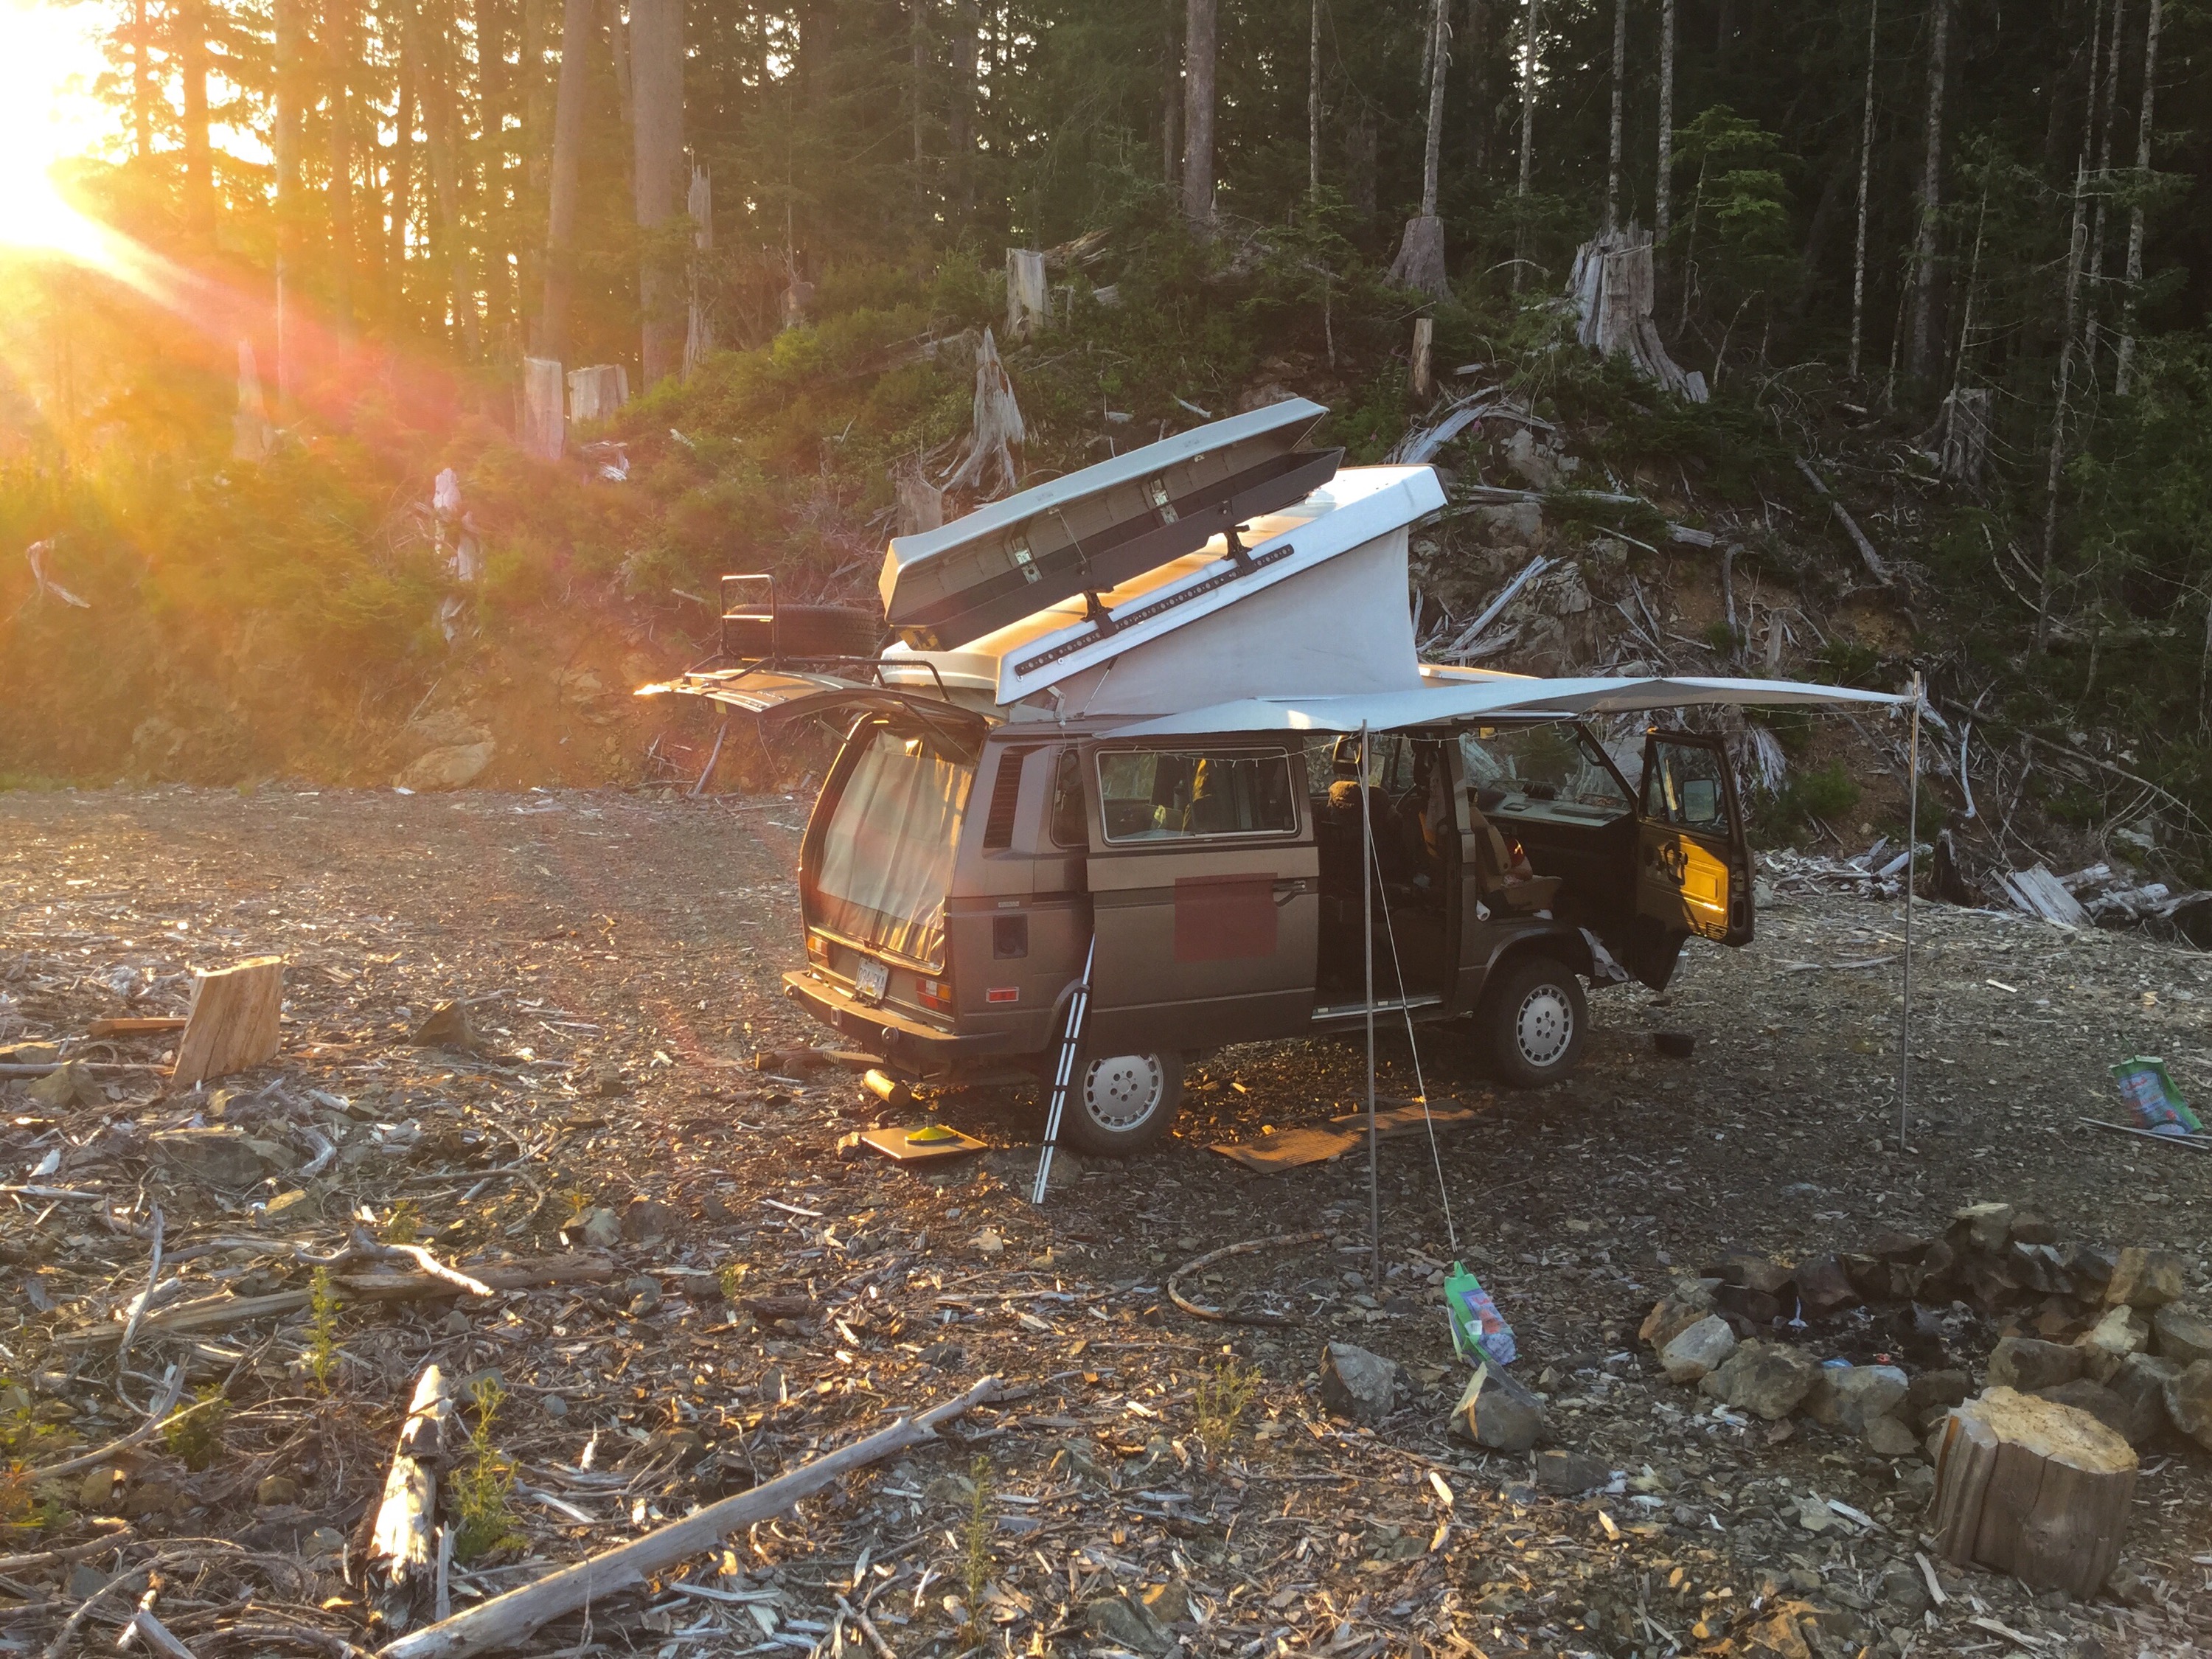
Headed out Saturday morning with thoughts of the high spot campsite to catch a breeze and maybe see the Fourth of July fireworks over on Neah Bay. It has been an incredibly dry and hot summer here and the forecast was for mid 30C in the area we were heading to.

Started looking for fireworks early
It was hot and for some reason there were a lot of horseflies and deer flies around. I have to get one of the those electric fly swatters. Nearby pond was so nice, warm, peat infused water. Left you feeling very clean and refreshed. We were back and forth to the lake for a dip a few times.
Still looking for fireworks. Well no, actually we could smell smoke when we arrived, we were wondering where the fire was.

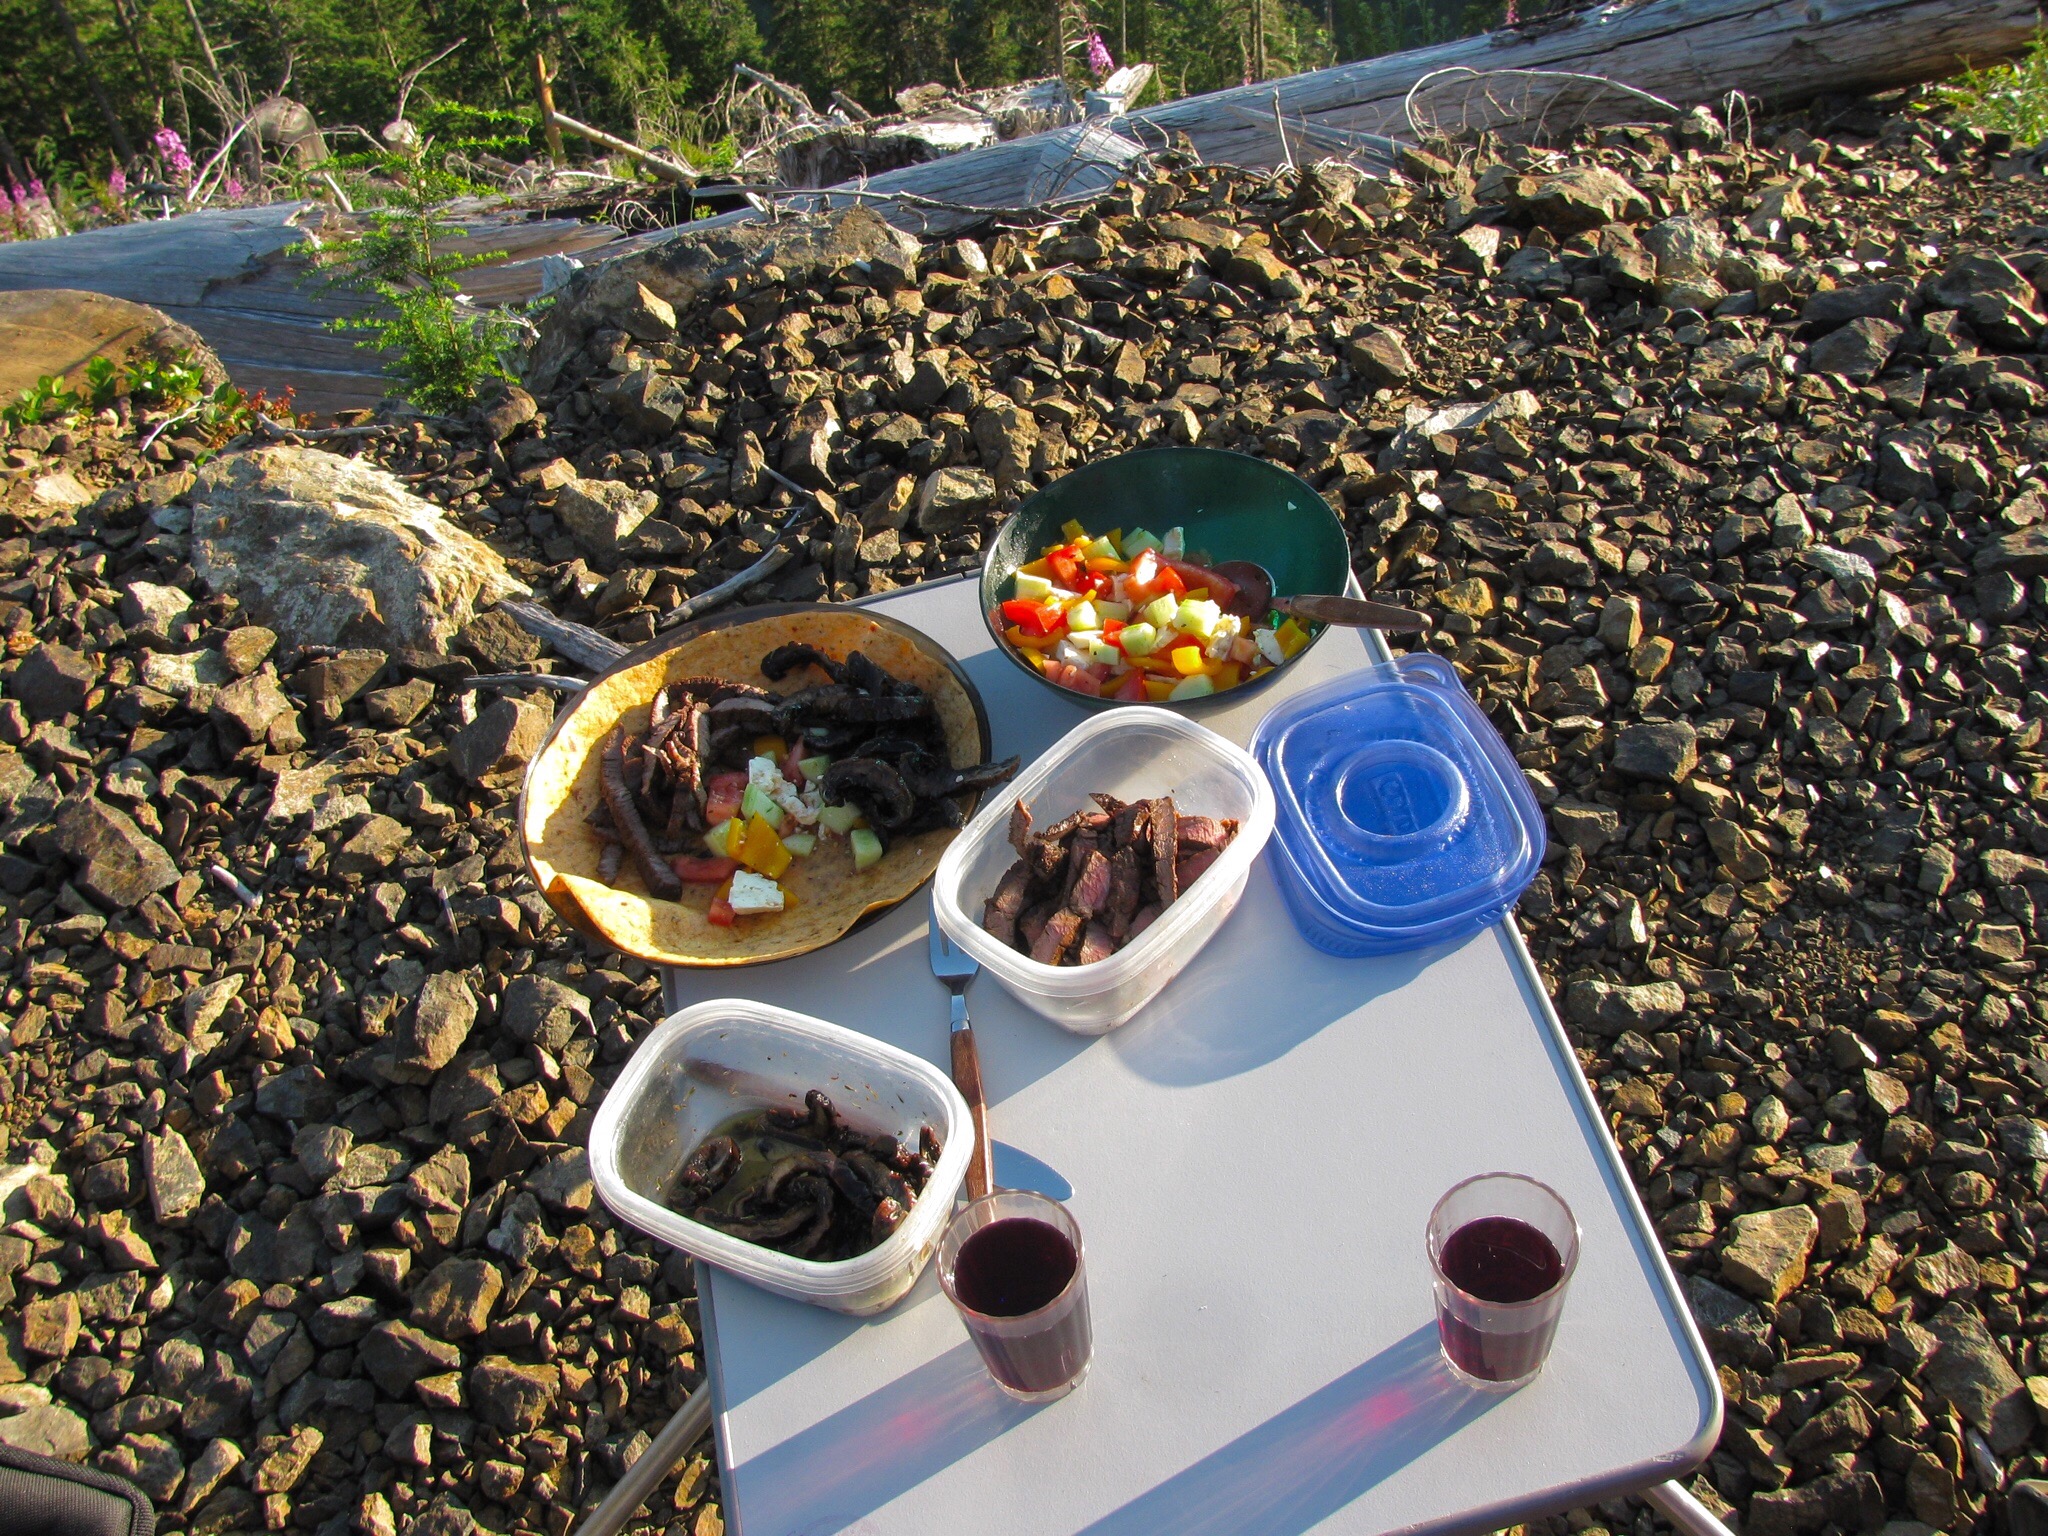
There was, and I think still is, a complete fire and BBQ ban in the back country, so we had pre cooked the food for supper. Grilled meat, grilled and marinated porcini mushrooms, a simple salad, all on a store bought tortilla.
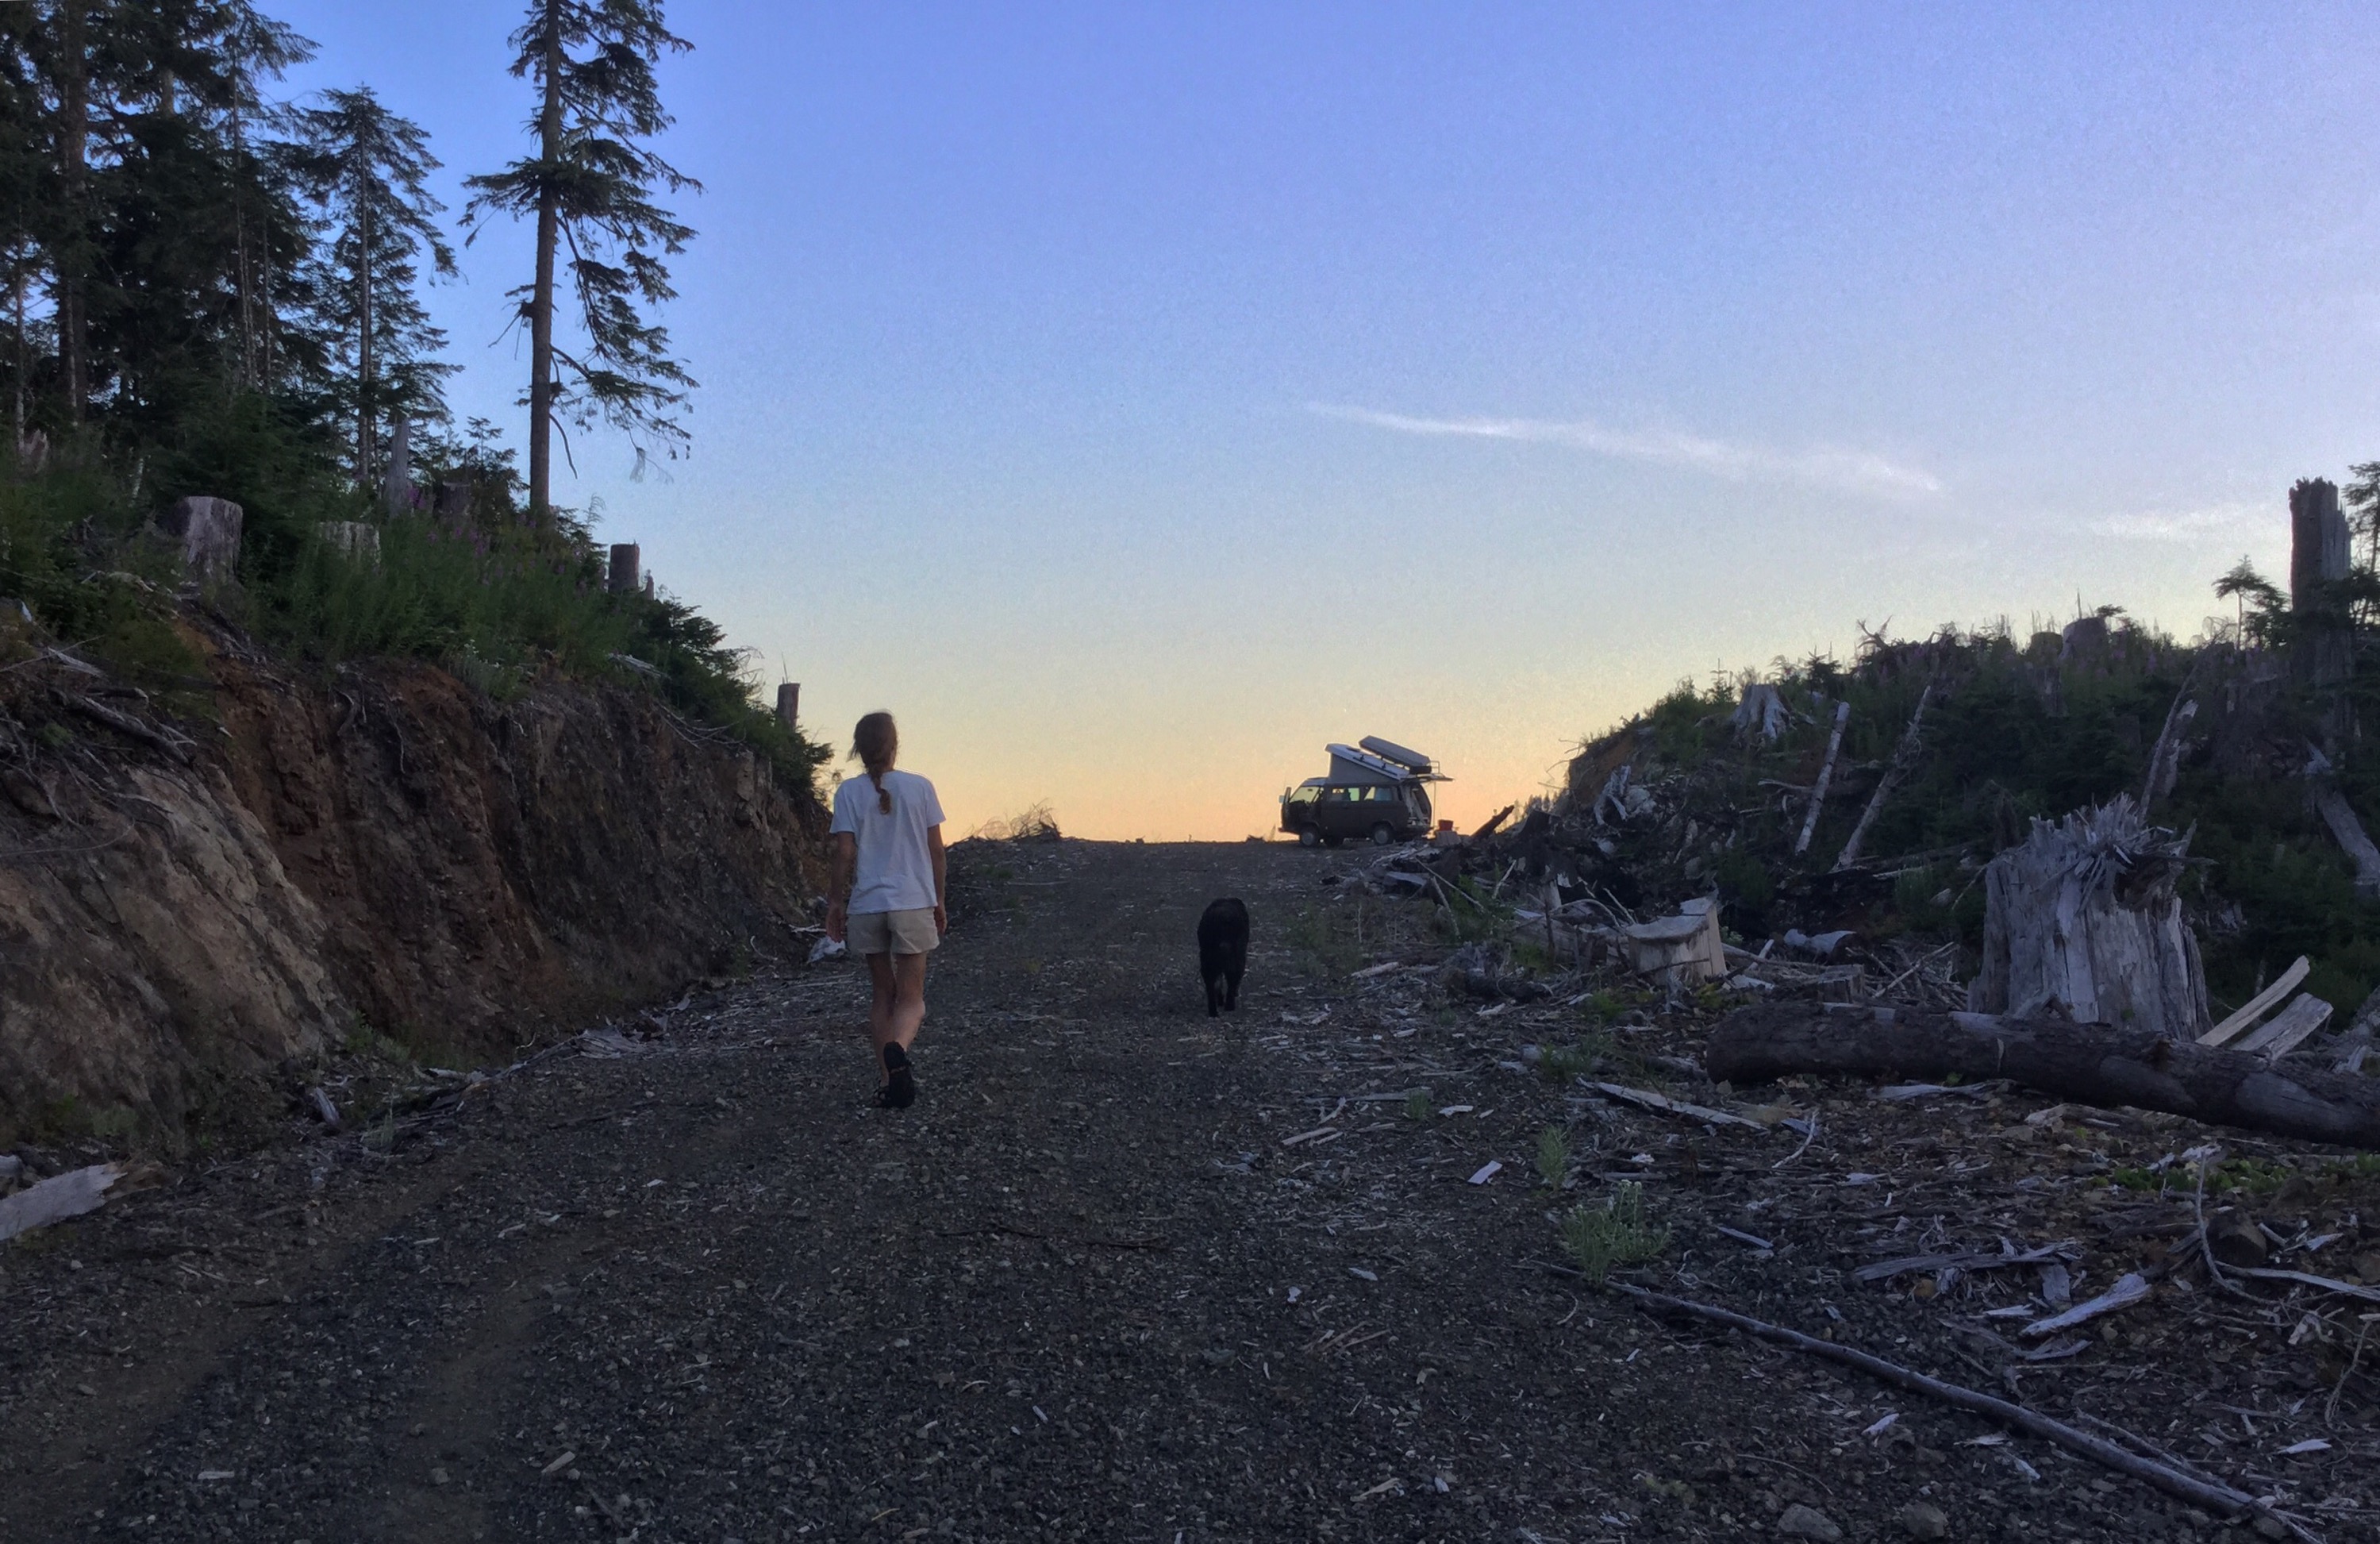
After dinner walk and then back for the fireworks. Yeah, you probably are expecting pictures of the fireworks, but Neah Bay is 20+km from where we were and while we could see them, and believe it or not we could hear them, I couldn’t get a picture.

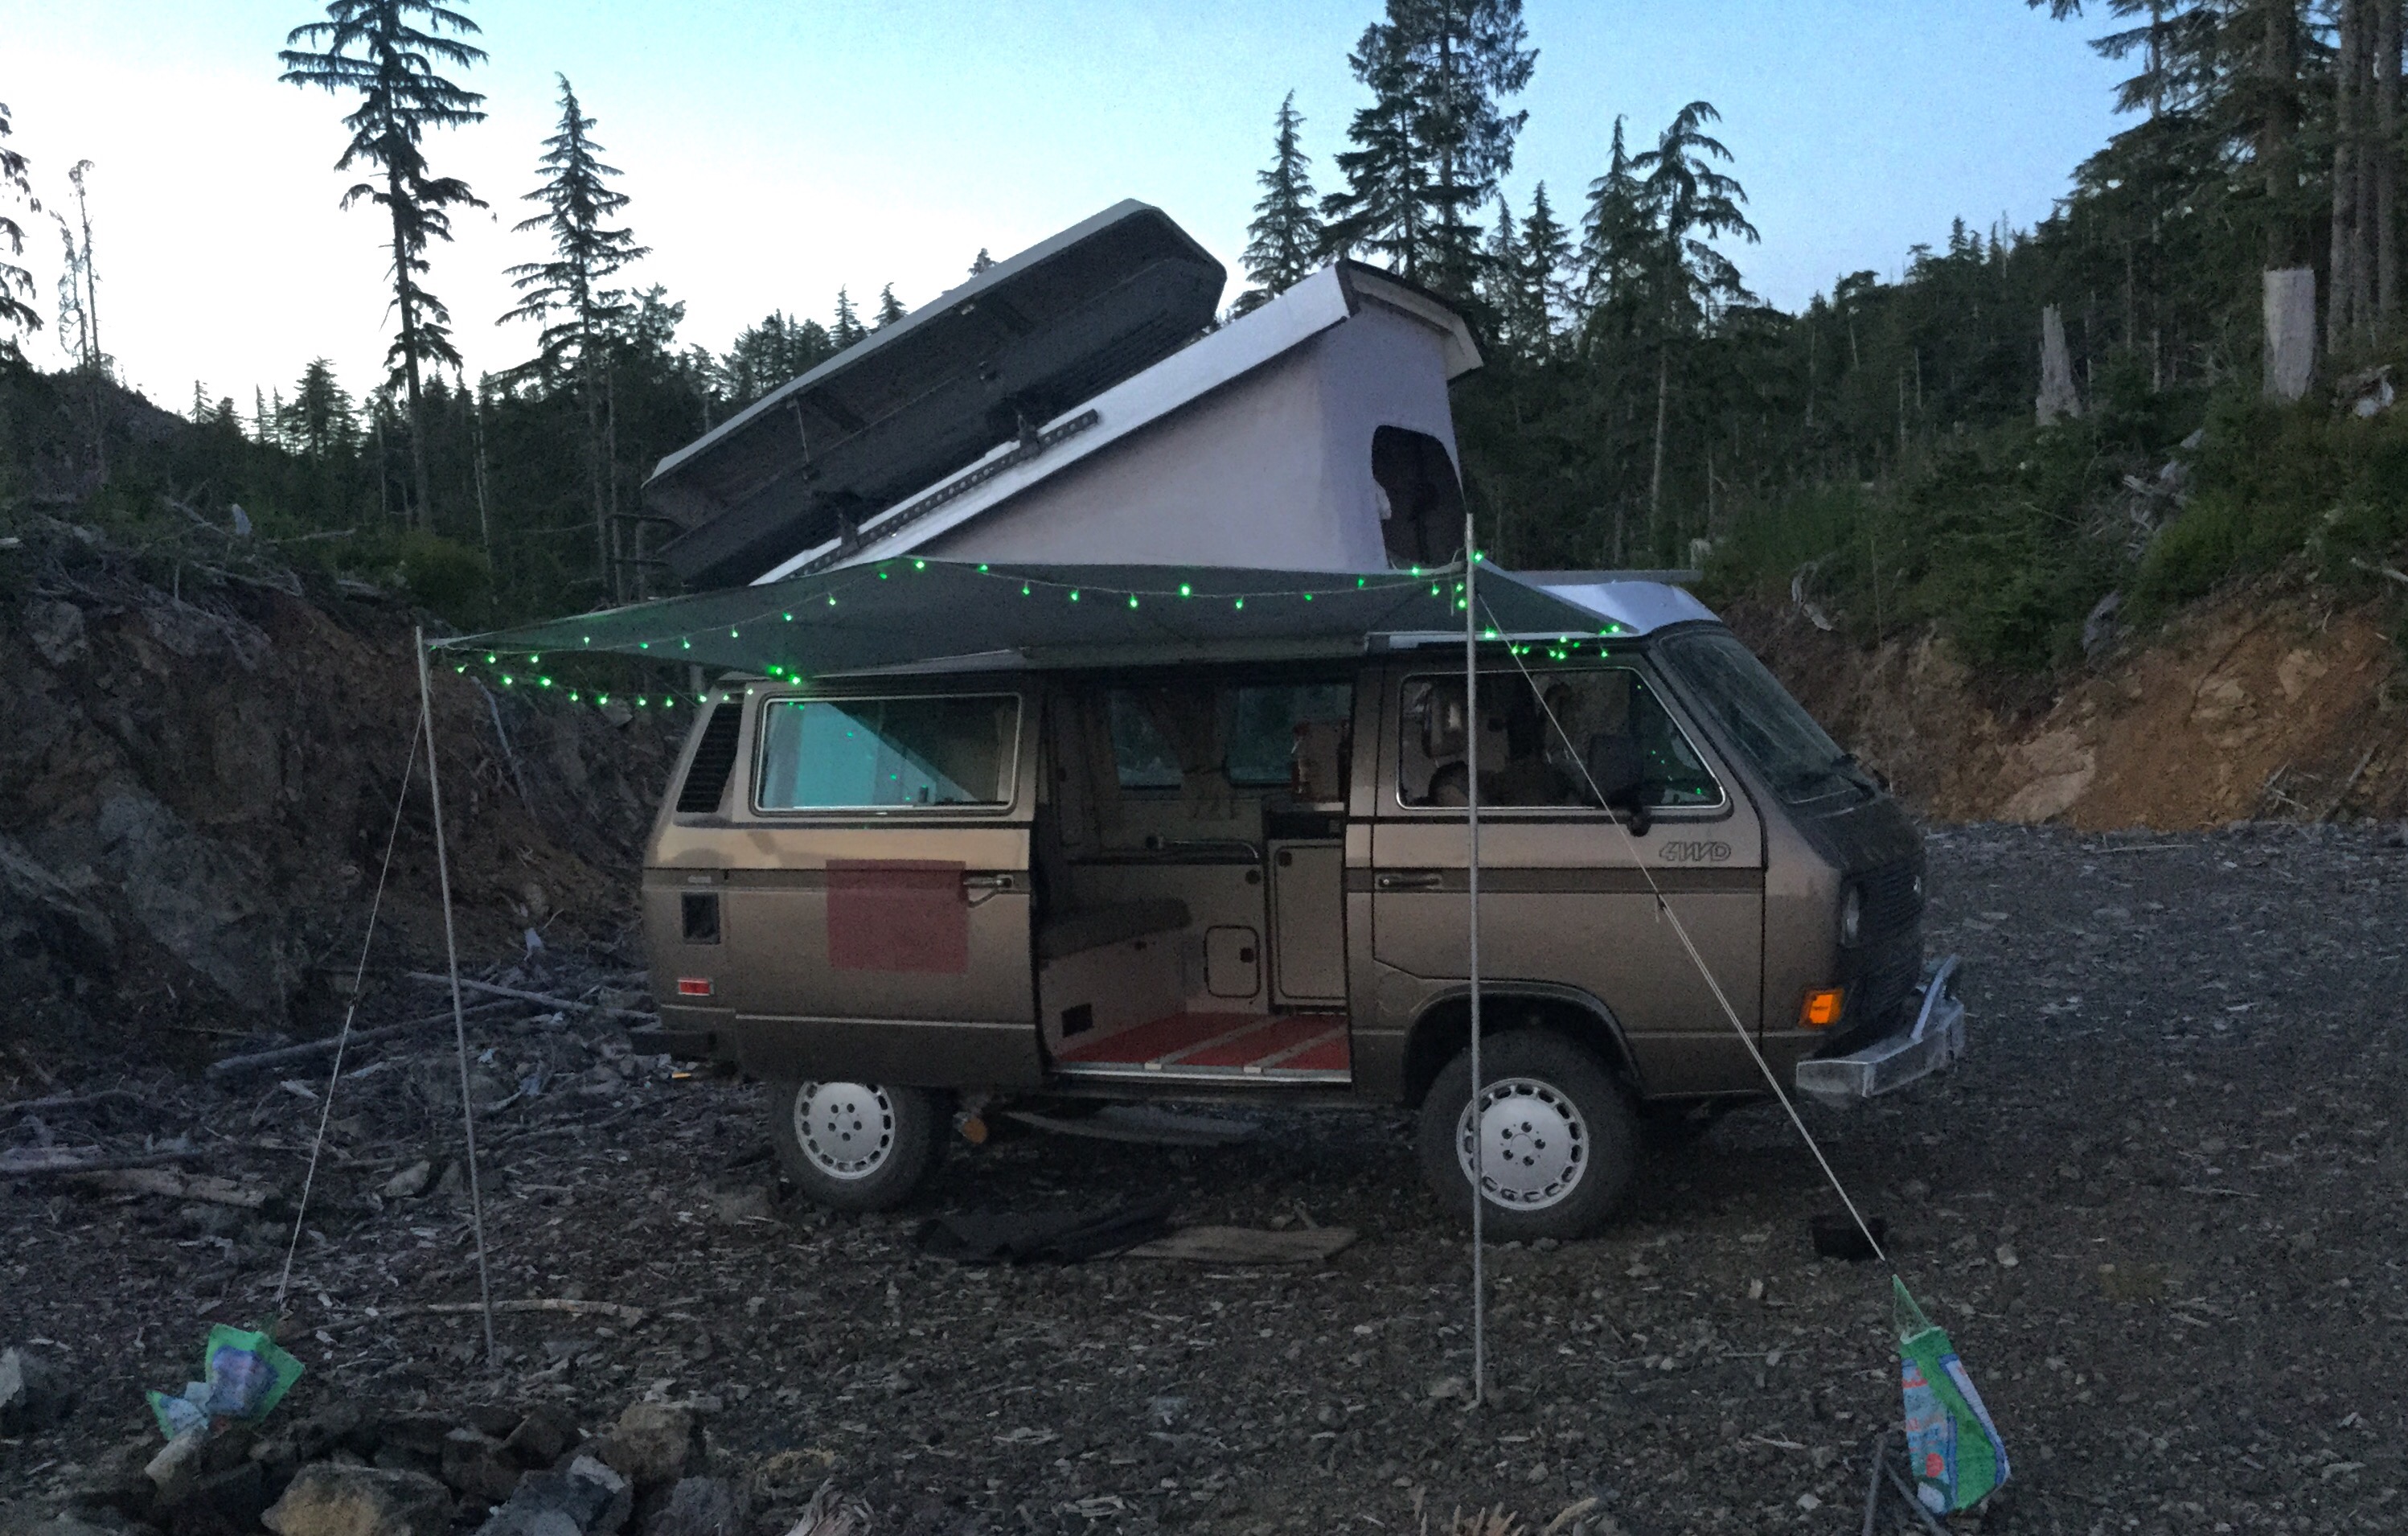
So I put up some battery powered Xmas lights for a small attempt at acknowledging the southern neighbour’s celebration.

In the middle of the night we noticed the moon was hazy, was it fog or smoke?
Next morning about 6:30 am, eastern sky was reddish.
Nice shot of Jake.

The smoke haze was moving in form the east.

And got worse.

At times like this, toast is the answer.

We packed up and decided to go exploring. The smoke haze changed the light in a strange way. Some things took on a sepia tone, but the greenery really popped out. Explored along Braden Creek, Loup Creek, got tuned back at the gate on the road near the abandoned Gordon River logging camp, doubled back to Port Renfrew and stopped at the Gordon River a few km upstream of the marina. The point and shoot camera really exaggerated the sepia tone. The iPad Air II not so much.
Braden Creek

And the very low Gordon River

Canon PowerShot camera really made a meal of the tinted light.


On the way home we stopped at “Shirley Delicious” coffee shop in… Shirley. Good stuff. The new wheel and tire combo worked outs great. The tires have a much, much smoother and less jarring ride than the old ones. Traction was better although on some stretches of road it is like driving on ball bearings. I didn’t notice the slight gearing handicap with the larger (5 or so percent?) diameter tires on the rough roads, but did notice it a little on some steep paved grades.
Oh, and once home we found out where the smoke was coming from. Most of it was from Pemberton over on the mainland. Some might have been from the fire at Sproat Lake near Port Alberni here on the island. An inversion layer in the atmosphere kept the smoke contained. I found this, and I admit it looks a bit dubious, satellite pic taken yesterday, Sunday the fifth.

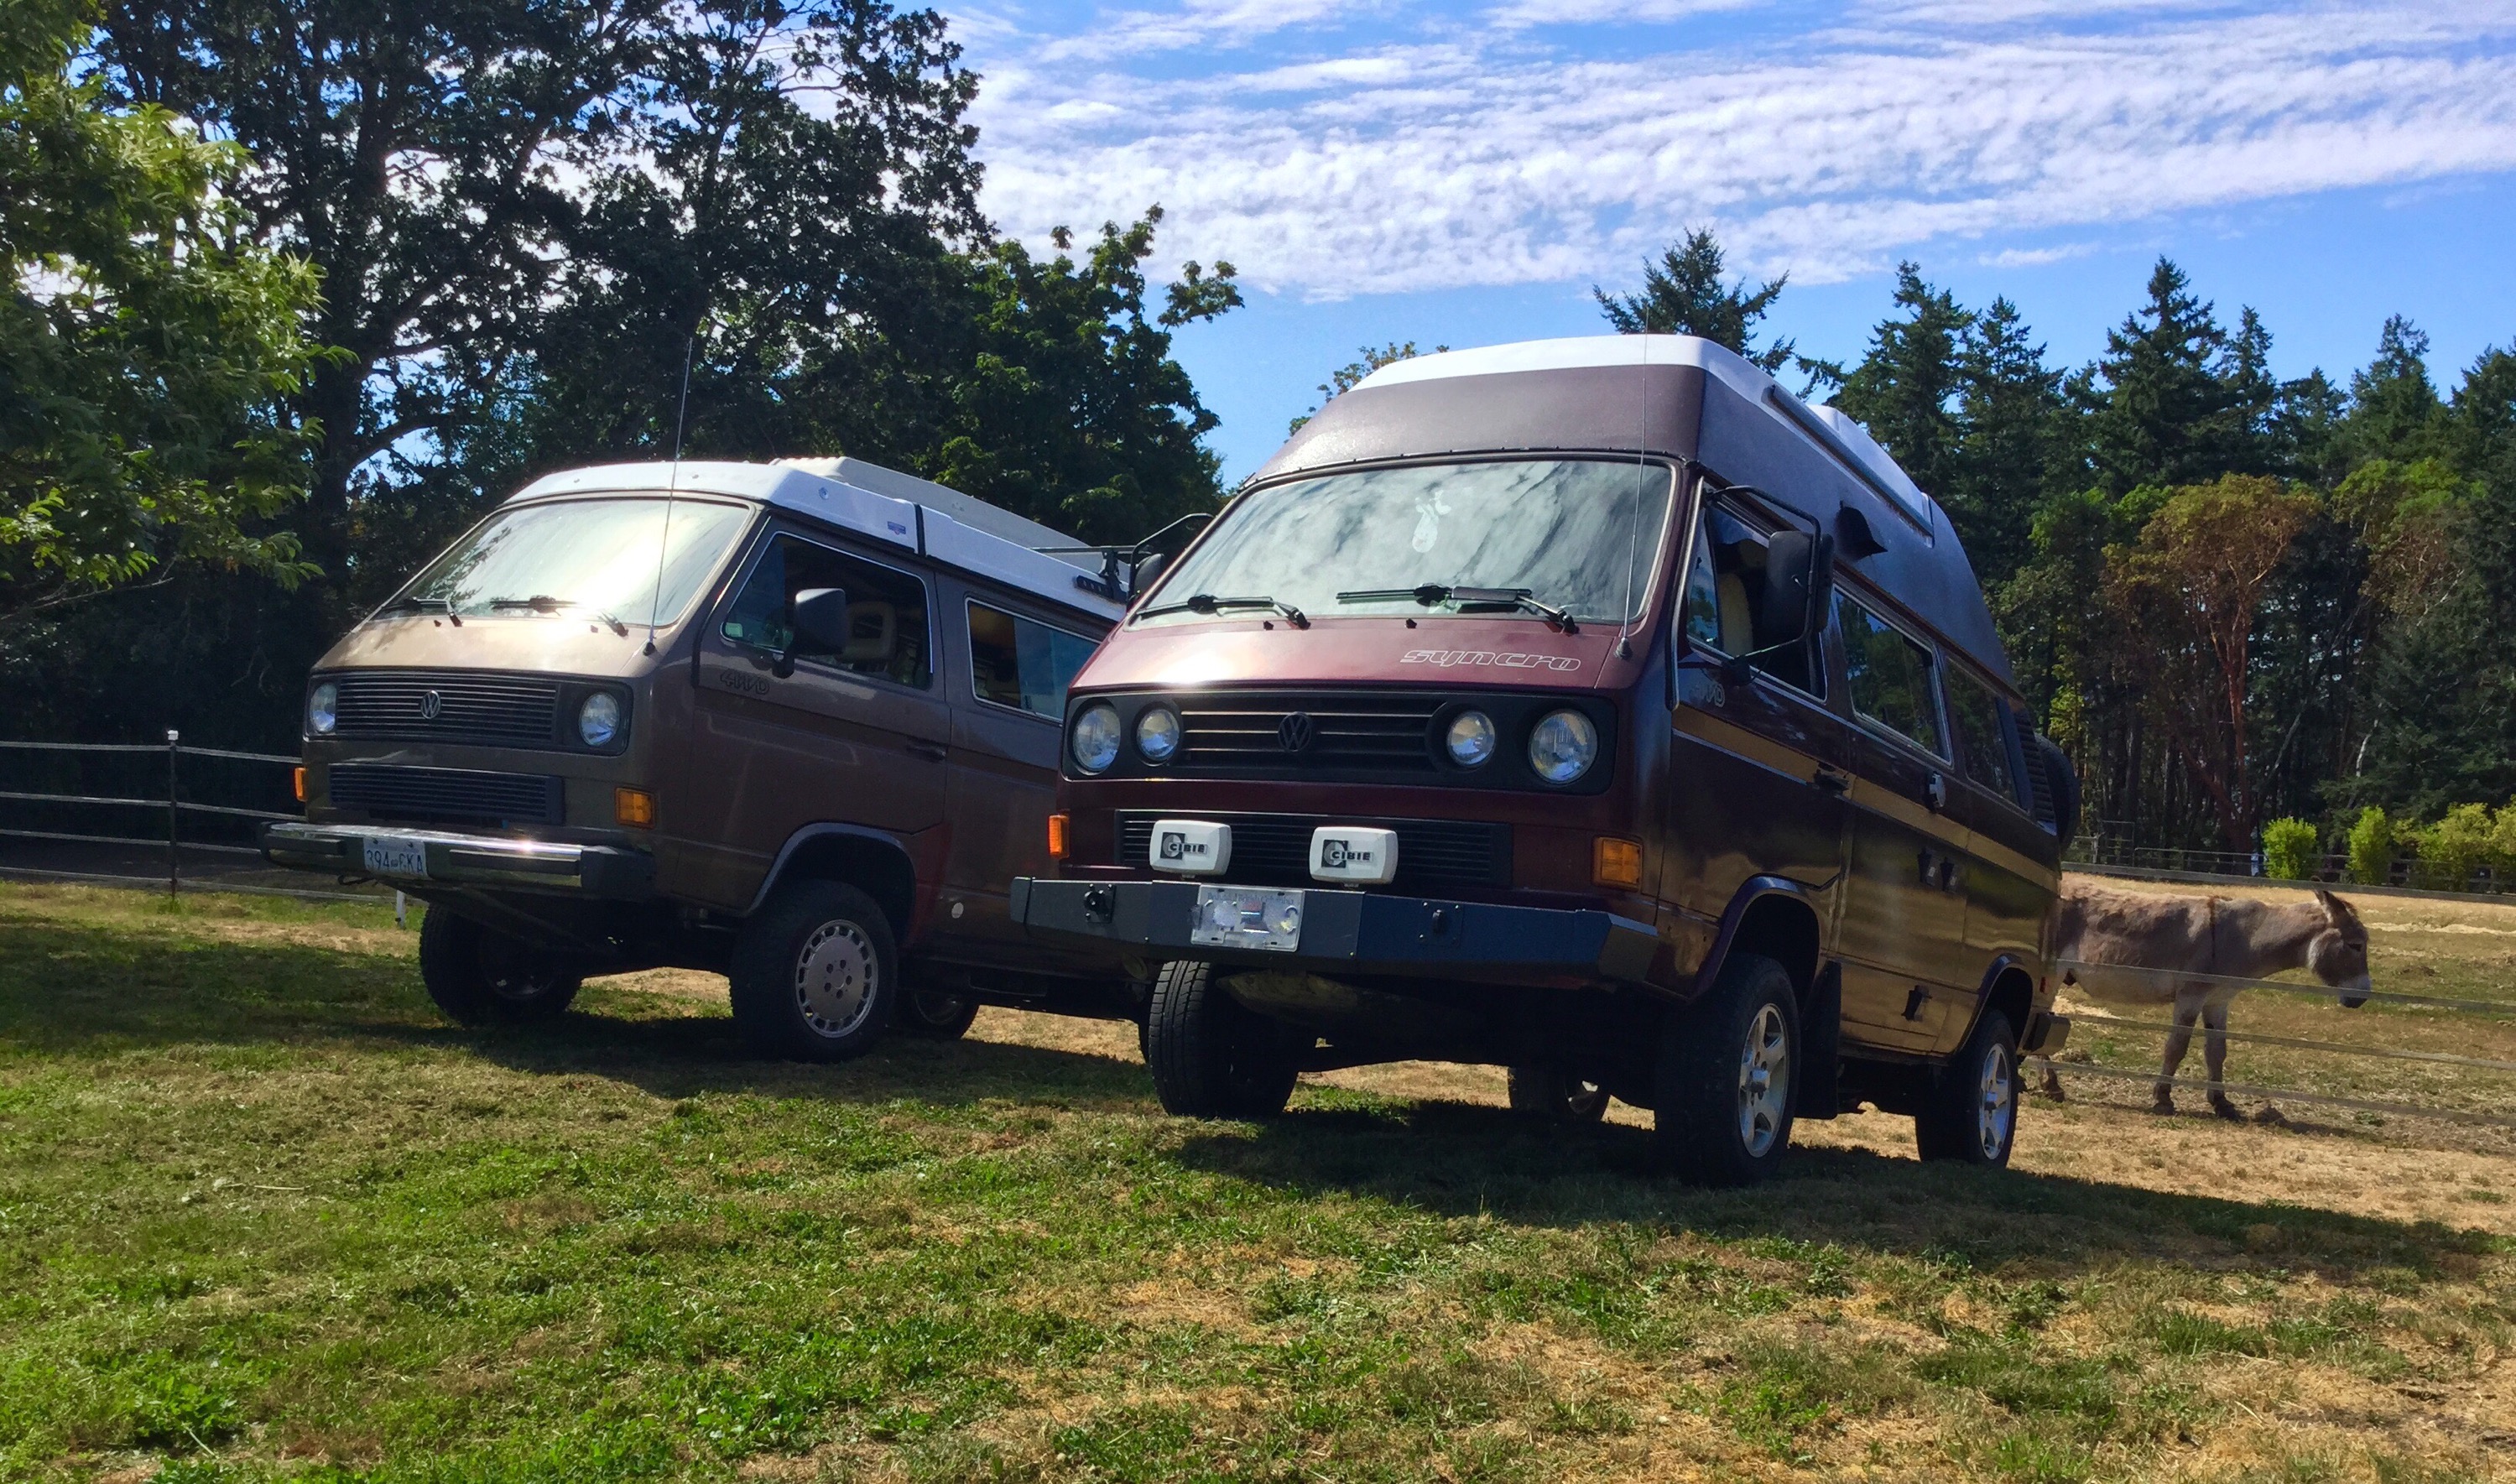
Vanagon – two syncros and a donkey
My rough 86 and good friend Simon’s 91 hightop. And an old donkey.
Vanagon – some notes on new wheel install
Posted by albell in syncro, syncro specific repairs, vanagon, vanagon mods on June 26, 2015
i bought the Mercedes alloy wheels last year. They weren’t my first choice, I wasn’t really sold on the flat face look. But the price was right ($100 for 4) and I thought the offset of 25 might work out for me. The ideal offset would have been 30mm, but folks have successfully used ( without wheel spacers) wheels with offset of 37mm on the syncro. Mind you I think those wheels were narrower than 7″.
The whole subject of wheel choice can be confusing. Chris at T3 Technique has good information (link) and there is a very lengthy Samba thread on the topic.
With the alloys having an offset of 25mm I wasn’t concerned about clearance issues with suspension components but I was a little nervous about how much space there would be between the sliding door and the passenger side rear tire. As it turned out there is a good 3/8″ – 1/2″ space between tire and door.
Some time after I bought the alloys, good friend Simon bought a set of Mercedes 15″ steel wheels. 6.5″ wide, offset of 37mm. He offered them to me, we thought that maybe the black steel wheel look would work on my van. If they did both of us would use one of the alloys as a spare, if not then the steelies would be out spare. Simon needs a better rin for his spare.
I had one of each type mounted with tire and compared them on the van. The alloys won. The clearance between the steel wheel and both the front and rear suspension components was tighter than the alloy.
As the alloy wheels have a thicker cross section where the wheel studs locate I had to get longer studs. Well on the rear wheels anyway. The studs are a tad longer on the front wheels so I left them stock. I measured and determined I had 8.75 turns on the lug nut on the stud as it tightens up to the wheel. The thread size is M14X1.5 so that gives 13.13mm of engagement which I think is sufficient . Replacing the front studs on the syncro is a pain. Note that various alloy wheels differ in thickness in this area, some are quite thick.
I got the longer studs from Chris at T3 Technique, hands down the best source for wheel hardware. I had a spare set of rear hubs so I had the studs pressed in, sitting around waiting until I got off my duff.
Also, the lug nut seats on the Mercedes alloys were the small ball type, the stock steel wheels on the Vanagon use large ball seats. So I had to buy some new lug nuts and yes I got them from T3 Technique. Here is a pic comparing the stock Vanagon lug nut to the lug stud that came with the alloy wheels.

And one more thing to do. The Mercedes alloys are drilled for 12mm studs. The Vanagon uses 14mm studs. I enlarged the holes with a 37/64″ drill.
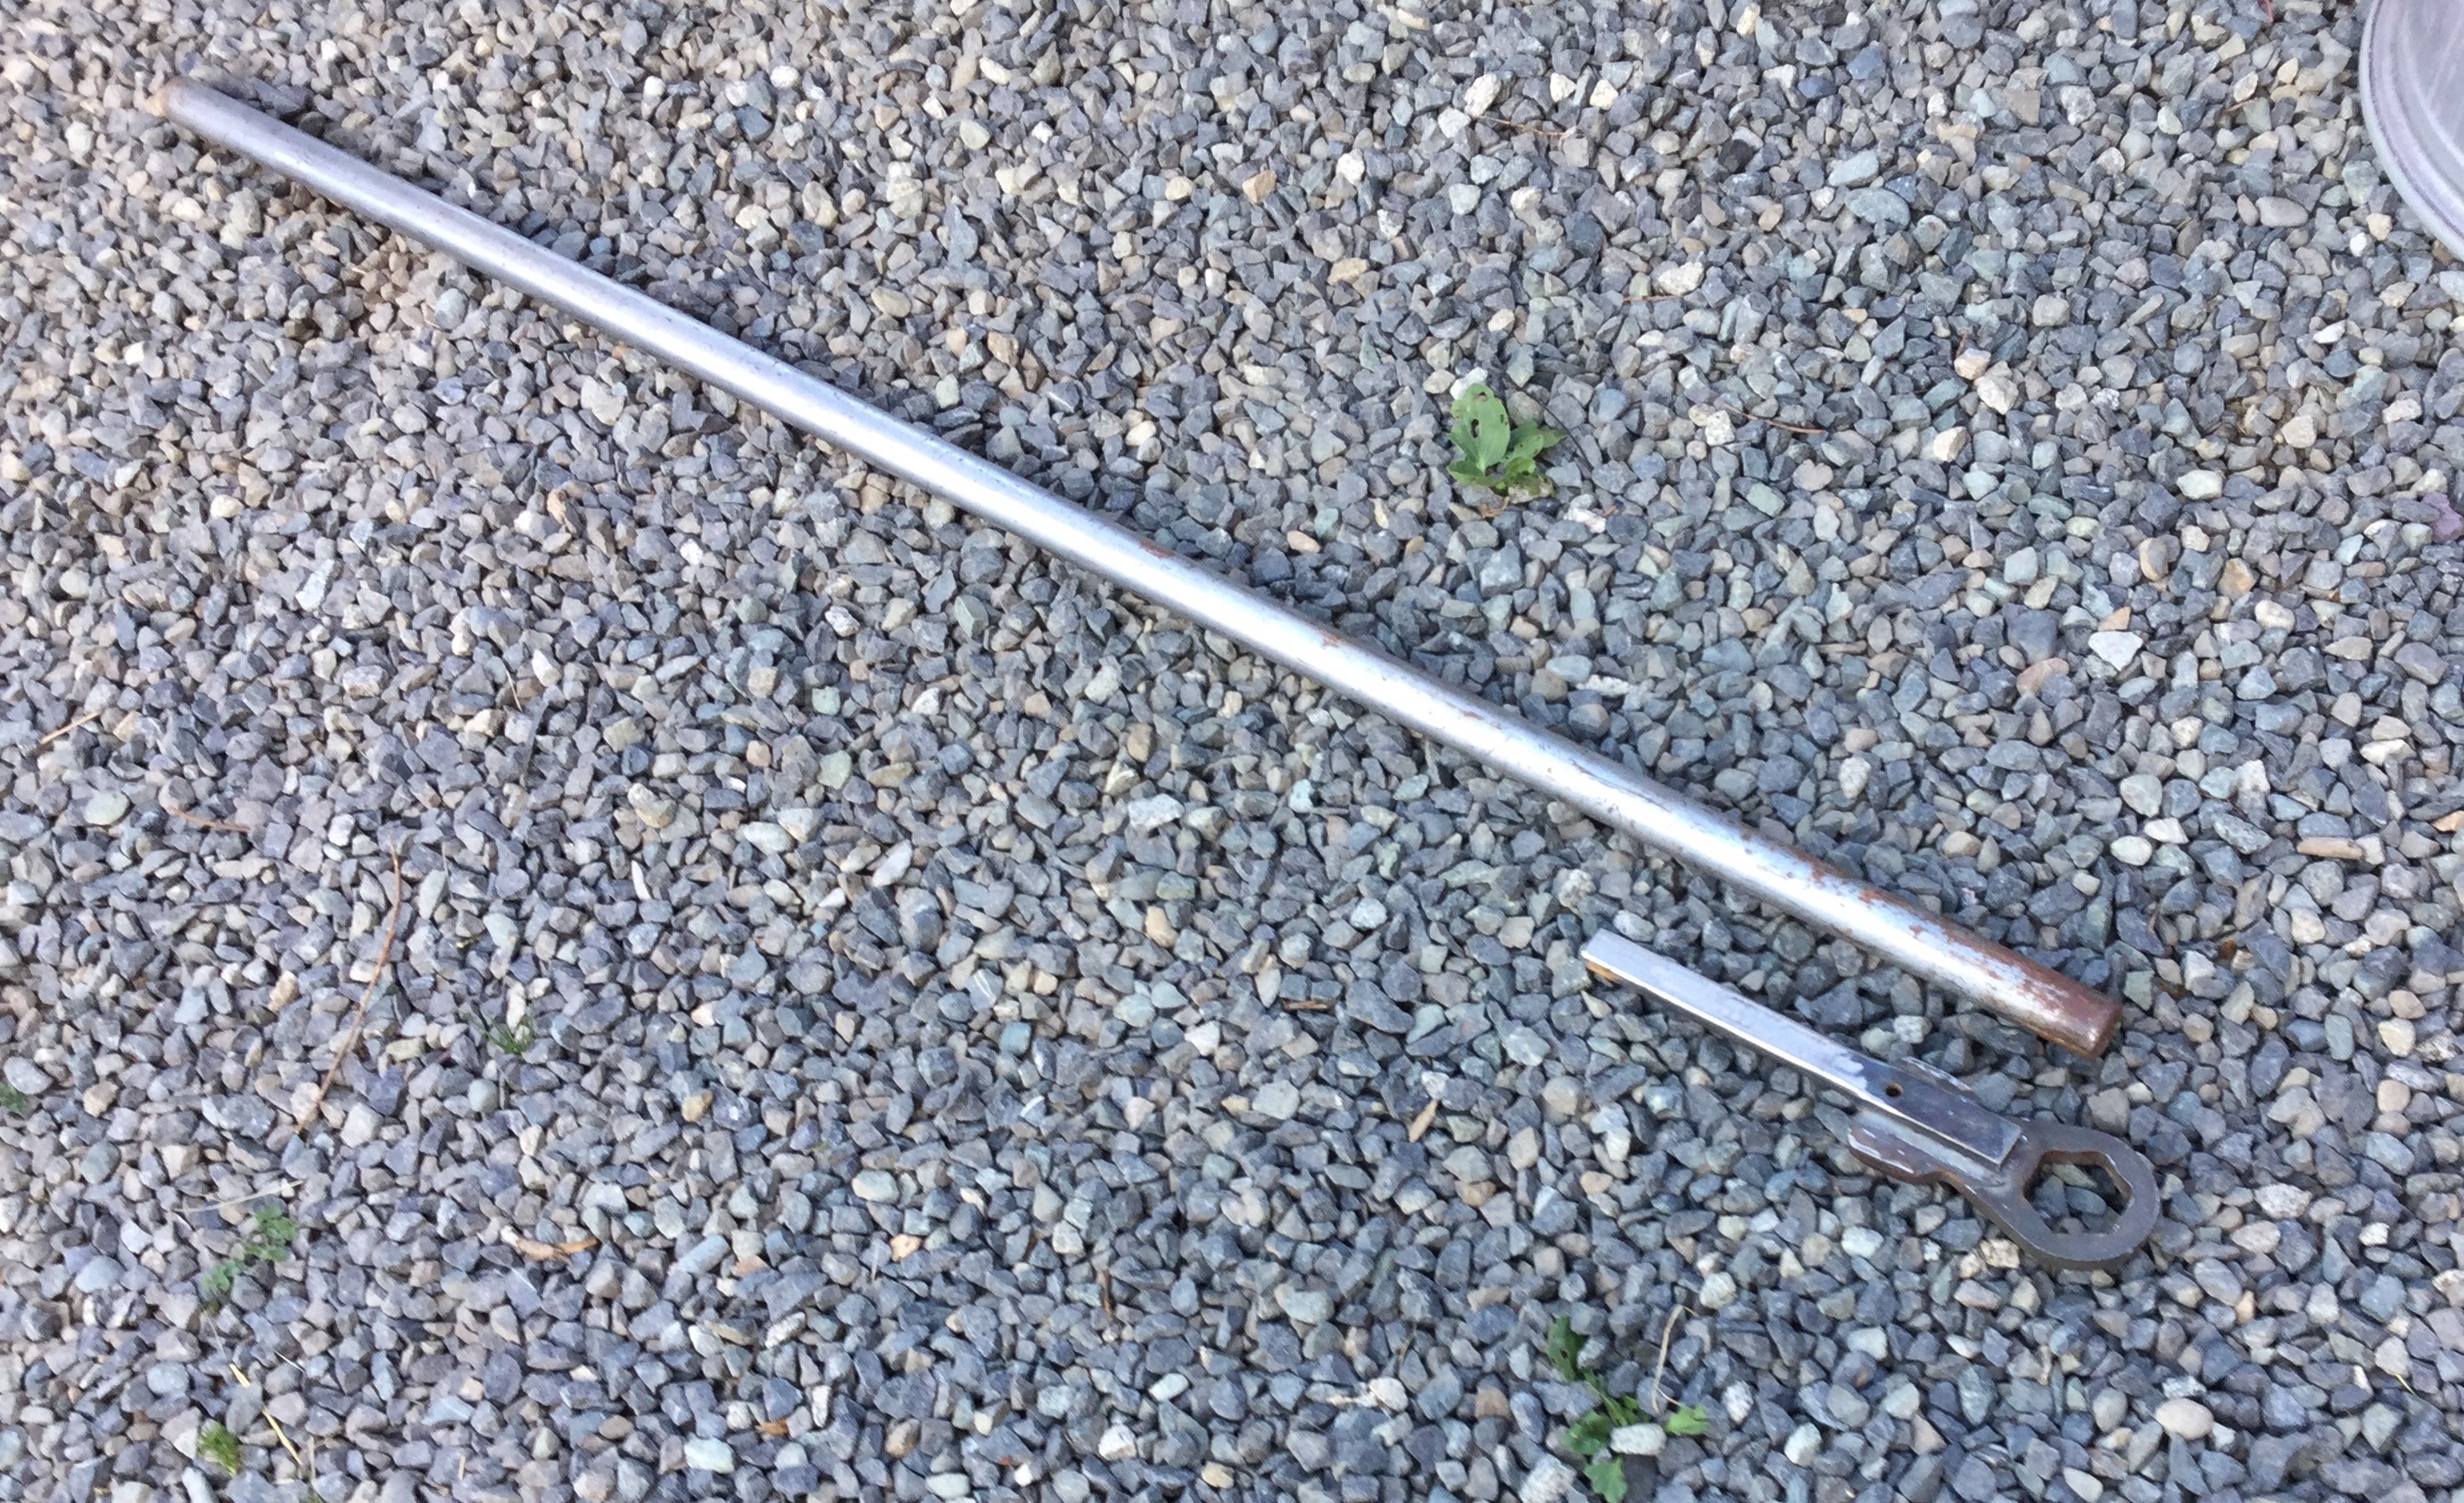
I had a bit of fun getting the hubs off the van. I’ve done this job a few times but this time the big 46mm axle nuts were very, very reluctant to come off. What I normall use is a 1 13/16 socket, 3/4″ drive but for the life of me I couldn’t find the 3/4″ extension and T bar for the socket. So I thought I’d be clever and modify the 46mm slugging wrench I had. Btw, I have a hard time using the slugging wrench in the way it is supposed to be used. I find it hard to get a good swing at it with the heavy hammer without hitting the wheel.
I welded a bit of 7/8 hot rolled steel to the wrench, and that spud fit into the 5′ steel tube I use as my might extension. Well, the hot rolled bent immediately. Ok, I cut it off and welded on a found section of bar stock. I had the notion that this particular bar stock was perhaps a stronger steel.
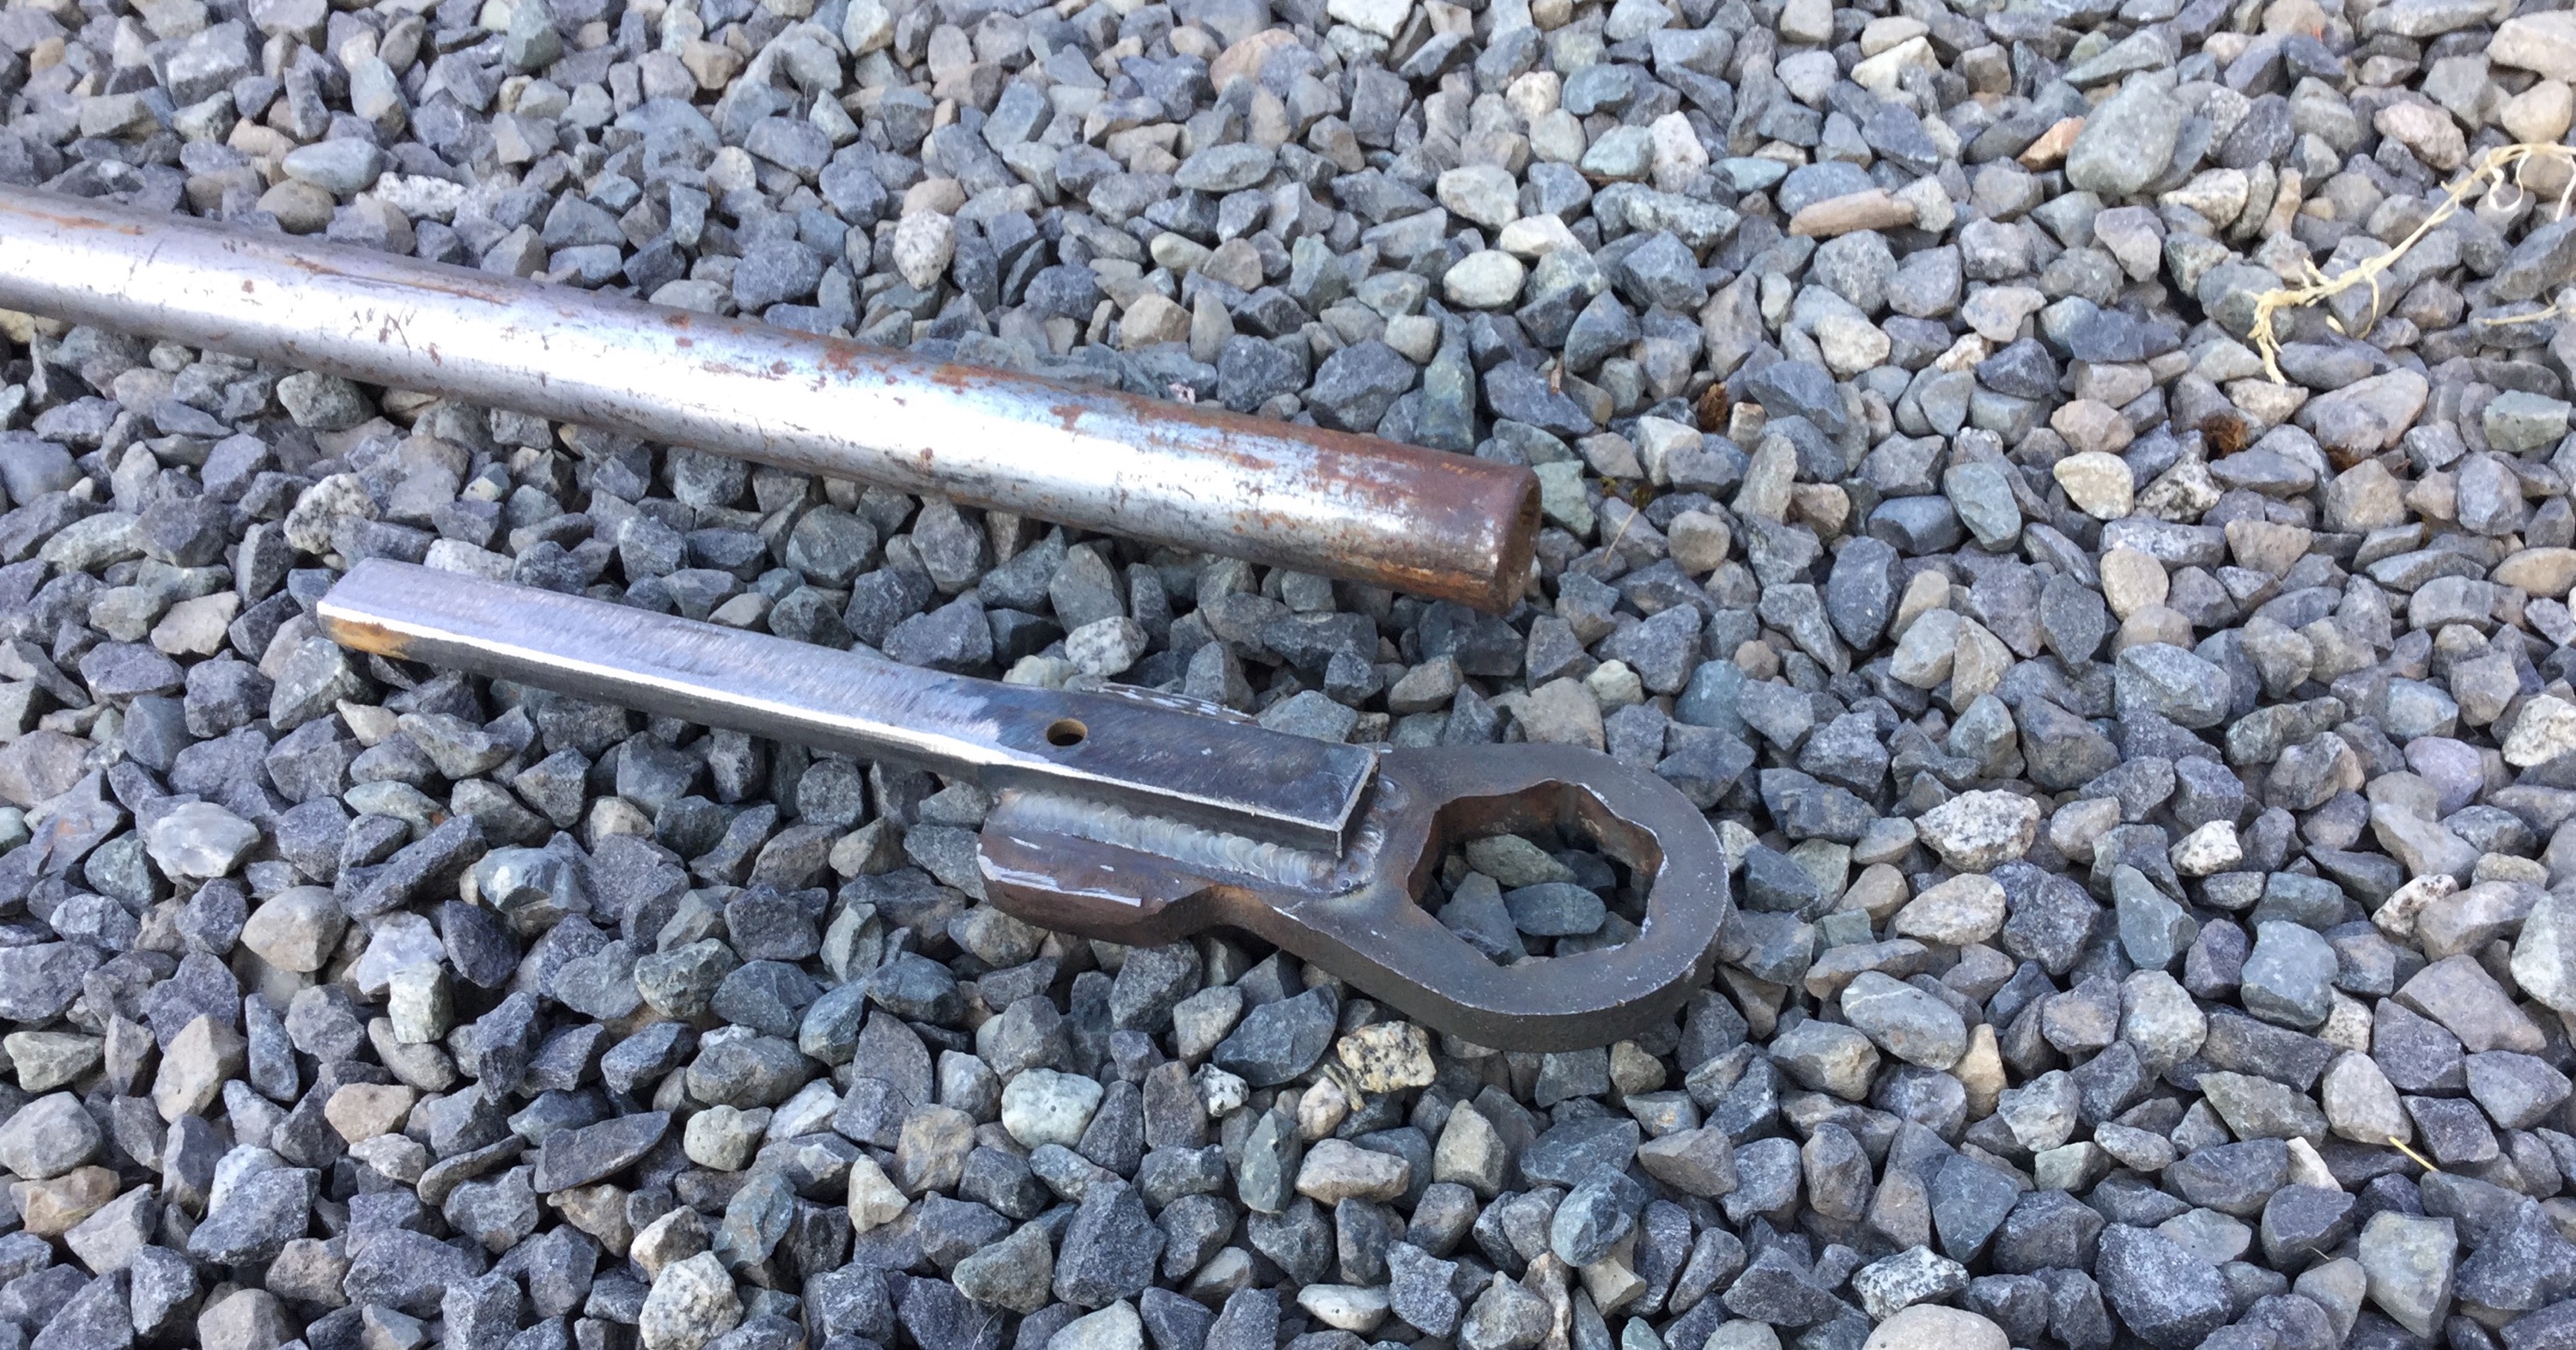
Why the heck did I weld it on with the hole at that end? I can’t explain this bozo move.
Well that shifted the rig hand side axle nut, but it bent a little in the process.

And the hub swapped.

But Mr Wrench (and my weld at the end) was not up to going after the other side.


I nipped over to a friend’s shop and he easily loosened the nut with his Milwaukee battery powered impact gun ( has 1100 ft lbs of torque).
Mr Wrench was still strong enough to re-torque the nut to the 365 ft lbs the bugger needs. I added a bit more weld in the hope that I can use him again sometime, in his new cranked conformation.


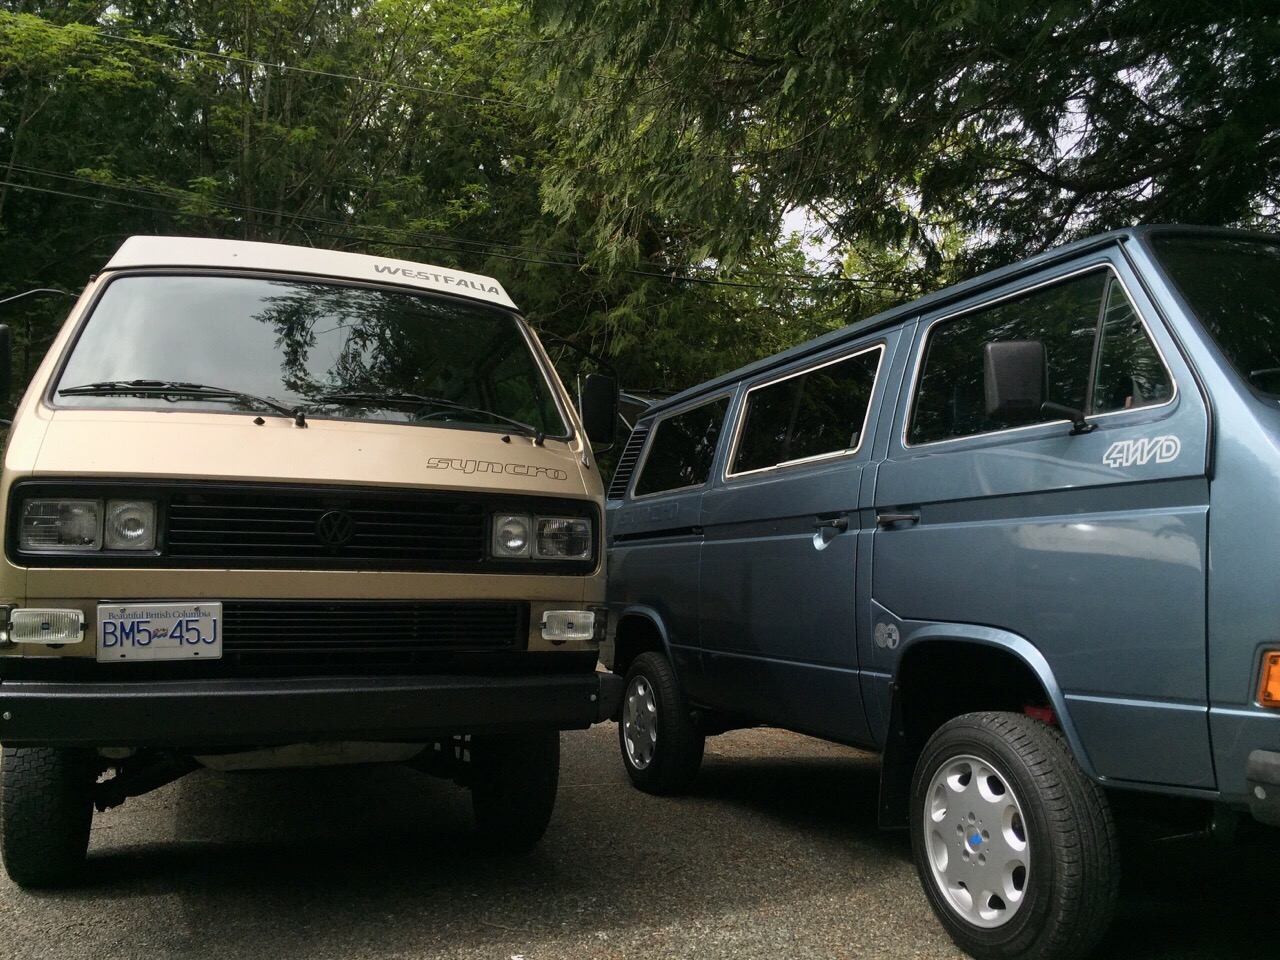
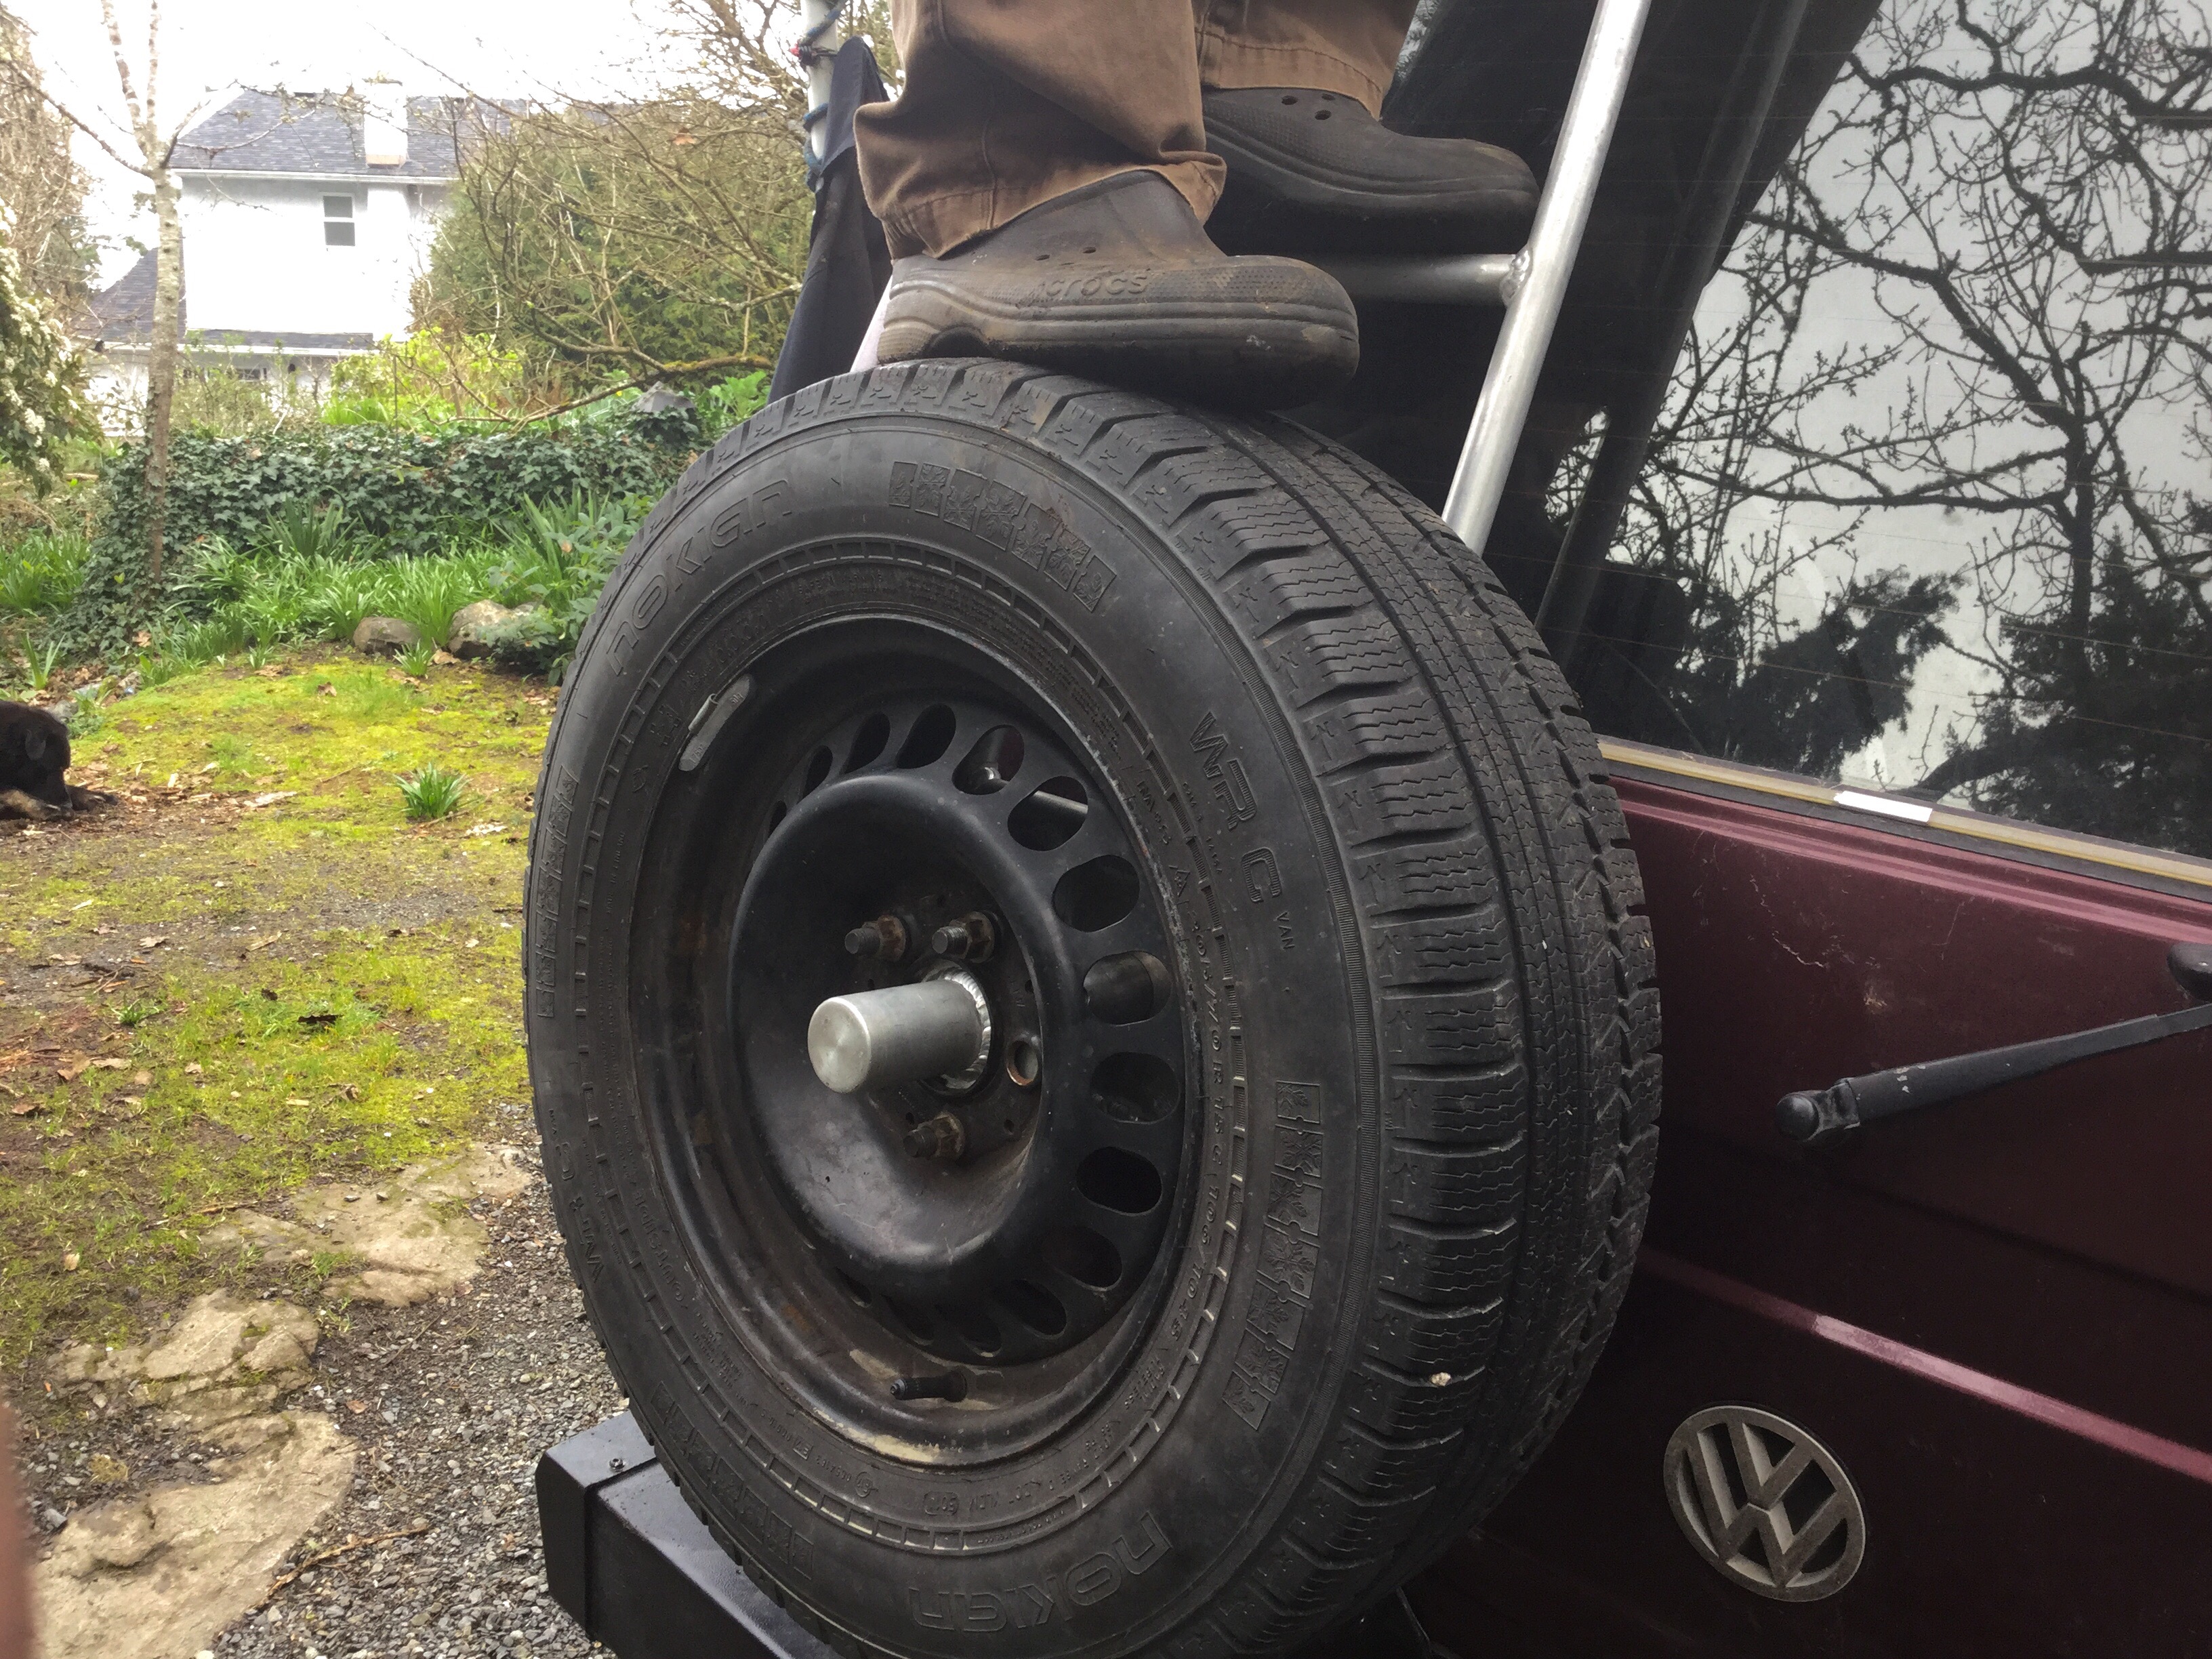
I’ve yet to get some good shots of how the wheels and tires look on the van. In the meantime here are some quick snaps of my van and good friend Simon’s van. Simon has South African Carat (?) alloys and Nokian WRC 205/70-15.


Vanagon – tire and wheel comparison
I just installed, at last, some new wheels and tires. I dithered for so long and ended up with a compromise. The wheels are Mercedes alloys,15″ x 7″, ET of 25. The tires are Yokohama Geolander ATS 215/70-15.
The offset is a bit lower than perfect, the wheels stick out a little more but that gives a tad more clearance on the suspension side and the sliding door clears tire by a good 3/8″.
Simon left his van with me while he is on a trip to an un-namable place so I had a chance to do a visual comparison” his wheels are 15″, ET 30, and I think 6.5″ wide, South African carats. The tires are nokian WRC, 205/70-15.
I have only riven a short distance on my new tires but I lie, what I feel so far. Smoother over bumps, little tire noise. They change the feel of the van in a very good way.
Here is quick vid of the two vans, Simon’s van is the high top.
Trip – Much of the same
Another weekend trip to favourite places. A little different this time as there was little fog. I hope the residents of Neah Bay across the straits took the opportunity to hang laundry.

Obligatory clear cut shots.


And one of our favourite creeks.
Saw lots of shipping with the lack of fog. Cruise ships, oil tankers, and container ships. a few of this kind went past. I like how the containers are stacked in a subtle wedge shape.

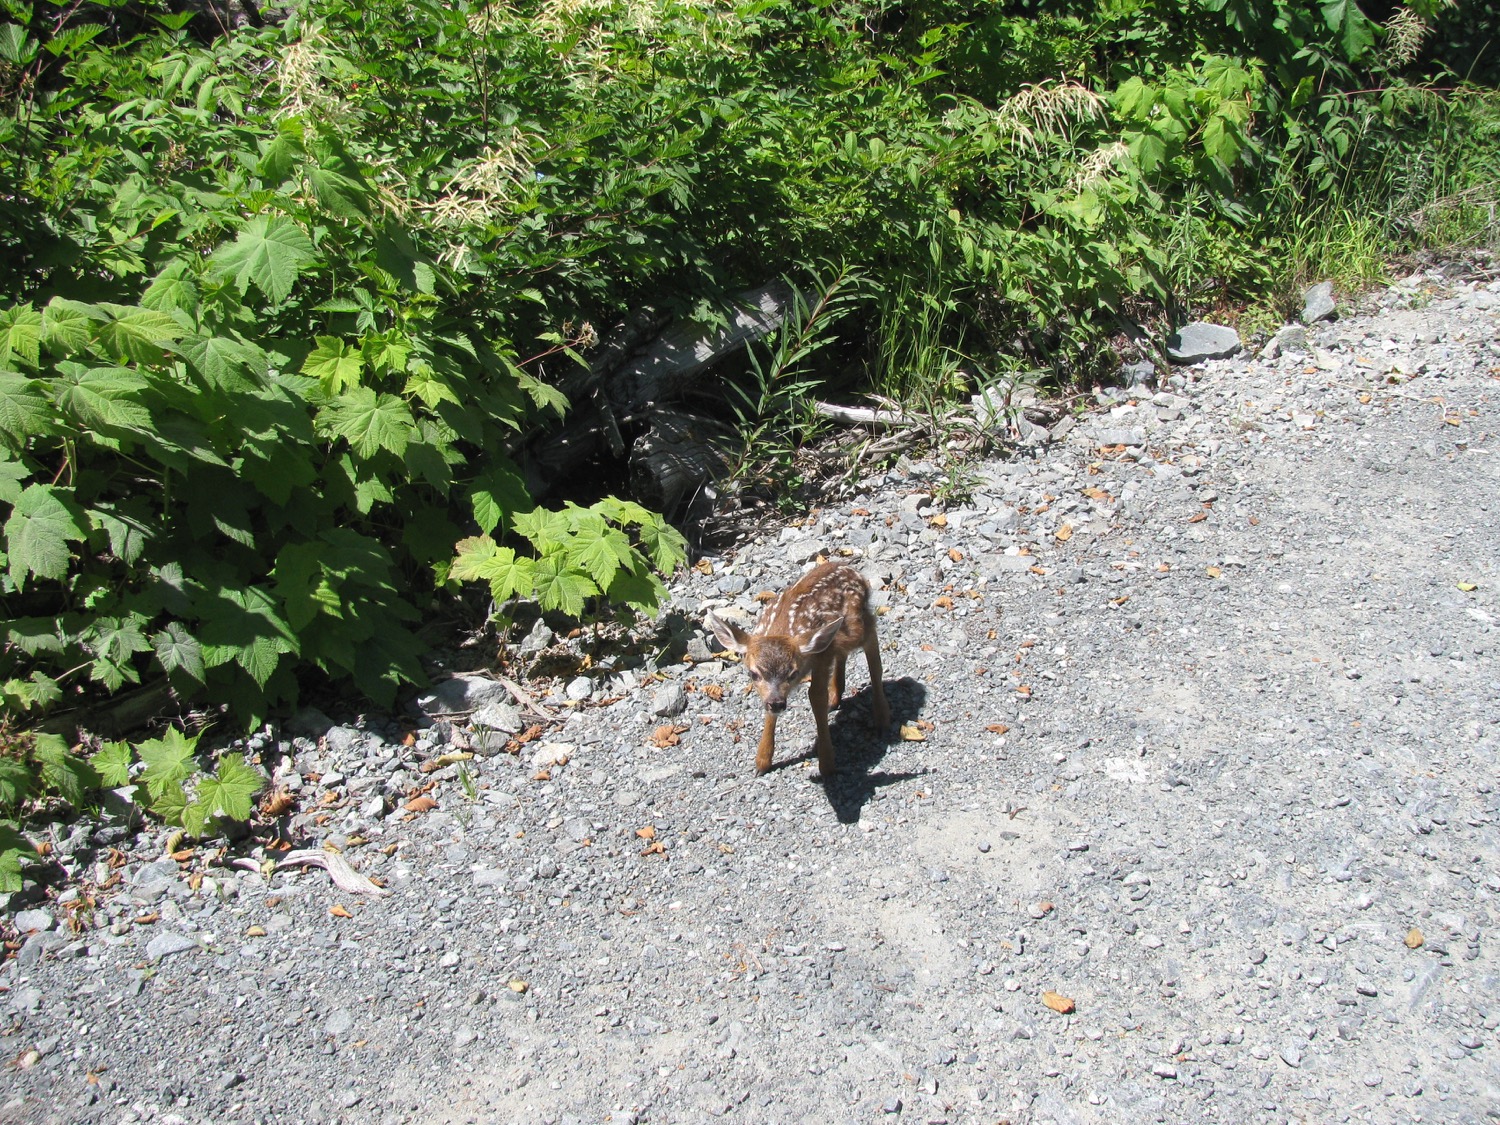
Came across a doe and new born fawn. Fawn was very shaky and wouldn’t get out of the way.

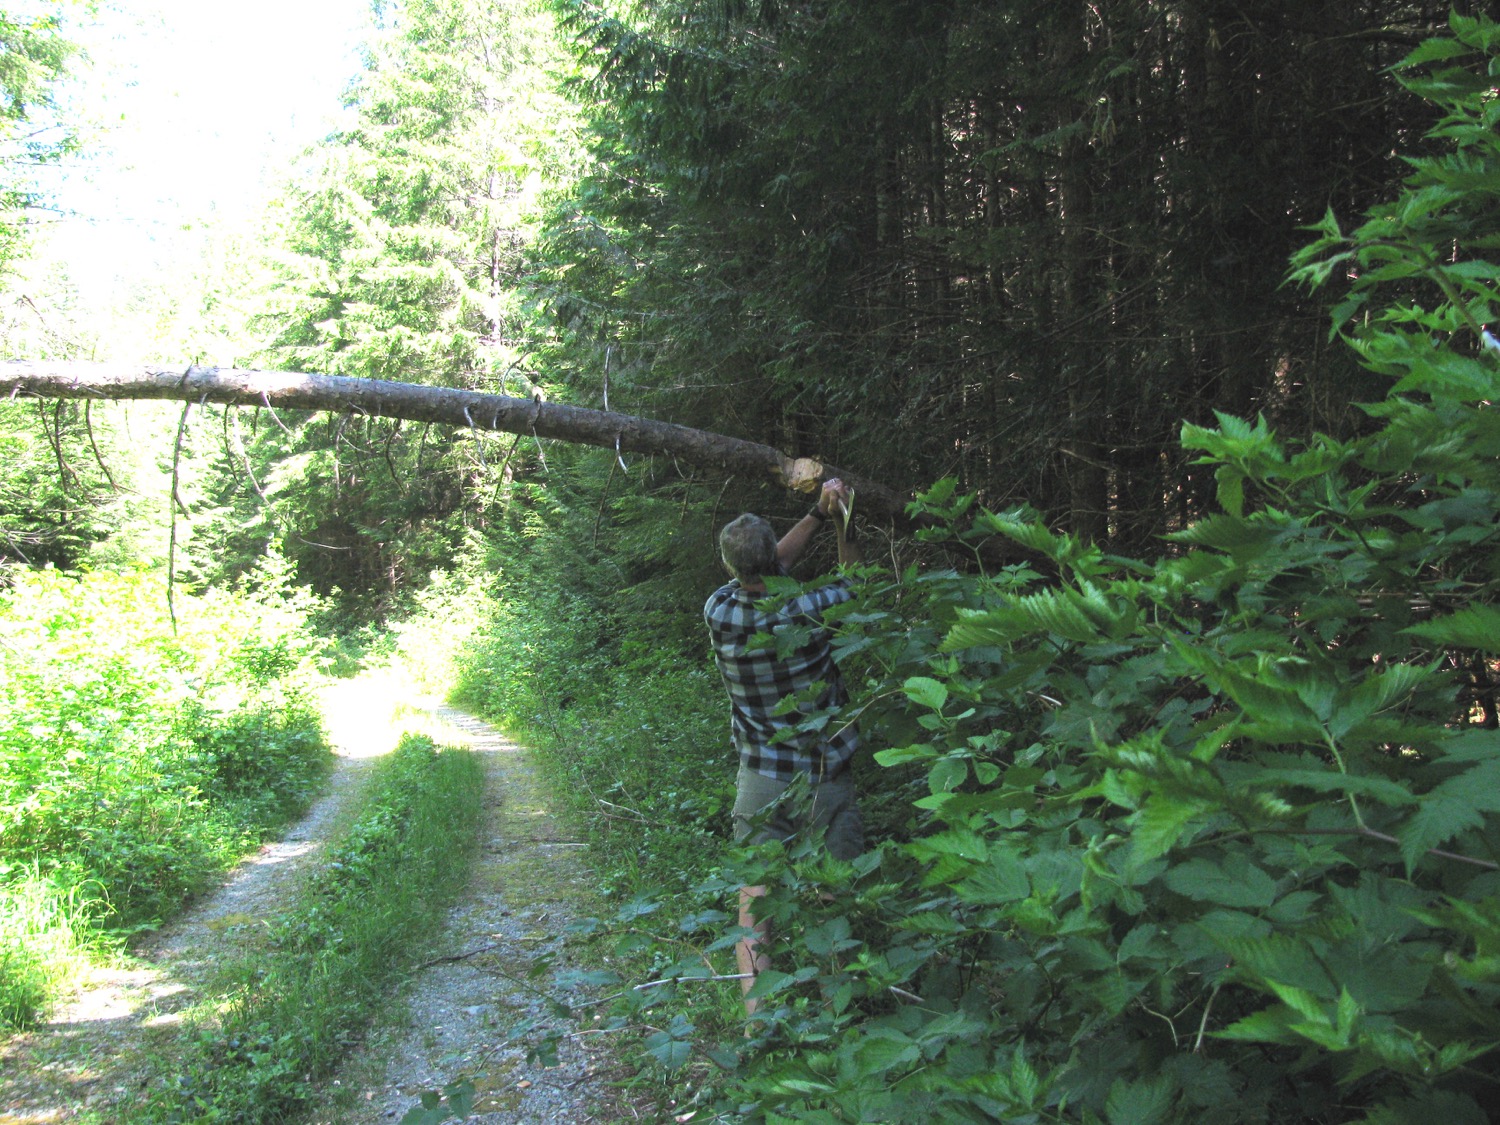
“and my axe”
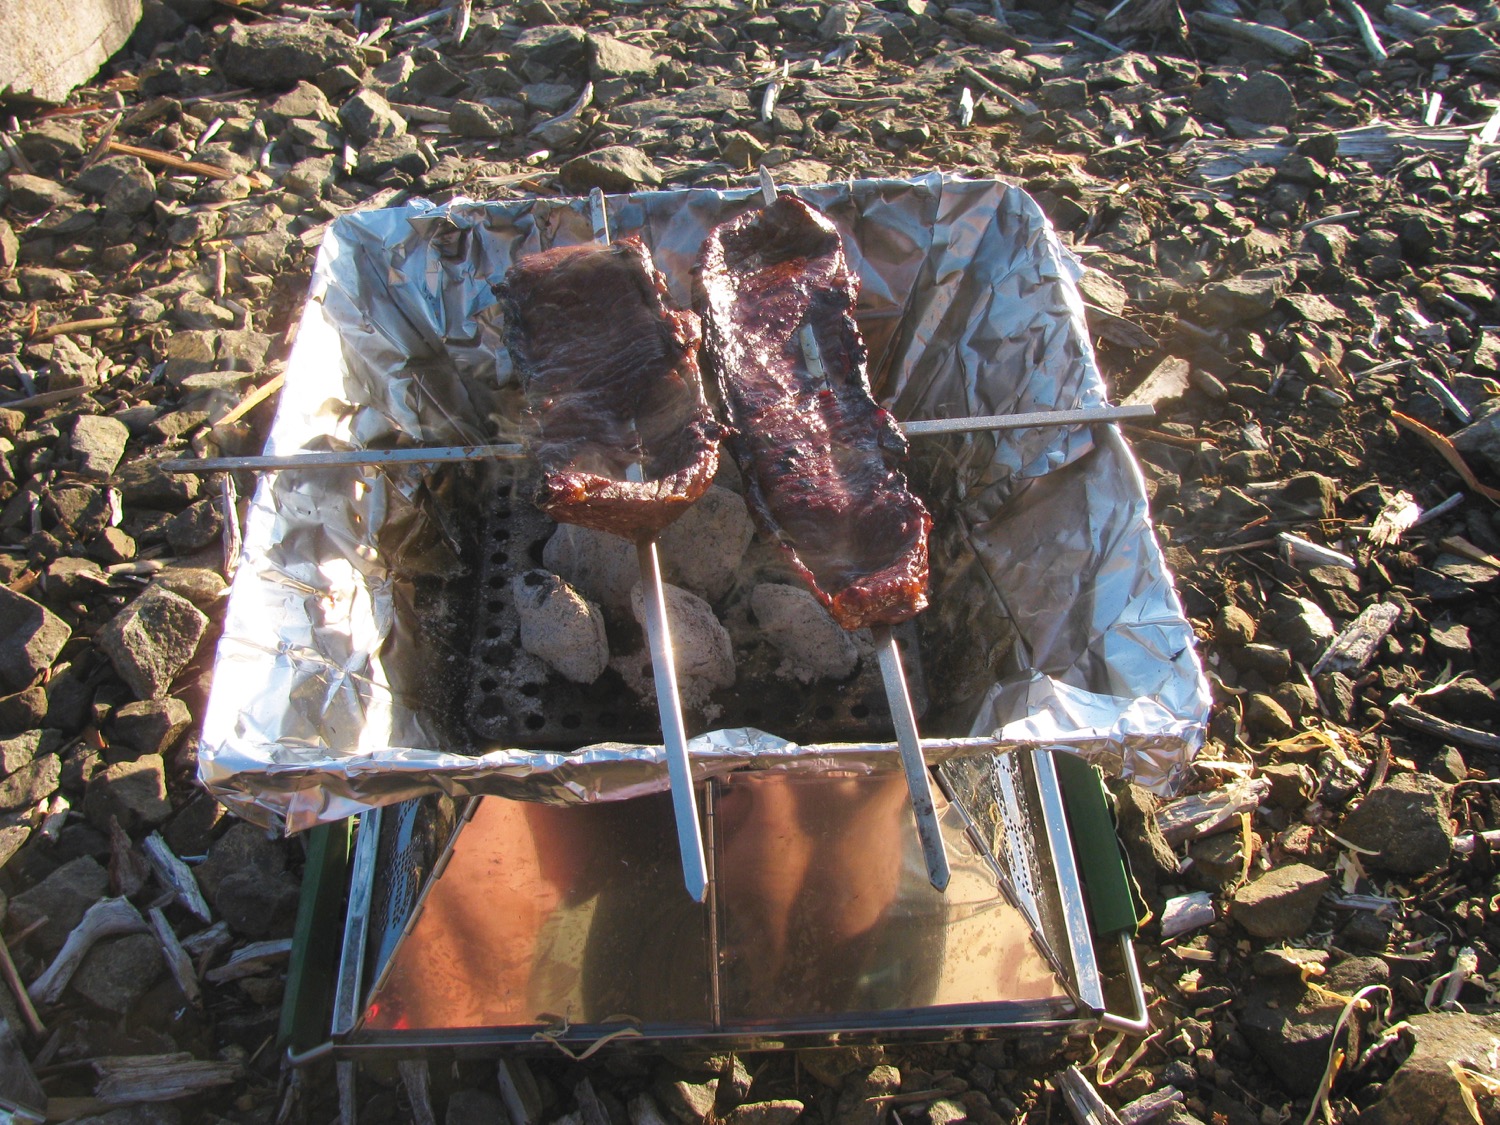
Mmm, chicken
ok, another cheesy vid, this time the creek
Trip – same old same old, but finally the first trip of the year
For various reasons we haven’t managed to get out using the van for its intended purpose until this last weekend. It was just an overnighter to familiar places, but still a fun outing.
Driest May on record here this year, and the Thursday and Friday before we left felt like August. It wasn’t quite August out on the west coast, the wind was coolish, but the sun was warm.
The syncro was a champ, hauling us up loose gravel and rock logging spurs, and the newly installed big assed auxilliary battery didn’t even blink about the amount of electricity we used. The battery truly is way bigger than we will ever need, its both daft and kinda fun to have it.
And yes, we camped beside clearcuts 🙂
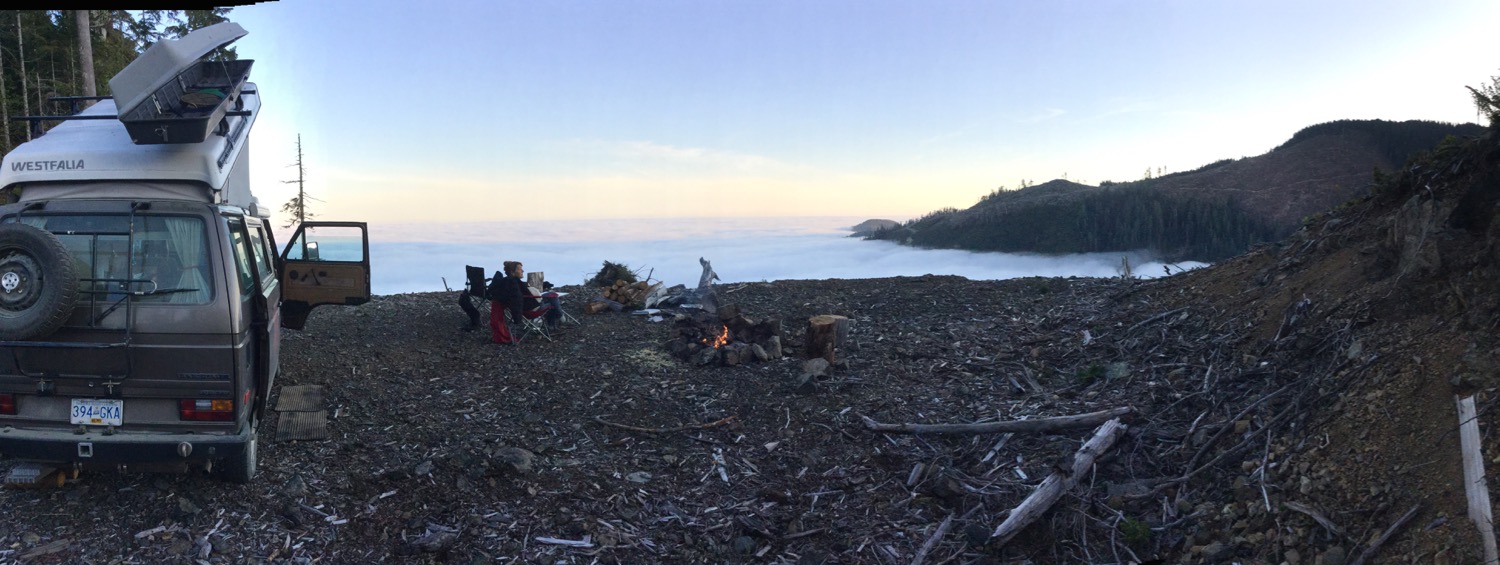


On our way, we realized we had left the Thai themed marinated chicken thighs back at home, so we picked up some meat strips in Sooke.

Where’s Waldo?

Vanagon – kinda crazy sway bar mod to help install homemade drop links
Posted by albell in syncro, syncro specific repairs, vanagon, vanagon mods on April 25, 2015
This value of this modification to the sway bar is debatable. But hey, don’t let fear and good judgement hold you back from having a bit of fun. And god knows I’m not going to sit here and tell you this is an original idea, I’m old enough to know that someone somewhere has done this before.
I didn’t look forward to installing the sway bar drop links with Whiteline polyU bushing. It can be a bit of a struggle getting the drop link onto the sway bar. Mind you, Chris at T3 Techiniques makes it look easy in his video. By the way, T3 Technique is a place to buy polyurethane bushings and other suspension parts.
http://www.youtube.com/watch?v=7oXY68F8Uwo
I had thought about the notion of cutting the knob end off the sway bar then drill and tap a hole so a thick washer could be attached to replace the knob. But I didn’t like that idea for a few reasons.
So what I did do was this, I welded a 3/8″ stainless steel bolt to the end of the sway bar. Well I should say sploodge welded the bolt on, not pretty.
So what eh? Well now I made a bullet shaped tool, tapped for the 3/8″ bolt on the blunt end and tapped for 1/2 NC on the pointy end.

Some tubular spacers, lube, and a nut and the bushing ( already fully seated in the drop link by squeezing the two together in a vise) and hey presto, the bushing and link can be easily pushed on to the sway bar. Hey don’t rely on this pic for correct orientation of the sway bar bend to the sway bar, I was just doing a test run and didn’t take care. I did get it right in the final assembly… I think 🙂


i made a Delrin cap to fit over the exposed bolt. Tidies things up and may help to prevent the drop link coming off the end of the sway bar. This has happend with the softer urethane Powerflex bushings, maybe not as likely with the harder Whiteline bushings I have used, but hey, it’s another justification for this mod.


And of course I scraped the heck out of the paint on the sway bar installing it on the van.
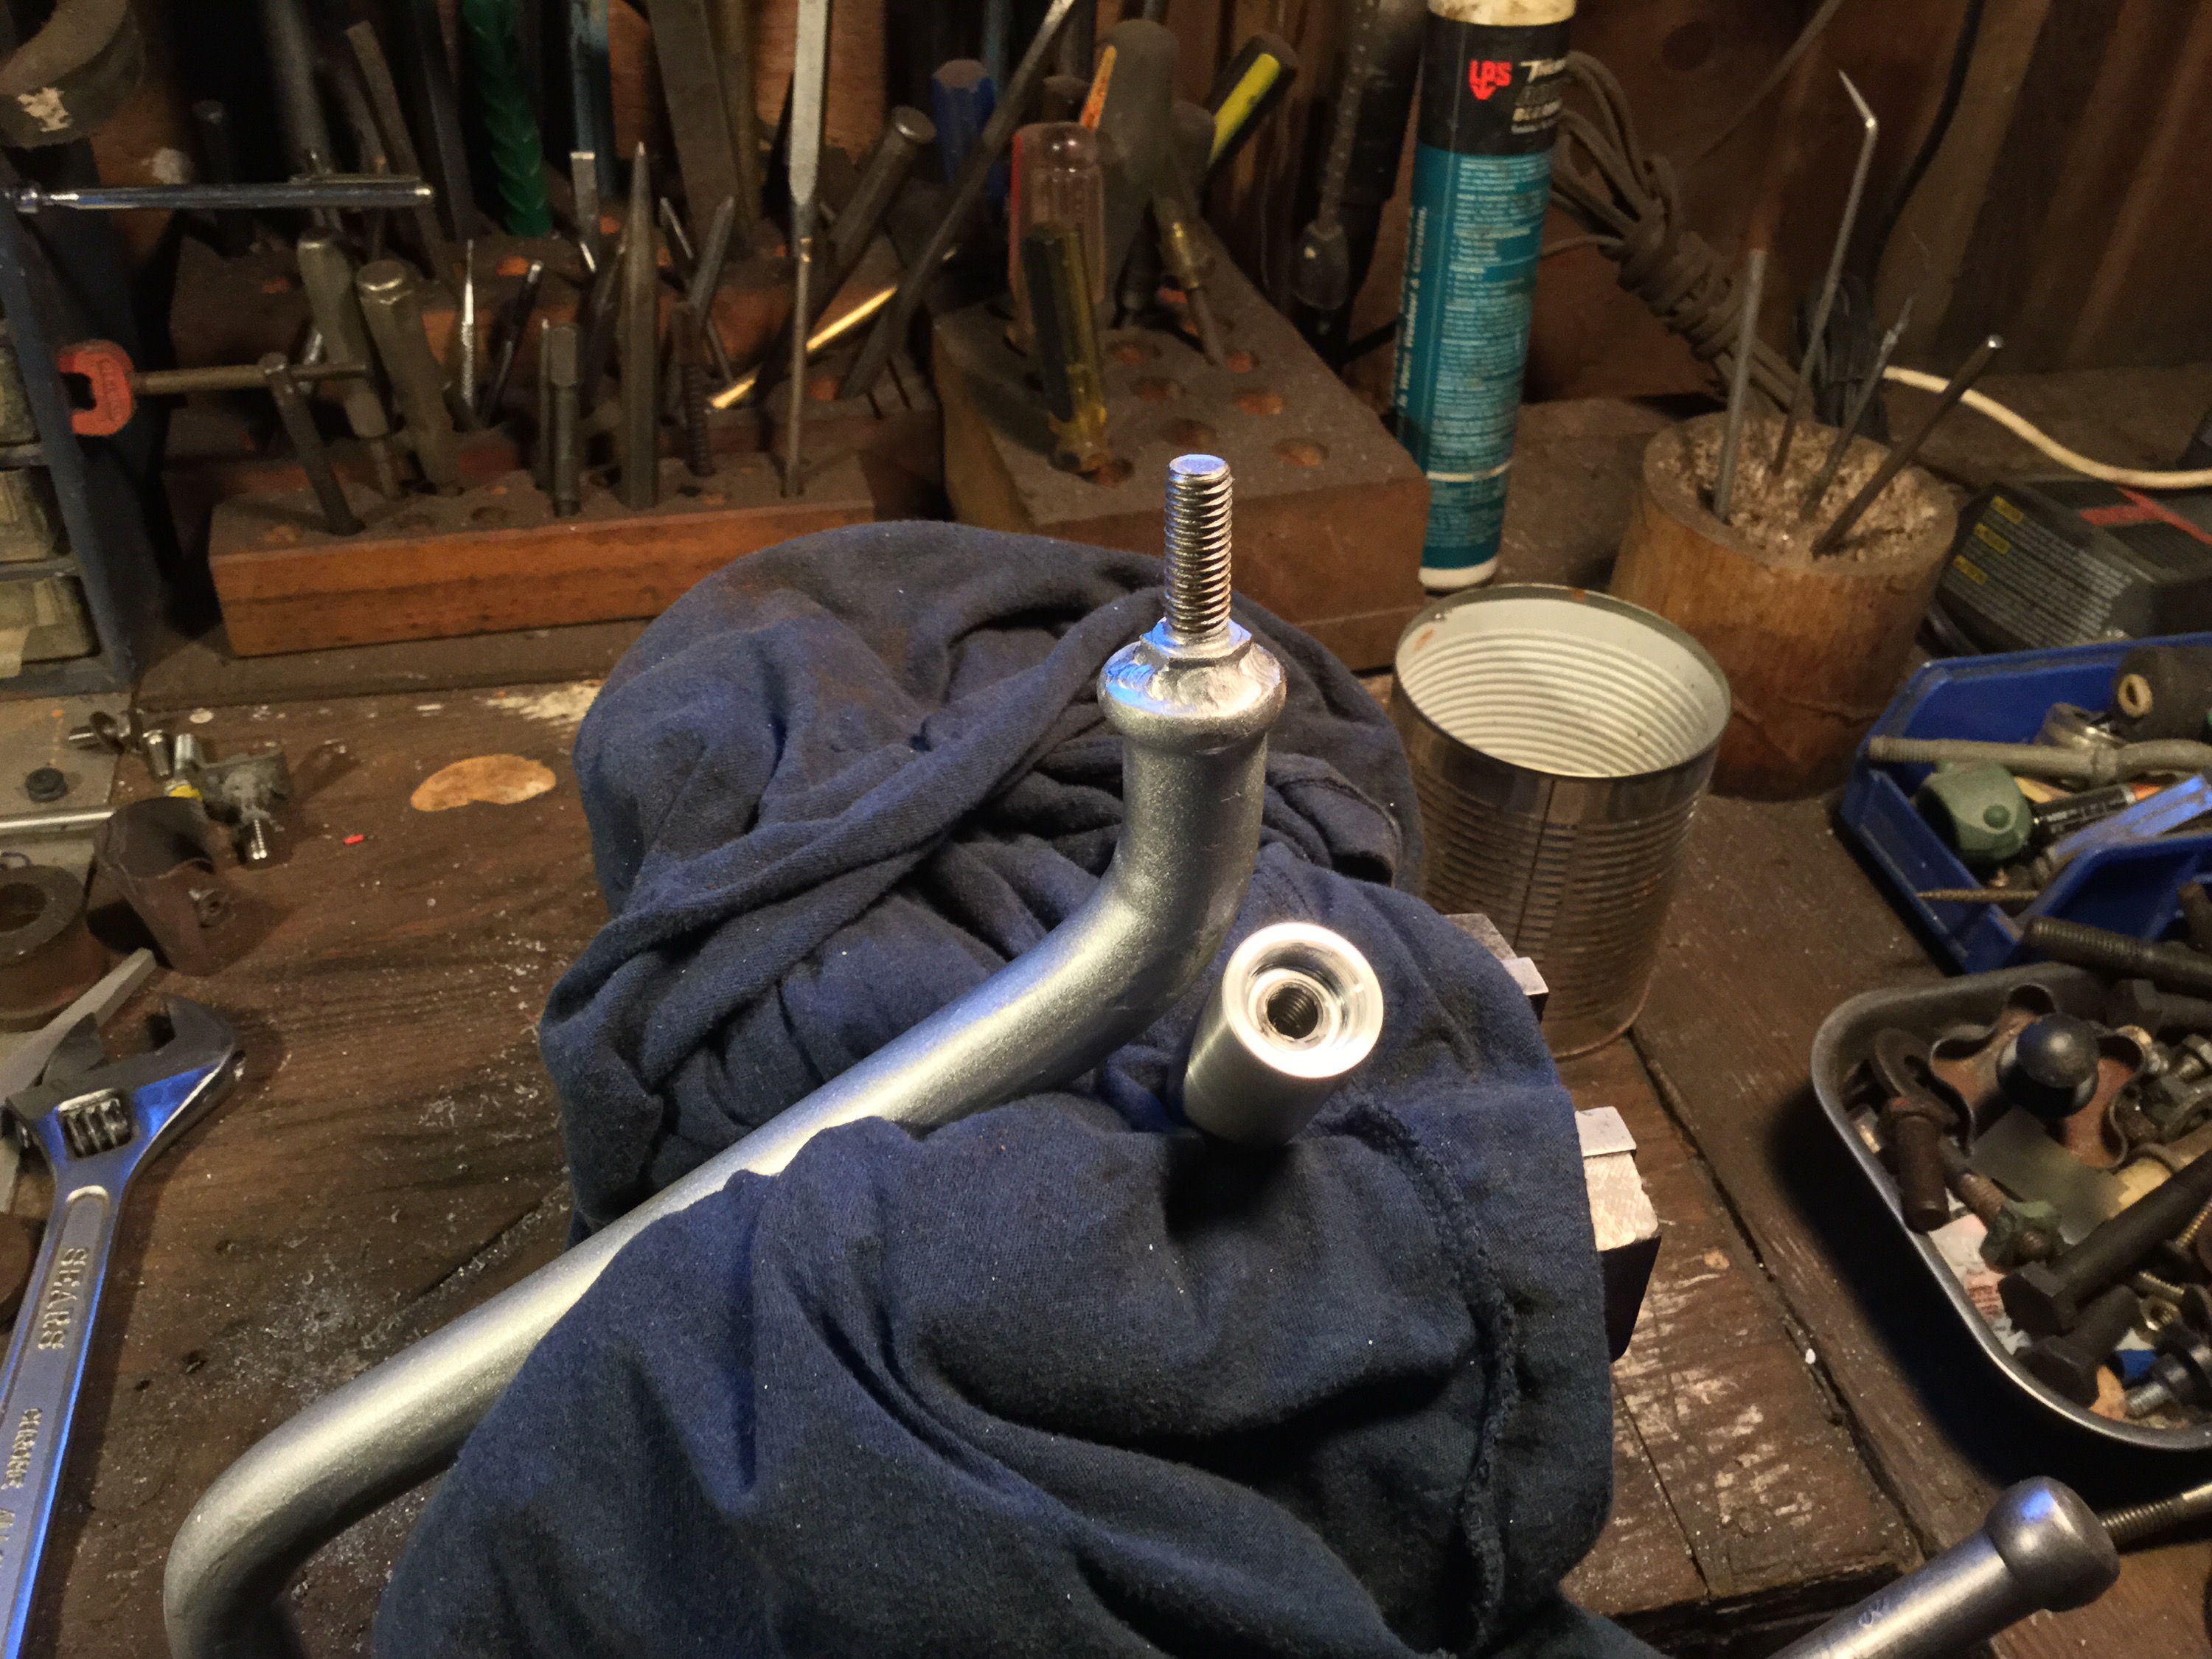
 I guess I should show hey finished drop links. I had machined them a while back, 3/4″ (19 mm) stainless rod and heavy walled ( sorry I forget the wall thickness) tubing which had ID of 1 1/2″ (38mm) very close to to the stock link. Threaded the end M12X1.5, and a section approximately 17mm in diameter where it passes through the drop link bushings. No spacer in this set up, we’ll see how that works out, but is not an original idea.
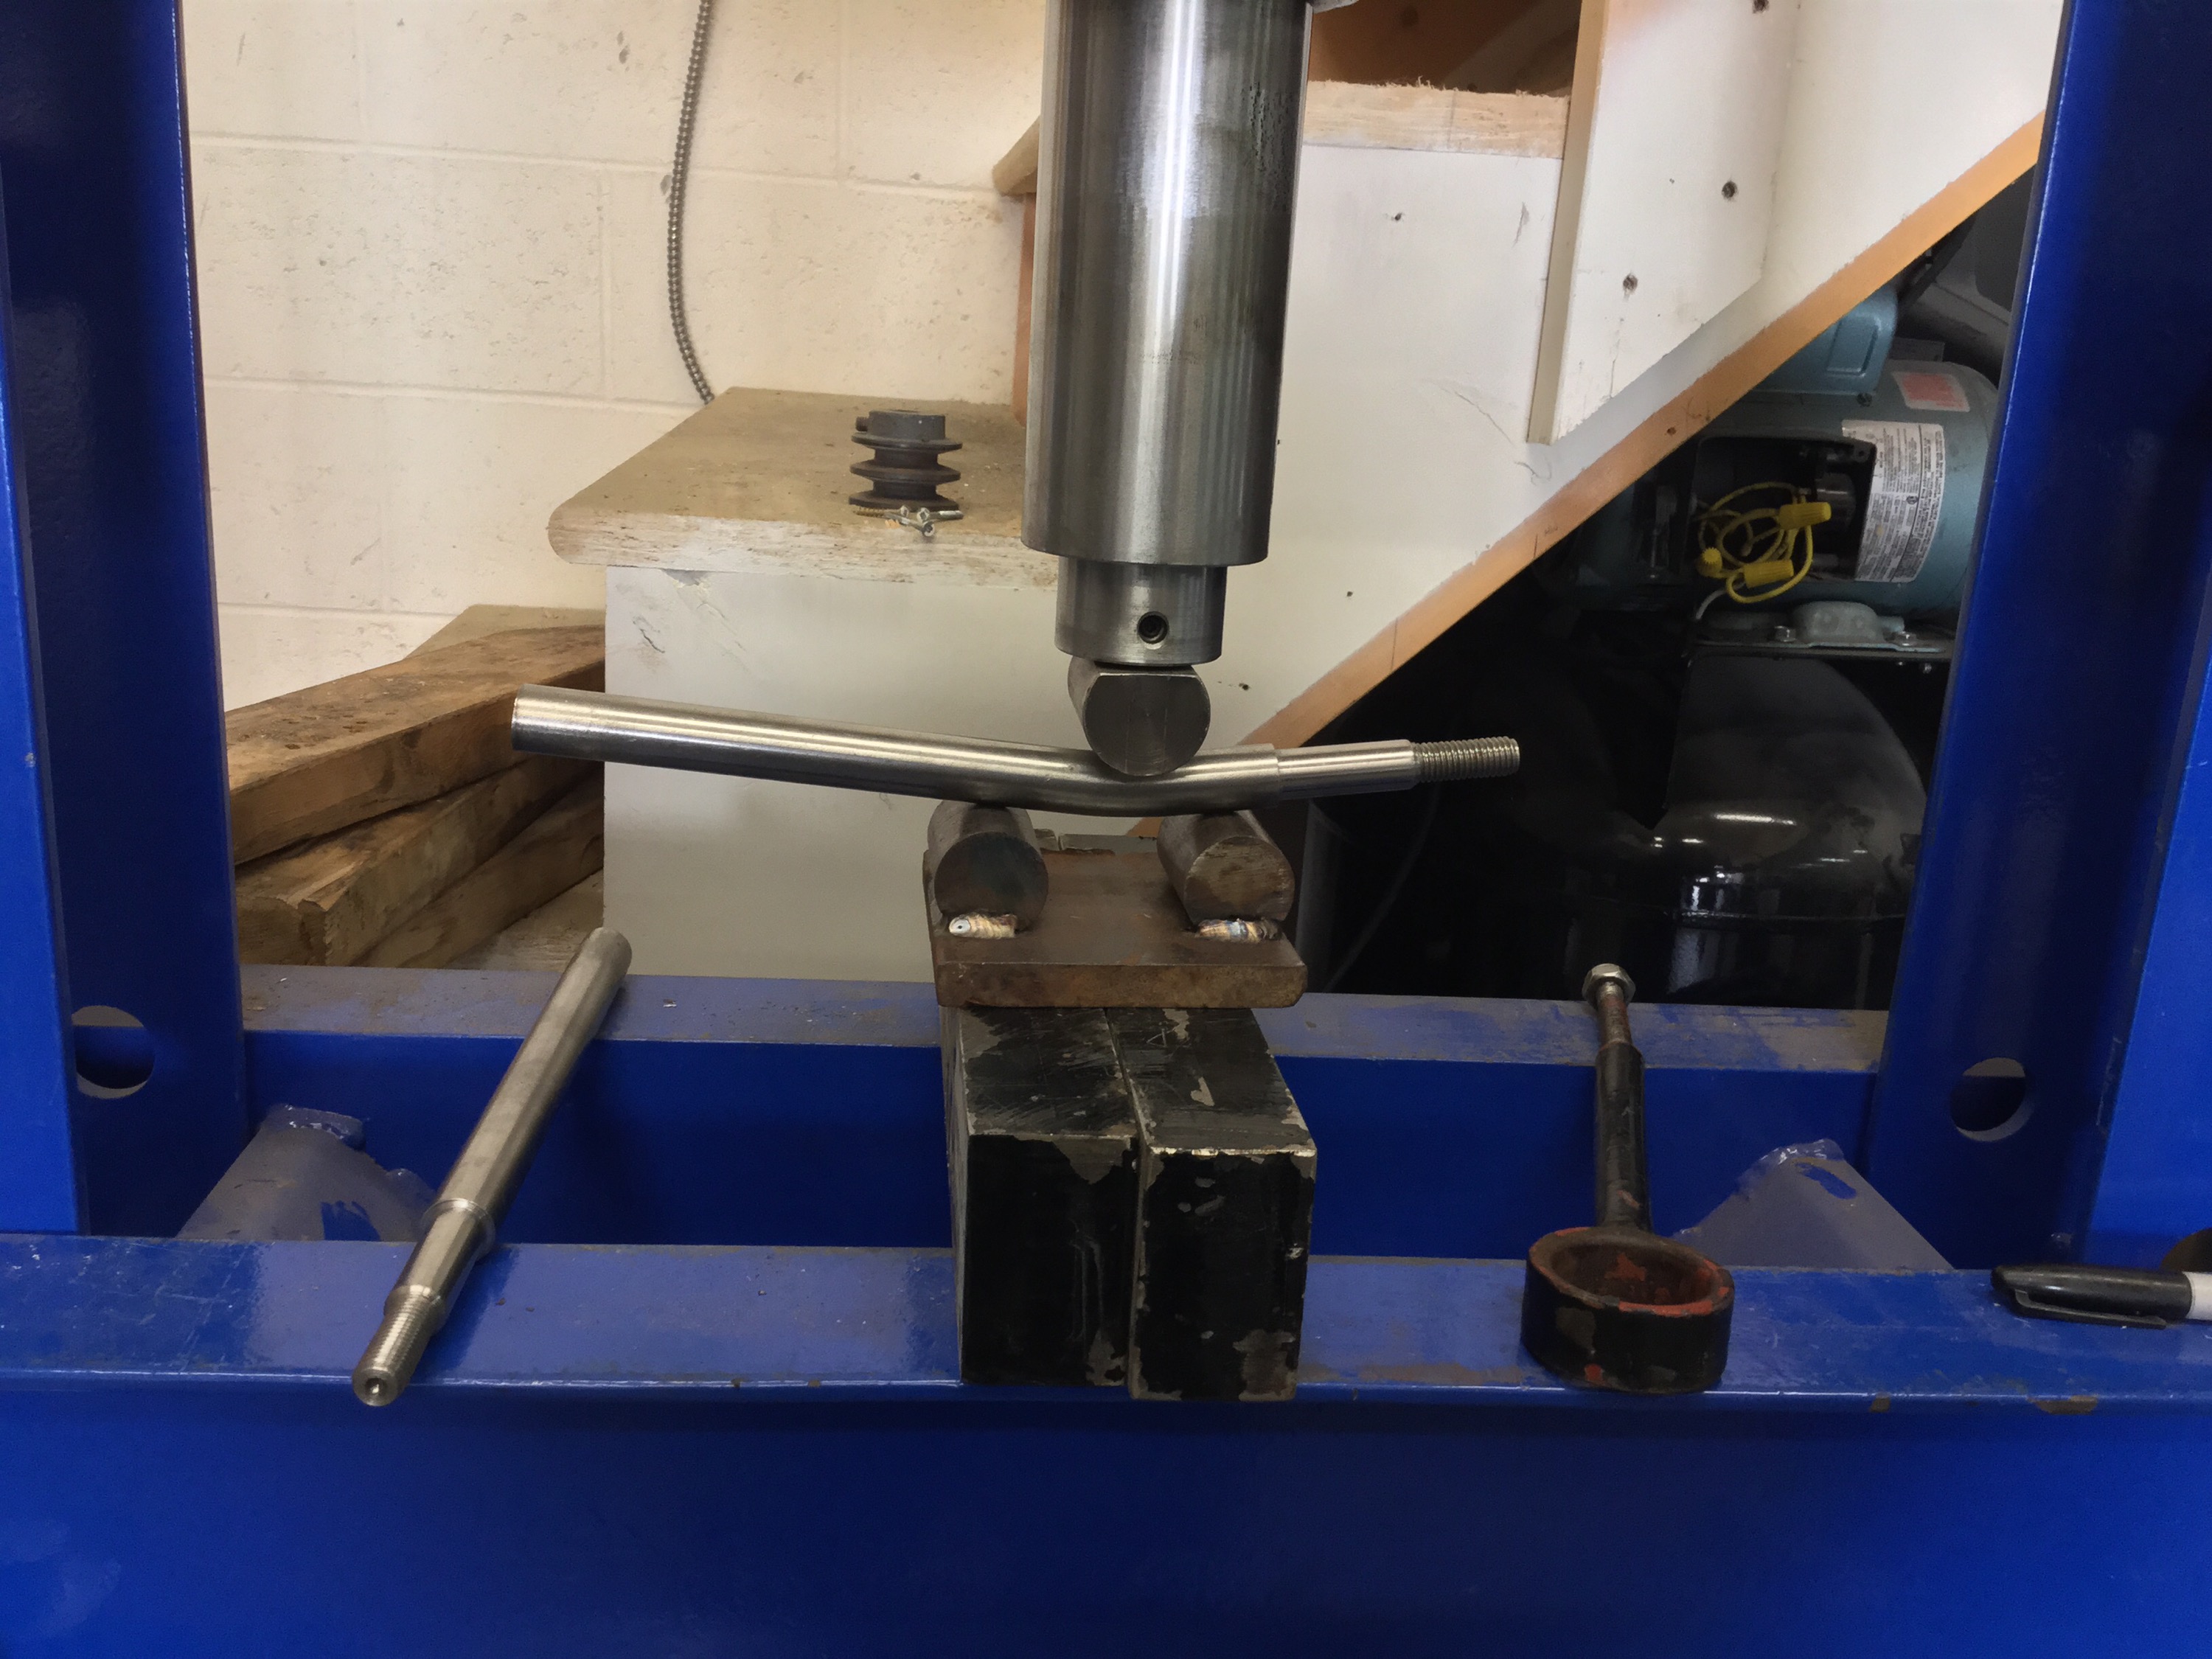
I bent them on a friend’s press using a quickly made set up that does leave some dimples in the bar. I think I took about 8 tons of force to bend them. I was shooting for 4 degree bend, but I went a degree or so more. I don’t think that will be a problem.
I cut them to length and ground a chisel point on the end. One root pass, then two straddling passes of weld, then I washed over with the torch. I got a bit of under cut on the rod, I could have done better but it will be strong enough. Notice the pattern on the ring portion, patented “Chattr-Mastr” finish on the bevel.

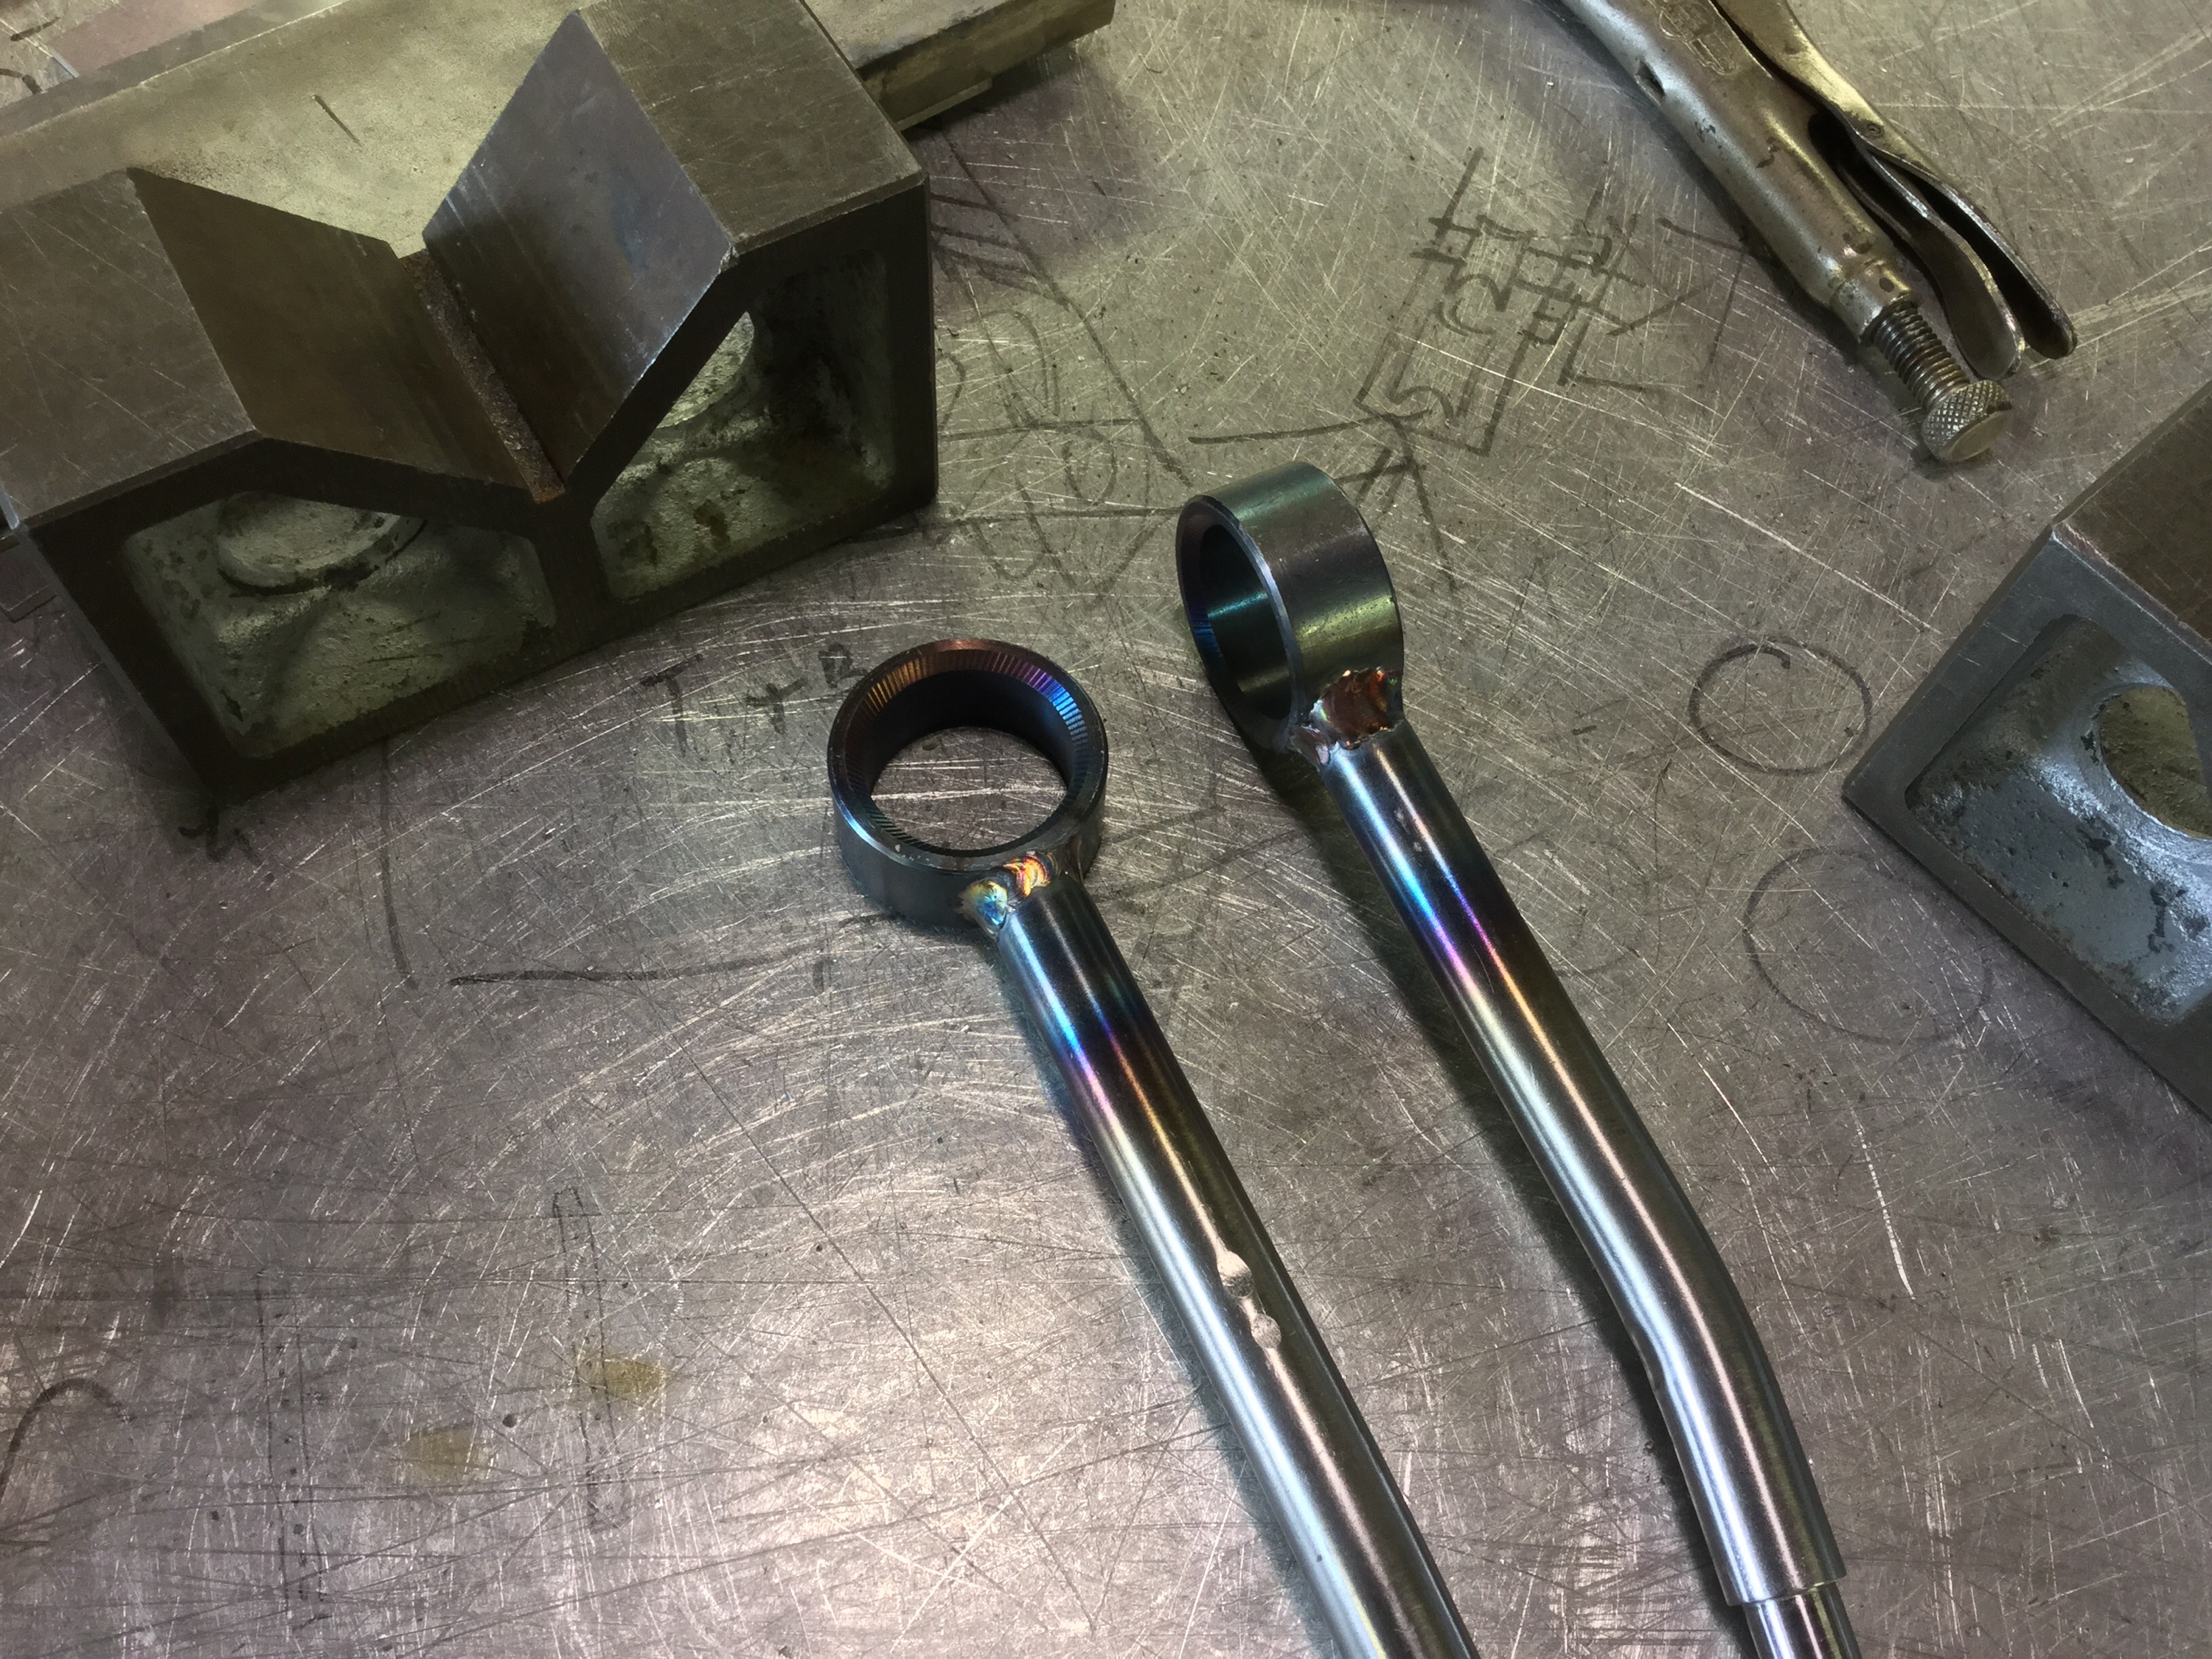

I used the cup washers I made a while back, but welded on a smaller diameter flat washer to the should of the drop link as I was worried that the enlarged hole of the cup washer would get pressed over the shoulder under hard use in the van. I think you might spot that washer in the pic of the sway bar install. I’m happy with these drop links, maybe not in the same league as Burley Motorsport’s, but ok for an amateur.
And another thing, with the bolt welded to the bar it is possible to make some little adapter so one could use a puller to remove the drop link from the bar easily. Ok, that’s a pretty weak advantage of this modification but I’m trying to find other reasons to account for the time and effort.
Vanagon – Simon feels small
Friend Simon traveling this last week, parked beside white van at Hood River Oregon.


