Archive for April, 2011
Car audio ground loop whine
Posted by albell in vanagon, vanagon mods on April 17, 2011
For the last few months I have been trying to fix a whine coming through the car audio system when the engine is running. It came on all of a sudden, and only on the front speakers which are powered by separate amp and go through crossovers. The noise is present no matter what input chosen: tuner, CD, aux, USB.
What I have tried :
-redid all grounds, signal, and power leads to front speakers, crossovers, and amp
-ran new power and ground wires to head unit
-swapped in another amp
– tried alternate pair of rca jacked leads from head unit to amp, straight run, not crossing power lines
– new antenna and lead to head unit (old one was really bad at head unit)
– if I grounded amp directly to battery post instead of body, noise was louder. BTW, the amp ground wires are a short run twisted trio.
-pulled alternator brush pack and cleaned connections
-pulled the noise reducing capacitors on alternator and cleaned connections
-removed the diagnostic plug (TDC sensor lead and plug) from alternator
-pulled distributor cap and cleaned, above and below black plastic shield
-cleaned up edge of rotor
-cleaned all the grounding points (pivot bolt area etc) on alt. body
I did notice that the whine would disappear if the radio antenna was not connected. I talked to a few people and most told me to install a ground loop isolator on the low level lines from head unit to amp. Yesterday I talked to an ex-car audio installer and he advised to try grounding the RCA jack shields. That advice and the information here, convinced me to try it, and miracle of miracles, IT WORKED! Not a hint of noise or whine. To say I’m chuffed would be an understatement.
The head unit is a Pioneer DEH-P5000UB.

Vanagon rear wheel bearing replacement
Posted by albell in syncro, syncro specific repairs, vanagon on April 16, 2011
I noticed some play in right rear wheel (jacking up van and trying to move wheel, 12 and 6 o’clock positions) and a whiny noise when driving which changed in loudness on turns. I figured it was time to replace the bearings. These bearings seem to last a long time but there is a limit I guess. For another good description of this procedure have a look at the English translation of the German IG16 wiki entry. To start here are a couple of exploded diagrams showing all the parts. 
 It makes a lot of sense to take out the axle at same time so that you can re-lube the CV joints and also press the stub axle into the bearing housing on the bench. But I didn’t do that as I was short on time. If you do want to take out the axle, undo the transmission side CV joint when you still have the wheel on the van, unless you are using air tools, so that you can brace the wheel when undoing the CV bolts. First thing is to undo the 46 mm castle nut on the wheel. It’s on there tight (275 – 350 ft/lbs) so you need to do it with the van on the ground and the wheels chocked. Normally I use a 3/4″ drive socket and a long armed drive with some steel pipe as an extension. But this time I tried out one of those “slug wrenches”, I was given one a few months ago. The idea is that (after removing split pin on nut) you attach slug wrench to nut, use a 1/2″ socket wrench drive to apply some force, and at same time whack the slug wrench with a short sledge hammer. Its a bit awkward, the wrench lies close to the wheel so ou have to aim carefully so as to not hit the rim. But it worked, the nut came loose.
  Once the nut is loose, you then loosen wheel nuts, jack up and support van securely, and remove wheel. Then remove nut and the brake drum should come right off easily. Perhaps you might need to back off brake adjuster if the brake shoes hang up on a lip if your drums are old and worn.
 Next step is to undo brake line from the brake cylinder and cap it with a bleeder nipple rubber cap. Then remove the 13 mm bolt that holds the brake cylinder to the bearing housing. Then remove the 2 bolts (15 mm?) from the brake shoe holder at the bottom. I then removed the clip that holds the parking brake line to the underside of the trailing arm so that I could keep the parking brake line attached to the brake mechanism. The brake assembly and backing plate *should* pull off the bearing housing. However, it is located on the housing by one dowel pin on the brake shoe holder at the bottom. The dowel was stuck in there tight and I had to tap it out with a small brass drift and hammer. Don’t use a steel drift to do this, it will mushroom the dowel.
 See the dowel pin below the bolt holes in above pic? Wet area on trailing arm is due to some rust busting liquid I squirted on exposed threads on the 4 bolts holding the bearing housing on to the trailing arm. With the parking brake line detached from trailing arm it is possible to to pull off brake assembly from stub axle and lay to the side on the ground.
  Now remove the 4 bolts (17 mm?) that holds the bearing housing onto the trailing arm, and then the housing should pull right off the stub axle.
  Pretty ugly in there eh? Caked on dirt and some rust. I took the bearing housing to the bench for disassembly.
 The grease seals were stuck in tight, I had to put the housing in the vice and use a longish pry bar to pop them out.
  Above pic shows outboard grease seal removed and the inner race of the outboard bearing removed (it just falls out). On the inboard side, after the grease seal is removed there is a circlip to take care of.
  After circlip is removed the inner bearing can be removed by driving it out with a brass drift from the outboard side. The spaced sleeve in there between the bearings can be shoved to the side so that you can get the drift onto the bearing race. It took a bit of “drifting” to get the bearing out. If you have a press then you know how to do it better. Once that inboard bearing is out, the spacer is removed and then the outboard bearing outer race can be driven out. In my case that bearing was really stuck in tight. I used an old disk brake caliper piston to drive the bearing out, was a lucky good fit.

 There is a spacer in that gob of grease.
  Cleaned up the housing a bit, especially the bearing seats.
 All the parts arranged.
  Inboard bearing greased and carefully tapped in using that plastic headed dead blow mallet. Picture shows bearing started in housing, not fully seated.
  Bearings were tapped in carefully (a press would be better), the circlip inserted in the inboard side, the spacer installed and the grease applied liberally around the spacer, and the grease seals carefully installed. Again, picture shows bearing started, not fully seated.
  Now at this point, with the housing reassembled, if I had taken the stub axle off the van it would be pressed (or carefully tapped) into the bearings. But what I did was take the housing out to the van, slip it onto the stub axle making sure I didn’t damage the grease seals and that the spacer lined up on the shaft, and I pushed the housing onto the stub as far as I could. I bolted the housing to the trailing arm, then I used the brake drum and the big nut to slowly draw the stub axle into place. This method worked well. Oh, before I put the housing back onto the trailing arm I cleaned out the dirt and loose rust from inside the arm and shot a whack of Fluid Film in there.
  Then its a matter of putting the brake assembly back on, re-attaching the brake line (was a pain, I had to loosen the slave cylinder on the backing plate to get the thread started on the union), then the brake drum, big nut snugged up but not torqued, the wheel, and then get the van off the jack stands. Torque the big nut to spec (see diagram at beginning of post for torque specs), split pin installed, lug nuts torqued, and its done. No play in bearing when the wheel was grabbed, and the whine when driving was gone. I’m guessing that most Vanagon owners will only have to do this job once, or maybe twice, in the van’s life.
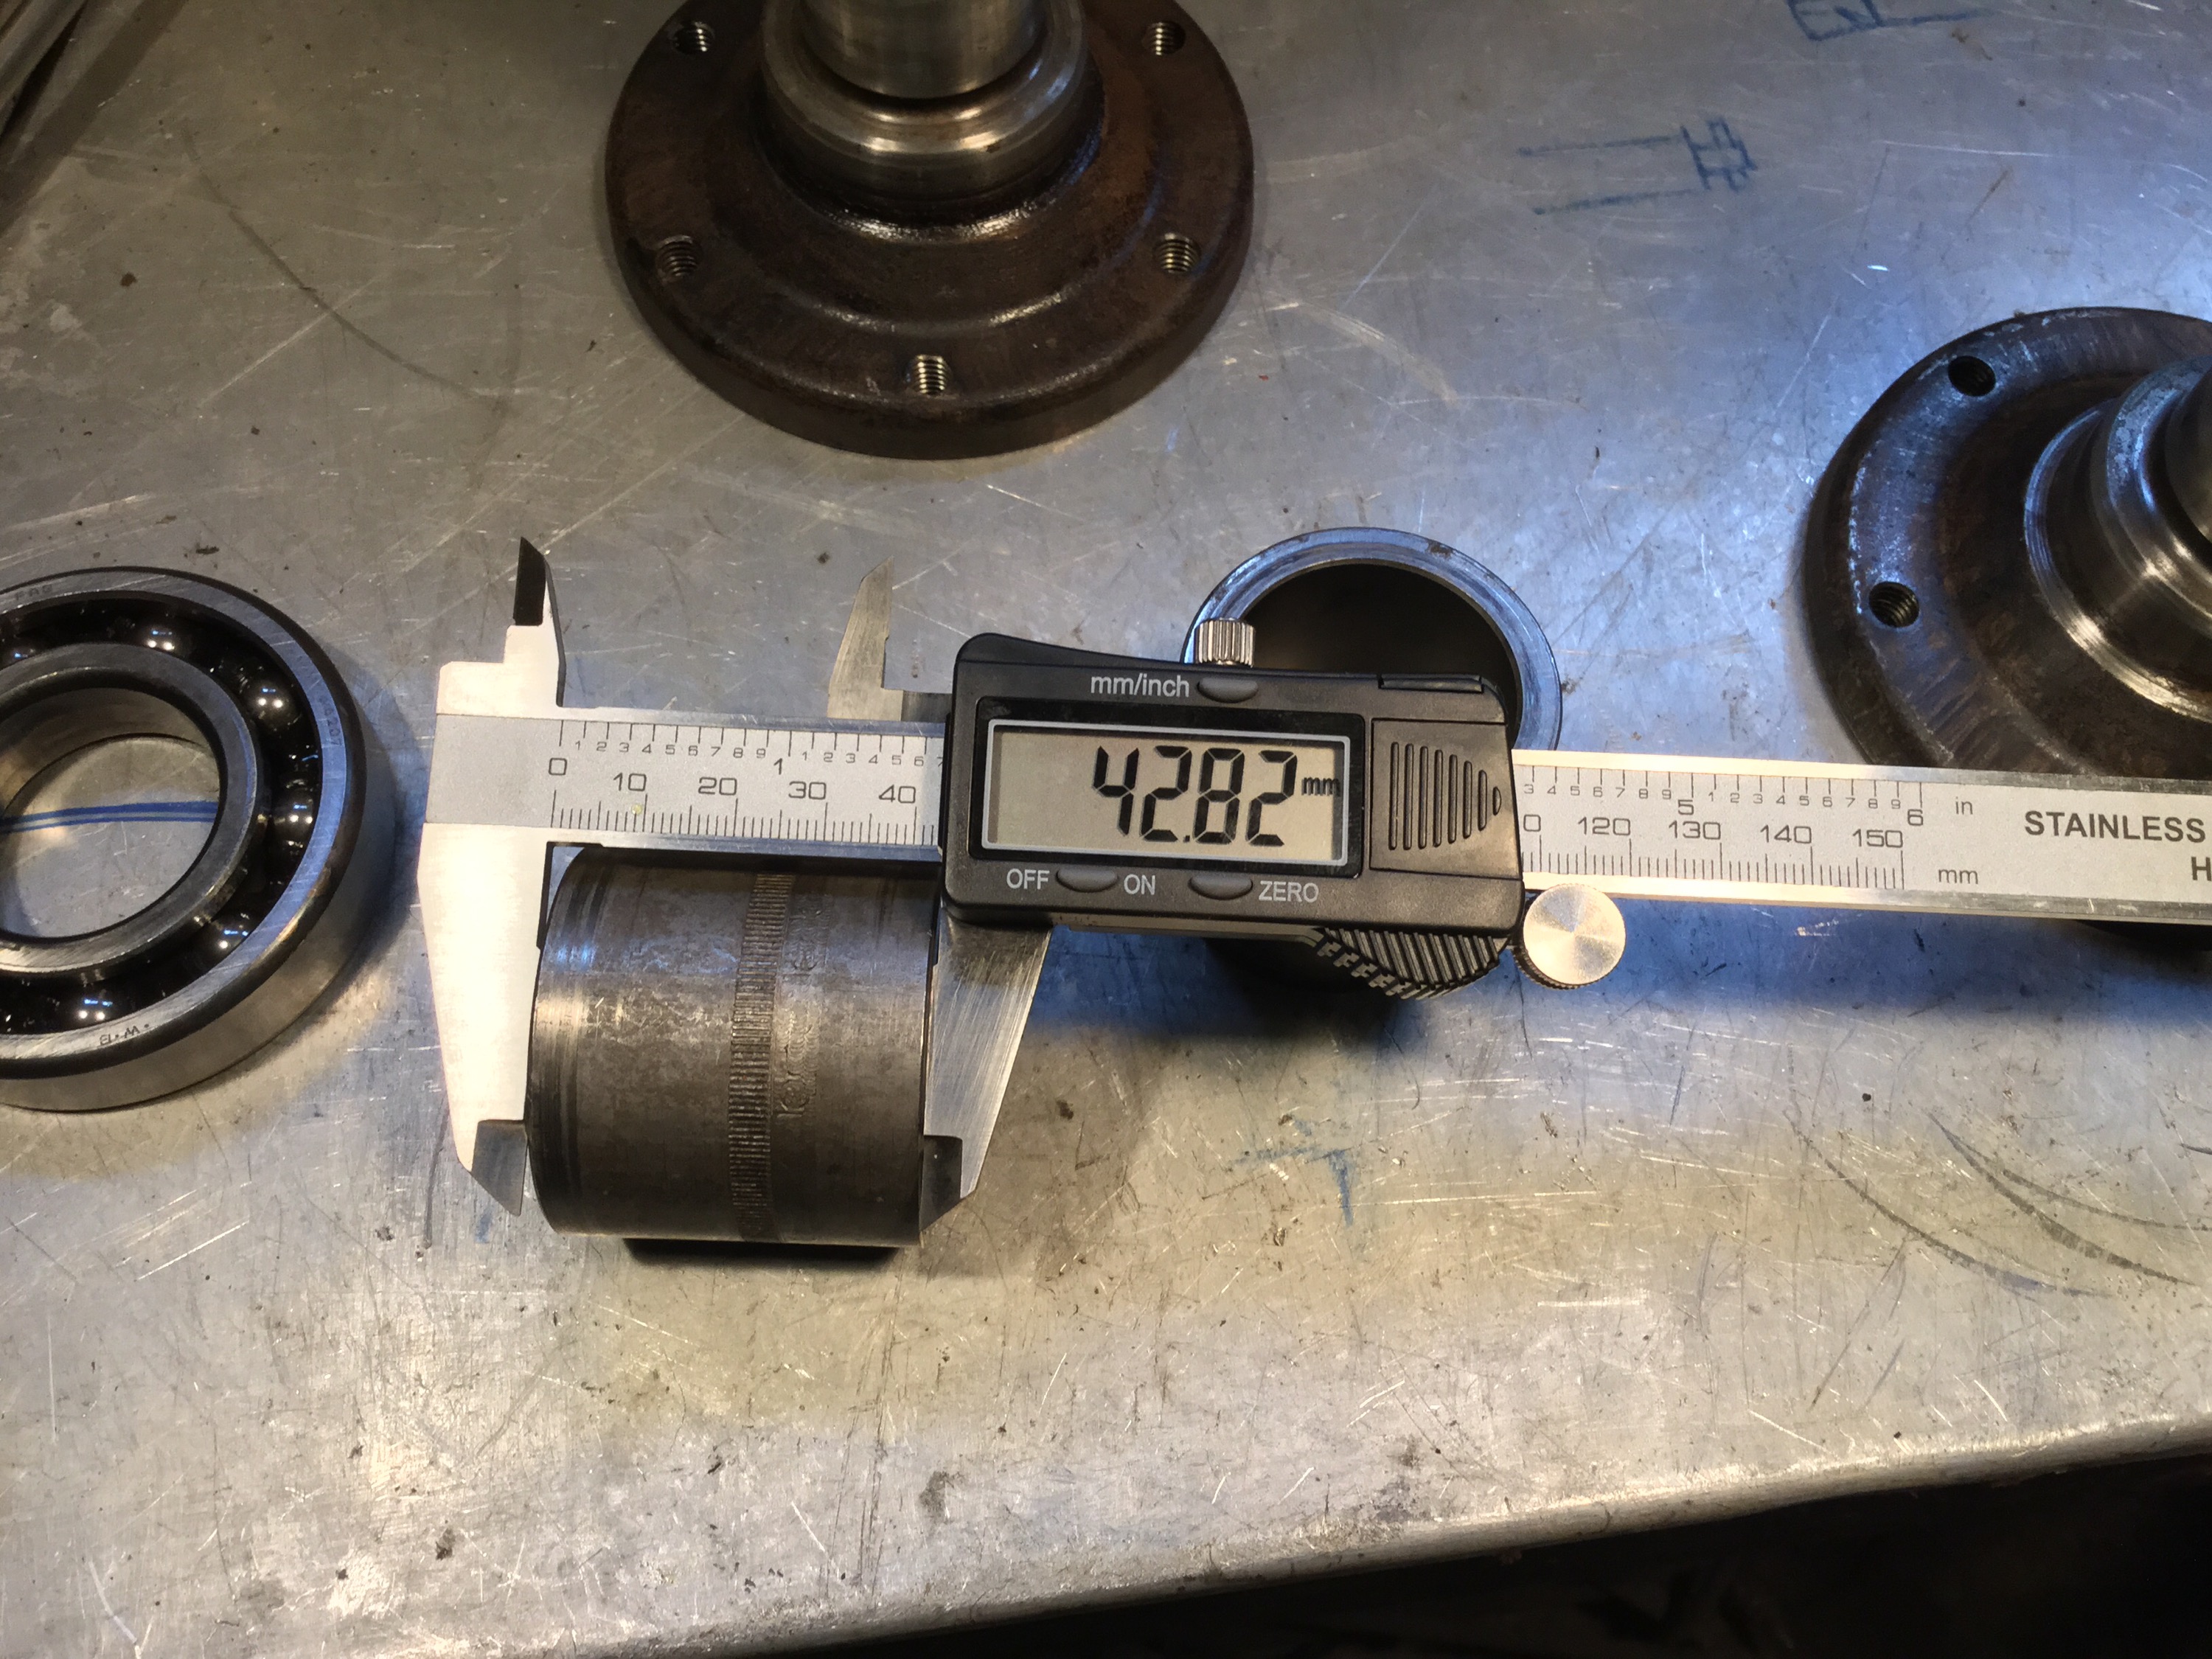
Addendum, April 30 2015, some measurements for Josh 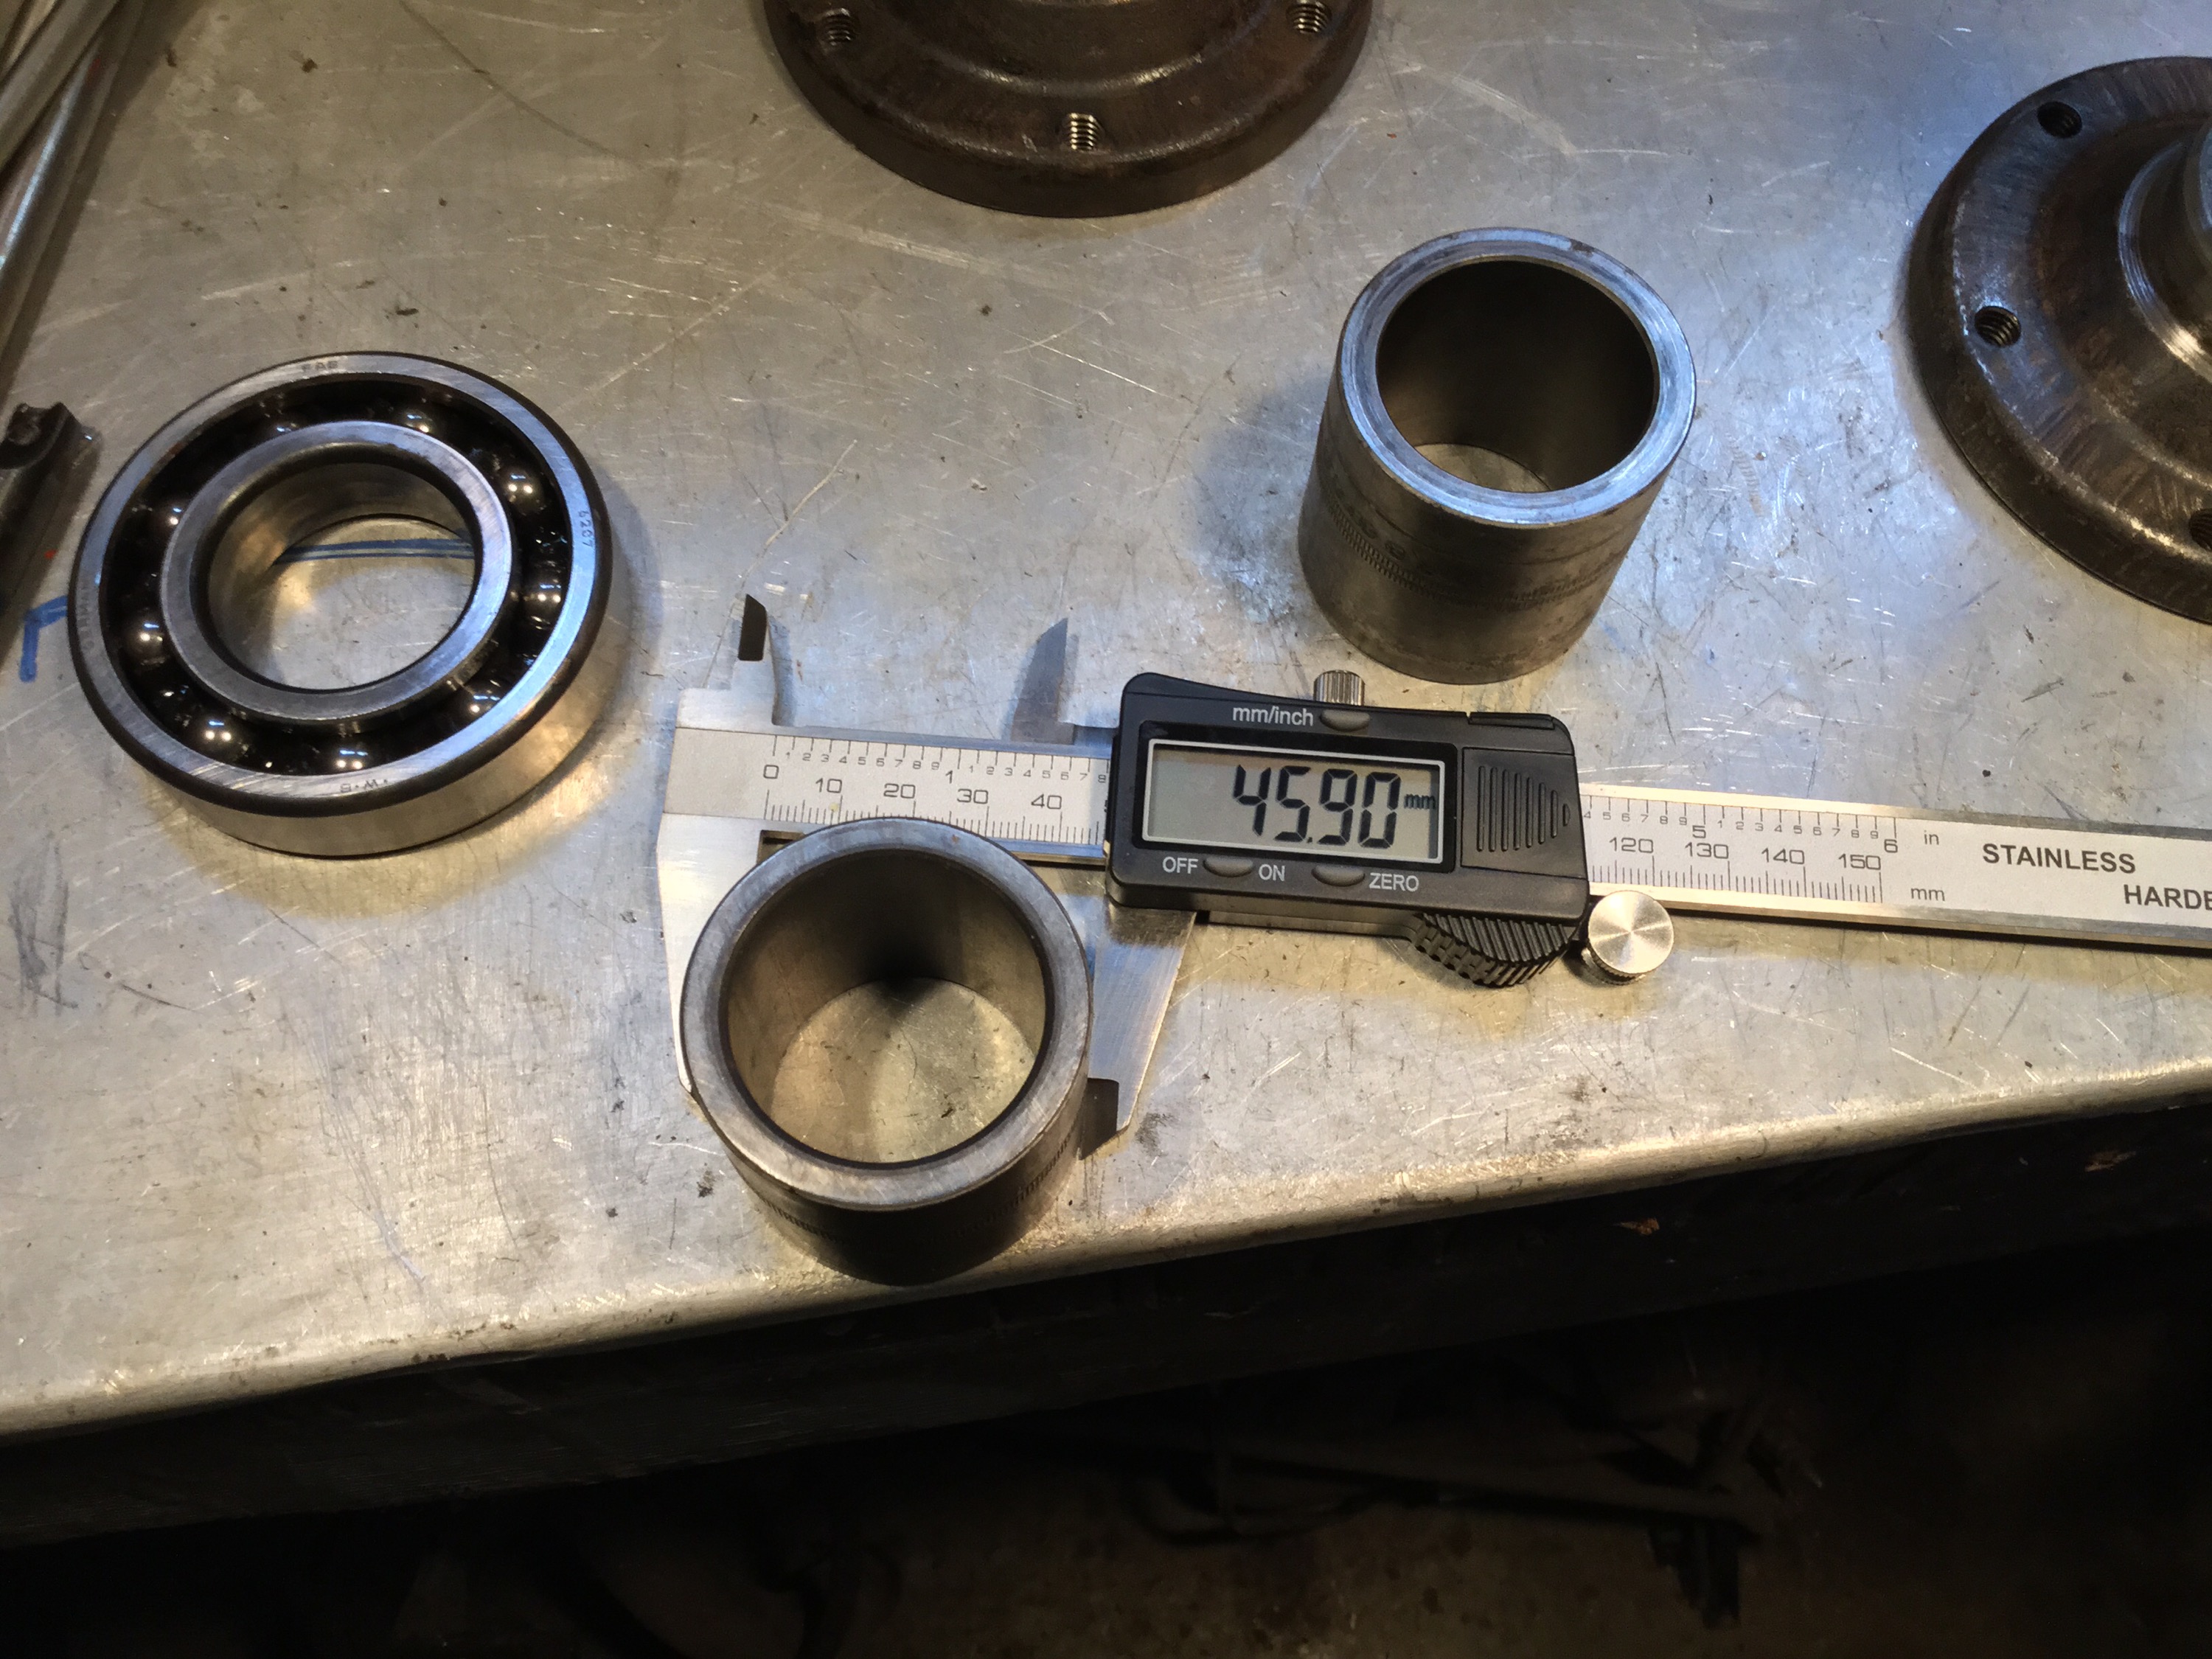


ATA – Bristol Hercules slide valve engine
Posted by albell in aircraft, around the airport on April 9, 2011
Correction: it is a sleeve valve, not slide valve engine. Of course… dunderhead mistake.
Three shots of this fascinating engine housed in the BC Aviation museum. More info can be found at this Wikipedia entry.


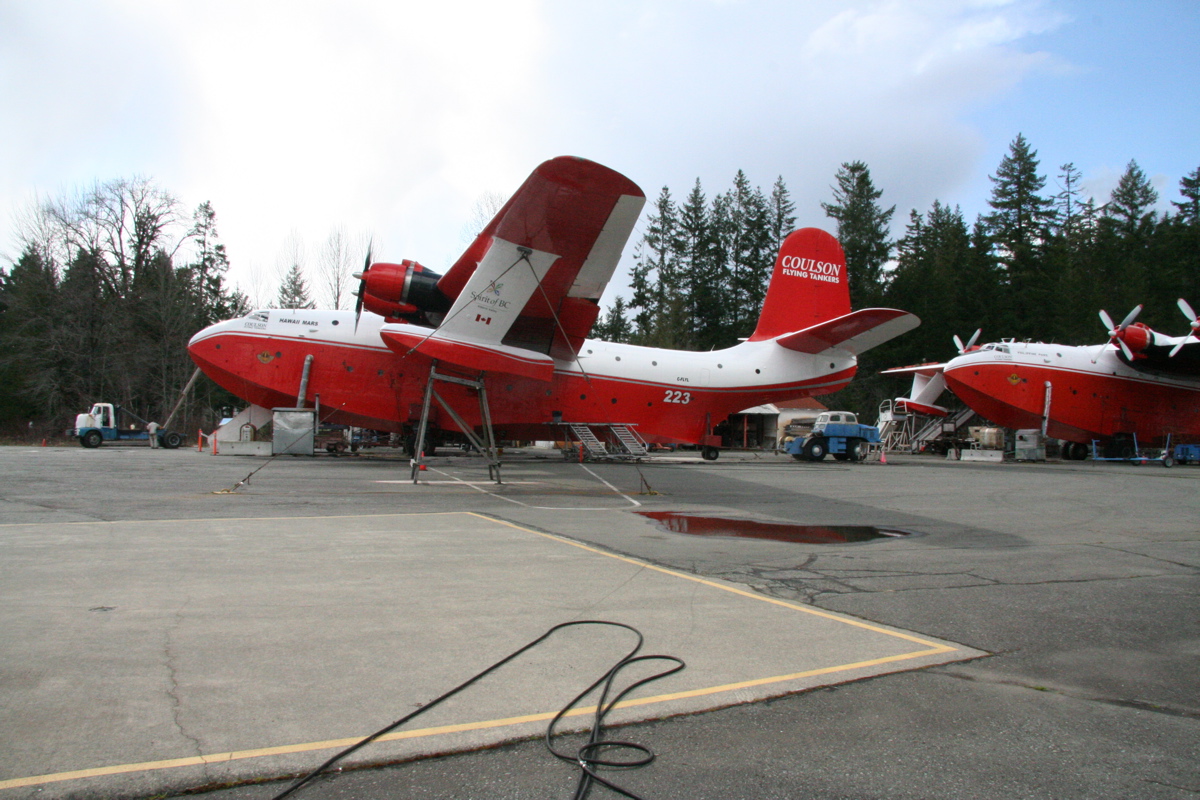
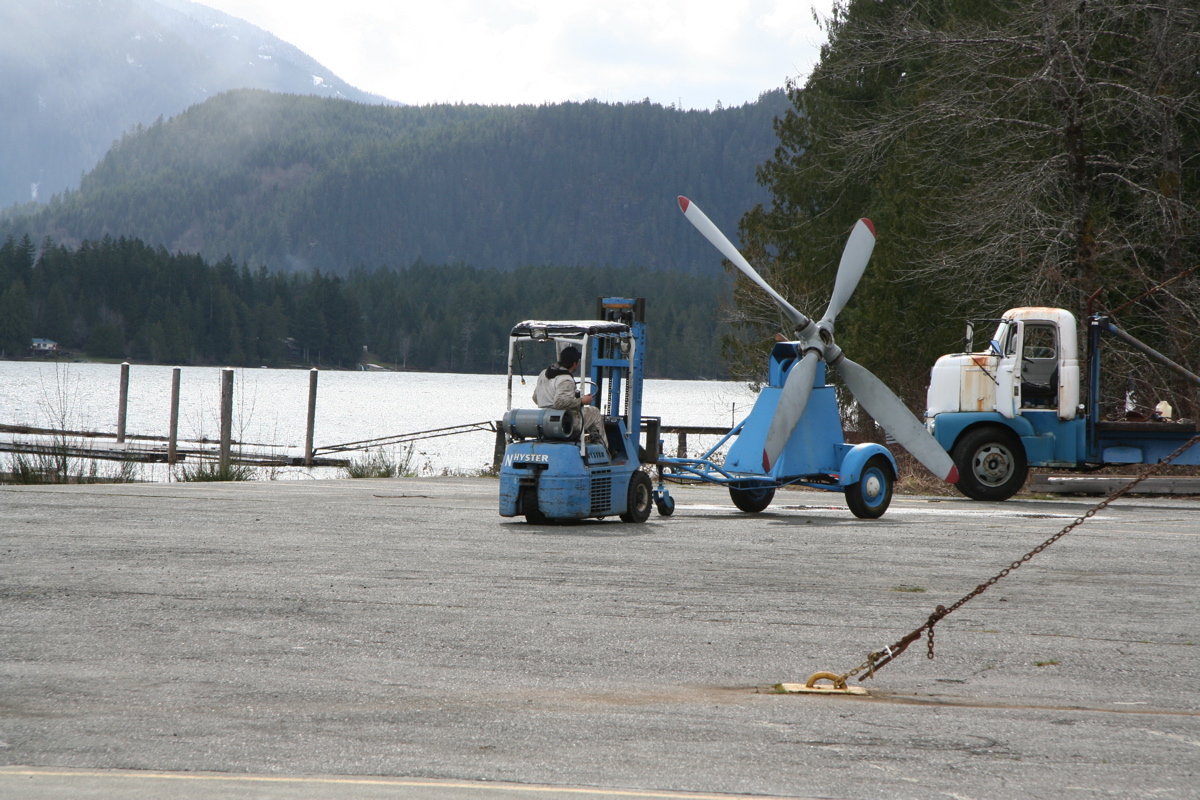
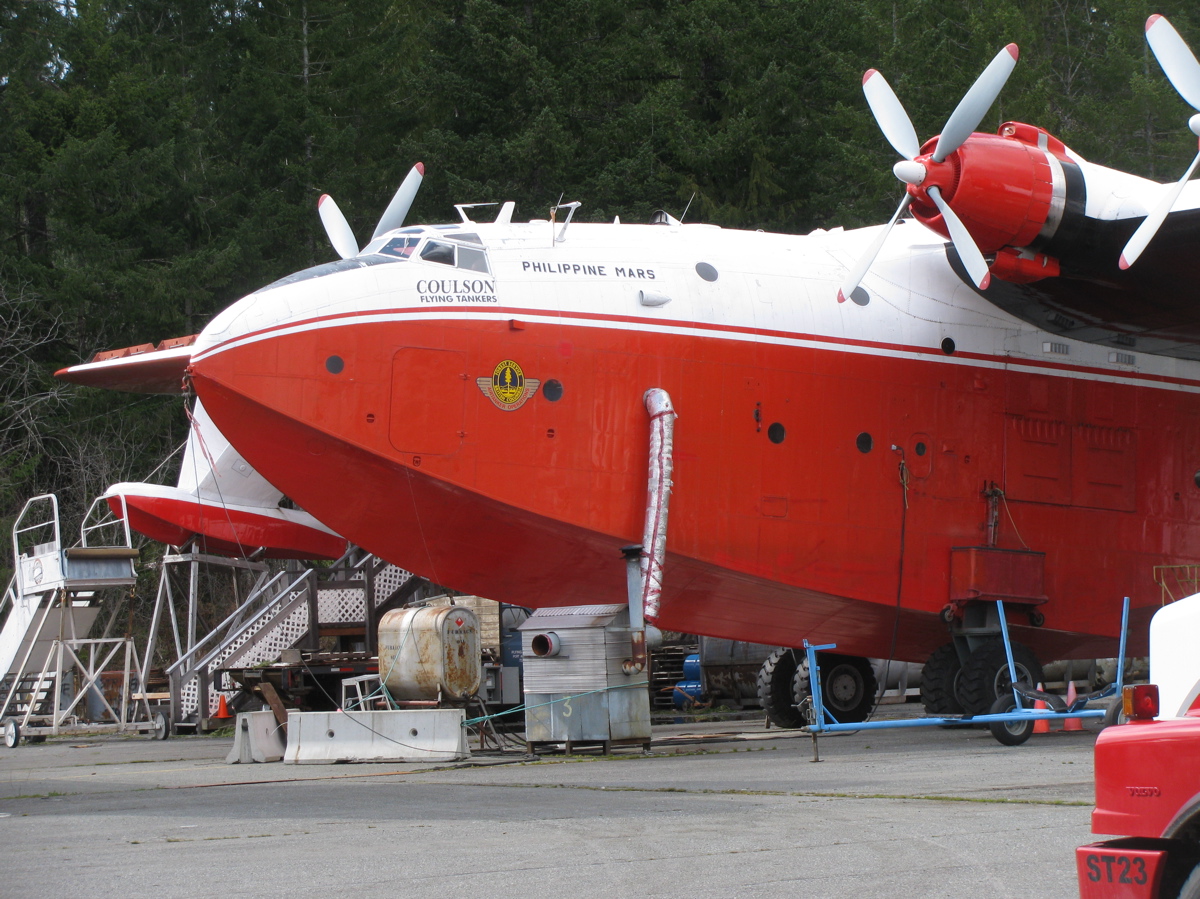
ATA – Martin Mars water bombers
Posted by albell in aircraft, around the airport on April 8, 2011
Not at my local airport, but at Sproat Lake near Port Alberni. One of the planes was having a prop removed.


Another logging road trip
This time with visiting Vanagon mailing list pundit David B. We headed to Port Renfrew, then north on that paved road to Lake Cowichan. From there it was logging roads to Nitinat and finally Sarita, a dry sort and booming ground on the south shore of Barkley Sound. Next day we headed west to look at the Pacific at Pachena bay, then north east to Port Alberni and got to see some nice machines behind the scenes at The Alberni District Museum and Historical Society , the Maclean Sawmill museum, and a quick peek at 2 Martin Mars water bombers at Sproat Lake. Then back to Victoria on civilized roads, stopping to look at the big Douglas Firs at Cathedral Grove.
The pics are a mix of mine and David’s.
