Archive for December, 2015
Vanagon – syncro starter repair
Posted by albell in syncro, syncro specific repairs, vanagon on December 10, 2015
Tuesday morning the van turned over slowly, but did start. I had to drop by a couple of places before getting to work, and on the second stop the starter died. Nothing, no click, no movement. Did a rolling start to get to work and there I checked out things ( connections, battery) and decided the starter was kaput.
I have to admit that the starter had been acting up on occasion for the last 6 months or so. Occasionally it would spin but not engage the flywheel. I agree, I should have known better.
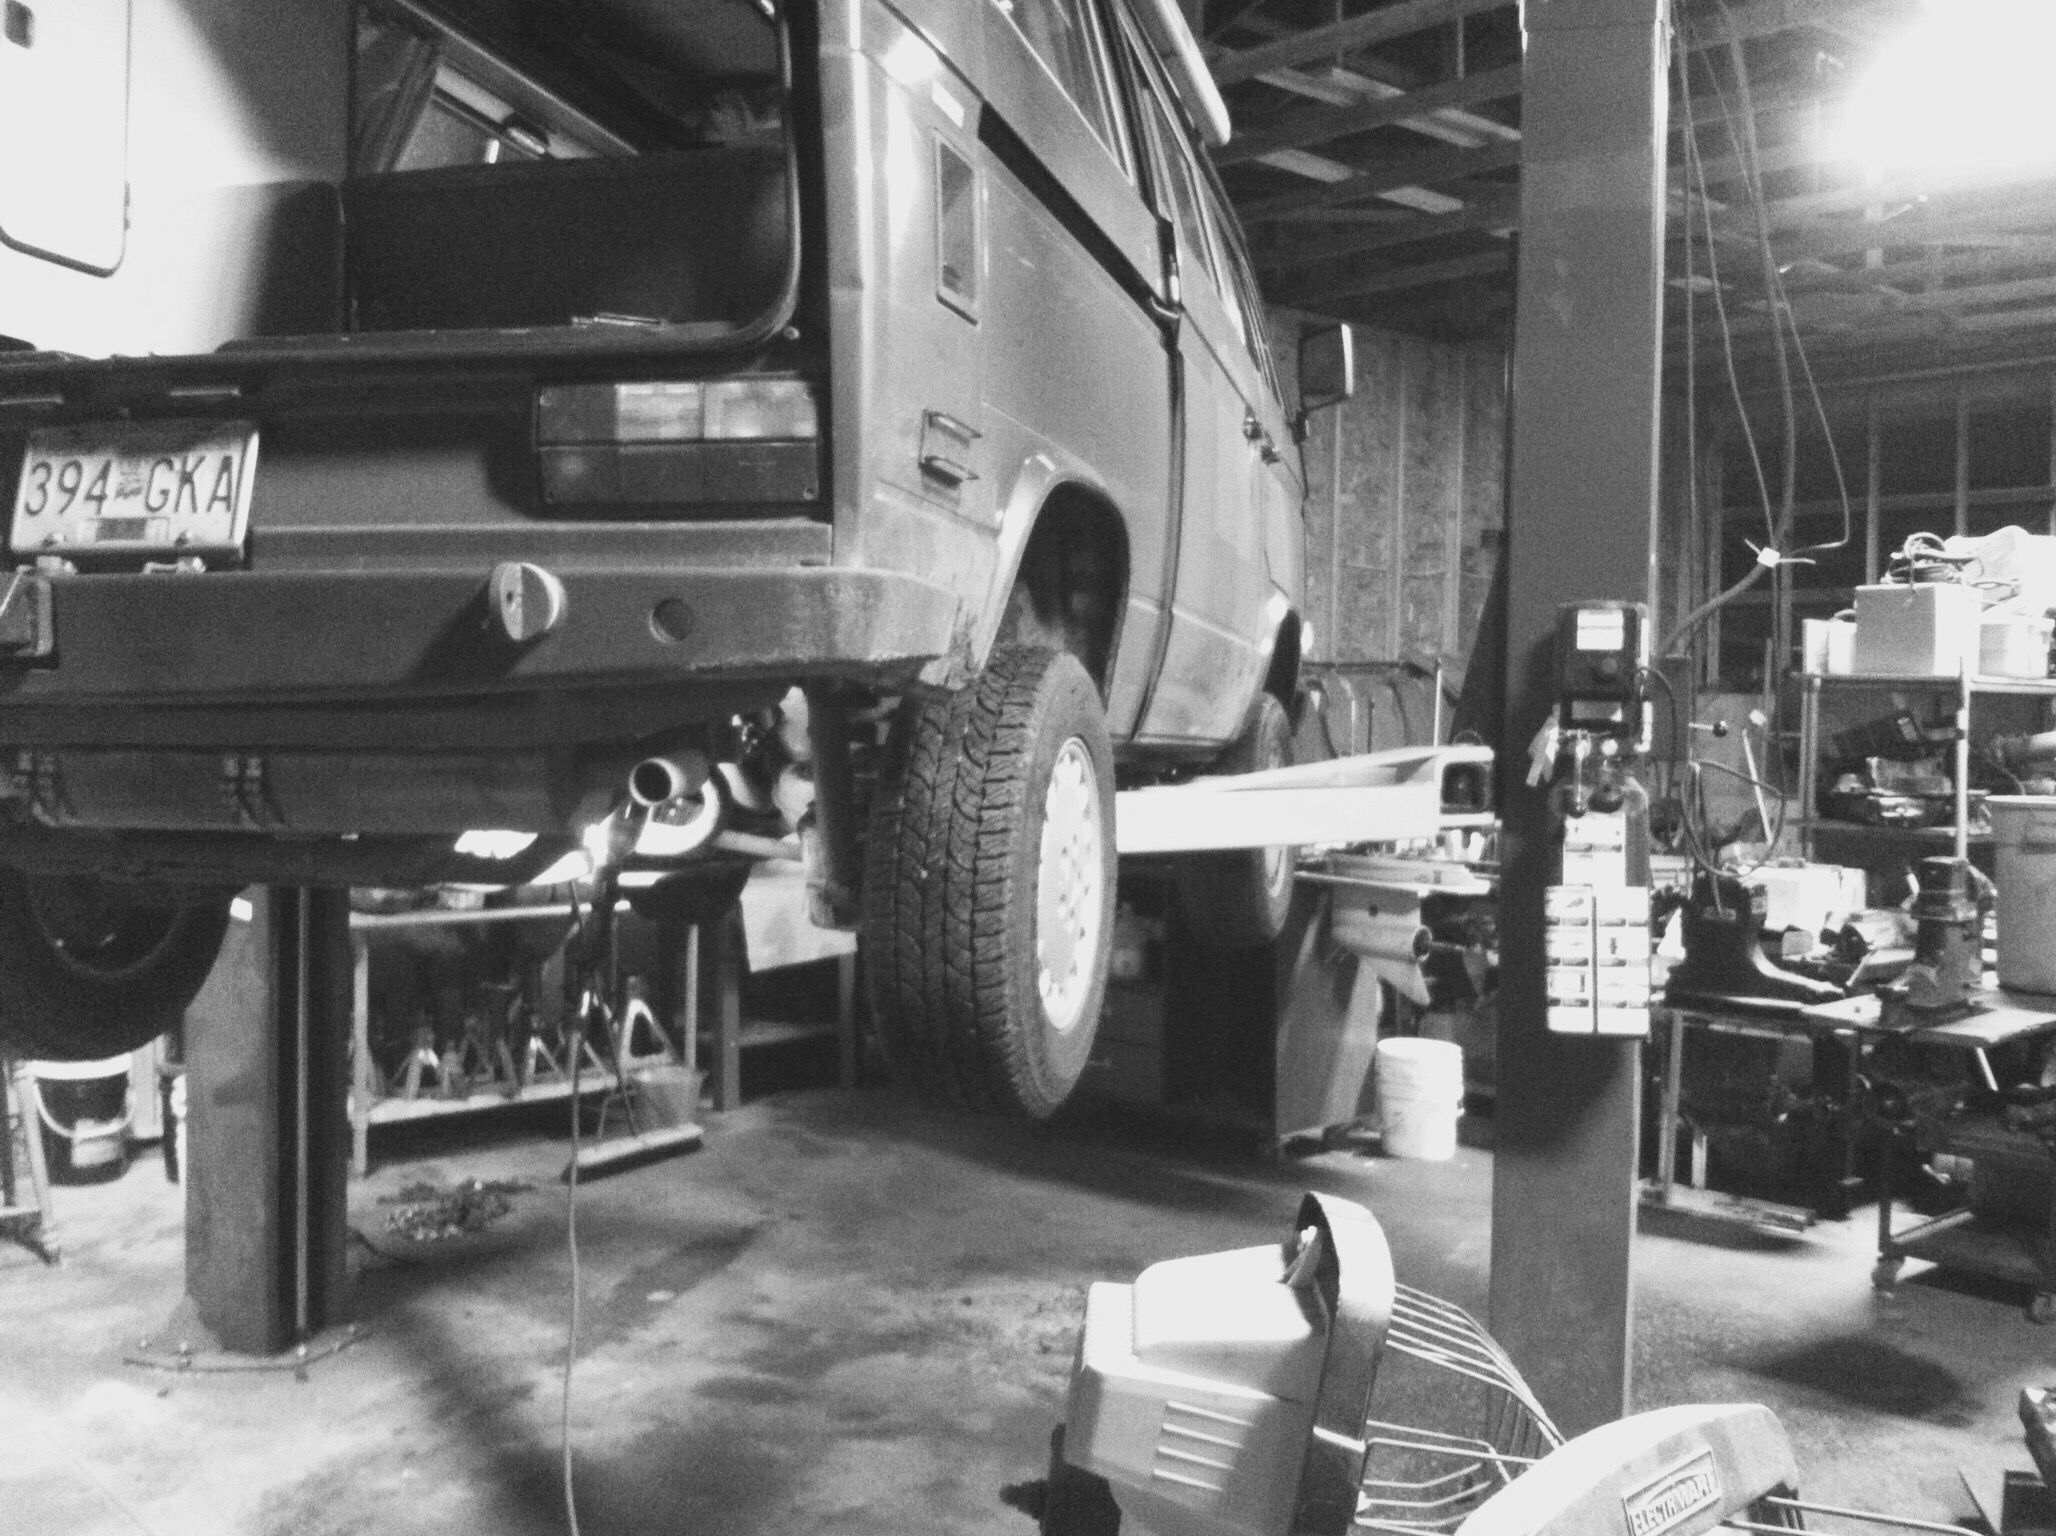
As luck would have it, workplace close by my work had a hoist and it was free. The owner let me use it and later that afternoon I got it up on the lift.
I really wasn’t in the mood to document the job, but I did take a couple of pics and while things are fresh in my mind I have a couple of notes about the job.
Bentley does a fair job of describing the procedure, and there are a few threads on the Samba with additional tips. This was the first time I had taken out a stater in a syncro with engine in van, and I had to use both sources.
Battery disconnected
Van still on ground, S boot on air intake and air filter removed. To get access to the upper starter bolt.
Upper bolt for starter mounting removed. 17mm wrench size on nut on engine side, hex key on transmission side (forget size).
Van lifted
Driveshaft disconnected from transmission. I found the boot ripped so I took driveshaft completely out. I had a ready to go spare axle assembly and I felt chuffed about that. This kind of preparedness doesn’t happen very often
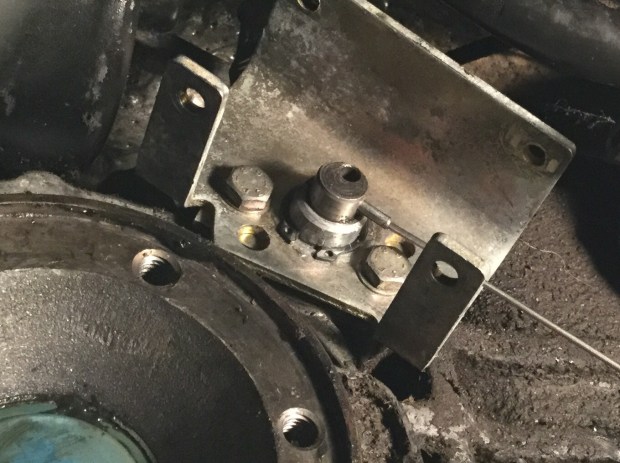
Diff lock actuator. Now this is a little bit of a bear. I found the nuts that Bentley said were welded to the bracket weren’t. Also found that the rubber sleeve covering the actuator shaft was a section of heater hose. So there was no pushing that up to drive out the roll pin, I cut the hose off. You can sort of see the cut hose in this pic.
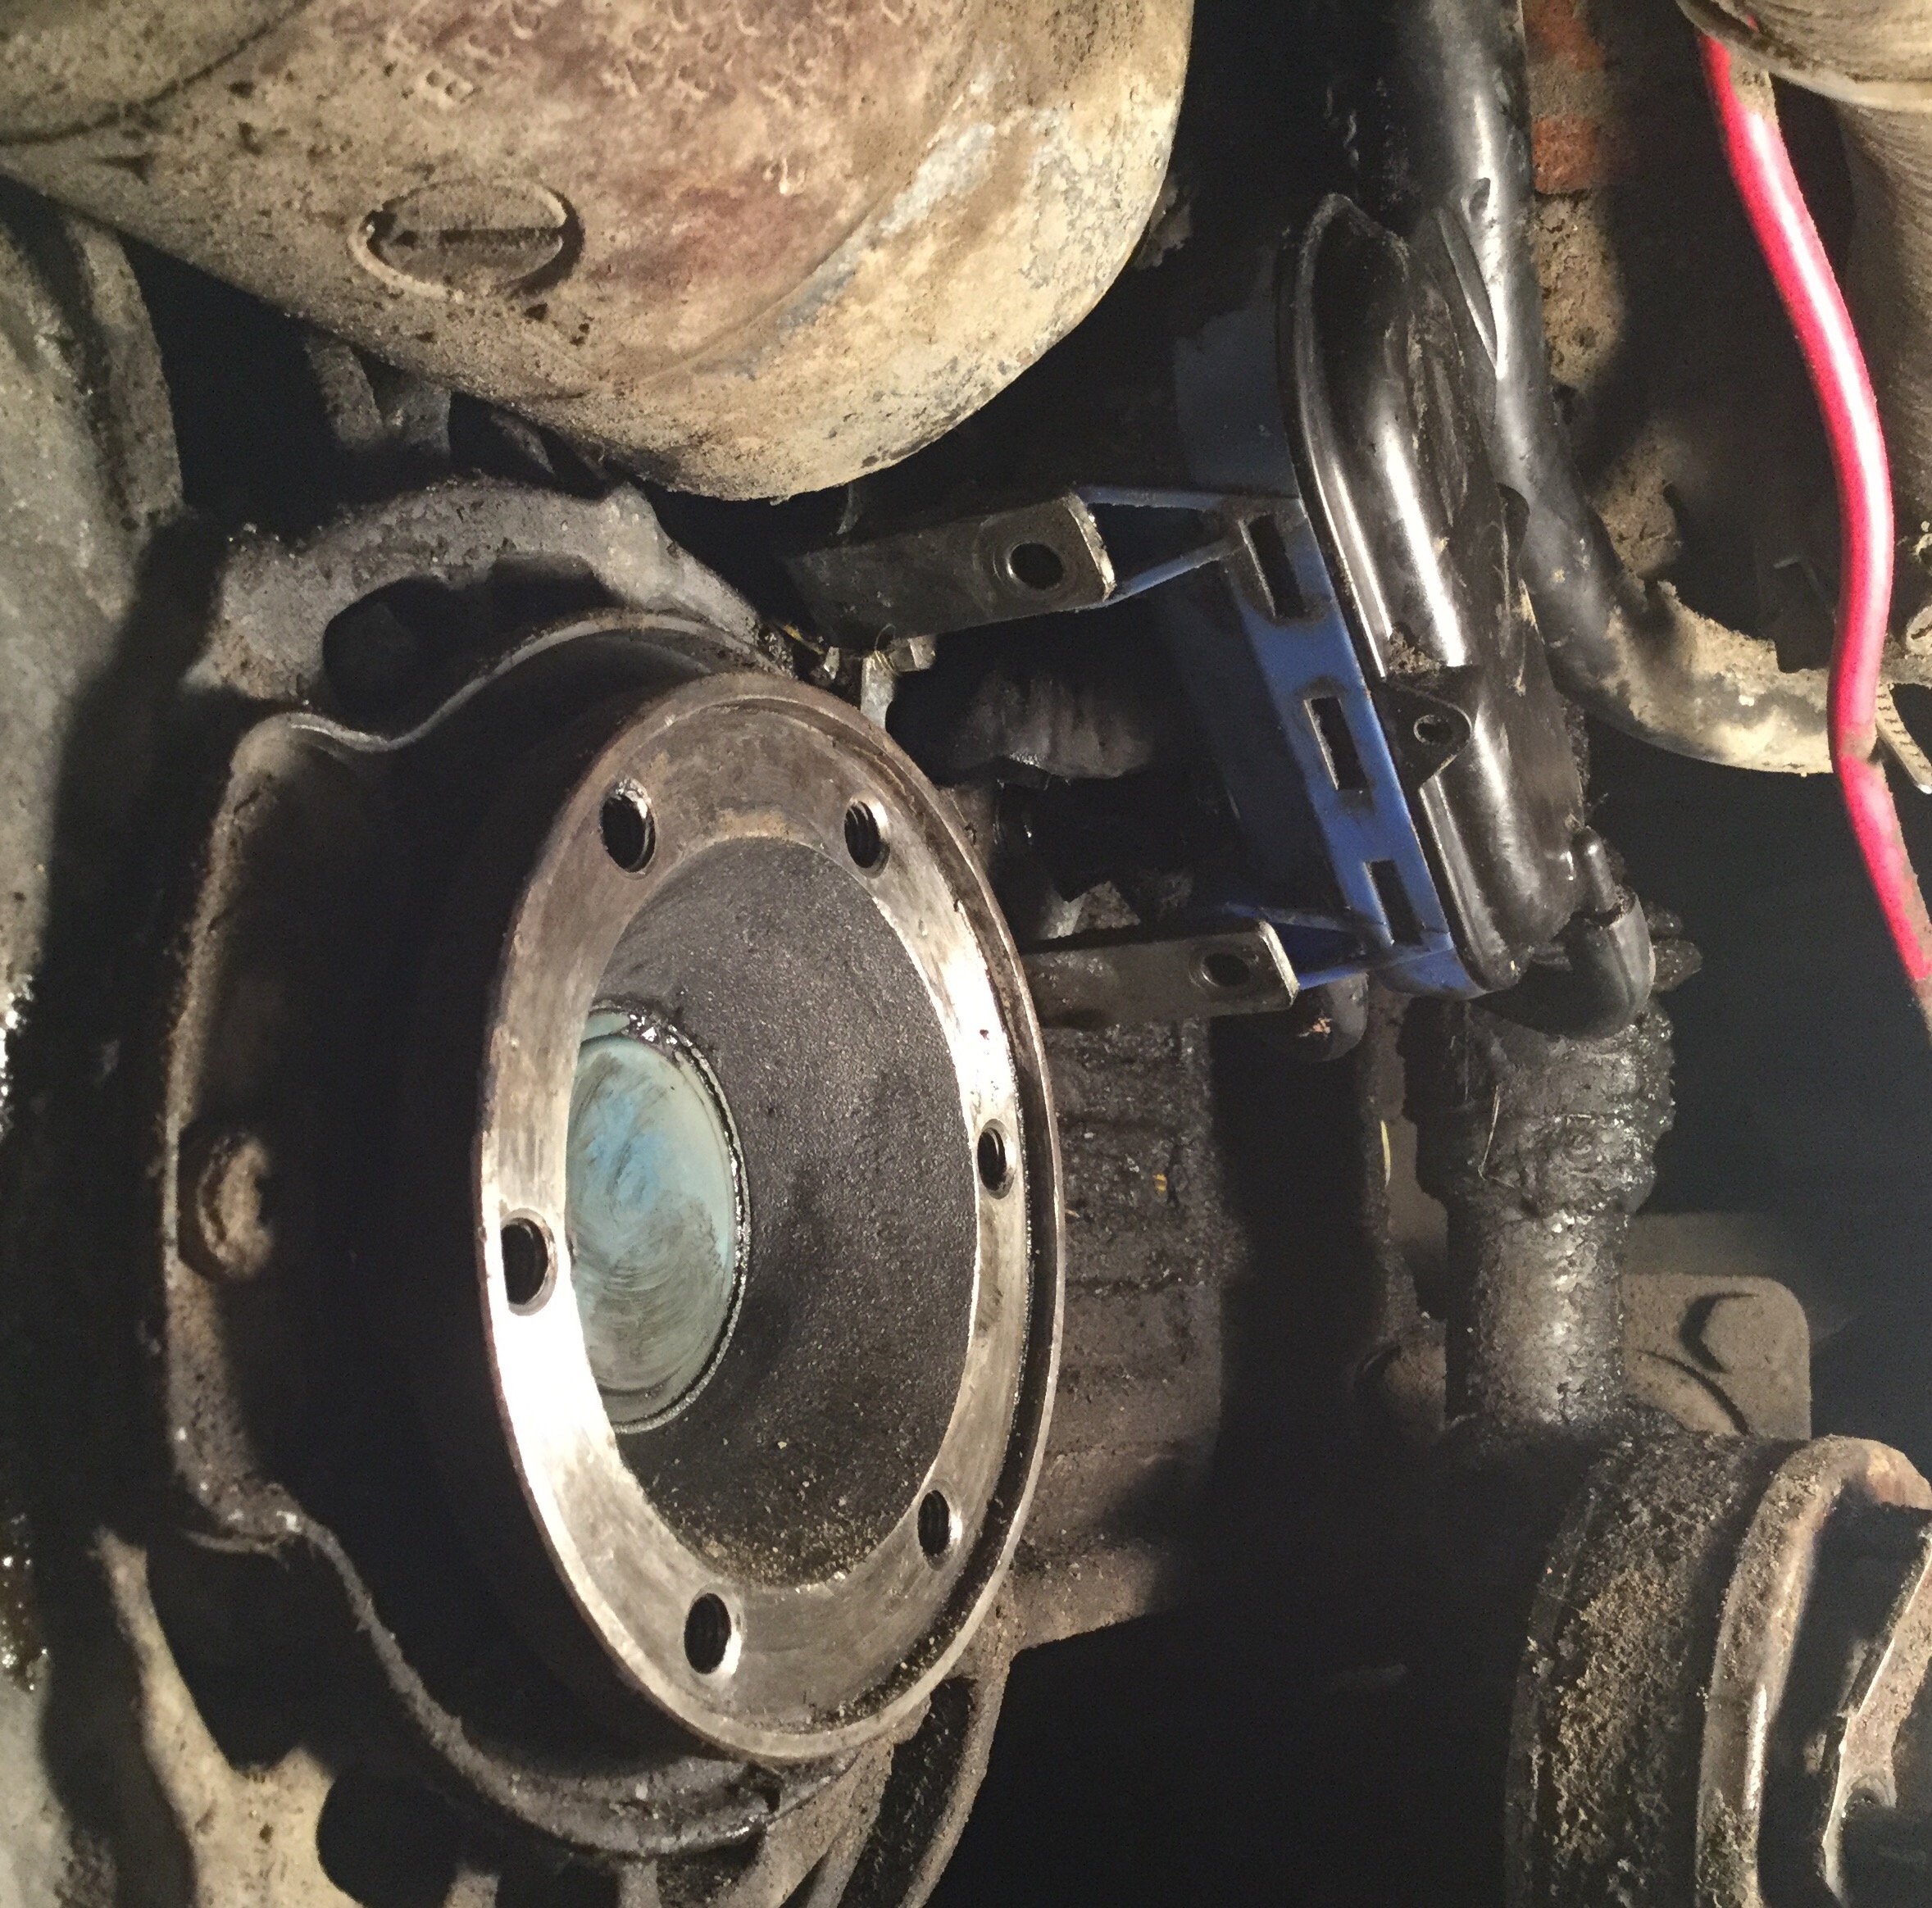
Driving out the roll pin wasn’t as hard as I expected. Room is limited in there but I managed to do it and leave the roll pin still actuator shaft.
Now the lower starter mount nut, and the jiggle and wiggle to get the starter out. Once the gear end was out and it dropped down a bit I could remove the electrical connections. Took the starter to the bench, took apart the solenoid. Look ok I guess, it would retract under power if I gave it a helping push. Removed one end of the starter and, well, have a look.

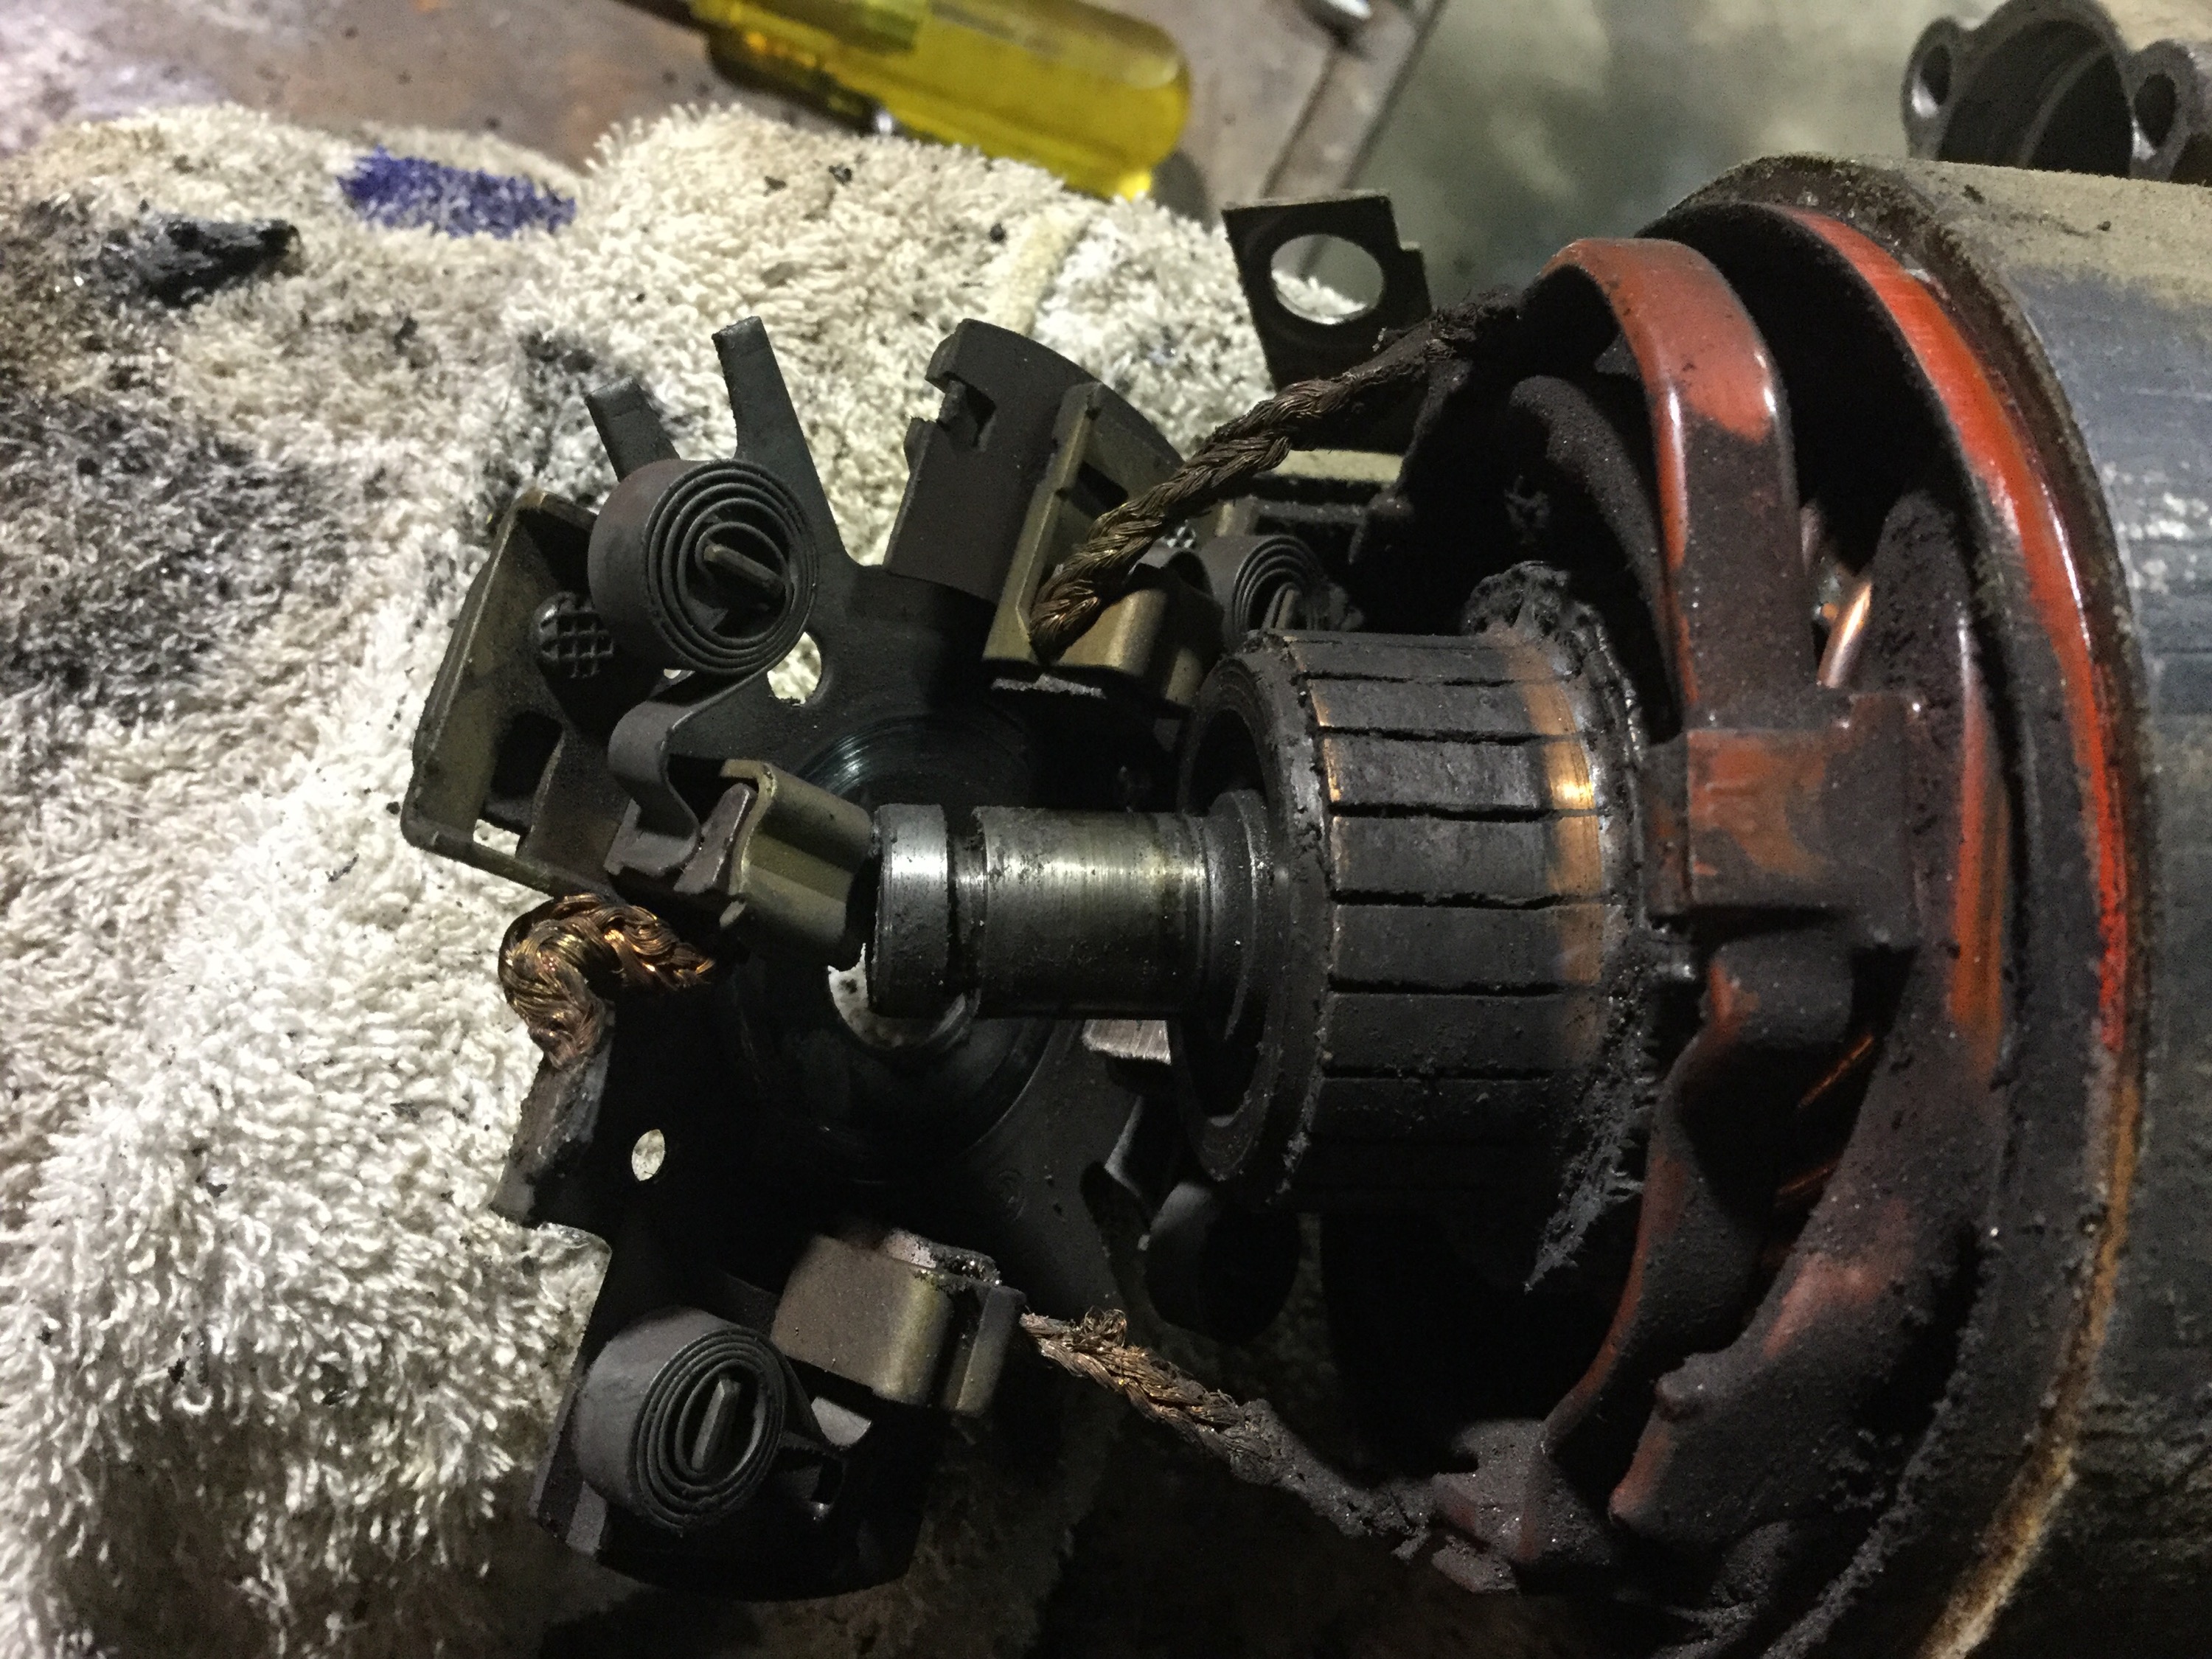
Brushes worn down to a nub. Commutator burned, dirty, ugly.
Next morning took starter to rebuilder in town. I can’t really explain why I chose to have it rebuilt instead of buying new (or factory reconditioned, whatever that means). Starter would be ready that afternoon.
Back out to work. Had some time to swap in my spare axle, but left transmission end up attached.
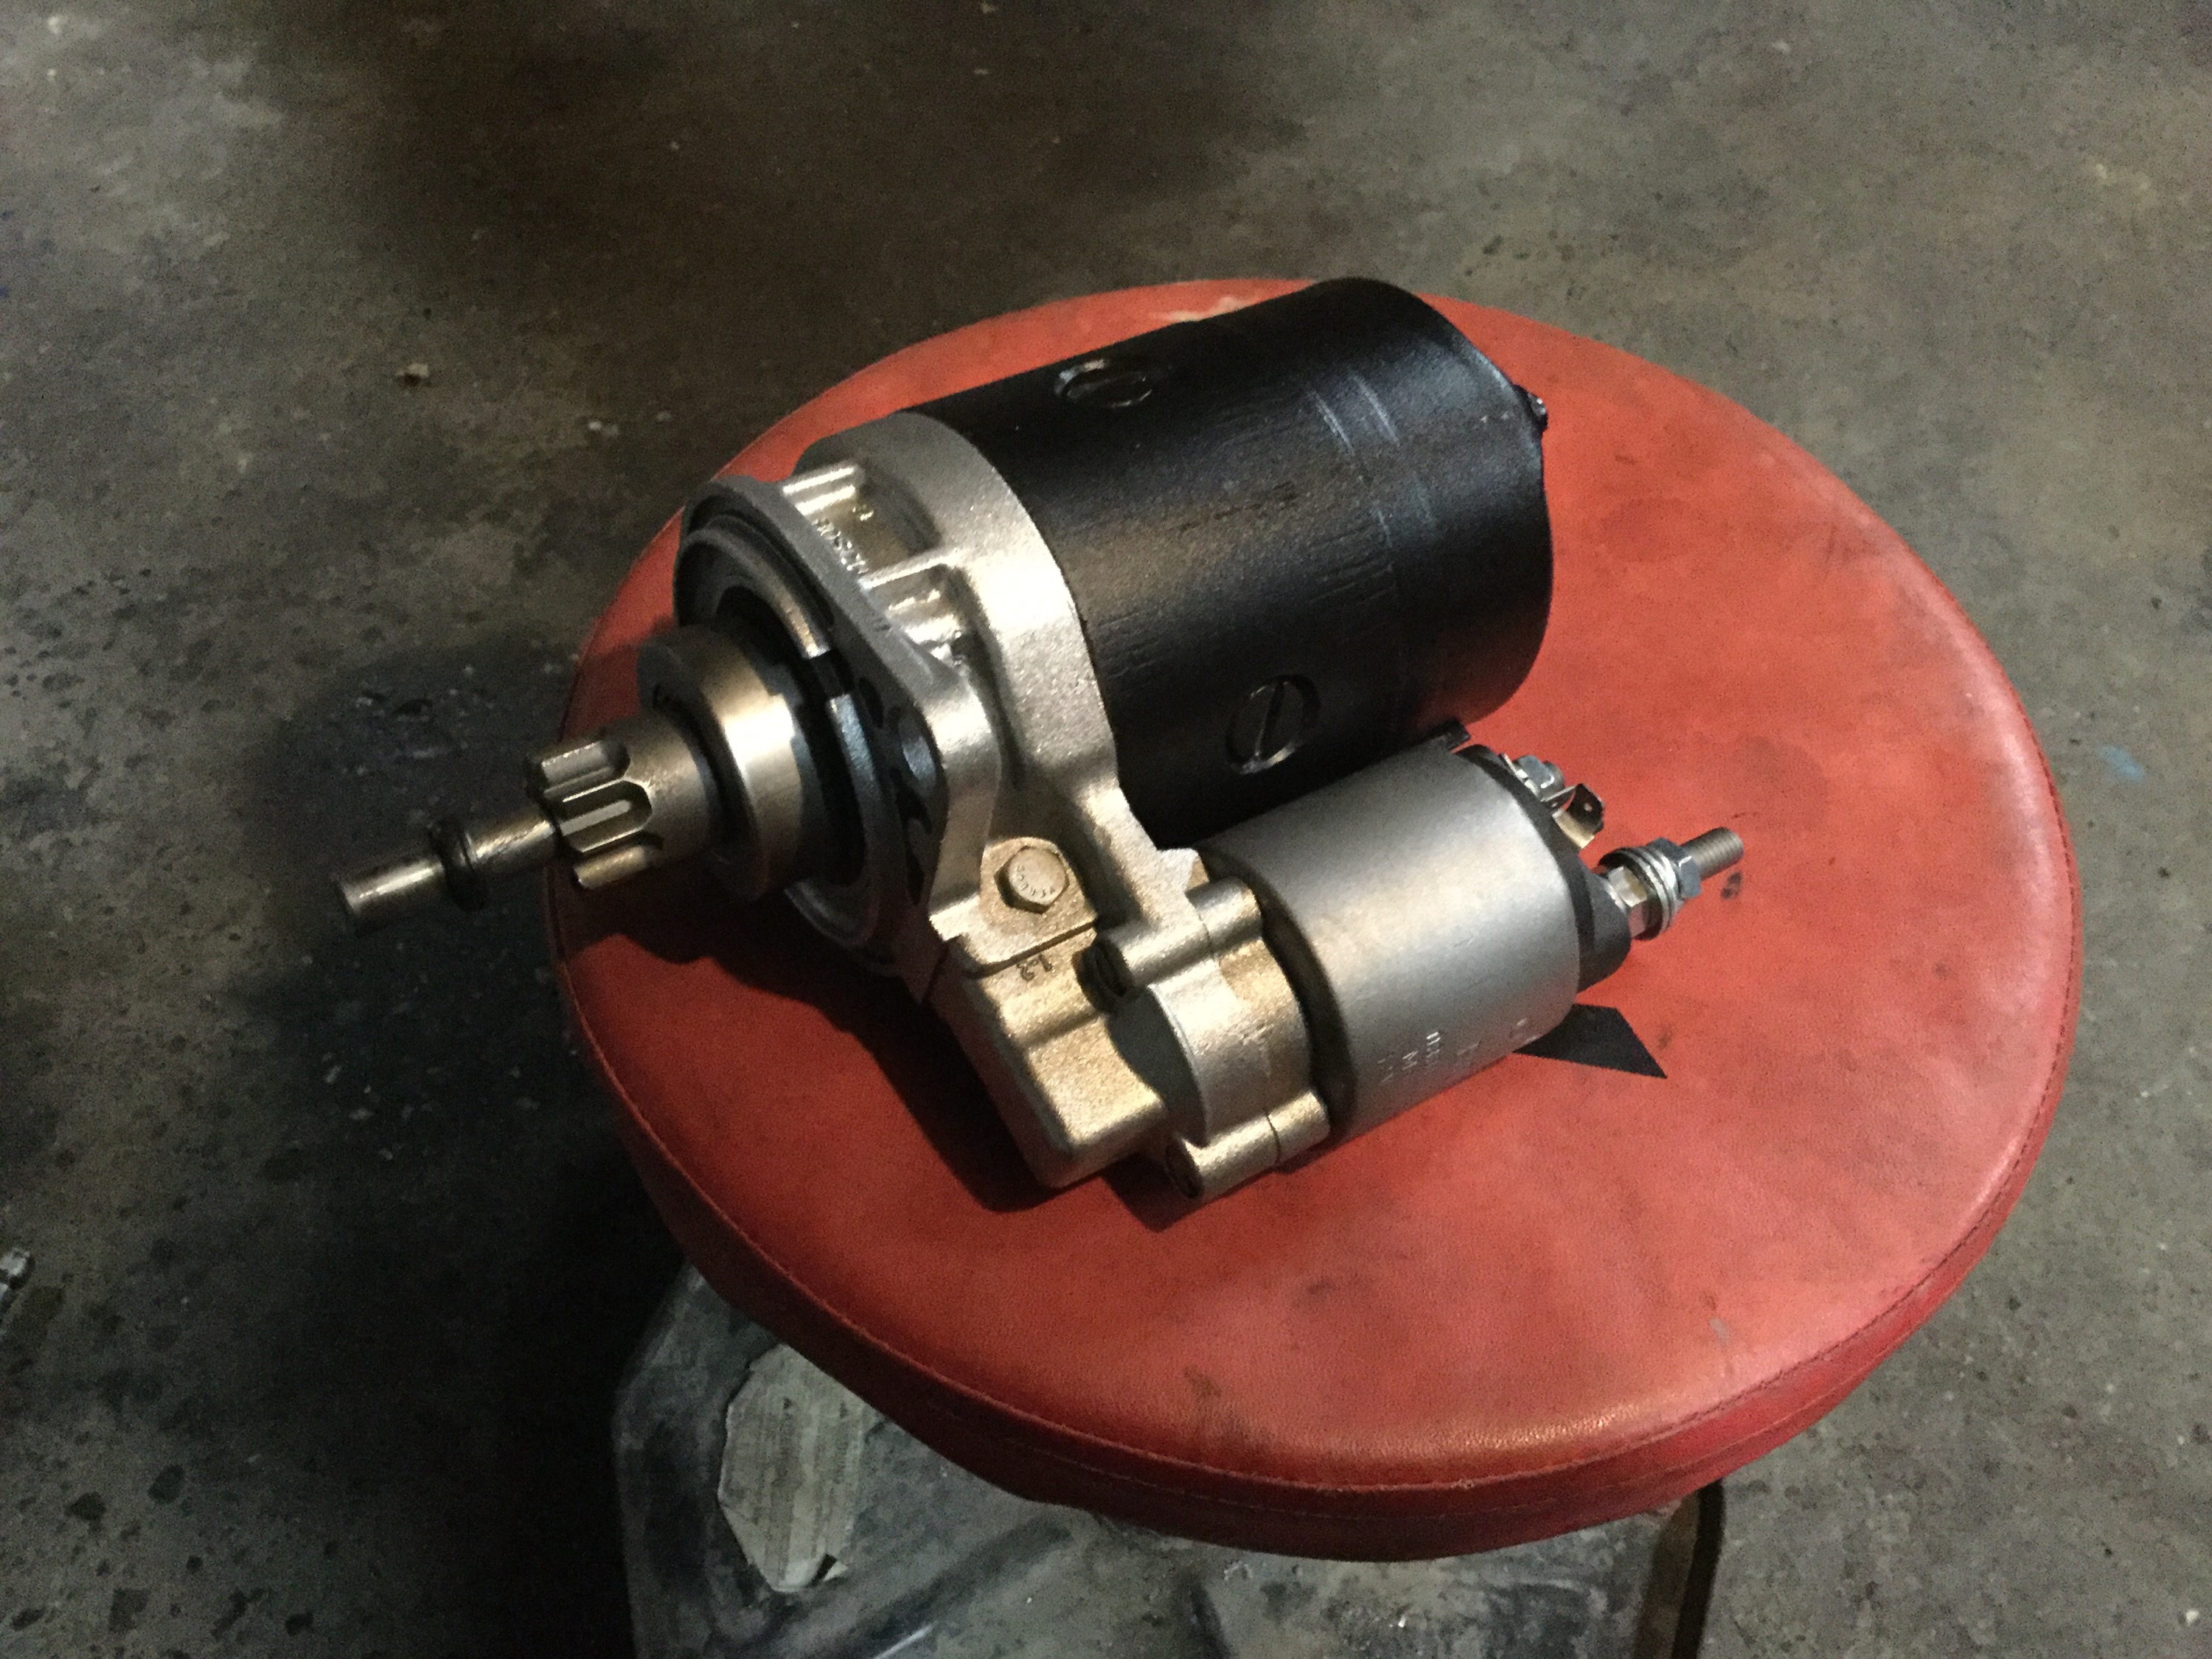
Back to town for starter. Labour charge CA115 ( 84/hr rate), parts 43 bucks. New solenoid, brushes, drive gear, commutator turned, armatures checked. Looks brand new.
I really don’t like how the signal wire is attached to the solenoid by a spade connector. So I soldered on a female spade connector, then crimped and soldered on a long pigtail to the spade. Heat shrink and silicone grease. Pigtail will lead to a relay in the engine compartment that I installed a few years ago.

Diff lock actuator boot – well I copied what the previous owner did and used some hose. Polybraid stuff this time with a little window cut into it so the roll pin could be driven home. You know, the acuator shaft was pretty clean when I removed the hose so I figured it worked well enough to do same.
Getting the roll pin back in is a little tricky. What helped a bit was threading the roll pin onto the end of some stainless welding rod. It fit nicely and fetched up on the ID stamp of the rod.

Pic shows the idea without the clutter of the vacuum gizmo and the home made boot. The wire allowed me to get the roll pin in and engaged, then I could remove the wire and tap the pin home with small punch and hammer.
I replaced the starter bushing in the bell housing. Used a 7/16″ tap and screwed the tap into the old bushing and as the tap bottomed out in the hole the bushing screwed up on the tap and out. New bushing was a bronze, oilite type bushing so I soaked in oil before hand and gave it a bit of pressure between fingers with bushing filled with oil. Fingers on open ends. I thought getting the bushing in place would be tricky so I made a quick install tool from some brass rod. Rod turned down to fit snugly in the bore of the bushing, shoulder on the rod, and the turned down section just a little longer than the bushing length so I could feel the entrance to the hole. That worked out pretty good.
Acuator in place, starter then wiggled and jiggled up and into place. I used sealant on the mating surfaces. I made the lextrical connections when the starter was partly in place. Oh, forgot to mention, made a new wire from big stud in solenoid to alternator.
Inner cv joint connected
While van was on lift I decided to rotate tires. Noticed scraping noise on rear drivers side wheel. Pulled drum and found the adjustment lever had broken and the spring dangling. The broken bit was still in drum. Have no idea how that happened. So off comes the shoe, some prep on the metal, and I welded it back together.
Then van down to the ground, upper starter bolt installed, all the other mess in engine compartment cleaned up, the new wires from the started connected.
And yes, the starter worked. Jeez, much faster than before. My starter was dying a slow death.
