Archive for April, 2016
Vanagon – one more hatch ladder/tire carrier
Posted by albell in metalworking, vanagon, vanagon mods on April 27, 2016
I’m rushing to finish this one so I took some pics while I still had the presence of mind to do so. Shooting into the sun and using the iPad, not the best formula.
Still prototyping and fooling around. This one has more rungs. Perhaps more than you need but the request was for a tire carrier that might at some time be used just as a ladder. The tire carrier unit clamps onto a pair of the rungs, but only at one location.
That’s a stock 14″ rim on there, just to give an idea of where wheel sits.


.
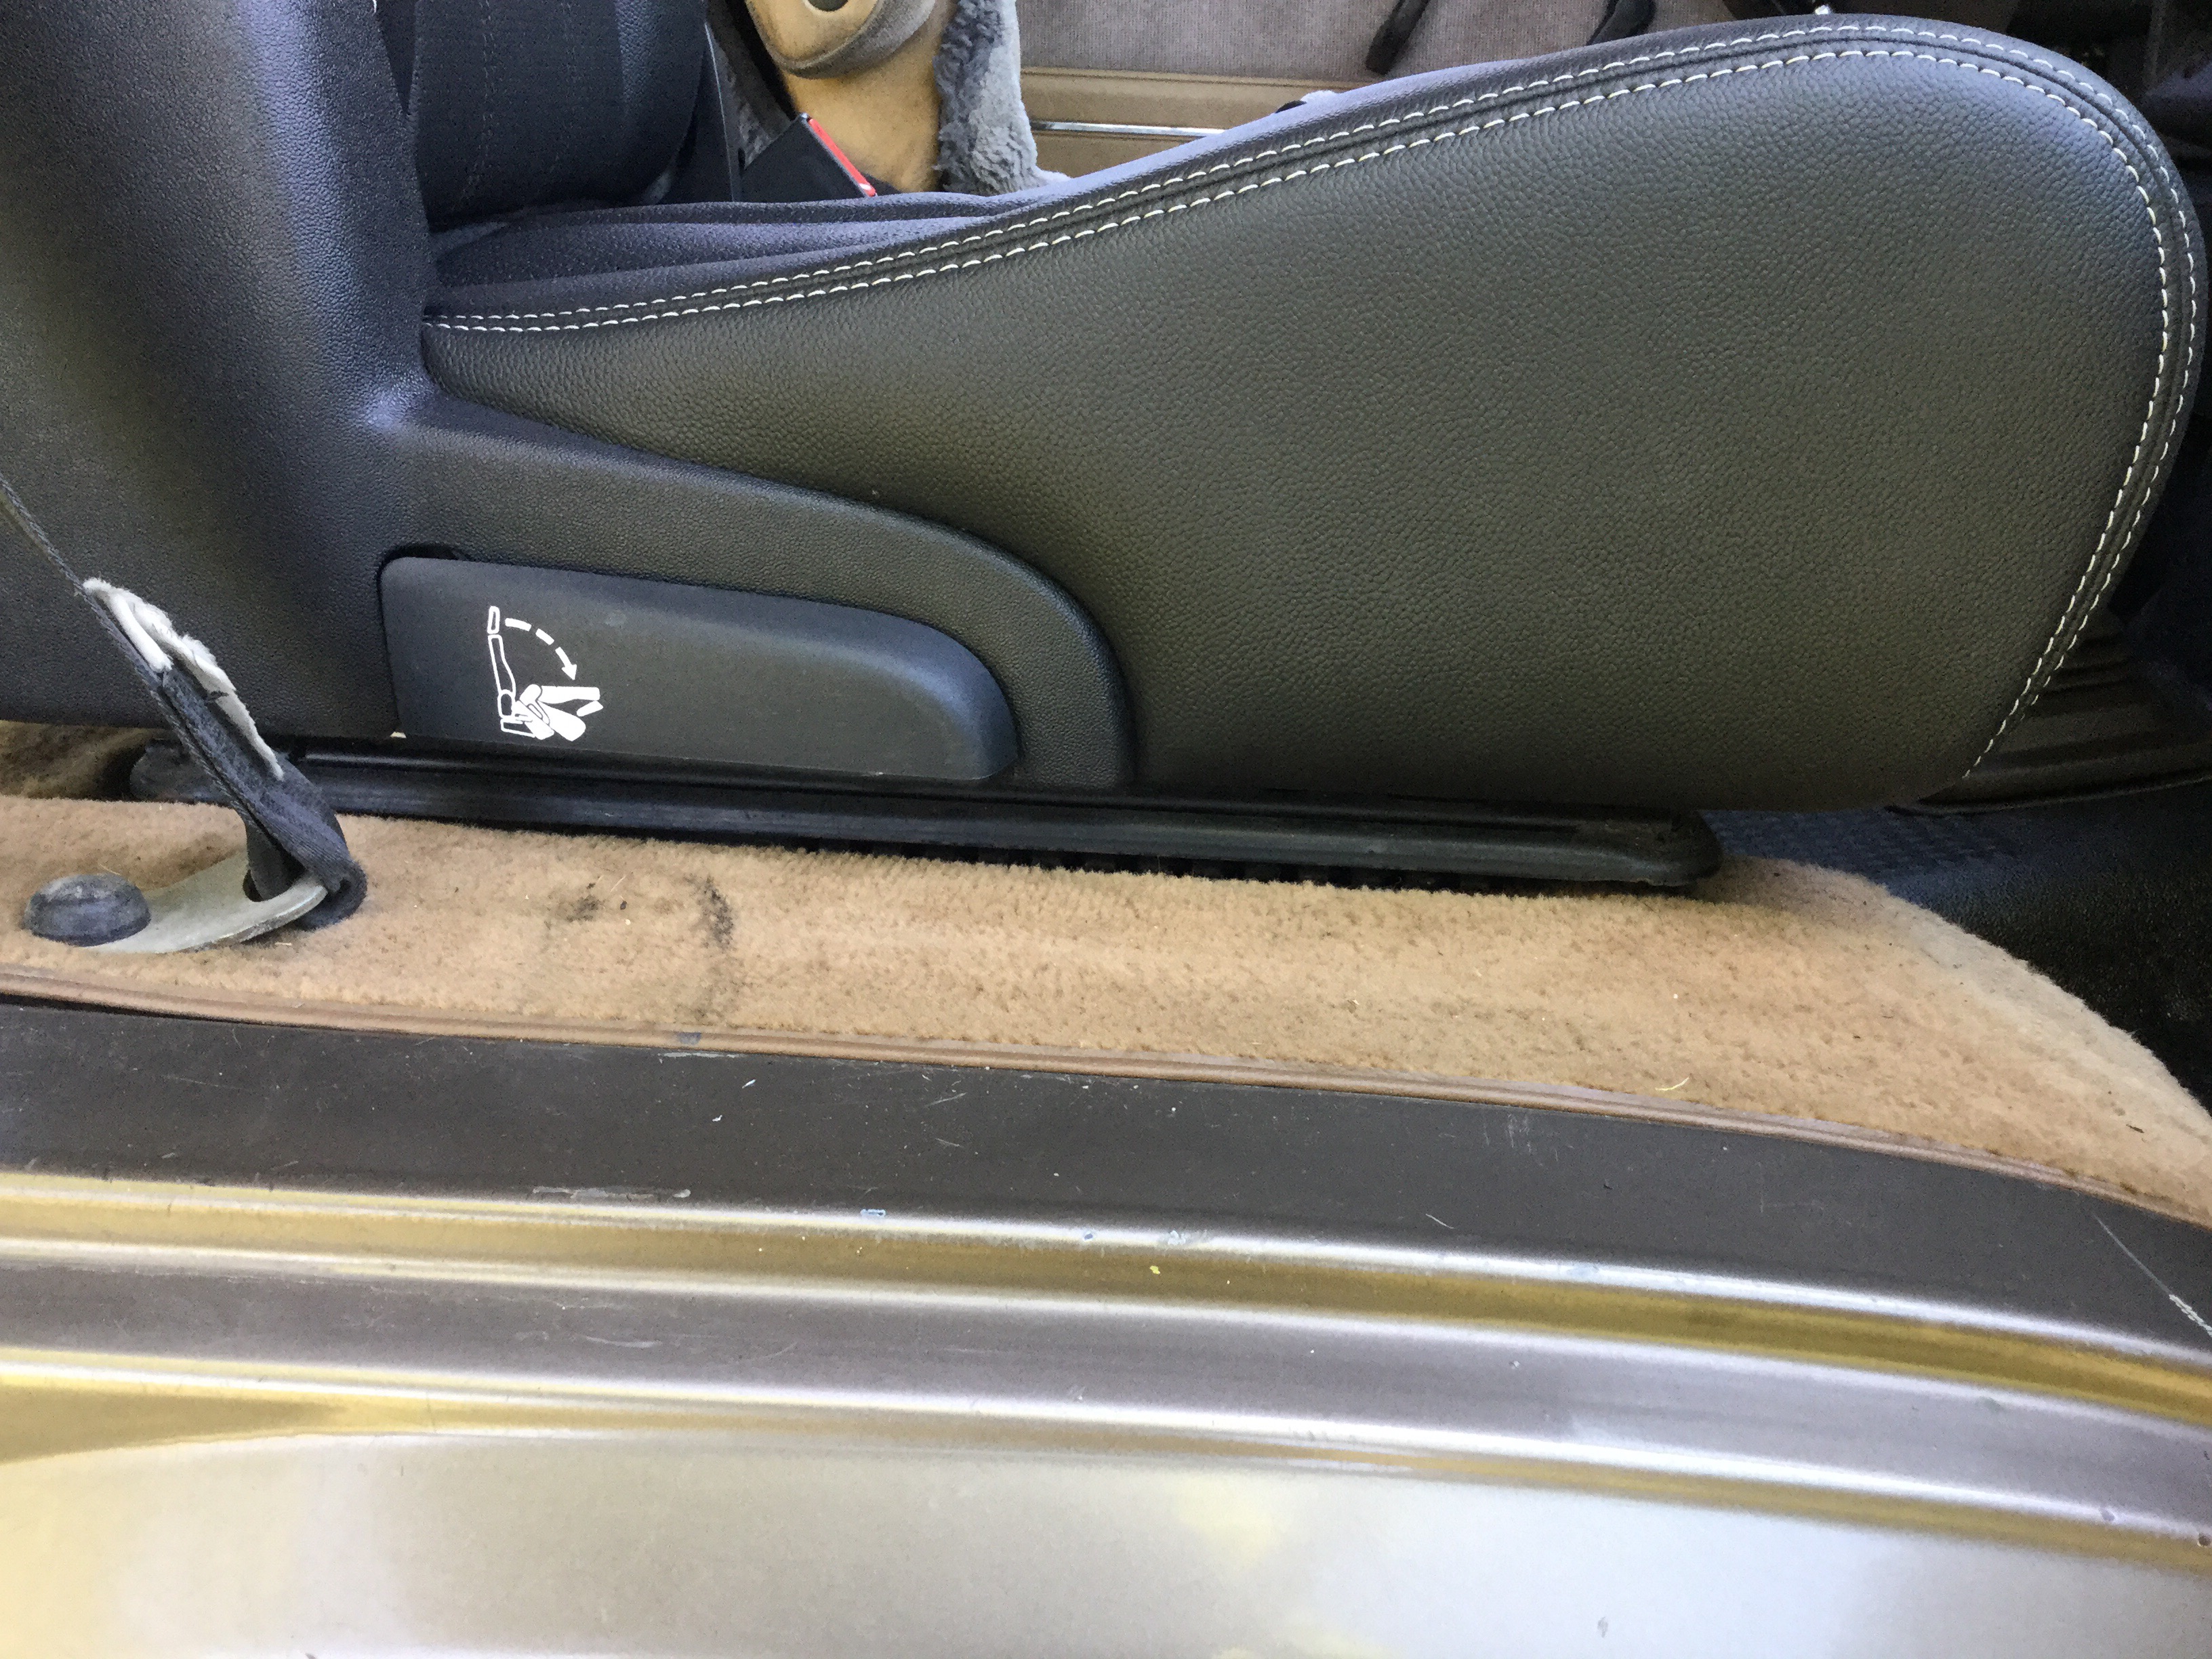
Vanagon – can you remove the covers of the adjustable arm rests?
Posted by albell in vanagon, vanagon mods on April 24, 2016
Yes you can.
We’re talking about the adjustable armrests. The procedure is pretty straightforward but there is one important warning. Do not unscrew the adjusting knob. Please don’t. I did do that (on one of the armrests I got on the old skanky seat I bought a couple of weeks ago ) and I haven’t managed to get it screwed back in. Unscrewing the knob (armrest on the bench, I don’t think you can unscrew all the way when armrest is on the seat) releases some part of the adjusting gubbins that appear to be inaccessible.
So don’t unscrew the knob.
Ok, on to the procedure. You know that you have to drive out a roll pin to remove the arm from the seat. It’s a little awkward as the upholstery gets in the way.
 .
.

Then lay the arm upside down on the bench. The knob is pressed onto the end of the steel shaft. There are splines, and it is tightly pressed on. This picture taken after I had the knob levered al,out all the way off.

I used a big screwdriver to lever the knob off.

Now that the knob is off, remove both screws holding the plastic trim to the arm.


Dig out the staples and the cover will come off.


That’s it!
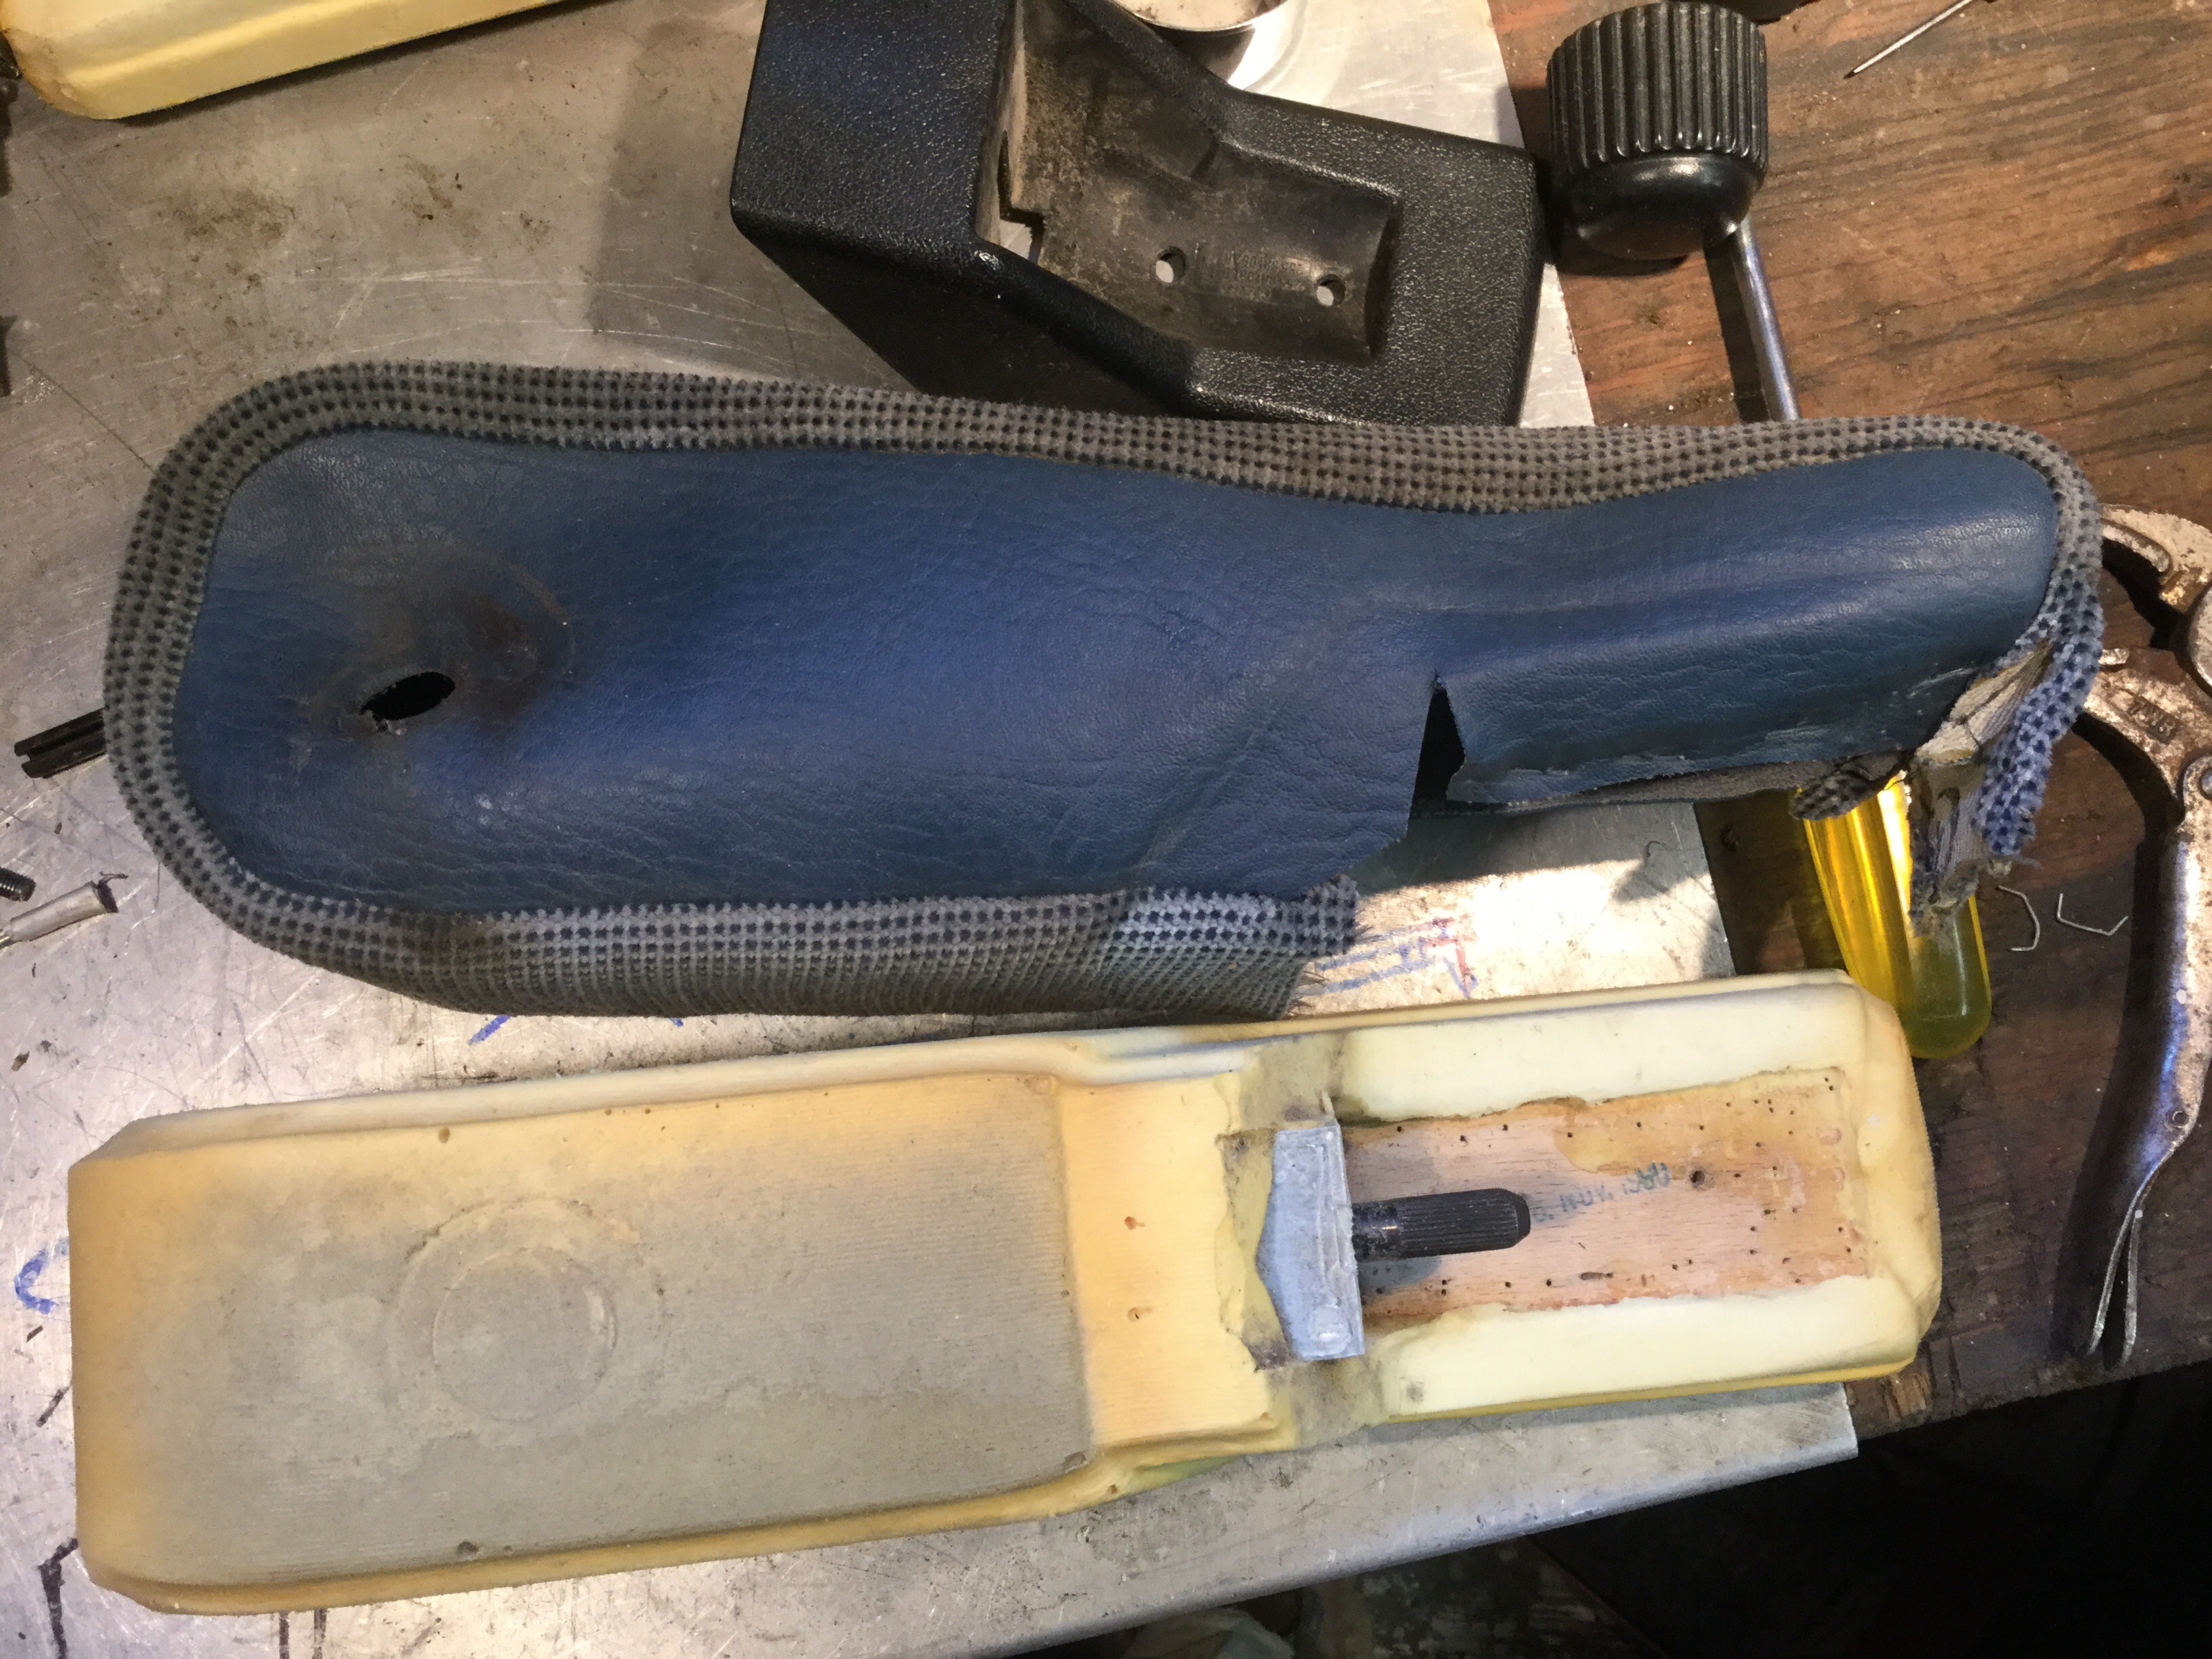
This naked arm is going to a friend who has a broken arm, you know what I mean, and her old arm cover put on. I’m digging into the other arm, the one that I unscrewed the adjusting knob all the way – don’t do that! – and so far it doesn’t look too good that there will be an easy way to get into the mysteries. The foam is cast around a plastic shell and a beech wood stiffener. Maybe more on that mess later.
Vanagon – a pretty darn good site for mods and improvements
Posted by albell in vanagon, vanagon mods on April 17, 2016
Abel has been posting really good stuff here, Texas Vanagons.
Definitely worth a good look.
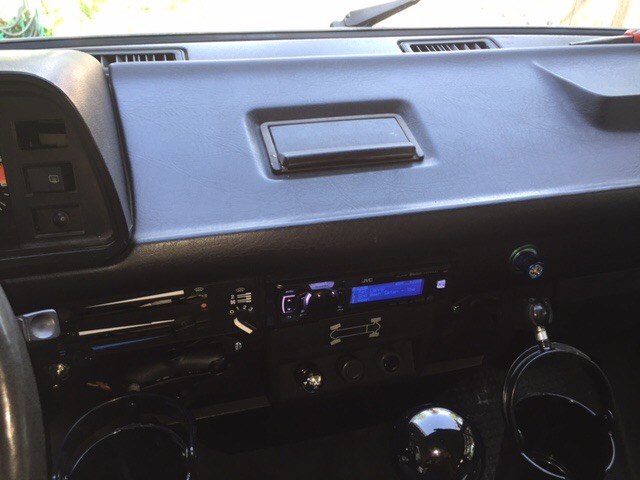
Vanagon – USB outlet, voltmeter, custom vent
Posted by albell in vanagon, vanagon mods on April 17, 2016
Bought one of those ubiquitous voltmeter and USB combos from bangood.com. Thought I would modify the vent on the fridge cabinet to install. But the old grill on the rear face of the cabinet had peeling paint and I didn’t like how the install looked. So I made a new grill from some 3/32″ thick aluminum plate. I milled slots, 3/8″ wide, on 1/2″ centres, 7 slots in total. And I milled a hole for the voltmeter/outlet combo.
The grill turned out a bit “gappy”, a bit too open perhaps. But as you don’t really look at it face on too often it’s good enough. The outlet and meter are wired to my auxiliary fuse panel under the driver’s seat. I thought about a switch to turn the thing off when not needed but I didn’t have a switch that would suit. I might add one later, but right now my big assed house battery will take any parasitic drain.
I’ll replace the mounting screws with the ones that will accept a plastic cap when I can find some.

Vanagon – Nathan meets very nice syncro tin top
Posted by albell in syncro, vanagon, vanagon mods on April 16, 2016
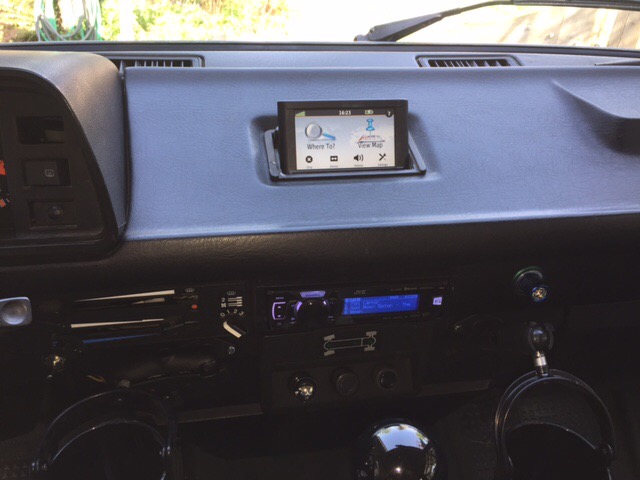
Addendum April 16, 2016. Very nice install of Garmin Nuvi 44LM in ashtray, pics at bottom.
Pics sent to me by Nathan, he met local owner of this really nice blue syncro tin top. The pics tell the story.


Vanagon – Nathan’s new wheels
Posted by albell in syncro, vanagon mods on April 14, 2016
I think they are 16″ Mefros. I’ll have to ask about the tires. Certainly looks perky. Hey, and note the tire carrier 🙂

Vanagon – trip to wreckers scores big, well fairly big
Posted by albell in vanagon, vanagon mods on April 13, 2016
I had the morning free to head up to Malahat Auto Wreckers here on the southern part of Vancouver Island, and I got lucky. There are fewer and fewer Vanagons in the wreckers these days, a big drop from the halcyon days of the turn of the century. But I found a tin top, year of manufacture 1991. Pretty rare here to see a 92 model year T3. The sticker said it was assembled in Austria. You know the story, the Hannover plant switched over to making T4 models and the Graz plant continued for a while to make both syncros and 2wd vans.
The van was in rough shape but it had the heated drivers seat intact, plus all the electrics for same. I had already scored the column mounted controller, housing, and relays some years ago but this time I got another set plus the wiring to the seat and the seat itself. The seat is pretty skanky ( and it’s blue, wouldn’t match my other seat even if it was in good shape) but I think the heating pads are salvageable.

Taking the seat apart I found that the wiring to the seat base was broken. Almost looks like it was cut. Everything else was intact and looked stock so I wouldn’t be surprised if the break was the result of some pinching and flexing. Nasty stains on the seat pad, ugh.

The seat back pad is fine.

My plan is to clean up the pads, test for continuity, remake the broken wiring, and install in my current driver’s seat. The other finds at the yard were some plastic trim pieces and the rarest of rare things, the little light above the glove box with an intact switch!

Vanagon – small led light bar
Posted by albell in syncro, vanagon, vanagon mods on April 12, 2016
I’m getting a lot of guff about this light bar.
“oh it’s so cute”
” hey you know the front of your van is starting to look like you”
” you call that a light bar?”
And then I get this, not for the sign, but Bender’s face.

And this.

But the best one is this.

Yup, that’s it.

It’s this light bar from Banggood.com
54W 18LEDs Car Work Light Bar Spotlight White Projector Lamp
I chose it for its small ( yes, I chose small) size, had decent reviews, and had IP68 waterproof rating. It’s also a spot rather than flood beam pattern but saying spot does not imply that it is a carefully focused beam. My thinking was that I wanted a spot beam to project down trails/logging roads. And also I was pretty curious about these light bars. And god knows you see a lot of them on burley trucks around here. Multiples of the smaller ones, long ones that almost span the width of the truck, on bumpers, above cabs, you know the scene.
I mounted the light bar to what I call the light bar on my bumper ( getting confusing now ), power wire routed internally, ground wire attached to bumper. And I noticed that it’s missing one of the M3 socket headed cap screws on the face plate, sheesh.


Couple more pics of the ludicrous look.


Back to the wiring. Ran the power wire up into the dash, to a relay and fuse, and it’s switched on the second position of my fog light switch on dash. That’s why you see the aux lights on in the pics. They are on the first position of the switch.
So how bright is it at night? It’s bright but not life changing bright. I took some pics but you know how that works, never really gets things right.
First pic is the aux lights alone. These are tired 55w bulbs and I have aimed the aux lights low and a little bit to the right. The aiming is little bit of an attempt to catch any suicidal deer.

And this pic the led light bar and aux lights on. The led bar could be aimed a tad higher. It’s hard to believe from the pics but you could drive easily with this light combo.

And in this pic I’ve added my main lights (high beam).

Am I happy with the light bar? Well yes, it’s fine. Good old high quality halogen spots would beat it, but for the power draw and the price I think it will do what I want it to do .
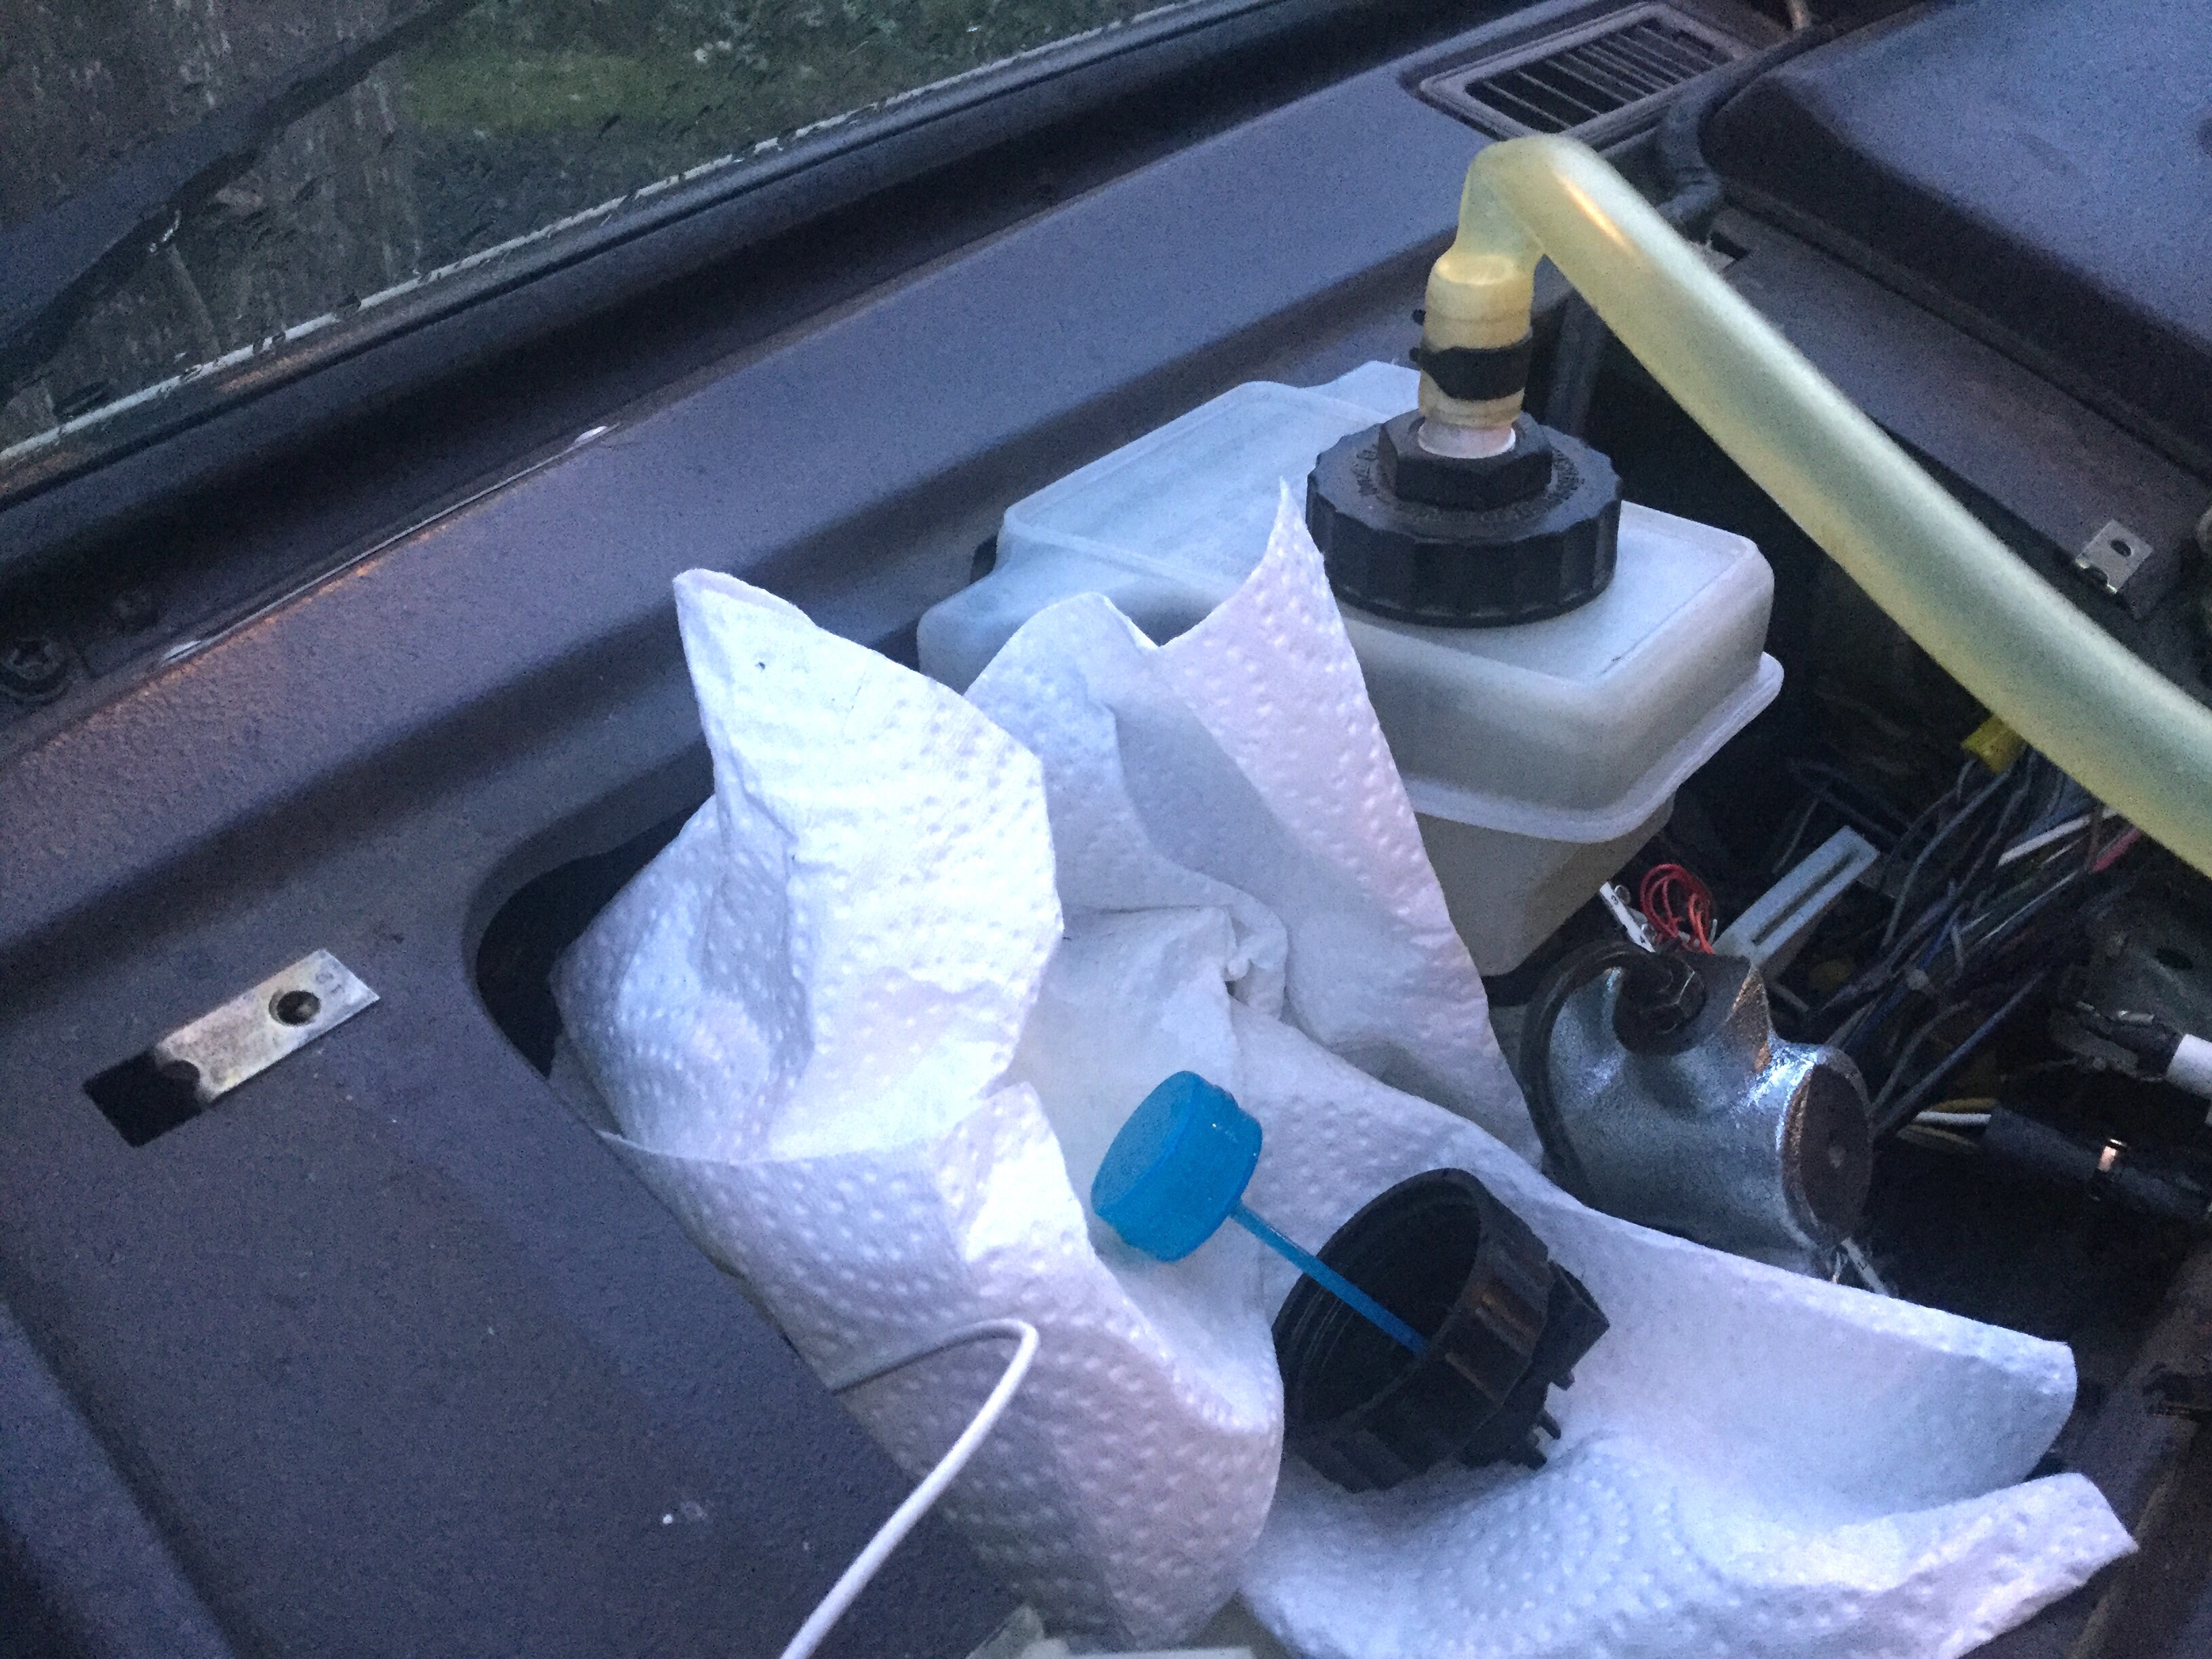
Vanagon – brake master cylinder
A couple of months ago I replaced my brake master cylinder. It was a strange failure progression. I’ve noticed over the last few years that I would on occasion get a real soft brake pedal when driving on logging roads. Most often happened on quite bumpy steep downhills. But then the brake would return to normal and it didn’t happen during normal driving. I thought maybe it was the proportioning valve? Bleeding the system and adjusting rear drums didn’t seem to affect things, but then again it happened so infrequently…
But during this last January the soft pedal started happening during every day driving. So, I put a new master in and things are good again.
Couple of pics for no other reason than I took them. Used syringe and hose to drain reservoir.

Old and new master. I tried cleaning out the reservoir with some DOT 3 fluid I had, but couldn’t get it really clean. Fine grey sediment wouldn’t shift.


I pressure bled the system after install. Old cap connected to compressor, about 4psi pressure used. I managed to flush a full litre of new fluid through the system.
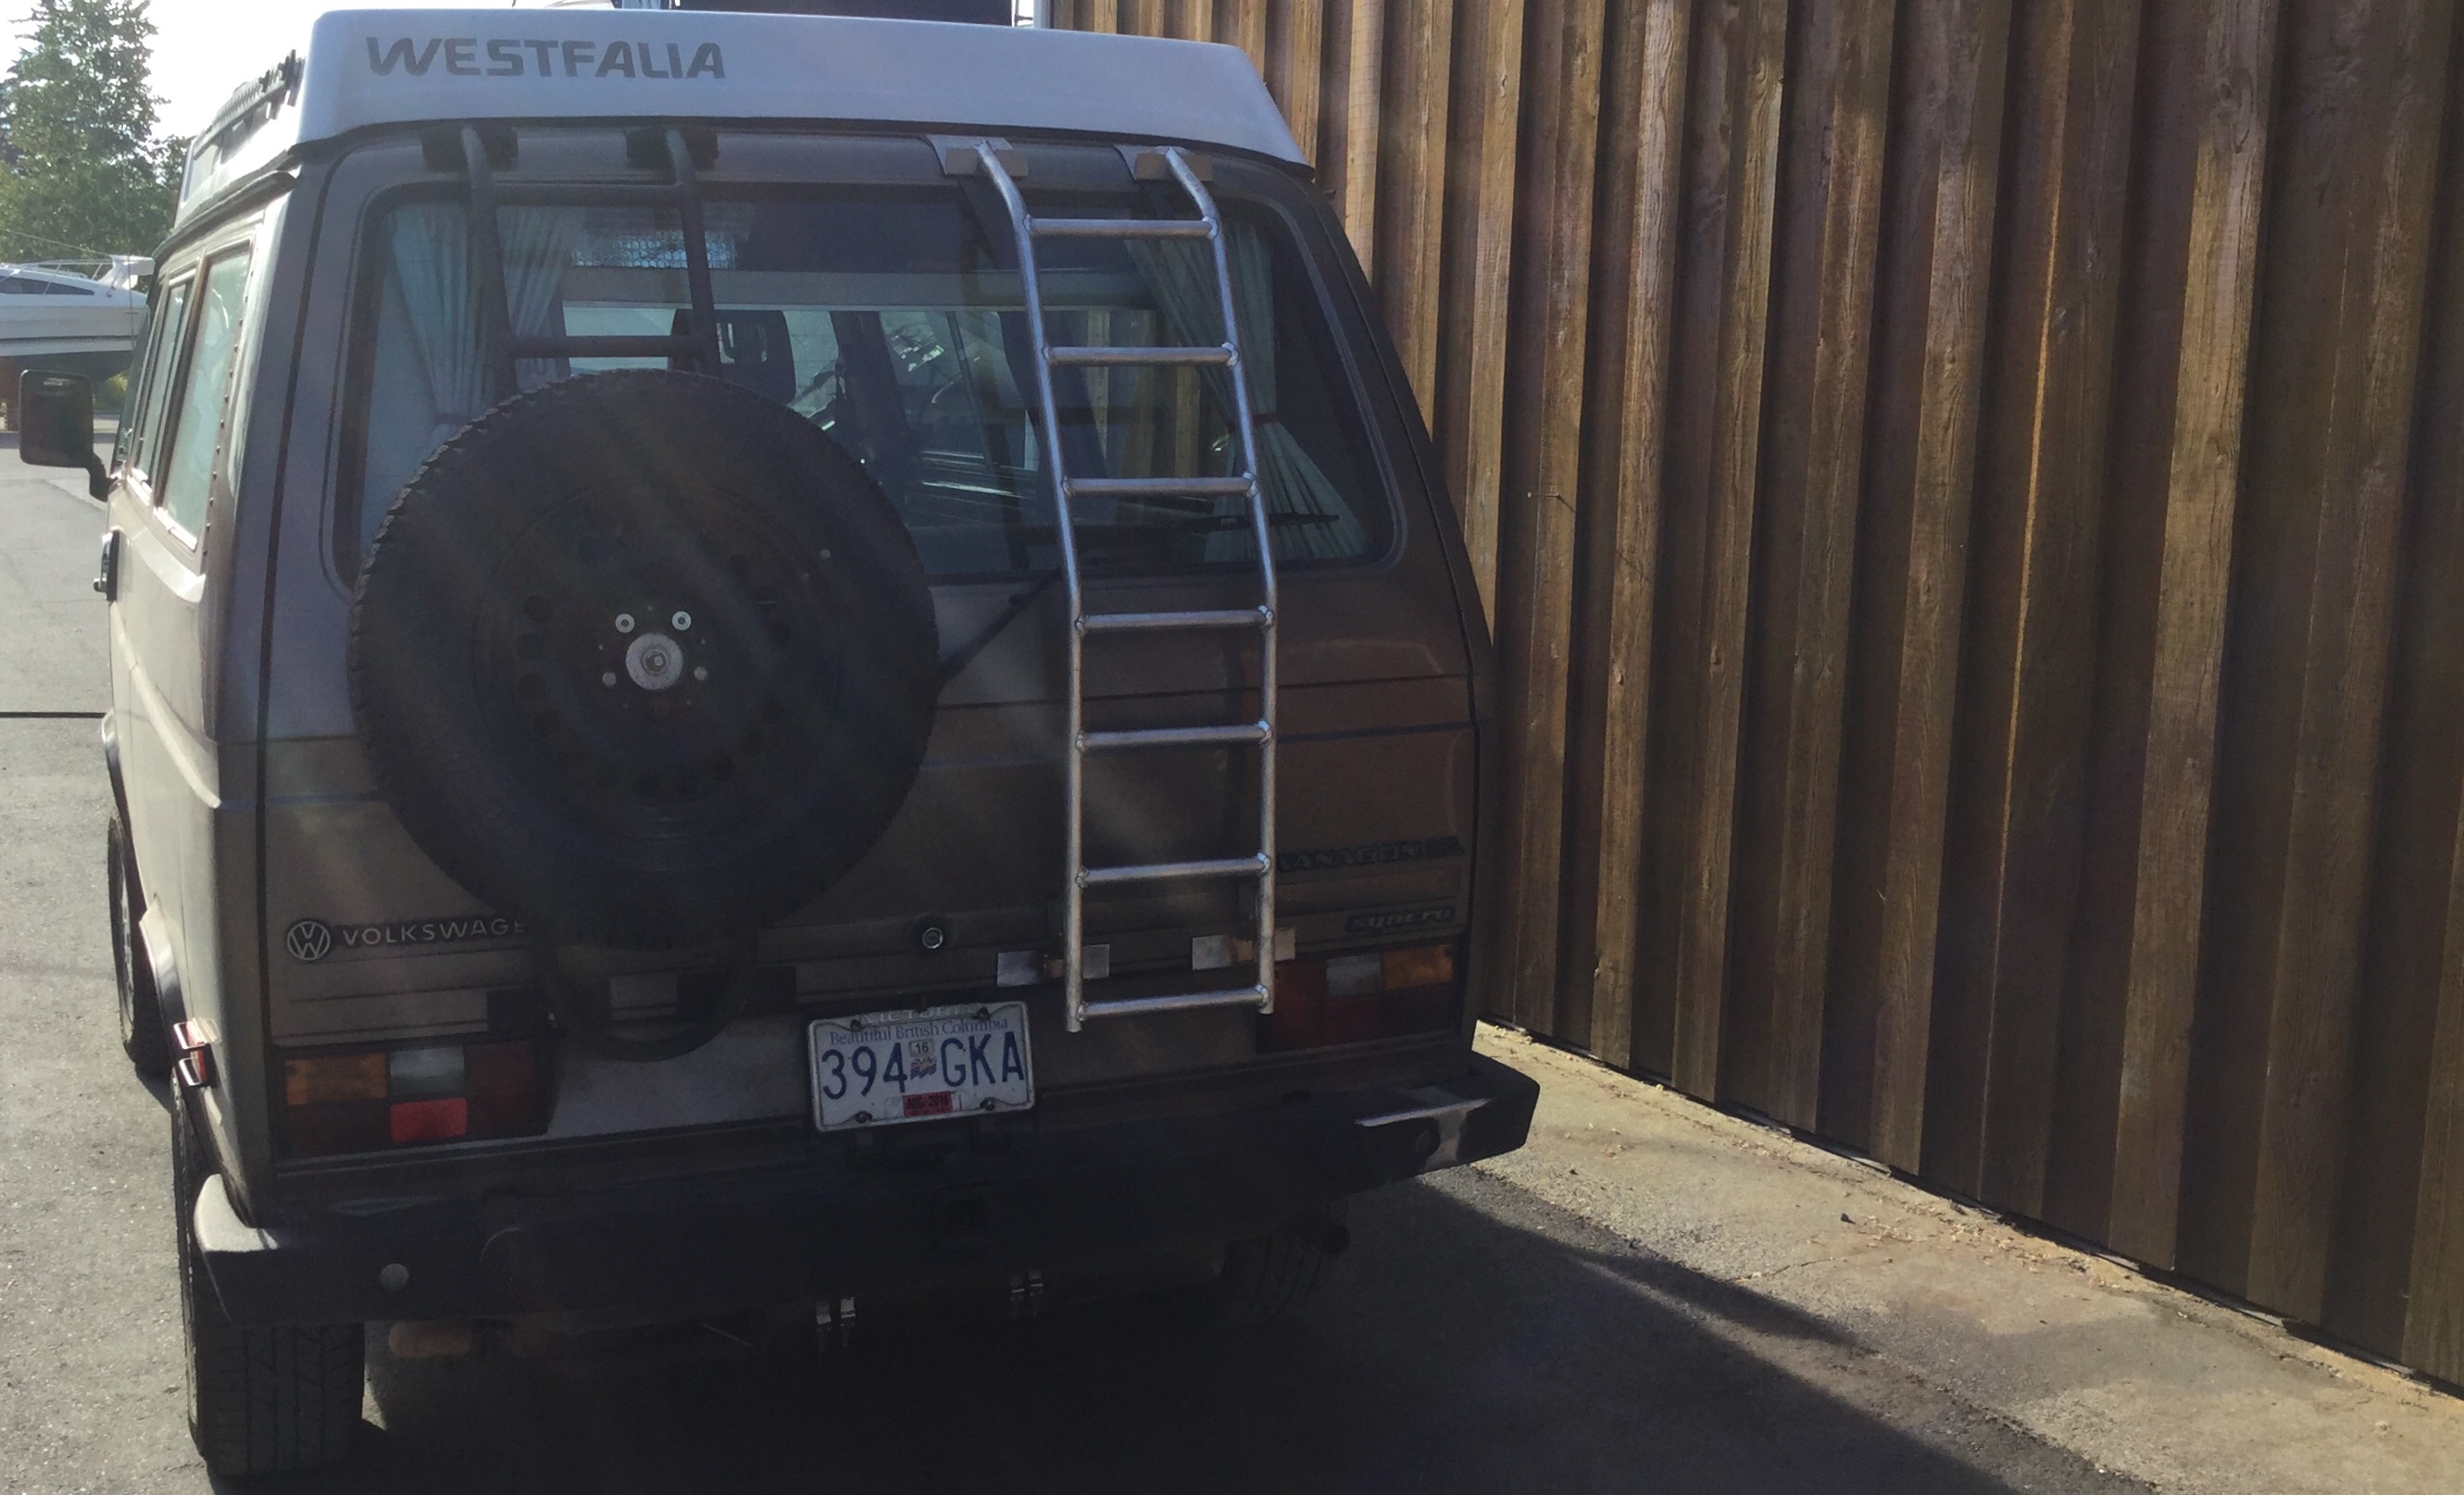
Vanagon – another ladder/tire carrier prototype
Posted by albell in vanagon, vanagon mods on April 10, 2016
Still haven’t got a production model yet, still trying things out. This one has offset tire position which I thought was a good idea, but looking at it installed I’m thinking it’s awkward.
It’s on Nathan’s van. Pic of Nathan’s van beside my van kinda shows the offset and that the tire is a bit lower on the ladder. Oh and I did away with the curved bottom on this one.
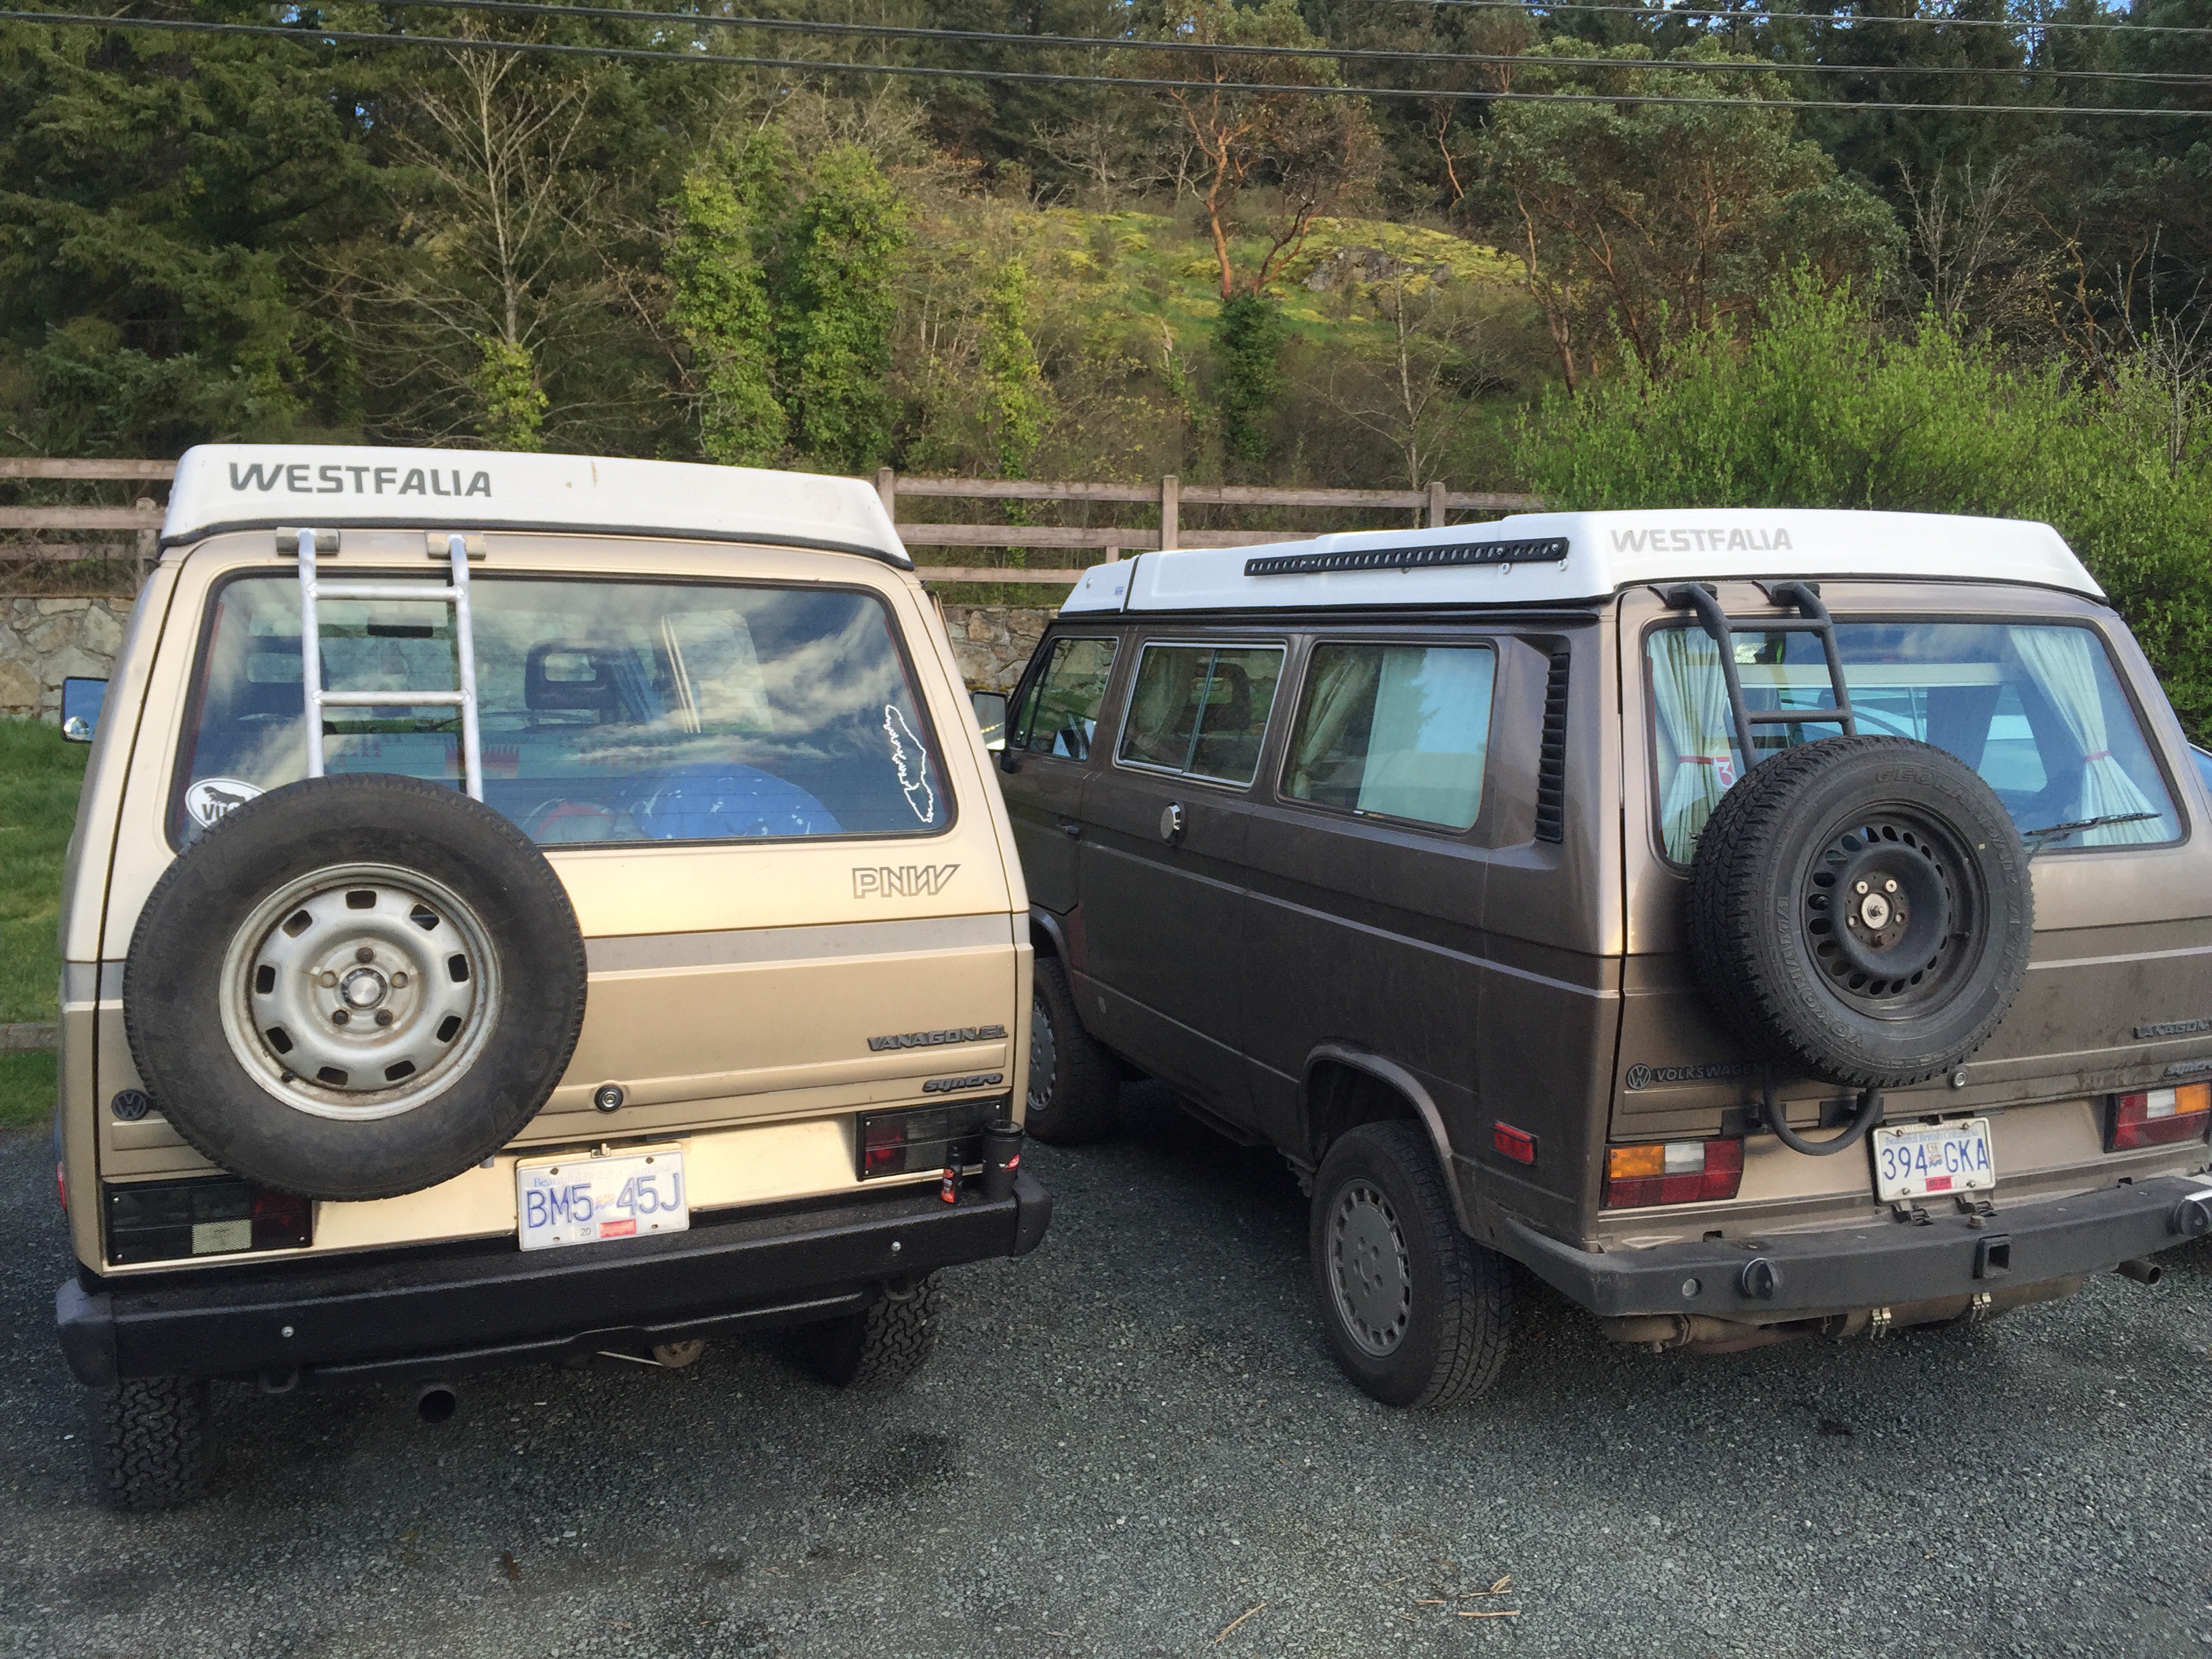

Yeah, that offset looks a little odd.

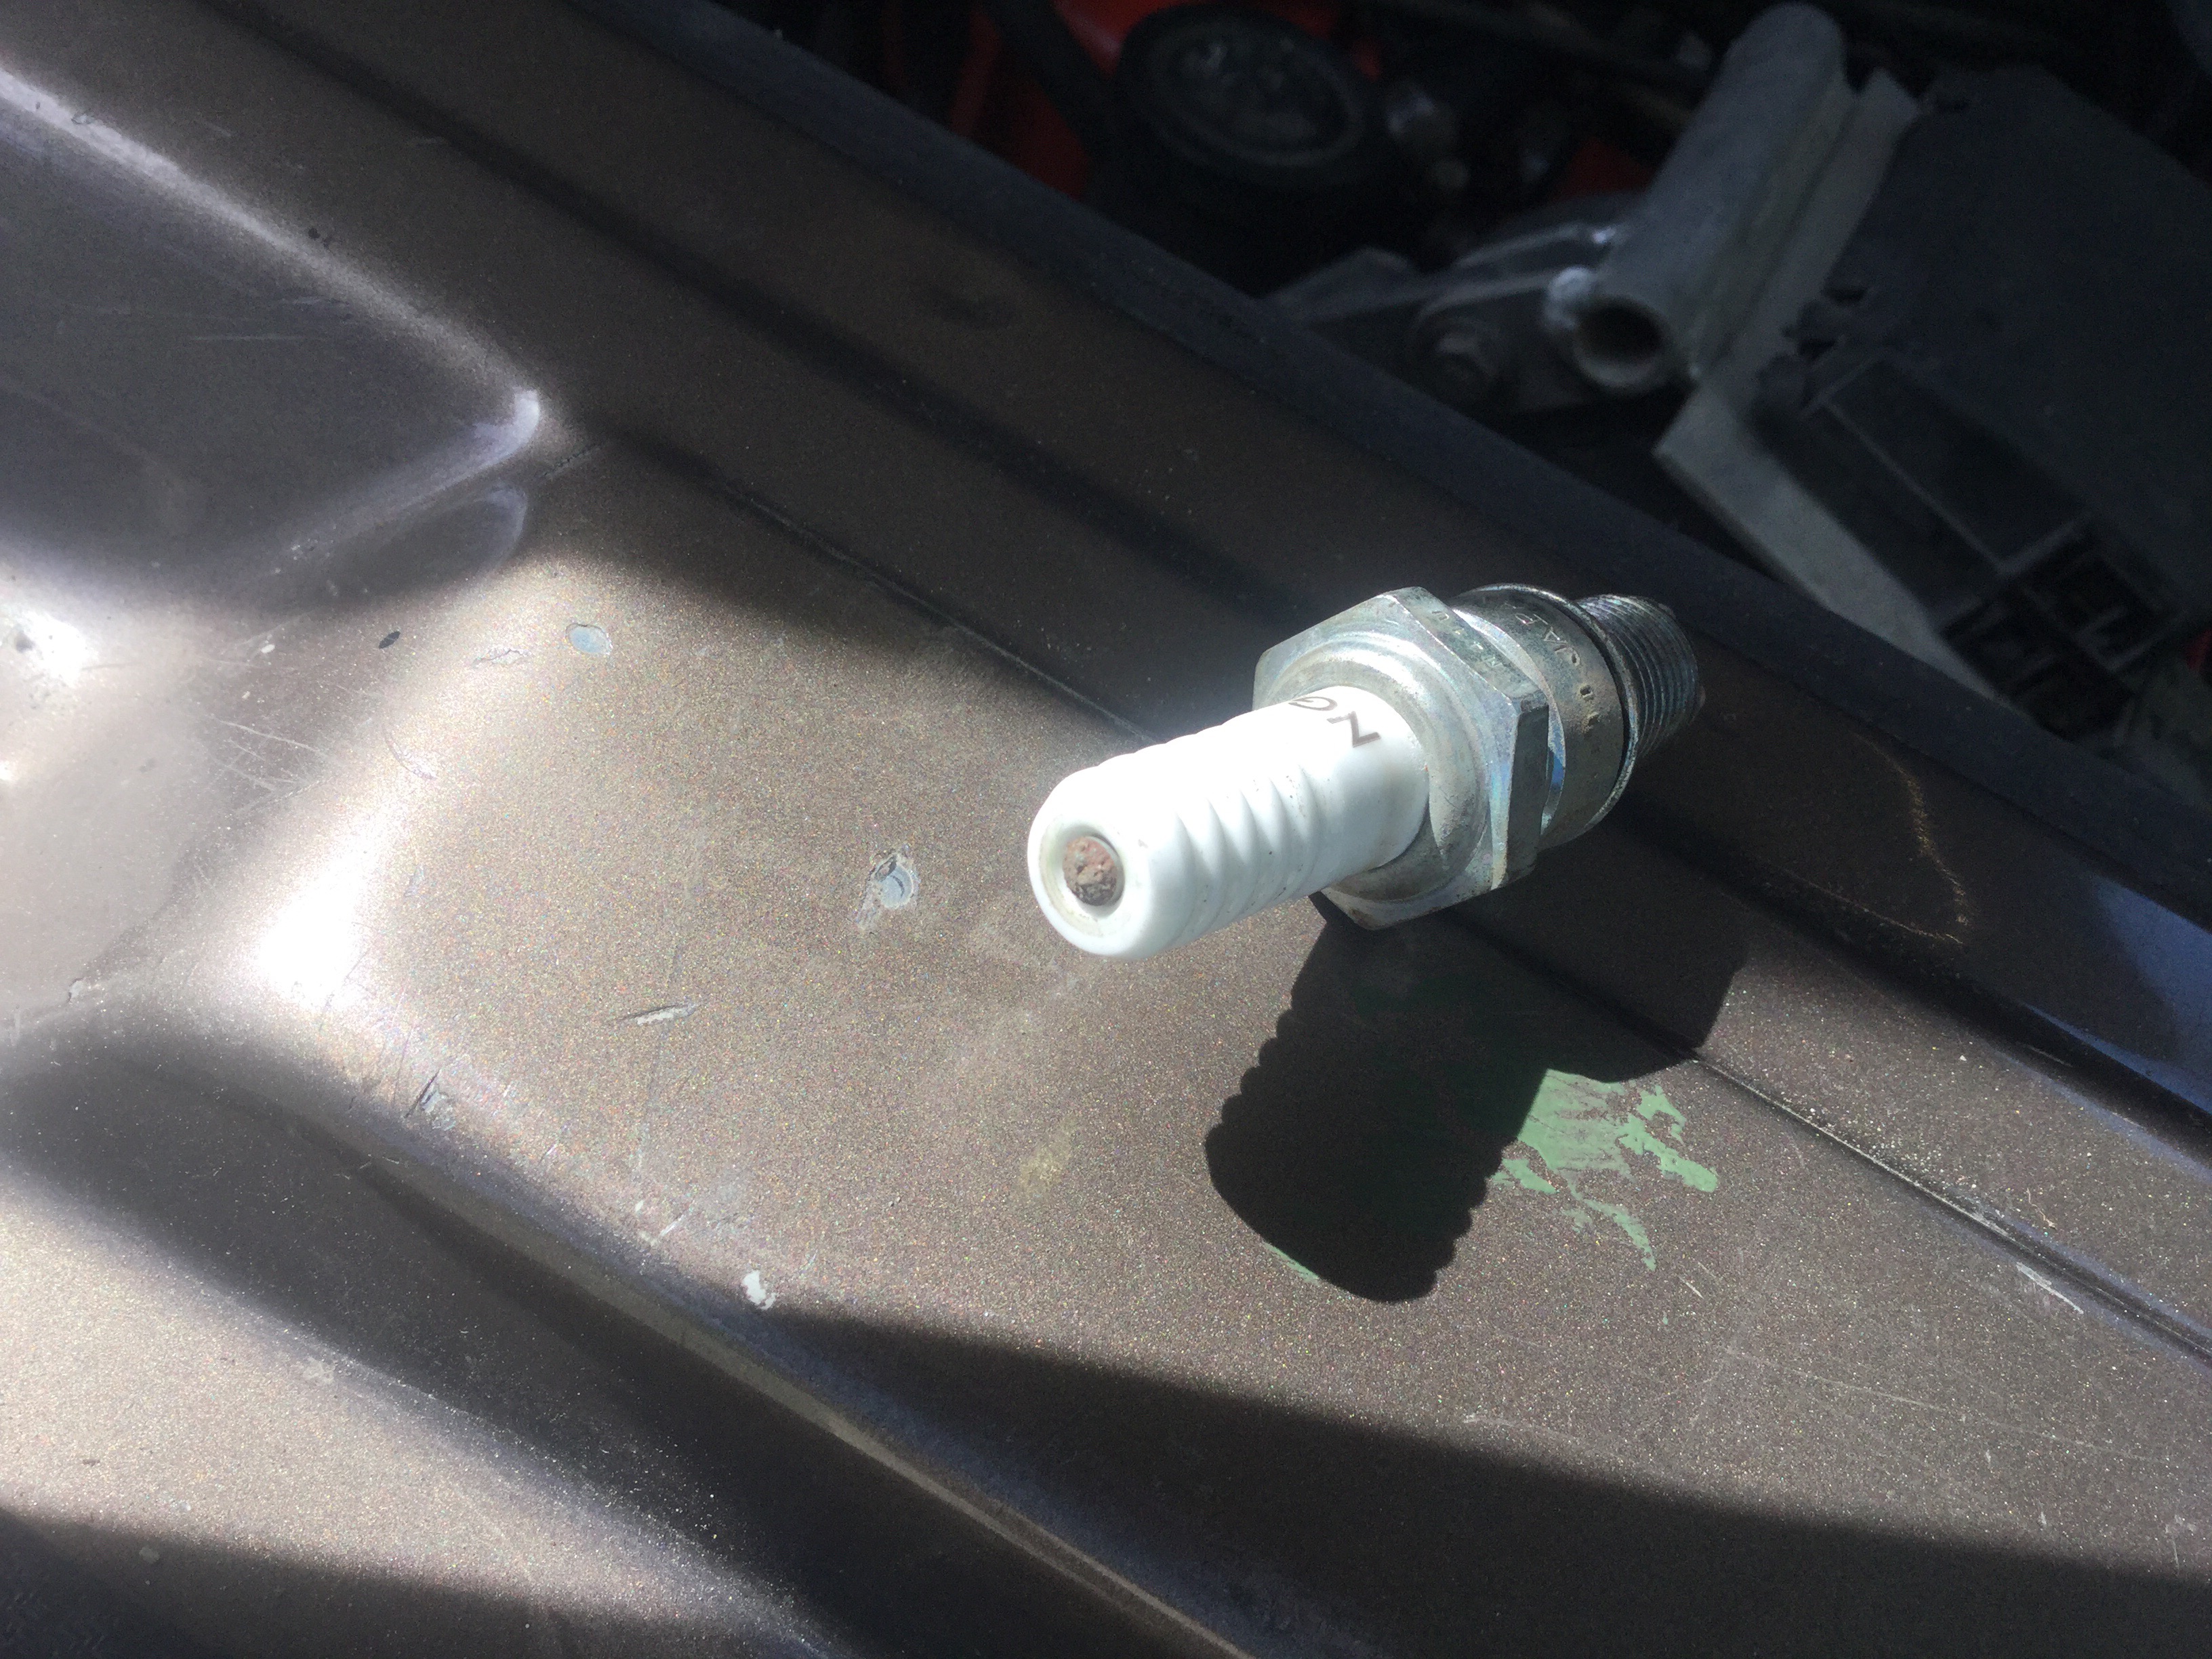
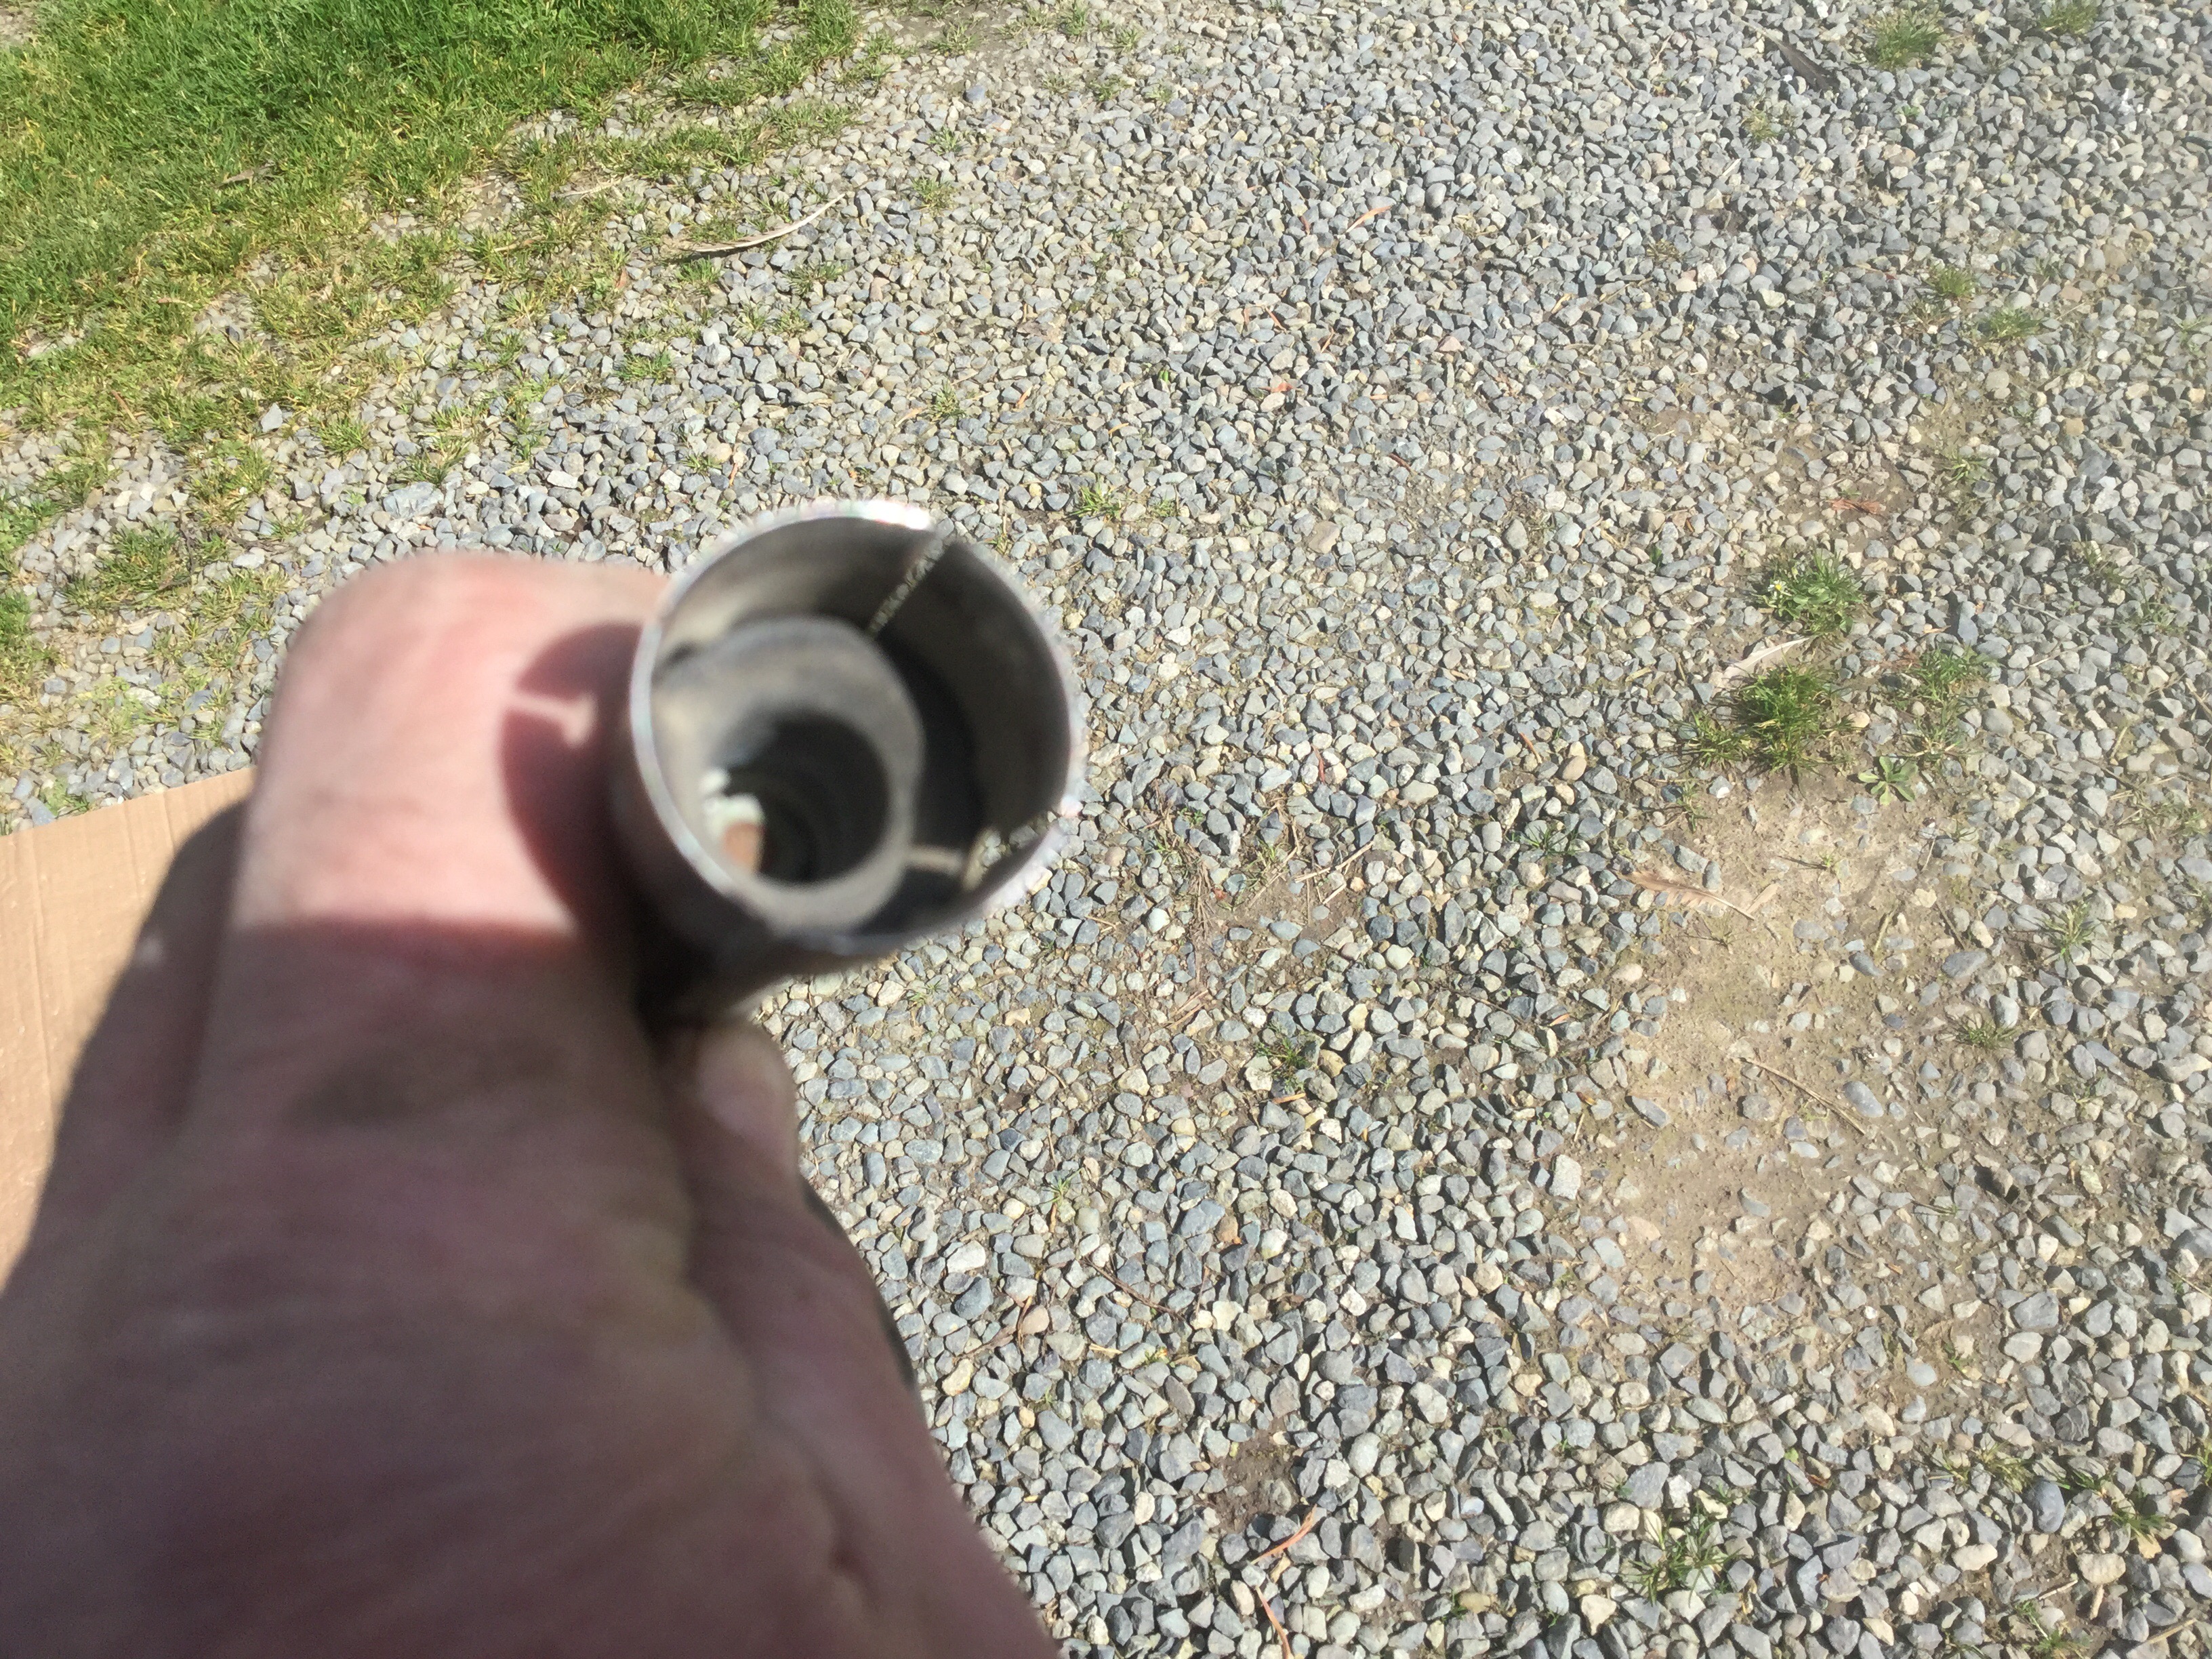
Vanagon – spark plug failure
I’ve never seen this before. Might explain why my van wasn’t running very nice the last month or so. On the other hand, trying to track down the running issue did turn up some cracked vacuum hoses so that’s all good eh?
I couldn’t get the broken bit out of the boot. Had to use spare.

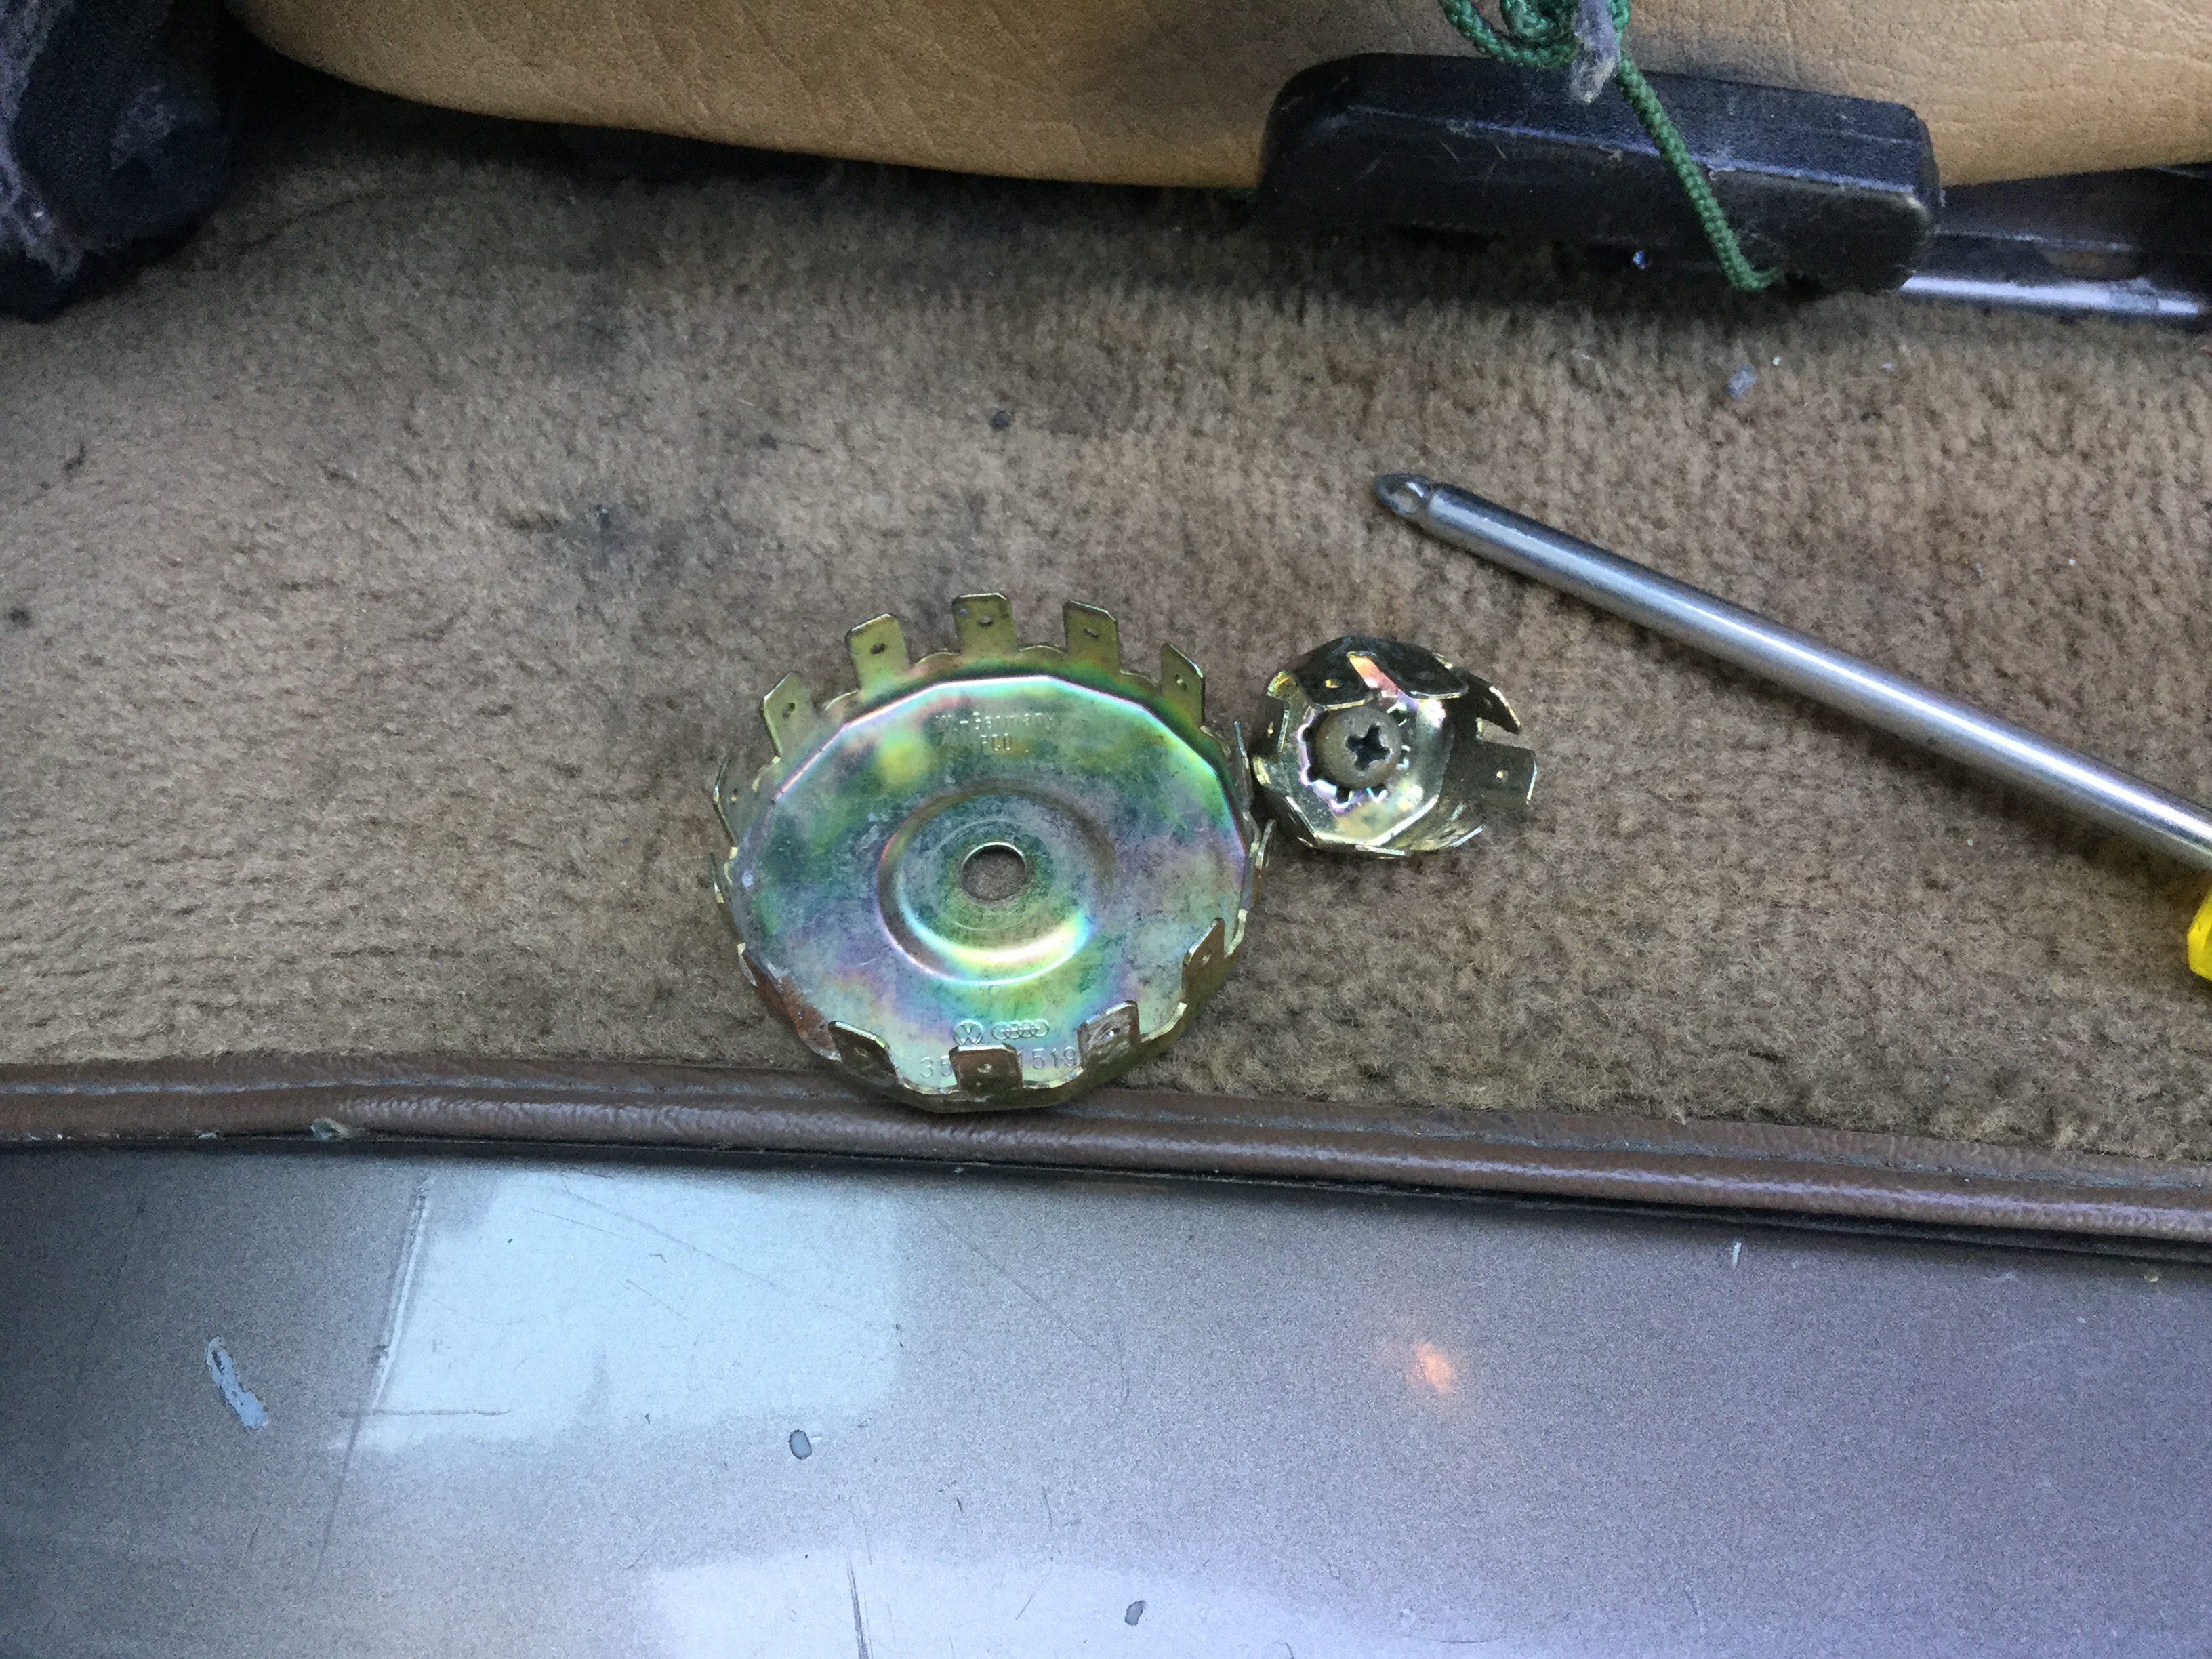
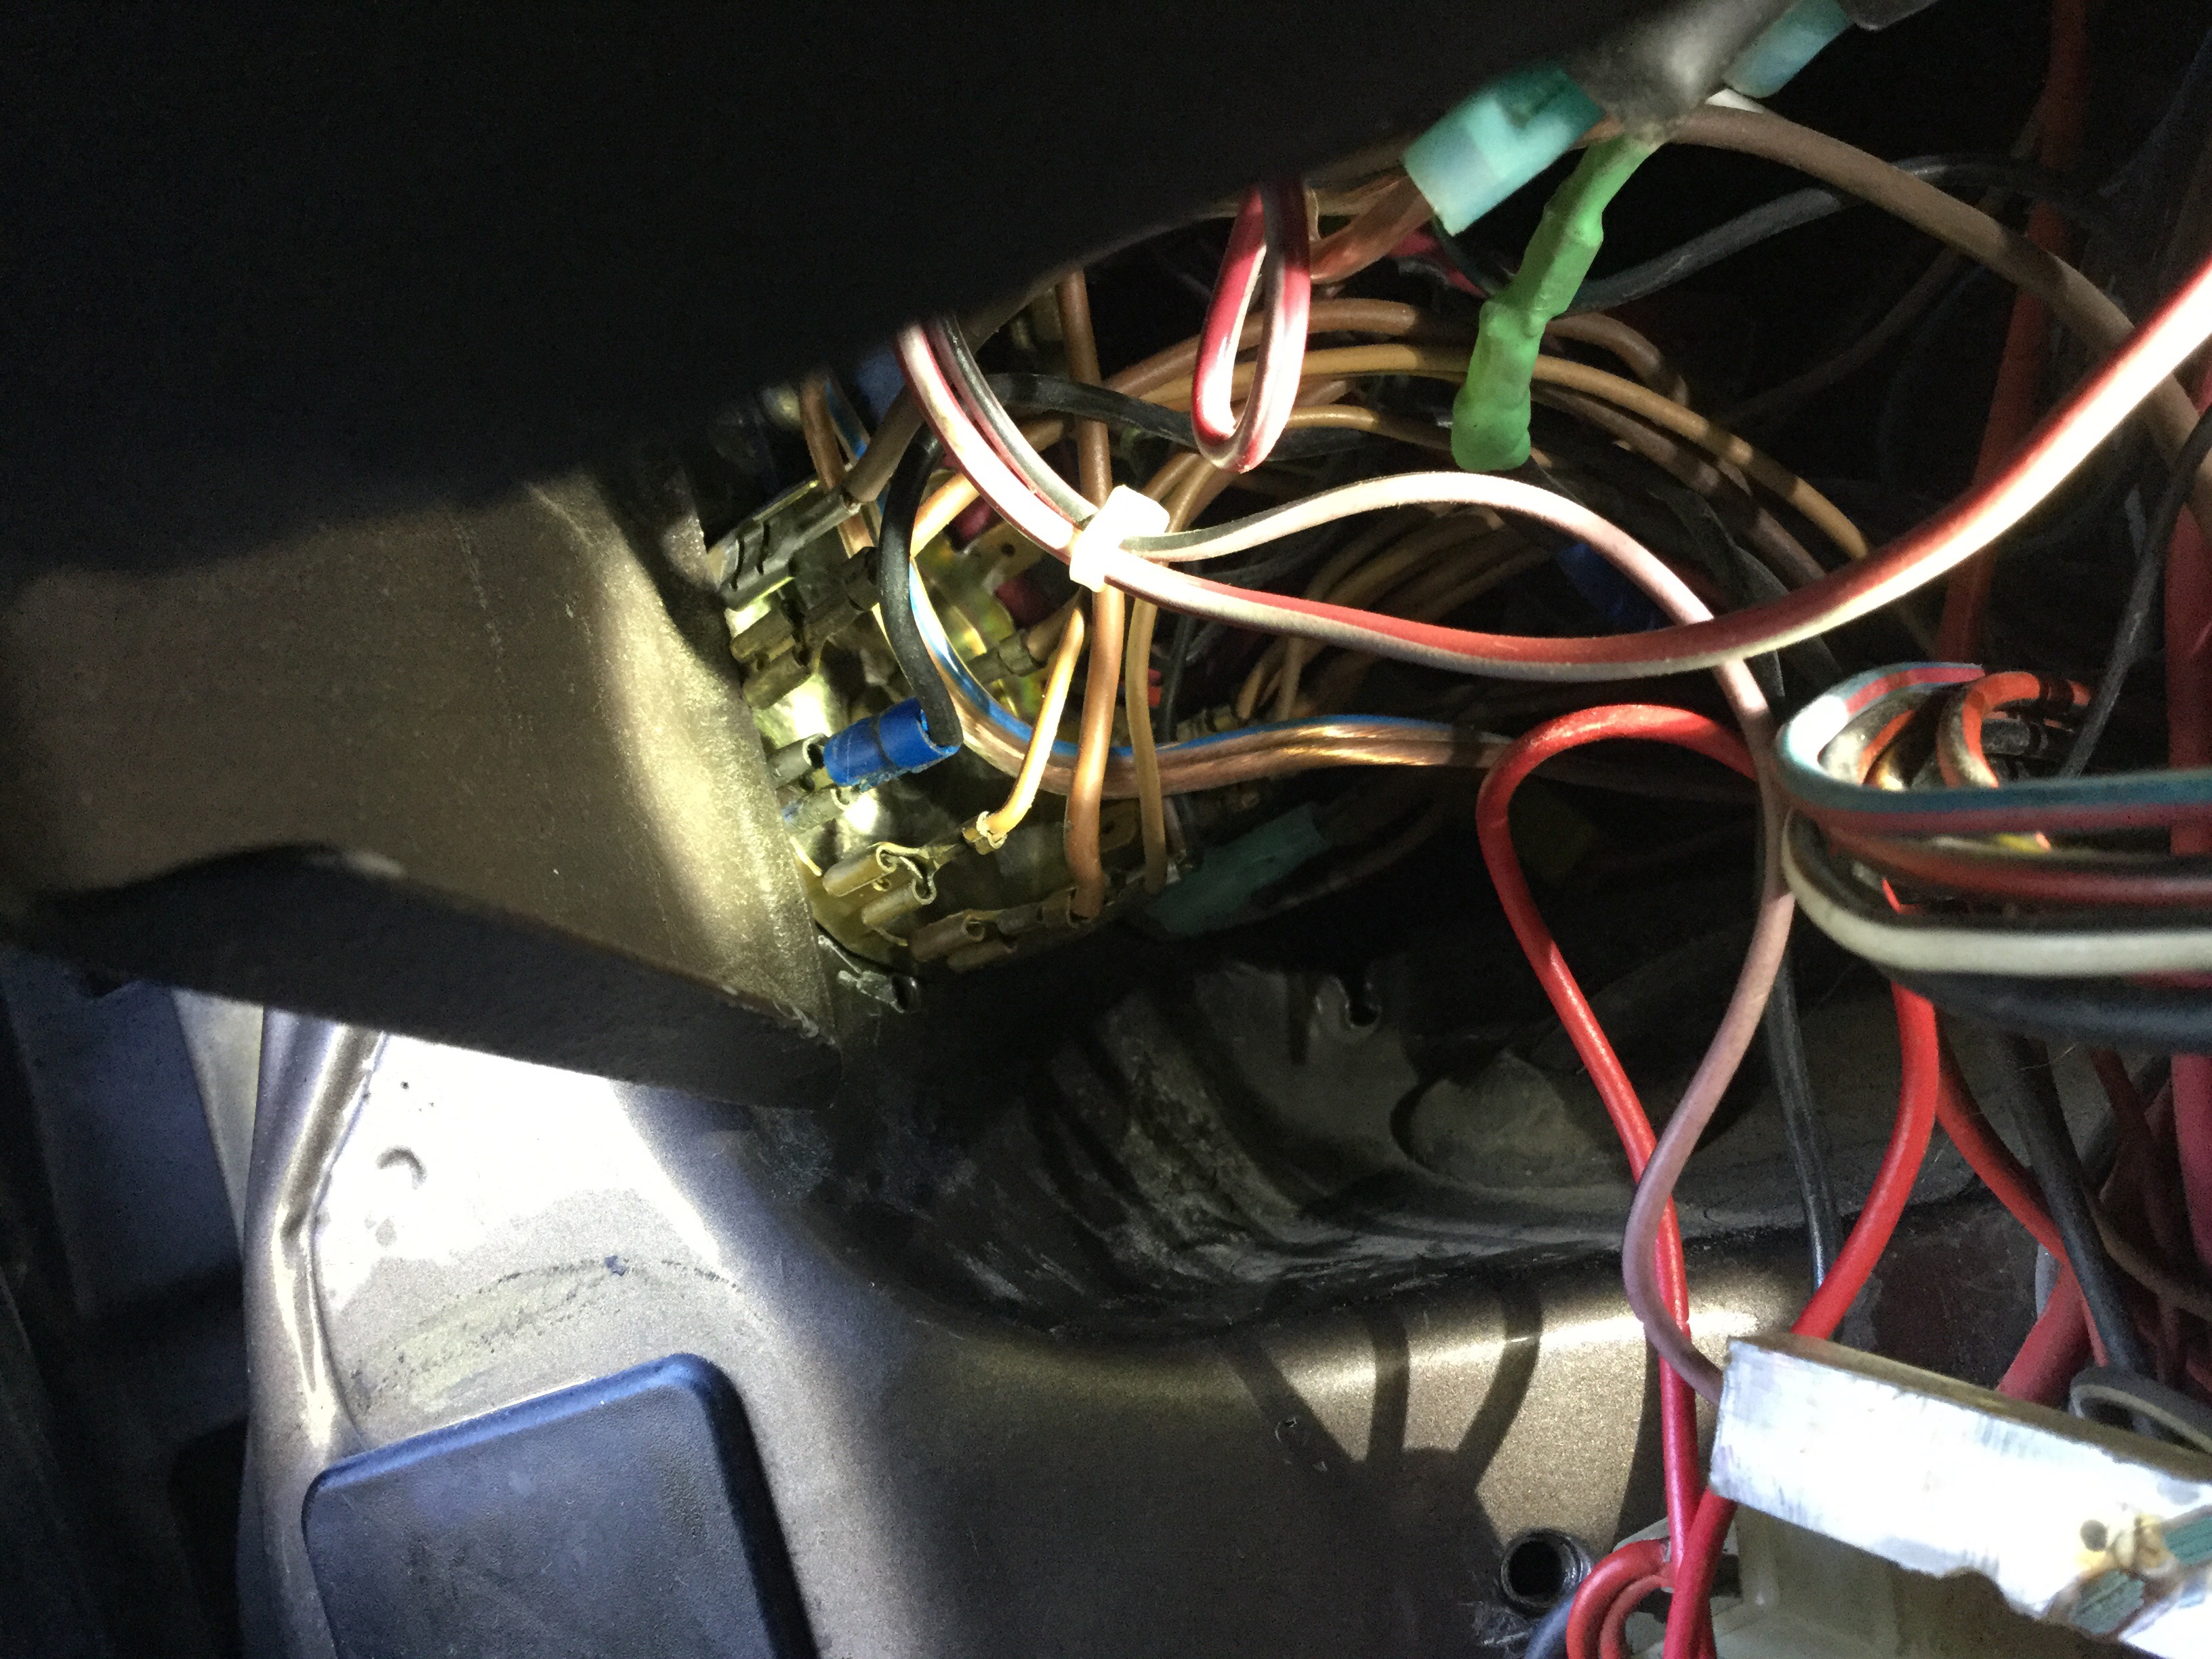
Vanagon – T4 grounding crown
Posted by albell in vanagon, vanagon mods on April 10, 2016
Hey, did you know you can just squeeze in a T4 grounding crown in the aft position of the pair of stock crowns just to the left of the fuse panel?
It’s tight, but it gets in there.
I mangled the stock crown a little getting it out. But look, look at the abundance of connections on the T4 crown 🙂
Not a great pic, but here is installed.
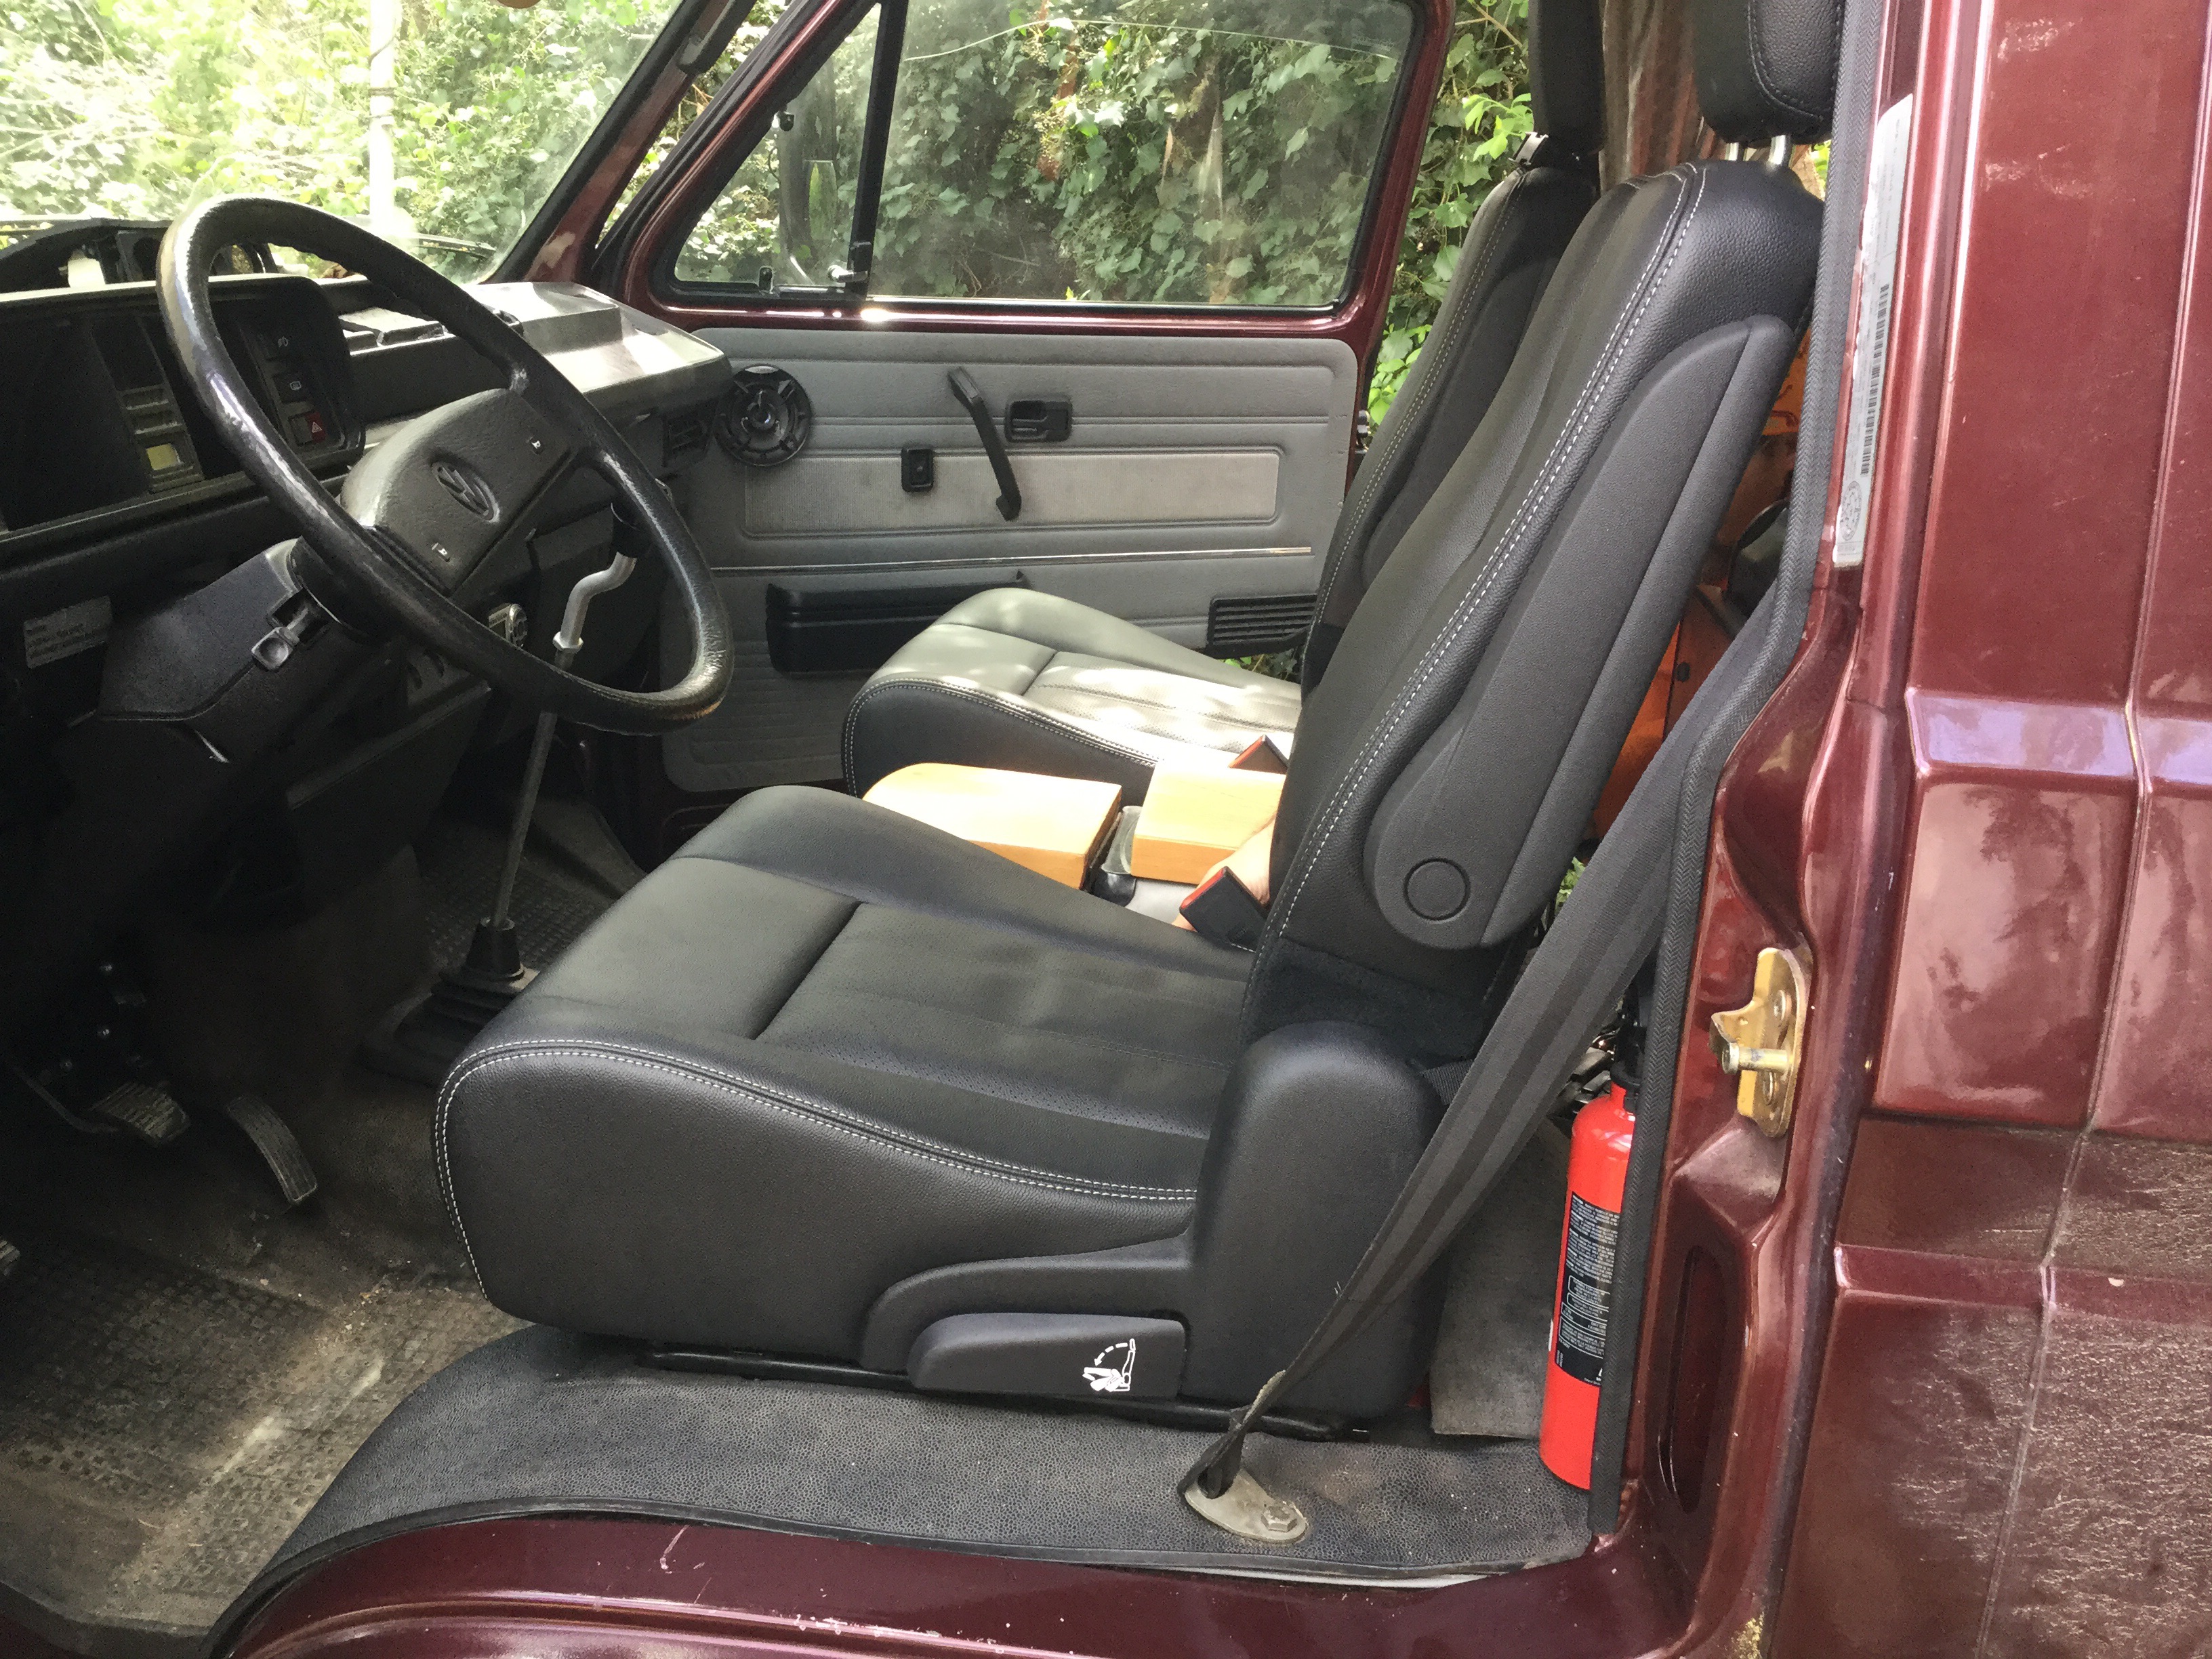
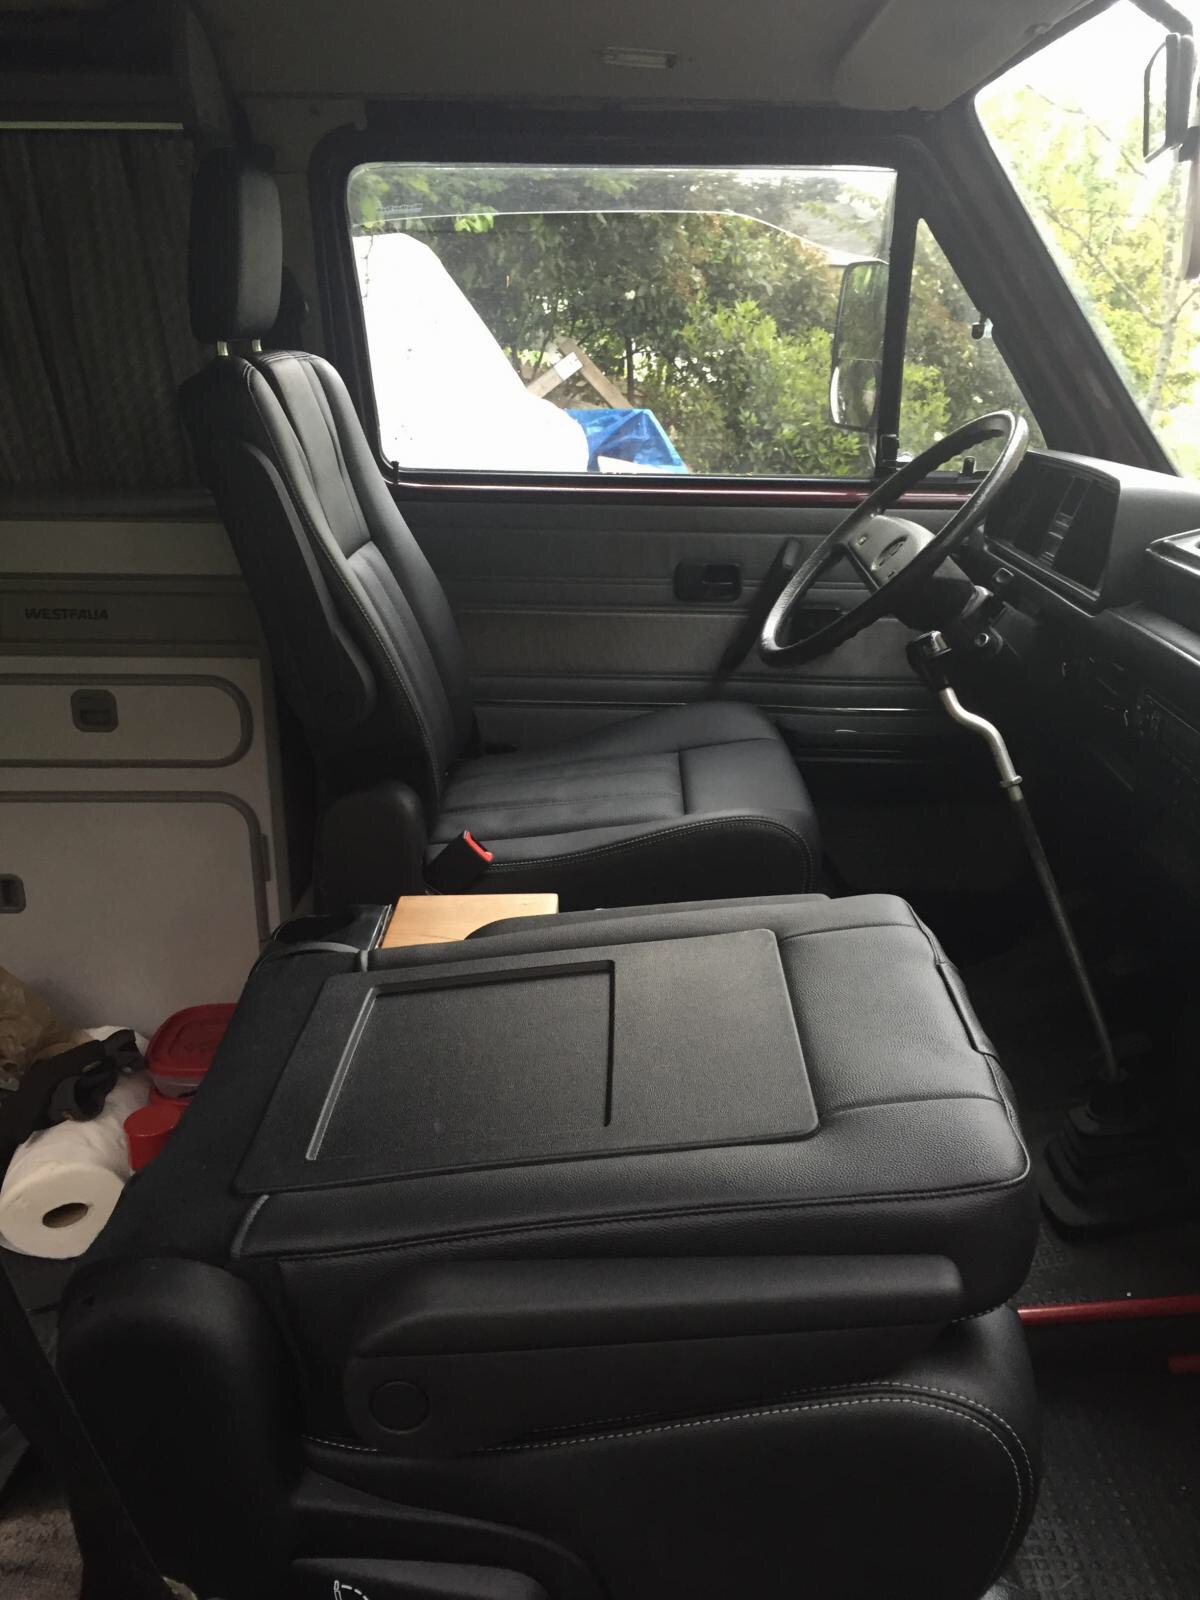
Vanagon – 2015 Dodge Caravan town and country second row seats
Posted by albell in vanagon, vanagon mods on April 7, 2016
Addendum April 10, 2016. Drivers seat installed today. Simpler install, four bolts welded to stock swivel plate, 1×2″ steel box section fits onto those bolts, box section bolted to Chrysler seat. Pics at the end of the post. Oh, btw, sitting in the drivers seat is a big improvement over the stock seats. I’m 6-2, I still have a finger width or two head room to ceiling, and for some reason due to the seat adjustment or whatever, I get a much better view of the speedo and tach than I do in my van. This alone makes me want to have the seats in my van.
Addendum April 13, 2016. Some more pics taken by Simon of seats in his van, added at bottom of post.
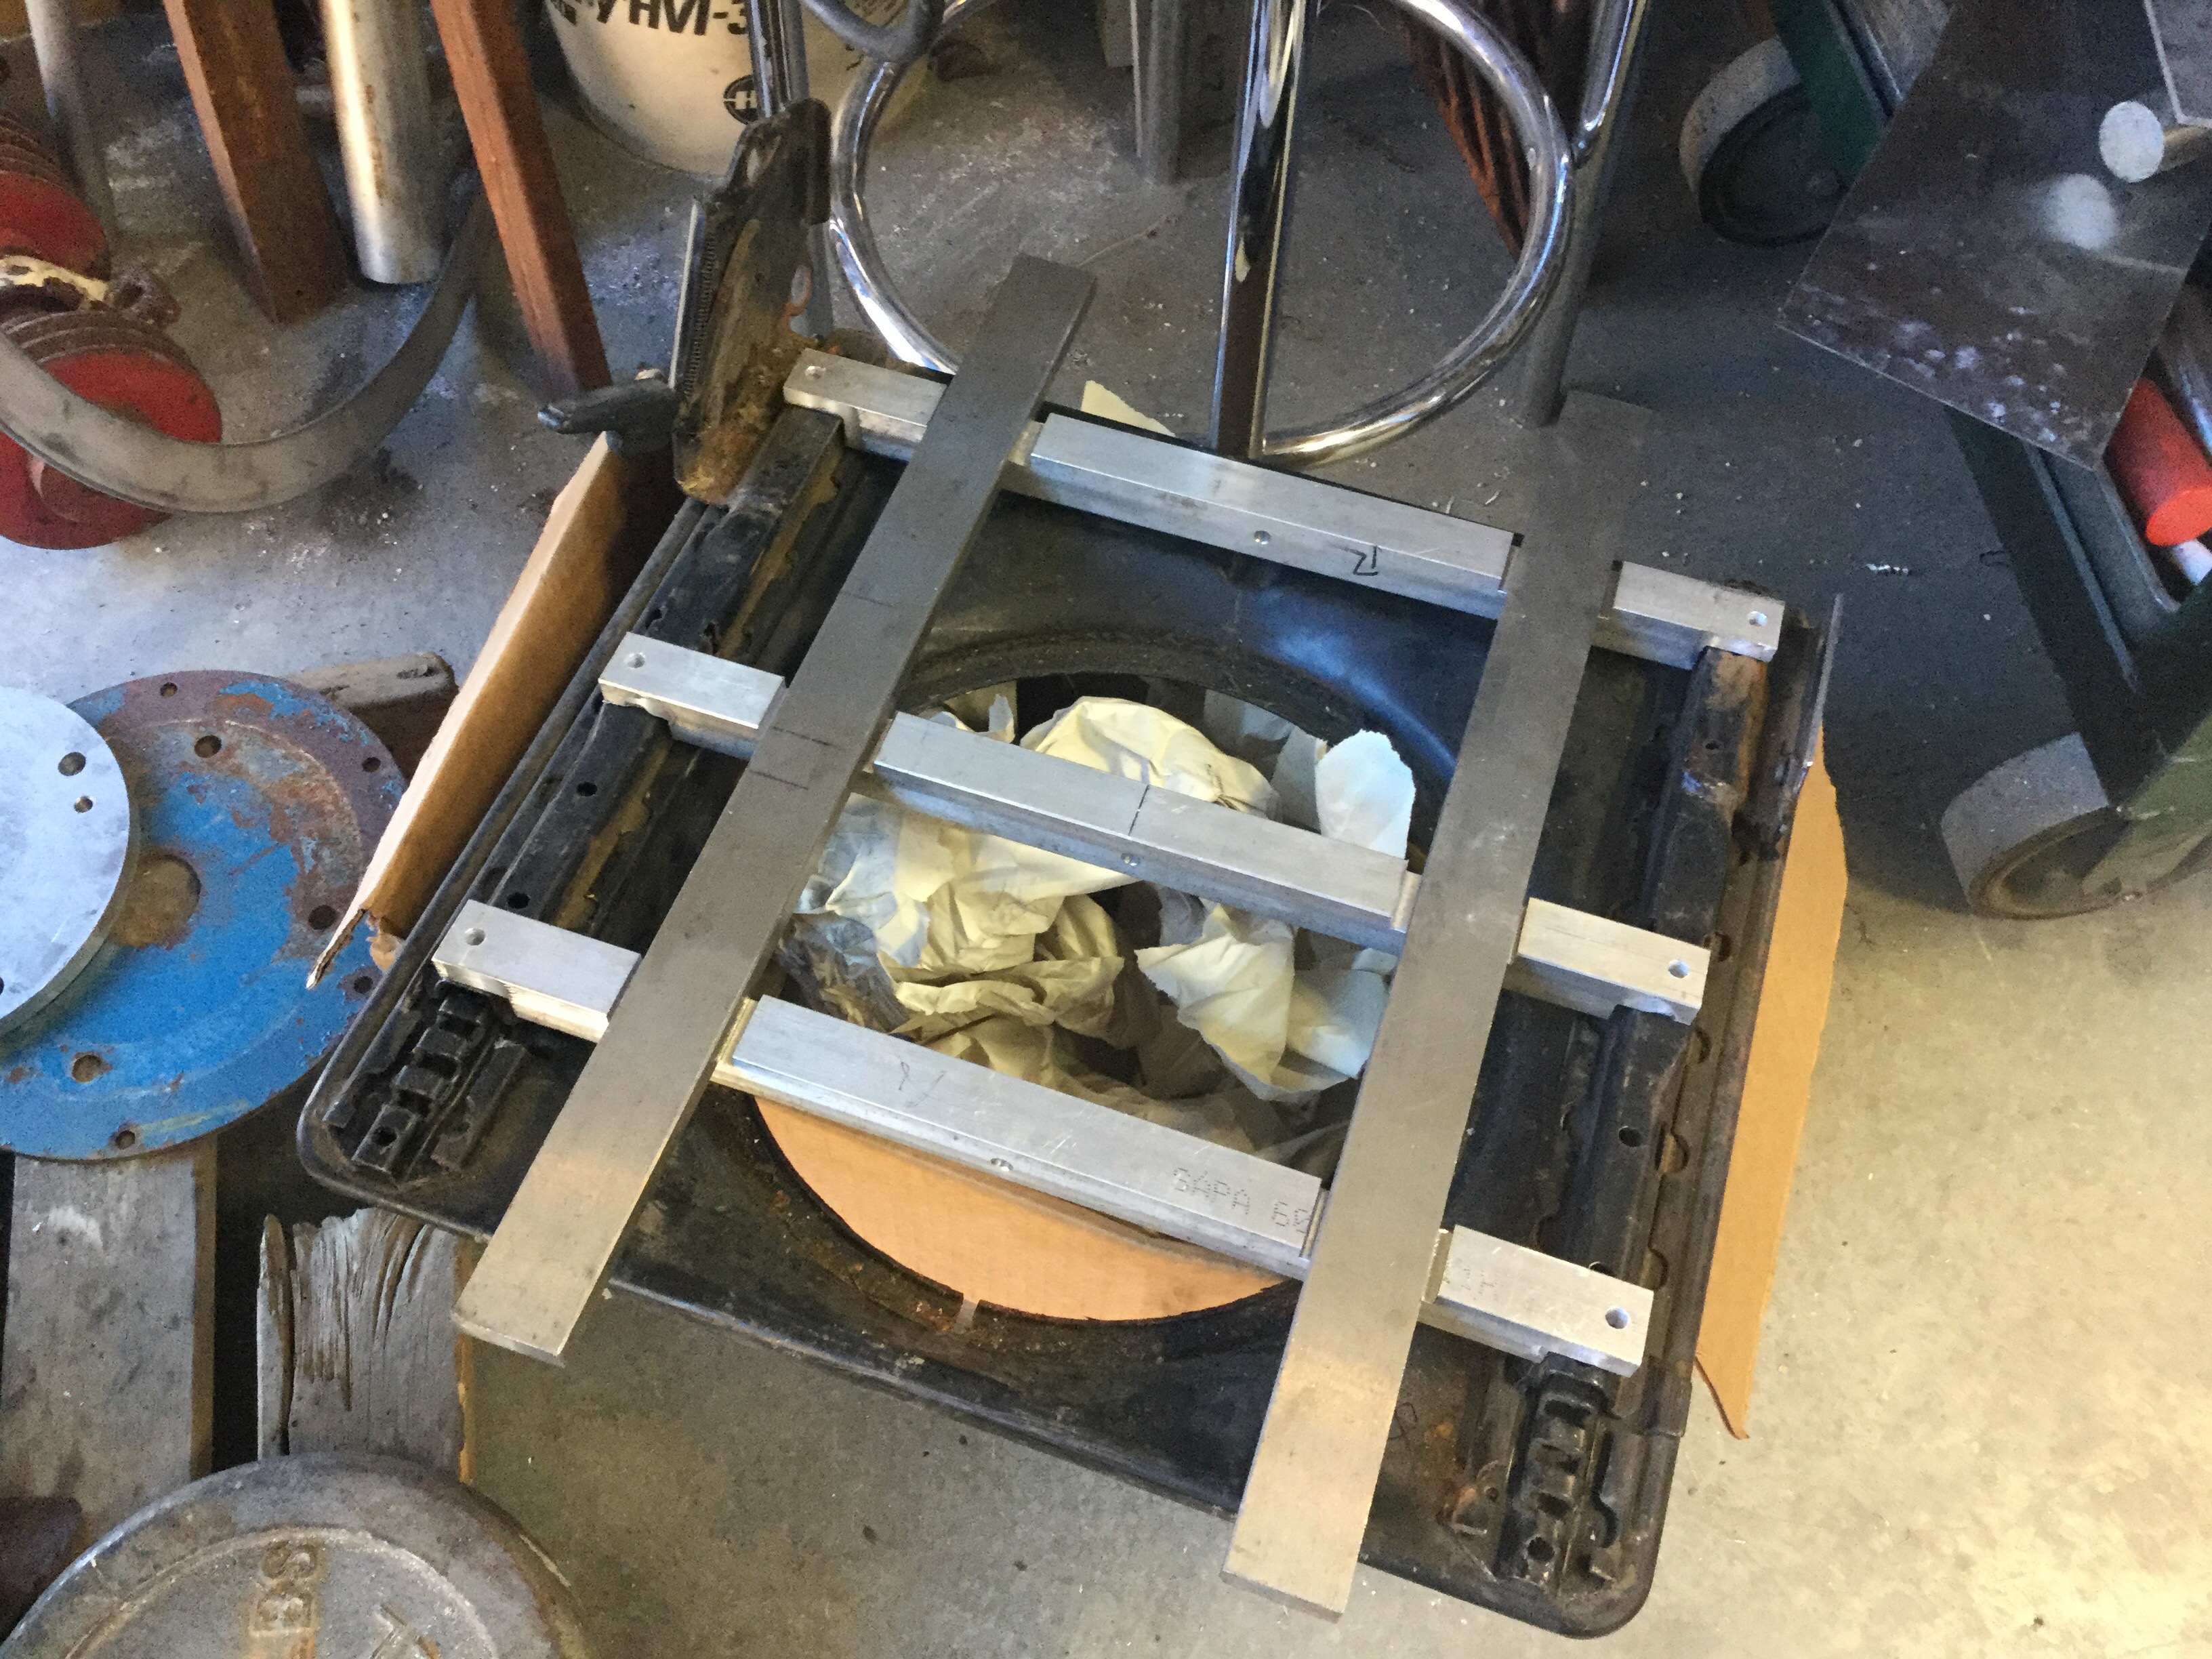
Addendum June 14, 2016. Added some pics of the aluminum rails I made to mount the passenger side seat.
Quick post, I hope to show more details later. Adapted one of a pair of seats to fit on stock seat slider. There is a samba thread about this seat and the pioneer (link ) only used the Caravan slider mechanism in the install. Good fried Simon liked what he saw in the thread and bought a pair of seats and had the necessity of being able to move the passenger seat more, ie incorporate the stock sliders. With both sliders in action you can get a good range of fore and aft movement.
I just finished making the adapter and doing test fit in my van. The seat is more comfy than the stock seat. And it’s leather, and has heating elements ( connecting the heaters is a chore yet to be enjoyed).


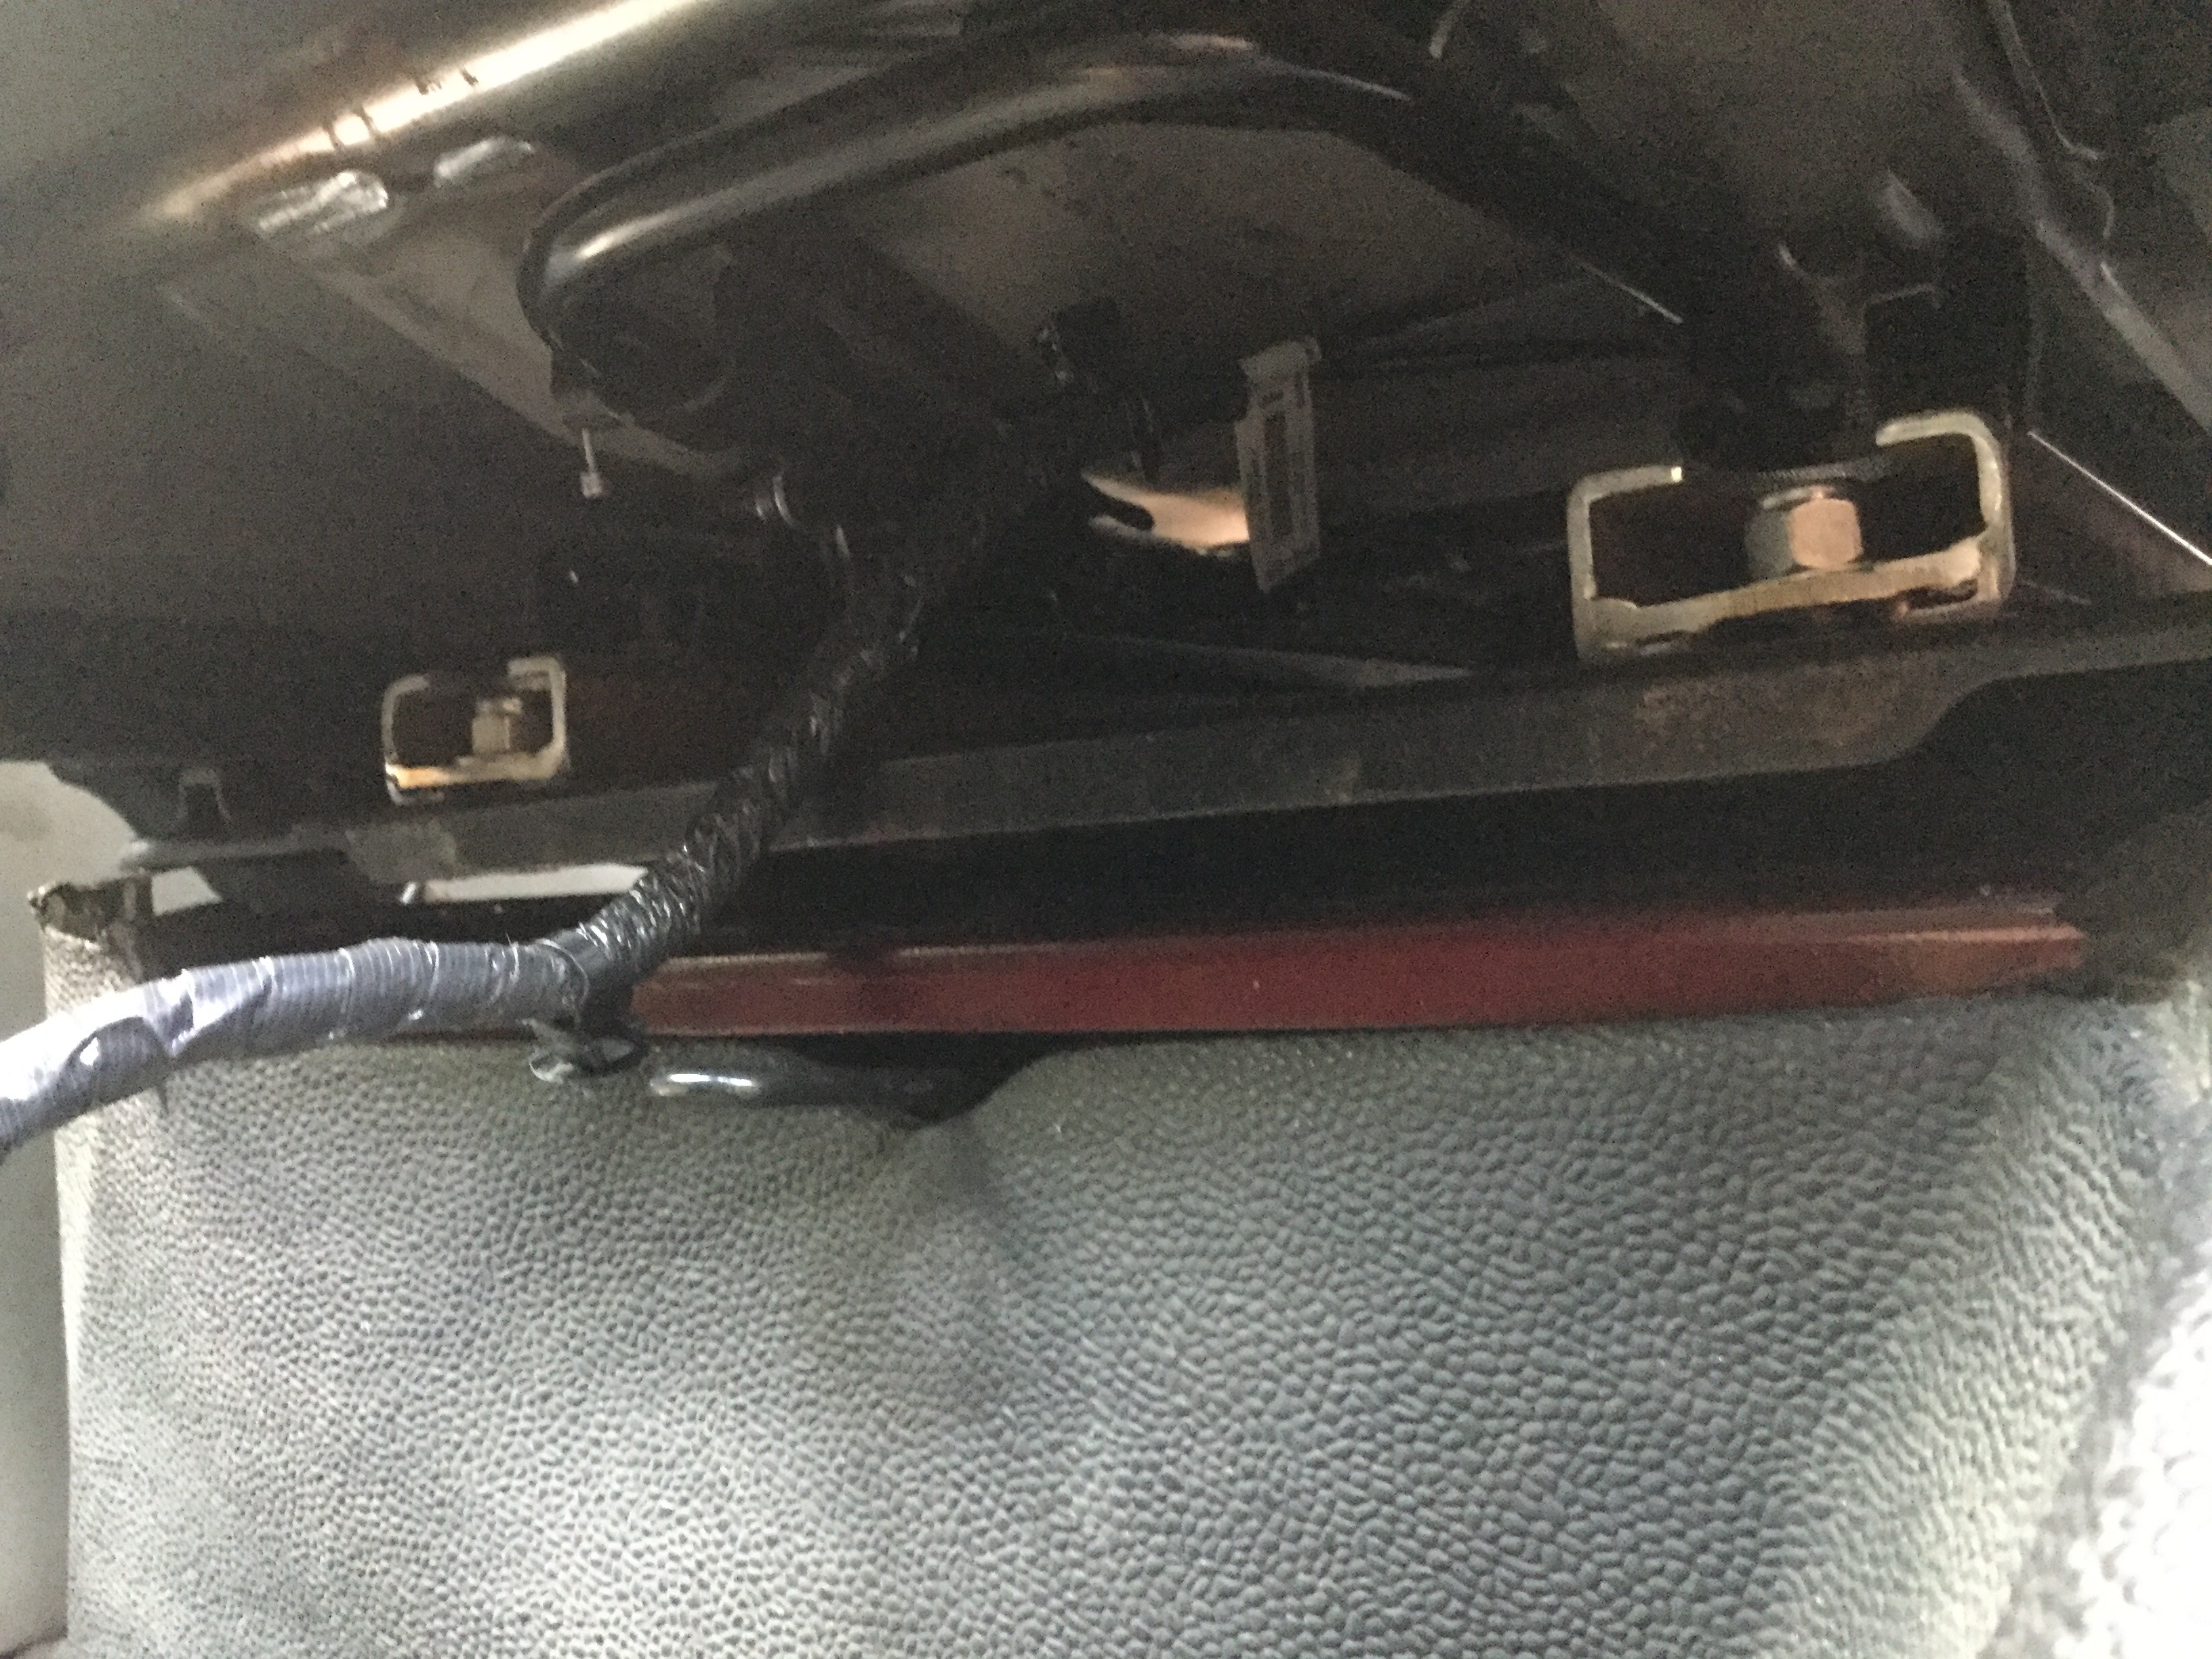


Here are some shots of the aluminum rails I made to allow stock seat sliders to be used. Note, the aluminum stock was left over scrap, the single holes in the vertical face have nothing to do with the install.
Laying on the stock sliders ( sliders salvaged from a spare seat, a couple of bars laid in the recesses just to show where the Chrysler seat rails will fit. I don’t have any more pics right now of the completed assembly including the slider release mechanism made to allow the stock slider rails to move ( the Chrysler seats have integral slider mechanism. Having the stock one too was really just to secure the stock rails). I’ll try to remember to get pics.

The longitudinal bars sitting in place. They have yet to be drilled to match the Chrysler seat bolts.