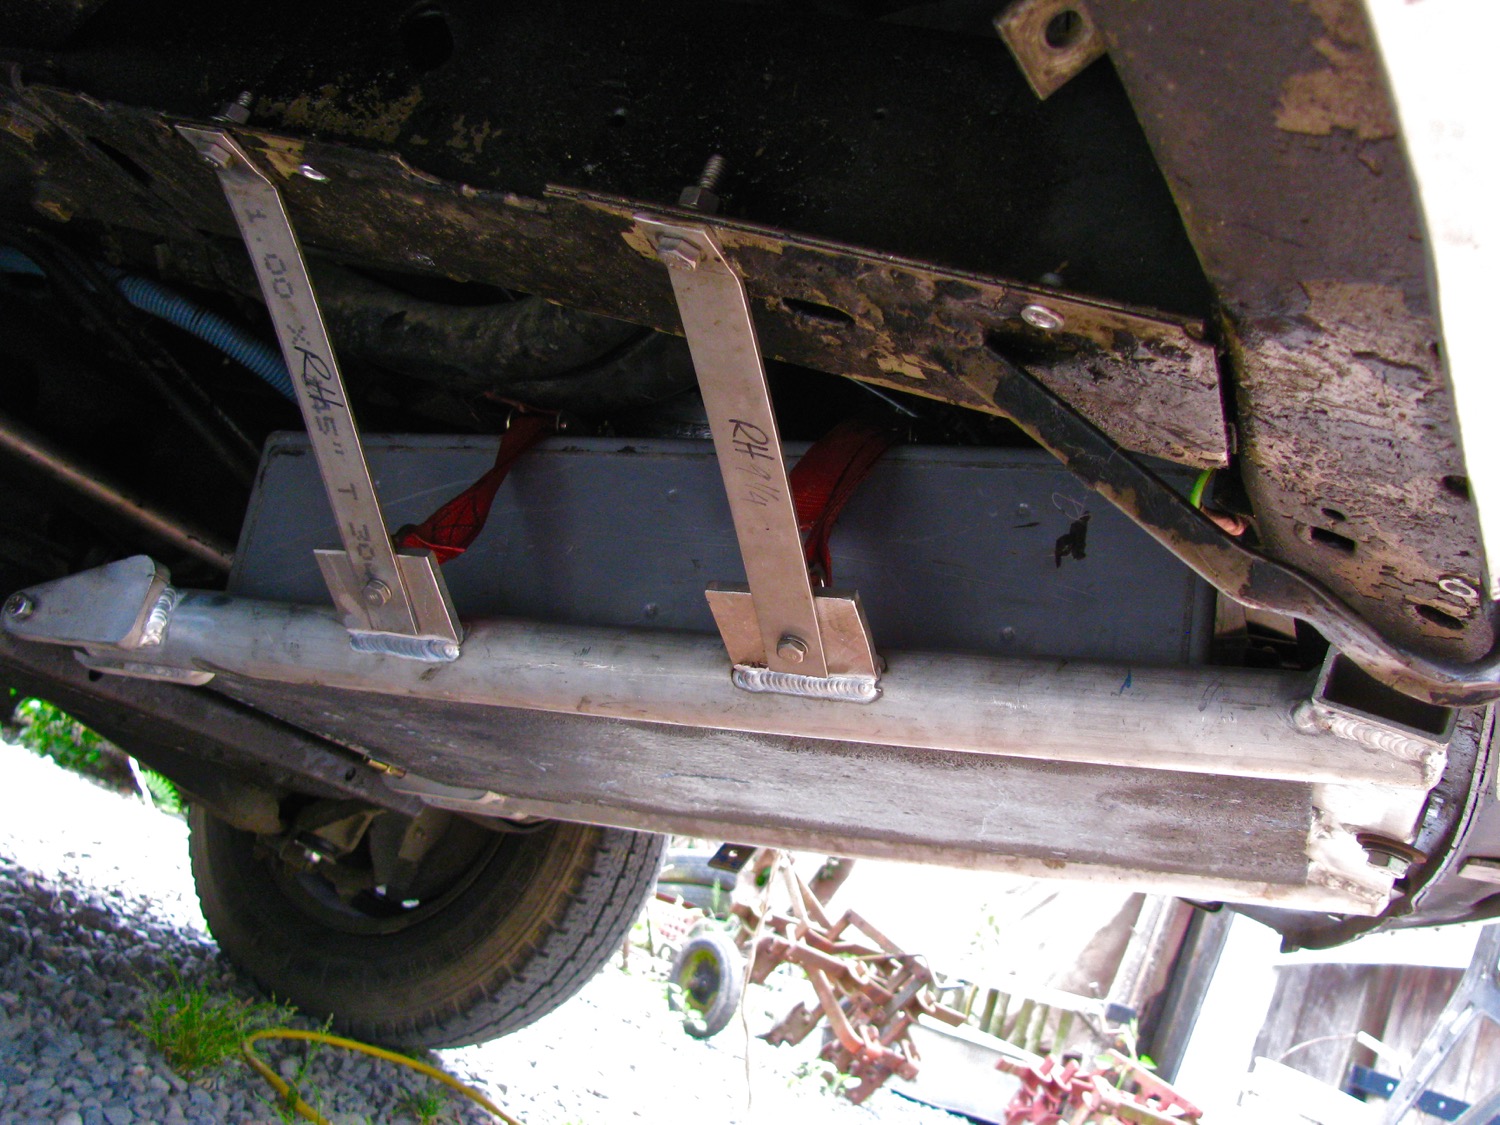
It took longer than making a baby but I finally have my big battery installed. I got this Northstar 200 AHr battery some time ago, I think I mentioned it in this blog post. The size and shape of the battery made it seem like it would fit easily under the rear seat but it just doesn’t ( without taking up more space than it needs, if that makes sense). I toyed with the idea, and went as far as making brackets, of mounting it up under the van between the door sill and frame rail but no, that didn’t look right. So I settled upon the admittedly dubious spot of where the spare tire sits. A couple of problems with this placement. Number one is that I now have to find a spot for the spare tire. Ah but what about my much talked about swing away spare tire carrier? More on that at the end of the post. The other dubious characteristic of this battery location is that it places 128 lbs forward of the front wheels. I’m a little worried that it might make a difference in how the van negotiates dips and ditches in logging roads. Skipping a head a bit, I have had the battery installed for a week and I really don’t notice any driving different on paved roads. I made a carrier for the battery quite a while back, crikey, it was a year ago, since then I welded in some locating brackets that the battery fits into, and some tabs on the side tubes for supporting brackets. The brackets are made from 1X1/8″ stainless and I bent them to fit to the van frame rails. They are secured to the frame rails by 5/16″ stainless bolts that I will someday change to 8 mm. The bracket to the tab connection is done with 1/4-20 bolts and instead of nuts I used stainless ring nuts. The rings are to secure nylon straps that cross the battery and hold it very securely to the tray. Ok, some pics of it installed. First pic taken from driver’s side, one stainless bracket not fastened. Gives you the general idea of how the battery lies. 
And on the passenger side. You can probably make out the red nylon hold down straps going up over the battery.
.
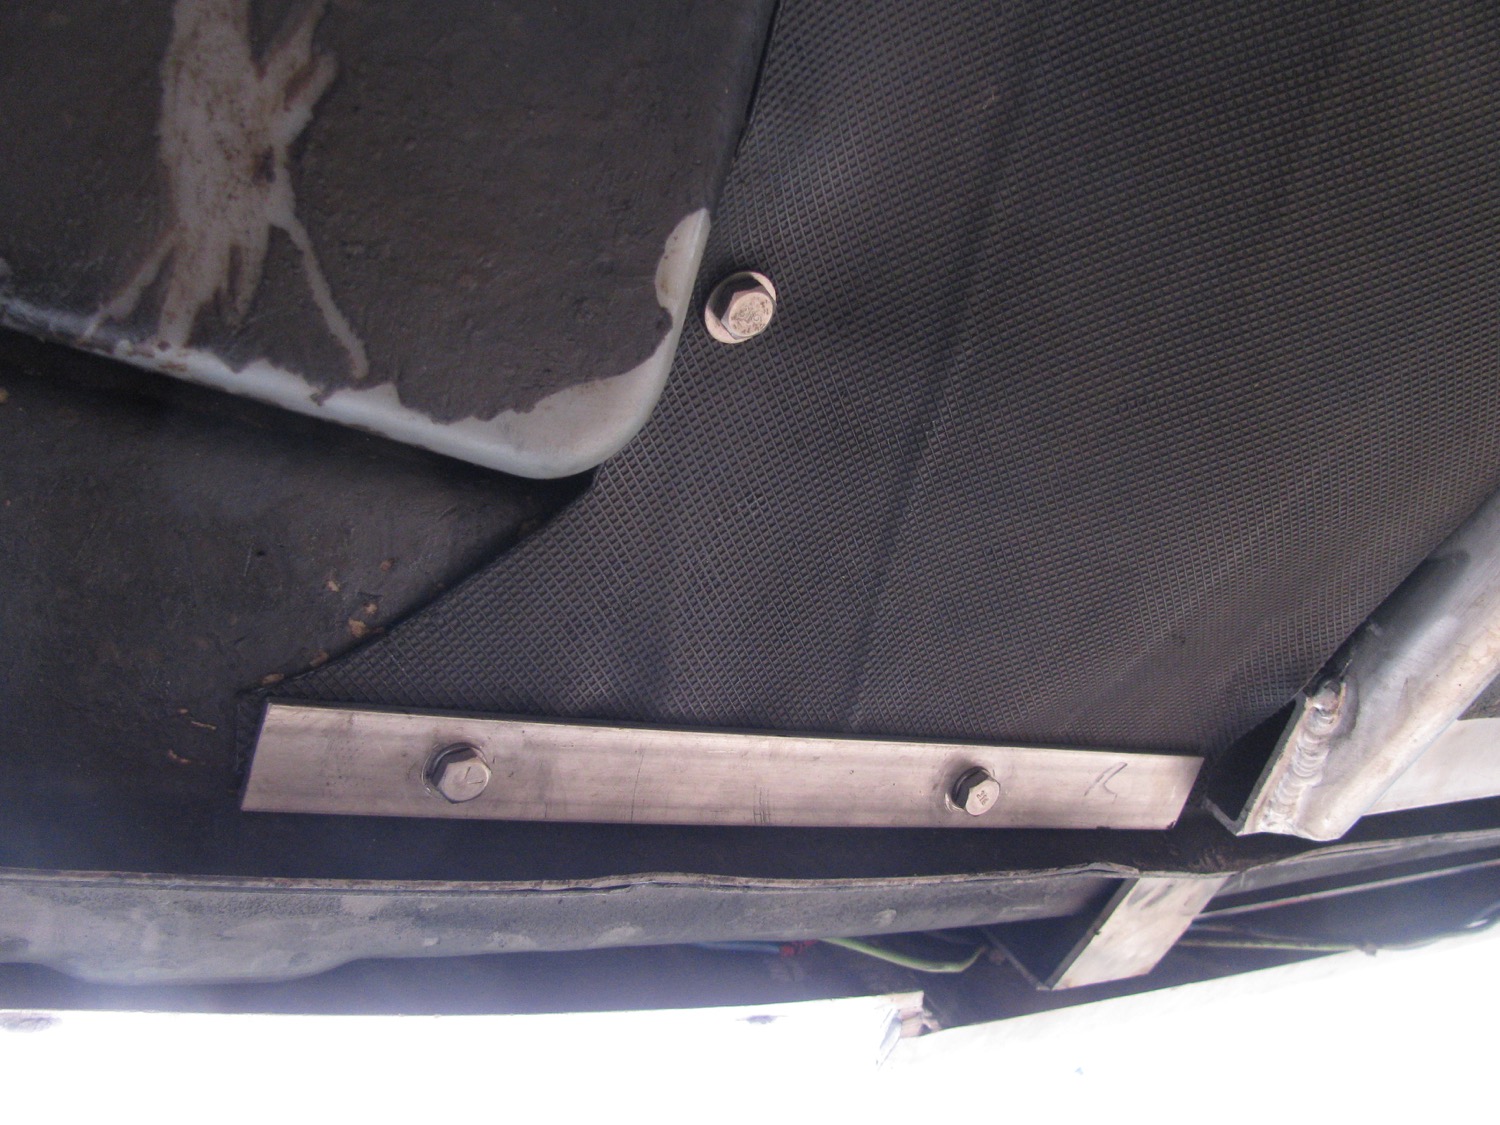
I had thought of making aluminum side splash plates but I was dissuaded by the changing angles and company curves needed so I used some scavenged treadmill material. I installed 1/4-20 riv nuts in the existing holes in the van frame and bolted the treadmill material.
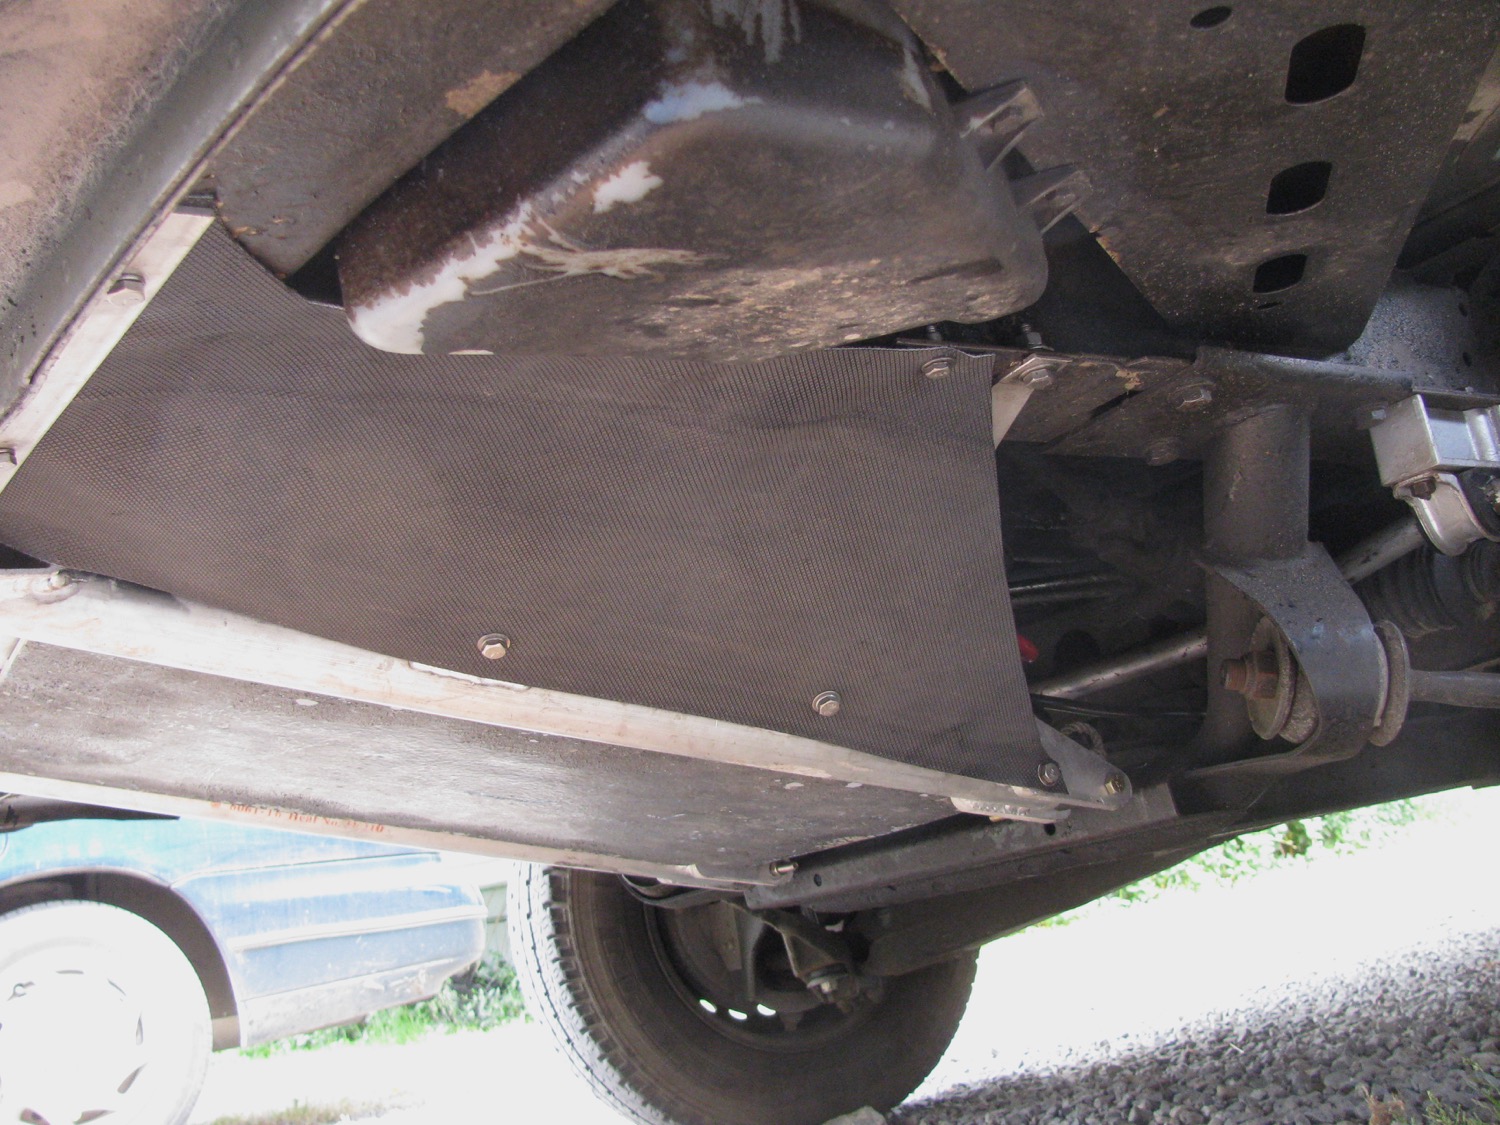
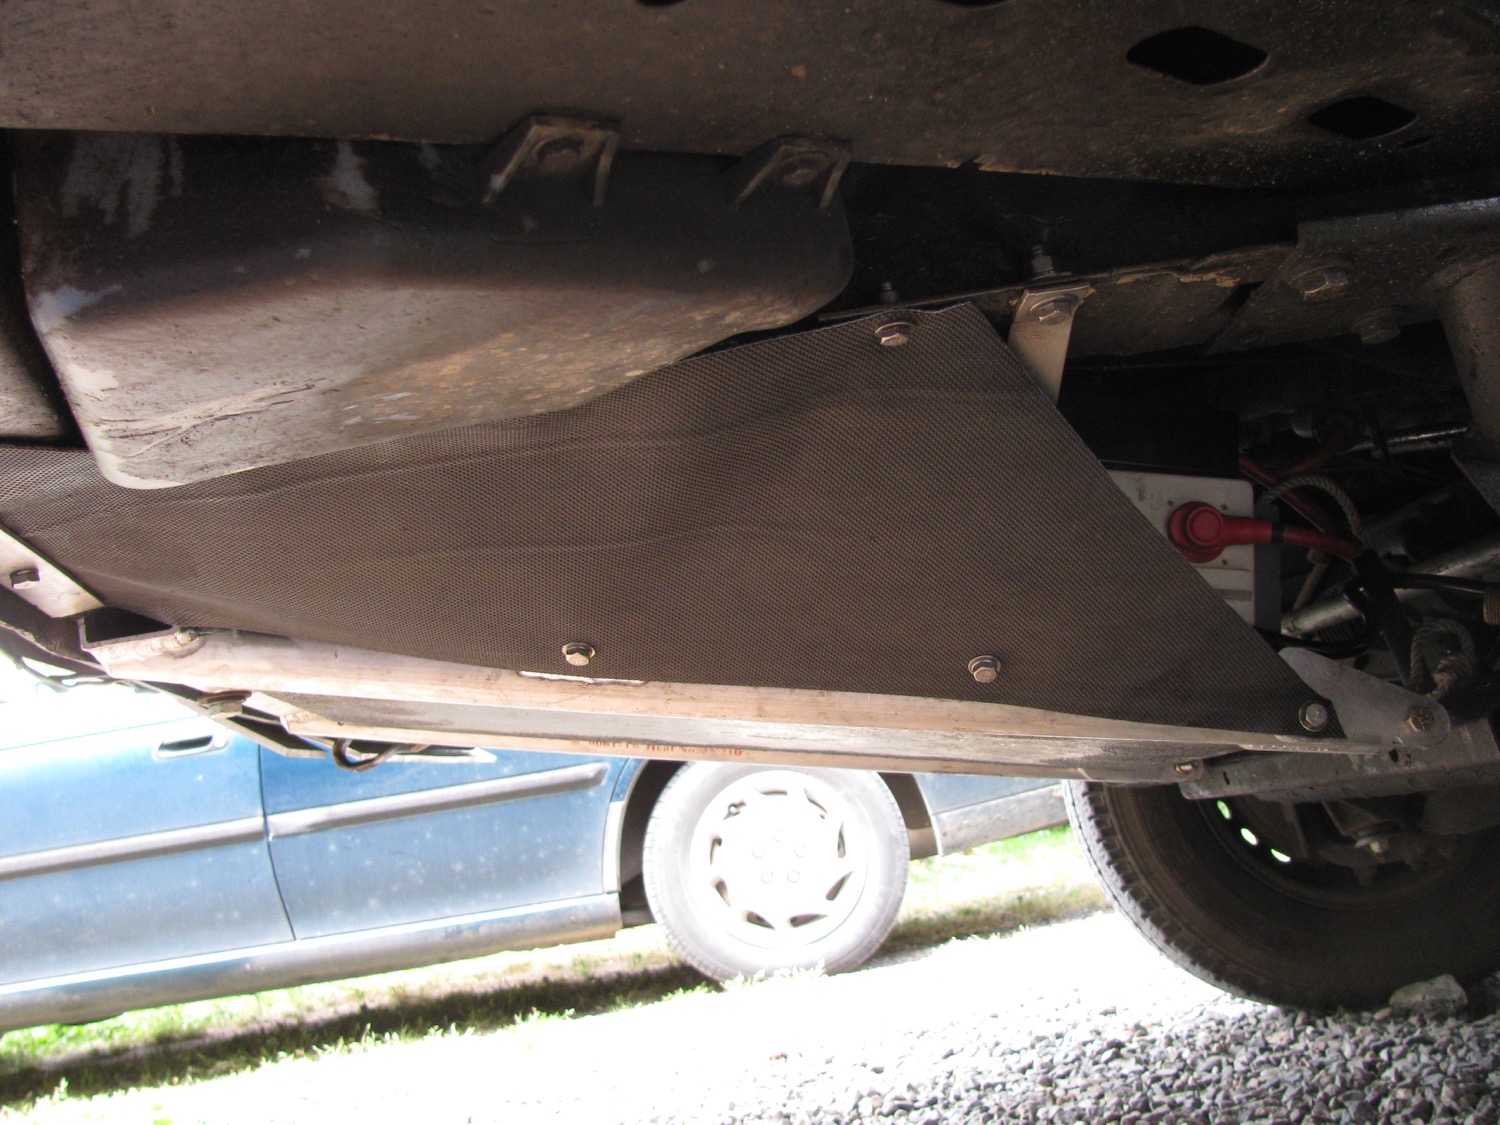
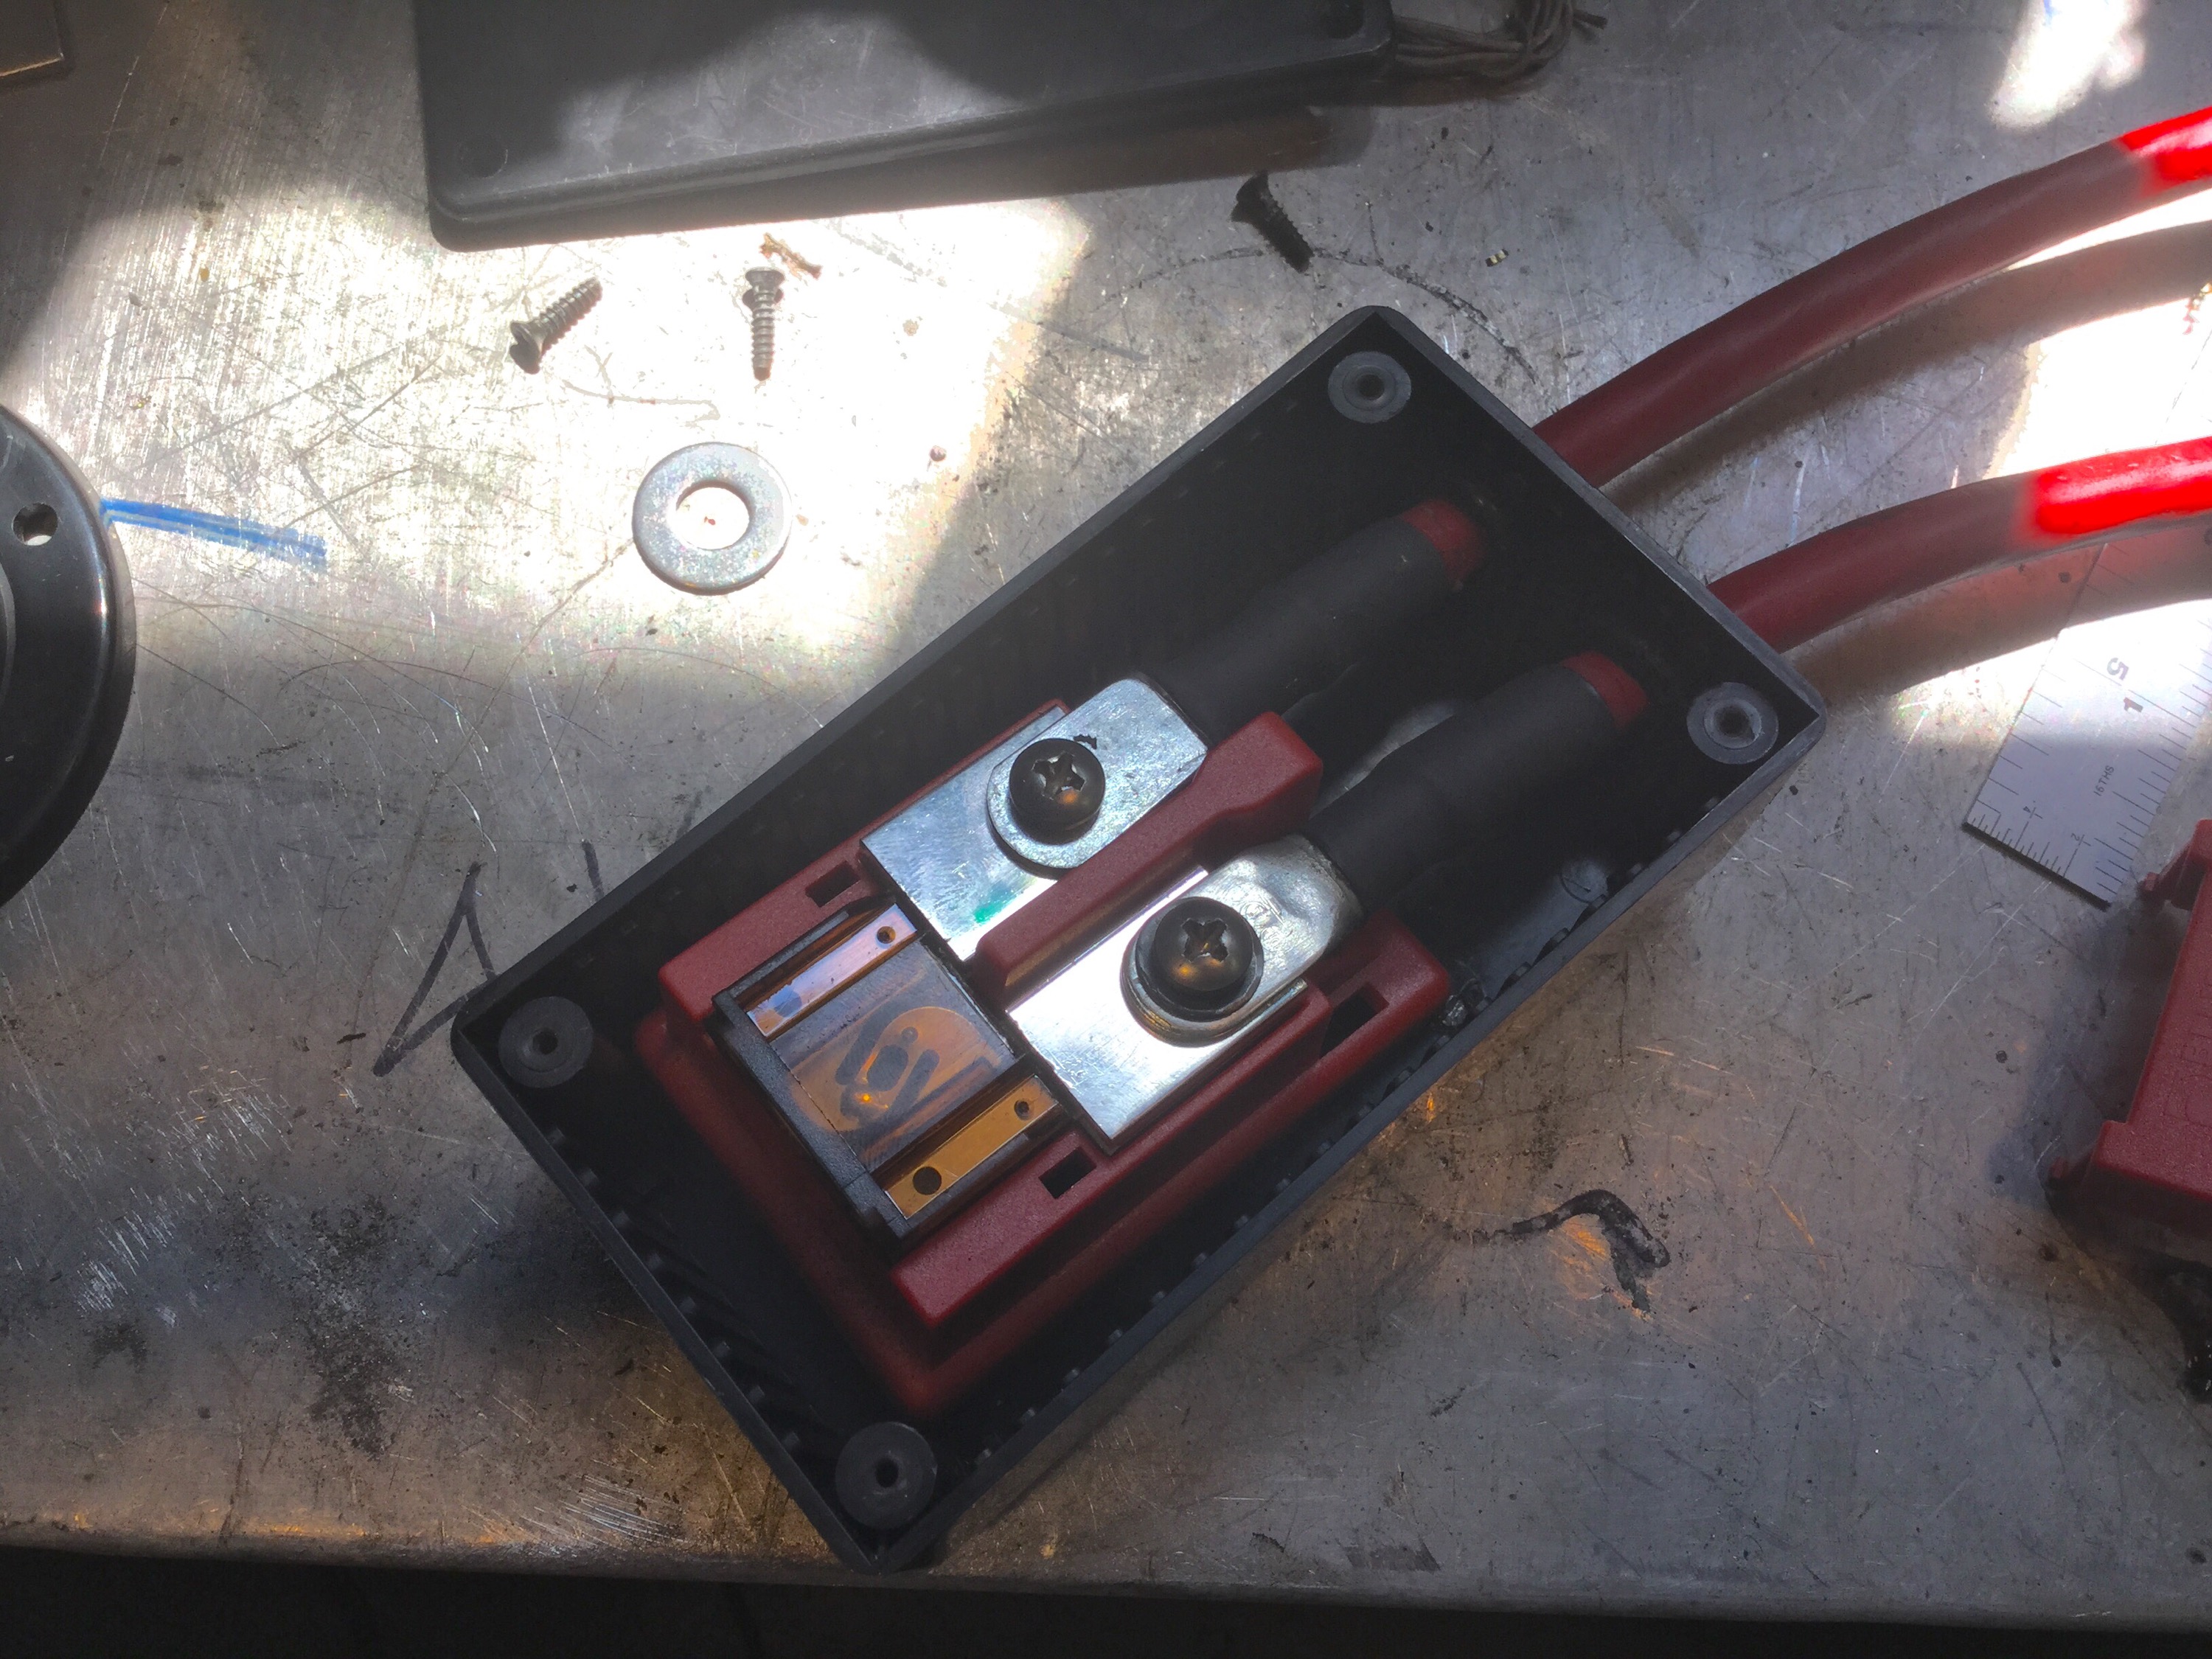
It’s not great but it’s not bad. It’s just there to reduce water splashing on the battery. Not shown in the pic are tubes leading from the battery vent up over the battery and on up to behind the front grill. When I did that I was thinking I was clever, I thought that leading the vents up high would prevent water getting into the battery if I happened to go through a deep puddle. But I found out later that the battery vents have a valve in them to prevent water ingress. A note on the wiring. I ran a short length of 4 gauge wire from the negative terminal back to the bolt holding on the transverse member supporting the front differential. On the positive terminal a short length of 4 gauge comes off the terminal and up into a black box (attached by Velcro) on top of the battery. In that box is a Blue Seas Maxi Fuse block, with a 70 A fuse.
Update: in the comments Marius wondered about battery cold weather performance. Here is a graph I found in one of Northstar’s documents .


 Then out of the box and through some plastic sheathing and a sealed bulkhead fitting into the battery compartment behind/under the driver’s seat. Then it continues on to connect with my Blue Seas ACR. I’ll write more on that when I tidy up the wiring, I’m going to change the auxiliary power distribution layout there. I was surprised and pleased to discover that when all is bolted up tight the stainless straps from the tray to the frame seem to support the entire weight of the battery. The bolts at the rear, where the tray hinges on, have no weight on them. So that pretty well sums up the installs the battery. As mentioned I will post more on the auxiliary power distribution set up when I finally fix the positions of the various components. So… The spare tire, where does it go? It’s time for a confession, I couldn’t get my swing away tire carrier to work the way I wanted to. I’m not going to explain all the things I tried, and I did try a lot of things. But I could not get happy with the rigidity of the set up. The tire vibrated in the carrier when I smacked it with my hand. It bugged me no end. I finally lost my patience and removed it, cut out the hinge from the bumper and welded the bumper back together and painted it. I’m going to make a hatch mounted tire carrier, don’t laugh… Yet. In the meantime I’ve pulled my old Paulchen rack out and I have the tire bolted on that.


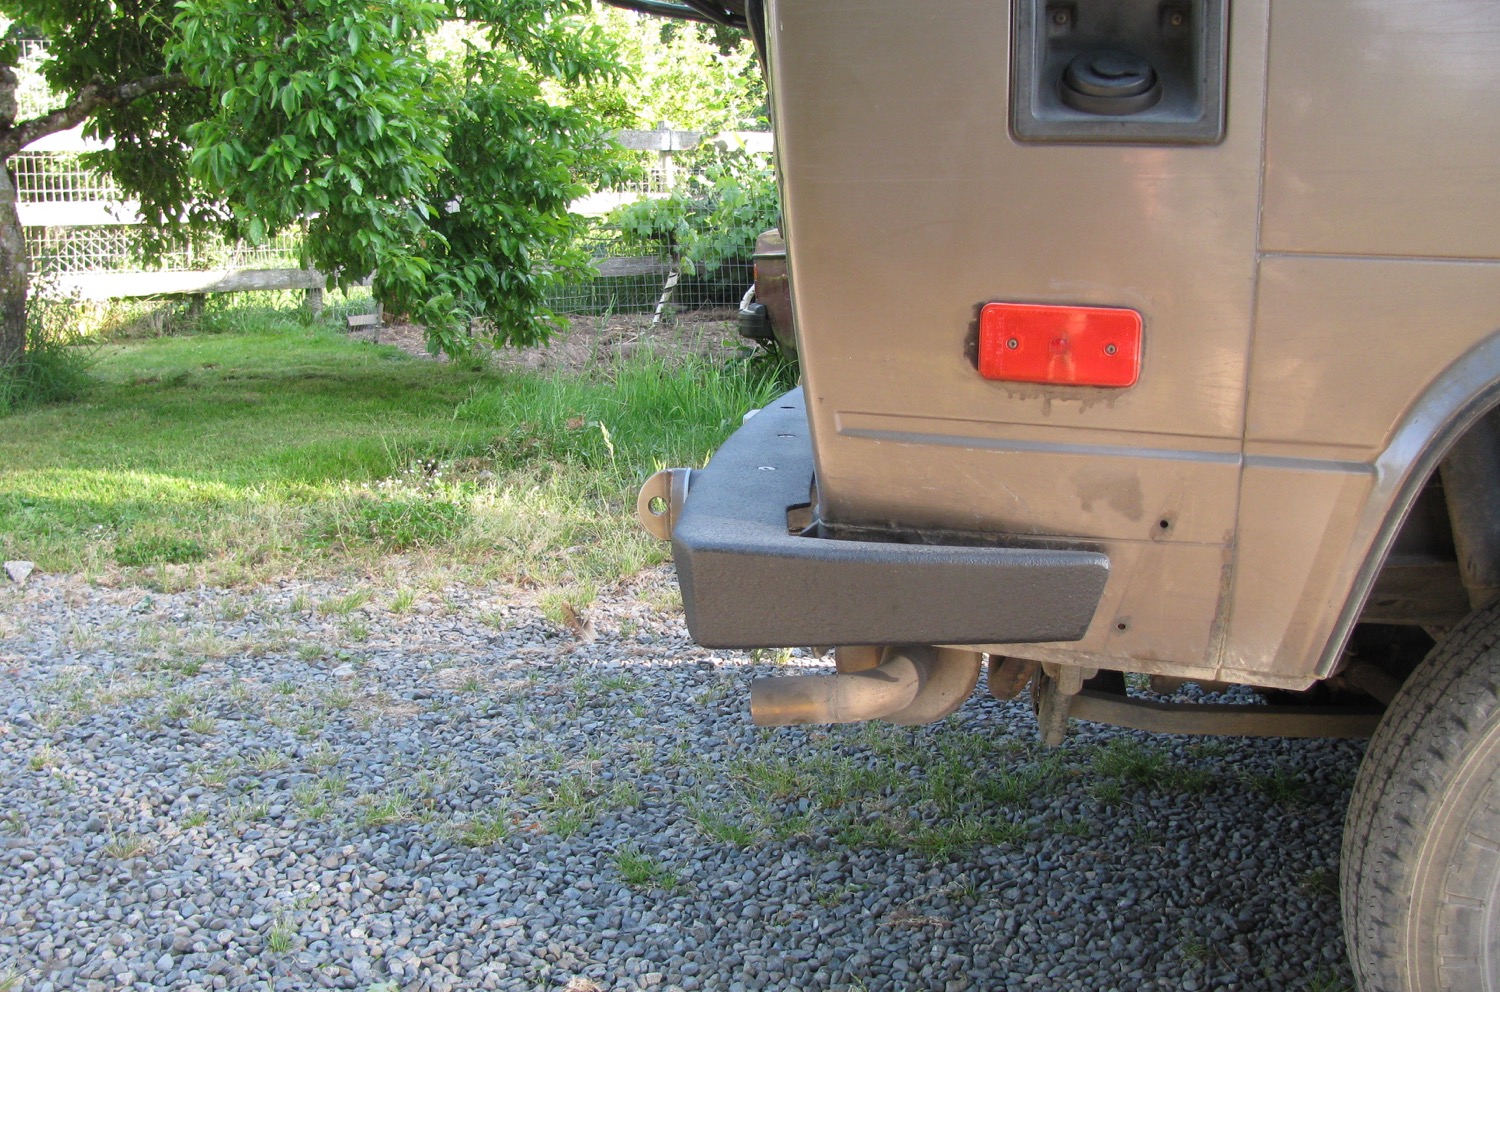
And the bumper… well its ok, but I’m not ecstatic about how far the end caps stick out, oh well maybe I can say it provides better side protection and its Mk I. And i still have to paint the tow loops and the receiver hitch.


#1 by mariusstrom on May 24, 2015 - 9:01 pm
The idea of externally mounted batteries has always intrigued me, but I’ve been worried about the cold temperature effects on battery capacity. Not a concern to you?
#2 by albell on May 24, 2015 - 9:11 pm
Hi Marius,
Yes and no 🙂
If I had the battery inside would it be warmer all of the time? The inside of the van is pretty well at ambient temp when I get in it in the morning. And then in my old diesel westy the battery was in the engine compartment and that sure was at outside temps in the morning.
It does seem more exposed outside, I’ll admit that, but in reality I don’t think it is worrisome. One thing though, I will have to connect a longer wire to the temp sensor on my solar charge controller so that it accurately reads battery voltage. I can see the battery being colder than the inside of the van on summer days, and my controller is inside the van.
Cheers
Alistair
>
#3 by mariusstrom on May 24, 2015 - 9:35 pm
The scenario I was thinking of more is while winter camping — the interior is heated (thanks to my Webasto), but the outside is colder than the proverbial witches naughty bits. It’s in this scenario that I want the battery delivering all it can – though, I admit, I haven’t researched temperature effects on AGM batteries – maybe they fare better than my bad lithium-ion and NiCad experiences (in much smaller capacity, granted).
#4 by albell on May 24, 2015 - 10:31 pm
Got it, yeah I see your point. I think AGM batteries have pretty close to the same cold weather performance as gel cell batteries, and I think that might be as low as having only 1/4 capacity at -20C compared to room temperature.
Ab
>
#5 by albell on May 25, 2015 - 8:11 am
Marius,
I think I was wrong on the temp vs capacity number I gave in last comment. Well maybe it is correct for gel cell, but I found some info on the Northstar battery I installed. Going to try posting graph here in the comments…
No go.. I’ll Insert the graph in body of post
Ab
#6 by mariusstrom on May 25, 2015 - 1:17 pm
Nice find on the graph. I was seeing similar, about 50% capacity for high-discharge scenarios. I think I’ll stick to cabin mounted – though, ironically, having it in the cabin during the summertime is bad for the battery’s life! Can’t win no matter what we do…
#7 by albell on May 25, 2015 - 3:19 pm
Everything about this battery install is a compromise. Your pint about Lowe temp performance is one I completely overlooked, but the graph I posted makes me feel a bit better, I think I’ll still be able to draw a fair amount of power at the camping temps I’ll be in.
But one thing I still have to do is insulate the top surface of the battery. The coolant lines run right above it and also hot air from the radiator. I think it wouldn’t hurt to throw on an insulating blanket of some sort.
Ab
>
#8 by Rob on May 25, 2015 - 8:50 am
The bumper looks good & having the spare where you can get to it is a fine idea.
I’ve always been one if those people who thought (figured/hoped) the spare up front like that would help in a crash.
But it does look good!
#9 by albell on May 25, 2015 - 2:54 pm
Hi rob,
I’ve wondered about the role of the tire vis a vis crash test. Part of me agrees that it probably has some effect, but then another part of me thinks that if it were critical then there should be some notice in owners manual stating that a fully inflated tire be carried up there at all times.
My tray is I think much stronger than the sheet metal tire carrier, so I have that going for me. And maybe the battery will add something too 🙂
Cheers
Alistair
>
#10 by famillysyncro on May 28, 2015 - 7:26 am
Nice job Alistair.
Seems it belong there. I would not be too concerned about the cold at your place anyway.
In the other end, we have batteries in our van and even with heat in the winter, those batteries are still close or at freezing temperature under both seats or even under the bench (if the heater isn’t placed there).
It is common for us to let water bottle under the bench or in the cabinet where one battery is and get ice in the bottle during a night at -20C even if we have the van toasty during the night.
Your bumper is sweet, way less bulky than the GW.
Jerome
#11 by Steve M. on February 17, 2017 - 7:37 pm
Interesting location for the battery mod. It certainly works. My question is that I’m wondering about the heat blowing off the radiator during the summer and any effect on the battery?
Great Blog sight!
#12 by albell on February 17, 2017 - 10:44 pm
Hey Steve,
Thanks for commenting. Yes it is an interesting place, and it’s not without its drawbacks. First off, and I think I might have mentioned this in the blog post, the battery was a gift and was much appreciated. At first I though the form factor would let me put it inside the van somewhere. But as it turned out it was just too big.
So up under there it went.
I was concerned about the cold, but that was a red herring. Yes, it’s the heat. So to maybe help reduce the amount of heat from the radiator air flow I installed two layers of 3/8″ aluminum honey comb panel material and same thickness of closed cell foam on top of the battery.
It must help a little I think.
The other negative is the additional weight up there infront of the wheels. Yeah, not the best. It’s hard to say if that has made any noticeable difference in handling.
The battery is still working fine. I certainly don’t tax it much at all when camping. It’s more battery than I need but I’ll say it again, it was a generous gift and I’m using it.
Cheers
Alistair