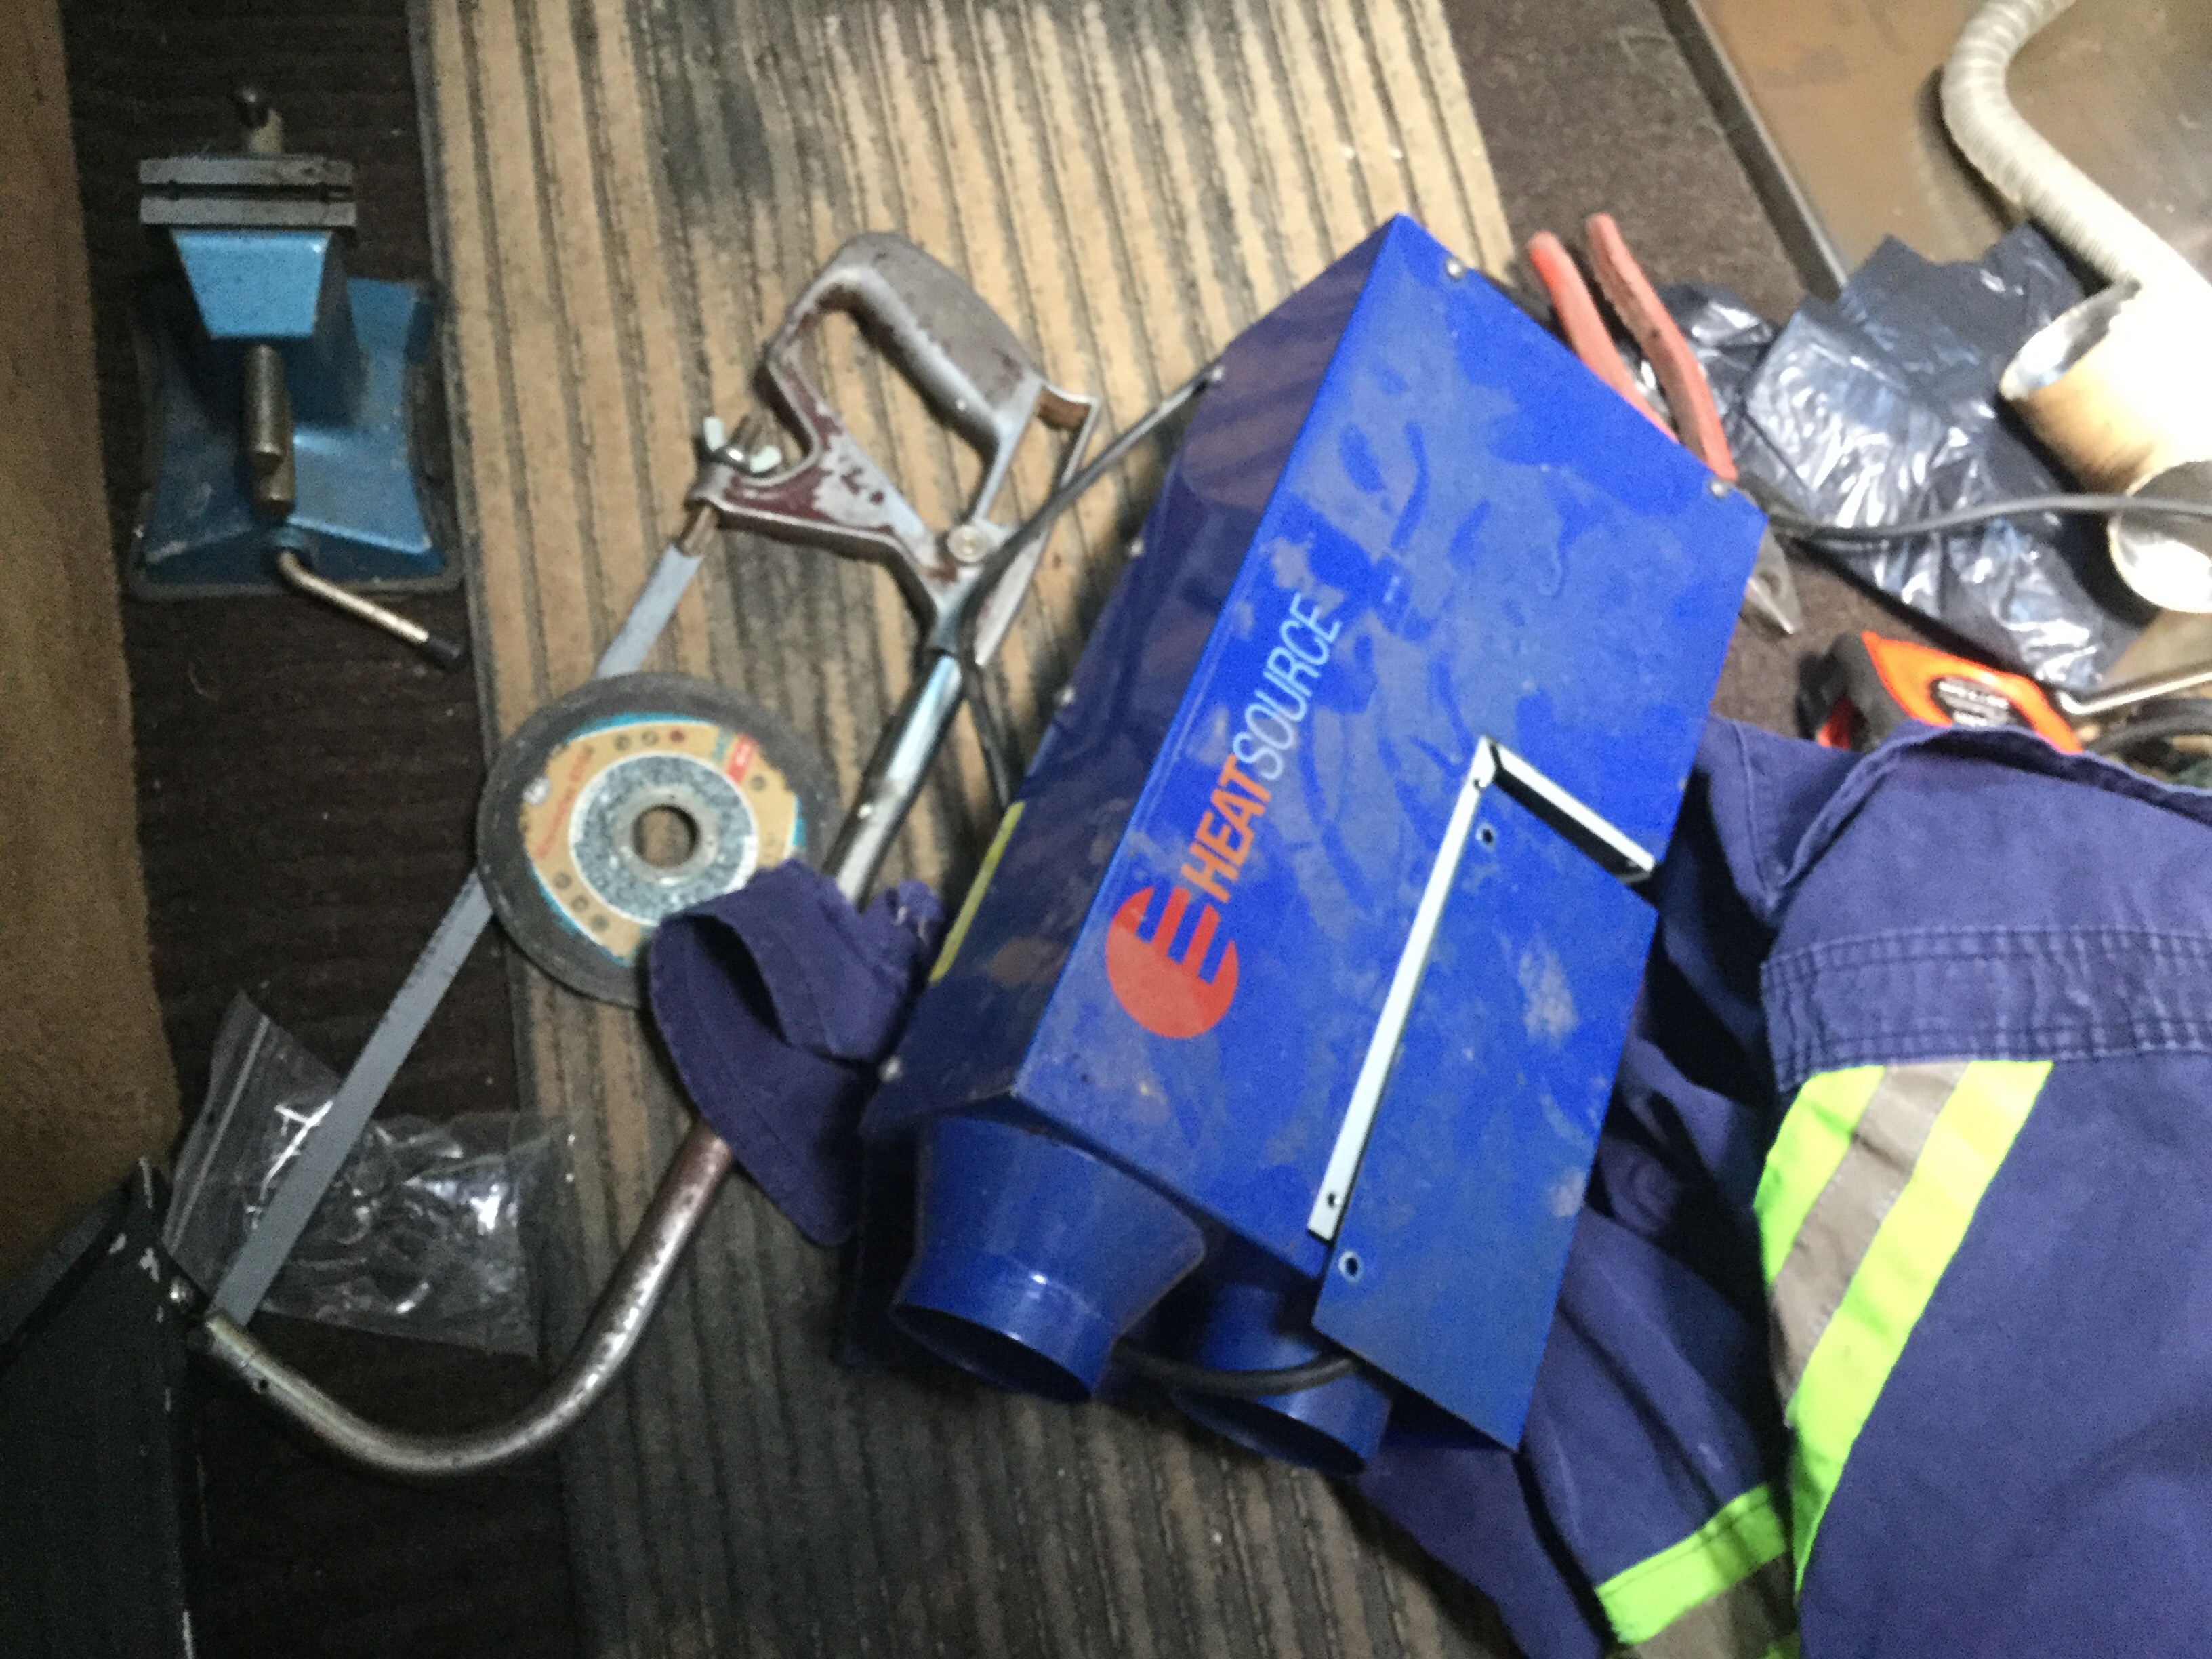
A couple of weeks ago I had time to visit the local auto wrecker. I found a new arrival, a late model Westy that had a engine fire. A sad sight, but on the upside the fire was pretty well limited to the very rear. Under the bench seat I found a Heat Source HS 2000 propane heater. It’s commonly referred to as a Propex heater and it was undamaged by the fire. Well the cable to the thermostat did get burned but everything else was ok. Settled on a price and I pulled the unit along with the intake and exhaust pipes and as much cable as I could get out.
A pic of it in the van, taken so I could send it to Simon and do some crowing.
Simon has the same unit and we mounted his between the front seats, with a hollowed out console over it. It’s worked out very well for him and after a lot of waffling on my part I decided to do more or less the same. Does it go without saying that this install location only works with syncros? The gas tank on 2wd Vanagons precludes this option.
I set the heater up on the bench, supplied power and propane, but no joy. Deader than a fart. I mentioned that the thermostat cable was damaged by the fire, I had cut out the bad part and spliced the wires. But the unit was dead none the less. I emailed Karl at westyventure.com and he kindly, and promptly told me to check out a fuse on the heater unit circuit board. It’s a well disguised fuse and indeed he was right, it was blown. We both agreed that the fire damaged thermostat cable was the cause. I jumped the fuse and the heater fired up.
I ordered some fuses from digikey and they came the next day ( amazing ) and all was well.
Next step was to assemble the parts needed for the gas line connection. The heater came with a 1/4″ compression fitting elbow. It’s 1/4 BSPT into the unit and what I discovered that there are various compression fitting sizes possible for the other end of the elbow. As I said, I had 1/4″, but it could have been 5/16″, 8mm, or even 3/8″. Anyway, I bought some 1/4″ soft copper tubing, a four way connector ( 4 by 3/8 NPT female) , a 3/8″ close nipple and a 3/8″ NPT X 1/4″ compression elbow.
Yes it’s confusing and I don’t think I can say it any more clearly.
Ok, pic of the propane tank end with the new fittings in place.
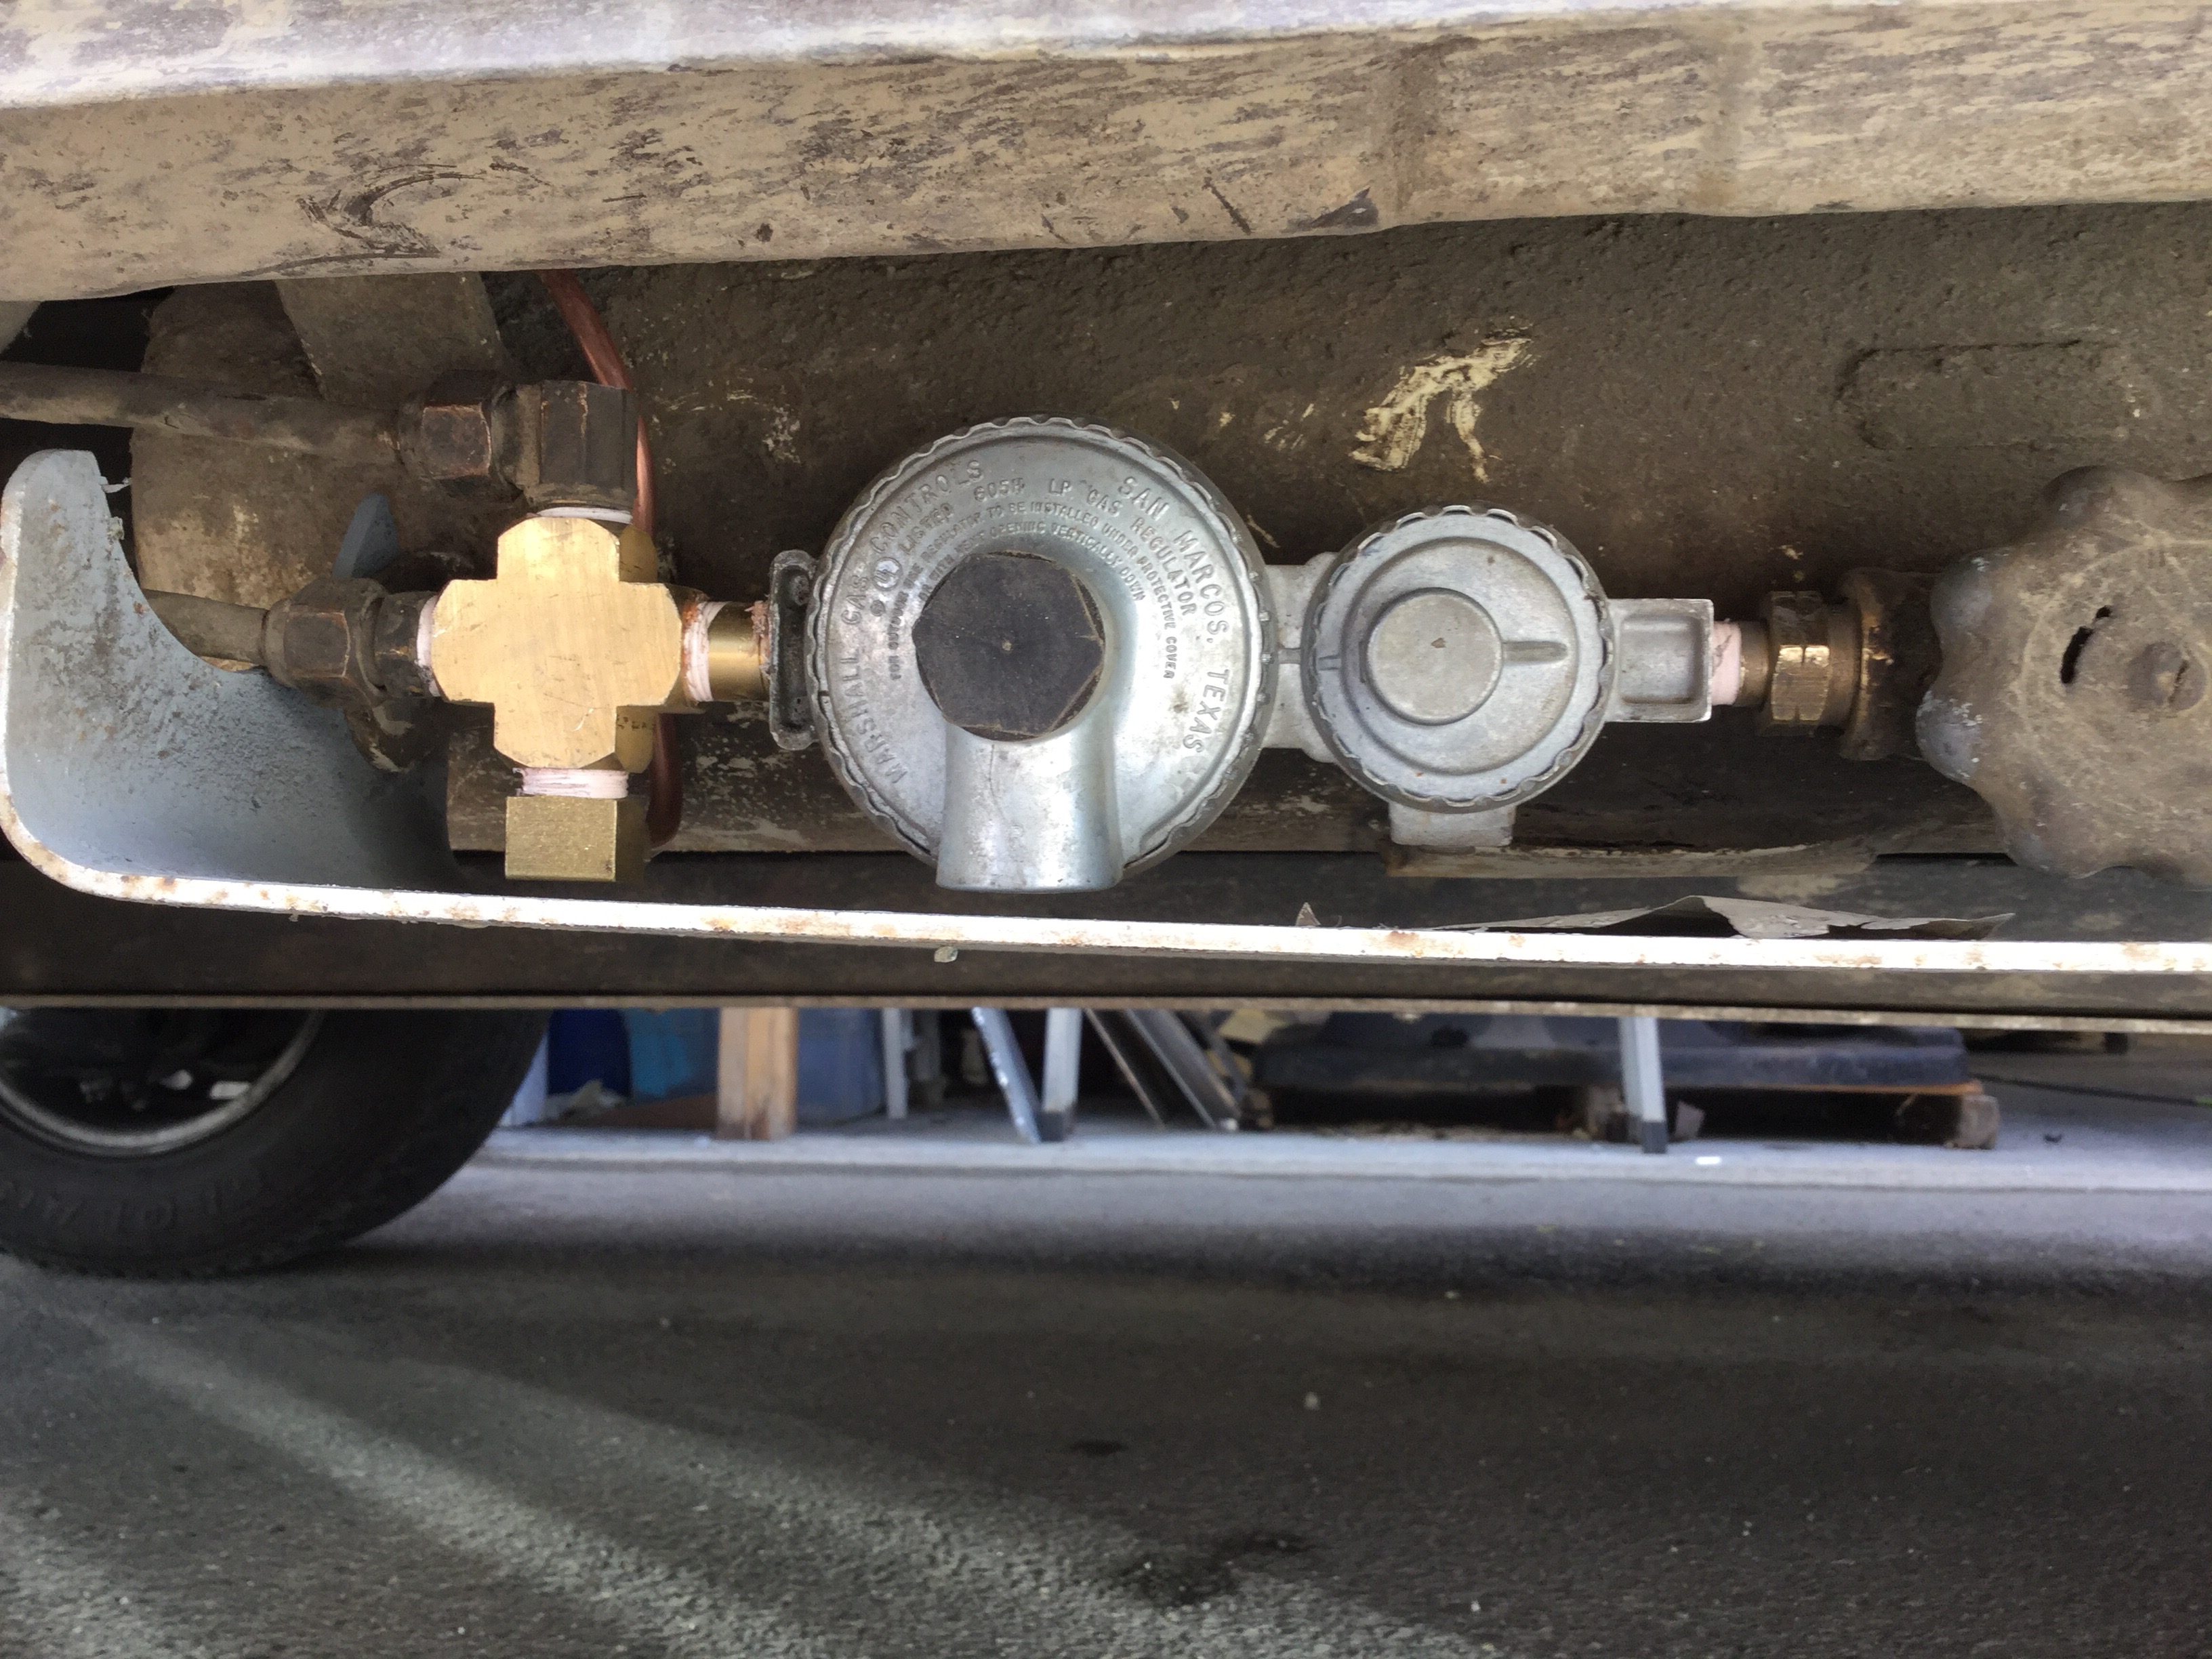
So, you see the new four way connected by the short nipple to the regulator. It replaces the stock three way. The stock plumbing to the stove and fridge connects the the four way pretty well in the same orientation they did with the three way. The new elbow barely makes it at the bottom of the 4 way connector. You might be able to see the copper line running vertically behind the 4 way.
I led the copper up to the floor then between floor and fram rail. That’s the sink drain there. The 1/4″ copper makes it in that tight gap. I don’t think anything larger would.
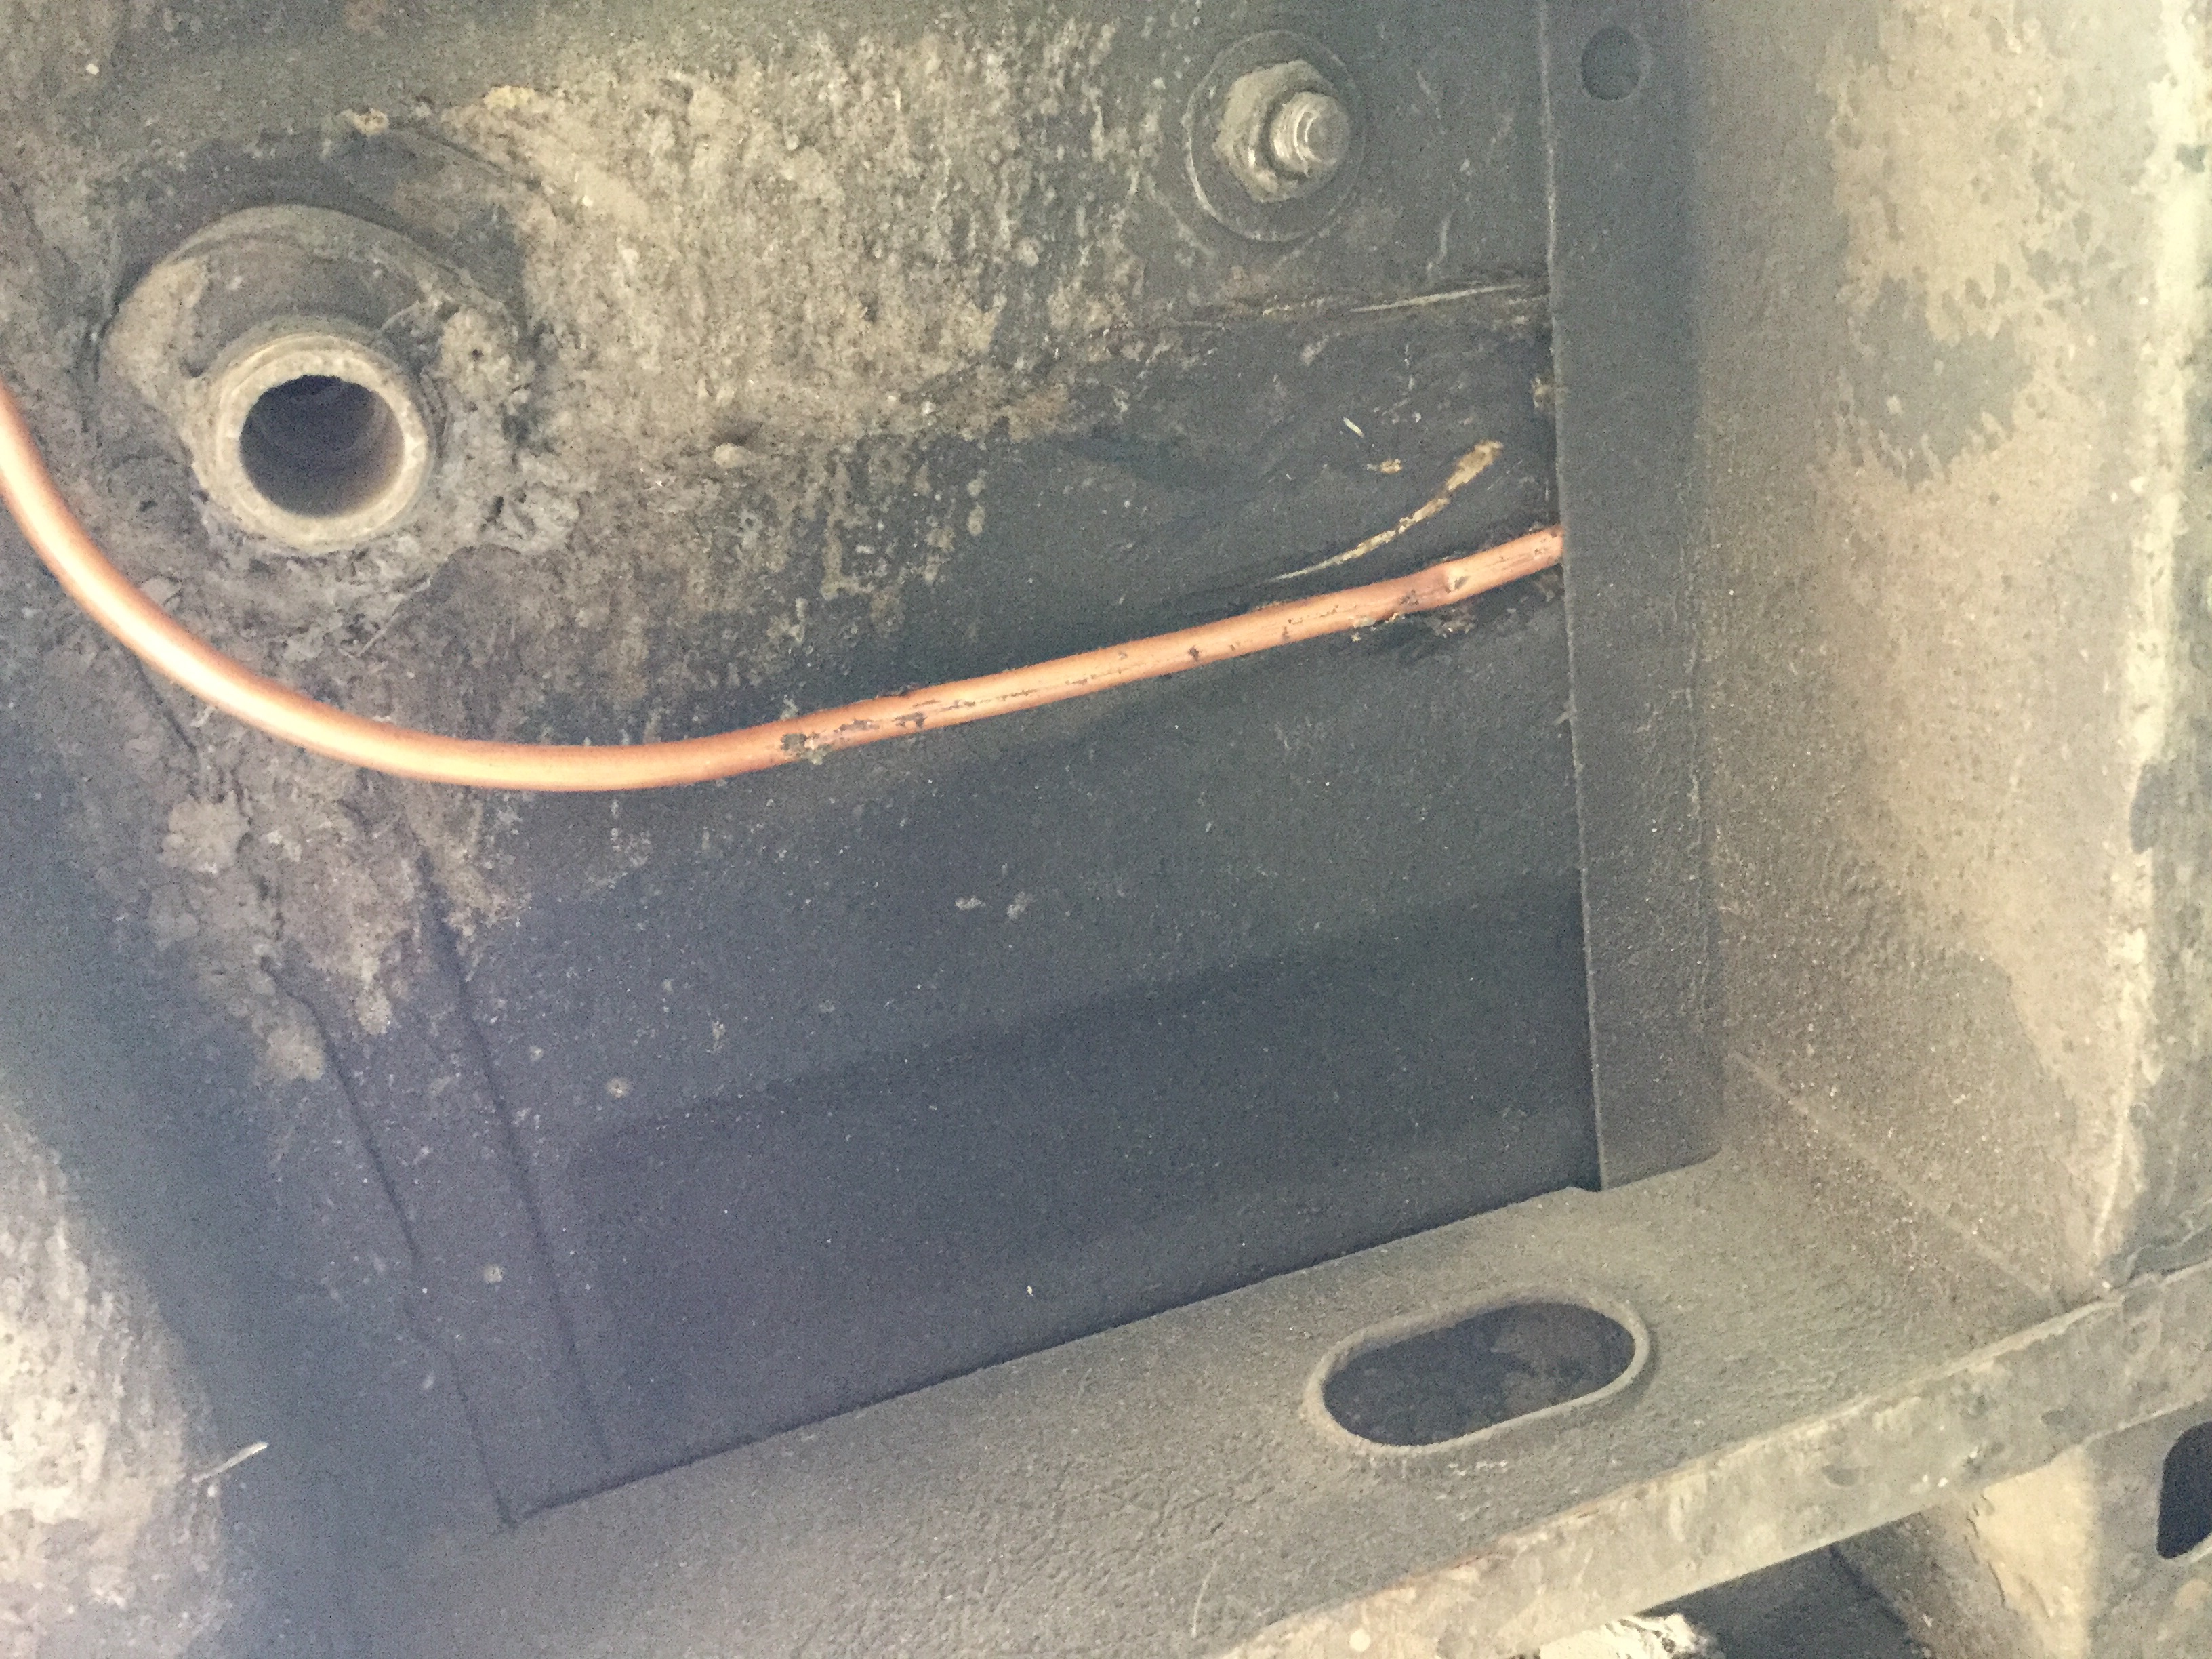
Them it runs up forward.

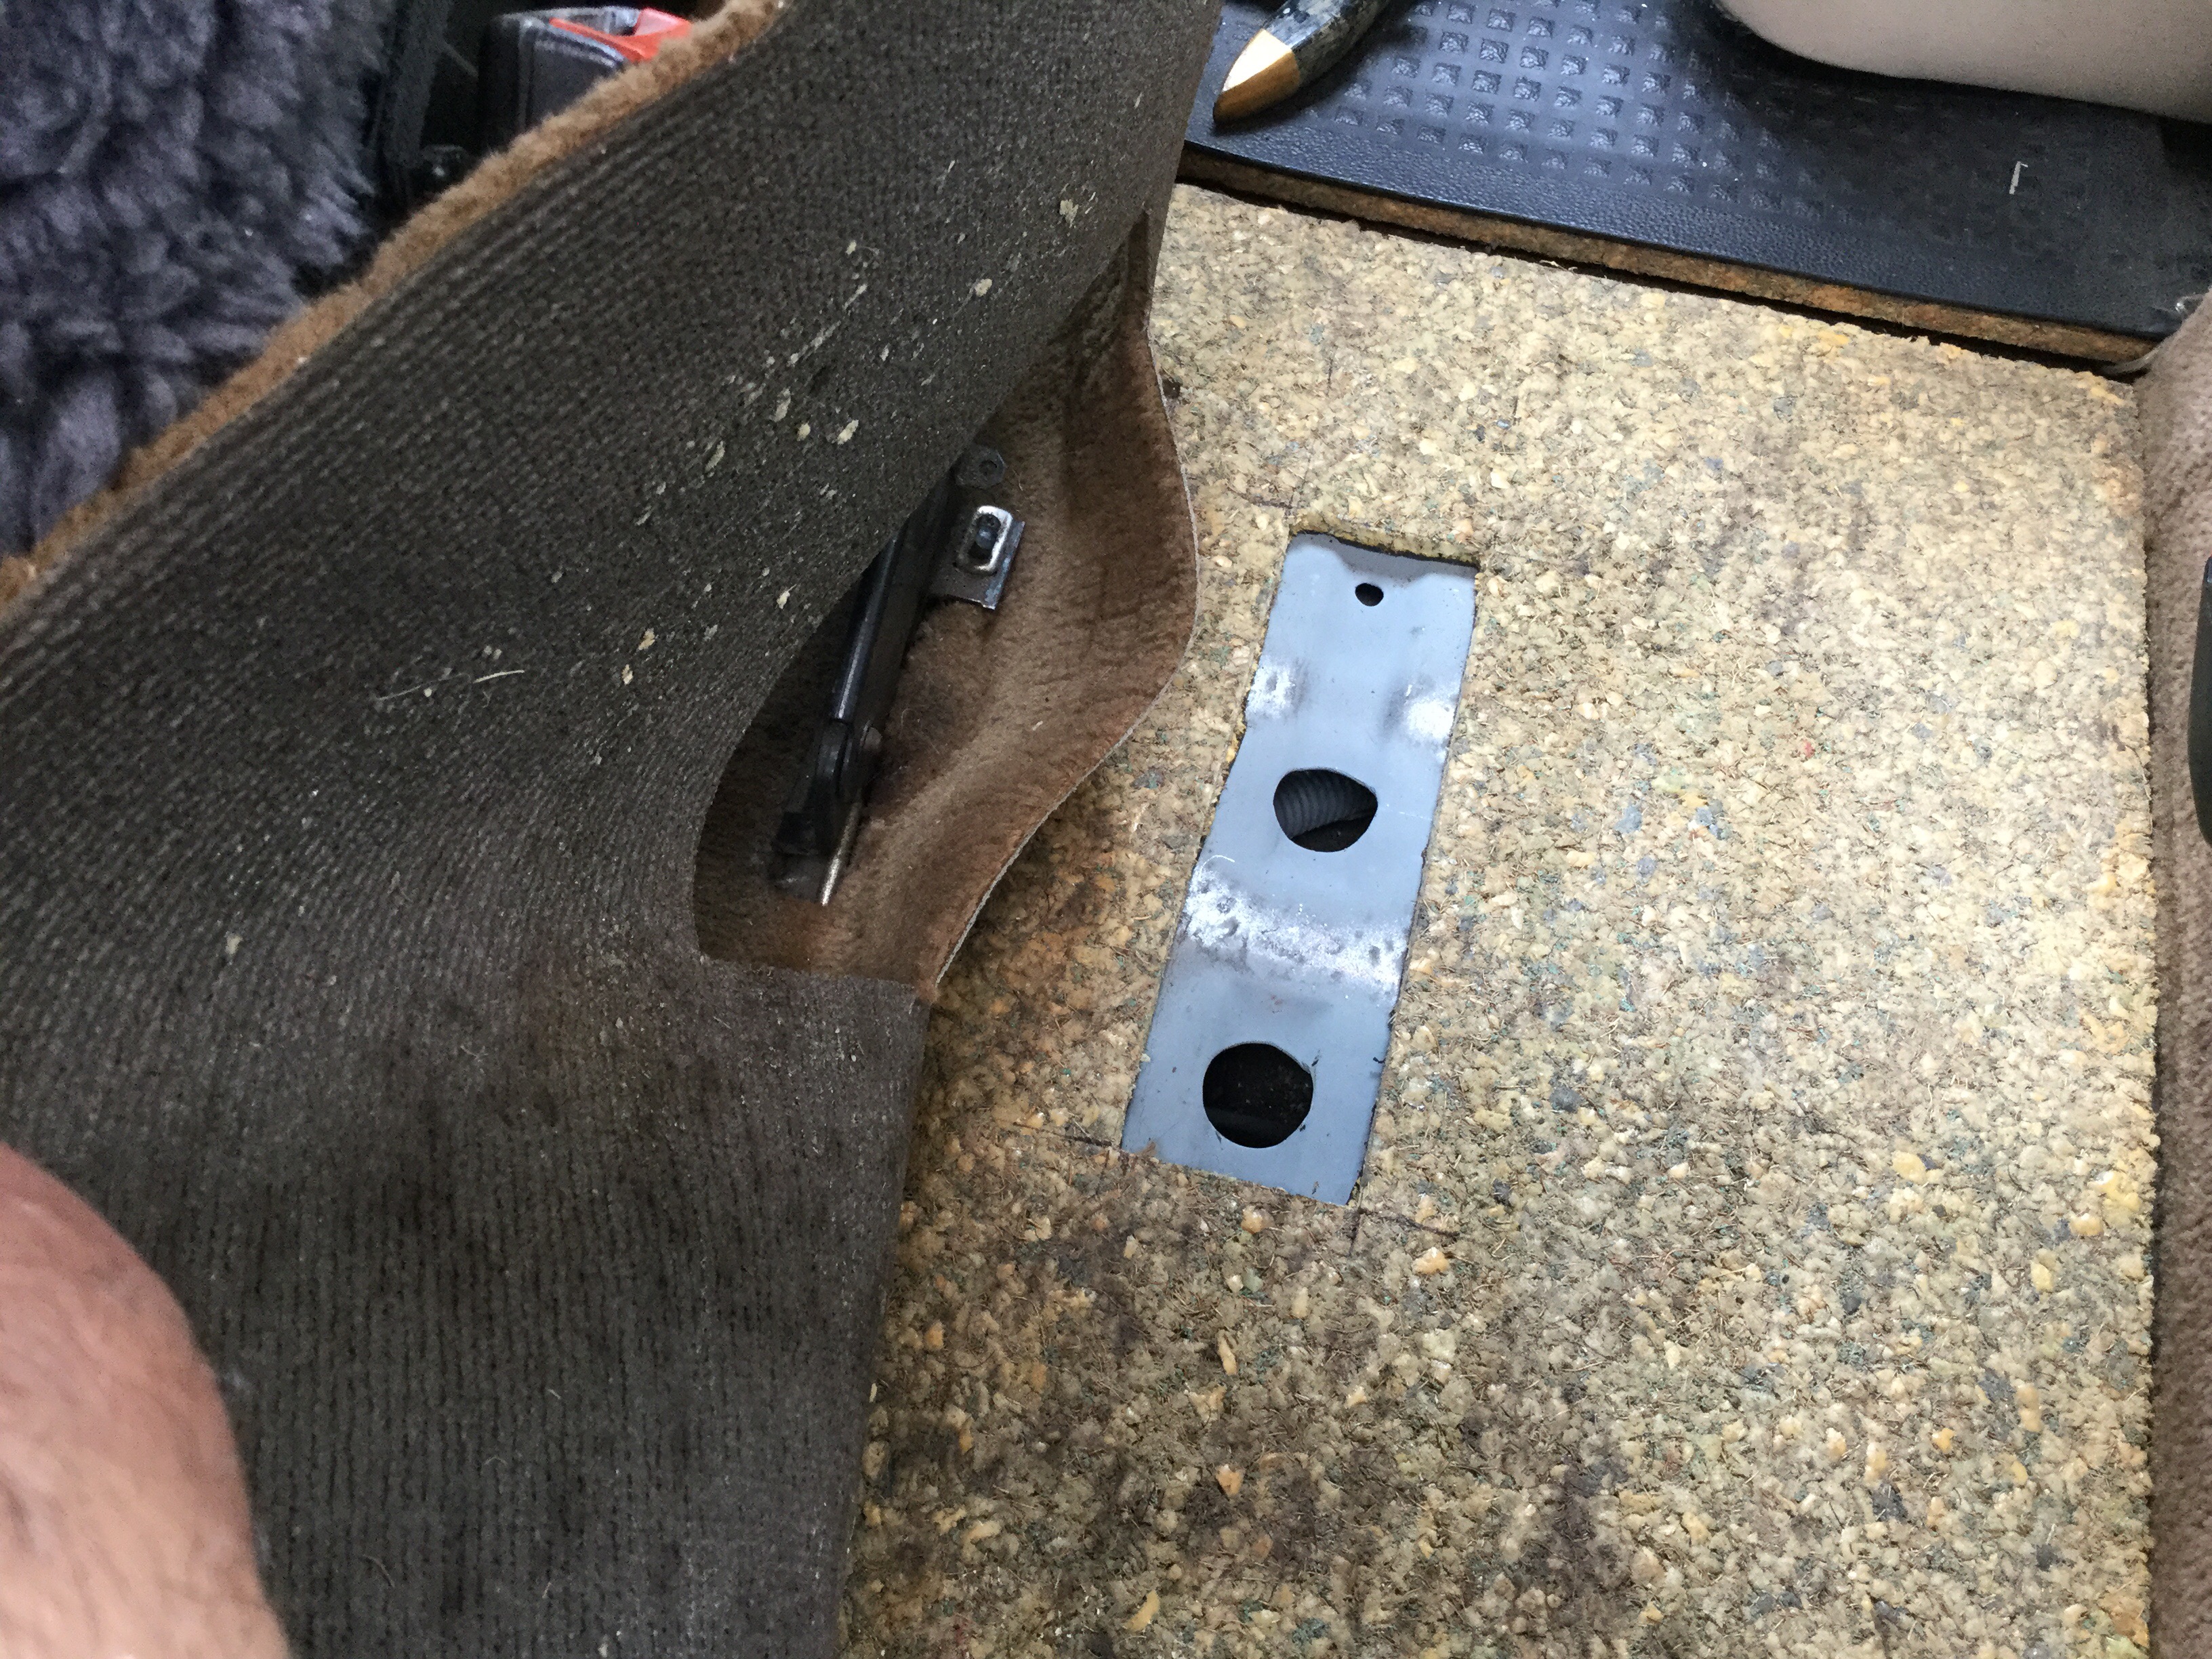
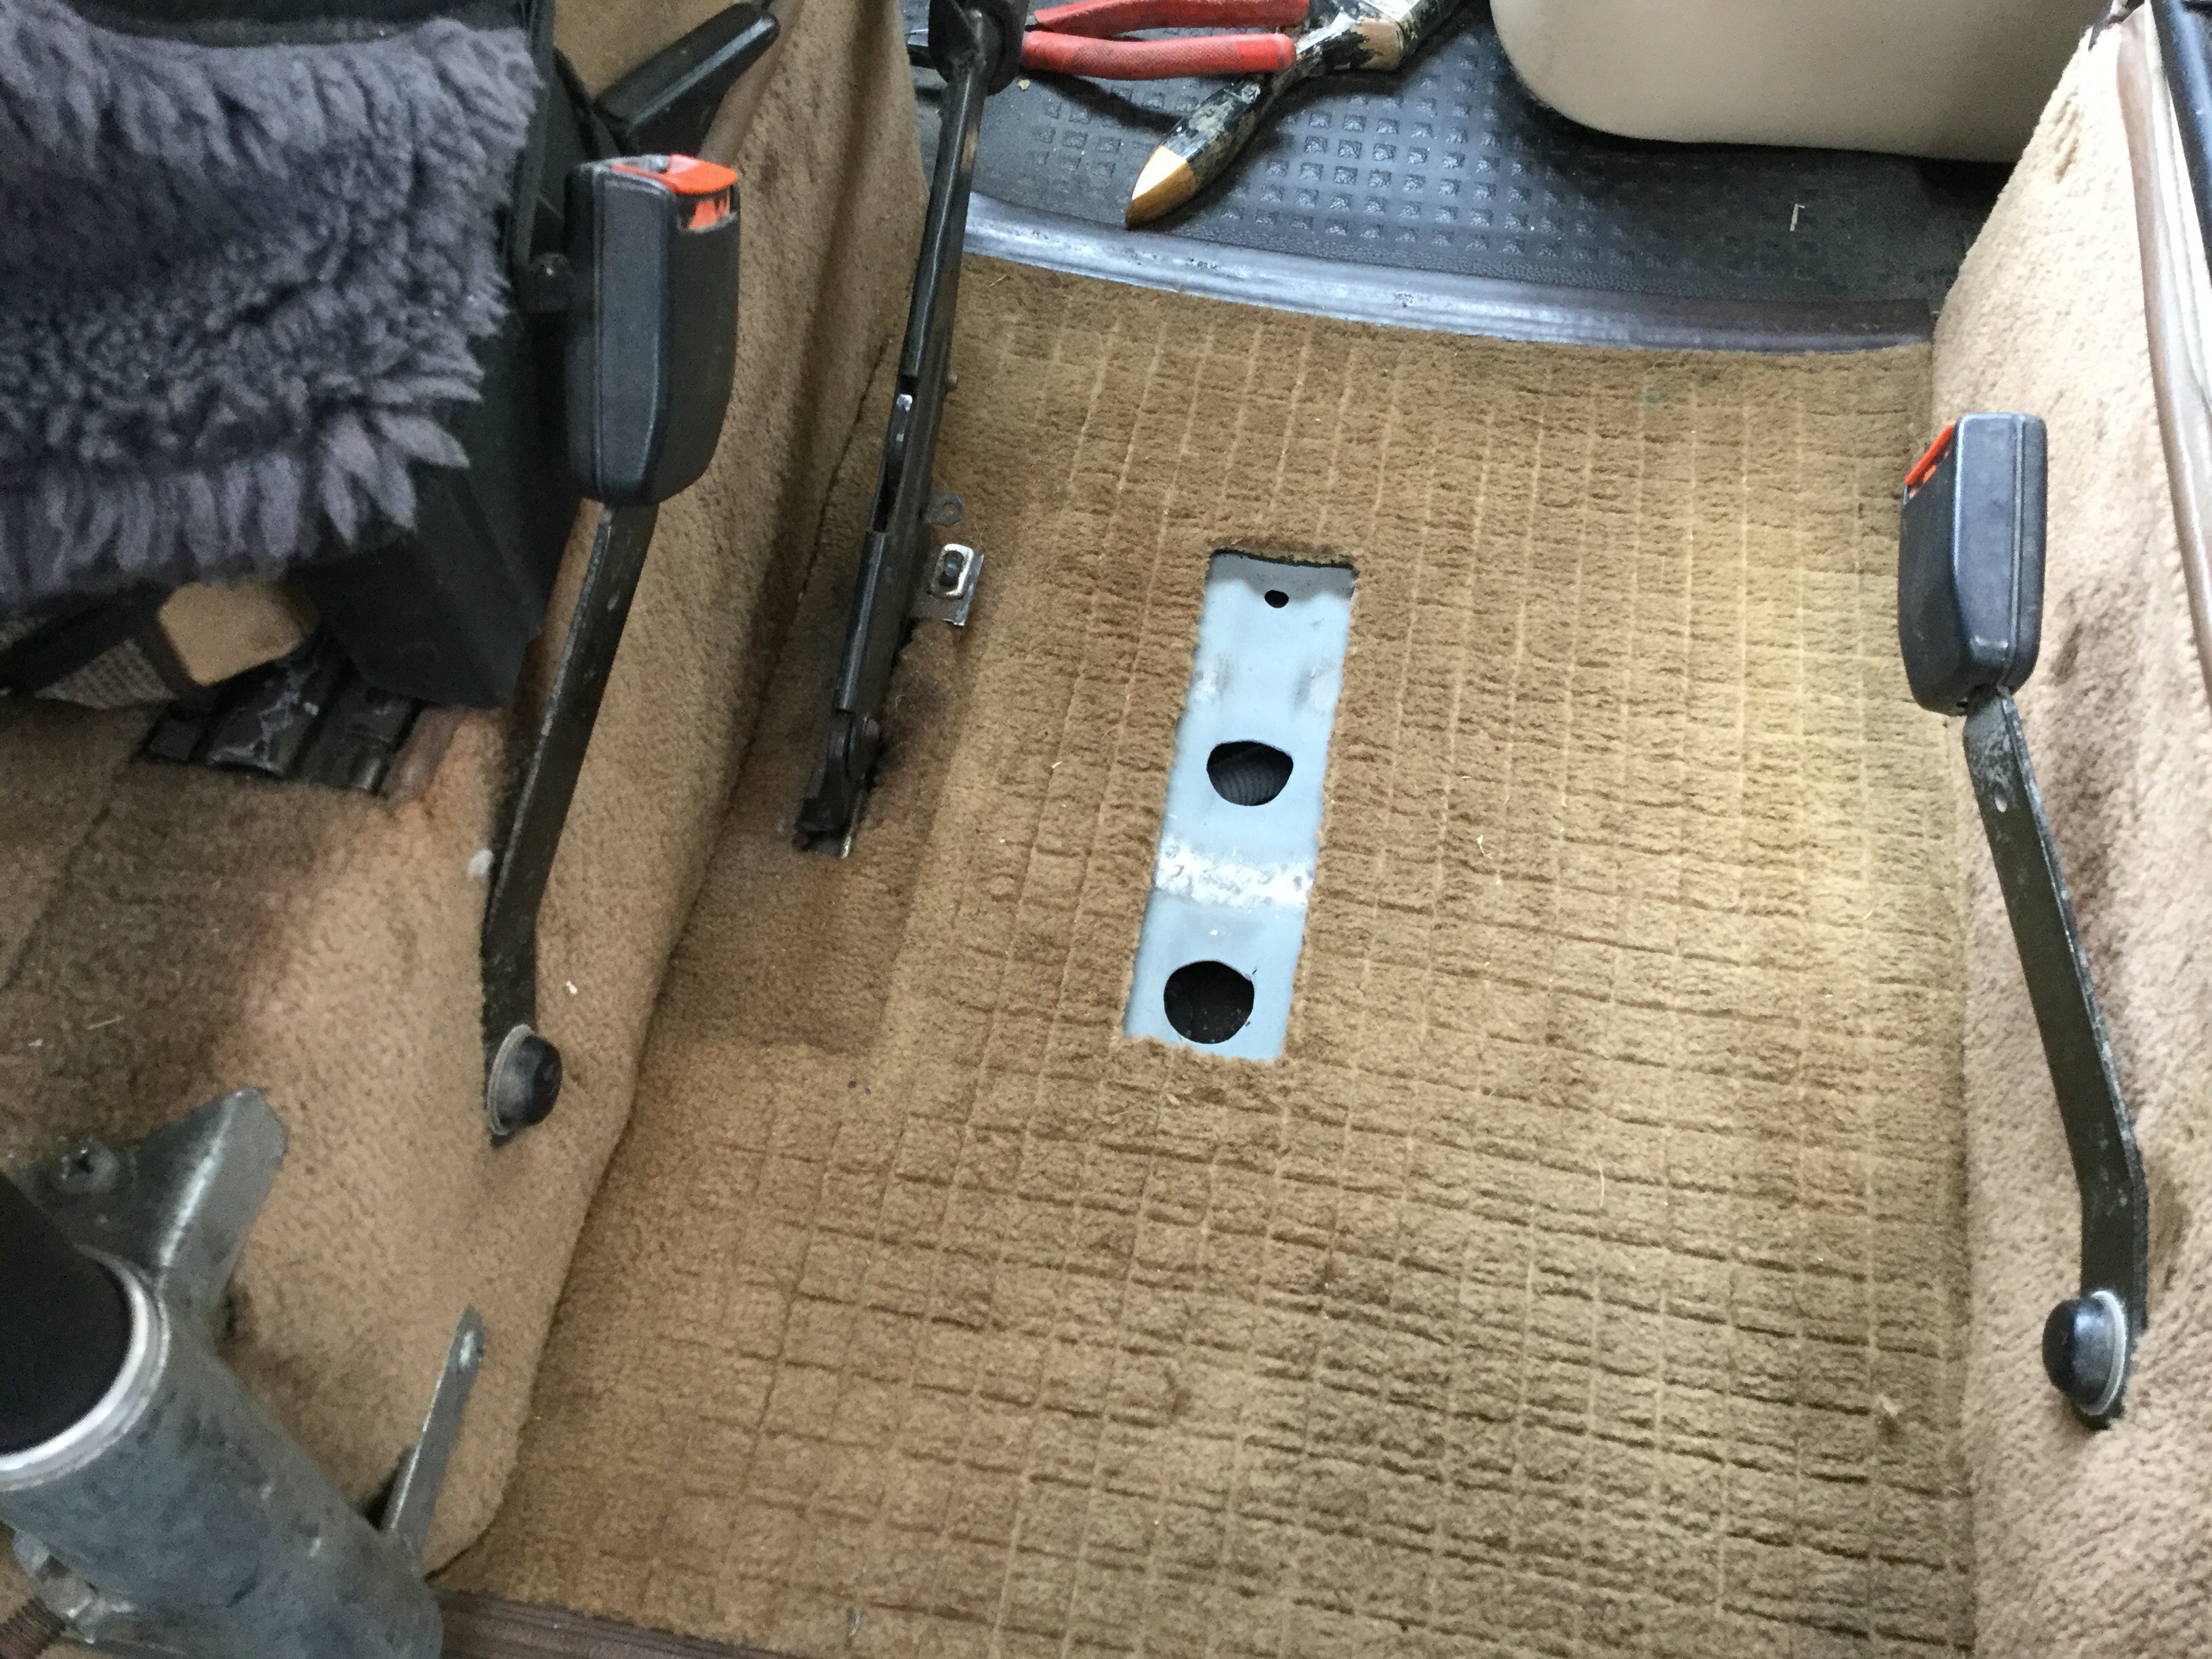
Yup, to reach the area above the front diff and below the passage way between the front seats. Used my magic hammer to make the holes.

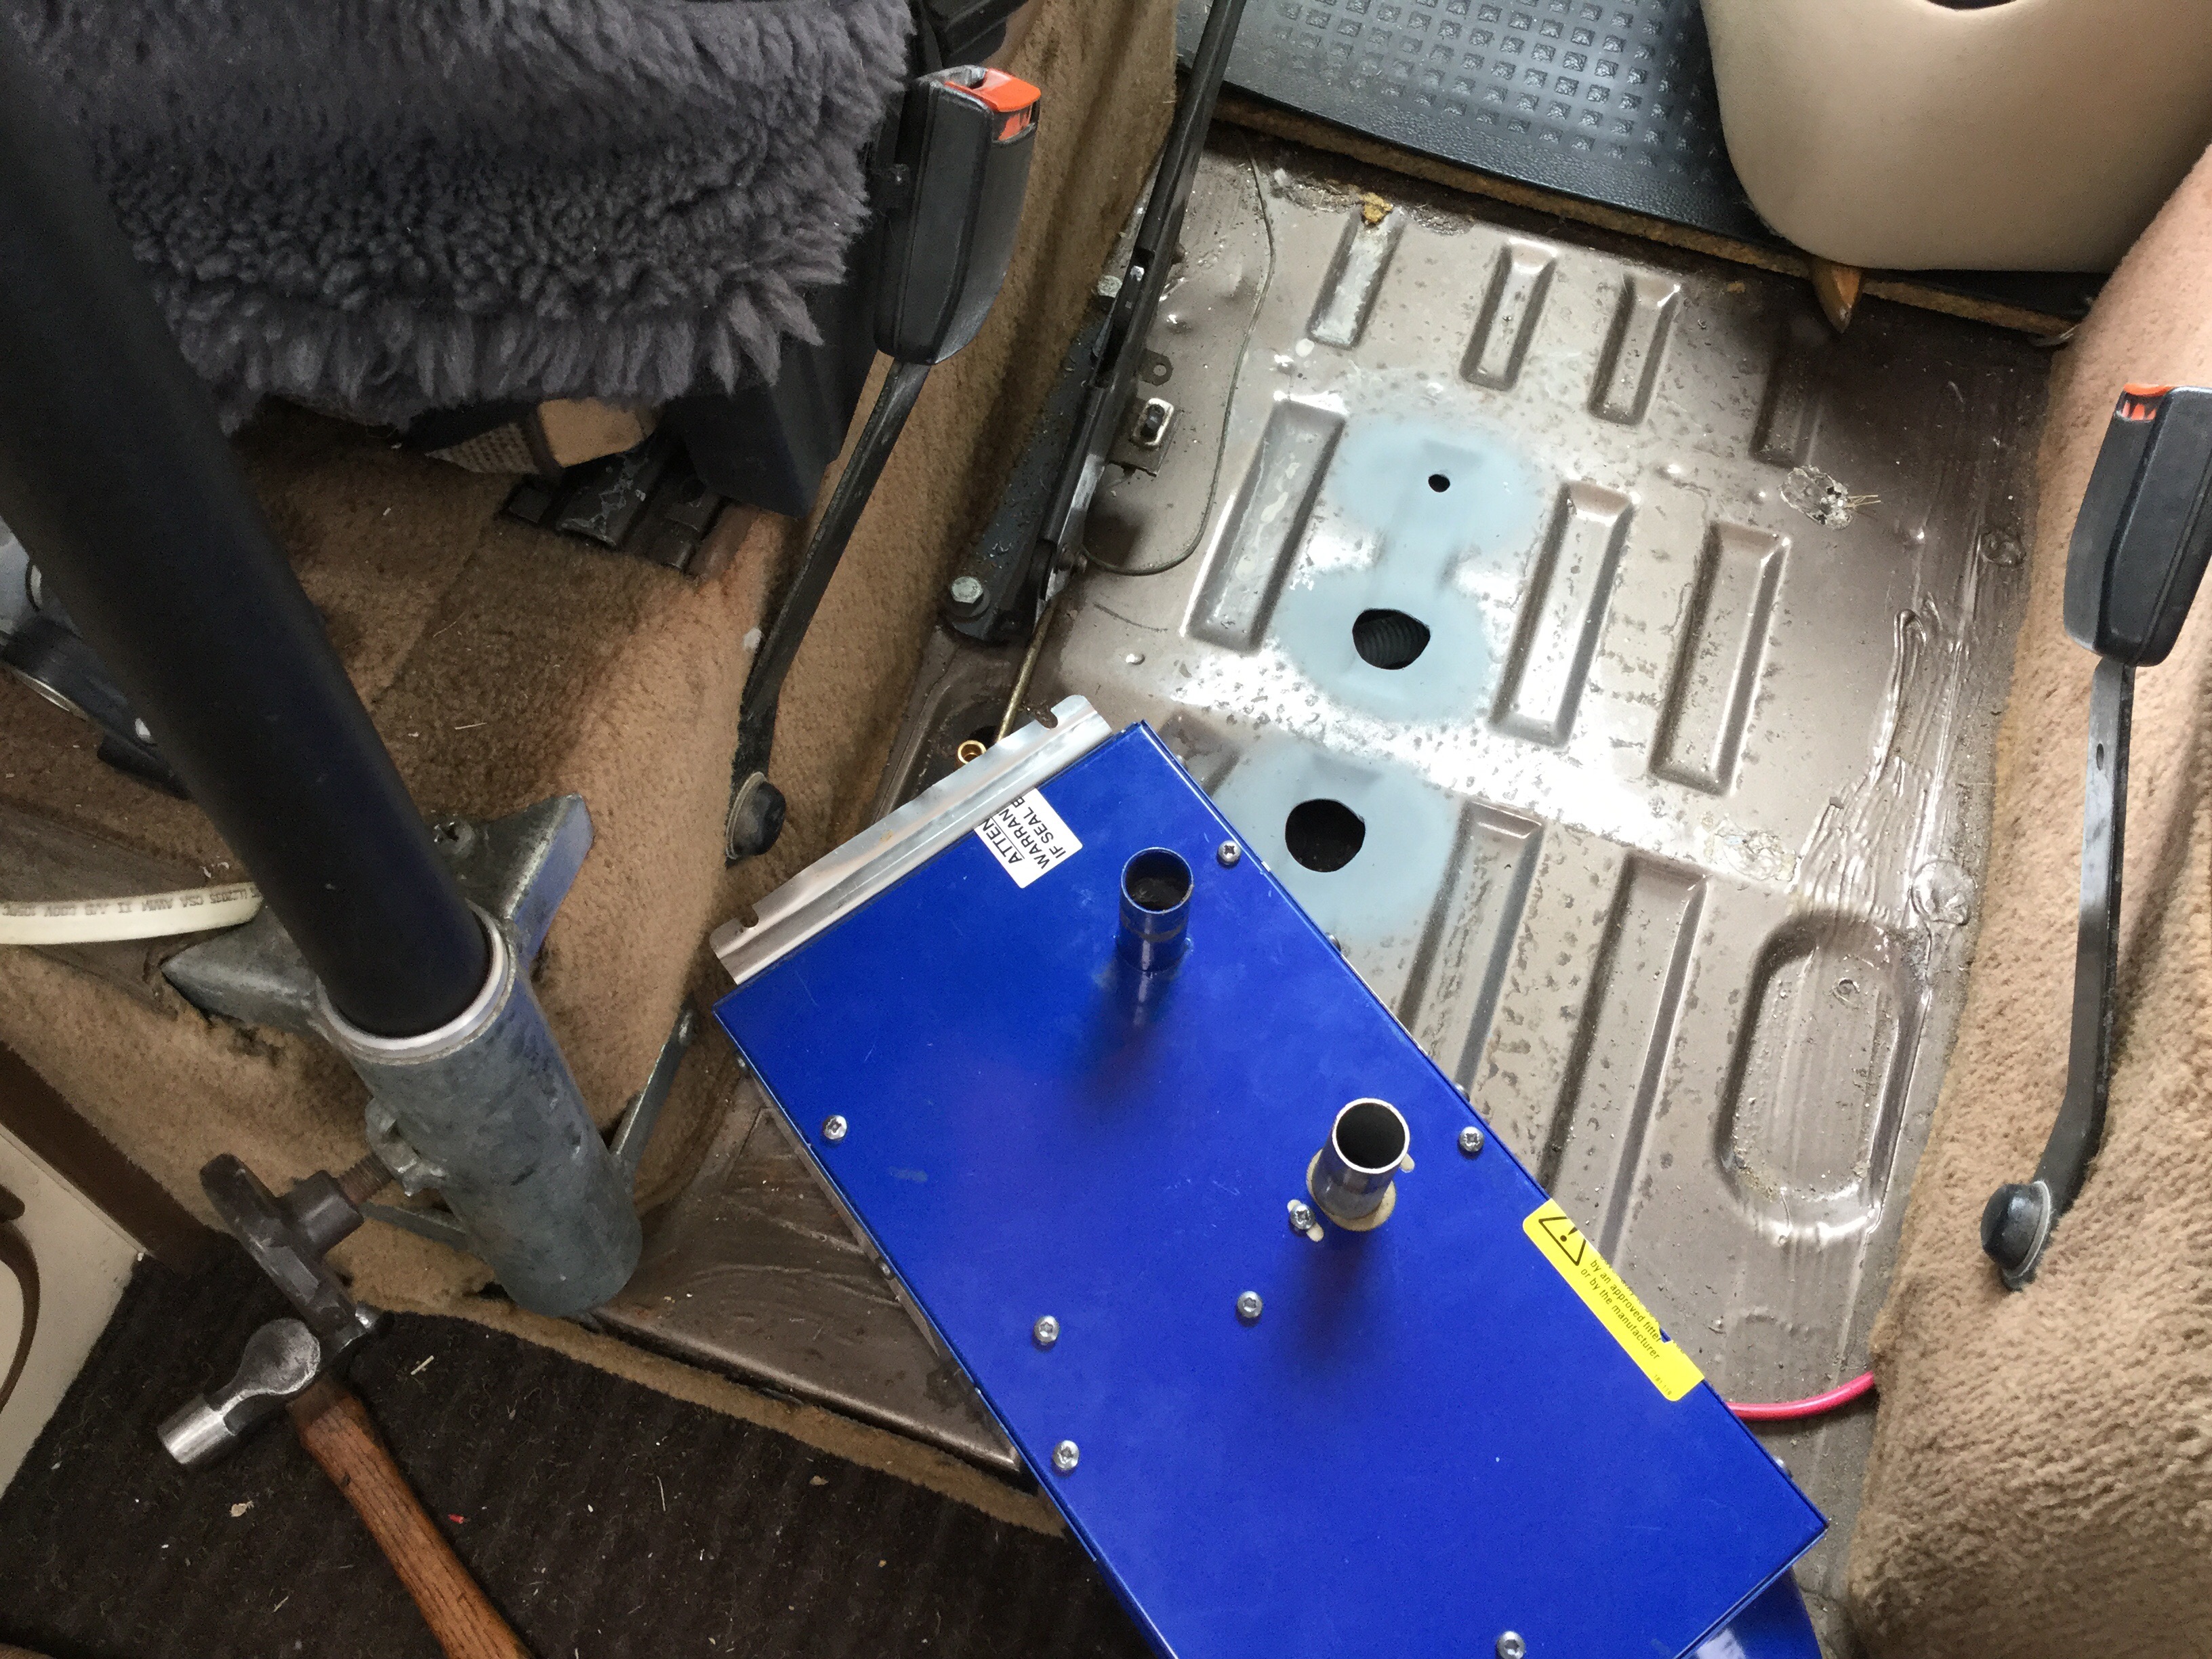
And because of the carpet and the rubber mat (latter not shown yet) and because the floor slopes, I made a base from 1/8″ aluminum for the heater to sit on. It’s supported at the rear by some 1″ C channel.
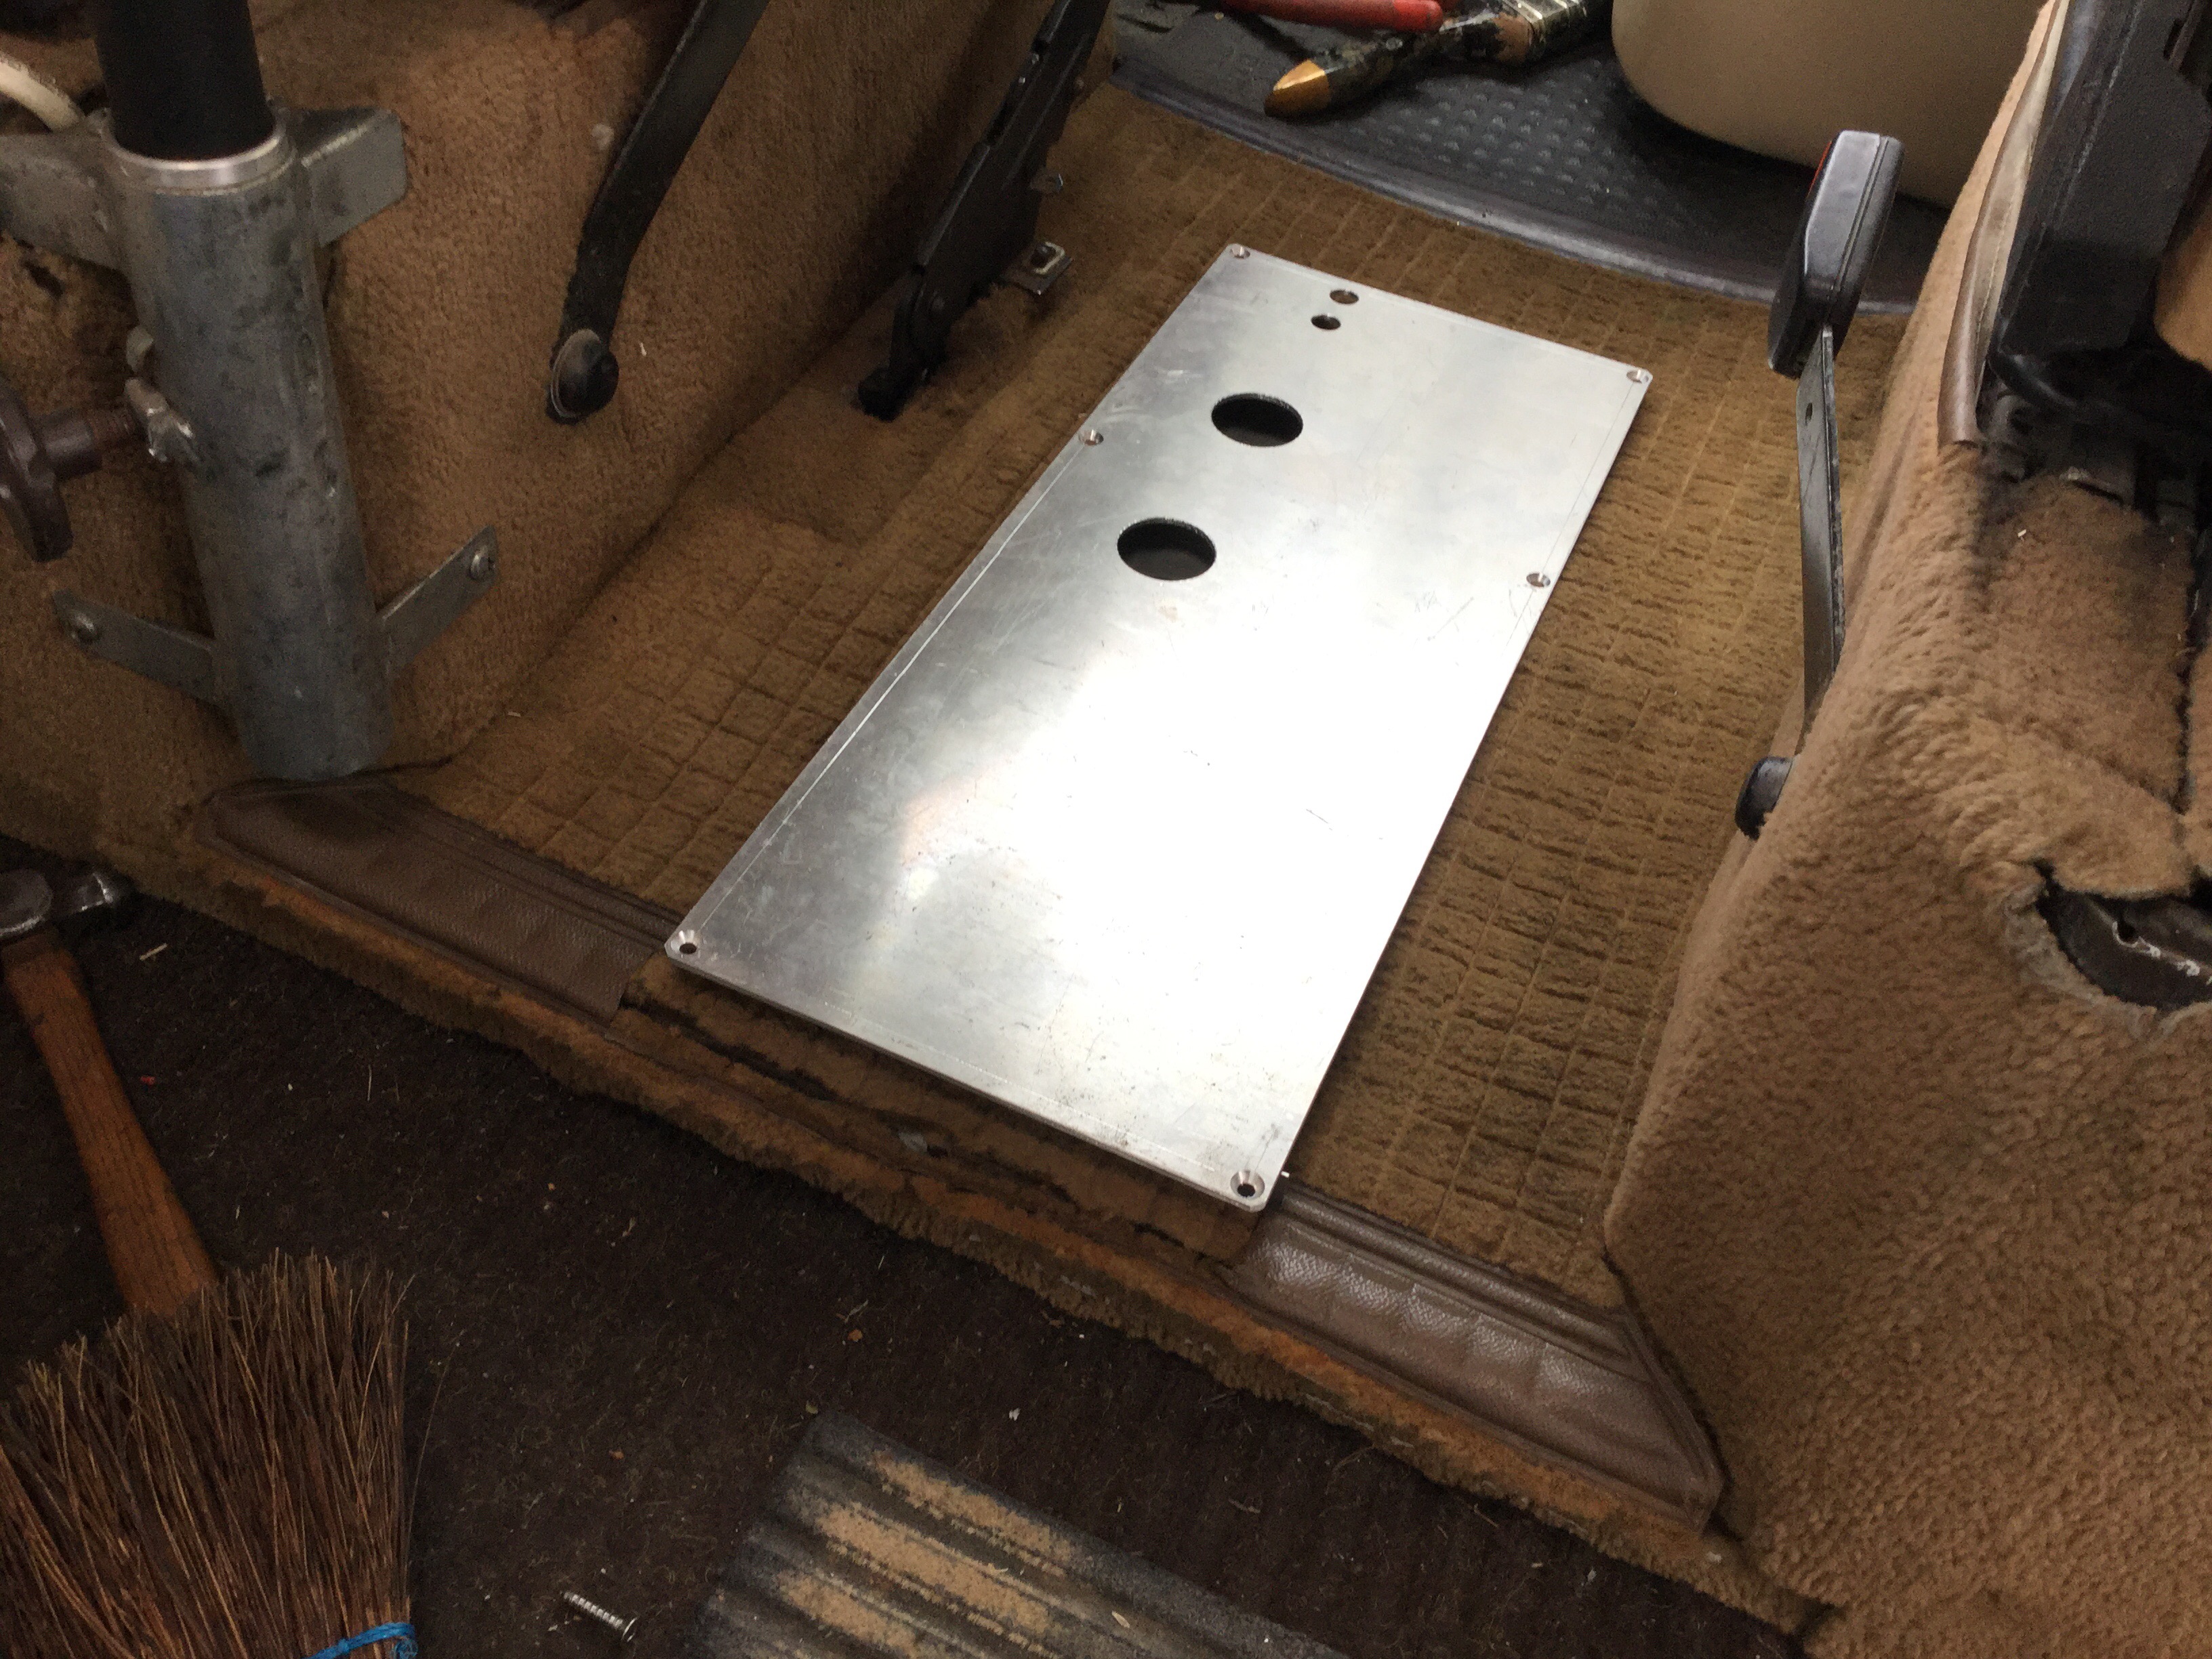
And because the heater is not sitting directly on the metal floor, I stuck in a pair of aluminum tubes. Sealed with high temp silicone, and the ID is a close fit for the intake and exhaust tubes.

It wasn’t easy making all the connections, I got the heater in place and connected.

In the next part I’ll show how the intake and exhaust tubes run, and how I prettied up the heater.

#1 by edbee on June 26, 2016 - 10:48 pm
Interesting, I was thinking of going for the usual under the back seat location for mine (if I ever get around to installing it) but this could be an option. I am interested to see the photos of the final ‘product’. What are the major advantages of the ‘front’ installation and any drawbacks you can think of?
thanks, Ed
#2 by albell on June 26, 2016 - 11:03 pm
Hi Ed
I’ve built a box to house the heater, I’ll get that blog post written tomorrow. I couldn’t decide whether to ditch the between seats console or modify it to fit over the heater. I’ve started to modify the console bit not sure how it will work out. The box though, looks good.
Advantages of this location? Well it doesn’t take up any cupboard or under the bench space. You know many decide to remove the rear heater and put the propex in, but I like my rear heater and I also like the storage there. I also like how the warm air is directed from the front.
Disadvantages? It’s more difficult to install. It does take up space between the seats ( not an issue for me, I had the console in that space ). Jeeze, can’t think of any more.
Cheers
Ab
>
#3 by John on June 27, 2016 - 2:03 am
Hi Alistair, tell me about this magic hammer of yours? Obviously I have missed an earlier post about it and how it makes perfect looking holes in metal? Or you are kidding and I’ve just been had!
#4 by albell on June 27, 2016 - 6:44 am
It’s useful but tricky tool. You don’t have a second chance, you have to get it right on the first swing.
Hammer was left lying there, used to pop some centre punch marks for the hole saw 🙂
Hey, I have the seat covers washed, I dropped the ball on getting them posted. Still interested?
Alistair
#5 by Johnb on June 28, 2016 - 12:41 am
Damn I had hoped this was new clever tool that I would be forced to make or buy!!
Should have signed off as Johnb (from South Africa), not just John, as I think you think I’m someone else re the seat covers? Mind you my girlfriend also seems to think I’m someone else most of the time, keeps thinking I’m the one with lots of money!
#6 by albell on June 28, 2016 - 7:30 am
Doh!
Sorry John, my mistake.
Cheers
Ab
>
#7 by Paul on June 27, 2016 - 4:07 am
Good Idea for location.
#8 by albell on June 27, 2016 - 6:47 am
Hi Paul,
If a poll was taken about the location , I’m betting a 50:50 split. What I had to keep reminding myself was that no matter where the heater was installed it involved drilling holes in the van.
Cheers
Ab
>
#9 by paul gordon on June 27, 2016 - 7:49 am
Hi Alister, I was faced with the same conundrum, if thats really a word. I did opt for under the bench seat extreme starboard side. It has worked well and I like to think I didn’t loose too much space. At this point in time I am up to my #$#% in a 2.5 Subaru/ RMW conversion. Wiring harnesses are what nightmares are made of. Regards P;-)
#10 by albell on June 27, 2016 - 8:02 am
It is a bit of a conundrum isn’t it? I think no matter where you put it you compromise a bit. I would have been more willing to go under the seat but I have a particular problem there. Remember the van was a tin top and I converted to a Westy using the interior of my old 82 Westy. That van didn’t come with a rear heater but I installed one back in 2005 or so. When I did that install I decided, and it seemed like a good idea at the time, to shift the heater as far starboard as I could. I cut the grill to match. So I dishing have the option now to tuck the propex to that side, and it would have really eaten up useful storage space if I installed it on the other side of the stock heater.
I considered the space adjacent to the water tank, mounting the propex on its side. But I think that would have been an awkward install.
I was close to installing it in the wardrobe, right over against the port side wall. I think what put me off was the hot air vent routing. I wasn’t sold on the hot air coming out above the cubbies.
Also thought about a box right behind the pass side front seat. You know, like the RMW box. That wouldn’t have been too bad, but it does take up floor space.
Between the front seats takes up floor space but as I had a console there I was used to stepping over.
Oh I don’t know if there is a best location. What’s done is done now 🙂
Ab
PS I feel for you regarding the wiring harness. Do you have it laid out on a board?
#11 by Paul on June 28, 2016 - 4:14 am
Yes the harness is “strewn” all over the bench. Very scary!
#12 by PNW Adventuring on November 24, 2016 - 3:25 am
I like it! Can’t wait to get a heater installed in our adventure-mobile!
#13 by albell on December 2, 2016 - 9:43 am
It’s will be great in a high top, an insulated hi top. Good friend Simon has one in his hi top ( pics of it all over my blog) and he finds it works fine during camping ski trips.
Cheers
Ab
#14 by PNWAdventuring.com on November 25, 2016 - 9:02 am
I love the ingenuity! I cant wait to install a proper heater in our van. Thanks for the inspiration. Stay awesome!
-Matthew-
#15 by albell on December 2, 2016 - 9:41 am
Hi Matthew,
It’s a pretty nice heater, probably just right for our weather on the coast. If I was in a colder climate I’d consider going for the larger model. Mind you I got this one at a great price so I’d probably have gone for it no matter where I lived 🙂
Cheers
Ab
#16 by Greenred on November 28, 2016 - 11:53 pm
You should be using shielded copper pipe, or poly FARO pipe, and securing it at 30cm intervals with pipe clips when running propane lines outside the van.
#17 by albell on December 2, 2016 - 9:40 am
Hi
Yes you’re right about both points. Mind you I didn’t think I’ve ever seen a westy install with shielded copper lines.
And yes, even though the copper line is held pretty securely by the frame, I should add a least a couple of clips.
Cheers
Alistair