ATA – BC Aviation Museum
Posted by albell in aircraft, around the airport on January 18, 2011

I spent 3 hrs at the BC Aviation Museum today. Its a fantastic place, full of incredible things. Low key and casual and what really makes it special are the volunteer guides who walk you through, offering information and personal stories of the planes and their experiences. I recommend a visit to anyone even faintly interested in aviation.
Here are some quick snaps I took and some hints to help you identify…
– Vickers Viscount being restored. The smell inside is so nostalgic, and note the size of the windows, the ashtray in seat and in washroom.
– Auster
– A26 Intruder water bomber conversion – note how the prop tip is to the ground
– Harvard and the front of the DC3/C47 (rest outside) in the workshop under going some work
– Bristol Bolingbroke (Blenheim)
– Avro Anson
– Bell 47
– Norseman
– Fleet Model 2
– T33 twin seat trainer
– RR Neme engine
– Wright Cyclone 18 cyl. radial (that’s a quarter on the shaft and on piston)
– Orenda jet engine, plaque detail
– Eastman Sea Rover
– S-55 Helicopter
ATA – 443 Squadron open house 2001
Posted by albell in aircraft, around the airport on January 14, 2011
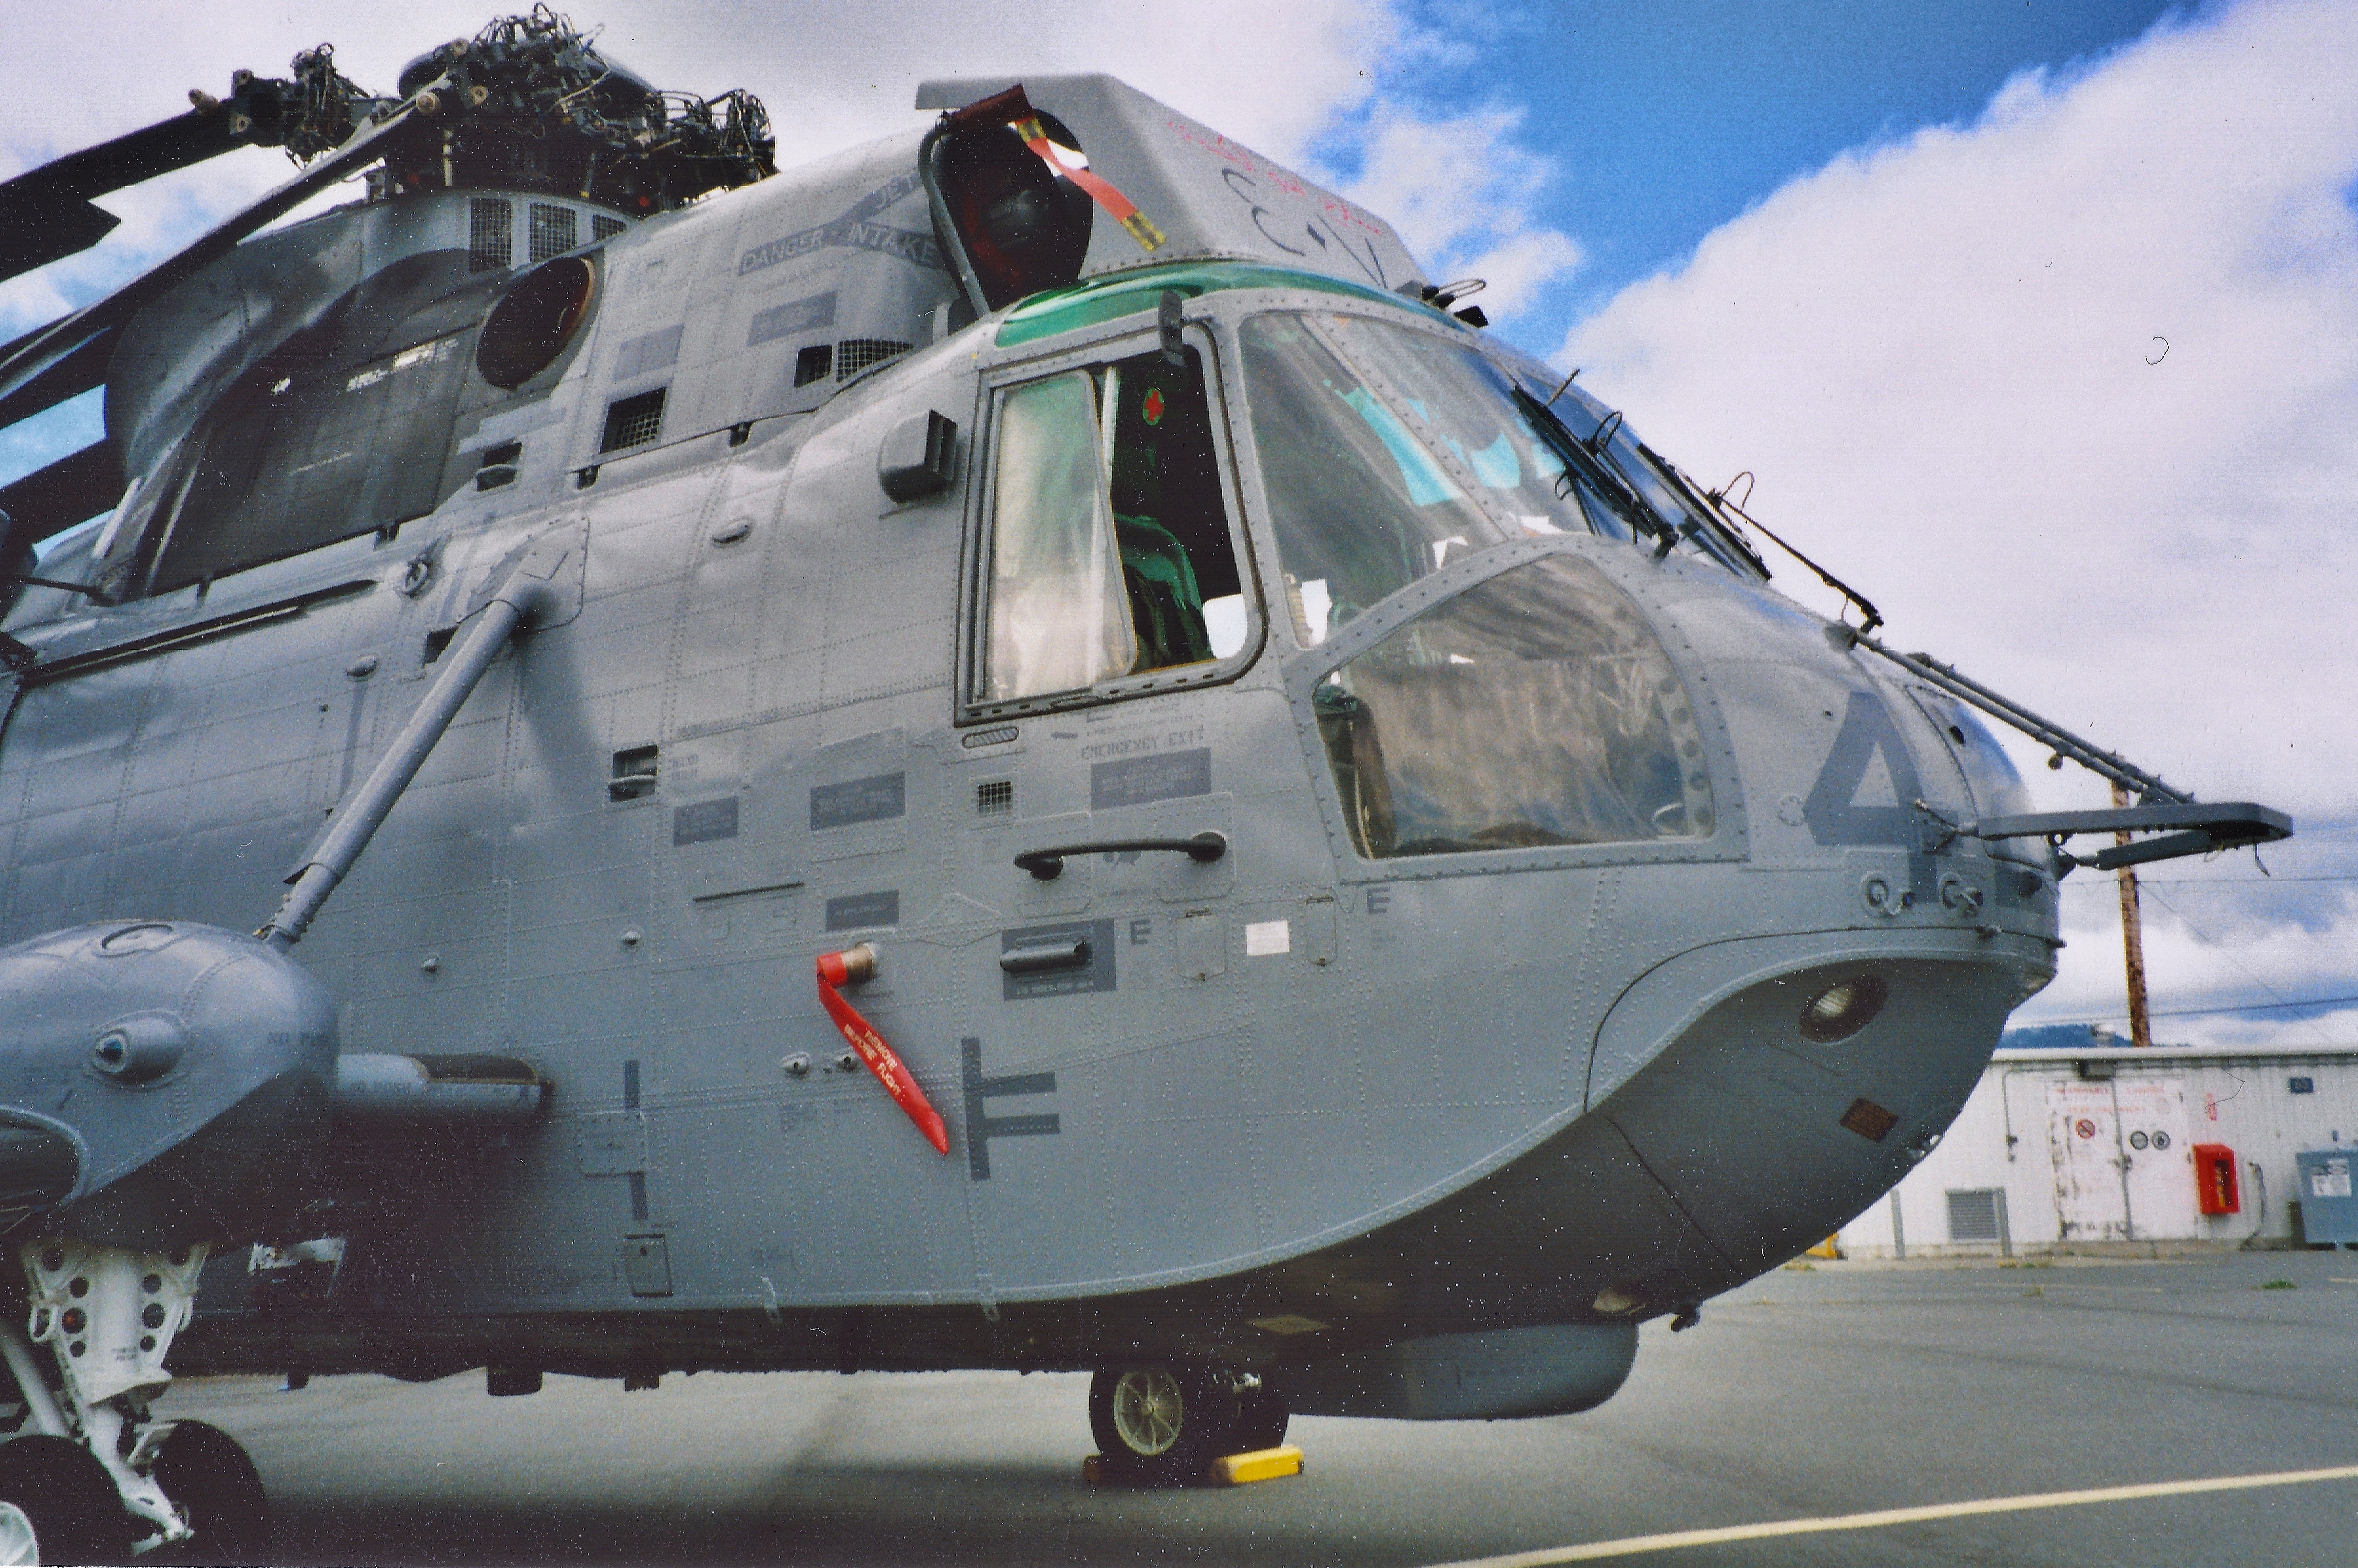
Some old snapshots taken way back in 2001(?) at the 443 Maritime Helicopter Squadron open house.
Sea King
Avro Anson

My minion attempting to steal a Tiger Moth

AAA – around another airport
Posted by albell in aircraft, around the airport on January 10, 2011
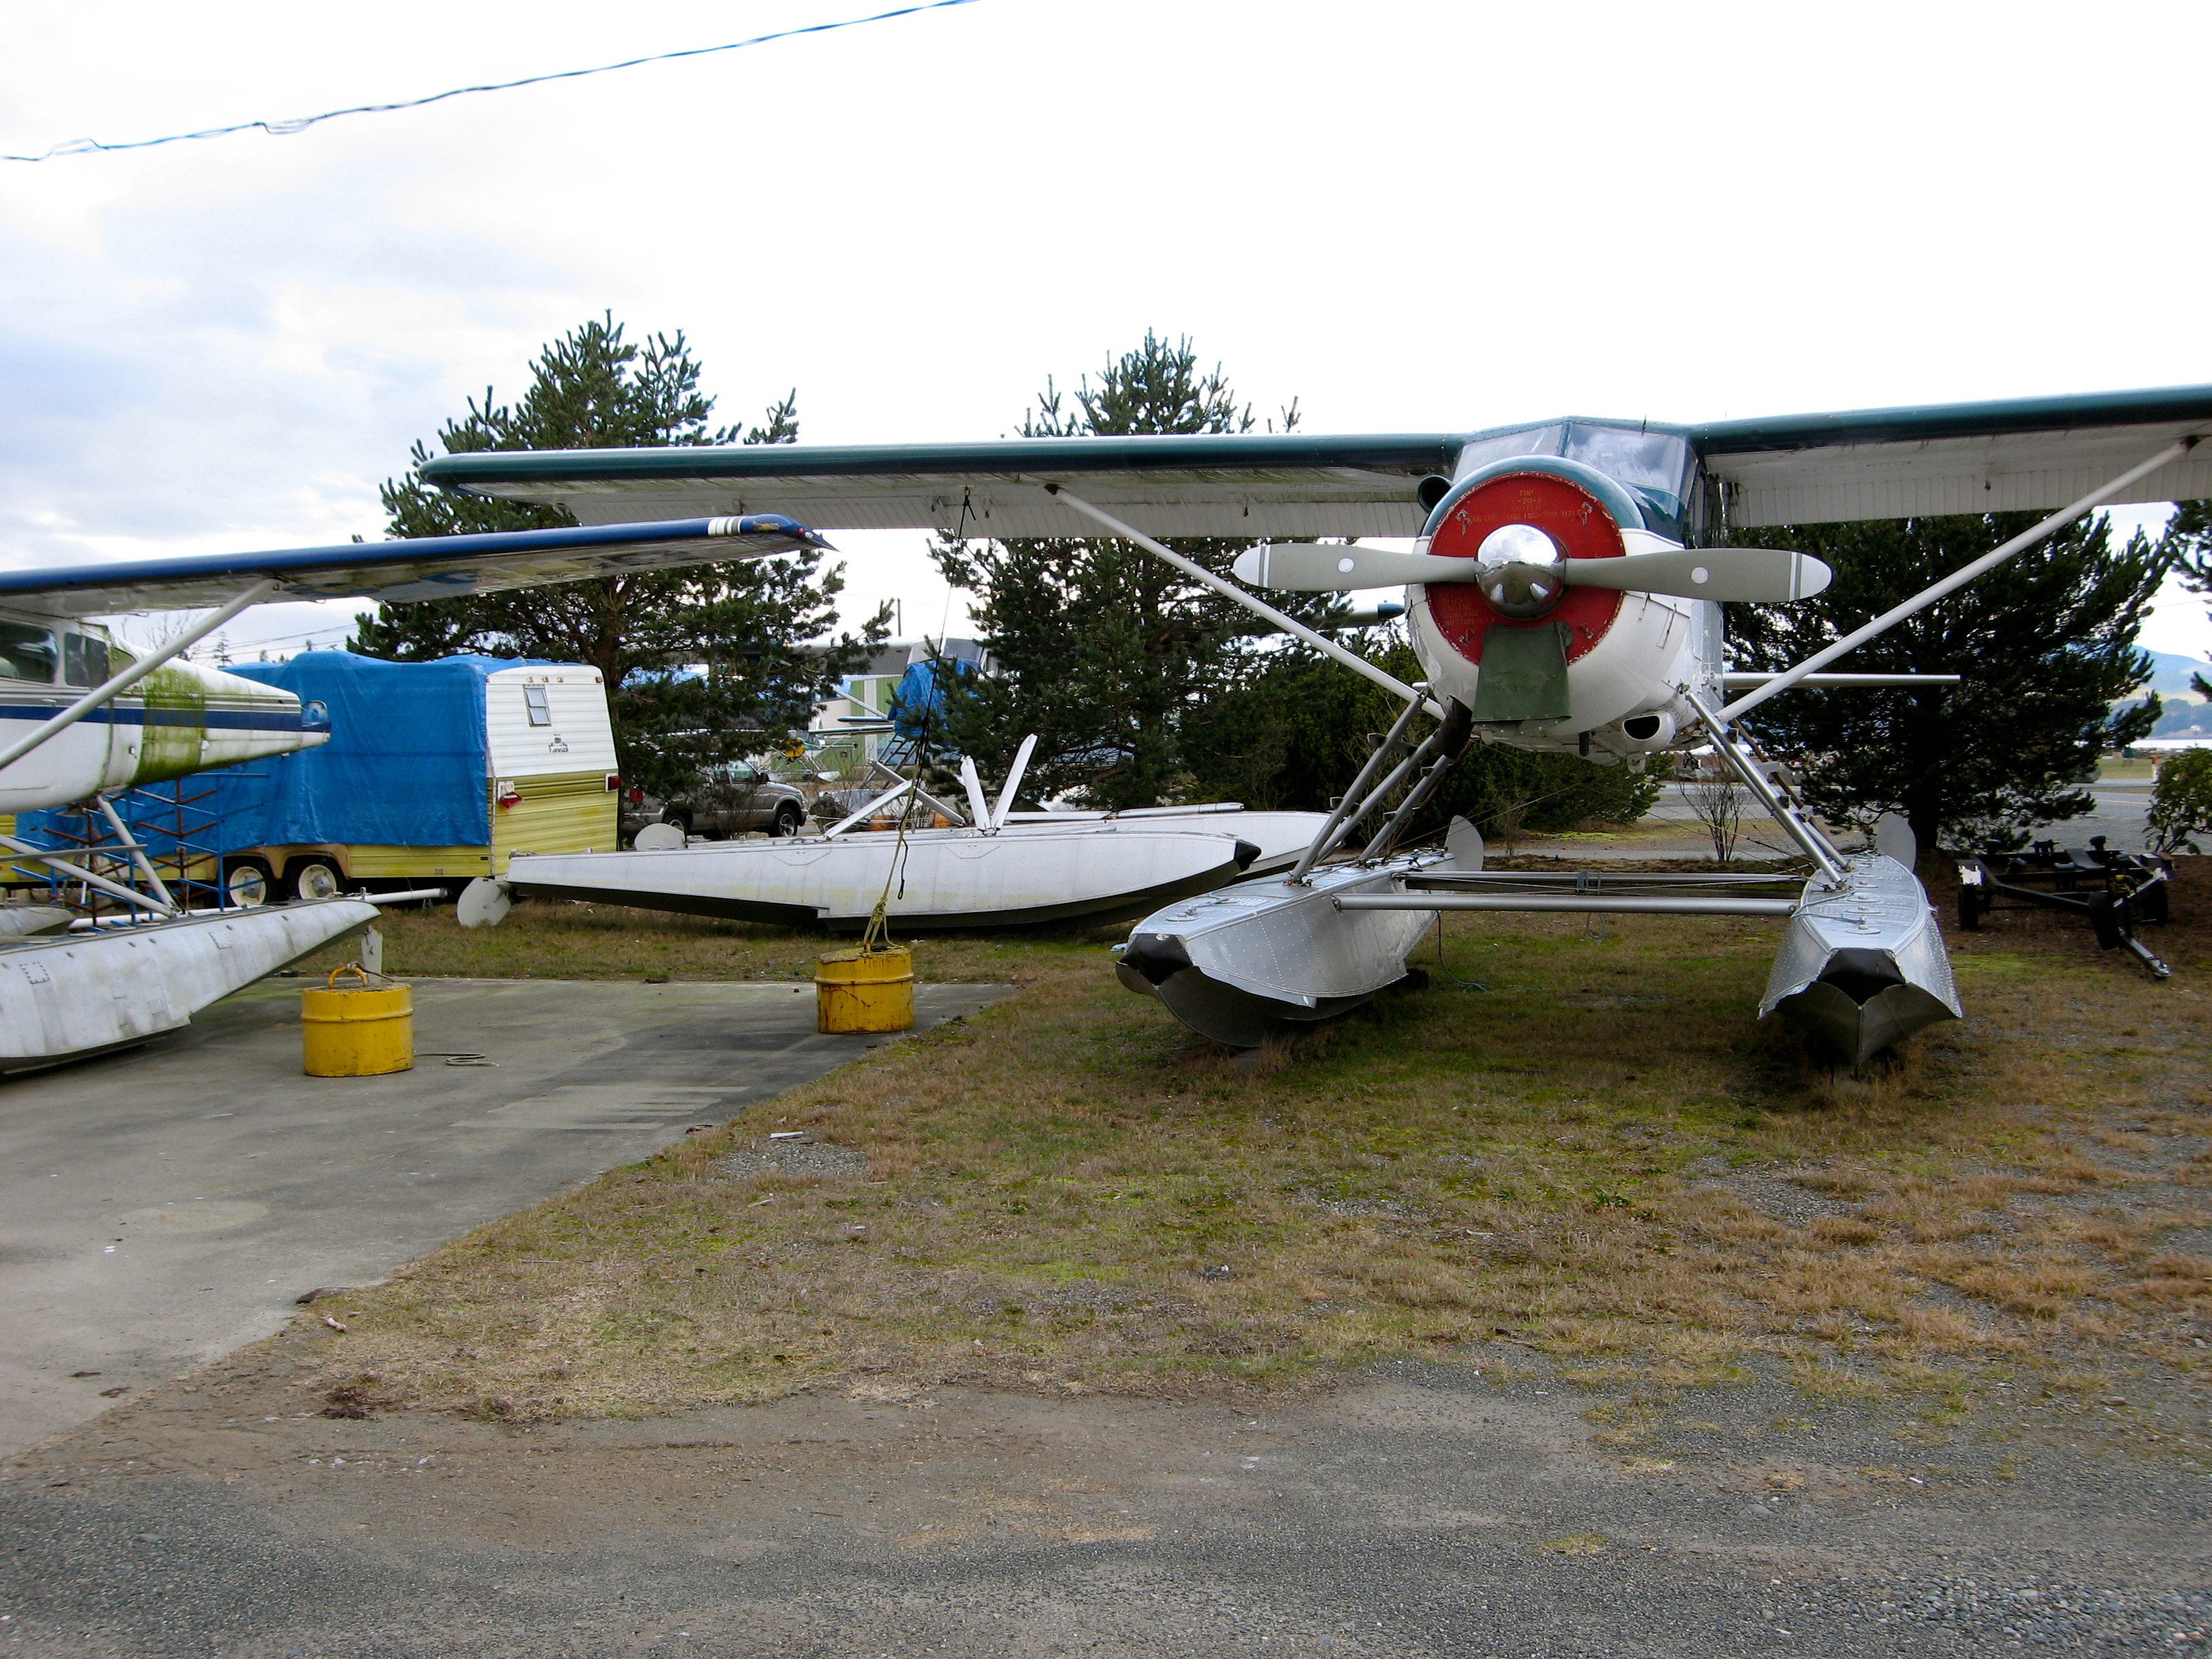
Phil Z. sent me these photos of float planes around Campbell River Spit Aerodrome. Beaver galore (no, not the Bond girl).
The twin Beech looks small in comparison to the Beaver, or is a trick of the lens?

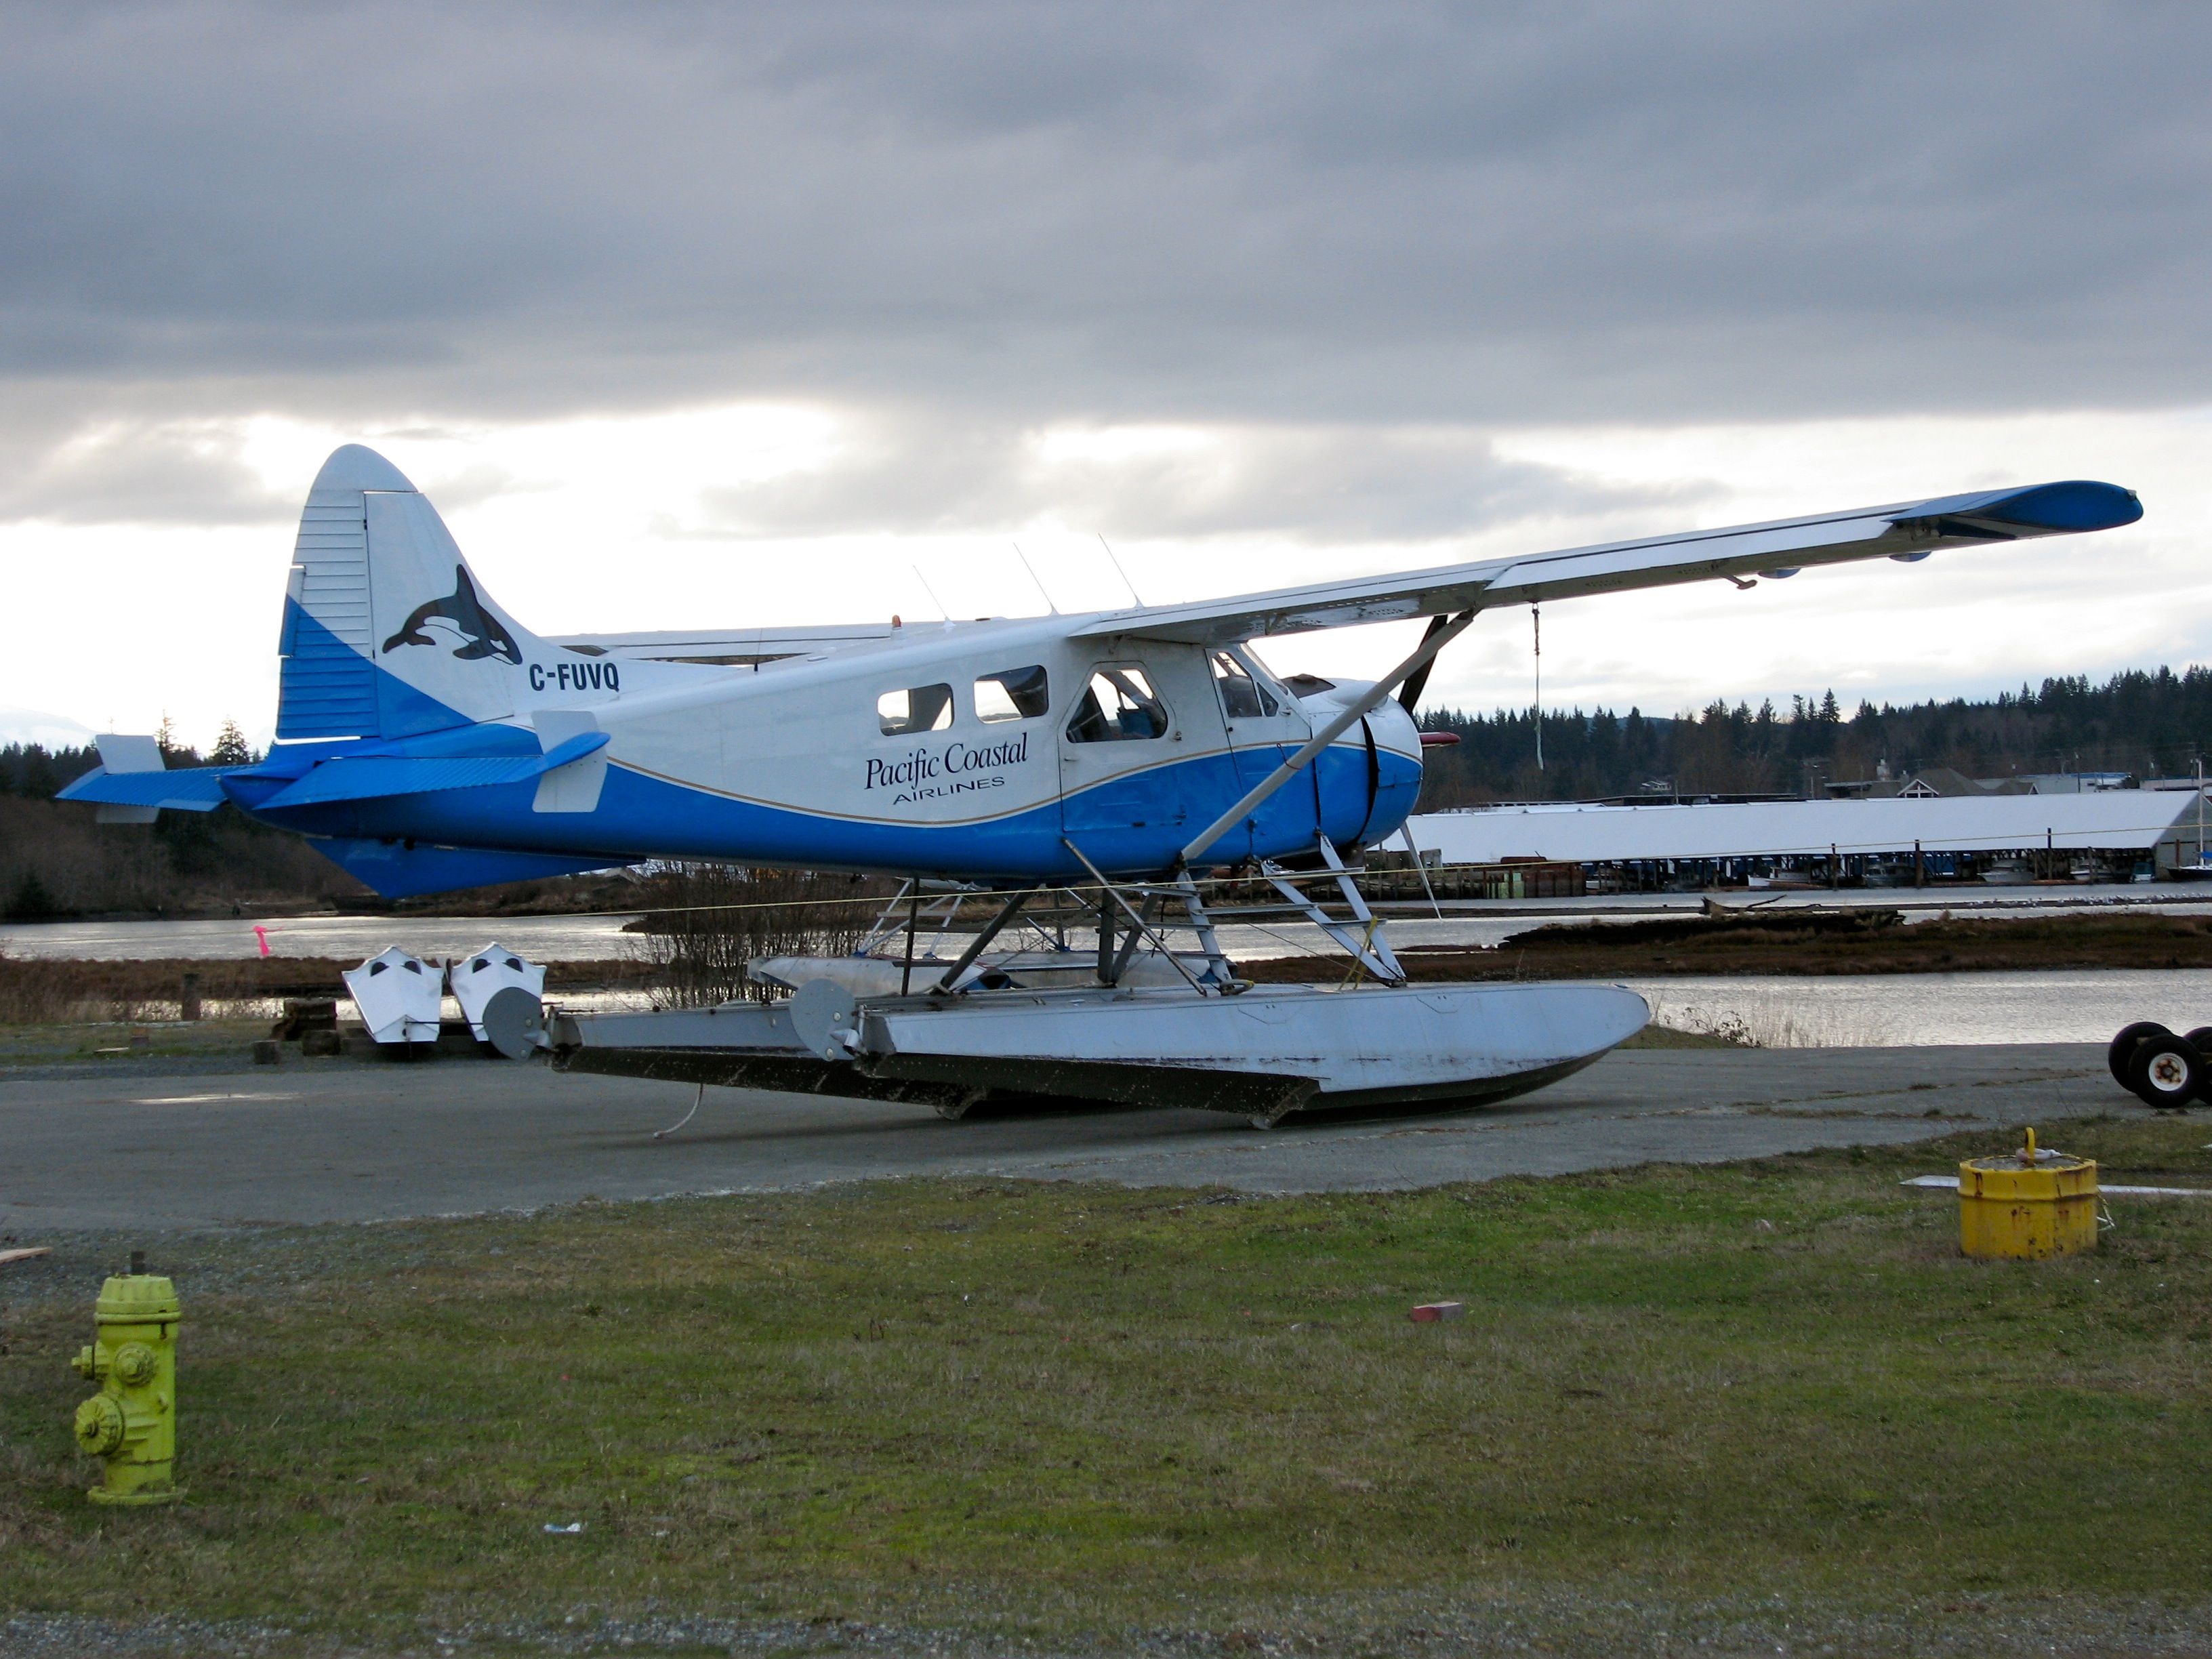
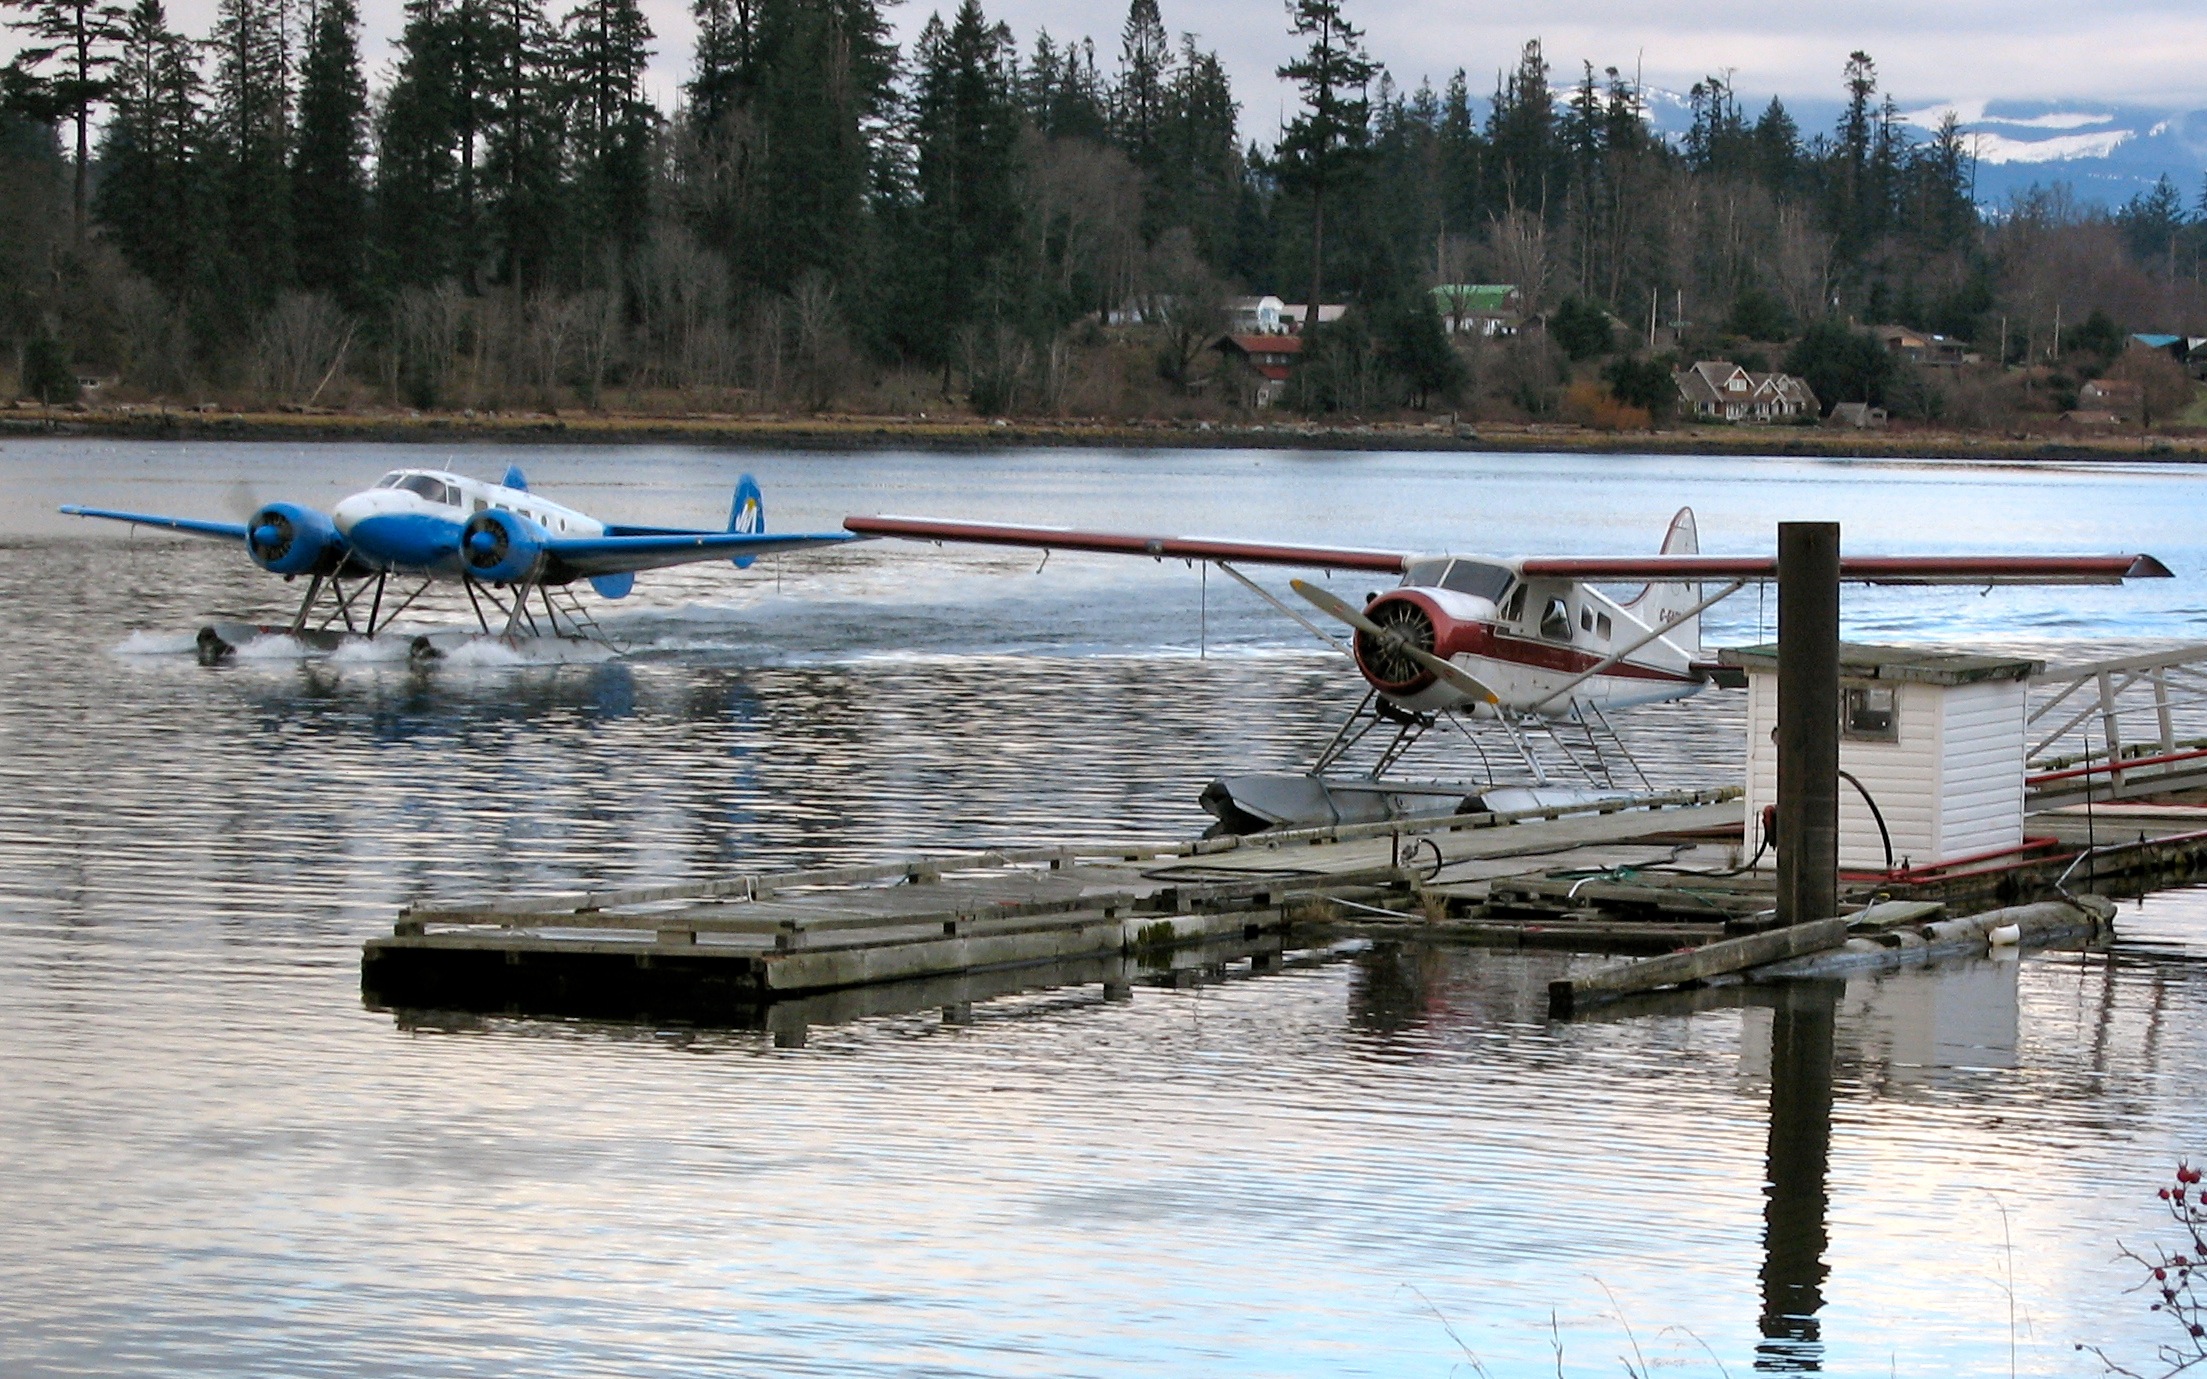
Another shot by Phil of the twin Beech and Beaver, the size comparison perhaps makes more sense.

Jan 2/3 2011
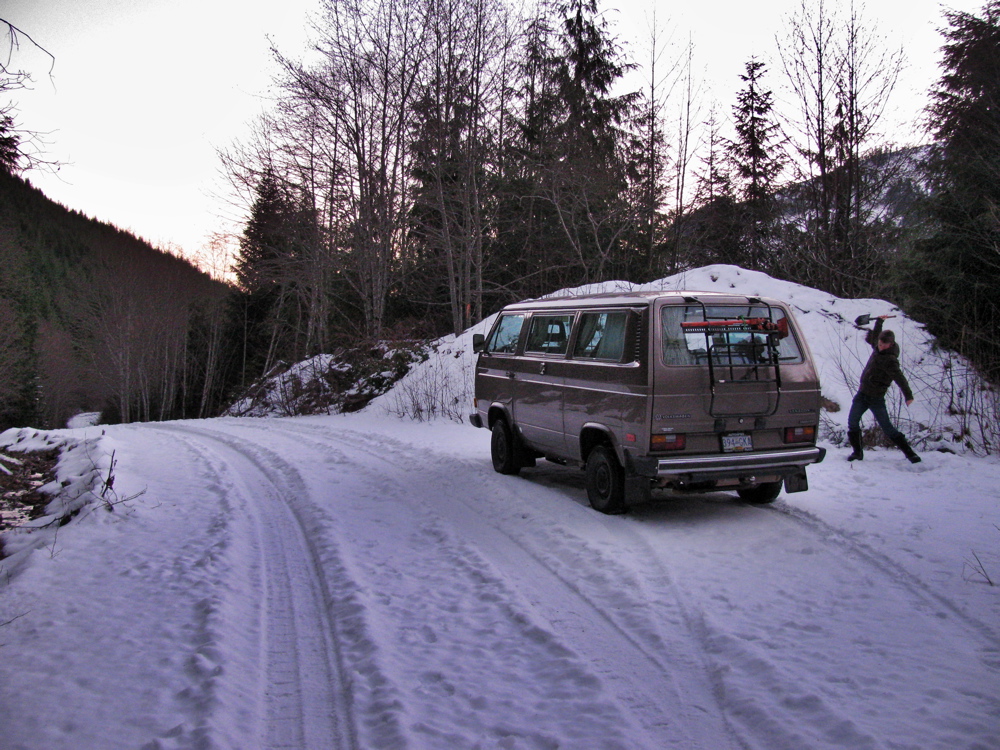
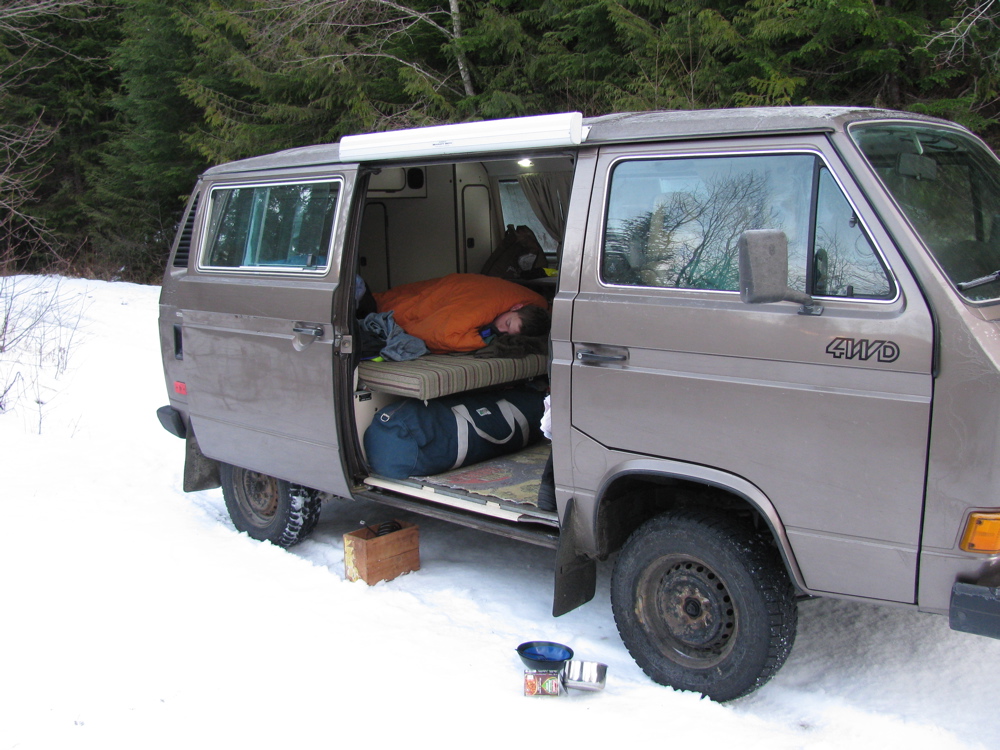
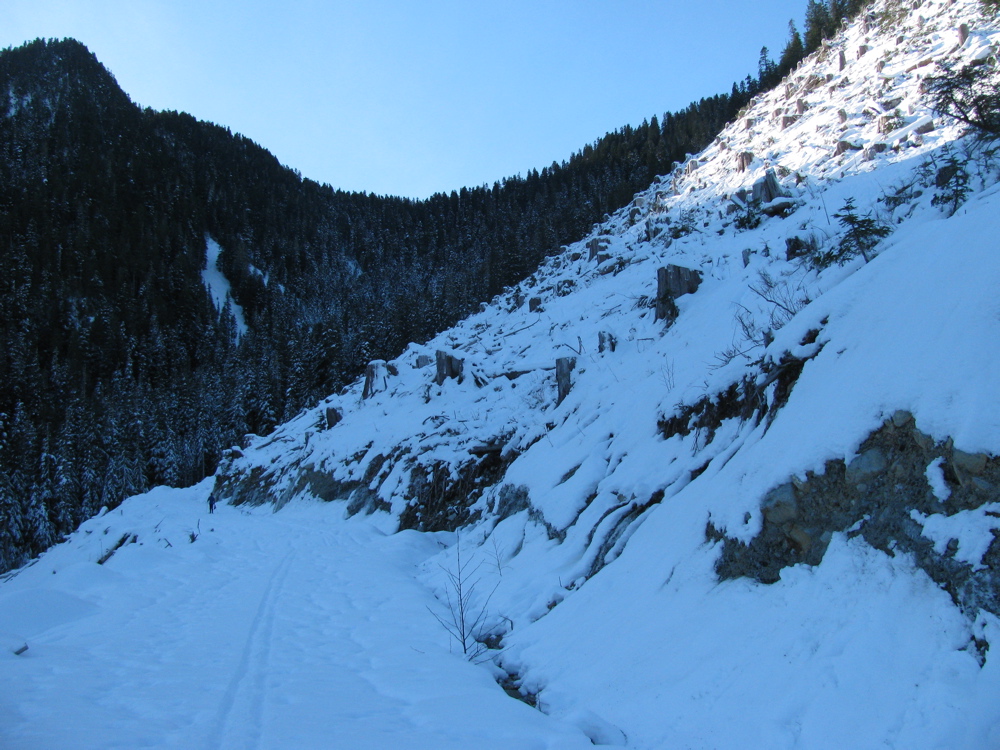
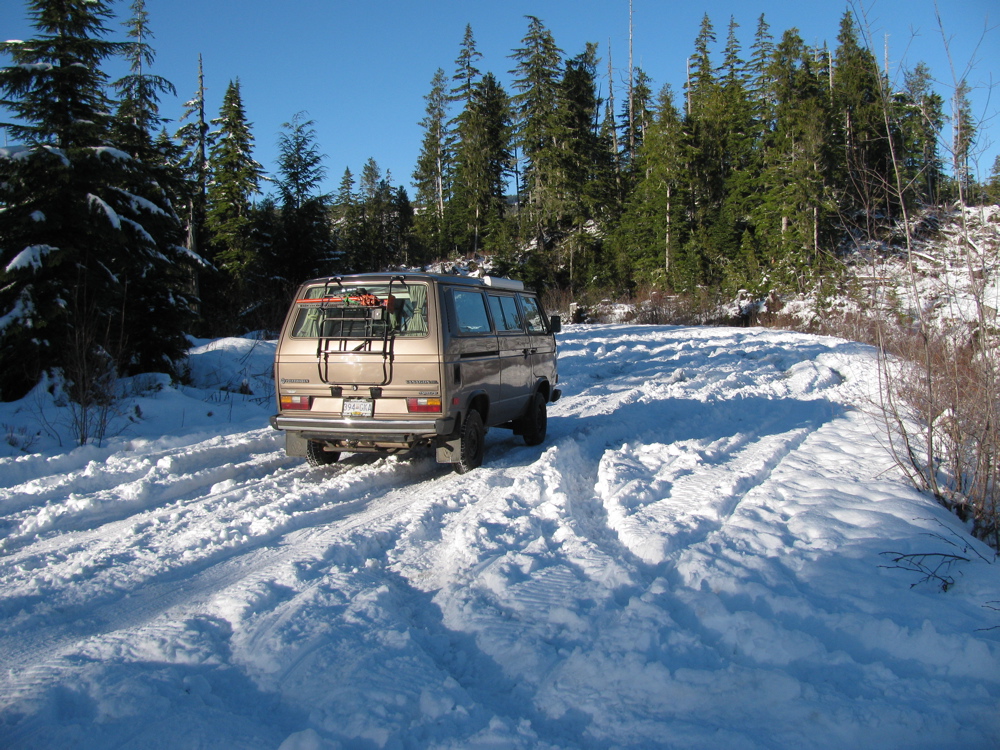
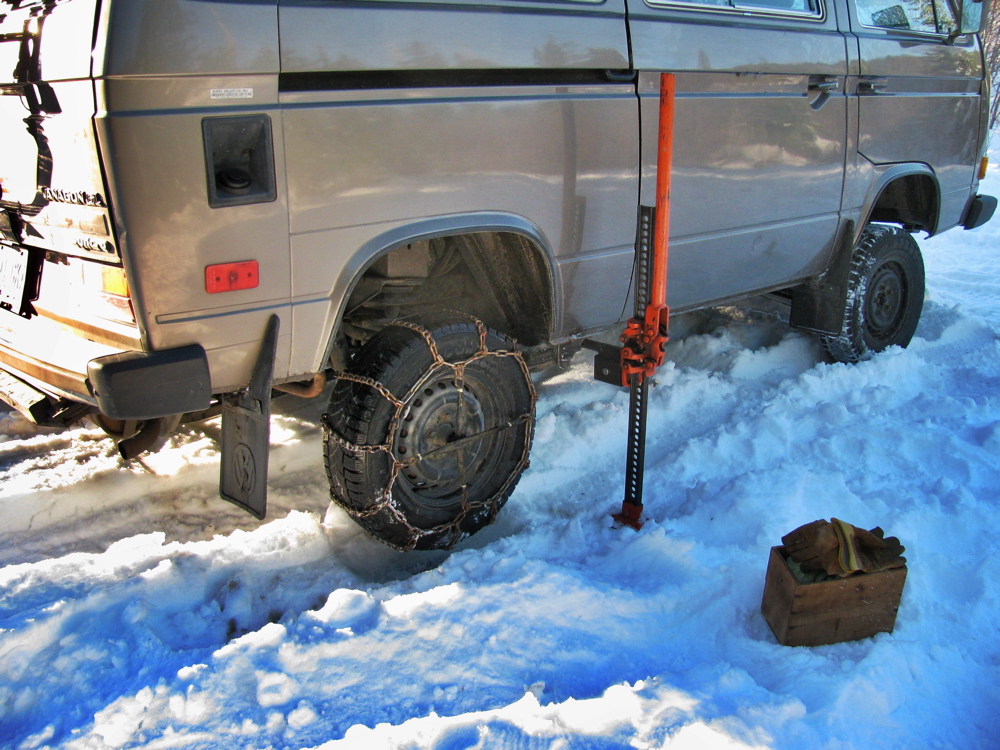
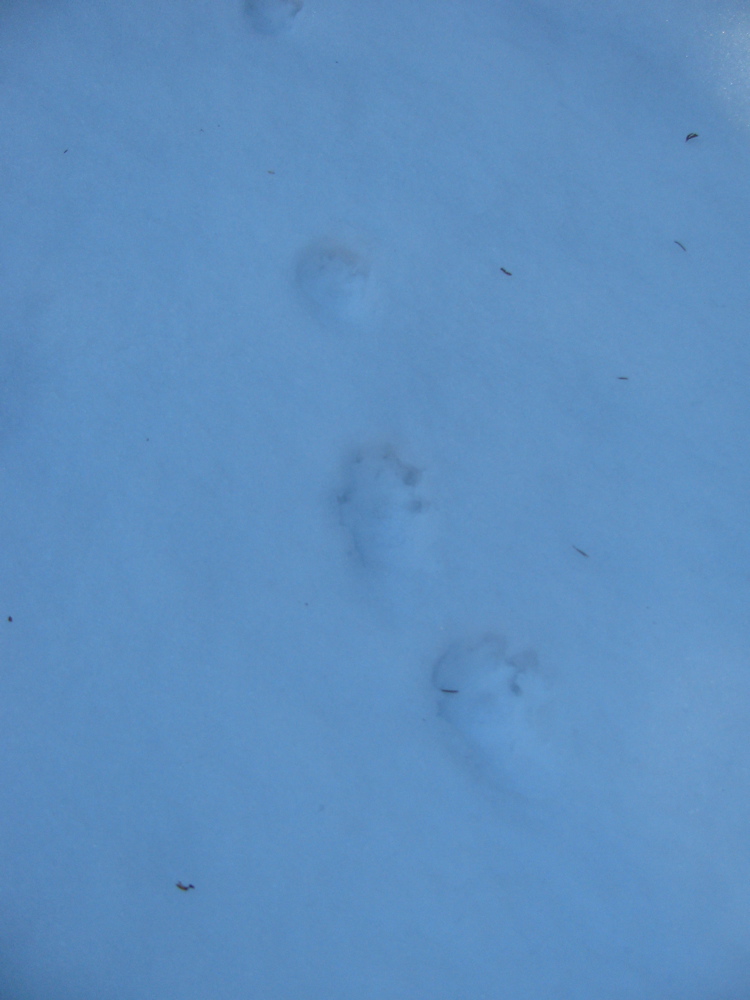
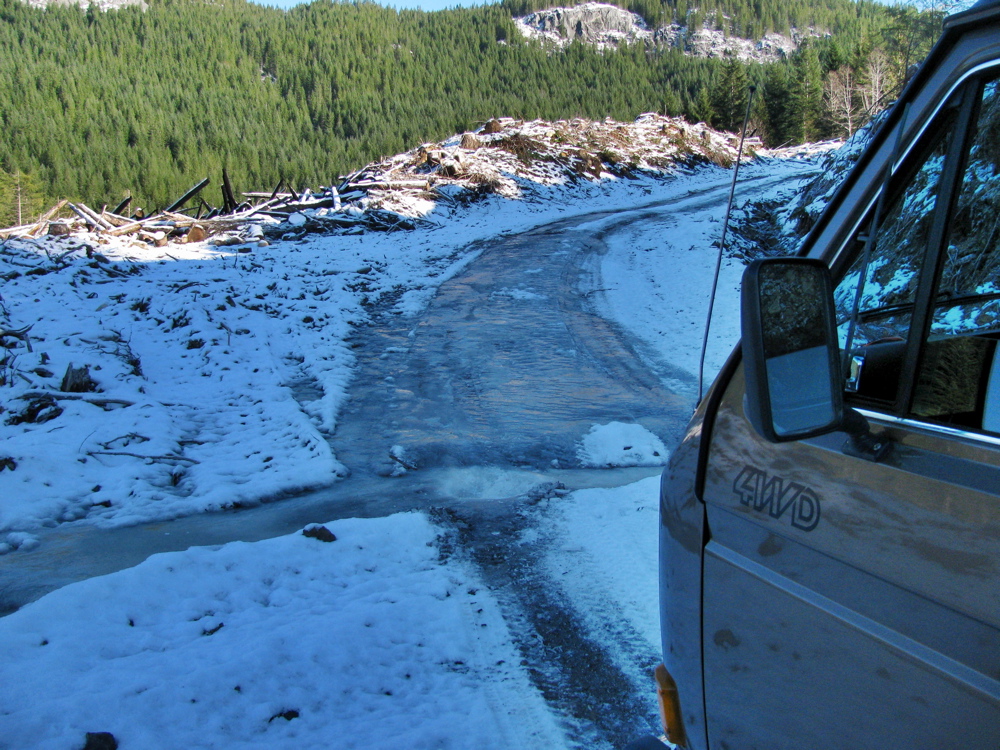
I”m just home from another overnight trip, with my son this time. I switched tires to the Nokian CS set and hoped to do a tire comparison, but the snow at spot where I had camped 2 nights before had softened and so i really could not honestly compare the tires with the Vredestein Winter Comtracs used before. We decided to move on, and we ended up camped on a pretty dismal part of Granite main logging road (I had got stuck just a little further up this road 2 days before).
Here is the google map ref link for the camp spot on road. The sort of sideways heart shaped logged logged area to the west of the green arrow (“campsite”) is where we skied to the next day.
google maps ref
On the way to that spot we had to drive past Port Renfrew . By the way, you might know Port Renfrew as the southern entry point to the west coast trail.
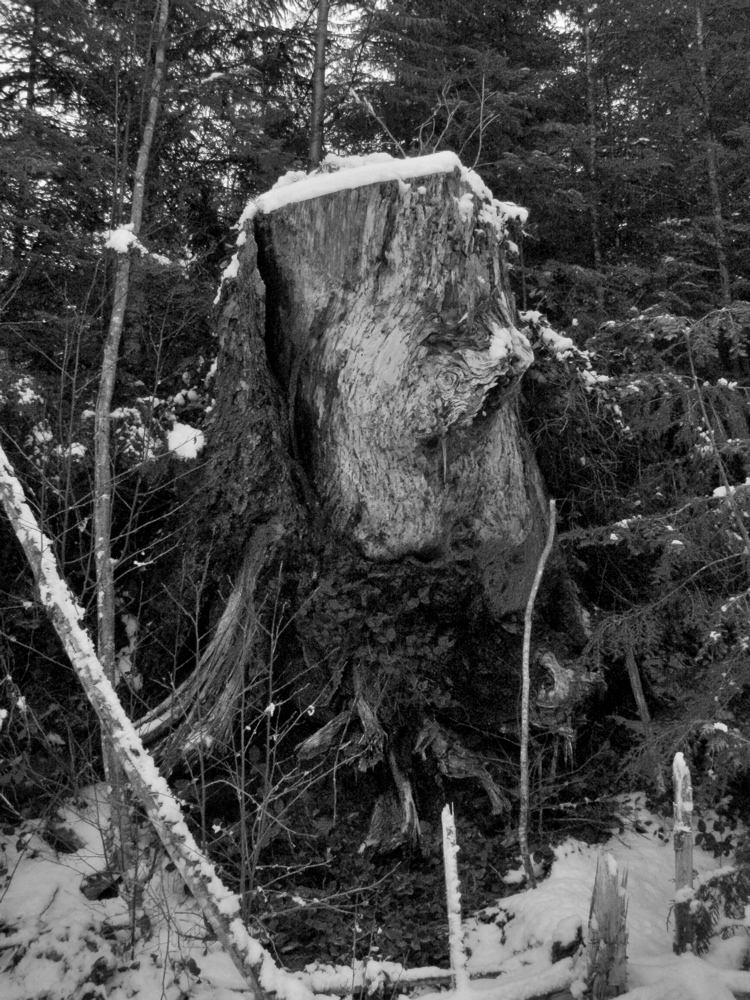
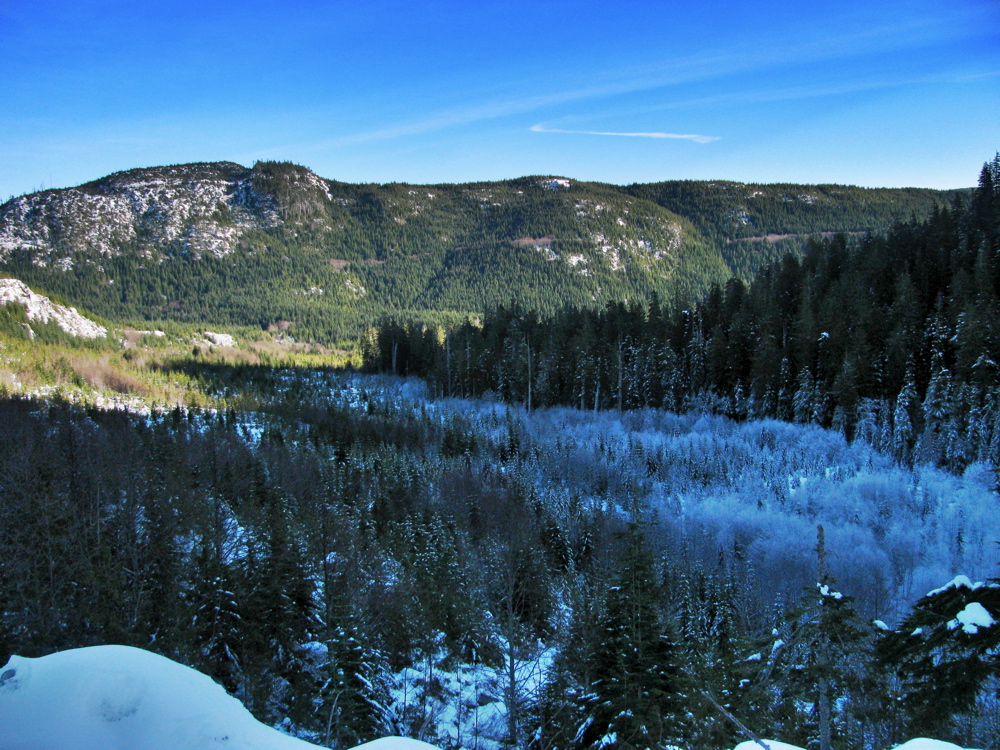
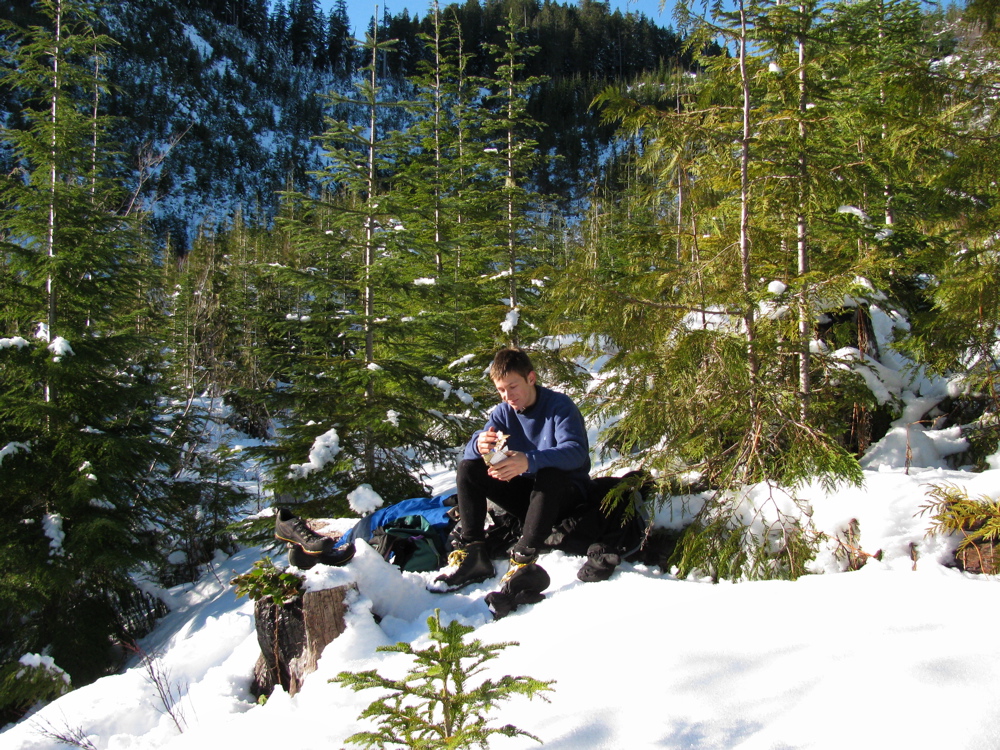
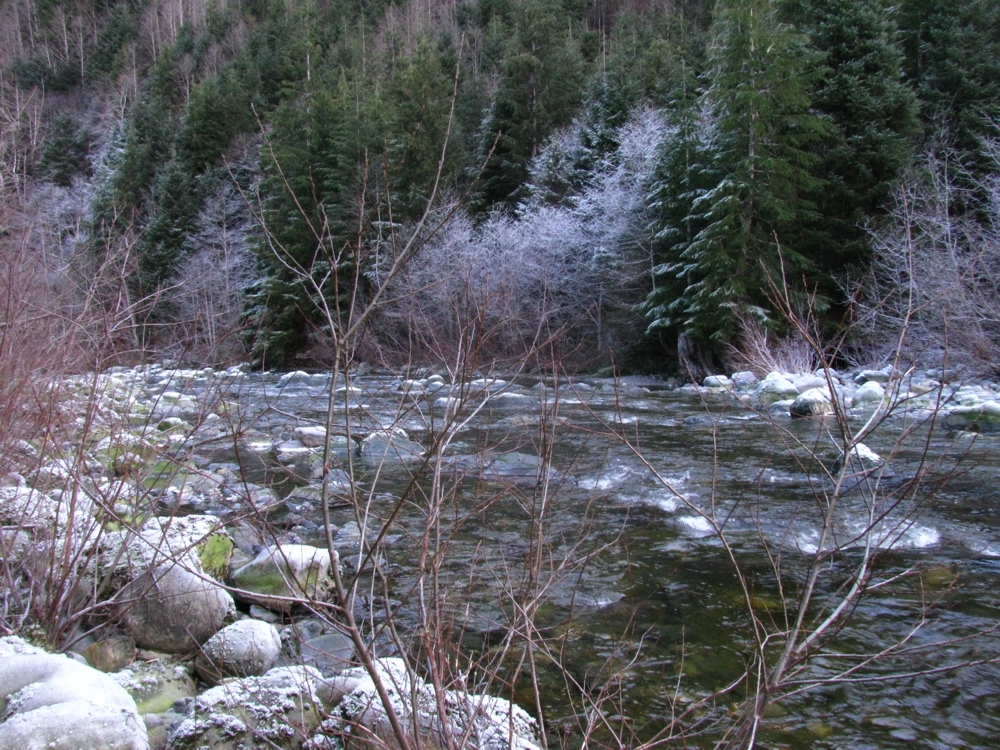
It looks almost tropical, not typical, in the first two pics. The eastward looking shot is where we were heading, not much snow visible. We went up “Granite Creek main”, not quite as far as where I got stuck previously and decided to camp overnight by the side of the road. Next day one of us decided to sleep in. Then on to slog along logging road to the heart shaped cut block seen on the google map ref. The snow was heavily covered in rime/hoarfrost, and the area was mostly second growth with a few reminders of the size of trees there before. Looking back to where the van is parked, near the base of that vague diagonal line at the left of the picture, then looking forward at the cut block… pretty close to a 45 degree angle, hard work cutting trees on that, eh? Then found some sun to have some chocolate and on back to the van. We headed home via Cowichan Lake, just as I did the trip before.


2010 in review
Posted by albell in Uncategorized on January 2, 2011
The stats helper monkeys at WordPress.com mulled over how this blog did in 2010, and here’s a high level summary of its overall blog health:

The Blog-Health-o-Meter™ reads Wow.
Crunchy numbers
About 3 million people visit the Taj Mahal every year. This blog was viewed about 31,000 times in 2010. If it were the Taj Mahal, it would take about 4 days for that many people to see it.
In 2010, there were 105 new posts, growing the total archive of this blog to 144 posts. There were 643 pictures uploaded, taking up a total of 425mb. That’s about 2 pictures per day.
The busiest day of the year was April 12th with 712 views. The most popular post that day was Weekend trip in April.
Where did they come from?
The top referring sites in 2010 were thesamba.com, mail.yahoo.com, gerry.vanagon.com, ig-syncro16.de, and en.wordpress.com.
Some visitors came searching, mostly for cyclekart, webasto bbw46, webasto bbw 46, bbw46, and webasto.
Attractions in 2010
These are the posts and pages that got the most views in 2010.
Weekend trip in April April 2010
Webasto BBW 46 heater December 2009
Frank G.’s modified instrument cluster January 2010
Cyclekart November 2009
8 comments
Pop top conversion- Mosaik kit February 2010
End of December quick trip
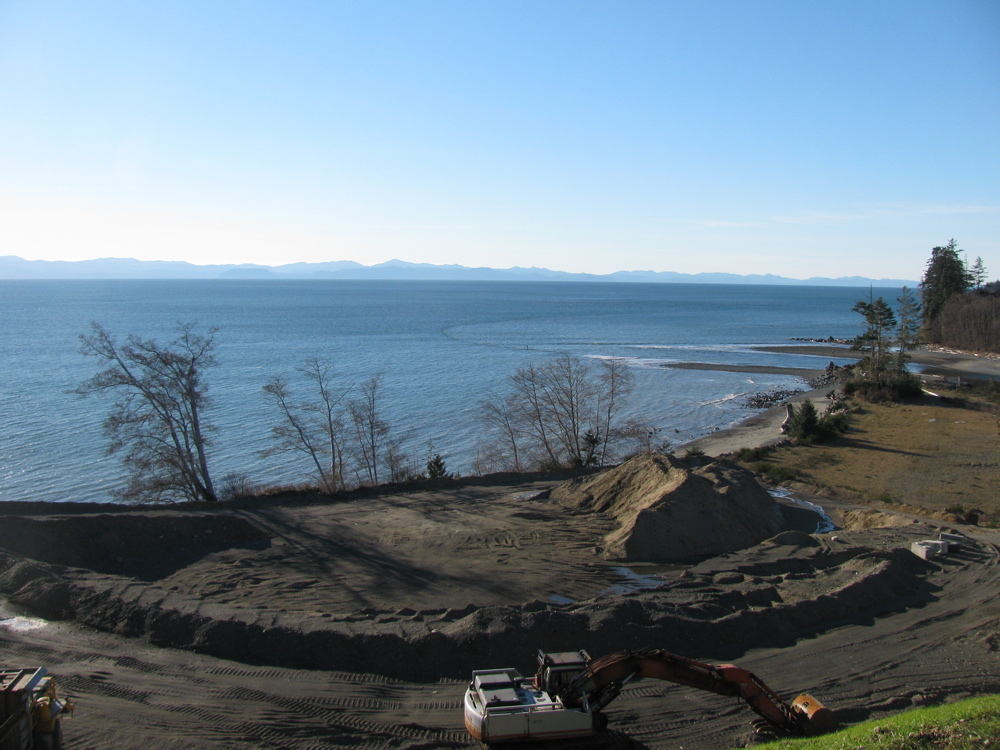
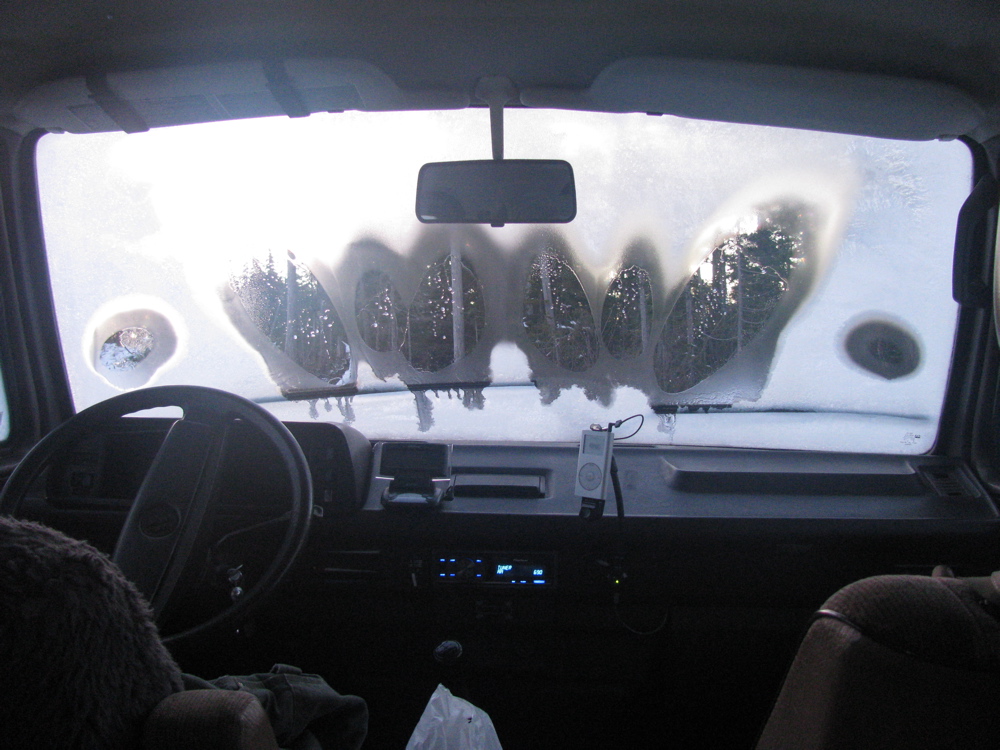
Just back from an over night trip around the south tip of Vancouver Island. Starting point of the slideshow is the one overlooking a gravel pit, tiny dot in the ocean is an optimistic surfer. Left the paved road at China Beach day use area and then headed up northish towards San Juan ridge. The snow is old and hard, and icy underneath. Spent the night up there (48.47573 N 124.06610 W), the jury rigged platinum catalyst heater helped to keep van interior above zero. Next day, defrost inside of windscreen and then back down to paved road and on westward to Loss Creek. Up the road alongside the creek/river, getting more brush scratches on the van, found someone’s hunting camp and then 100 metres further the road is out. So back out to pavement, on past Port Renfrew and on to road heading to Cowichan Lake. I took a look up Granite main logging road as far as I could go, saw shotgun shells, got stuck in the snow, saw wolf tracks, and came back down to paved. Further along the road went up logging spur mentioned in the April trip report. The road too steep and slippery to be able to get to where we camped before, came across a pretty tough obstacle, lots of ice. Back then to the main road and on to Lake Cowichan then back down the island highway to home.


ATA – around the airport – Beaver edition
Posted by albell in around the airport on December 22, 2010
I’m getting clever, making a new category. Here is a Saltspring Air Beaver on land with its tug.

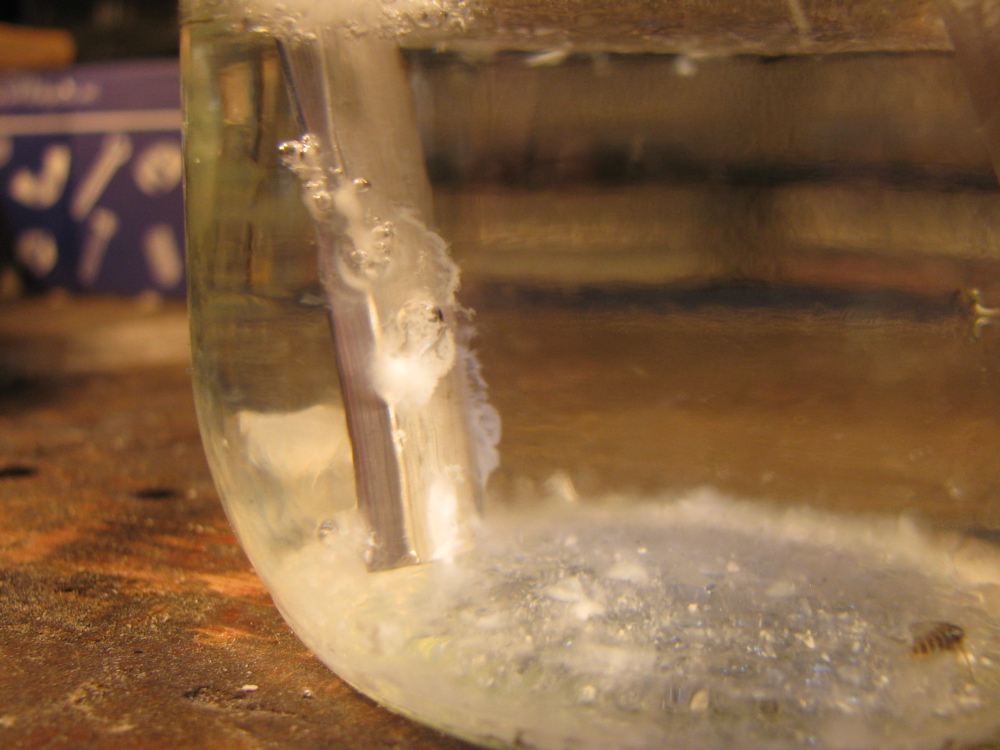
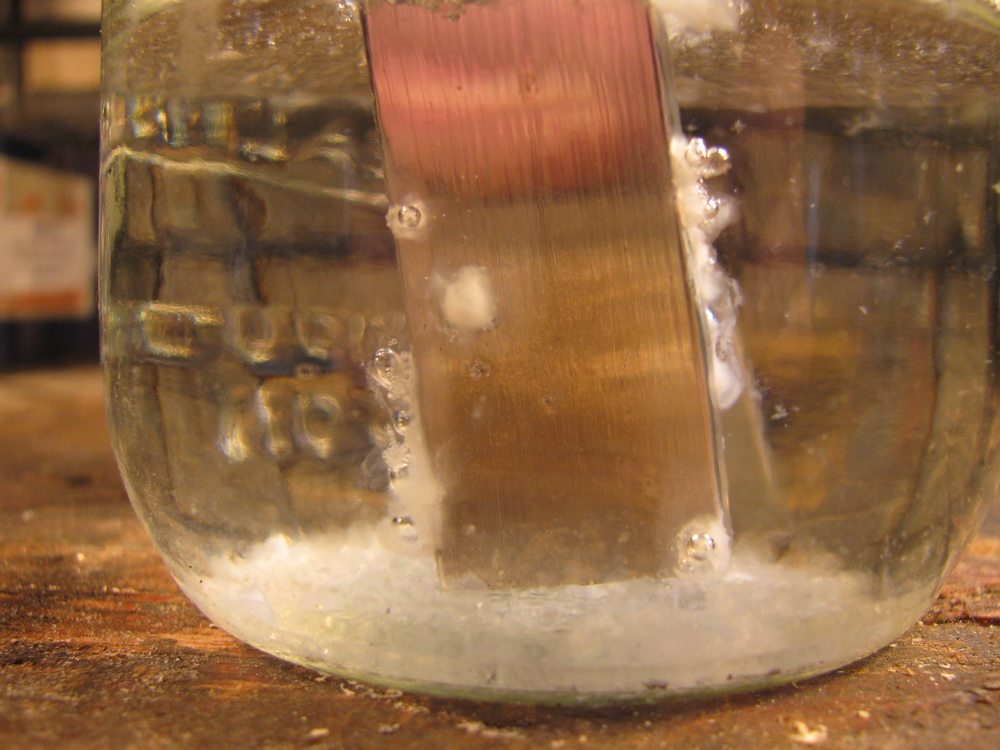
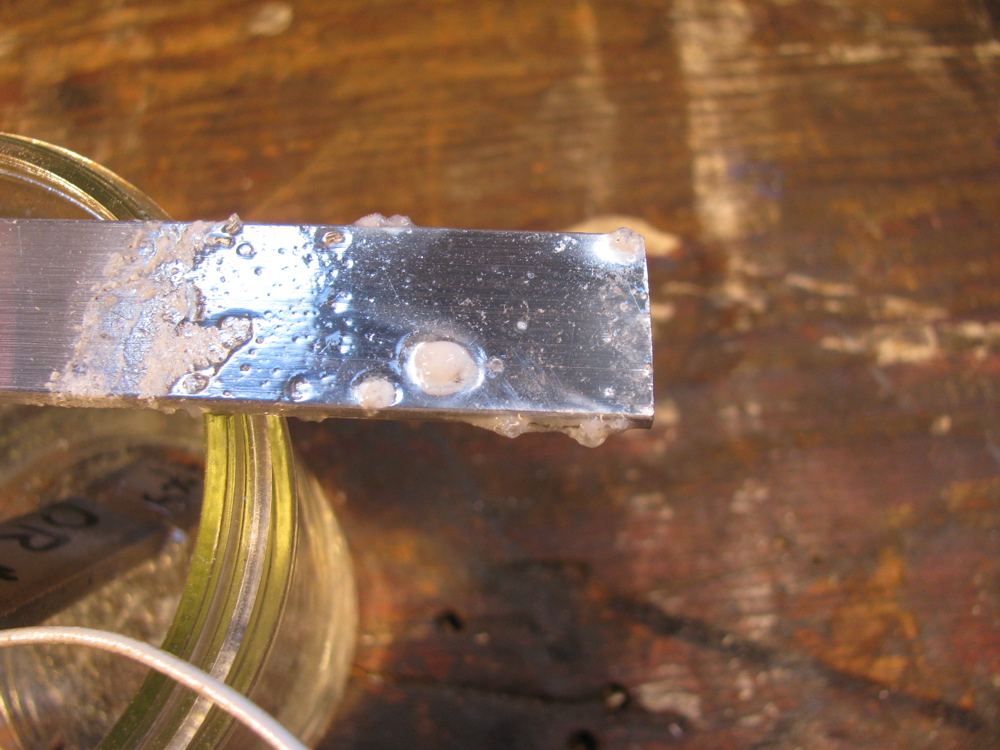
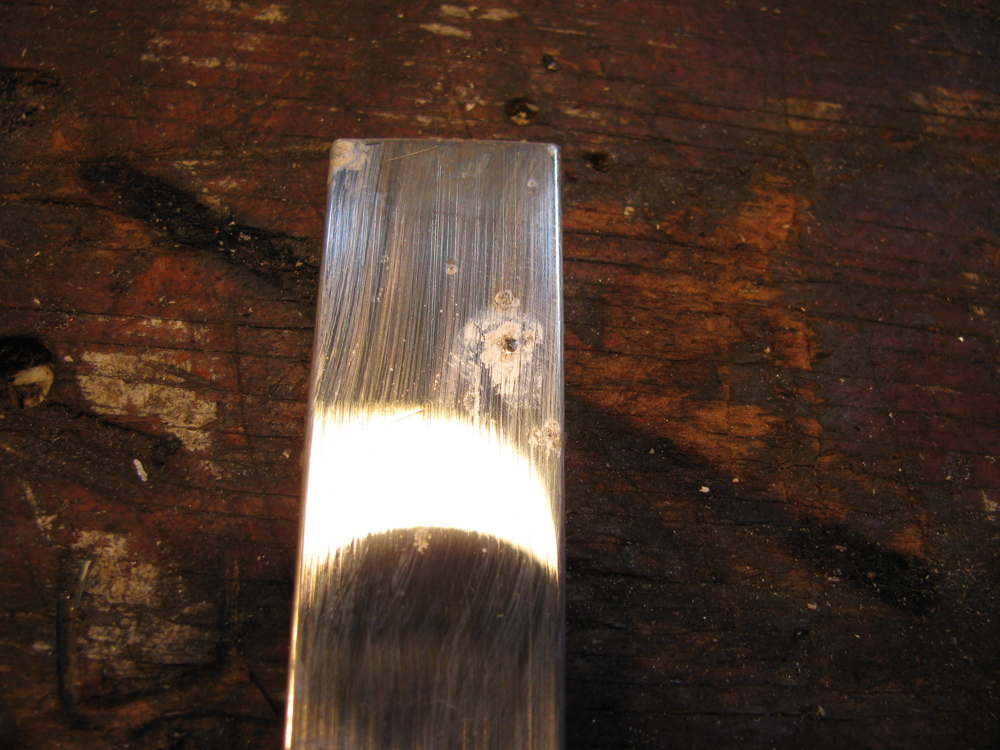
Dissimilar metal corrosion – 1.5 month update
The jar has been sitting undisturbed for over a month and a half now. During that time it was frozen solid for about 2 days (the barn is un-heated). The original set up and explanation can be found here.
The photos clearly show the amount of “fluffy” material formed. I have to guess its something like aluminium hydroxide. You can also see in the photo where the strip was wiped off, that there is a bit of erosion on one spot which corresponded to a location with the white deposit. Its funny how localised these areas are, open to conjecture.
The stainless steel sample was unchanged.
My next step is to make a series of metal pairs and immerse them in a range of liquids. I’ll do that after Christmas.
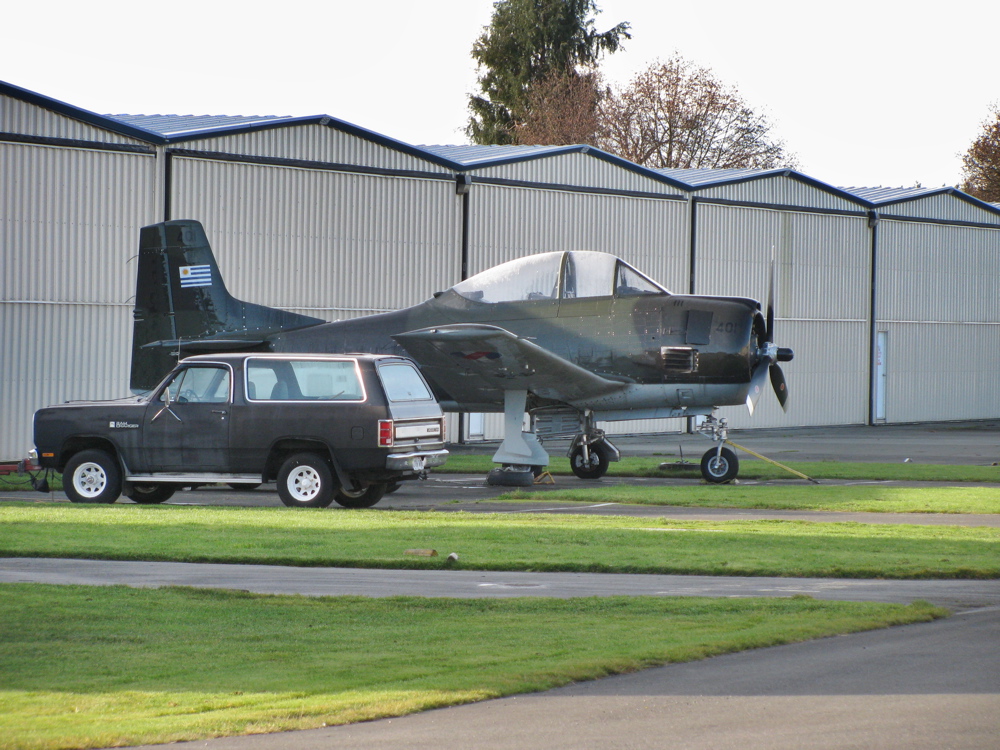
T-28
Posted by albell in aircraft, around the airport on December 17, 2010
East end of the airport (flying club, Viking Air, VIH etc) sits this T-28. There is an unpainted, bare aluminium beauty inside another hanger. I have heard rumours of 3, maybe 4 on the Island. Not a very good picture, there is a fence keeping me out.
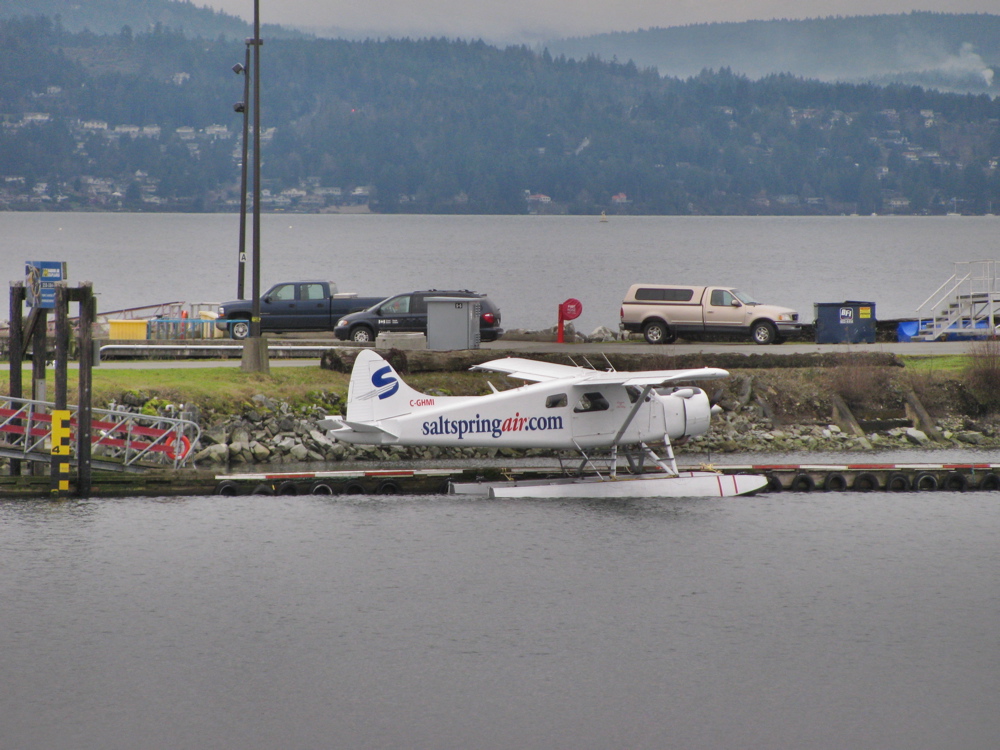
Floatplanes
Posted by albell in aircraft, around the airport on December 16, 2010
This is becoming an aeroplane blog. I forget that I live in a spot with aircraft galore so I thought I’d take pictures like a tourist. Here are a couple of shots of the floatplane base down the road from the house (its beside the Institute of Ocean Sciences and Coast Guard base, that property was a big seaplane base during WWII). Notice the chopped fwd cars used as tugs.
I don’t know about you, but I think having an URL plastered on the side of your De Havilland Beaver is de trop.

Kamov KA32A11BC at YYJ
Posted by albell in aircraft, around the airport on December 15, 2010
I sometimes see it flying in and out, and here it is at rest.

Again, something you don’t see everyday
Posted by albell in around the airport on December 9, 2010
And again at the airport, different part. Volvo C304 (I think that’s the right number).

3 weeks later
Same pond but 3 weeks later (recent cold snap).
Vanagon clutch and brake pedal assembly
How can I introduce this? Why not just say that after some time the Vanagon clutch and brake pedal assembly wears a bit at certain points and its a bitch to repair in the van.
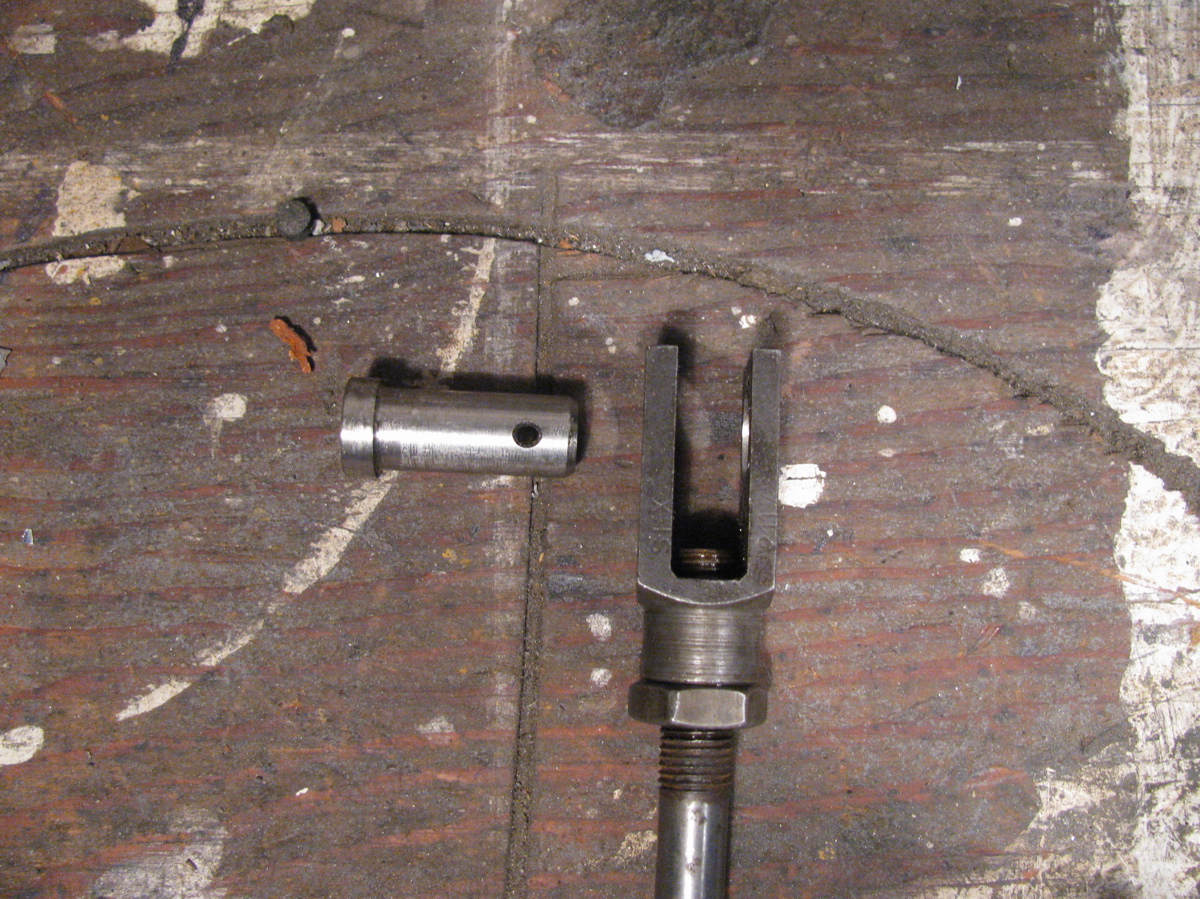
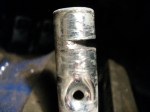
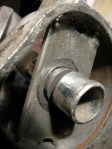
My ’86 syncro has a squeaky clutch pedal and I know why… the metal arm of the pedal has a hole in it where a pin connects it to the clevis of the clutch master cylinder slave rod, and this hole wears into an oval over time. The pin also gets worn. The result is a less than smooth and silent clutch pedal.
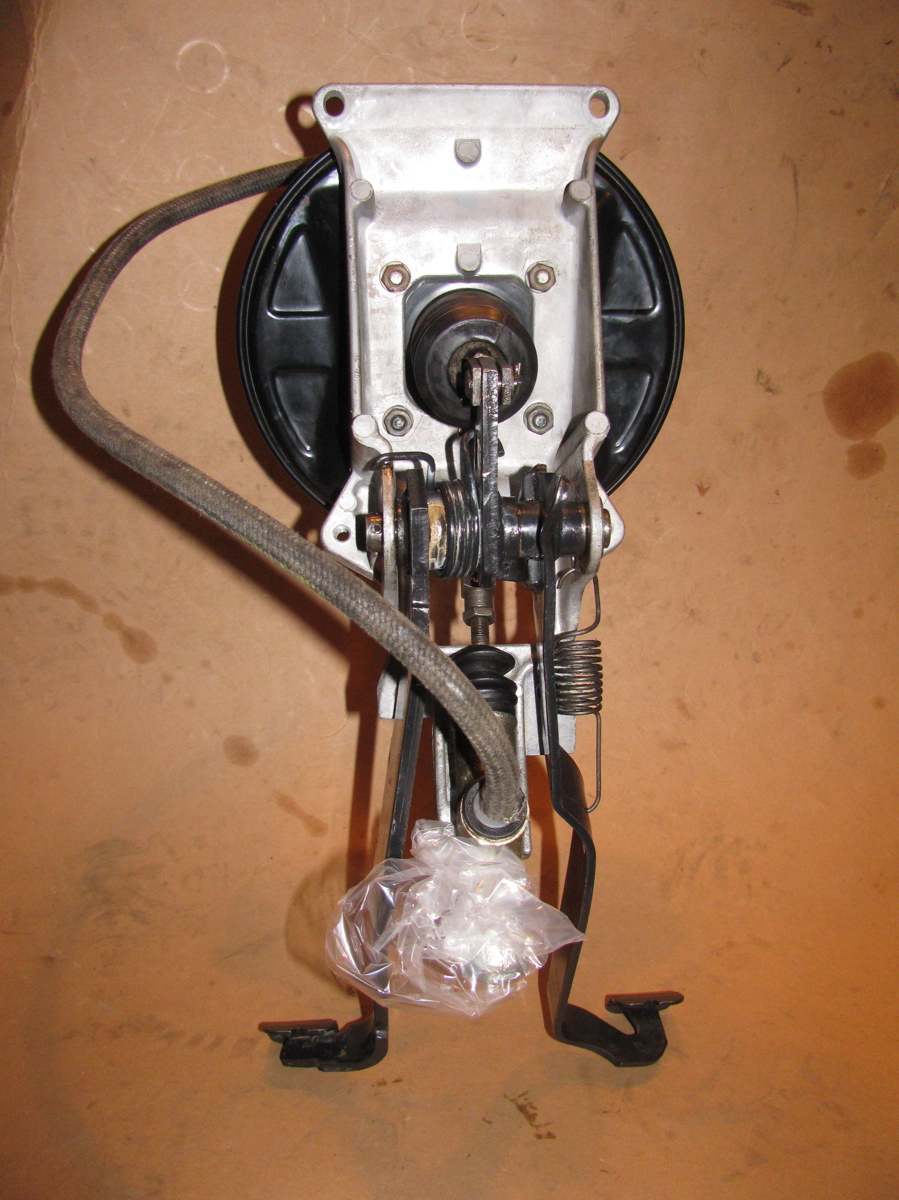
I happen to have a complete assembly taken from my dearly loved ’82 westy that I could work on and refurbish.
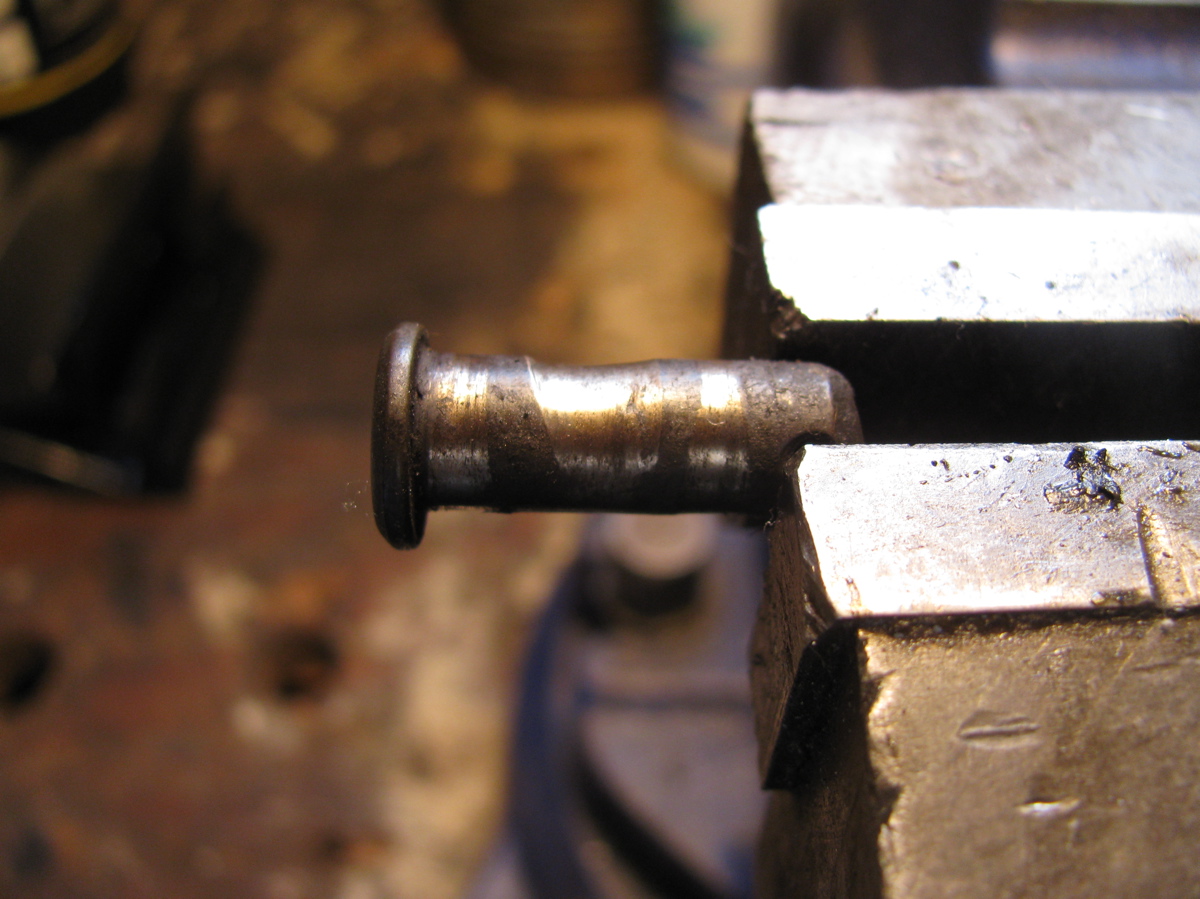
On the ’82’s clutch pedal the hole was indeed oval and the pin worn (pic of pin in vise is the original worn one). So I drilled out the pedal hole to make it round again (others have filled in hole with weld and redrilled to stock size), also drilled the clevis hole, and I made a new pin out of some stainless stock. Like an idiot, I forgot to take before pics. But the series of after pics show the disassembled assembly and the whole shebang together again. A close up of the clutch clevis and pin included.
One day I’ll swap it into my syncro (it probably means dash removal, but some rumours of being able to get it up and out via binnacle are about). Maybe before I do that, I’ll swap the brake booster for a larger one from an E30 series BMW (see Herman’s blog linked to the right for details).
Oh I should add, if you are like me and can’t be arsed to pull dash to get pedal assembly out for refurb, or at least greased, then you can try scrootching under the dash to get at the bugger. If you lie across the floor, or half in, half out the drivers door, you can reach up with one hand and feel where the clutch actuating rod/clevis connects to the cross pin. You might have to move the clutch pedal with other hand to really get at it. If you put a blob of grease on your finger you can try to massage it around the pin.


Something you don’t see everyday
Posted by albell in aircraft, around the airport on November 4, 2010
PBY5A- Canso waterbomber at the Victoria airport, NE end. Belongs to Buffalo Airways, see the rest of their fleet here.

Dissimilar metal corrosion expt. – minor update
Took a picture of fluffy deposits on the aluminium sample (after 2 days). See the original post here
Red leafed Oregon Grape
Every so often you come upon a red leafed Oregon Grape.
Why is it red? Random mutation? Virus? Phytoplasmas?

Porsche 917
I couldn’t resist swiping these pics and posting them. One of my all time favourite cars, and I’m always surprised at how small it is, the side by side picture with 914 really shows that. The picture of the rear suspension shows the 2 rubber “giubos” (see note at end of post) on the driveshafts, big brothers to the giubo found in the syncro prop shaft. YouTube vid has Derek Bell having another go.


Note on Giubo – from an Alfa Romeo mailing list:
To:
Subject: Giubo spelling and pronunciation
From: “John Hertzman”
Date: Tue, 17 Jun 2003 07:19:49 -0400
Cc:
Content-type: text/plain; charset=”us-ascii”
Reply-to: “John Hertzman”
Sender: owner-alfa@xxxxxxxxxx
Anthony White writes “I have a suspicion that the vernacular spelling
accompanies a vernacular pronunciation: guibo, pronounced ‘gwee-bo’, as
opposed to giubo, pronounced something like ‘joo-bo’, following the
pronunciation of Giulietta. I’d be interested to know how others pronounce
this.”
In Italy, and presumably in Heaven (if indeed they are not the same place) I
believe “something like ‘joo-bo'” is the first,if not only, choice. Searching
my personal digest archives I found this, from AD7-061, 26 Aug 1998:
“Il Topo recently sent me a photocopy of a hand-written letter, 24 maggio
1986, by GianPaolo Garcea, a singularly literate engineer who was one of
Orazio Satta’s right-hand men as Assistant Director of the Design and
Experimental Department. The letter, with lavish freehand illustrations,
confirms and elaborates on what Topo had previously told me and others, that
“the ing. Boschi had invented and patented the elastic joint (giunto) and
later formed his firm GIUBO SpA, which manufactured the first giubos for the
1900. ‘GIUBO’ = GIUnti Boschi = Boschi joints, and the pronunciation is
(gee-yew-bow or jew-bow).” That is the straight squeak from what is, as far
as I know, the last surviving purebred Portello mouse.”
The person I irreverently called Il Topo in those days (from previous
references to “the oldest rat in the barn”) is Don Black, who had met Dr.
Boschi when he was working at Portello in the sixties. Black’s friend and
mentor GianPaolo Garcea, who was a design engineer at Portello from 1935 to
1982, thus spanning from the late Jano era to the late Hruska era, is the
author of a memoir “La Mia Alfa”. It is a singularly charming work, presented
with the printed text and photos on the right-hand page and the beautifully
handwritten manuscript and illustrative sketches on the left-land page. I
suppose it is an anachronism, writing and engineering without typewriters and
drafting machines, let alone computers, but there once were engineers who
didn’t need spellcheckers, and this book is a window into that world, for
those who may be interested.
Later in my digest archives I found this, from AD7-715, 14 May 1999, from the
late Fredissimo:
Subject: GOO-EEBOS?
“What the hell are GUIBOS? I wonder if you mean GIUBOS = GEE-OOBOS. Sorry
but it irritates me when the wrong names are used for Alfa parts. At a parts
store in Italy they would not understand. Fred DI Matteo”
I also found earlier references to Boschi in letters from both Black and Fred,
but didn’t look them up (time presses) but guess that Fred’s initial chewing
me out as a proxy for Don was in off-digest correspondence; but from the
on-digest evidence it was gee-yew-bow or jew-bow at Portello, and something
like GEE-OOBO at the parts counter.
Ralph DeLauretis asks “Does anyone know why Alfa when they designed the Alfa 6
sedan they re – designed the Alfetta sedan platform to accept a front mounted
tranny? Did they realize their mistake? Cut costs? Anyone know?”
My impression (haven’t looked for the source) is that something Don Black
wrote said either that the design of the Sei either preceded or was concurrent
with that of the Alfetta. It was not unusual for a project to be shelved,
either temporarily or permanently, to concentrate limited resources on a
prospectively more lucrative mass-market product. The Sportiva and Giulietta
are such a pair. I am fairly certain, on nothing more than intuition, that the
Alfetta engine bay was initially dimensioned to accept the V6, which was not a
fresh design when it reached production. But that is guessing.
John H.
Dissimilar metal corrision
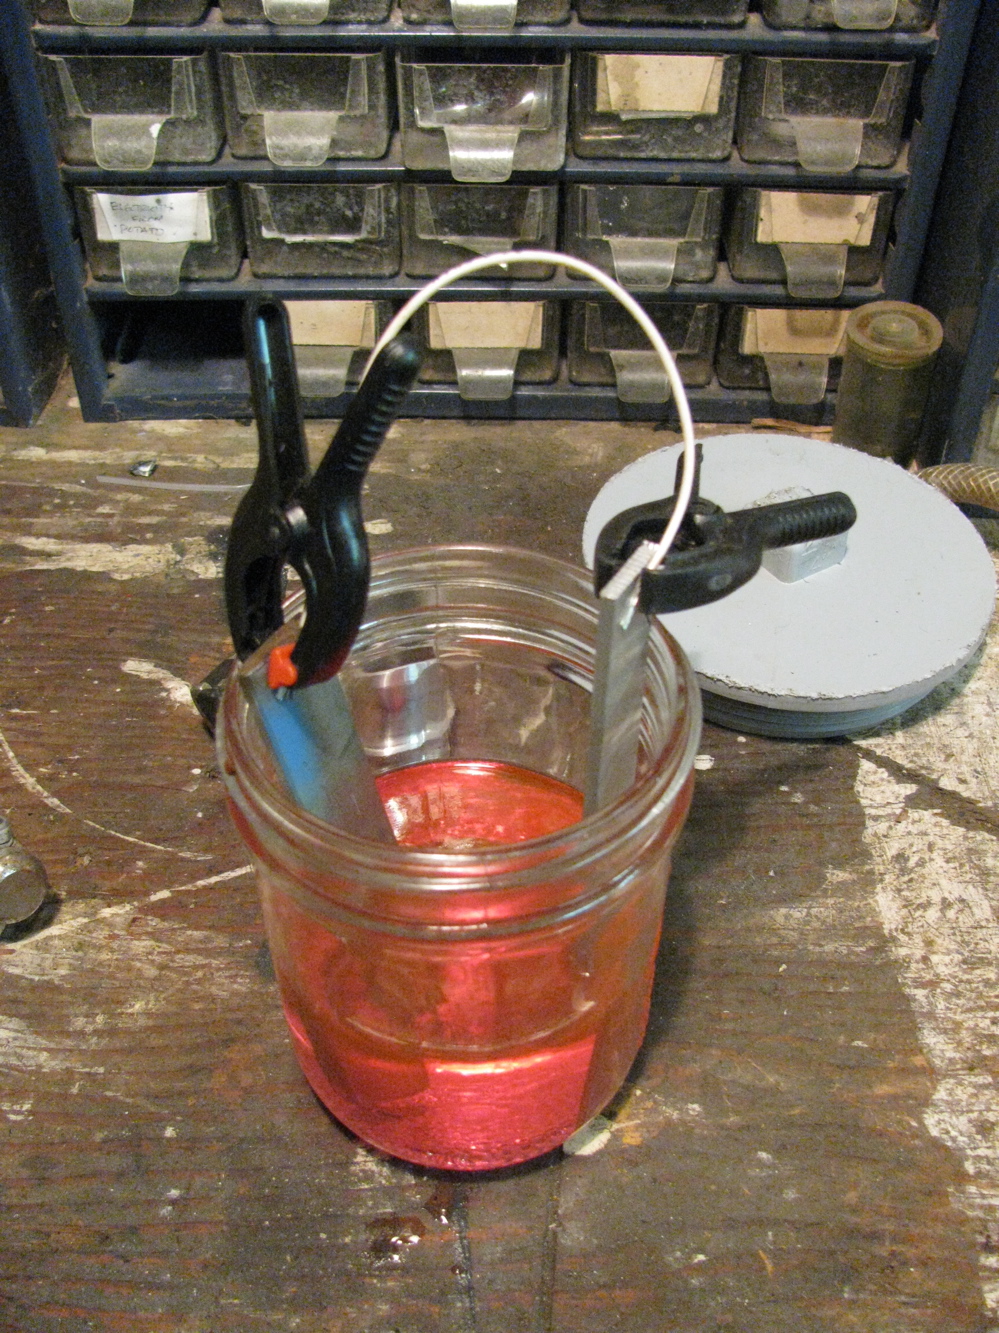
There has been quite a lot of activity in the Samba Vanagon forum on the subject of stainless steel cooling lines causing dissimilar metal corrosion in the aluminum alloy engine. About a week ago I decided to do a little experiment to see if I could detect any visible corrosion on a bit of aluminum connected to stainless steel, both in shared electrolyte of engine coolant.
The stainless is 304, the aluminum is 6061. Both samples are 0.125″ X 0.750″ and immersed in the coolant to approx 2″.
The coolant in a 50/50 mix of OAT based coolant and distilled water.
I did a casual buffing of both samples with tripoli, and then degreased. The buffing was to allow any corrosion to be more visible. In the picture, the aluminum is on the right.
The samples are connected by tinned copper wire.
Ambient temp in the lab, I mean the barn, ranges from 7 C to 10 C.
Initial measurements between the unconnected samples in the coolant was, 150 microAmps and 540 milliVolts.
Experiment started at 6:30 pm, pacific time, October 26 2010.
I’ll leave it undisturbed for a week or so, then take pics of the metals.
It will be interesting to see if anything happens

Nov. 2 1220 hrs – I pulled the metals out of the jar and rinsed off coolant. The aluminum looks pretty good. I don’t know if the pic shows it but there is a very slight haze on the surface.

I replaced the coolant with tap water (well water, pretty hard), and set the expt. up again, same conditions as before. Initial readings are:
326 mV and 195 microAmps between the 2 samples.
(I don’t know why wordpress is sticking the “I” up there to the right of the image… I have tried to get it back down, the html looks right to me, but…)
Update, Nov. 4, 2010.
There are a few spots on the aluminium (none on the stainless) that look like a white “fluffy” deposit.

A bunch O’ fungi
Took some snaps while walking the dogs.
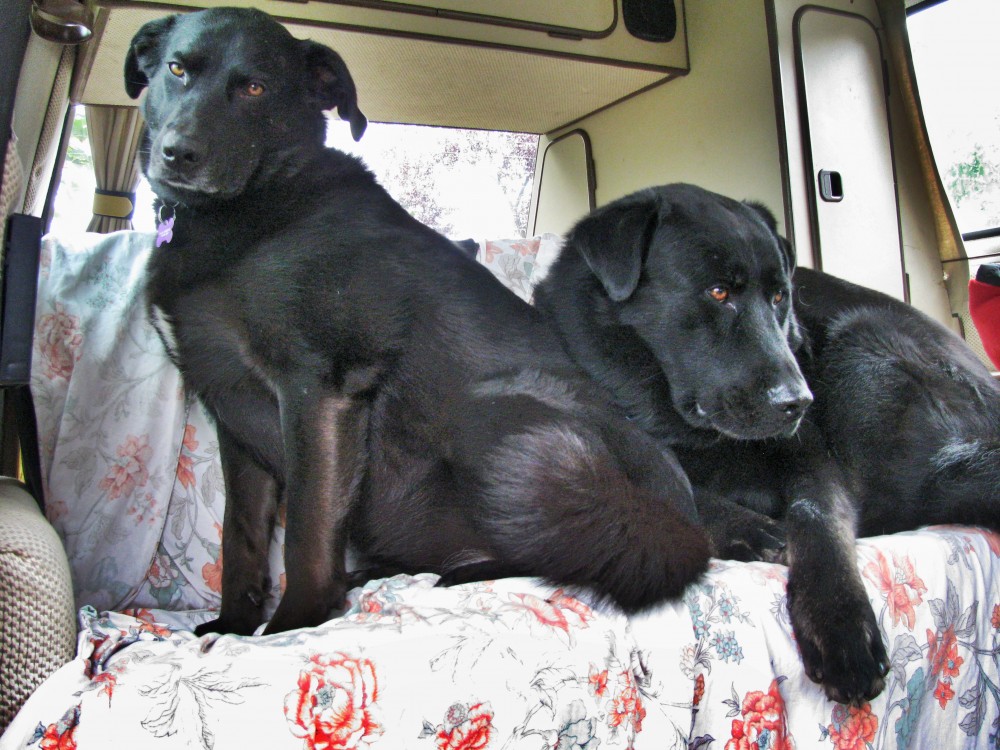
Dogs in the Vanagon
Any chance they can get, they are in there. Funny thing is I never seem to able to get a good shot of them.
Dual horn relay and wiring
Posted by albell in vanagon mods on October 6, 2010
Minor but sort of fun mod… in the German wiring diagrams I noticed a page with the schematics for a dual horn set up. It uses a relay in relay position #6, and some minor wiring changes on back of fuse panel. The only special tools needed are molex connector removal tools, 2 sizes (see this post on how I made mine). Also, you need a few of the molex connectors or you can connect to salvaged pigtails.
Here is the German wiring diagram, kinda hard to read, sorry:

And here is the stock single horn set up:

You can see that you “only” have to move the wire from connection C15 to L2, make a new connection between L2 and C15, add a ground wire to L3, and make a connection between L1 and C20. And of course, you have to add another horn and wire it up in parallel with original horn.
So what and where are those connections L1, L2, etc? They are on the back of the fuse panel, and the legend is here:

Funny how the label the L block as for horns, when the wiring diagram later show the horn wiring going to C and B blocks. The manual is not perfect 🙂
Finally, my crappy version of the modified wiring diagram (you see I have a 40 A relay in position 6, its only because that’s what I had on hand, 20 A would be fine):

For a more professional drawing of the modified wiring diagram, check out this on Michael Sullivan’s site (and have a look around the site, pretty interesting).
Westy pop top lifting assembly problem
I had a look at the assembly, and sure enough it shows the same wear as others have noted – David and Neil, (and Neil’s Vanagon Wiki article on assembly worth a look).
And a good Samba thread on subject here.
So what to do? A copper bushing as Neil did or a bronze shaft as David did? Or both?
Will report back.

July 2016, reporting back. Did a fix of the problem, post is here
Camperisation Part 4
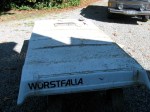
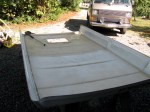
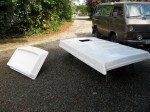
Pulled the pop top roof and “luggage rack” from the old ’82 Westy. Boy oh boy it had grown a lot of lichen and dirt in the last year and a half. I pressure washed them, scrubbed with a Scotch-Brite pad and Simple Green, then sanded the outside. The time consuming part was getting the old caulk off, where the roof and skylight seals were. Next step will to be filling the 2 holes at the back or the pop top where I had eye bolts installed (lashing points for canoe) and checking for any cracks that need repair. The “Wurstfalia” sticker was a practical joke played on me by a friend. I didn’t have a Westy sticker back there ( I suspect the roof had been repainted before I got the van) and my friend snuck by the house and put that sticker on. It got comments.

End of August trip
Back to blogging, catching up… here is short trip report I posted on the Samba about recent trip. Back from 6 days of exploring Nitinat and Klanawa watersheds on Vancouver Island. Started with us heading to long time fav spot on Nitinat river. Stopped the van to check on access trail and found it to be well blocked. We were pretty disappointed, and then more so when the van would not start. I discovered that the red/black ignition wire had come adrift from starter solenoid, and on the syncro its a bear to re-attach. Light was fading so we managed to push the van back up traill a bit and then push start. We headed to higher ground, up Worthless creek logging spur road, to about 500 m elevation and camped over looking Nitinat river valley. Google map ref Pics show low clouds around around 8 next morning. 
 I’m sure some of you know what this is:
  After a lot of cursing I managed to get wire onto solenoid, and we headed down and then north to the Klanawa watershed. We were looking for a nice secluded riverside spot, and went down a lot of old dead end spurs, most of them with alders overgrowing the sides, so the van got a lot of scratching and rubbing. no one else on the roads there, maybe due to the fire restrictions? Who knows, but we stayed away from “central main” logging road which I think gets most of the traffic to Bamfield. We ended up at an ok, but not great spot by a bridge on Tsucowis river/creek, right where Gorge creek enters. No traffic went by us when we were there (infact we didnt see or hear another vehicle for the 3 days in the Klanawa). Google map ref
  Then on to explore more of the Klanawa, heading west, almost to pacific rim national park boundary… we thought we might be able to get access to Blue lake, but no luck, road that might have done it was blocked on purpose by large cedar log, active logging not far away (logging right up to park boundaries.) And again, more fruitless spur road exploring (btw, lots of berry laden bear poop around).
  We were getting really frustrated and finally, after a long, and again, failed attempt to get to a map target (this time Dorothy and Arthur lakes) we headed back toward Nitinat. On the way we stopped at Flora Lake forest service camp site, just for a look… Years ago we had discounted this site as too close to “main” roads and very dark and buggy. But this time, it was sunny and no one was about. So we stayed a night. The lake was lovely, but the forest around was still buggy despite the recent dry weather, and really looked like “Mirkwood”.
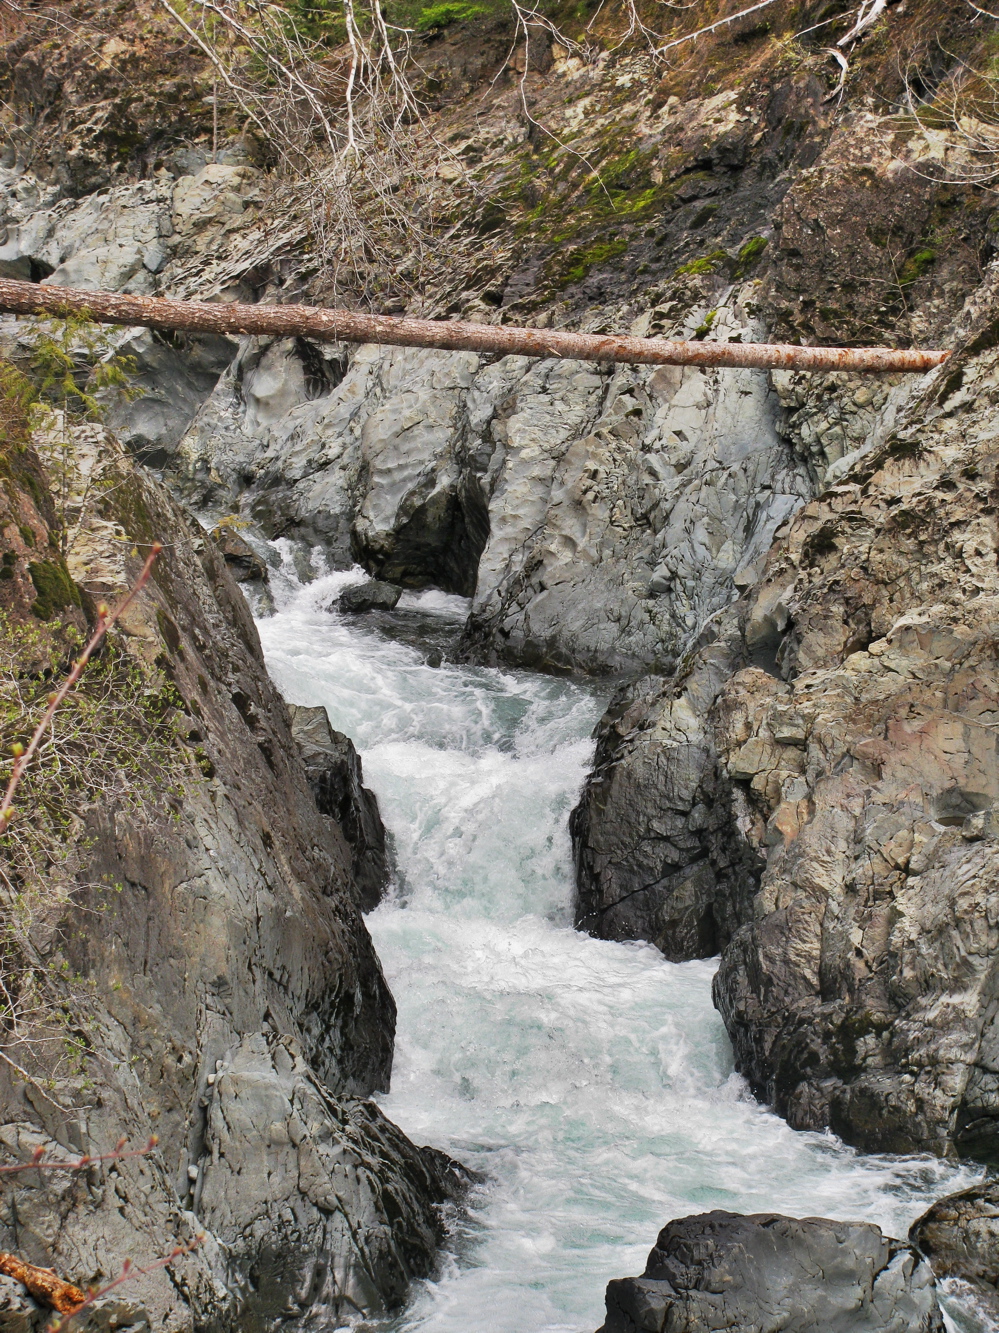
 Next day back into Nitinat valley and west to the village of Nitinat to get some gas. Then eastward, back up the river and we found a road down to the river. It seemed like a popular spot for locals, road was clear of brush and there were signs of camping. But no one else there and we set up camp. We spent a couple of days there. You can see the trail from the main road, and it ends at the top of the google maps ref, at the wihite gravel bar on the inverted V of the river. Google map ref Further upstream you might be able to make out the rocky “falls”, we walked up the river to do some fishing there, you can see the large trout in the clear water, quite amazing. No luck landing one, but some fun had hooking then loosing 🙂

 Well that’s about it. It was a real shakedown trip for the van, the roads were pretty harsh in spots. Scratched van, right hand side mudflaps hit and loosened from body, front right bumper strip lost, couple of dents here and there, sort of par for the course. No real trouble apart from starter wire except some periods, when van hot, of bucking and jerking on part throttle and acceleration. I looked for all the usual suspects but found no smoking gun. It went away after we gassed up in Nitinat, so for the time being I am putting it down to bad gas. Oh, and the Dometic fridge worked flawlessly 🙂
Vanagon camperisation, part 3
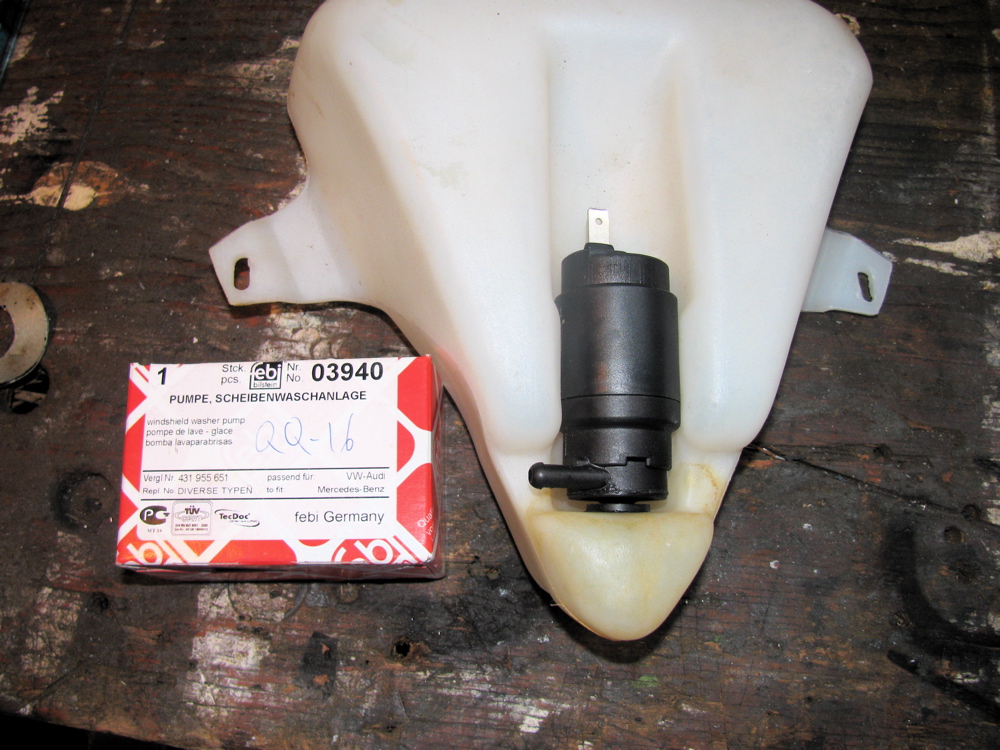
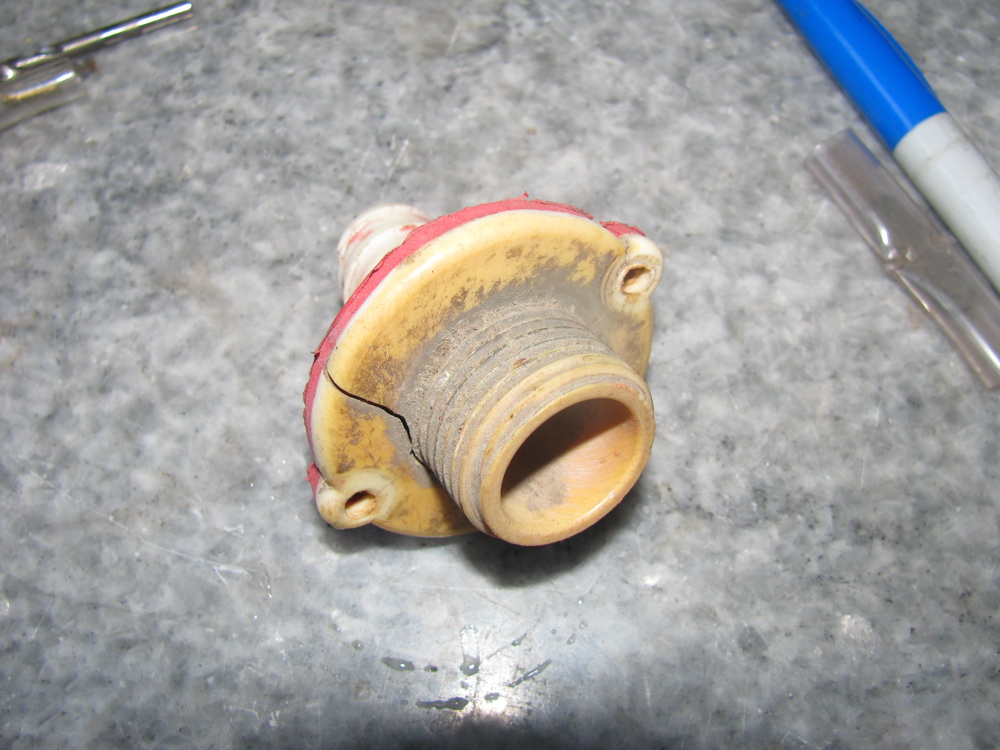
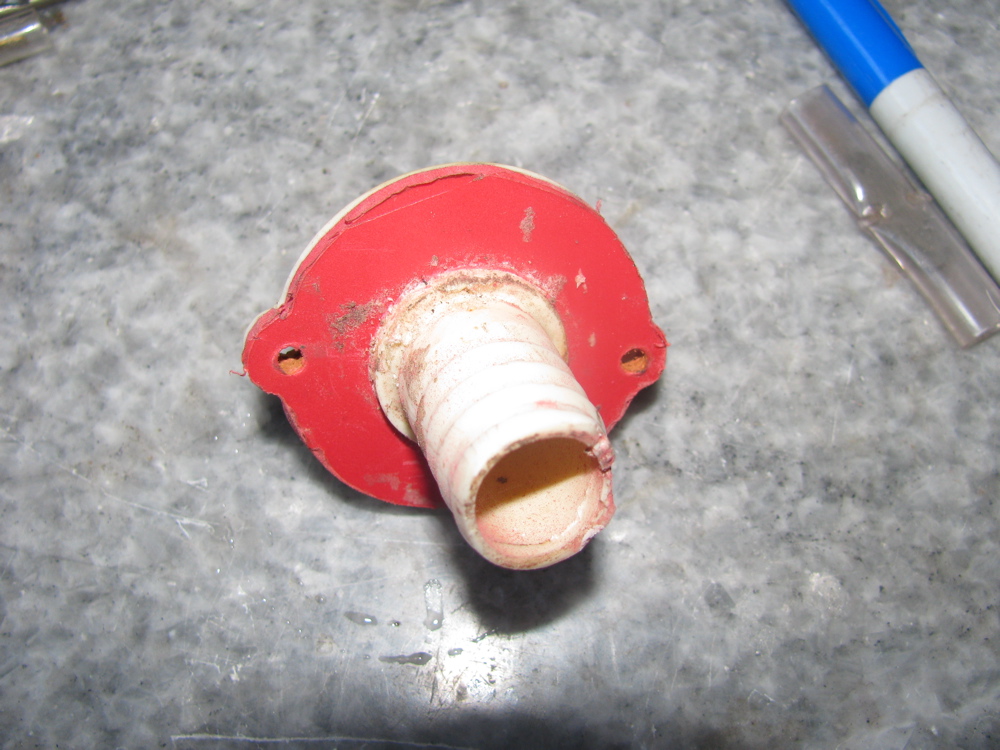
Not much progress in the last couple of days. A new rear windscreen washer pump was bought from dealer (best price, 20 bucks, had the option of $120 original from dealer, or a rather suspicious “trico” brand one from local parts supplier). I removed the old sink drain bulkhead fitting, you can see how I repaired it years ago with some red plastic. I looked for a stainless fitting to replace it with, but could not find one.
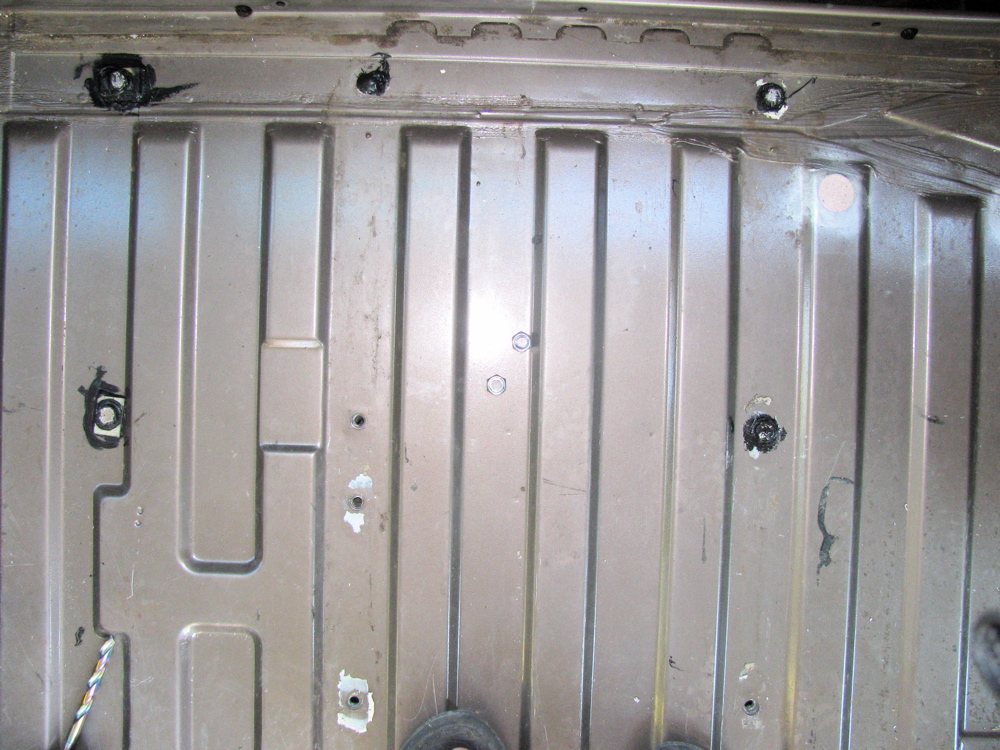
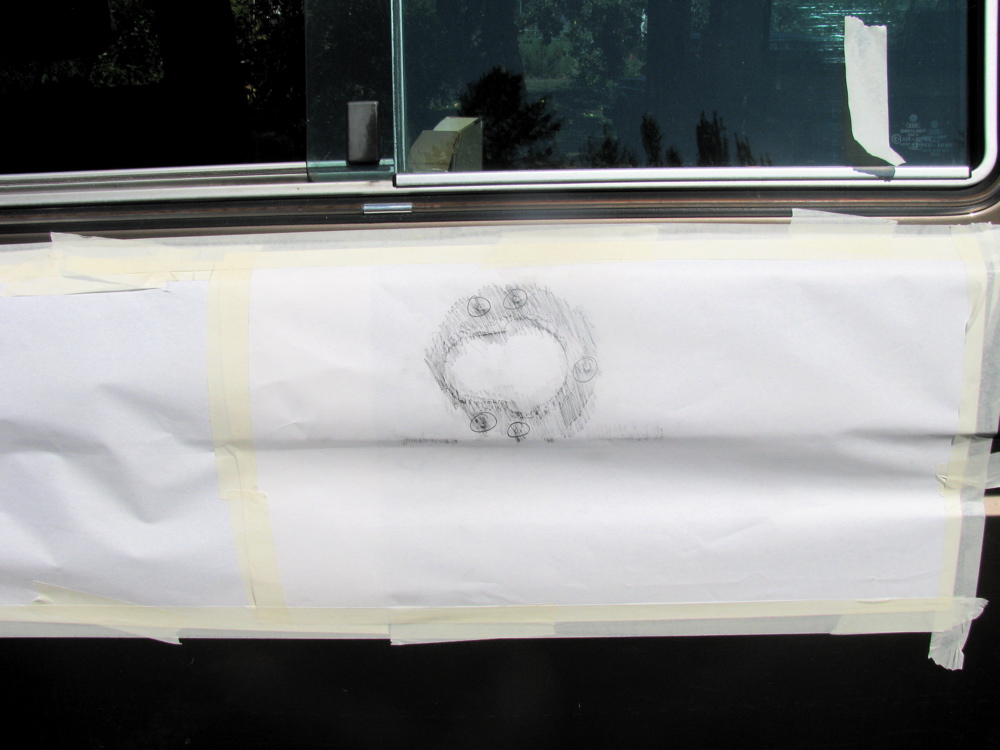
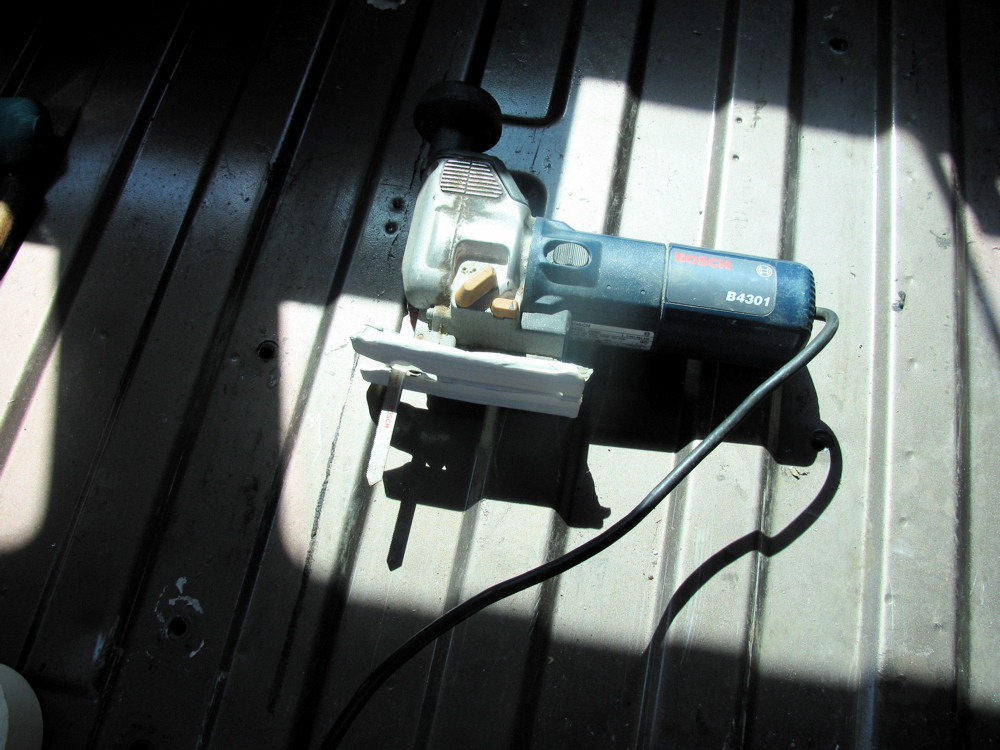
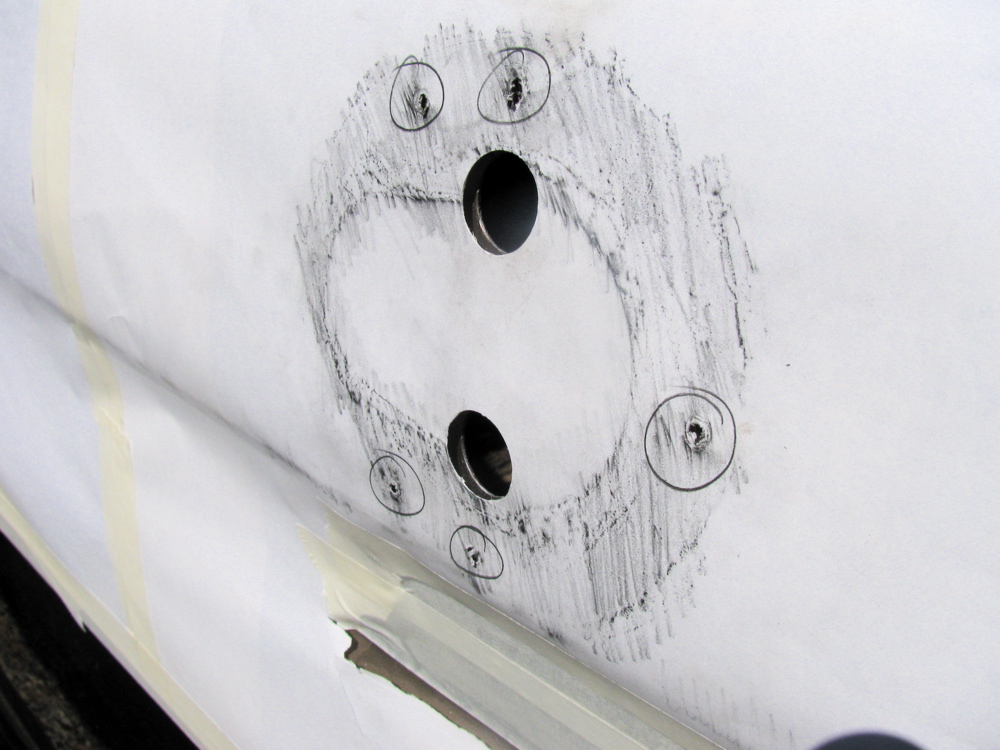
Also, I pulled all the cabinets and drilled holes for the rear most 2 attachment points for propane tank. The forward 2 points use the existing welded nuts for the seat tracks, but new ones had to be drilled, metal “washers” installed and the bolt held in place by nylock nut underneath. Silicon caulk applied liberally, and all 4 bolts stainless steel. The fridge vent hole was cut. I used paper to make a “rubbing” of the shape and location of hole on my Westy, and taped the paper to the syncro and first drilled the screw holes, then used punches to make the “ear” shaped curves and finally a saw for the rest. I taped the base of the saw to insure no scratches on van’s side.
I also put in a second battery and automatic charge relay. The install is preliminary, nowhere near picture worthy yet.
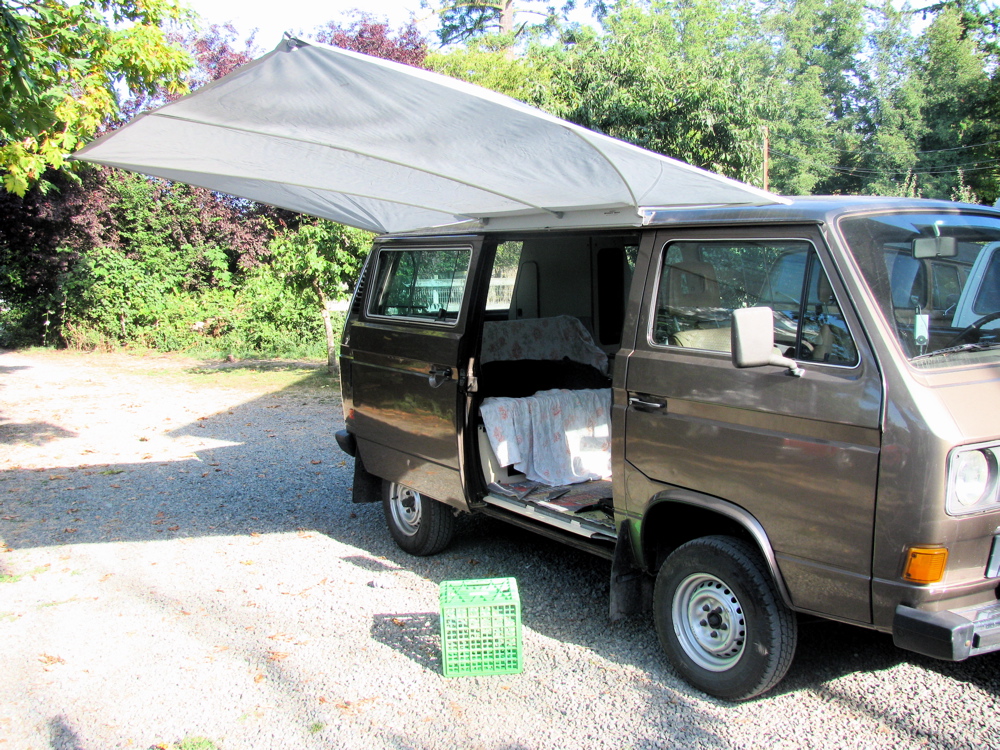
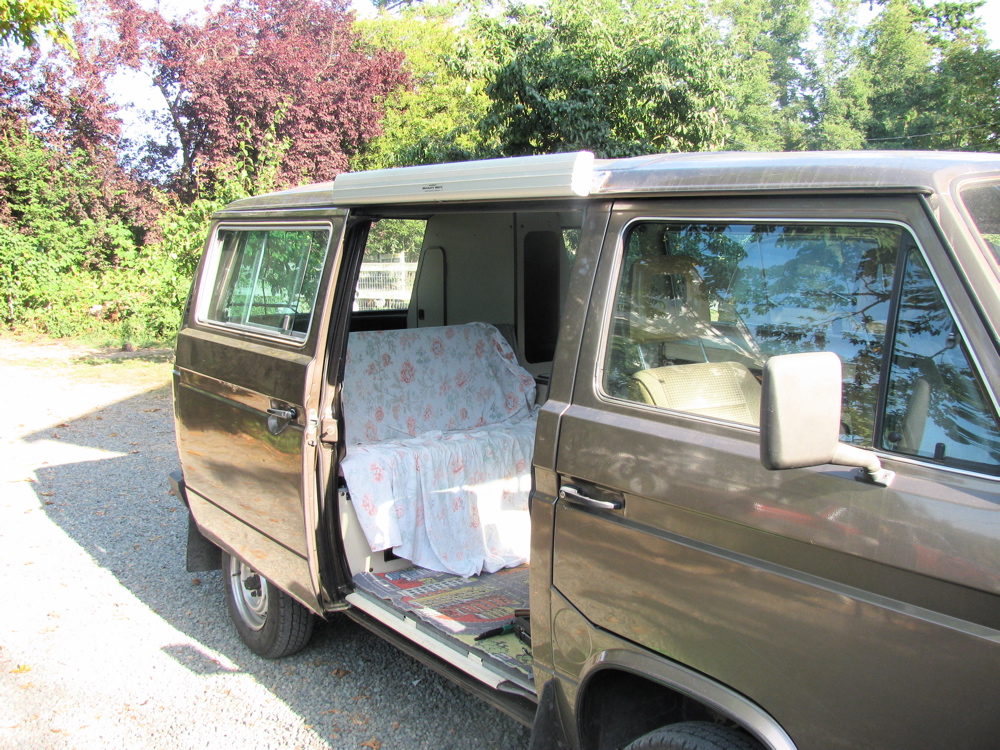
Finally, today I installed my “Shady Boy” awning. I really like this awning, lightweight, simple, and it works. Picture show it deployed without guy lines or down draught poles.


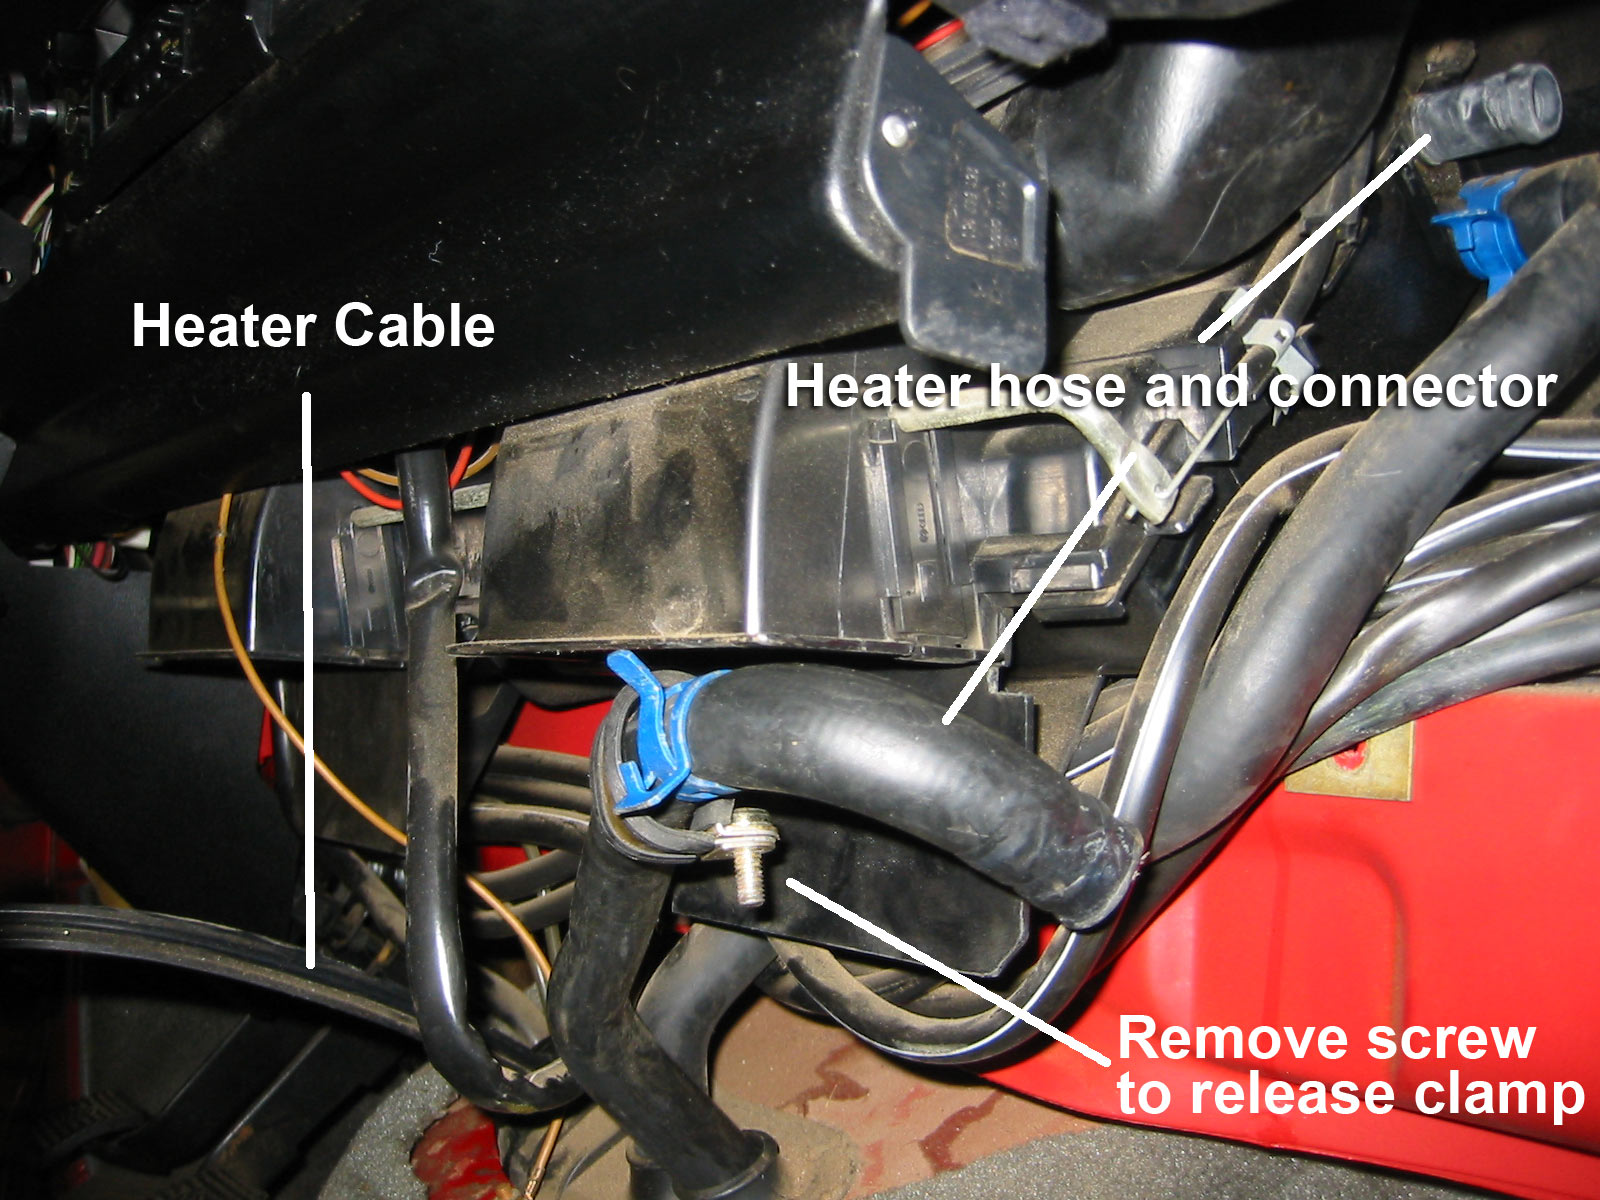
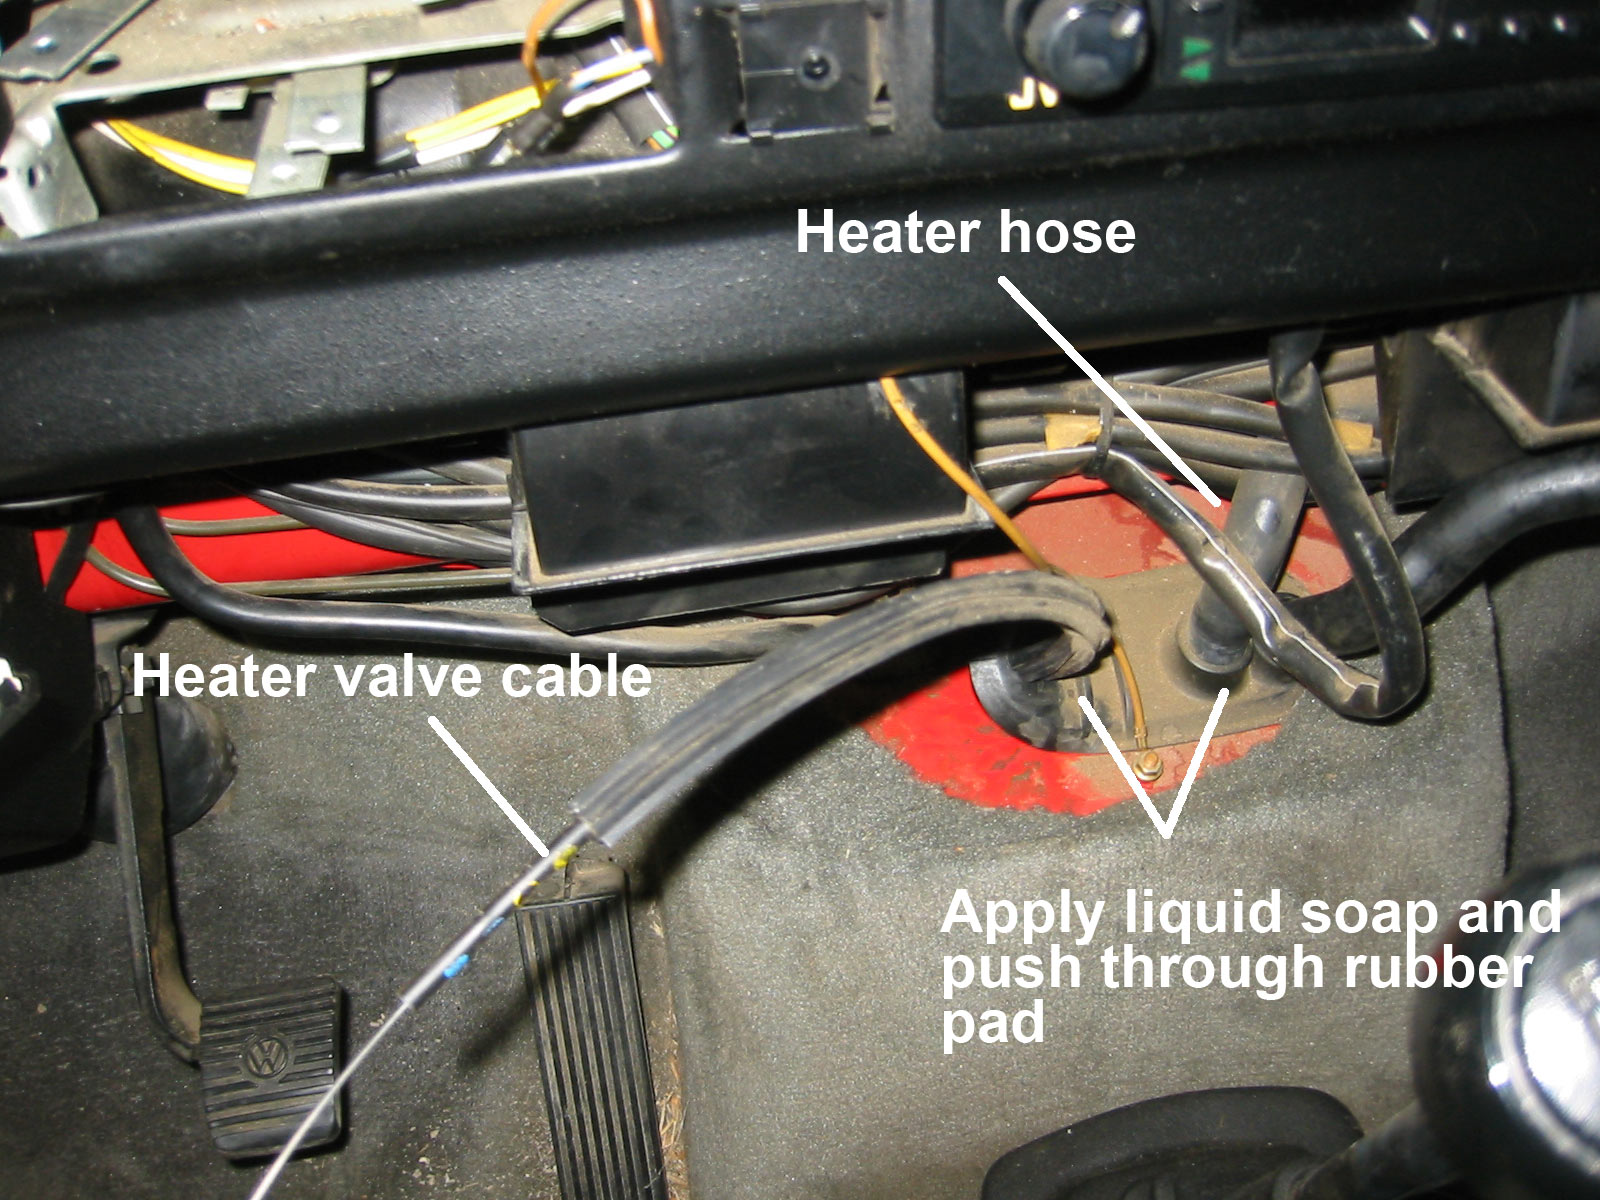
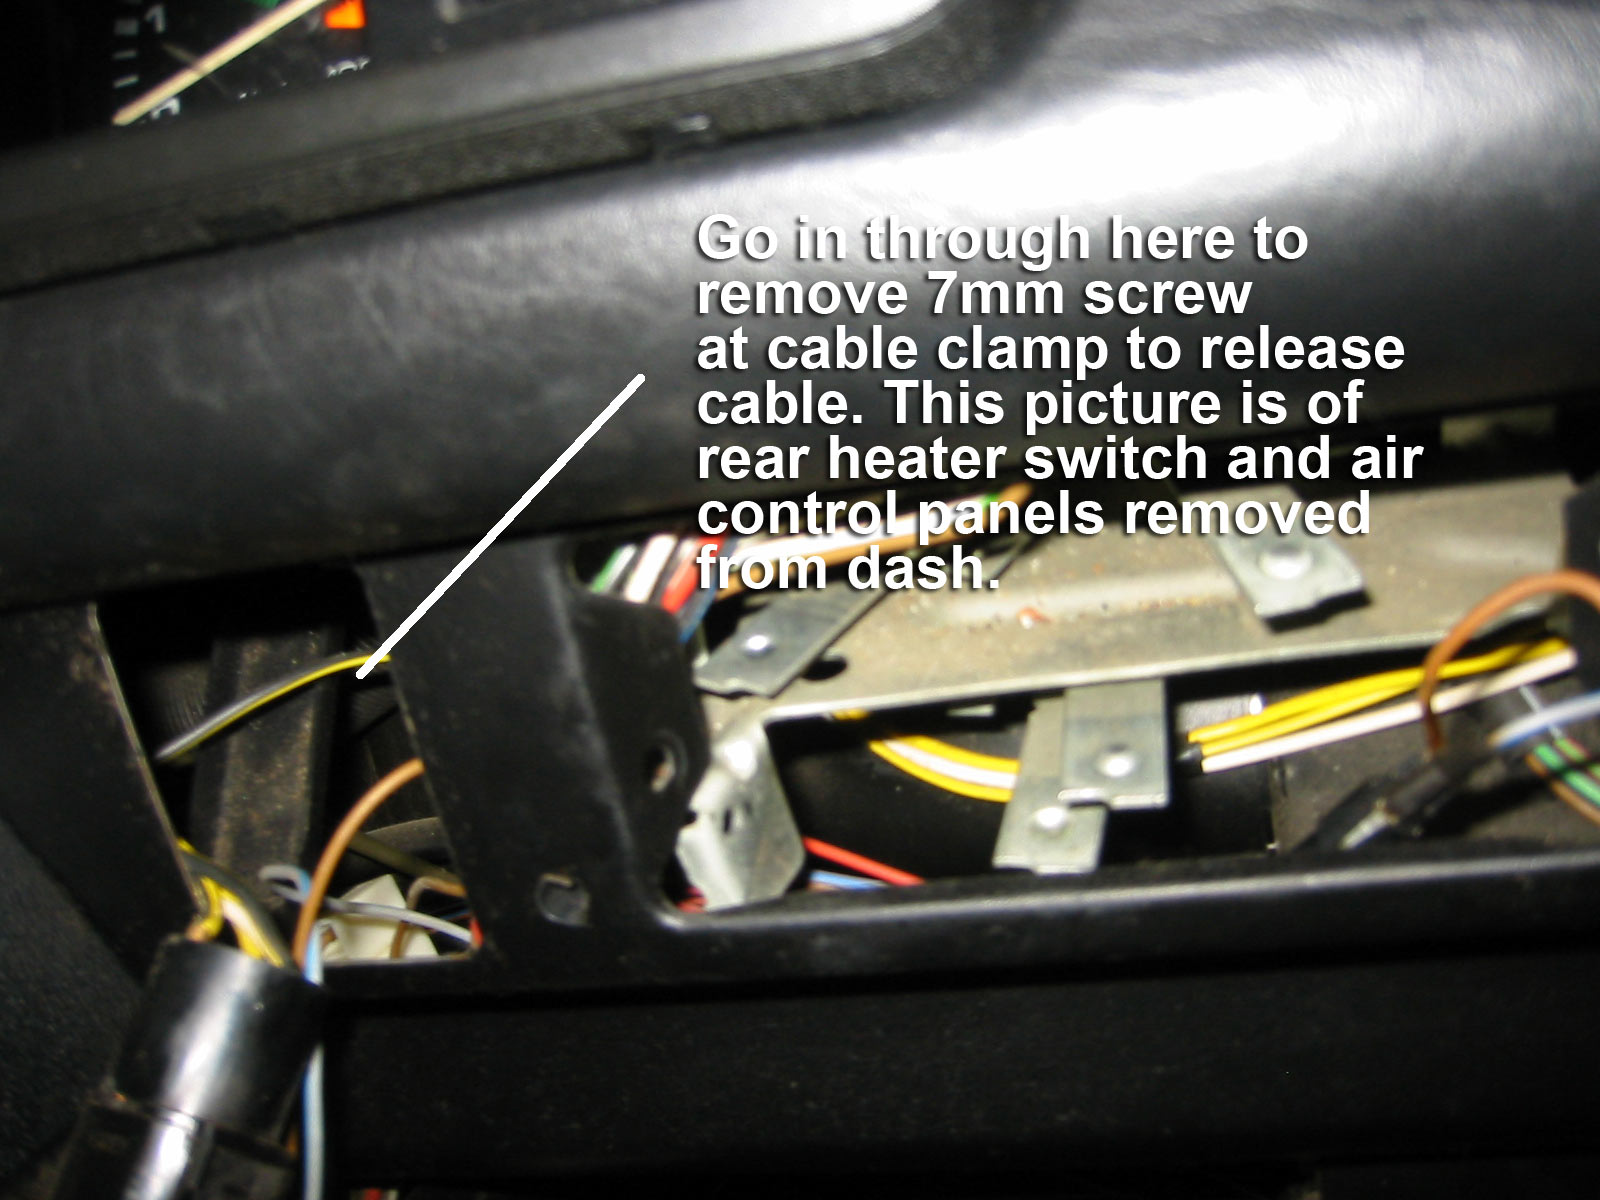
Vanagon heater valve replacement
Posted by albell in vanagon, vanagon mods on August 19, 2010
Jim’s annotated photos.
’83 Vanagon diesel dipstick mod.
Posted by albell in vanagon, vanagon mods on August 19, 2010
Jim writes:
This might be of interest to anyone wanting to use an 82 block with a later Model vanagon, or for anyone wanting to get away from the stick-in-the filler tube setup.
A few weeks back I wrote that I had carefully studied and measured the dipstick tube on my vanagon-specific NA diesel and was trying to make another one out of brake line for the 82 vanagon-specific block I was building.
What makes the blocks specific to the years is the treatment of the “dipstick” hole in the side of the block. With the 82 block, the hole is plugged with an aluminum piece, and the dipstick assembly is part of the oil filler tube.
I was going to use the dipstick tube out of the original 83 engine after knocking the aluminum plug out of the 82, but upon careful inspection, it isn’t that simple.
The machining in both holes is different. The 83 has a larger top part—the holes are step- drilled so that the bulge in the dipstick tube will seat at the step, assuring that the marks on the dipstick itself are the correct distance from the bottom of the pan and thereforeread accurately.
The bulge in the dipstick tube on the 83 will not even fit into the 82 hole at all without grinding it down, which would thin the tube walls, making it weak and ruining for further use in an 83.
So here’s what I did:
Start with a 7.5 mm steel brake line 36 inches long, and while you’re buying it get a brass compression fitting that just barely fits over it. They make one that’s perfect, you just have to try a couple of sizes to find it.
Cut off the flanges on both ends of the tube. slide the compression fitting over one end and touch a grinder with the fitting so that it grinds concentrically as the fitting is spinning on the tube. It doesn’t take much, you want a nice fit so be careful
Push the fitting up from what will be the bottom of the tube so that the bottom of the ferrule is 30mm (7 and 5/8 inches) from the bottom. This has to be exact. Now mark the top and bottom position of the fitting and use a small file to clean the metal of the tube where it will sit. Now solder it in place.
Slip a coil spring type pipe bender over the tube and bend it to shape by hand (I think I’ve already posted a picture of the proper bend photographed against a 1 inch grid for reference). The curve should be smooth, but it doesn’t have to be particularly faithful to the original for the setup to work. What DOES have to be accurate is the distance of the compression fitting from the bottom of the tube, and the length of the tube overall.
Go to a junkyard and get any VW gas or diesel dipstick where the orange plastic piece snaps over the end of the tube. Unsnap it and throw away the tube, you are going to put the plastic piece on the end of the tube after bending the pipe, and cut the tube several times until the dipstick (dealer item if you don’t have one) protrudes from the end of the tube exactly two millimeters.
Once done, drop this into the dipstick hole in your block and seal with black permatex. Behind the alternator, under the nut, drill and trim a hadware store angle bracket to fit under the nut. I bent the top, flat part of this to conform to the roundness of the tube and secured the tube to the bracket with a hose clamp.
After putting 3.5 quarts of oil in the car, the dipstick shows the level exactly halfway between the marks.

adding middle seat rails to a Westy
Posted by albell in vanagon, vanagon mods on August 19, 2010
Jim writes:
How to install middle seat rails in a westy
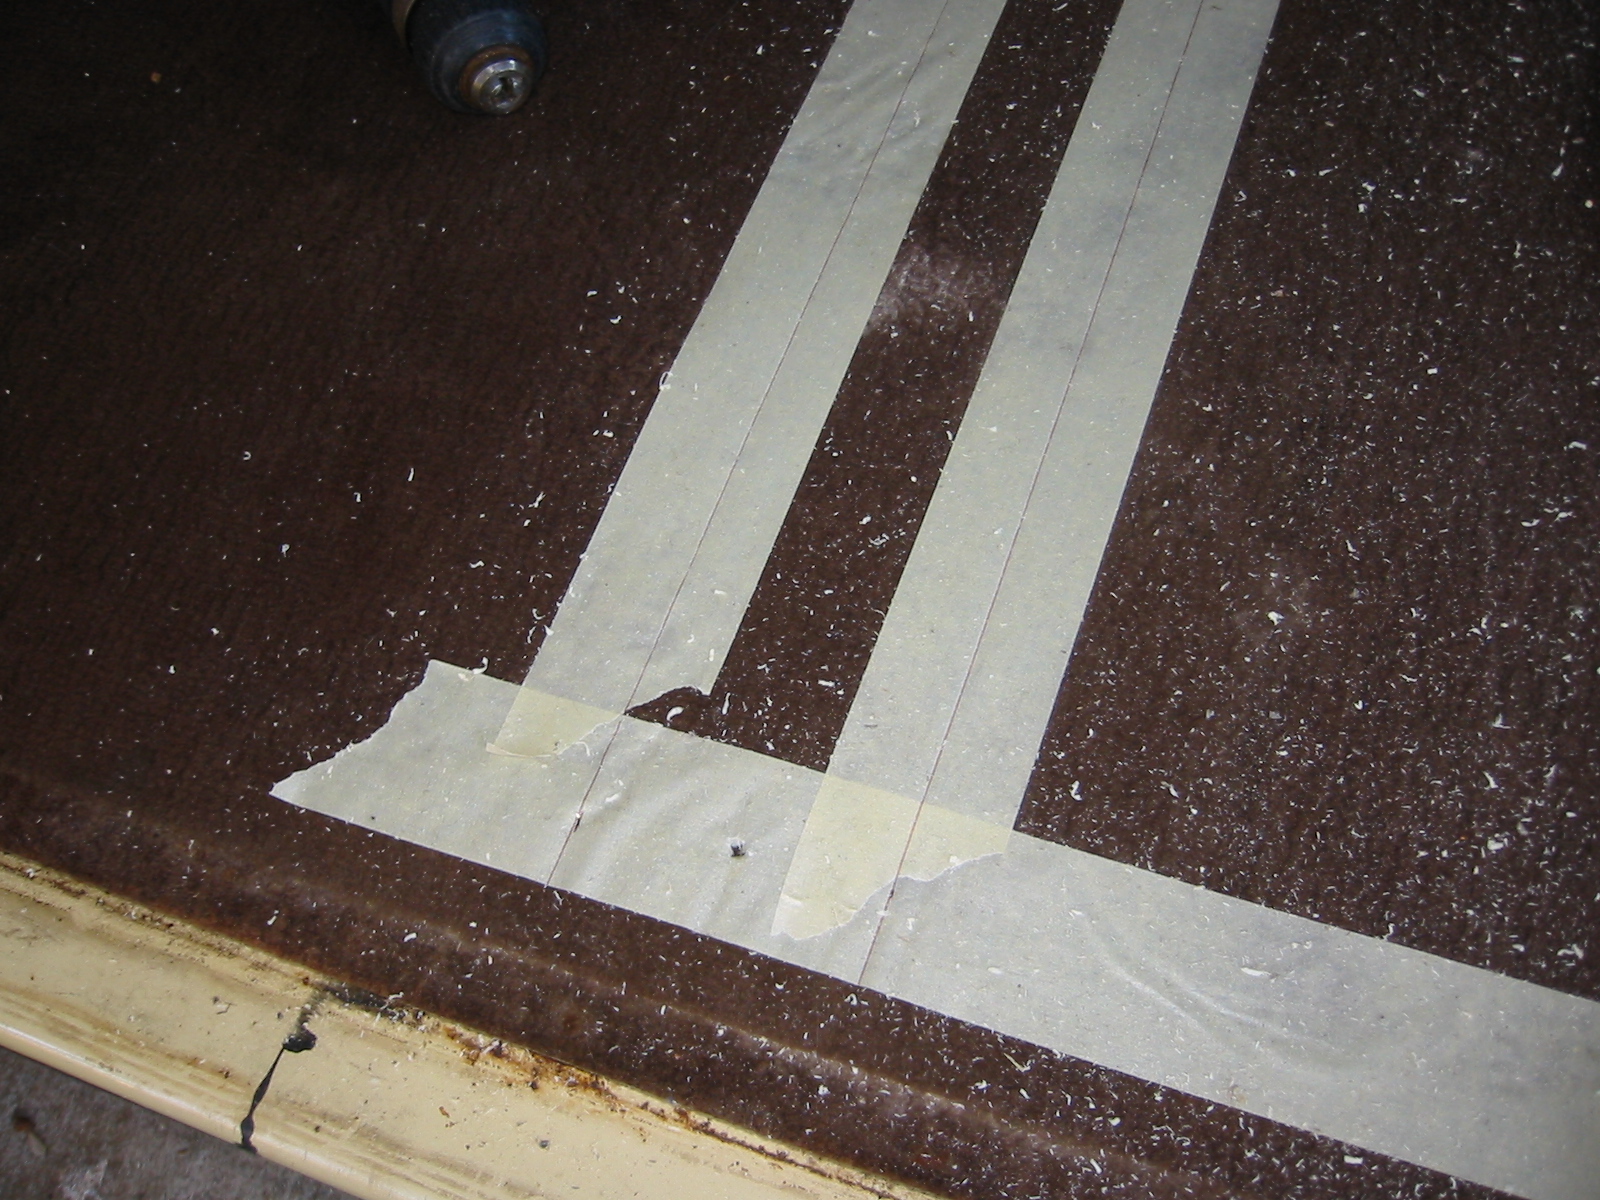
You’ll need a way to get under the car, a circular saw, the usual hand tools, a set of seat tracks and the fasteners for those tracks, a marker, a tape measure and a straight edge and some 2″ wide painter’s tape. The tape will allow you to mark accurately for the cuts, and will help the carpet cut cleanly. You will need a very long 3/16th (approximately, it just has to fit through the center of a 13mm bolt hole–that’s a head size of 13mm, not shaft diameter) drill bit, about a foot long I believe. You will use the bit to drill up through the bolt holes in the bottom of the van to locate the center of the pieces you are going to remove. It’s tight up against body crossrails, and the drill body will interfere with these if you don’t have a really long bit.
When the instructions refer to bolt holes in the floor, realize that every vanagon ever made, as far as I know, has the bolts for this welded into the metal of the floor. The trick is to remove two sections of wood that cover the holes in such a way that when the sliding seat trays are dropped in, their holes align exactly with the fastener holes. It isn’t difficult if you can mark and measure carefully.
First pull out the fridge unit so you have access to the whole width of the floor board. Take off the front (door side) trim.
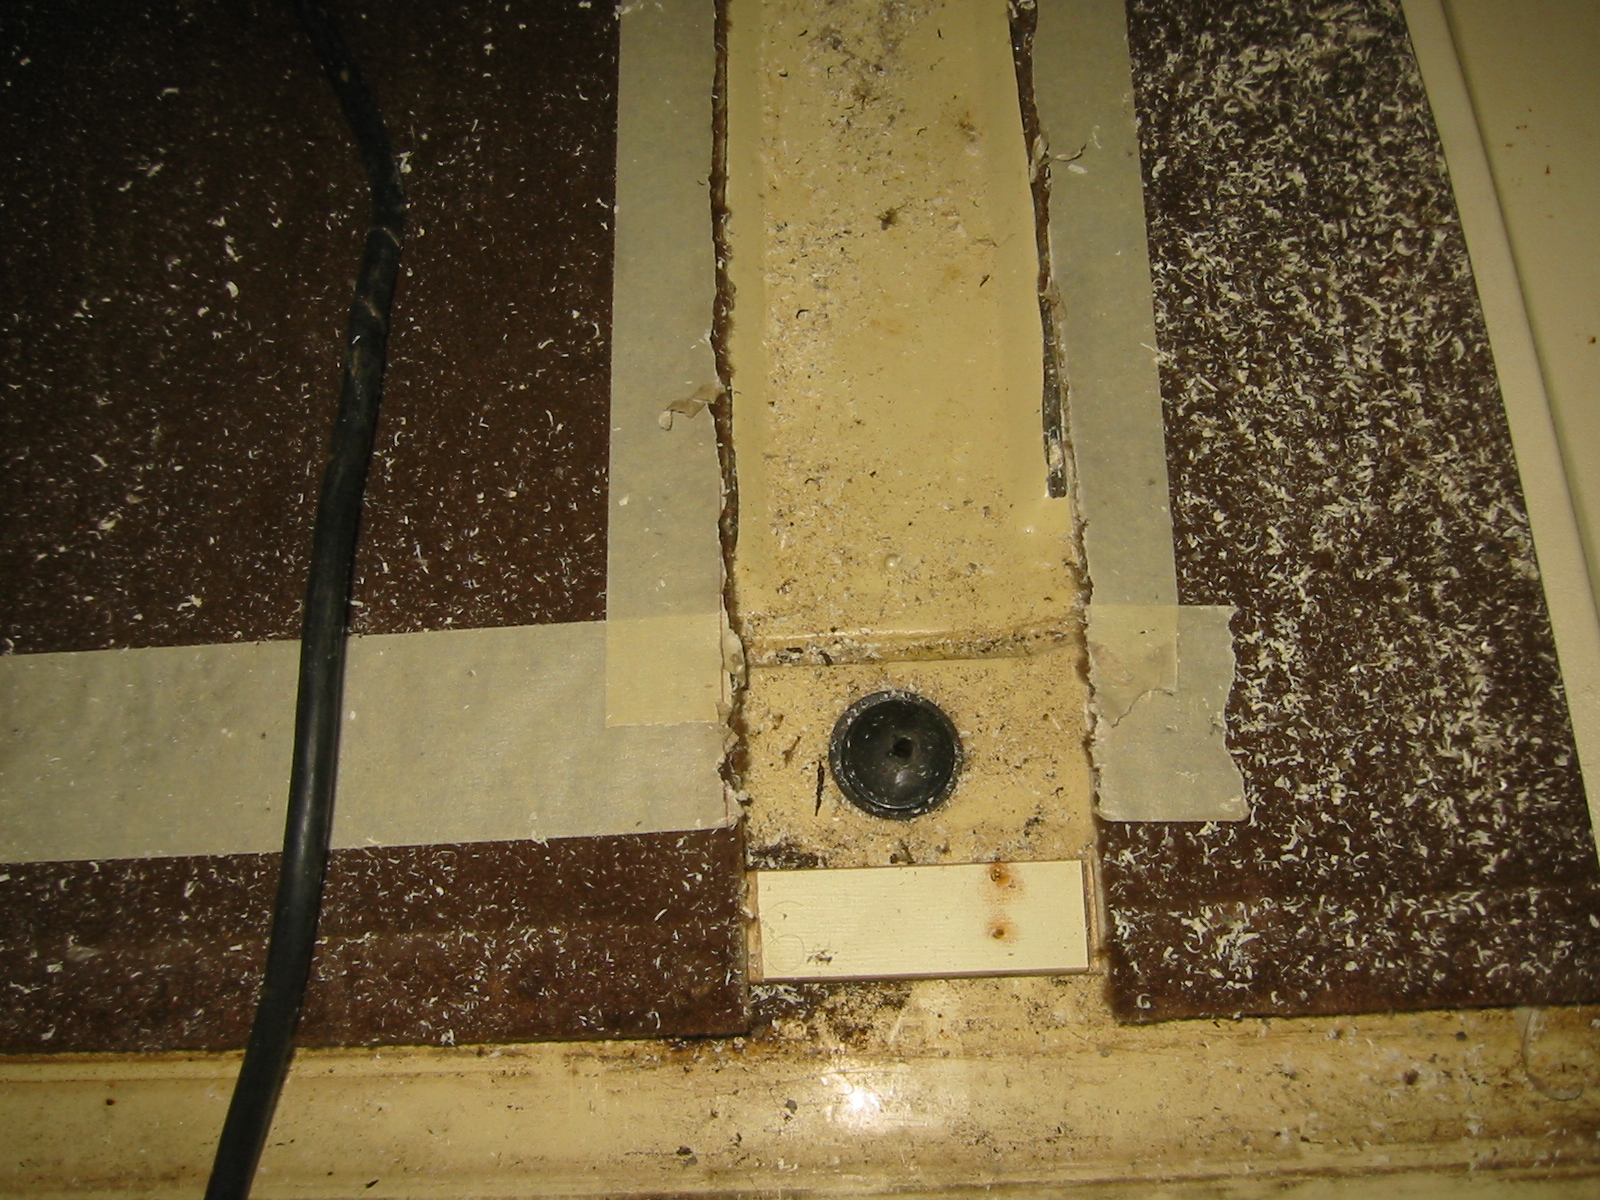
Go underneath with the long drill and locate the fitting welded into the floor where the floor track will be. This will be obvious as there will be two rows of them across the car in about the middle of the rear area. Once you have drilled up through the two fasteners near the door, measure over the width of the floorboards and then go below to locate the corresponding pair. You don’t want to go all the way to the driver’s wall because there’s no point in removing the plugs. You are not going to use them because the seat rail won’t reach them.Start at the ones just inside the door and drill up through the floorboard. You are drilling through a plastic plug. After you get the floorboard strips removed, you can remove all of the plastic plugs from the top with with a phillips head screwdriver. But, until you can remove the wood flooring, you must very carefully mark where you are going to cut, and for now must be content with drilling as small a hole through them as is feasible. You don’t want to break the drill bit off, but you don’t want to big a drill either. Just something large enough to find the hole in the carpet to use as a point of measurement. If you drill too large a hole in the plastic plug, you will just spin the plastic plug and it will not want to come out. You will also have drilled out the molded phillips head pattern in the top. So, use as small a drill as you can.
Lay down a strip of tape over all four holes, running fore and aft, each about ten inches long. Punch down over the hole to locate it in the tape. This will create your four reference points. Now run masking tape across the floor of the van between the marks. Now measure the width of the seat rail tray where it drops into the slot (not at the edges of the flanges). Look at the end and you will see this for yourself. The flanges down both edges of each piece are meant to cover the edge of the channel and embed in the carpet.
Measure this distance, divide it by two, and mark this distance out from your reference holes. Connect the marks across the width of the floor with a line from the straight edge. The material between these lines is what you will saw away.
Use the open area between the floorboard and the wall to set the depth of the circular saw to saw through the bottom of the wood without touching the metal and ruining the blade. It can be done. If you are worried about this, leave yourself a 64th or so and get the last with a knife blade. Lift the strips out and you will see all the plastic plugs that can now be removed.
Simply screw in all the track pieces–they will only go in one way–and replace the stove and fridge. Slide the seat in for reference before you do final tightening on the rails.

Replacing power window motor
Jim writes:
Replacing power window motors and regulators in a Vanagon
Once you’ve done this job once or twice, you can get in an out in less than an hour. It’s really not all that hard a job, just that when you don’t know how to twist the motor on the cables to get the assembly to slip out, you end up doing a lot of unneccessary tugging and pulling and scraping. The longer you keep a vanagon, the faster you get at this.
Instead of using a clamp to hold the window up, you might try cutting a couple of small wooden wedges to jam the window to the rubber so it won’t drop.
Here’s the sequence of events, best I can remember, The only tools you’ll need besides the wedges are a phillips head screwdriver, a small knife to pry with, a 10mm socket and a 10mm combination wrench. Maybe something else, but basically that’s it. When you get the motor out, you’ll need a good sized soldering iron to remove the short harness and connectors from the old motor and put them on the new motor. Make a sketch of how the wires connect to the weird little terminals on the motor or the window might work in reverse. Ask me how I know.
First, take the small bladed knife and pop the end covers out of the pull handle. You’ll see what I mean if you look closely. Pry out the molded-in end covers, working on the “inside” end closer to the center of the handle, as the outside edge (adjacent to the upholstered panel) is a plastic hinge. When pried open, the screws are revealed. Remove them and keep them organized, they are of two different sizes.
Next go after the door latch plate. Pull up the handle and pry out the plastic insert from the little slot at the front. This will reveal a phillips head screw, remove this and lay the parts aside.
Next comes the vent in the lower rear corner of the panel. There are two screws facing you when you look at the panel.
Now the panel will pop off with a tape-covered screwdriver. Try to find a fastener and pry near it rather than in the middle between two fasteners. When you can get your hand in, continue around until the panel is loose.
Carefully remove the plastic wind seal, you will either need to reattach or replace it with contact cement or tape.
If you have speakers, make a note of how they are connected and disconnect them.
Unplug the window switch from the main harness and the motor. Cut any cable ties you find fastening the motor.
The window needs to be all the way up to do the next steps easily. Now is the time to take a look as to how they will be accomplished.
The window glass sits in a metal rail that is bolted to a mechanism that is part of the window raiser. This part is the same for crank-up or electric windows. The trouble is that you will need to get to the two 10mm bolts that fasten the window to the raiser. If the window is not all the way up, this may be your biggest challenge but since mine isn’t apart, I cant’ describe the situtation further. But this is what you have to do next.
Following that, raise the now-loose window to the top and jam or clamp it to keep it out of the way. You will see a vertical galvanized metal track that the raiser slides in. If I recall correctly, a bolt in the side near the top and a bolt in the bottom of the door–yes, you have to look underneath the edge of the door–hold this track in. Remove these, don’t confuse the bolts with the two shorter ones that hold the window to the raiser.
The vertical track is loose, but it is connected to the motor by two cables in housings. If the housings are broken, bent or rusted, go ahead and order them too right now.
Now all that needs to be done is to remove the three 10mm bolts that hold the motor in.
Once that is done, the motor can be twisted with one hand about 90 degrees to make the cables align together as the other hand moves the vertical track, bottom first, toward the motor.
If you’ve done your twisting right, the whole thing will slide out the motor hole. When the motor is released, the whole thing will spring back to its arrangement in the car.
Two 13mm bolts hold the motor on to the mechanism. As I said, you may have to transfer a plastic mounting collar and a short piece of harness to the new motor, but other than that, it all twists up and slides right back in the way it came out.
