Vanagon – GoWesty Wasserstopper rain fly hook issue resolved
Posted by albell in vanagon, vanagon mods on June 8, 2012
I received replacement hooks from GoWesty for the Wasserstopper rain fly. I had complained that original hooks held on to the gutter poorly. Good customer service!
The replacements do hook on to the rain gutter much more securely, but I haven’t had the chance to fully test with them attached to fly.
My best pic of original hooks, they end up hanging on by fingernails.

Replacement hook.


Vanagon – that transmission noise fixed?
Posted by albell in syncro, syncro specific repairs, vanagon on June 7, 2012
I’m just back from test drive after installing my re-bushed propshaft and I can report that the noise I was hearing, and that I had thought was transmission noise, has gone! I’m chuffed!
But to ward off the Evil Eye, I’ll not claim victory.

Vanagon – making new syncro propshaft internal bushings – Part 2
Posted by albell in syncro, syncro specific repairs, vanagon on June 6, 2012
I decided to make a split bushing for the internal location. I first turned down some Delrin to final inner diameter (23 mm to match the turned down yoke shaft), then mounted it on a mandrel to turn down OD to 28 mm (was OD of upper bushing and I guessed that the inner one was the same).


I kept the bushing on the mandrel and clamped it in my wee milling head. I also used a small C-clamp on the bushing to stop it from popping off during slot cutting. I used a 1/8″ end mill to cut the slot, made the slot 6.8 mm wide (chord length) which I estimated to be slightly more than needed.

Finished split bushing.

And as I tried to install it, I realized I had no way of holding it compressed to get into the narrow bore, no grip after it goes into outer bushing area. Oh, btw, this is how the bushing should appear when it is finally in place at the bottom of the housing.

I had an idea, some stainless shim stock to act like a funnel.

That worked and I was able to tap the bushing home. You can make it out, down at the bottom.

The yoke shaft would not fit in, I had to chamfer the end of the shaft a little more, and polish the end. But I finally was able to tap the shaft in and it is nice and snug. Quite snug actually, it takes about 20 Nm to rotate the yoke, but no radial movement at all. Oh and another thing, I removed that flange on the upper bushing, didn’t make any sense. I’m feeling quite chuffed in managing to get some sort of bushing replacement made. I hope they will wear well.

Vanagon – making new syncro propshaft internal bushings – Part one
Posted by albell in syncro specific repairs, vanagon, vanagon mods on June 6, 2012
I have my propshaft off while I try and track down my transmission noise (see previous post). Some helpful syncro owners over on the IG16 forum suggested that I look at my propshaft as the source of the noise. Well why not eh?
This is a story of mistakes and ignorance. When I compared my two propshafts in this post, I mistakenly concluded that one shaft had thinner walled bushings than the other. Well it did look that way and both assemblies felt equally tight – ie acceptable fit of shaft into bushings. But I think I must have been wrong for when I examined the “thin walled bushing” propshaft (the one I just removed from van), I could detect play in the bushings. The rubber giubo and the internal O-ring have been removed and dial indicator set up to measure movement as I lifted U-joint yoke up (trying not to rotate joint as I did it).
Here is diagram of that end of the propshaft just to refresh memories.

And my measurement set-up.

And short movie showing movement.
I admit to this being not an extremely accurate way of measuring the radial play, was hard to just move the yoke up and down and not rotate it. But I could feel the play and it was more than I think it should be.
So it comes down to replacing the bushings. The outer one would be relatively easy, but the inner one is a different story. And I think the inner one is important to be snug as it is at the end of the shaft and would limit shaft movement more than the outer bushing. That was a convoluted sentence, I hope you get the idea.
On the Yahoo Vanagon Syncro mailing list, the bushings have been discussed a few times. One list member wrote (a year ago?) that the inner bearing could not be replaced as it sits in a recess in the tube and was probably installed before that end was welded onto the propshaft. The drawing at top of this post does not really show the recess (drawing too small), and I had forgotten all about it.
Foolhardy is a useful adverb to use whenever I get it into my head to fix something. I kid myself that I know what I am doing, ha!
I pondered how to remove the inner bushing and came up with chiseling it out. I have this neat little 1/4″ chisel that looked like it would work.


And off I went, chiseling a groove down the inner bushing. It took a couple of groove before I could break out the bushing. I found it difficult to get a good pic of what was going on deep in there, but in this pic you can see a section of the bushing folded inwards. Sharp eyed readers will be able to see that there is a lip in the tube which locates the bushing. Bushing was pressed in from other side, then that end cap inserted (portion of bushing is obscuring the hole in the center of that end cap), and then assembly welded to propshaft. Even sharper eyed readers will notice another, smaller lip about halfway between inner and outer bushings. I overlooked this, I have no excuses why and it bit me on the ass later on.

Bits and pieces of the bushing. After I knocked the fragments out I could see the aforementioned lip. I didn’t feel very happy at that point.

I really had no choice but to go on and cut out the outer bushing. This pic shows how well the chisel cuts the bushing and the underlying steel – doh!

Note the fretting or corrosion on the surface of the bushing. Here is a close up of a fragment, looks a bit like sintered bronze, like an “Oilite” plain bearing.

So alright then, what to do about the inner bushing problem? I wasn’t about to cut the end off the propshaft. I settled on the idea of turning down the diameter of the end of shaft a tad, to about 23 mm from 25 mm (diameter at end where shaft inserts into bushing) and making that reduced diameter area about twice as long as the original bearing surface. I reasoned that a Delrin bushing could be made to fit into tube, be supported by the tube and extending on unsupported over the original bushing spot. Jeez, I need a diagram to explain.
Here is a cartoon cross-section of the end of propshaft that houses the bushings.

And with shaft in place.

Modified shaft.

And assembled with new bushings.

The drawings are not to scale and are meant just as sketches to get my idea across. Important thing to note is the new internal bushing will come further up the shaft, and be unsupported in old bushing area.
Off to the lathe!
Mounted yoke shaft between centers, was lucky and set up resulted in less than 0.001″ run out at end (inner bushing area).

Then turned the end down to 23.00 mm. I found it hard to get a nice surface finish even with very light cuts. I was using a round nosed HSS tool bit (has given me nice finish on other jobs), but this time I had problems. So, a less than perfect finish.

Chamfered the end and gave it a quick polish. I think it will be good enough.

Next step is to make the Delrin bushings. Whoa, slow down sonny! Have another look inside the propshaft, it is not quite the same as you describe in your sketches. Go on, look at that picture you took of the bore. What? No! Really? , let me… well gosh darn it.

I missed this before I thoroughly cleaned out the bore – the bore is machined out slightly for a little way, above the machined out area for the internal bushing. Illustrated, but exaggerated and not to scale, the slightly bored out region is not as large a diameter as illustrated, but it still screws things up for me.

So my original plan of a longer internal bushing will not work, see?

I decided to make the outer bushing, classic avoidance behaviour. I actually made 2 outer bushings, first one really as a practice piece, second one with a lip. I also went ahead and, again for practice, made the now discarded inner bushing concept.
Delrin rod (1.5″ diameter but turned down a tad before this shot) and boring out to fit yoke shaft. Gotta love that chipped cutter I am using, funny thing is that it does a nice job on this plastic.

Bored out to size, 25.00 mm.

I made a quick and dirty mandrel to mount bushing so that the outside diameter could be turned to size.

Then to get the bushing off the mandrel, I bored out the end of the mandrel.

To make the “practice” inner bushing, I first bored out Delrin to size, parted off, then mounted oversized bushing to yoke shaft to machine down to size. Note the outer bearing installed first. Makes you wonder if I hadn’t realized the issue with the propshaft bore yet, doesn’t it?


As I mentioned before, I went on to make another outer bushing and gave up for the evening.

Back to the problem of, in essence, installing a bushing from the wrong end. How about making the bushing the squeezing it to deform enough to be pushed in the bore and end up in position, then use a tool to form it back into shape, against wall of bore? Nope, daft. Well how about taking propshaft to machinist to bore out? Well, that might be the fall back solution. Ok, how about a split bushing? Would that allow the bushing OD to be reduced enough to be pushed in and then expand in correct place? Mmm, maybe, worth a try?
Something like the Iglide Clip2 plastic bushing (but without the end flange)?

The nominal diameter of the bore is 26 mm, and where the internal bushing is located, 28 mm. Circumference of bushing should be (pi X 28) 87.96 mm, and to fit in through 26 mm bore, 81.68 mm. So slot in bushing needs to be at least (87.96 – 81.68) 6.28 mm. Seems like a large slot to be cut. One thing in my favour is that the yoke shaft does not fully rotate in the bushing, just a few degrees allowed by the flex in the Giubo. A diagonal slot as shown in the Iglide bushing above would provide better support of the shaft so it is worth a try cutting the slot that way.
This post is getting rather long and rambling and I have other work to do, I’ll try making the split bushing later and report back in another blog entry. Feel free to give me a hard time in the comments section, I deserve it 🙂
Vanagon – transmission noise hunt
Posted by albell in syncro, syncro specific repairs on June 1, 2012
For the last couple of months I have been noticing a slight whine/howl when driving no load/coasting, in 3rd/4th or neutral, clutch in or out. Only in a narrow speed band, 50 – 60 kph. I’ve discounted rear wheel bearings and I resolved myself to having trans. taken apart and examined. So I started the pull process, first with skid bars and propshaft. After they were out I decided to drive van and surprisingly the noise was gone. So what does this mean? Maybe front diff is making the noise or is the removal of propshaft affecting whatever is noisy in transmission?
I pulled the front diff and took the case apart, 3 sections. Front cover and rear section. Mid section has R&P and I set that up to measure lash on the R&P.
Rear section removed (note spacer not on top of VC, I took it off before pic, sorry)

Front cover removed (cover was cleaned before shot).

I clamped the input shaft so it wouldn’t move.

And then set up dial indicator on outer part of ring gear tooth.

Close up.

I wiggled ring gear back and forth and measured lash. Was in spec (0.004 – 0.010″).

And teeth looked ok. Mind you Daryl at AA Transaxle says ring teeth don’t usually show wear, its the pinion teeth that do. Hard to really see them when in case.

During removal I had to cut the vent line as I forgot to remove banjo bolt securing it to case (did same thing last time I removed diff, doh). So I made up a nipple and added a section of vinyl tubing.

So where does that leave me? Daryl is suggesting it is the pinion bearing in the transmission and I can still drive it for a while. I’m not clear on how the propshaft affects that bearing but I don’t feel quite as pressured to tear into, or have a skilled person tear into the transmission.
Addendum: Dirk over on the IG16 forum, wondered if the ring gears did actually show unusual wear. He pointed to lines parallel to the teeth. I don’t think that these marks are anything to worry about.


Vanagon – trying some things to make the GoWesty rainfly work a little better
Posted by albell in vanagon, vanagon mods on May 26, 2012
UPDATE – 29/05/2012 – I posted my attempts at fixing the gutter clip/angle/hook issue on the Samba and a member responded that there may have been a mistake made at Go Westy with wrong hooks being sent out. So I emailed Go Westy, outlining the issue and I got a quick response of new hooks to be sent out to me. I am impressed by this prompt customer service, well done Go Westy.
I spent a couple of hours playing around with the fly, wanting to fix- what I see as problems – the gutter angles/hooks and the front strap system. Previous post about fly here.
I’m just using what I had on hand, and this is only preliminary stuff.
I had some longer metal hold down hooks, I sewed some velcro on to them. These hooks have a more obtuse angle on them compared to the Go Westy ones. I also attached some webbing attached hooks and buckle for the front straps. I added some silicone tape wrap to those hooks.

The new angles are longer, so I stuck on some velcro to the clip itself to provide a bit more area of velcrotude.


The new angles/clips do seem to hold on firmer.

Where my ShadyBoy awning is, I left the stock hooks, they are fed up from below and the hook part can’t pass through the space. I was dumb not to see this way before, I said in my previous post about the fly that it was not possible to attach these hooks, doh.

The front strap mod is not so successful, but not completely ass.


An annoying curl in the material at the front.

Well, it is a start, I’ll be trying to get it a little better. I’m not happy with the front strap idea.
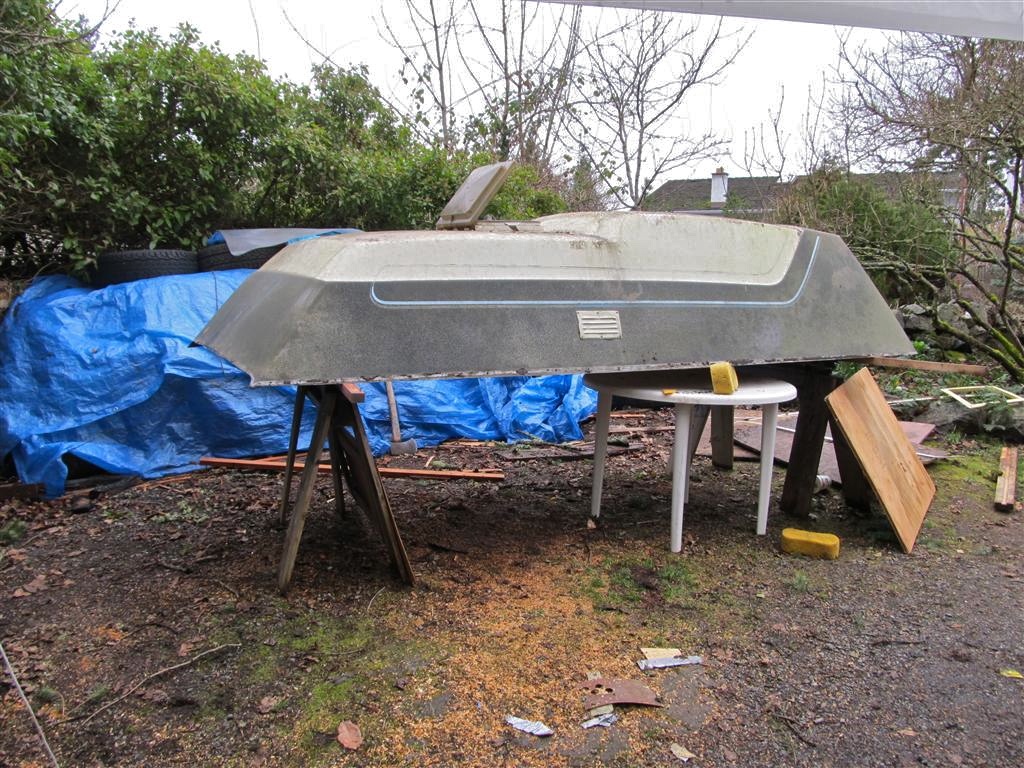
Workshop finds
I’ve been cleaning up my stepfather’s workshop and have come across a few interesting artifacts, here are two three to begin with. First is a keg of nails, flooring nails to be specific. Probably from the 40’s.


The other, a British pattern 1876 “Martini-Henry” socket bayonet. Story is that when my stepfather and his family moved into a larger house back in the ’20’s, his father (who was not at all a fan of militaria) threw out all the stuff the previous owner (and army colonel) had left in the attic. All that is except this bayonet which was used a a ground spike for the house electrics.


And finally, something a little younger. Over in one corner of the workshop was a wooden crate with a Woodwards (department store in BC and Alberta until early ’90’s) price tag of $129 . Turns out is was purchased in the ’70’s and had been sitting in the workshop, untouched, since then. We broke open the crate, and removed the rust preventing paper wrap and exposed a very nice vice. Paint job and machining on this vice is first class. We’re going to mount it up on the bench and my stepdad can finally have fun with it.


Simon’s hightop – installed and off on a trip
Weekend before last, the hightop was installed on Simon’s ’91 syncro westy. Late night and quickly thrown together video of install.
And then this last weekend he took it on a trip.


Inside is insulated and carpeted, but side cupboards and little details still need to be installed.


Big difference from the start.
Overnighter NW of Port Renfrew
We grabbed the chance to do a little exploring on the south end of the island (Vancouver Island), specifically just northwest of Port Renfrew. The area you get to if you hang a left instead of a right after the high bridge over the Gordon River.
Typical, secondary and not heavily used logging road.


Further on, around 680 meters elevation, some old growth but mostly second growth (guessing old growth cut in the 60’s-70’s, perhaps later). Lots of Yellow Cedar, one down across road but a section at end cut and easily moved to get past (yes, patch of snow there).


And found a nice viewpoint to camp.

Olympic Peninsula (USA) in the distance, Cape Flattery on extreme right.

Like a bad haircut, or having a hightop on the van, the campsite was fine looking out, not so bucolic looking in. Still, no one around and plenty of firewood (felt like a millionaire burning Yellow Cedar, the scent is divine).


Tired dogs.


A couple of little lakes close by, here is a glimpse of one.

The clouds and rain moved in next day.

The “Excelsior” proved its worth at breakfast time.

Typical view when rain comes, looking north east.

We spent the wet day exploring the roads a little, but the low cloud made it a silly exercise. couldn’t see much. Headed back home via long loop up via Gordon River watershed and Cowichan valley (some pics of Gordon River area in this post). All in all a great little trip.
Oh, forgot to include one of those “same place, different time” shots. Side road on Gordon Main (TR4 I think), again on slash, where my son and I camped overnight while exploring region last year.
Then:

And now:

Addendum: I was asked about pressure cooker beside “The Excelsior”. It is my EKCO model I use winter camping and in the van, had it for 30+ years. I bought it second hand and it seems the model at least, dates from the ’40’s. Found an ad at this site.

Vanagon – coolant temp sender wire repair and another broken hose
Posted by albell in syncro specific repairs, vanagon on April 24, 2012
Is it good or bad luck I am having?
About the same time I discovered that leaking coolant hose I mentioned in this post, I noticed that my coolant temp gauge was not working – no needle movement nor did the warning LED flash upon start-up. I had been mucking around with the cluster a fair bit and I thought that I had either broken the circuit foil or had a bad connection at T14. But examining the dash did not reveal any problems. I finally tracked it down to a bad connection at the female spade connection to the temp sender back on the thermostat housing. The insulation on the wire was very brittle for about 2″ up from the spade, and the connector itself felt a little limp on the wire. It has been worked on before, that is not a stock spade connector.

The copper was corroded, and you can see the discoloured insulation which pretty well corresponds to the brittle section.

I cut back the wire to where it was flexible and spliced in a new length, plus a new spade connector (section of plastic insulation was cut out to allow the spade to slip on the temp sender).

Here is the brilliant location of the temp sender, exposed to heat and road splash.

And the new connection made.

So after that I was mucking around looking at things in the engine compartment, engine running, when I pushed on the hose that runs from the upper coolant crossover tube to the narrow steel tube that runs around 3 sides of the engine compartment. The hose split and coolant rapidly spat out. Yes, that is steam in the picture.

Te previous owner had used fuel line hose, and it was hard and brittle.

I had some spare hose to make the repair, and I think my van is really trying to tell me to go over all of the hoses and replace. I got the message with the previous leak, but nothing like another nudge in the ribs.
Vanagon – eccentric stub axle?
Posted by albell in syncro, syncro specific repairs, vanagon on April 22, 2012
(note: holding stub axle by the splines was an error duly pointed out by David in the comments. Axle re-measured and post updated.)
I was complaining to Phil Z. about my wheel bearing failure and he suggested I have a look at the stub axle. So I chucked it up on the lathe, holding it by the splined outboard end (was careful to have the chuck jaws positioned correctly on the splines) and then I measured a couple of things.
Where the outboard bearing seats had 0.009″ runout.

At the inboard bearing seat I measured 0.015″ runout (sorry, fuzzy pic slipped past me).

Where the seal rides, 0.020″.

The face where the CV joint mates had 0.010″ runout.

I did not measure that outer edge of the CV mounting flange as I thought eccentricity there was not important as the cv is aligned by the bolts.
And here is a quick vid of the assembly spinning.
What does all this mean? How does a new stub axle measure up? Was this runout the cause of my bearing failure?
Addendum: Crow eating time. David’s points about where I was grabbing the axle (splines) was correct. I re-measured runout with axle held by outer bearing seat.
Runout at inner bearing about 0.005″.

At seal, 0.007″.

Flange face, 0.002″.

Looks a lot better in motion.
So there, no smoking gun after all.
Vanagon – cooling system leak
Posted by albell in syncro, syncro specific repairs, vanagon on April 20, 2012
Bloody vans eh? No sooner than I fixed that wheel bearing than another problem bites me. Last couple of days I had been noticing a slight whiff of coolant when I got out of the van. I couldn’t see any leaks, inside or out. Then yesterday I noticed that my coolant overflow tank was empty and even I could not ignore the fact that I had a real live leak somewhere. I topped up the tank and fretted about expensive repairs. Today after a short drive, the smell was much more pronounced and I did find the leak. Thank the Vanagon gods that it was a hose leak, short section that runs from the thermostat to the lower of the two crossover pipes at the front end of the engine.
This pic from above does not show any wetness (the bad hose is the lower, thick one). Update: I think it is this hose featured at Van Cafe.

But from below, you can see the marks of a leak.


I had to remove a bracket that holds the remnants of the Webasto coolant heater system to get at the short hose, and remove the bell housing vent to get it out of harm’s way (syncro bell housings are sealed to the motor and a vent is provided that leads up somewhere above the gas tank). No surprise I suppose when I broke the plastic elbow when removing the bracket, so it goes.

With the bracket out of the way, I could get at the hose. Off it came and time to look at it closely.

Just a pinhole really, but big enough to piss away 1 litre of coolant in about 30 minutes of driving. I had some used hose that I took the chance with, and I got it back in place. I had a closer look at the broken vent elbow, it was plugged solid with some sort of crap.


Then I made a jury rigged repair to the vent elbow using some silicone tubing, stainless tubing, and a bit of stainless wire wrap.

Yeah, I know, this hose leak is a not so gentle reminder that all of the cooling hoses on the van are old and tired. The thing is, I have it in mind to swap in a different motor so I’m being a bit cavalier with this old wasserboxer.
Vanagon – getting that 46 mm wheel nut off
It occurred to me that I should have mentioned how I removed the 46 mm castellated wheel nut off the rear wheel in the last post about the bearing failure. The nut is on there good and tight, Bentley says to torque it up to 360 ft lbs (for the 10 slot castellated nut, the older 6 slot nut was torqued to a lesser value, something like 285 ft lbs). I don’t have the heavy duty air tools that would handle this but I do have a 3/4″ drive, imperial socket that fits (1 13/16″ – handy metric to fractional imperial chart here), corresponding tommy bar, and a 3 ft section of thick walled steel pipe. You can apply a lot of twist with this set up and can even get a fairly good idea of torque applied if you know your weight and where about on the pipe you are applying it. You know the drill, 100 lbs of weight one foot from the axis of rotation is 100 ft lbs, same weight two feet out is 200 ft lbs. You loosen the nut before you jack up the van, and have the handbrake on. But the other day when I was doing the bearing job I had a dickens of a time getting the nut off without the wheel turning and the van moving, and it was impossible to loosen the nut on my parts van as the transmission is out and the free end of the axle was just hanging in space. I did try the slug wrench mentioned in my original post on wheel bearing replacement, but it did not budge the nut.
So how do you stop the wheel from turning when you are grunting down on the end of the 3 ft extension? Well, you have to jack van up and support it securely on good jackstands. Remove the wheel, and use the lug nuts to secure some sort of metal bar to the brake drum. I have lots of scrap bits of aluminium around, so I used some 1/8″ 3/16″ thick angle. The angle bears on the ground stopping the hub from turning. Here is a snap taken today when I pulled the drum and hub off the other rear wheel to have a look at the brakes. Not very clear in the pic, but there are 2 lug nuts holding the angle to the drum. Note also the old house jack supporting the socket extension.

This really worked, no drama, no movement of the van. Used the same technique when tightening the nut.
Oh and here is what I wanted to look at. With the hub out of the way I could see the gubbins clearly and I wanted to be sure all the brake springs were installed correctly (I *think* they are). Plus I wanted to pull off the threaded adjustment bar and clean it up so that it would actually adjust (I hate the Vanagon rear brakes).

Vanagon – rear wheel bearing redux
Almost exactly a year back I replaced the bearings in right rear wheel, but a couple of days ago I noticed some play in that wheel. I thought more play than there should be (i.e. none to a teensy amount). So I pulled the bearing housing and this time taking the driveshaft and CV joints with it. That meant CV joint to transaxle connection detached. I had a spare assembly, all greased up and ready to go, was from my old ’82 westy and still ok.

Got it installed ok, never really a fun job. Then I had a look at the one year old rebuild. I had the notion that maybe the bearings might be loose in the bearing housings, but no, they had to be driven out with some effort. The outer bearing looked fine, but the inboard bearing looks discoloured.

And it feels slightly rough when spun. So what’s the story? Did I not lube it enough during install? This picture from then looks like I did not put much grease into the bearing, but what you see is the stuff I had smooshed into the bearing, more lube was put on after the bearing was in place.

Maybe I did screw up, wouldn’t be the first time.
Update: looking at the bearing again, I’m not so sure it overheated. It looks more like corrosion on the outside of the outer race. Still puzzling.
Addendum: I cleaned up the CV joints on the axle I removed and one joint is ok, the other is on its way out. I have to admit that I had not serviced the rear CVs since I bought this van a couple of years ago, it really should have been done. The grease was a bit dry on both joints, and one showed signs of impending failure (Ed. jeez, that sounds a bit over dramatic).
Outer race removed.

Expected and acceptable wear.

One of these balls is not like the other ones.

Inner race, would this erosion spread?

You kinda wonder if tri-annual repacking of CV joints is the way to go, or just replace them every seven years or so. It is a bit of a chore getting the axles off, and more of a chore cleaning and repacking. CV joints are about 90 bucks a piece here, I don’t know what is the best strategy.
Vanagon – front door speaker mounts
Posted by albell in vanagon, vanagon mods on April 5, 2012
Update: I painted the mounts and grill. Blog post here. I think the paint holds the grill mesh in a dome shape better than no paint.
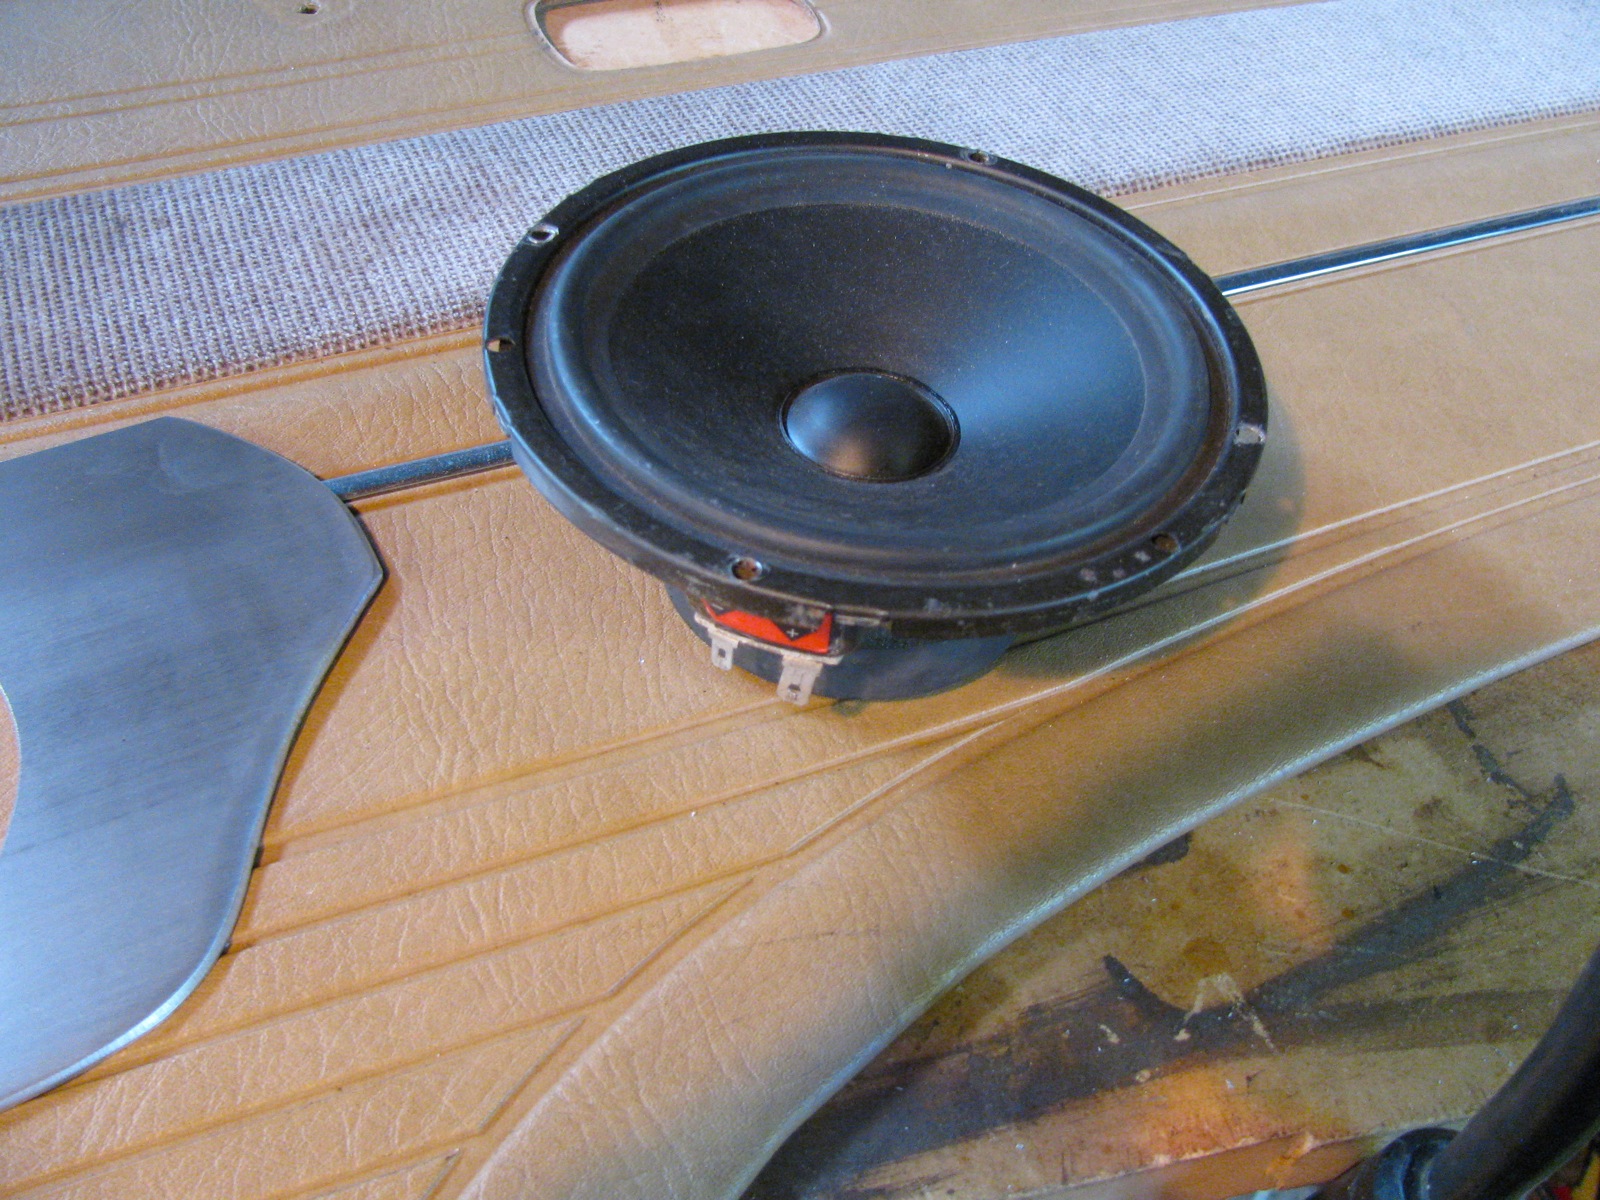
The door cards on my ’86 syncro were falling apart down where the previous owner had installed 6″ Boston Acoustics speakers. Really, the entire door card is pretty tired and warped but I chose to just do a quick and dirty reinforcement around the speakers. I used some scrap 1/8″ aluminium sheet to cut out a plate to stiffen the bottom of the card, some 1/2″ plate was turned down to make new bezels for the speakers, and some stainless steel mesh to make new grills.
It turned out more rugged utilitarian looking than elegant, but much better than before. Oh btw, there are tweeters behind the stock speaker grills up higher on the door. The crossovers are tucked up under the dash.


Simon’s hightop painted
Posted by albell in syncro, vanagon mods on March 17, 2012

")
AAA – around another airport – Clifton, Union Island
Posted by albell in aircraft, around the airport on March 12, 2012
I have posted some of these pics before, but here they are again with some notes.
First, Twotter, on final into airport. Wind is always strong and the approach is over a hill west of the strip so the plan has to drop down quickly. It reminds me of a great blue heron landing – trying hard to lose lift. Landing distance impressively short, as is the take-off distance.

The airport is unlit, here is the result of a forced night time landing. The story was a bit unclear, something to do with a group of Venezuelan business men…

There is a Mercedes firetruck on duty. Too big for the garage?

AA5B Tiger (I think I have that right) that I had a ride in.

On landing approach, close to the same spot the Otter was in the first pic.

And just about down.

Carriacou, Mayreaux, aerial pic of Clifton etc
Bit of a catch up, most of last week was spent taking underwater vid of reefs around Union island, Tobago Keys, Carriacou, and Cannouan, Here are some misc. snaps including boat drain plug held between Willis’ toes, boat rides with fairly heavy winds and respectable waves, bun with salt cod salad filling, small plane flight over area, dolphin fish (mahi-mahi/dorado), loggerhead turtle model.
On my way home, in St. Vincent now, flying out to Barbados then on to Canada later this morning.
Fri/Sat/Sun – Union Island
A snippet of what we were up to. Not shown are the equipment failures (leaky camera housings and fickle batteries), but we did manage to take a couple of hours of vid and record some transects of the sick coral reefs around Ashton Lagoon. We got towed round the area a fair distance using a manta board, deadly for sunburn on the back of legs and the back.
Rain boat ride to Canouan
Today (Thursday) we hired Jude and his boat to take us up to Canouan so that we could take some water samples around some of the resorts. It as very rainy and windy, and quite a bumpy boat ride. Some highlights were a stop at Charlton for brunch (bake macaroni, salad, rice, Kingfish. That fish is pretty darn good. The interesting yacht I posted earlier was spotted, it is the Kamaxitha. The rain and the wind interfered with much picture taking, so did running out of battery power.
Union Island – testing kite and eating
Outside getting burnt at midday testing the parafoil and kite aerial photography equipment on Big Sands beach, north shore of island. Then wandering around Clifton (conch shell corrals for live conch holding, finding sea turtle bones), and in the evening giving 3 folk a ride to Chatham Bay (west end of island where their boat is moored, their blog here) and being treated to lobster, mahi-mahi (dorado), plantains, salad.
Another Union Island first for me – tamarind tree
We drove the road east from Clifton, through Ashton until the road ends abruptly after a steep hill. Back tracking a way we headed up a newly cut road in the hillside and had a look around. We found a tamarind tree, with pods full of the super sour seeds and pulp.


Arrived Union Island
Caught the fast ferry from St. Vincent to Union Island yesterday, arrived here about 6 pm. Spent some time today looking around the island a bit, checking out the cottage friend Stephen rented, and having lunch (conch stew and rice). A day of firsts for me – first time touching the water of the Caribbean, first time seeing a coconut palm, picking fallen coconuts (most were dry, one still a bit green and had water inside), first time eating conch. I am quickly turning from the whitest guy on the island to the pinkest.
Panorama of Clifton area this morning between rain showers.

My first coconut, cottage behind is where we will move to tomorrow.

First wading in the Caribbean – was a strong rip right here

Pink house on the hill where I am staying right now, taken from restaurant in Clifton.

Nice chicken grill set up

There a re a few impressive yachts around, but this one is especially interesting.

Cobblestone Inn, St. Vincent
After a quarter of the rum had gone, I got all “Hitchensy” and stood on the roof top patio in the warm humid air feeling world weary and bottle-wise.


Clouds and stuff
I’ve finally arrived in St. Vincent, all in one piece but for one bit of luggage lost by LIAT on last leg from Barbados to St. V (the bicycle, yes, I was humping a fekkin bike with me). Plane was a Dash 8, almost a bookend to the Air Canada Jazz Dash 8 I took from Victoria to Vancouver the day before, but this one had more legroom and a teeny bit shabbier. Not as much concern about cockpit door security too.
On Airbus 319 from Montreal to Barbados I got punchy and bored (understandable after the hell that was the red eye from Vancouver to Montreal). Suddenly I saw clouds. I mean “saw” them. Look, by that time my neck was sore from all the head-snaps of micro sleeps and I probably had moved on to an alternate realm of common sense, but crikey didn’t the clouds around Bermuda and on south look text book?
Now hold on, before I even got as far as Bermuda I had grabbed the GoPro to shoot what I thought was the last part of N. America I’d see on the trip. The flight line goes straight down past Boston and out to run over Bermuda and on to Barbados. I can’t be arsed to id this part of New England, but will post the riveting vid.
And then the clouds just south of Bermuda…it got even better as we closed in on Barbados, but even in my fevered state I knew that lots of cloud pics would, in the morning, seem silly


AAA – around another airport – PET Montreal
Posted by albell in around the airport on February 25, 2012
Waiting for connecting flight, I’m wishing I could get out into the snow. Airbus A320 (or is it an A319?) here.

Starrett back plunger dial test indicator set

A – tool post holder
B – spindle
C – spindle
D – clamp
E – hole attachment (see-saw device to translate movement from one end to the other where the dial indicator can read
F – snug
G – buttons for end of dial indicator plunger
H – back plunger dial indicator
I – internal threaded knurled nut, for extending indicator plunger? No, I think it is an incomplete “shock absorbing anvil”
Update: “Oldfussbudget” lived up to his name by commenting how it would be nice to see the tool in action. So here are a series of pics with the dial indicator mounted on my lathe in 3 set ups.
First up is the tool post holder (A) in my old lantern style tool post. Spindle B is screwed into one of the threaded holes in the bar, the snug (F) attached, and the dial indicator held by same snug. A button has been screwed into the plunger of the dial indicator and is resting on the work piece. The bezel of the dial indicator moves to allow zeroing of the gauge. This set up can be used to check the runout of the work piece, especially useful when trying to center round stock in a 4 jaw chuck (3 jaw chuck shown in pic).

Now the see-saw, hole attachment (E) has been added to the set up and you can see how it can be used to check the run out in an internal surface.

Another view of same.

Better shot, showing button on plunger

And using the clamp (D) a spindle (C) to hold the gubbins onto an old style lathe tool holder mounted in the old style tool post.

And to answer Oldfussbudget’s other request, the only serial number found was on the dial indicator itself. The box had nothing. Oh, and you can still buy this dial indicator.

Stage prop – “The Master’s Laser Screwdriver”
I was asked to make a copy of “The Master’s Laser Screwdriver” for a Dr. Who parody. Here it is, a pretty crude and liberal interpretation. BTW, the lights do come on when the front section extends (spring loaded).


And a very, very amateurish vid showing the spring action.
Vanagon – VW pop top insulation
Posted by albell in syncro, vanagon, vanagon mods on February 13, 2012
Borrowed from good friend Simon, this genuine accessory is supposed to be installed outside the pop top but with the rain fly on, I thought I’d see if it was able to be installed inside. A little bit of a wrestling match, but it goes in and stands up by itself. Hey, notice I still haven’t installed an upper bunk.


Vanagon – Go-Westy “Wasserstopper” rain fly
Posted by albell in syncro, vanagon, vanagon mods on February 13, 2012
Note: clip fitment issue resolved, see this post
A Xmas gift installed. Over all pretty good but I don’t like the side clips that are supposed to hook on to the rain gutters. They have a too tight curve and don’t grip well. Also, the strap that goes in the front doors and hold the front of the fly down tight to the van is not that great of a method. I’ll try modifying both. However, as is, the clips do attach to the Shady Boy awning box. No way to get them to attach to the gutter with the awning box in the way. Link to Go Westy product page here.


