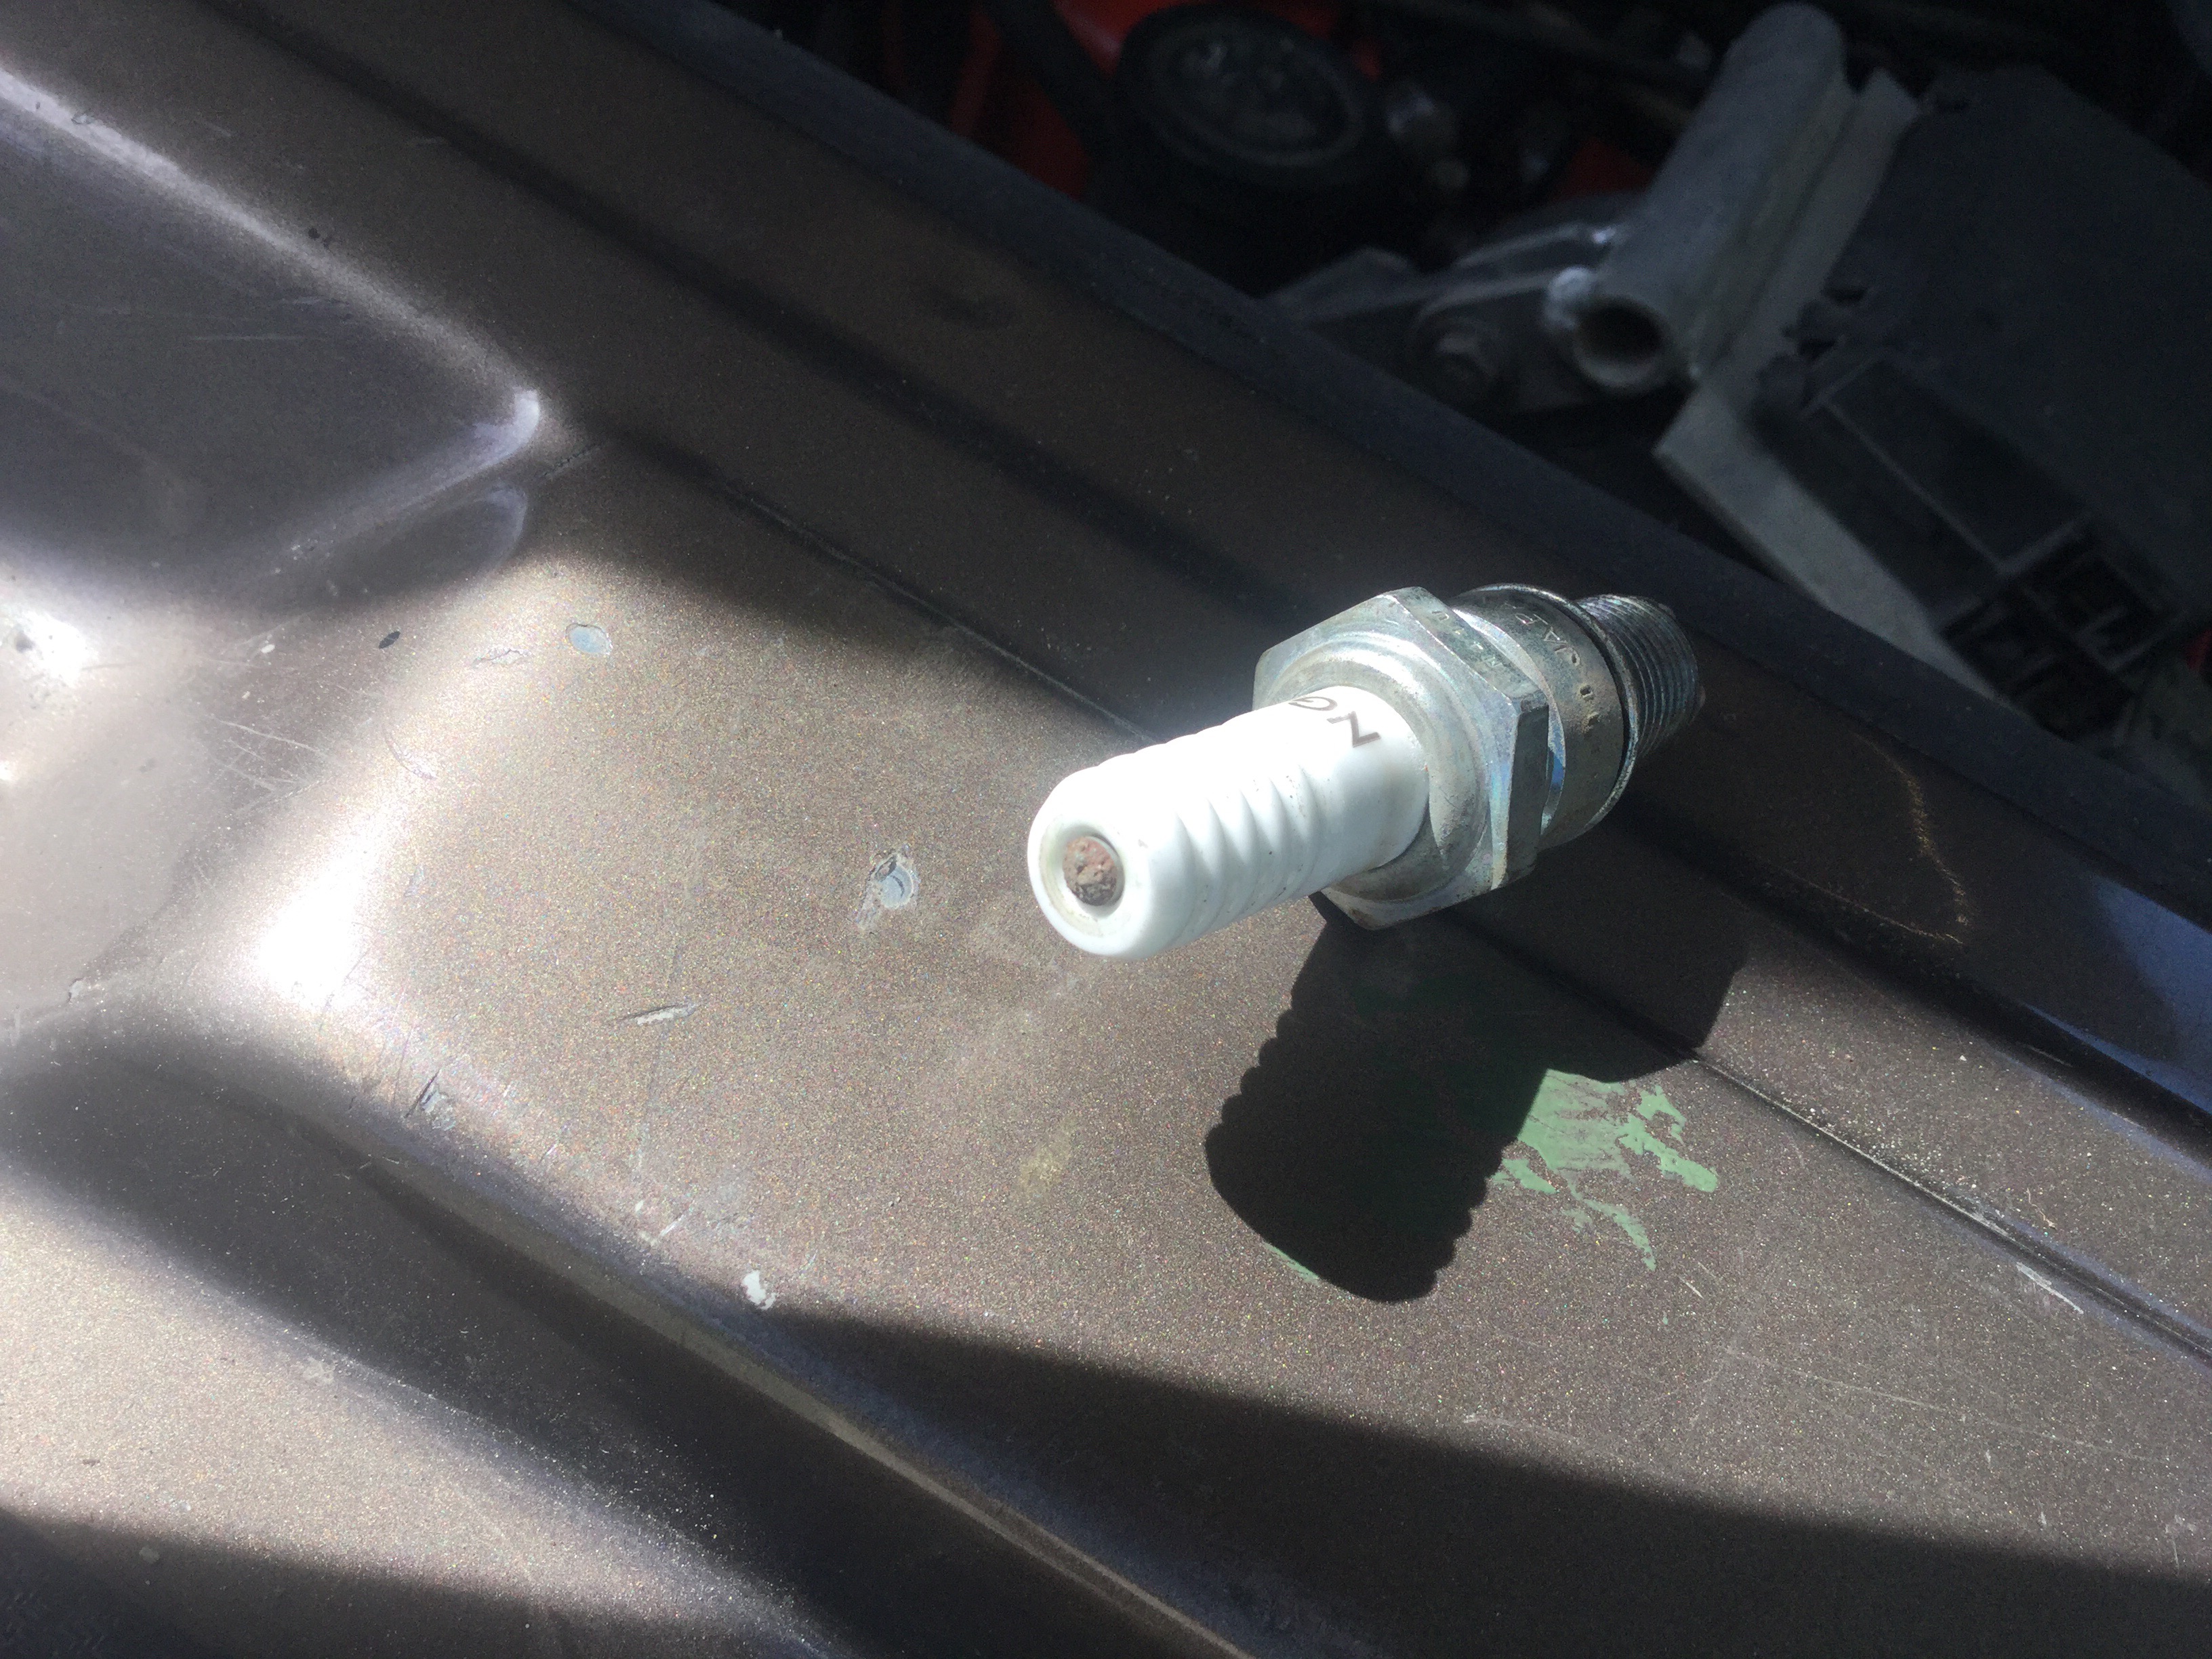
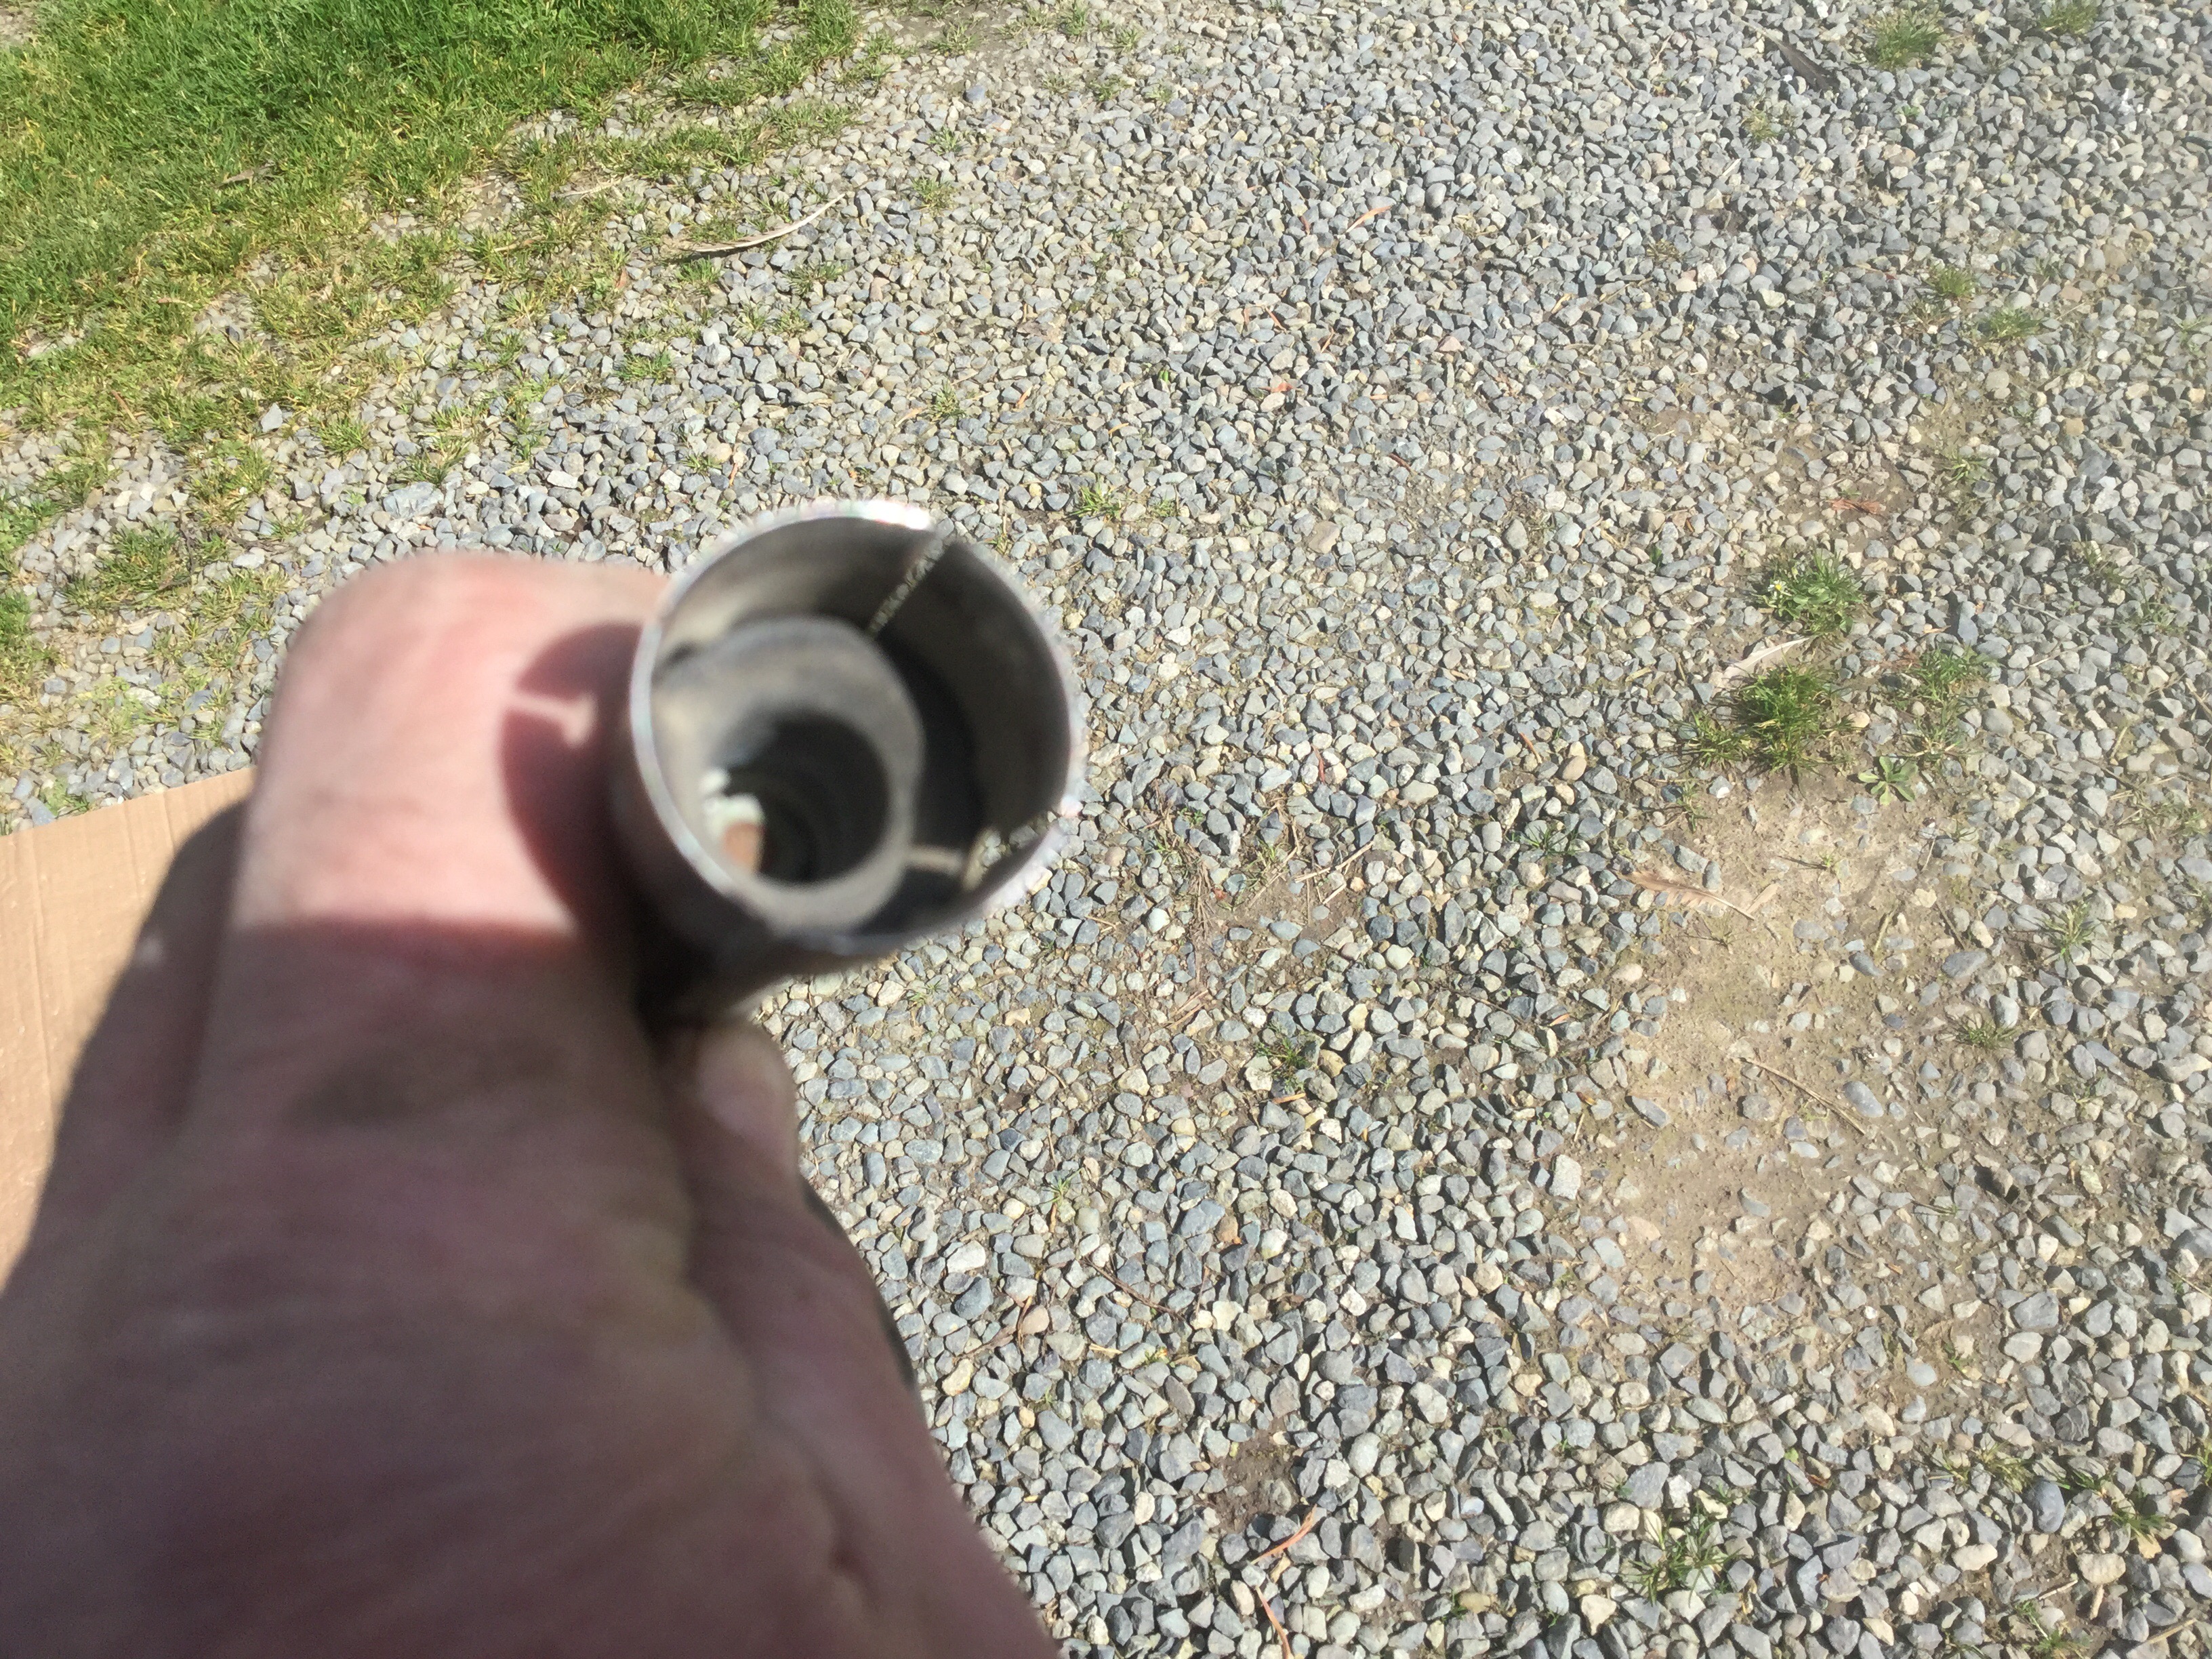
Vanagon – spark plug failure
I’ve never seen this before. Might explain why my van wasn’t running very nice the last month or so. On the other hand, trying to track down the running issue did turn up some cracked vacuum hoses so that’s all good eh?
I couldn’t get the broken bit out of the boot. Had to use spare.

Vanagon – T4 grounding crown
Posted by albell in vanagon, vanagon mods on April 10, 2016
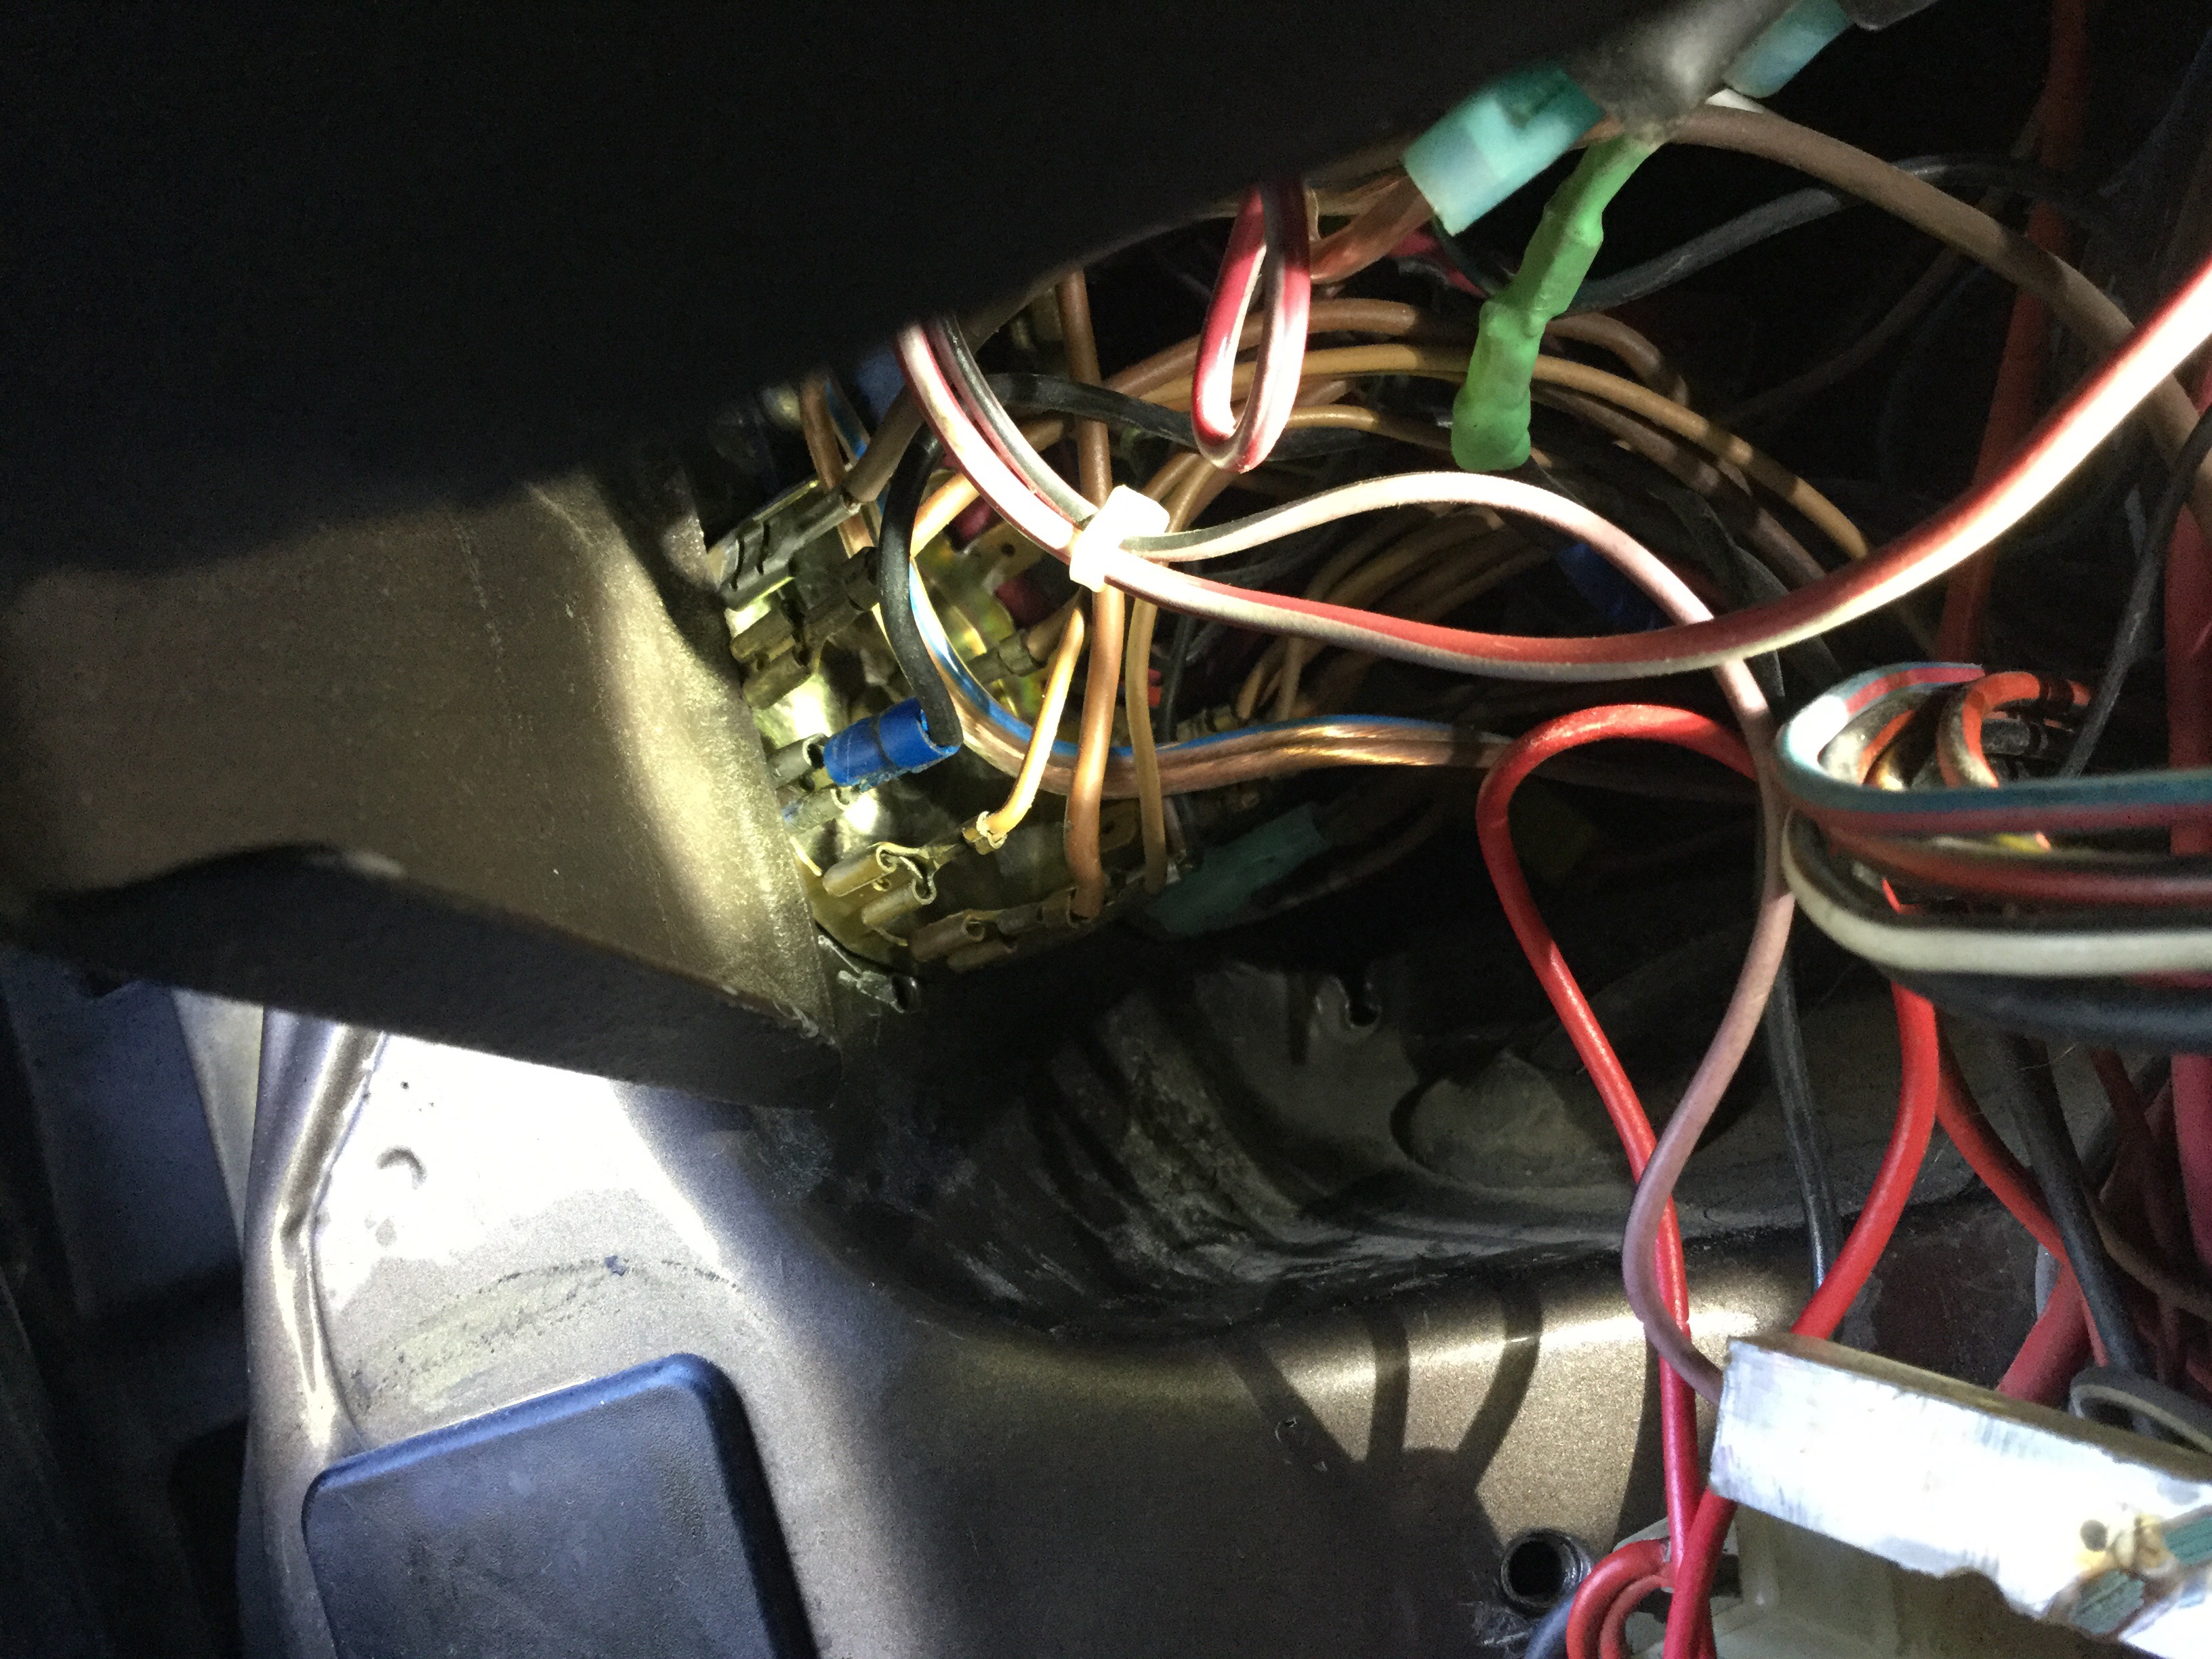
Hey, did you know you can just squeeze in a T4 grounding crown in the aft position of the pair of stock crowns just to the left of the fuse panel?
It’s tight, but it gets in there.
I mangled the stock crown a little getting it out. But look, look at the abundance of connections on the T4 crown 🙂
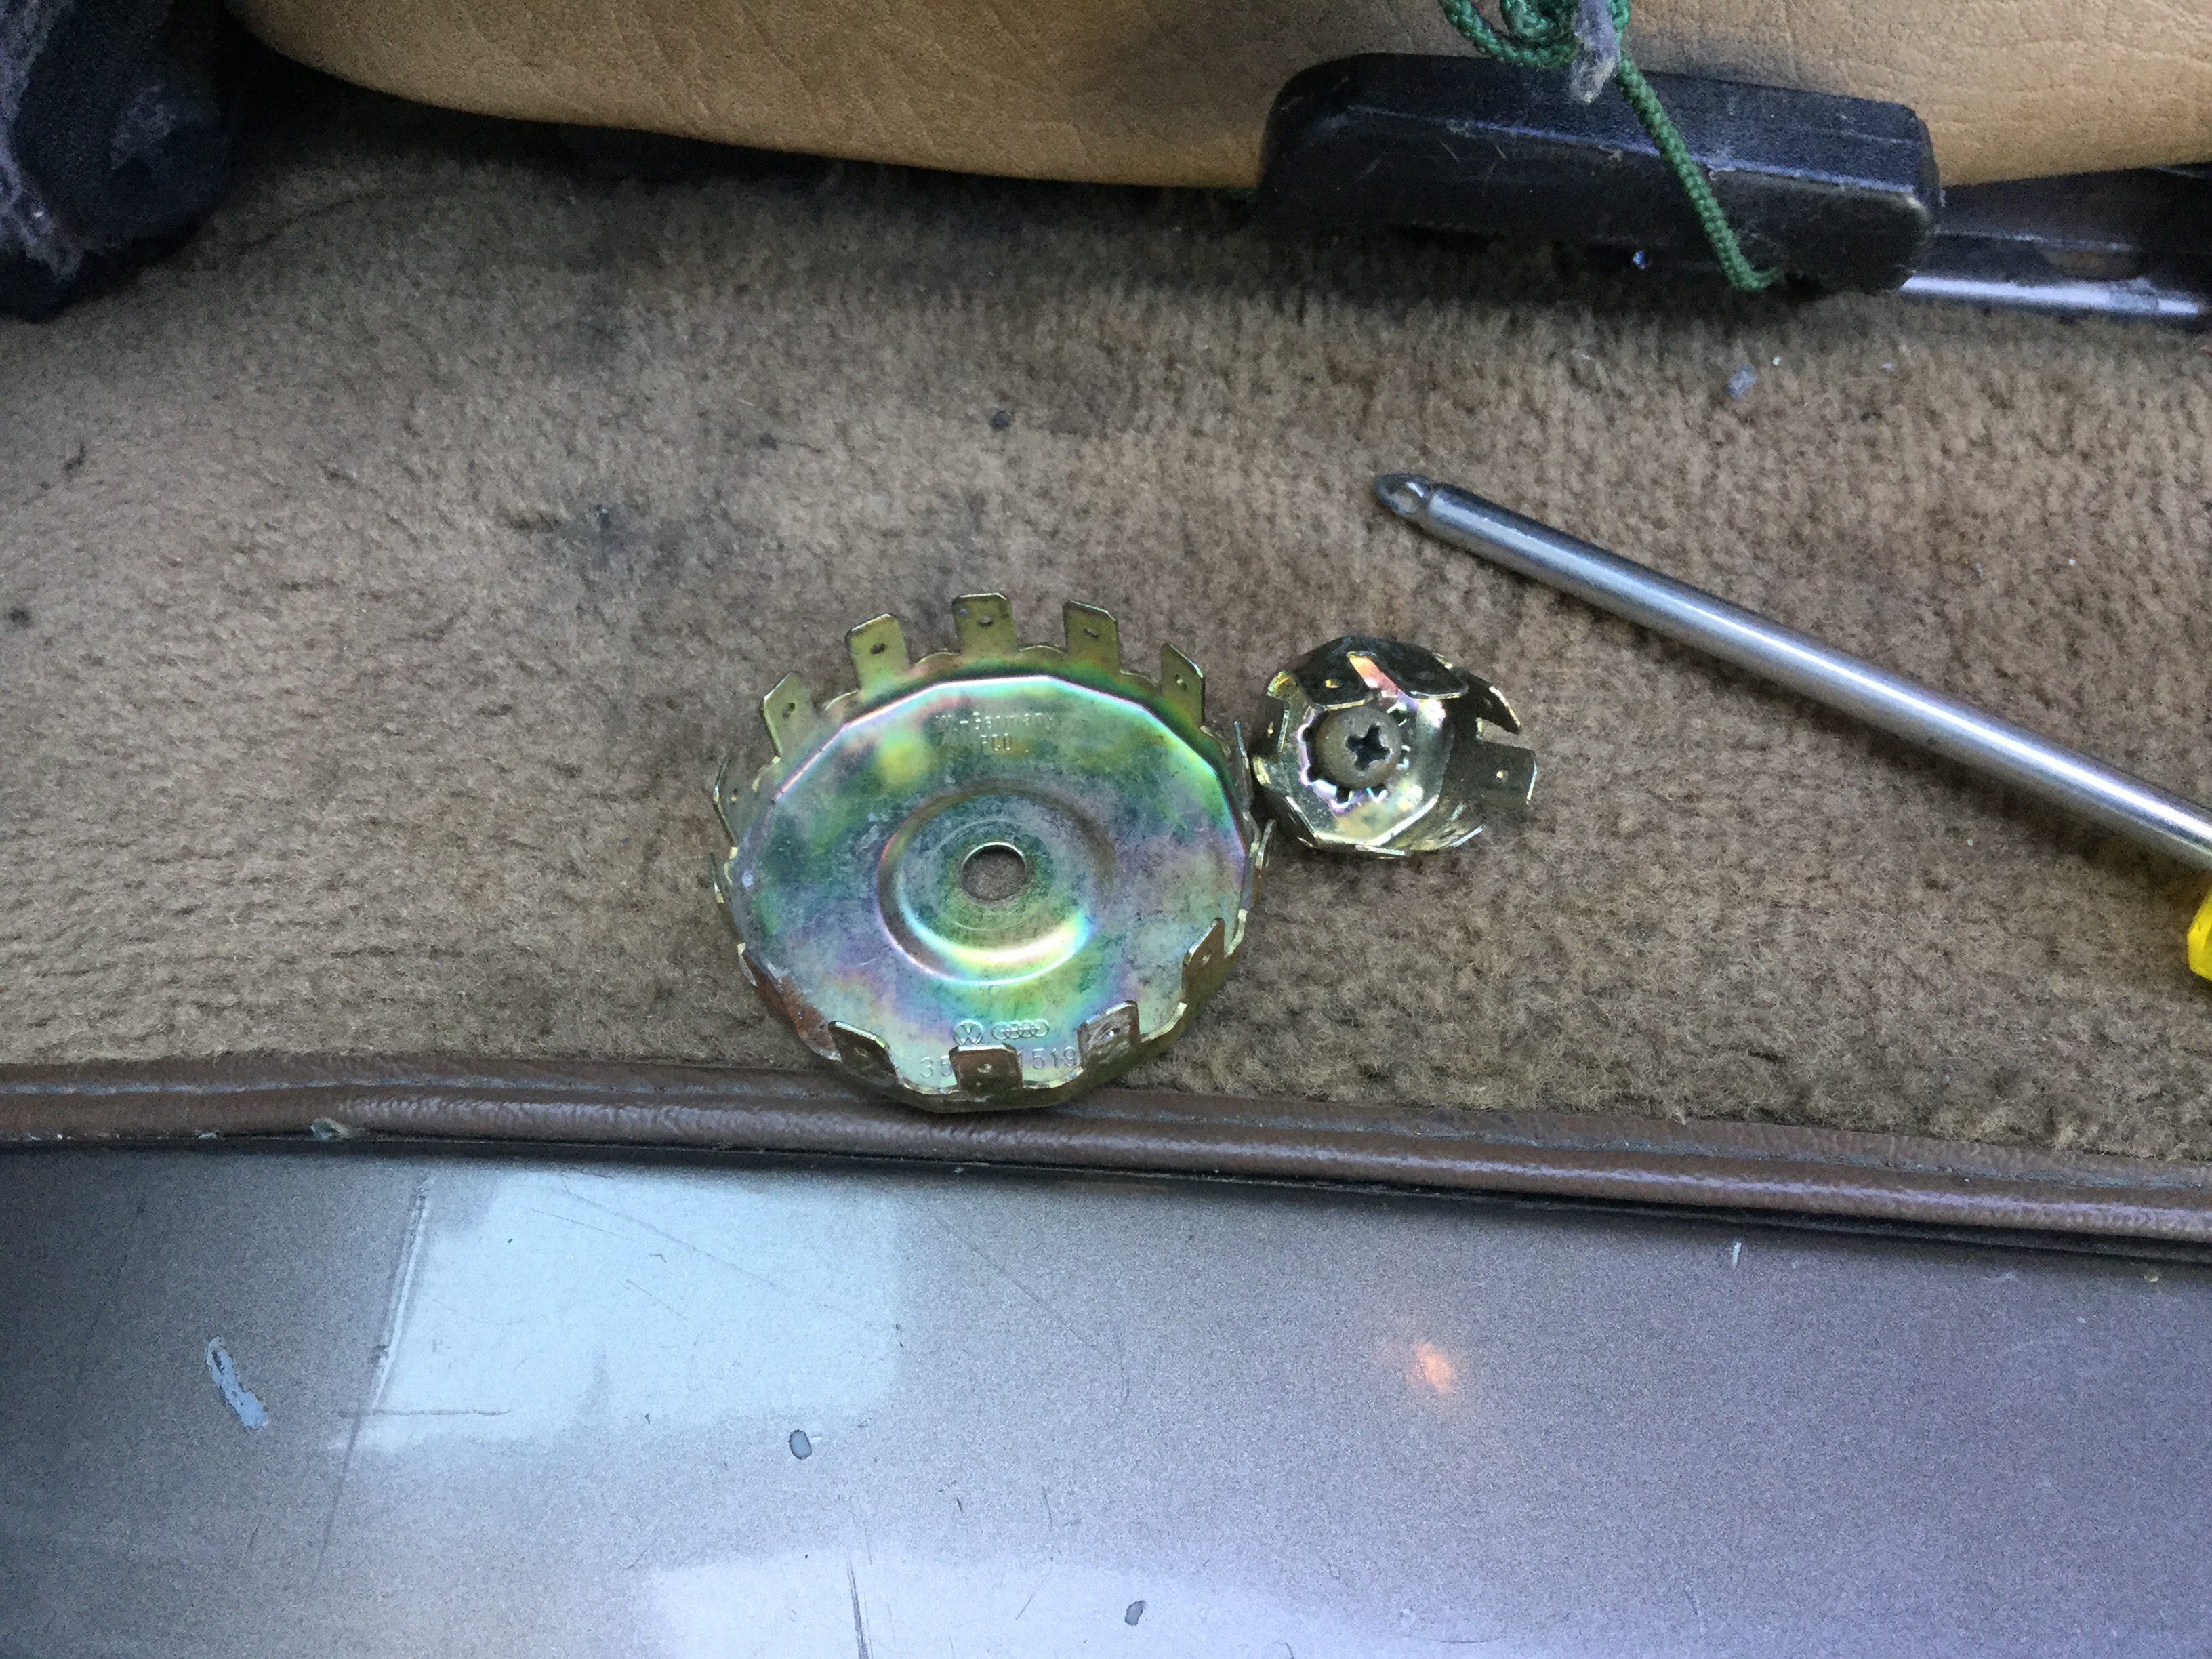
Not a great pic, but here is installed.
Vanagon – 2015 Dodge Caravan town and country second row seats
Posted by albell in vanagon, vanagon mods on April 7, 2016
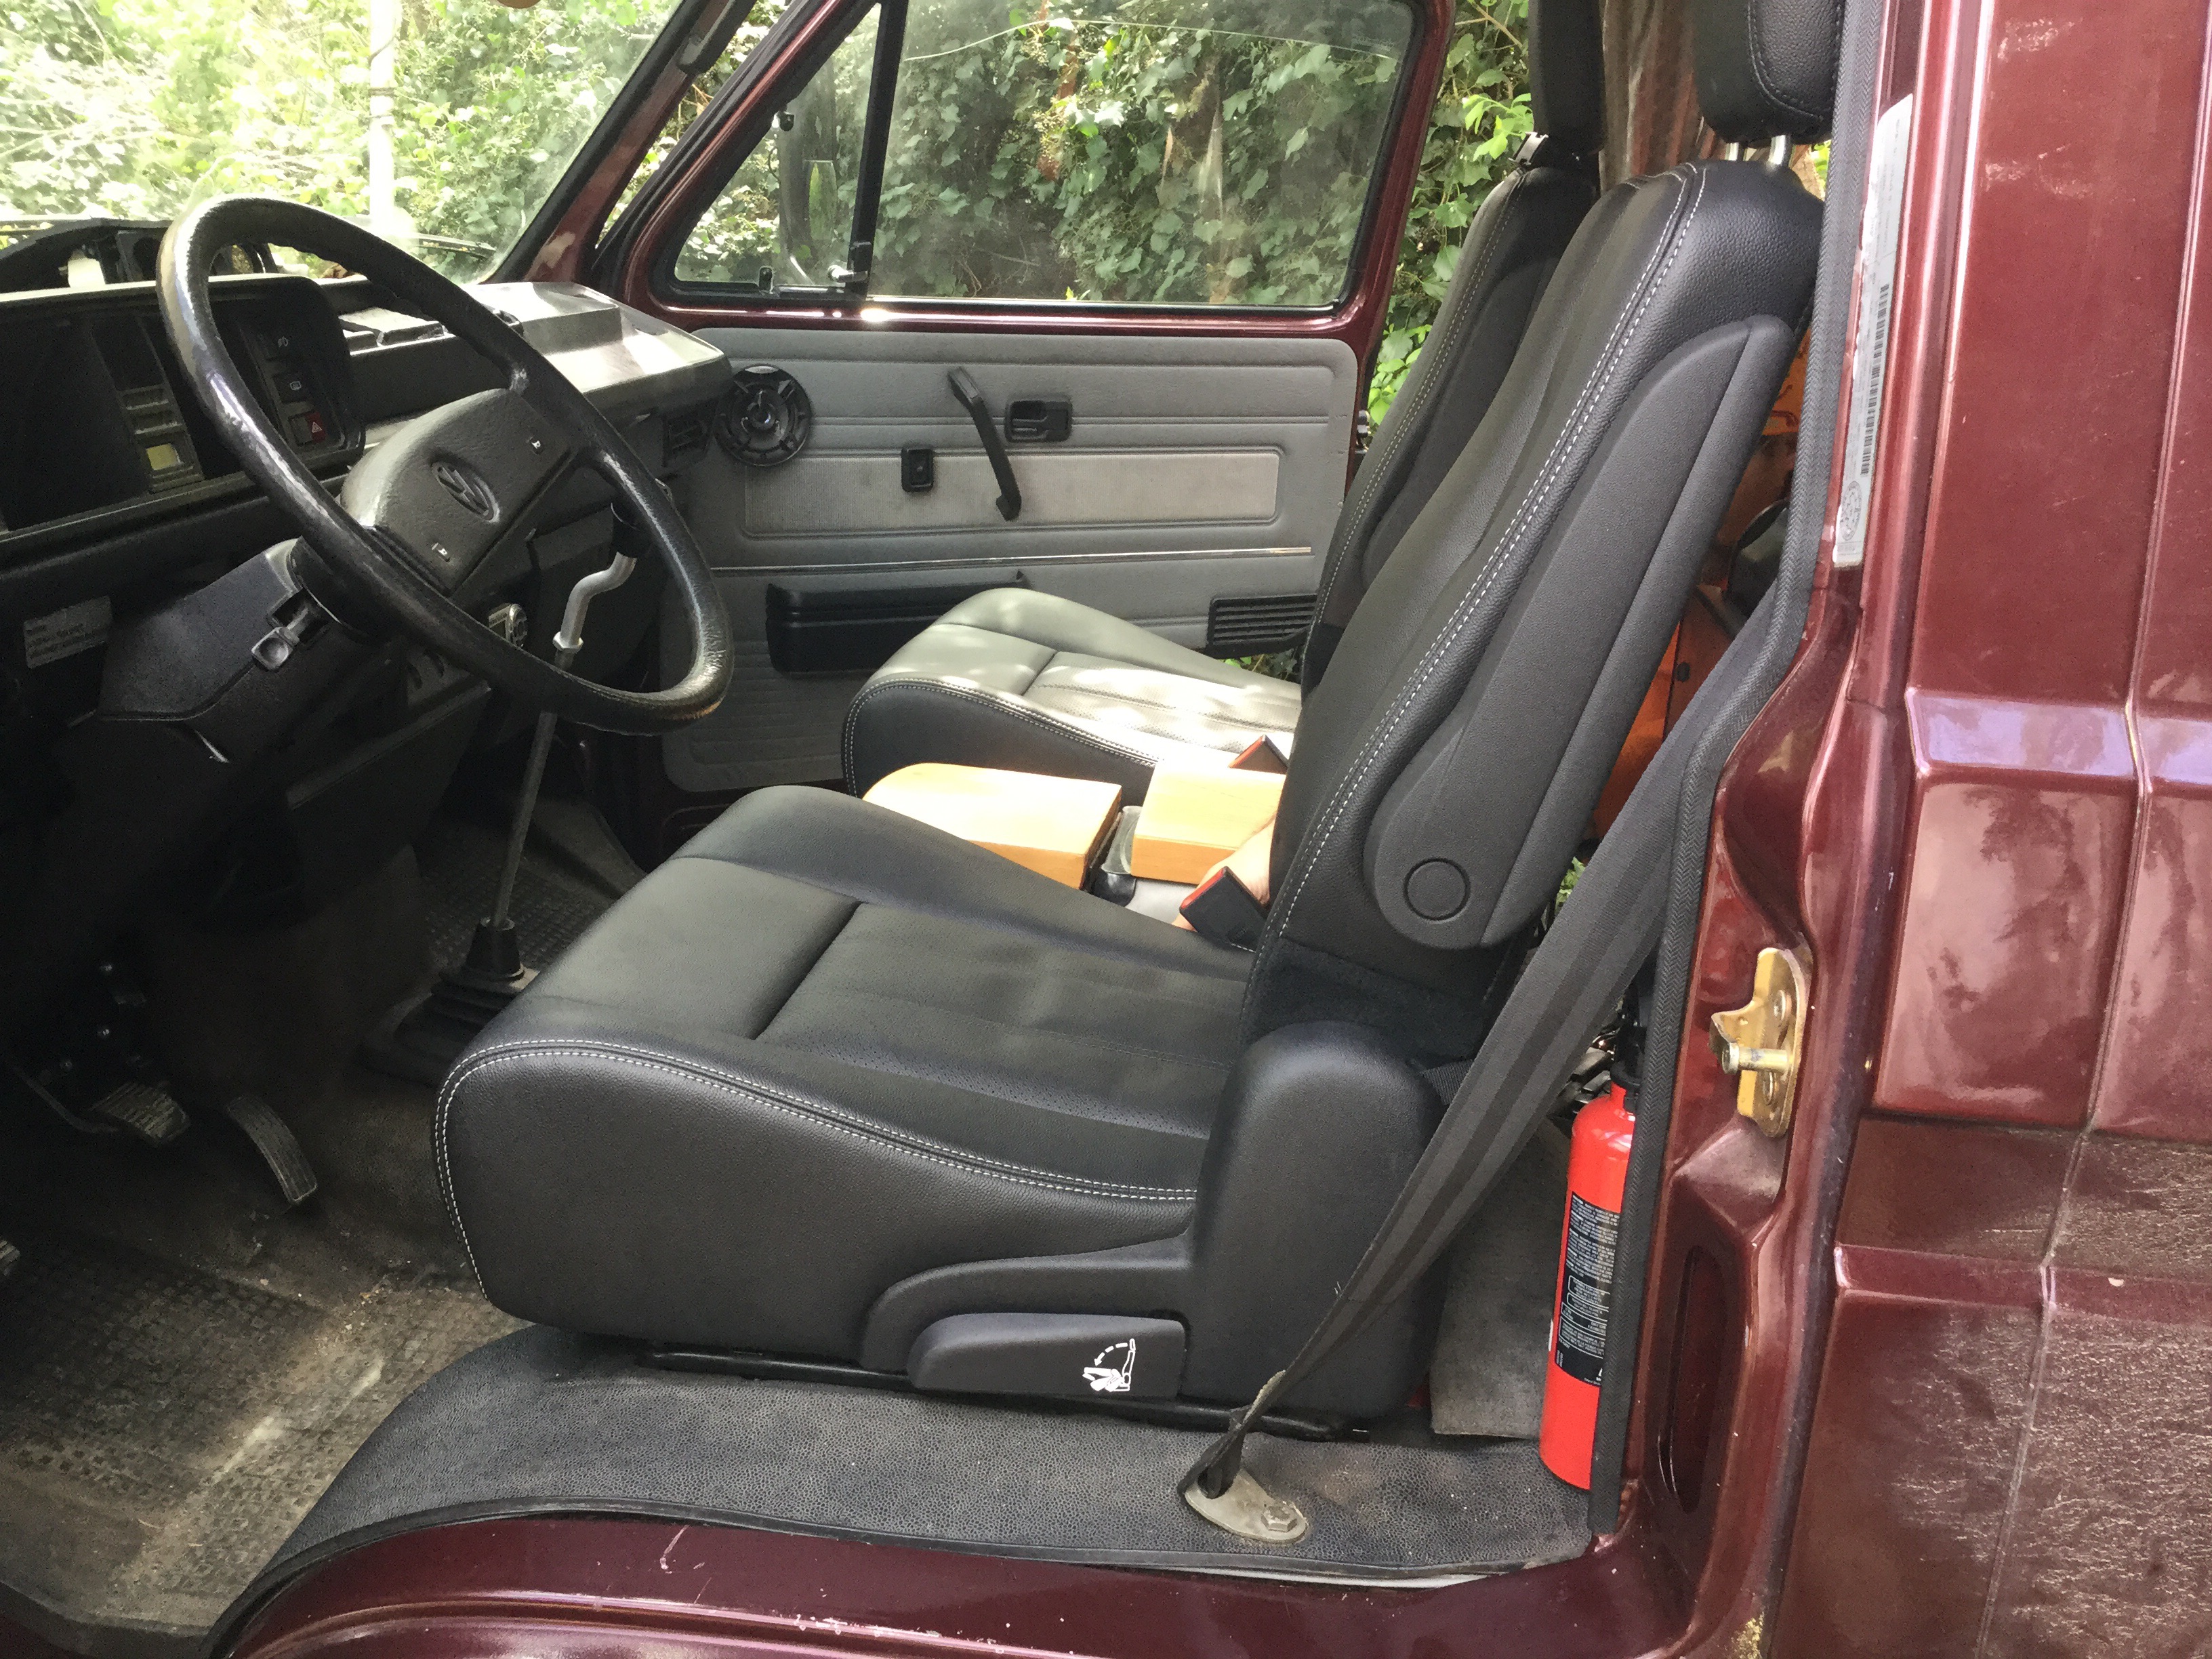
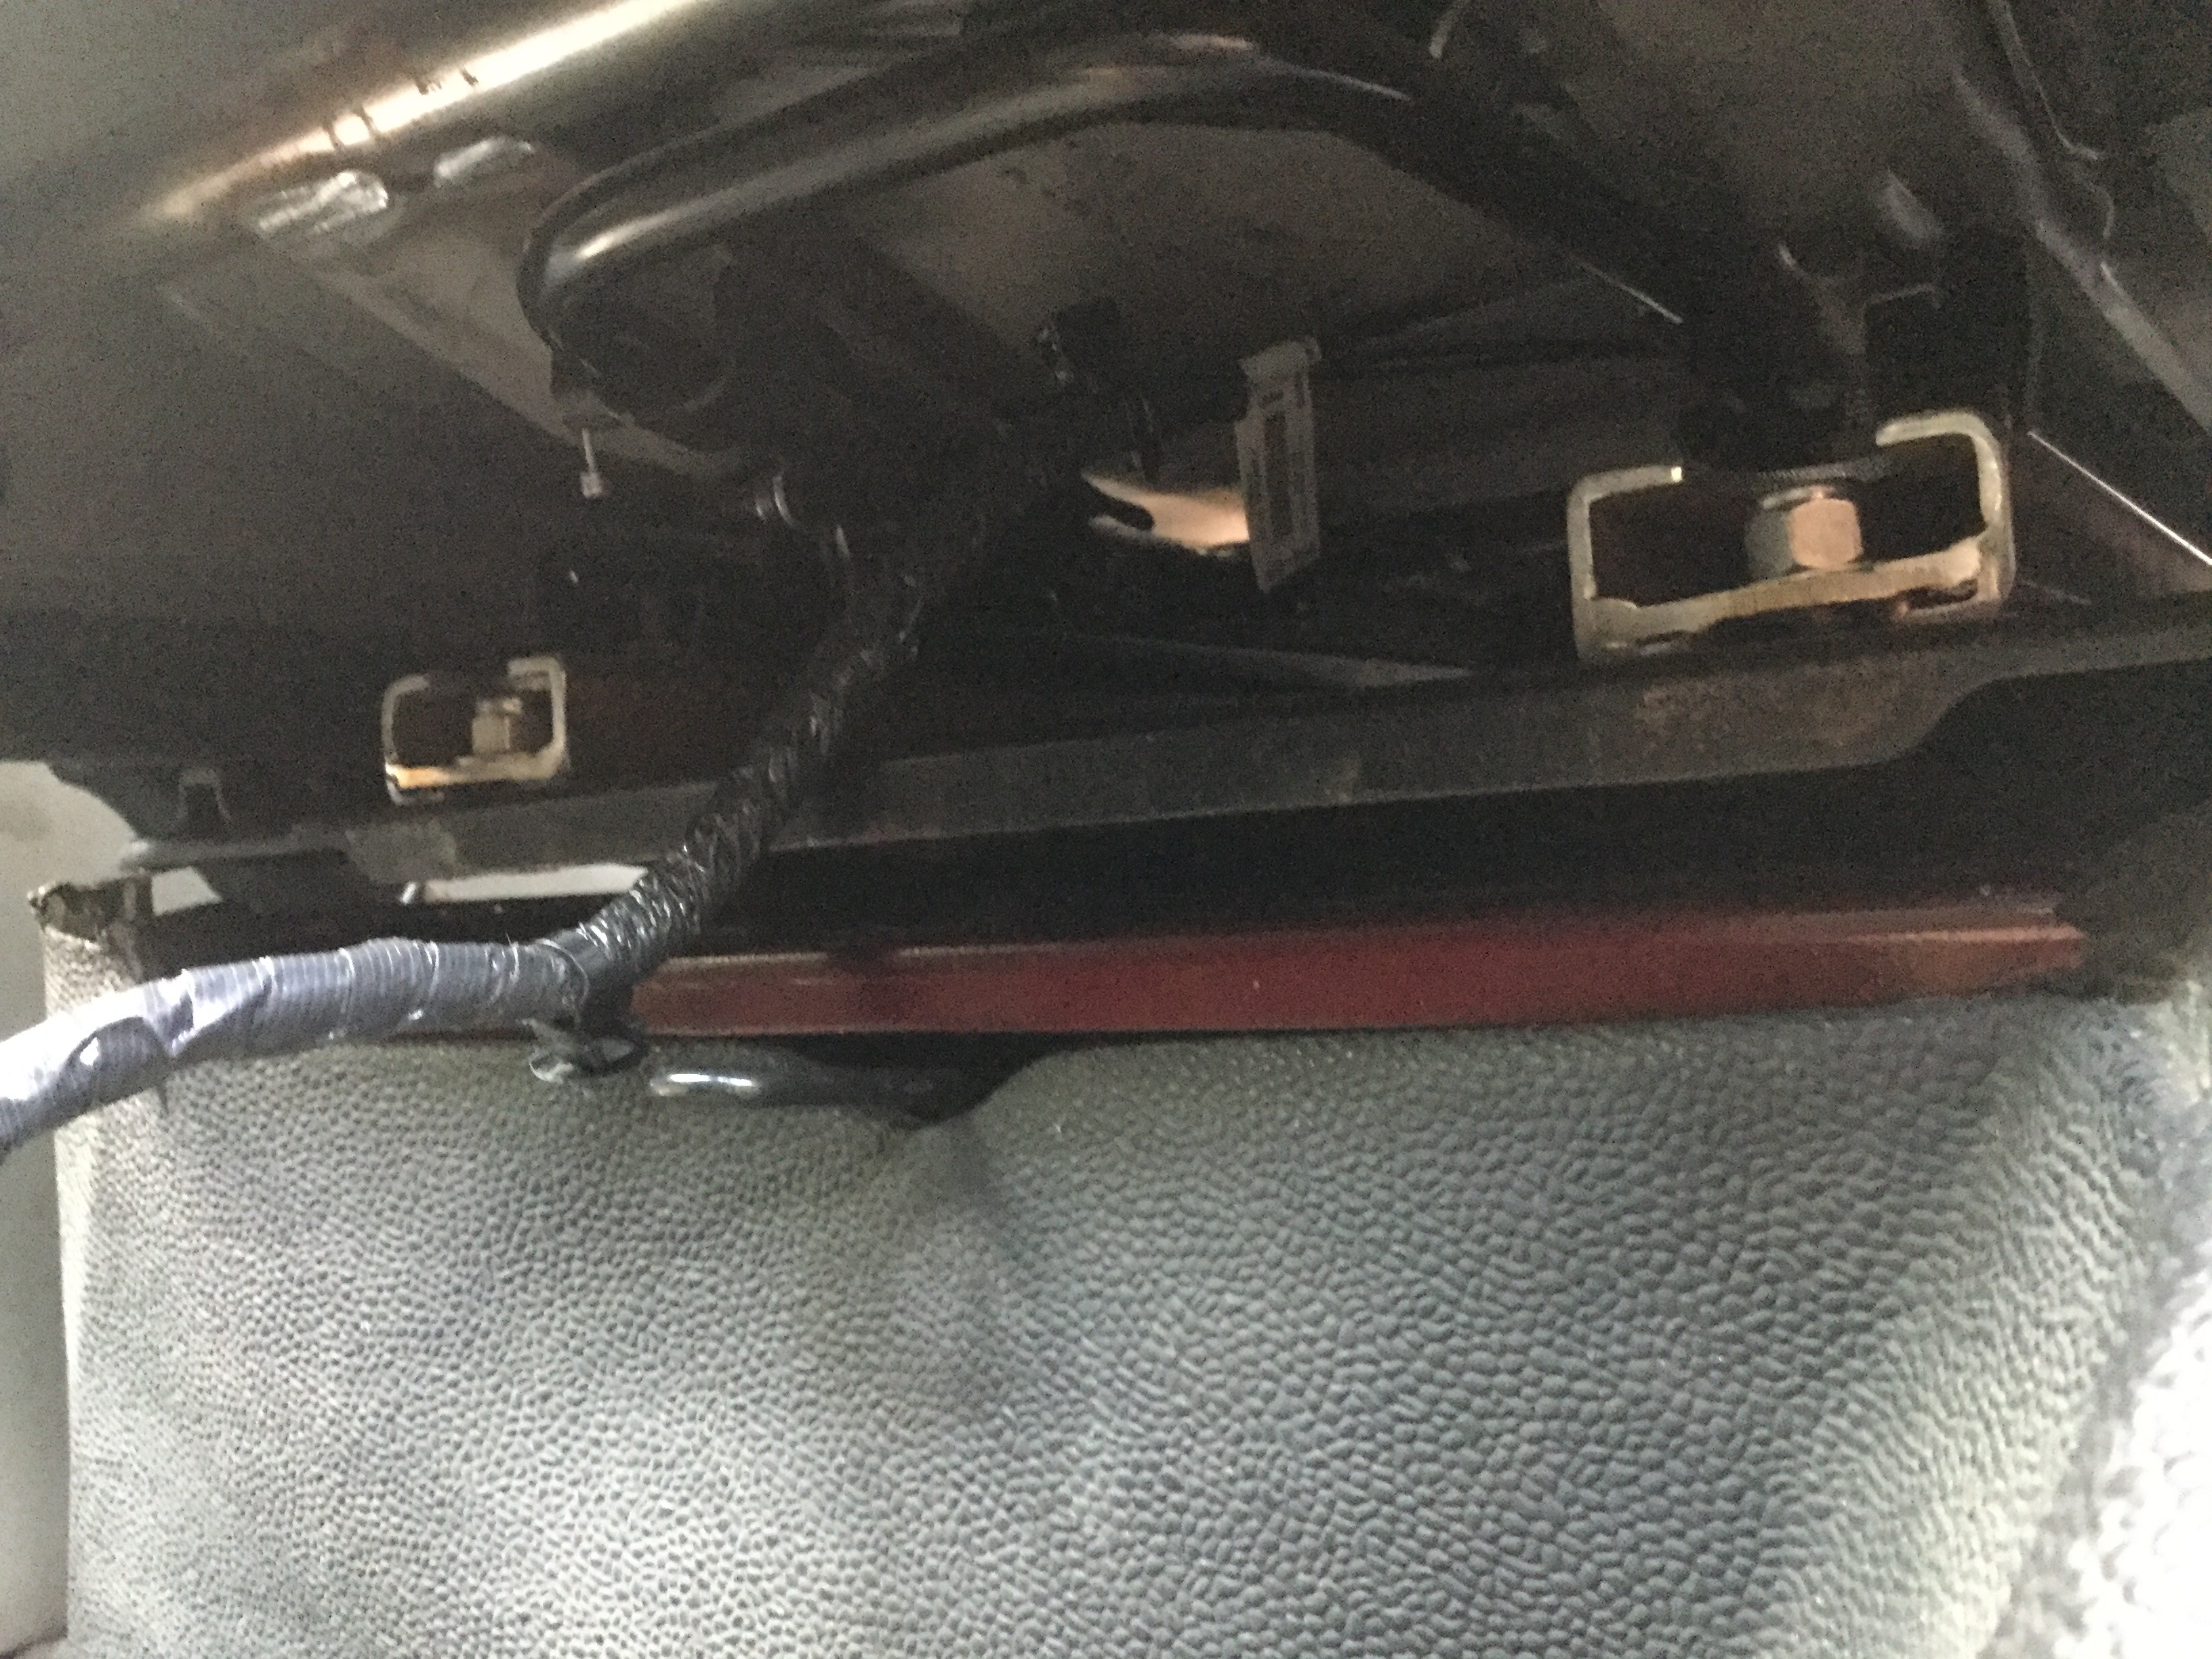
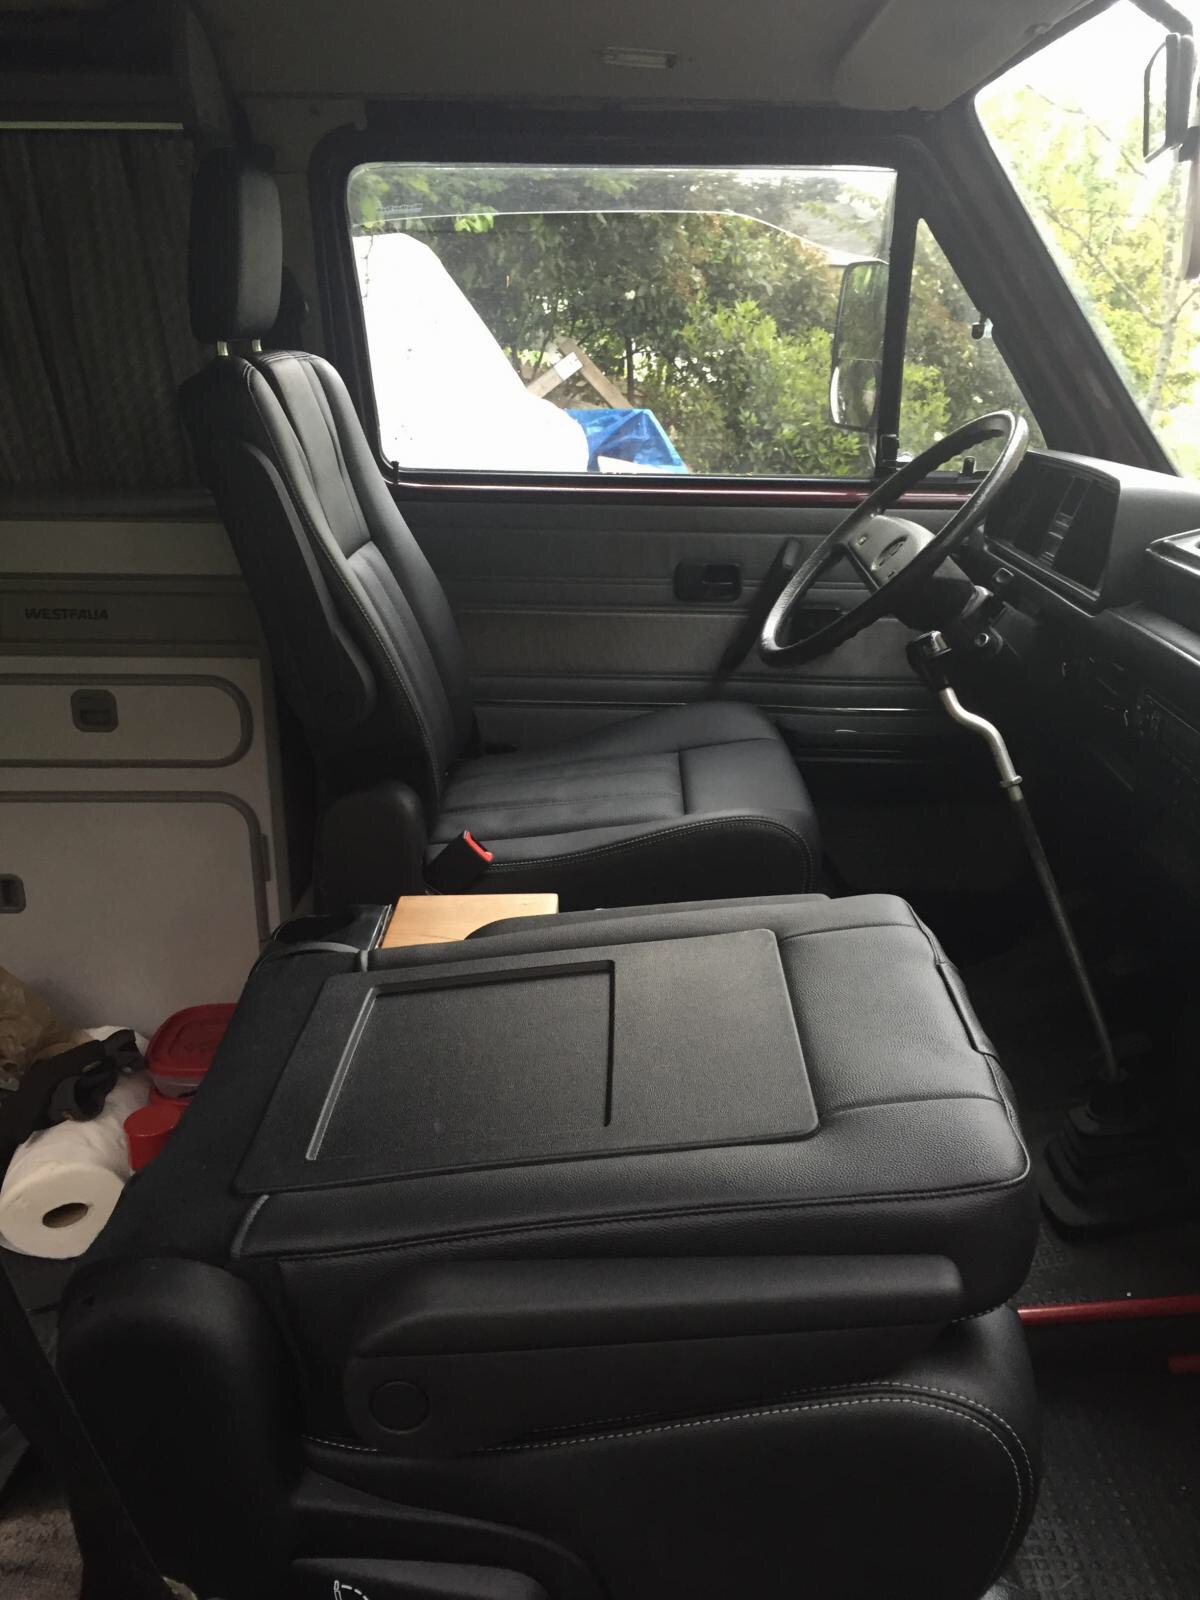
Addendum April 10, 2016. Drivers seat installed today. Simpler install, four bolts welded to stock swivel plate, 1×2″ steel box section fits onto those bolts, box section bolted to Chrysler seat. Pics at the end of the post. Oh, btw, sitting in the drivers seat is a big improvement over the stock seats. I’m 6-2, I still have a finger width or two head room to ceiling, and for some reason due to the seat adjustment or whatever, I get a much better view of the speedo and tach than I do in my van. This alone makes me want to have the seats in my van.
Addendum April 13, 2016. Some more pics taken by Simon of seats in his van, added at bottom of post.
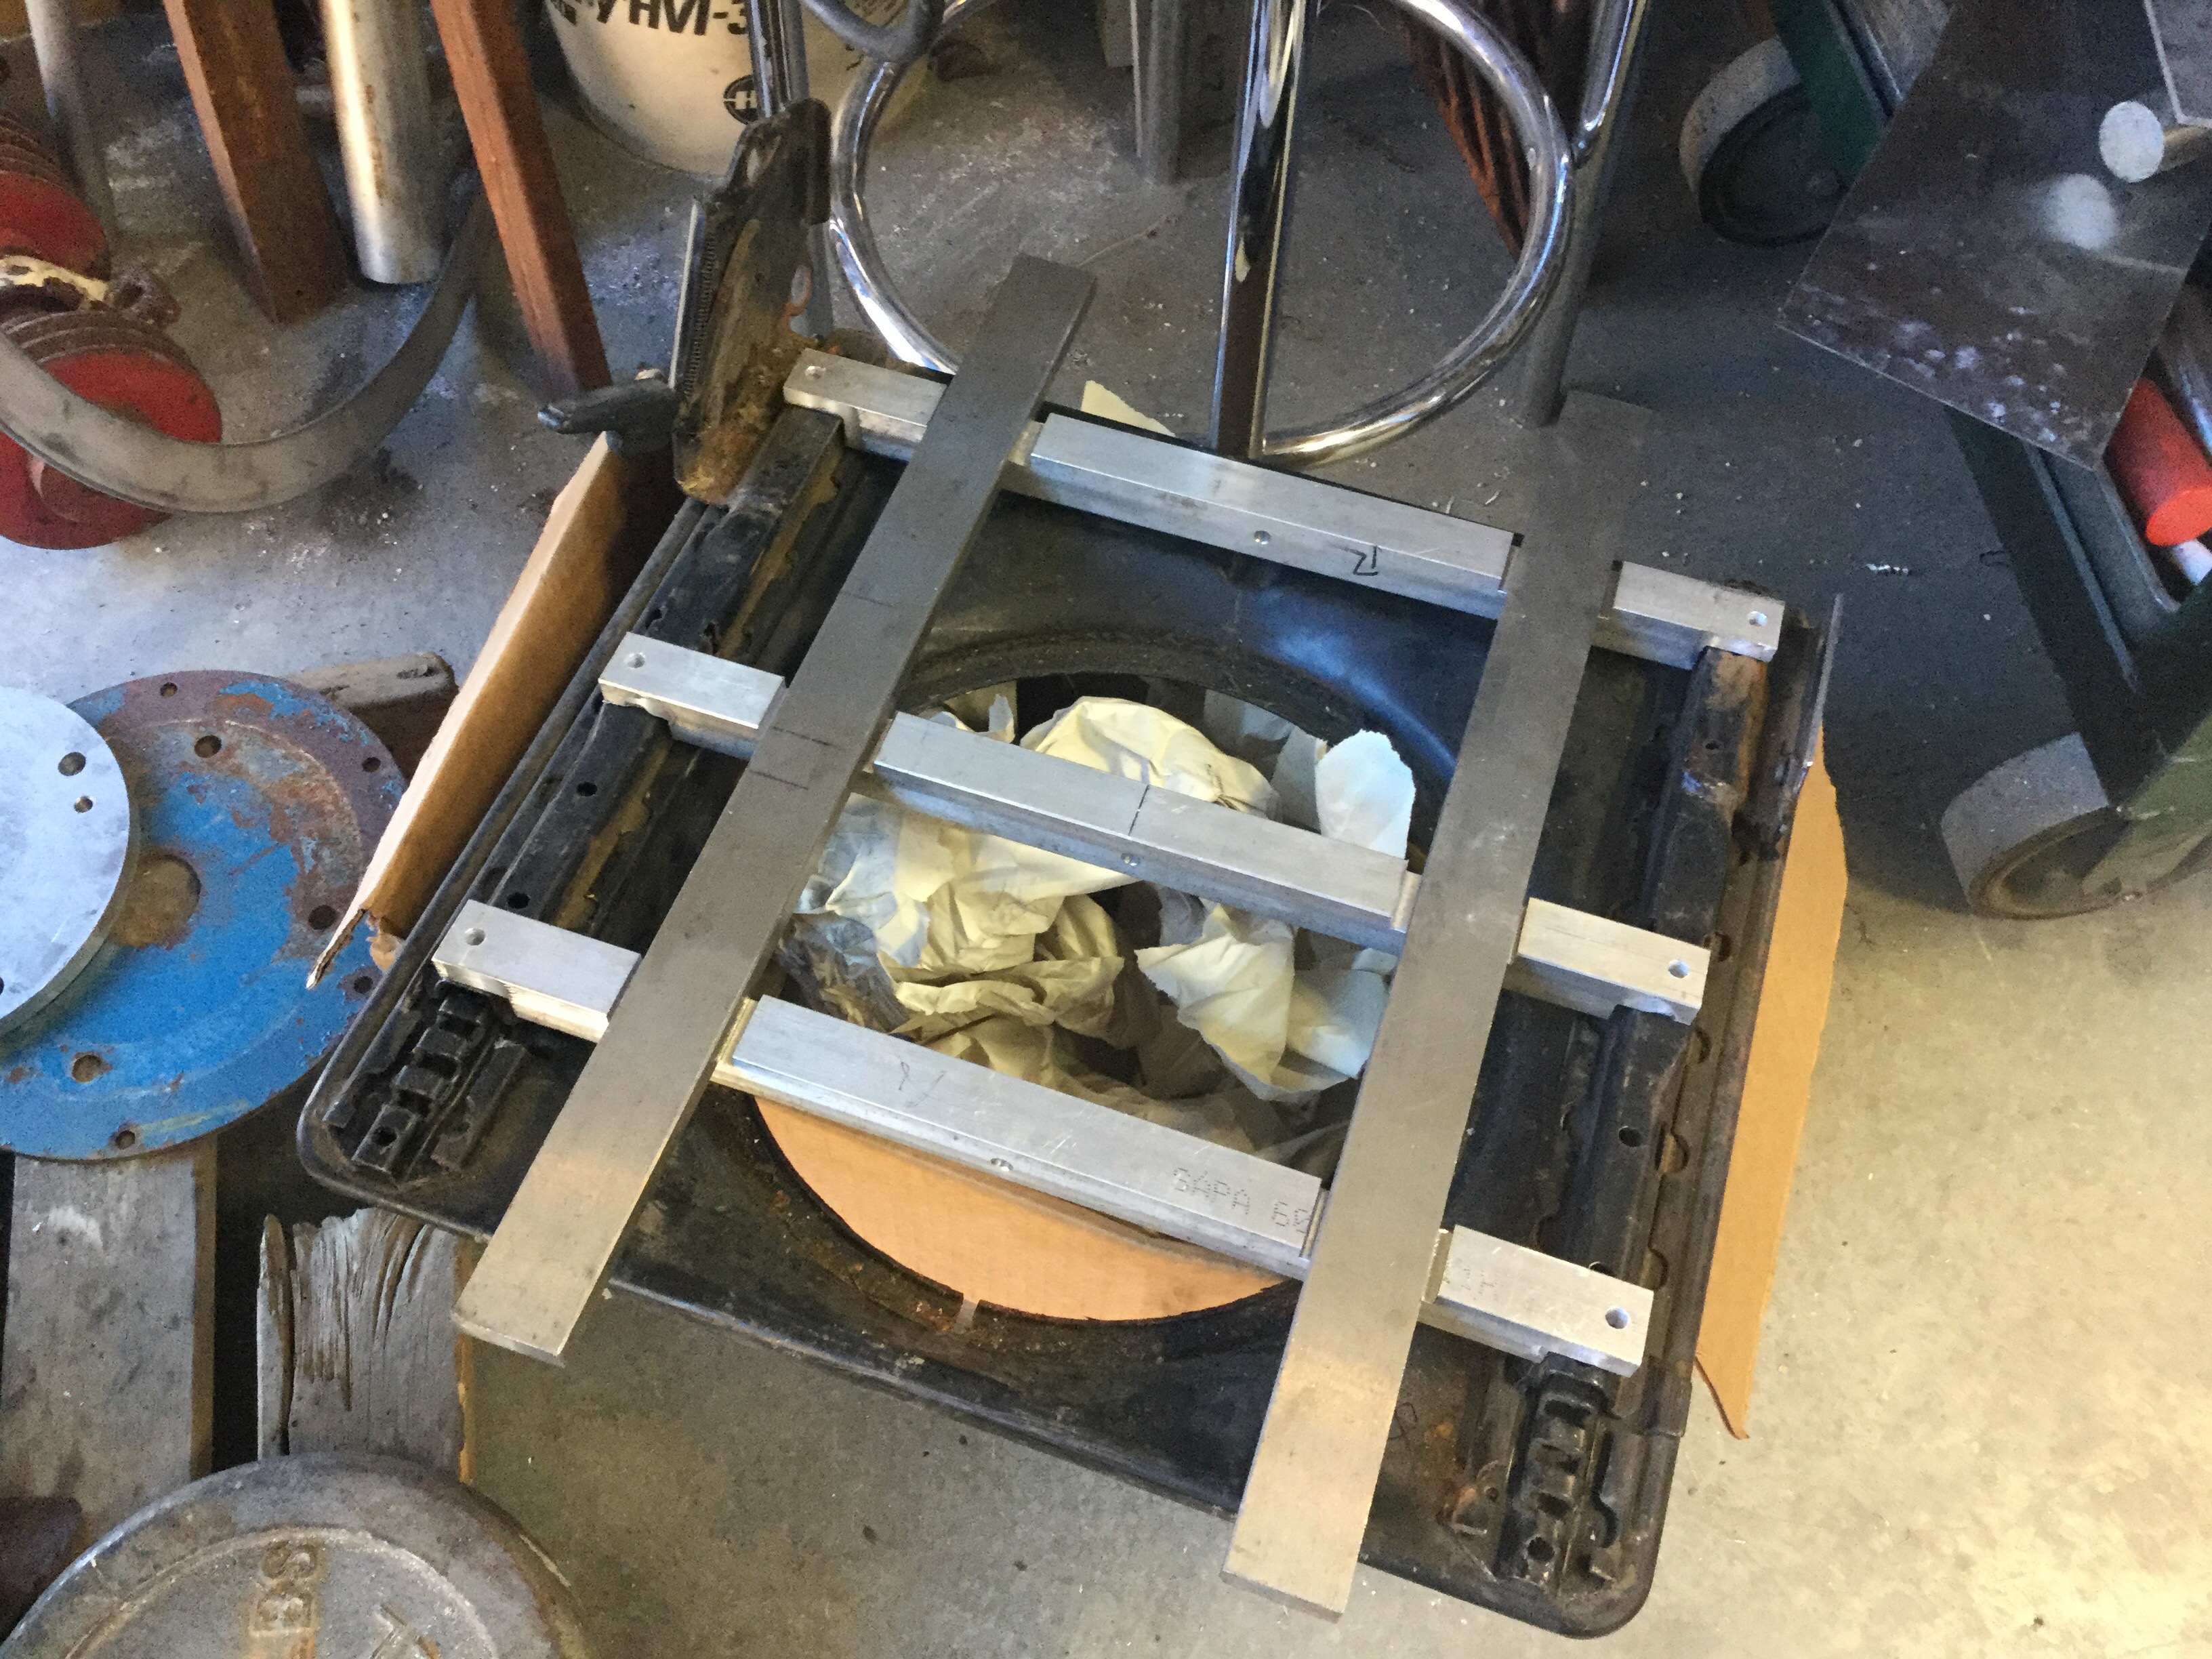
Addendum June 14, 2016. Added some pics of the aluminum rails I made to mount the passenger side seat.
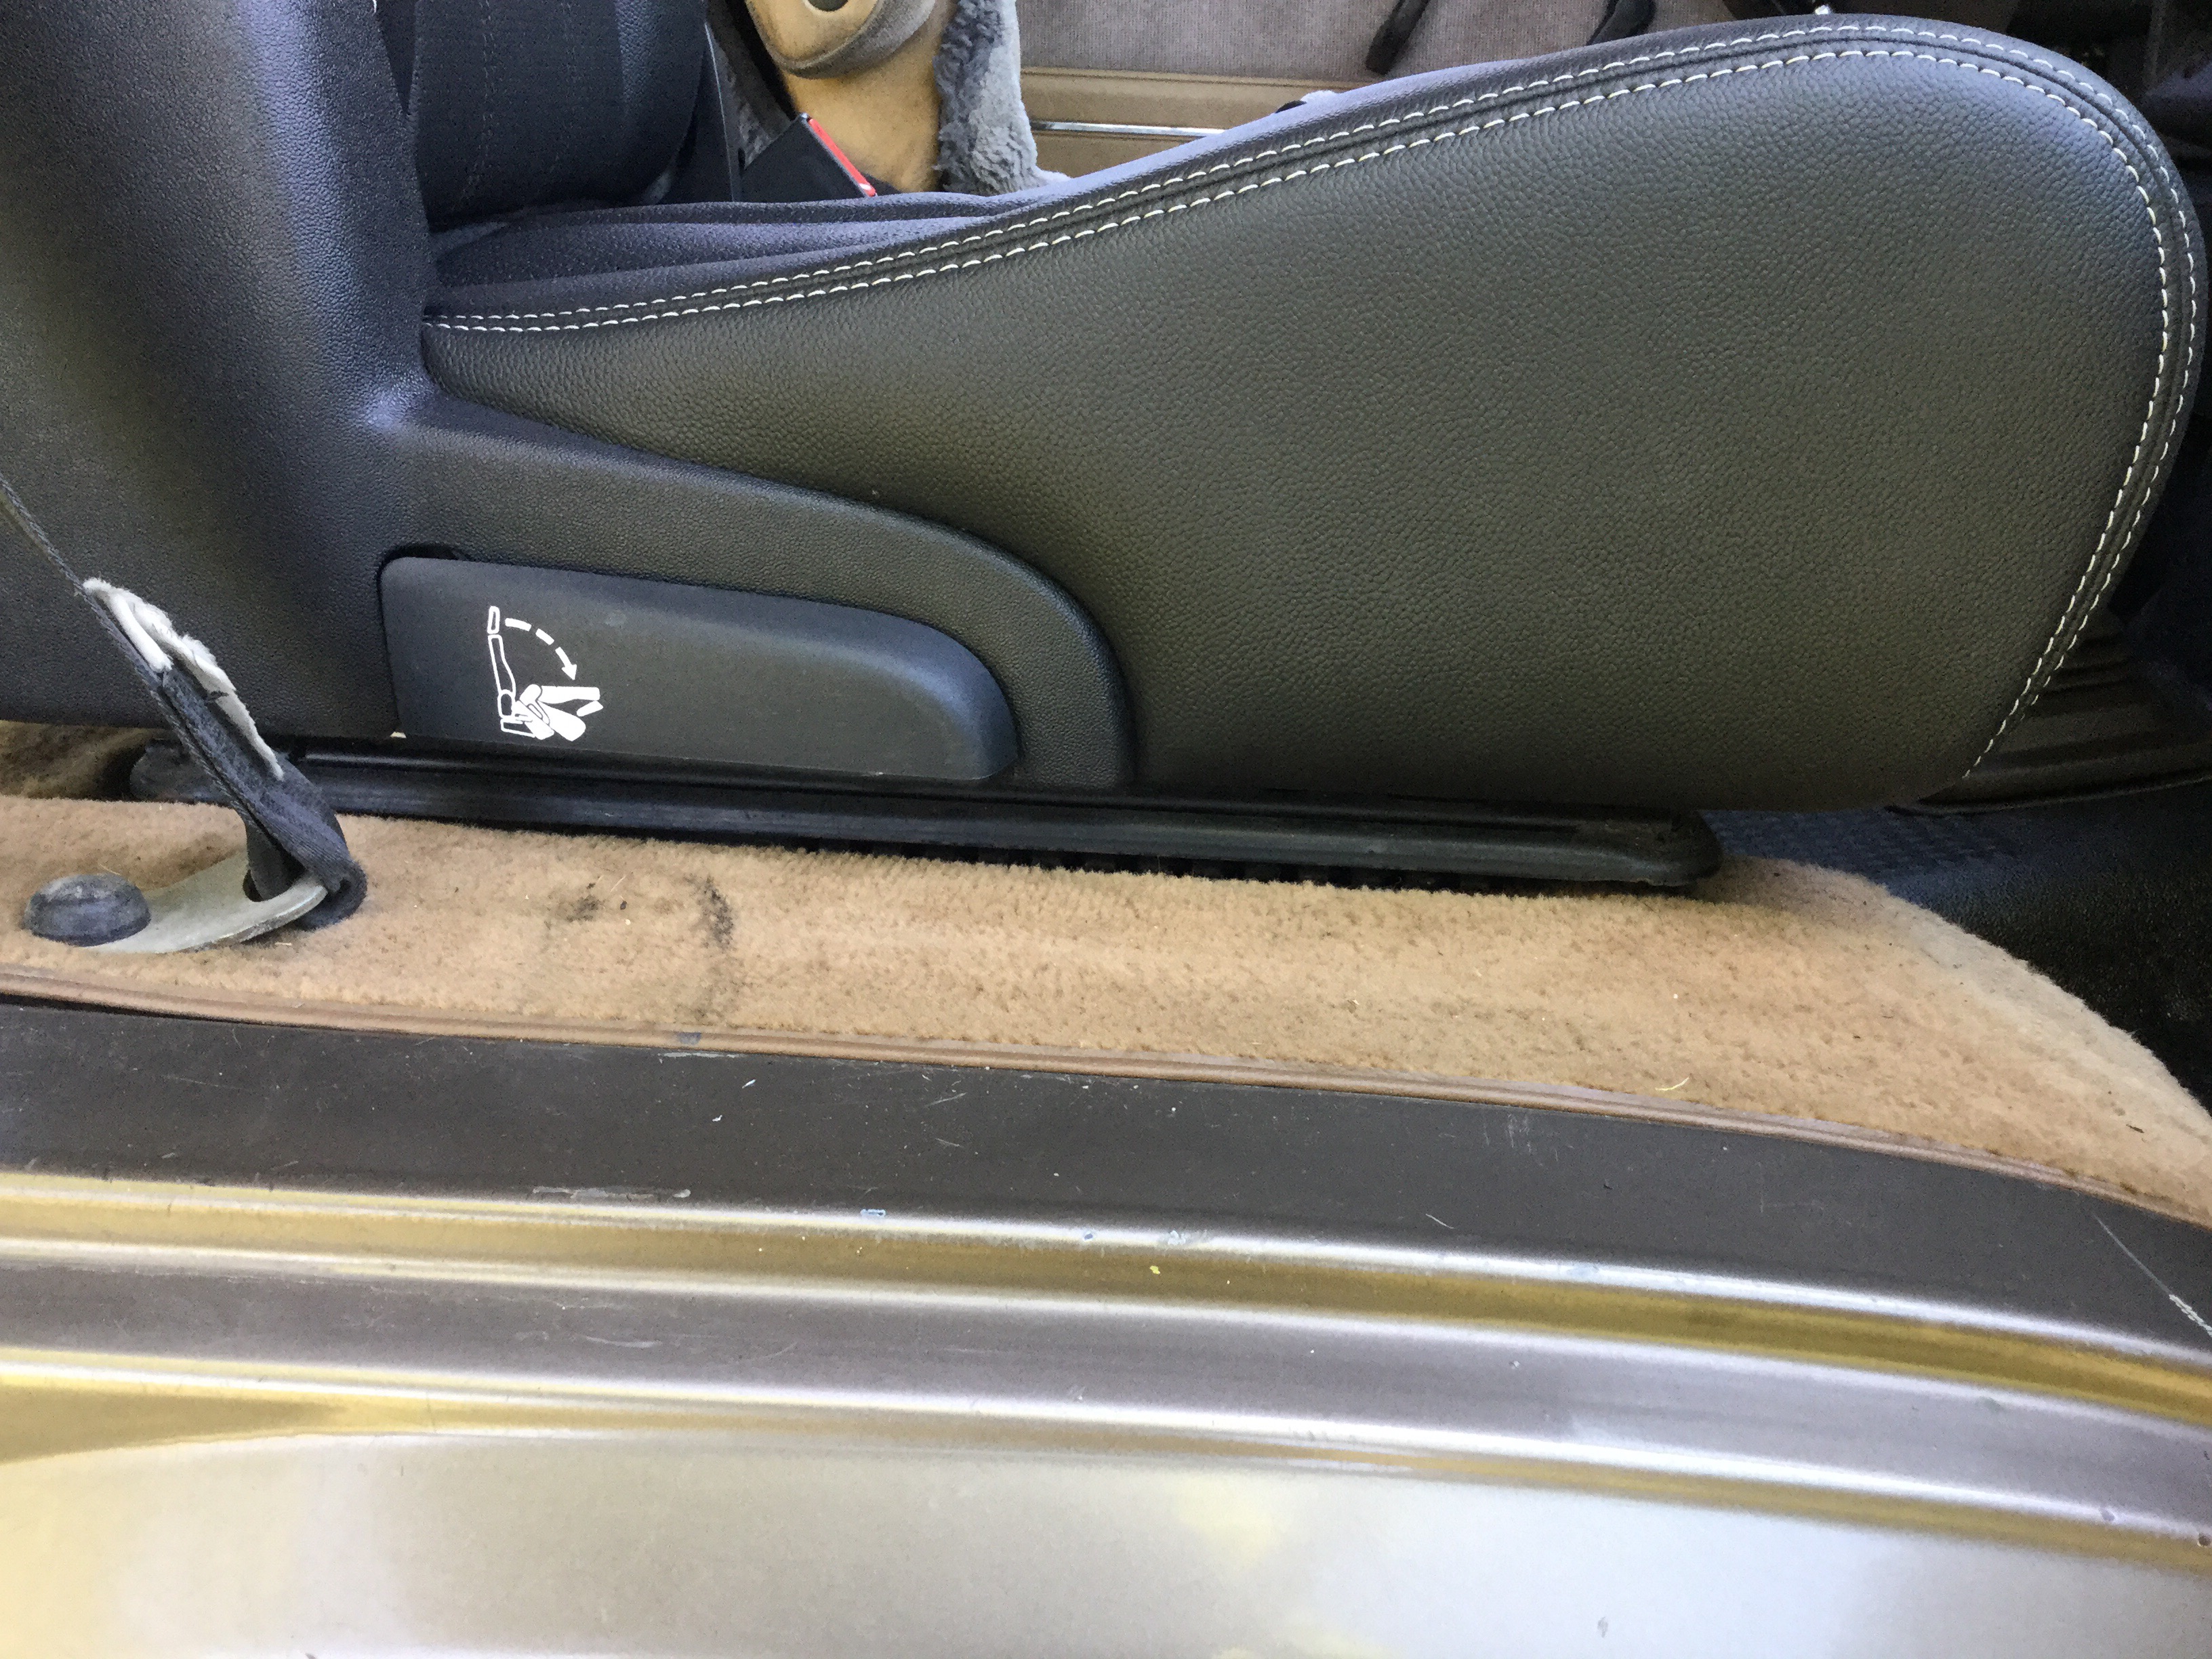
Quick post, I hope to show more details later. Adapted one of a pair of seats to fit on stock seat slider. There is a samba thread about this seat and the pioneer (link ) only used the Caravan slider mechanism in the install. Good fried Simon liked what he saw in the thread and bought a pair of seats and had the necessity of being able to move the passenger seat more, ie incorporate the stock sliders. With both sliders in action you can get a good range of fore and aft movement.
I just finished making the adapter and doing test fit in my van. The seat is more comfy than the stock seat. And it’s leather, and has heating elements ( connecting the heaters is a chore yet to be enjoyed).


Here are some shots of the aluminum rails I made to allow stock seat sliders to be used. Note, the aluminum stock was left over scrap, the single holes in the vertical face have nothing to do with the install.
Laying on the stock sliders ( sliders salvaged from a spare seat, a couple of bars laid in the recesses just to show where the Chrysler seat rails will fit. I don’t have any more pics right now of the completed assembly including the slider release mechanism made to allow the stock slider rails to move ( the Chrysler seats have integral slider mechanism. Having the stock one too was really just to secure the stock rails). I’ll try to remember to get pics.

The longitudinal bars sitting in place. They have yet to be drilled to match the Chrysler seat bolts.
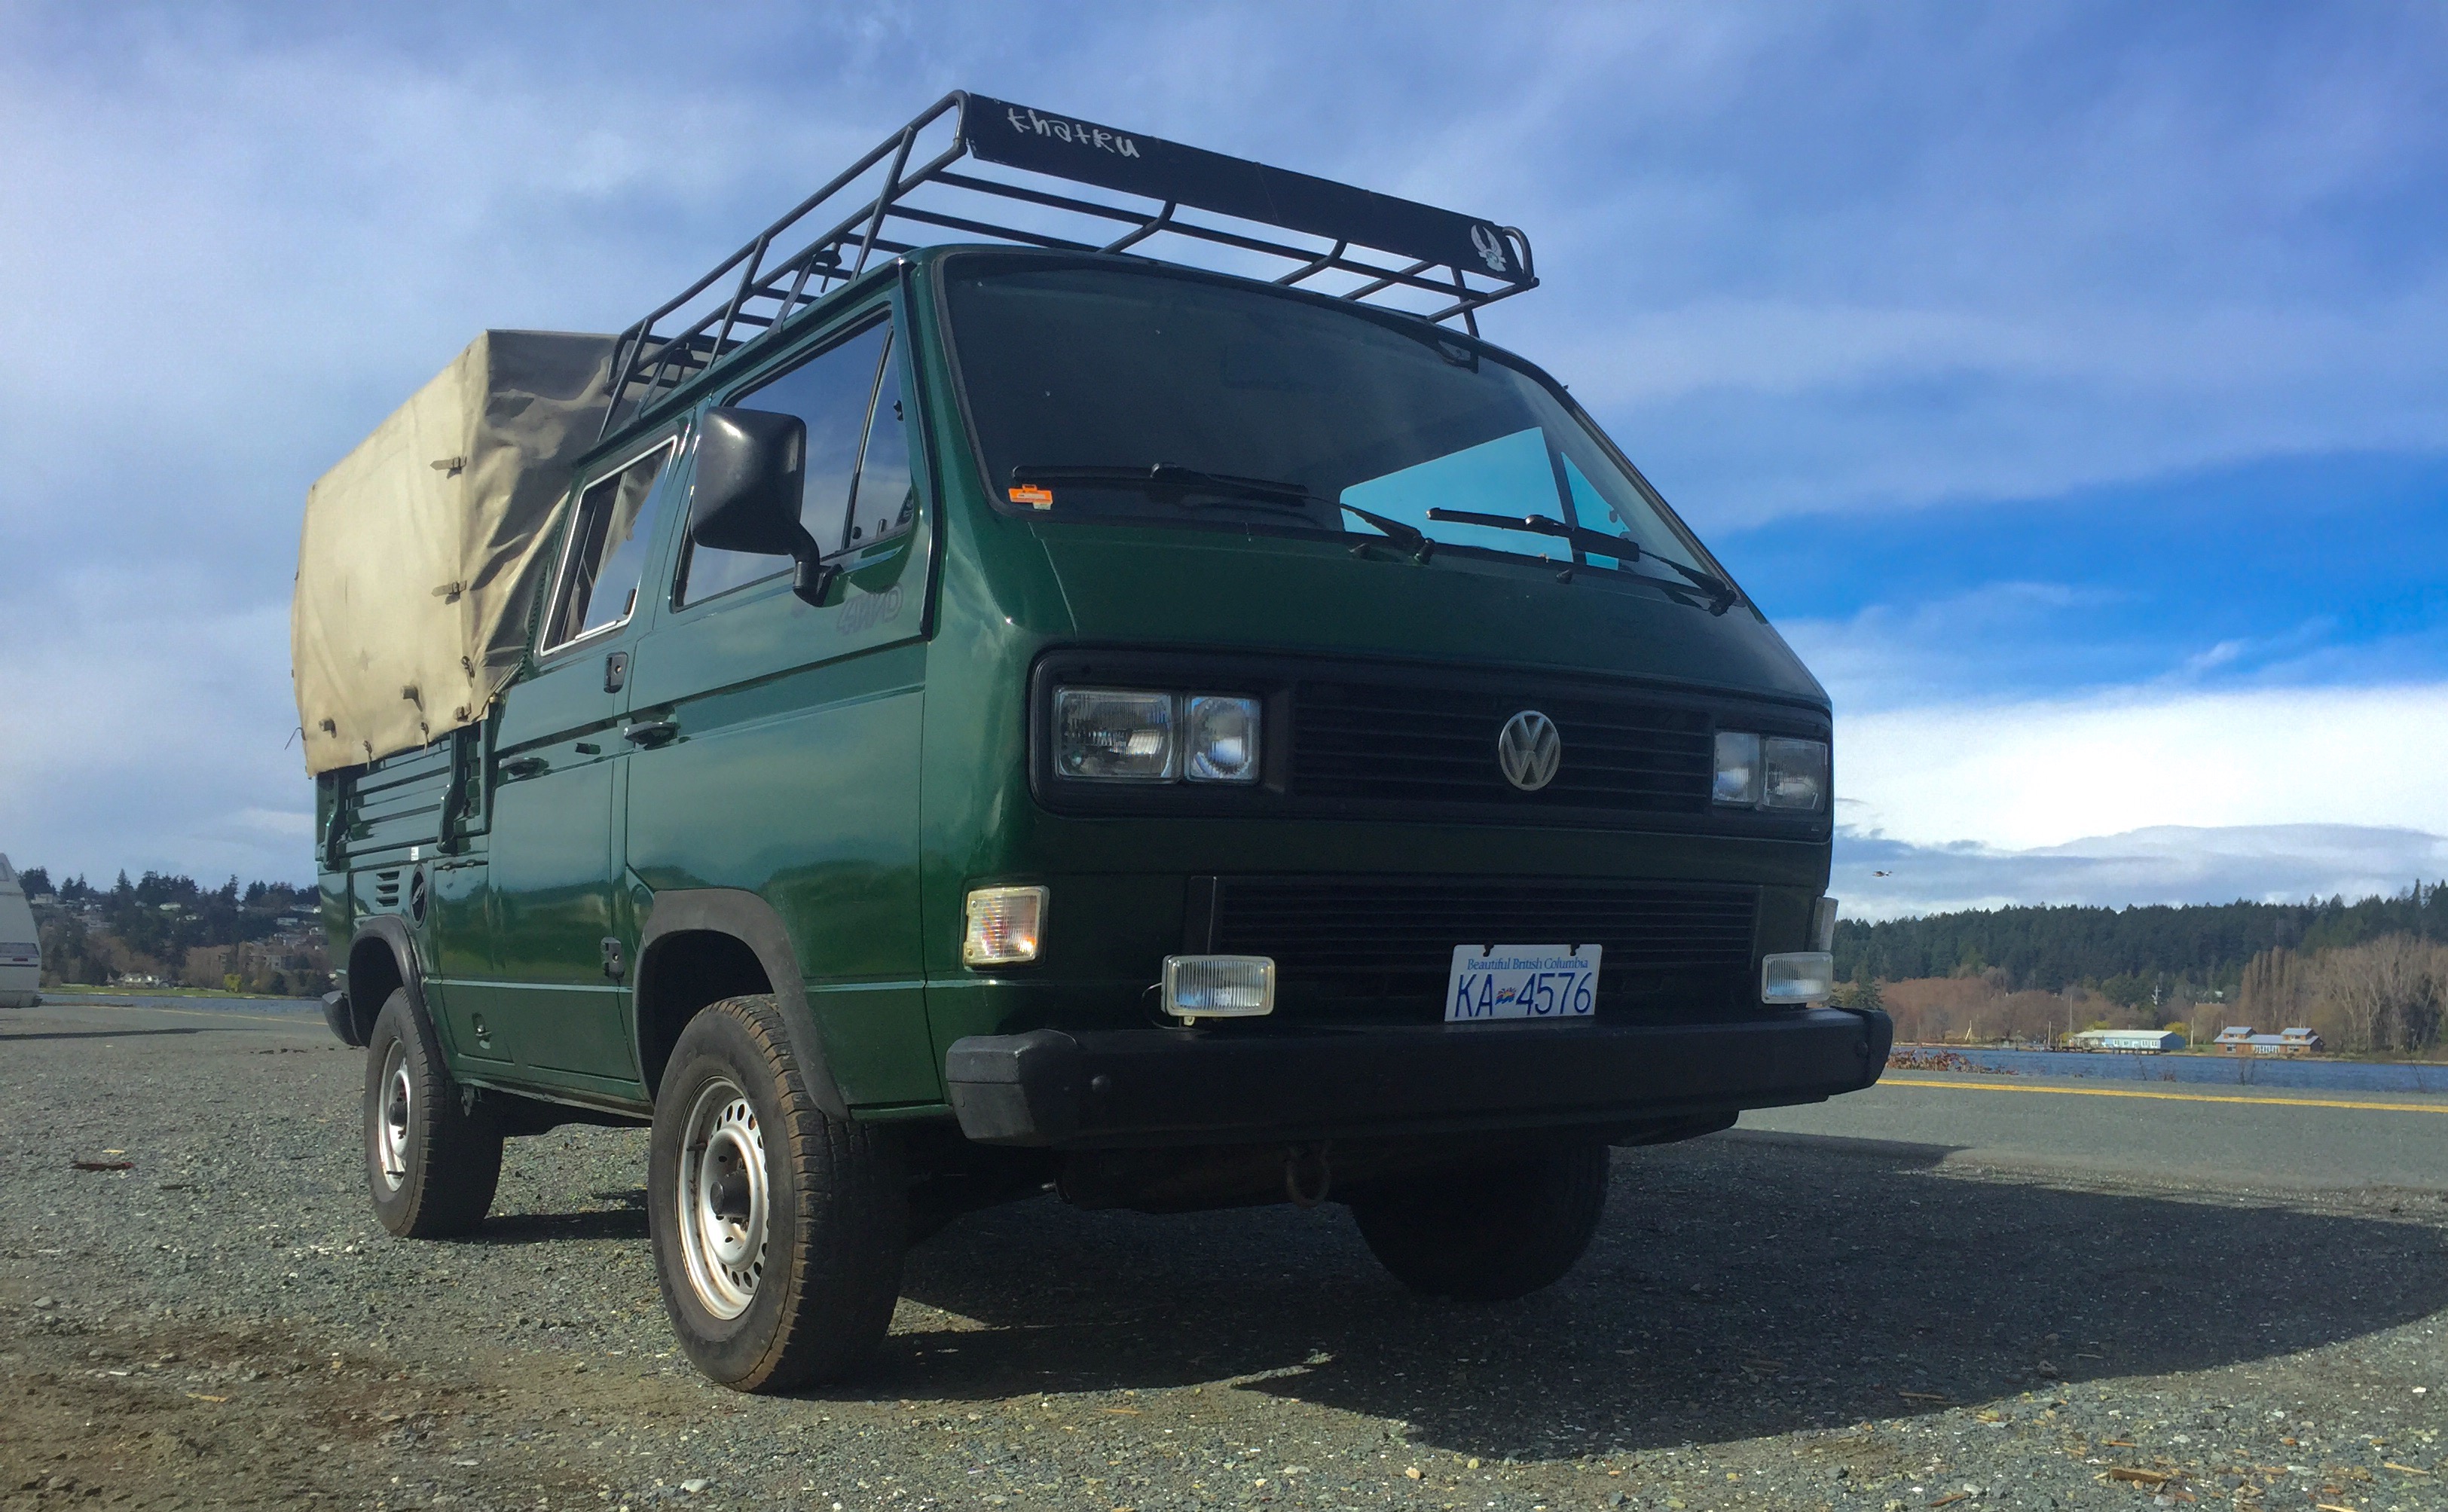
Vanagon – Simon’s Doka
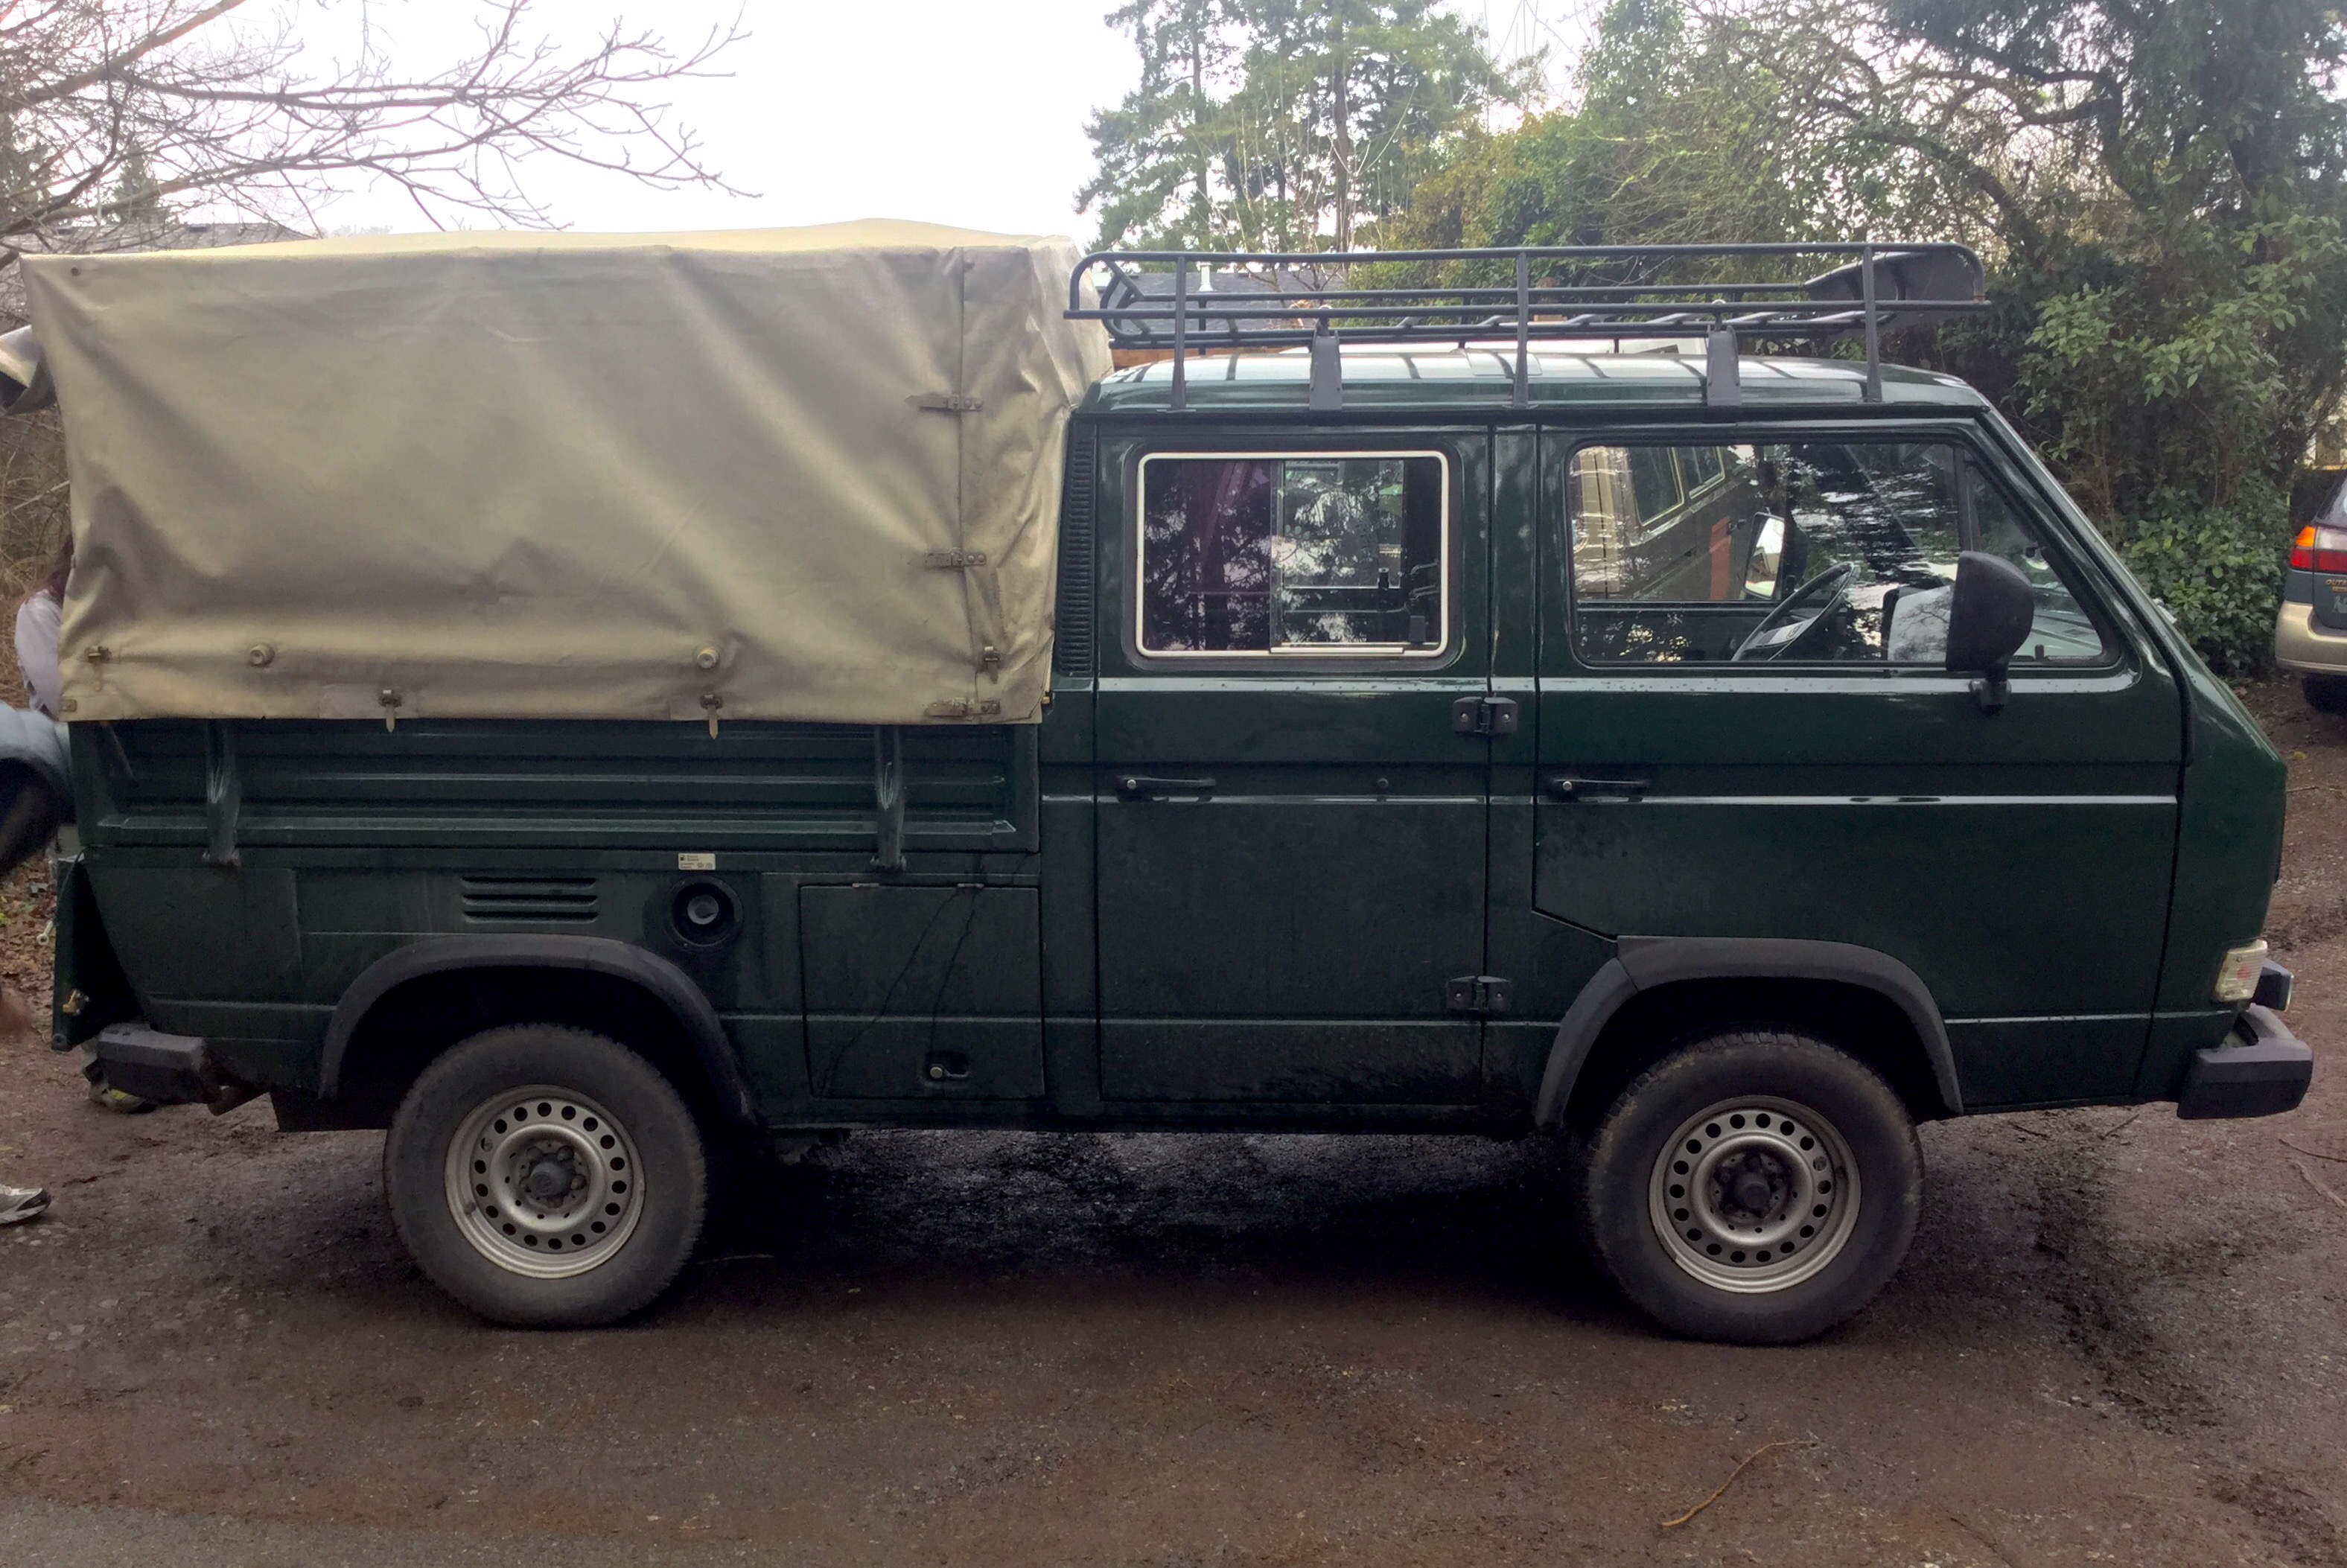
Some nicer shots of the Doka, taken by Simon. Notice the gun racks.


Another tire carrier
Posted by albell in syncro, vanagon, vanagon mods on March 6, 2016
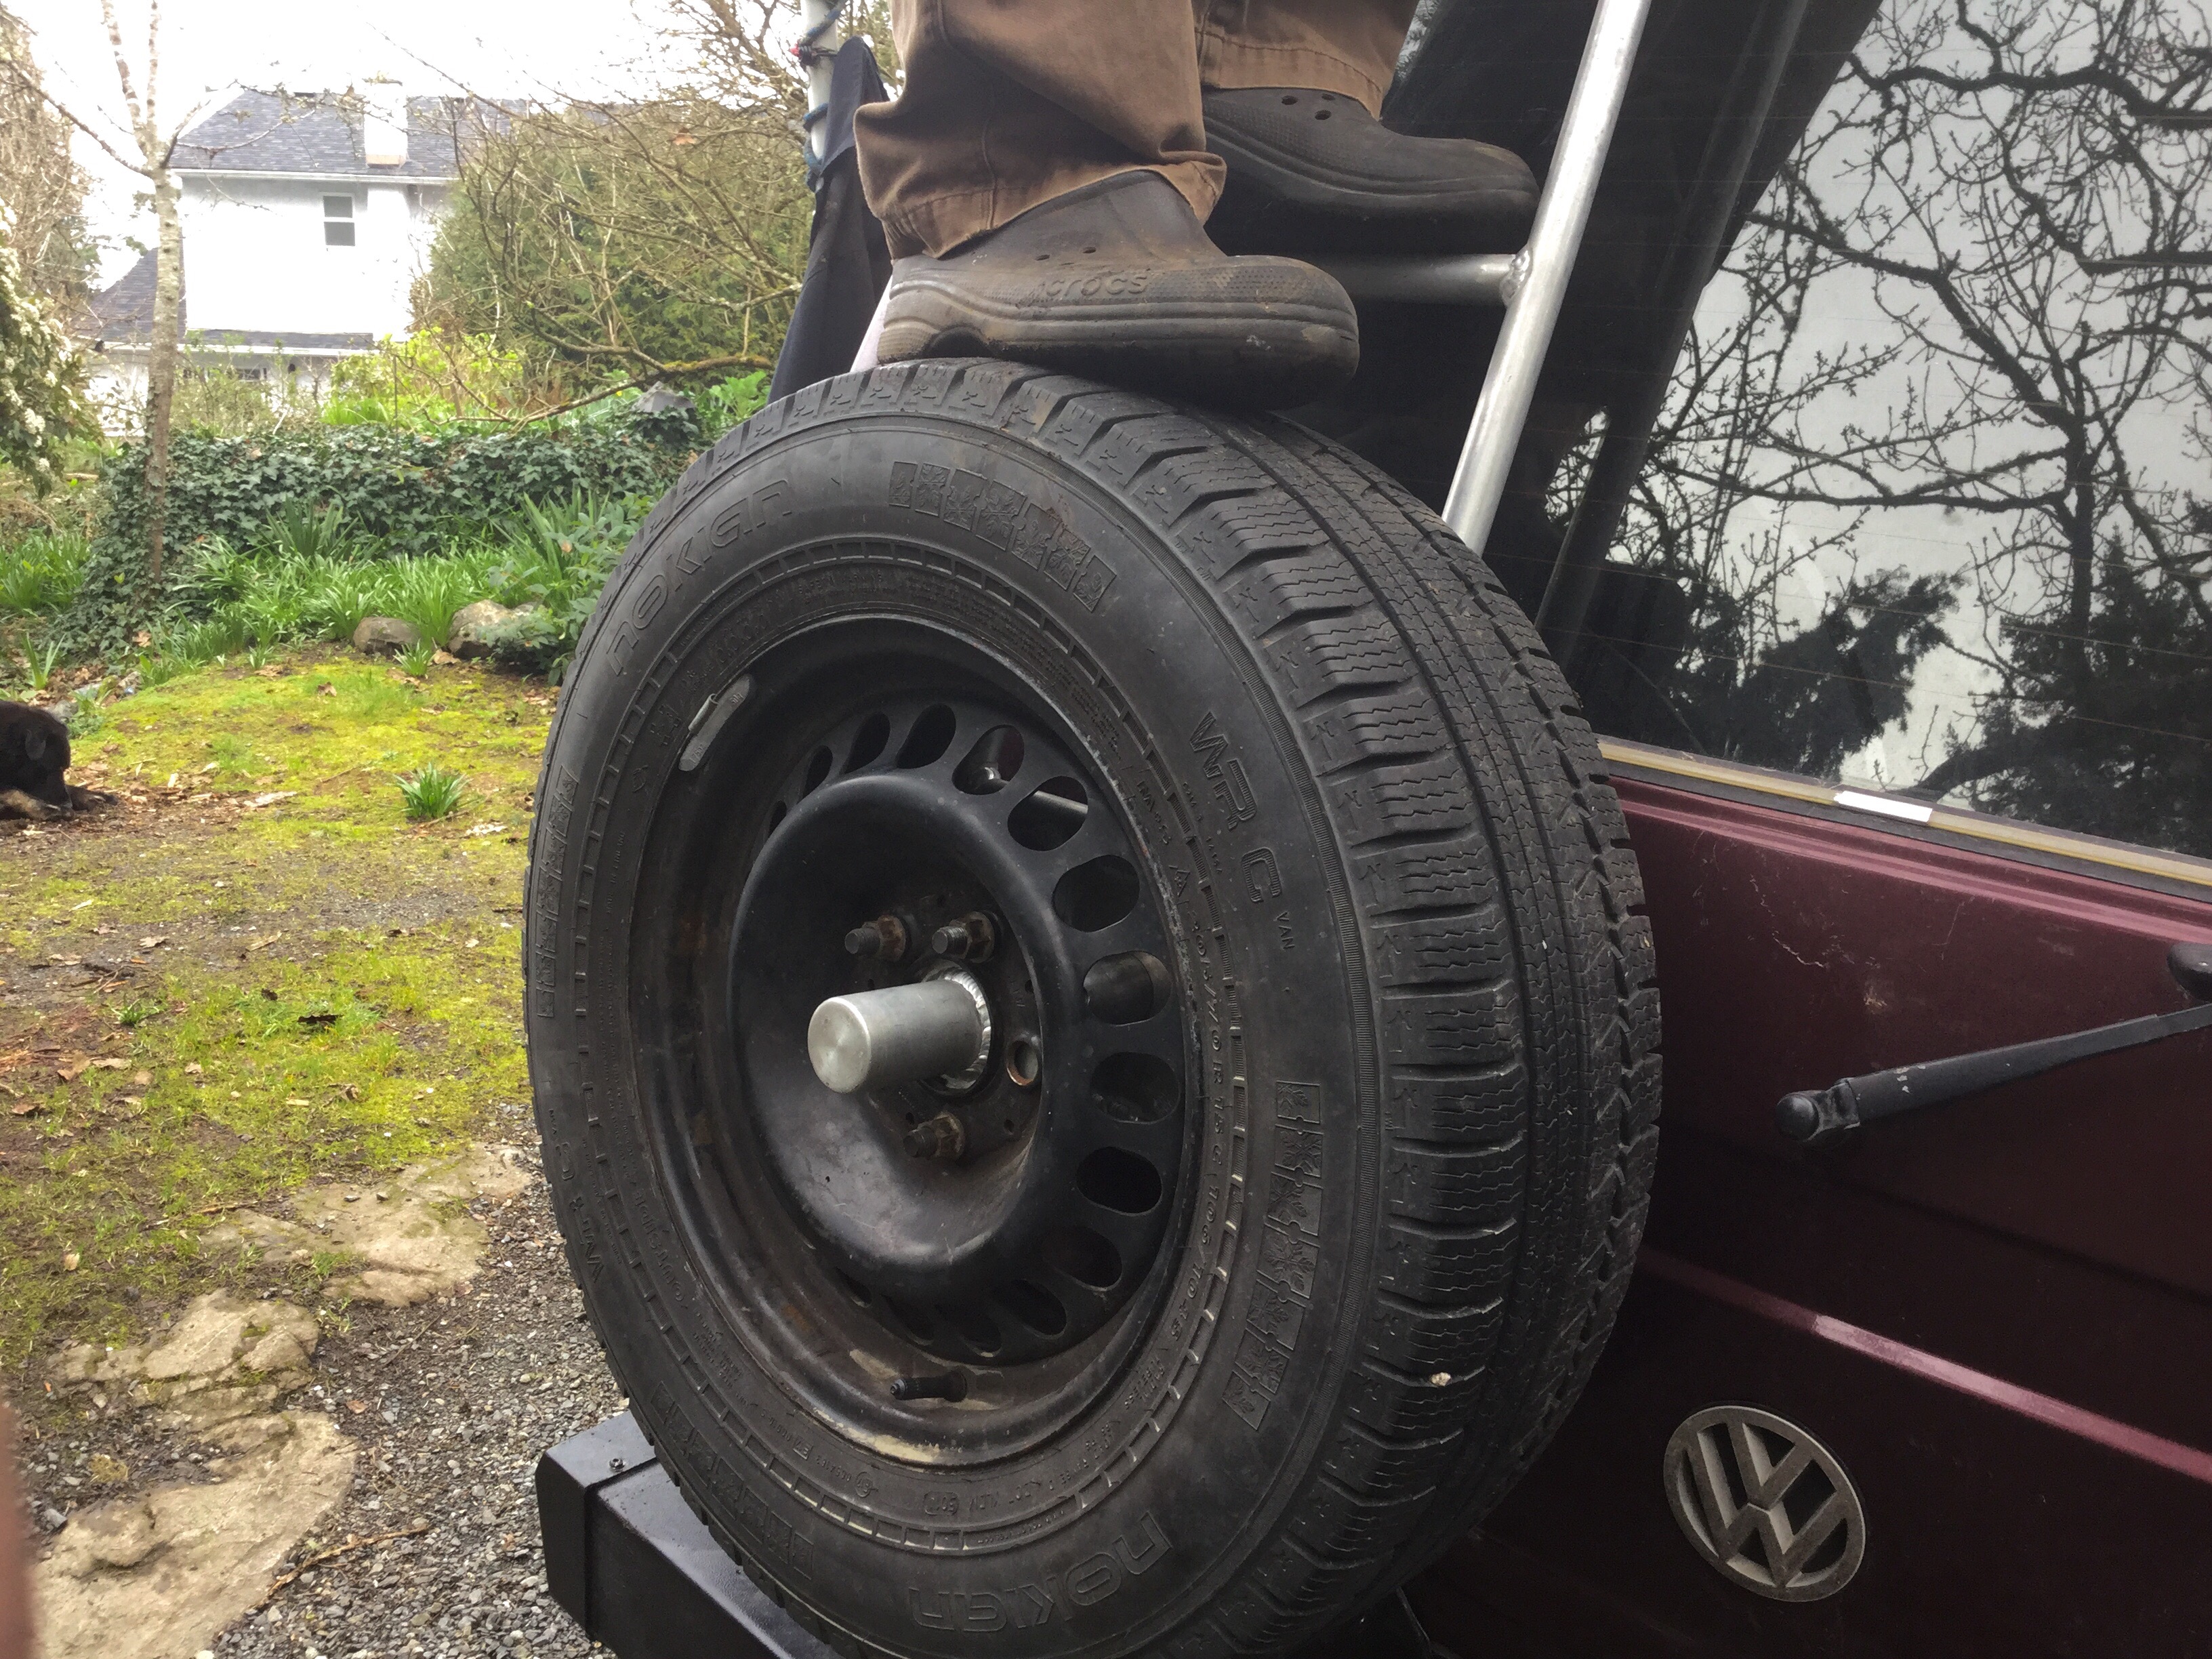
Made another carrier, for good friend Simon. Some changes made from my original. I think I have a much better hatch grabbing arrangement at the bottom. Little forward pressure on the door panel but lots up vertical grip. Tire is very solid to the ladder and the ladder very solid to the hatch. Also I repositioned the tire placement to be about 3″ lower than my original so less intrusion into the rear window.
Having the tire on the hatch is a compromise. You do need to have special hatch struts to make opening the hatch an easy process. Simon has a pair of very beefy 1250 N struts that raise the landed hatch with no effort.
The top hangers and the bottom grabber assembly is made from 0.120″ thick 316 stainless. Bolts are stainless. But the lug nuts and the mounting studs are steel.
I’m going to make some more, with some further refinements.
During the build, comparing tire placement with my original ladder.

Ditto.

It’s 1″ tubing, 1/8″ wall thickness, 6061 aluminum. Joints coped and tig welded.
On Simon’s van. The stainless steel hangers and bottom grabbers have been painted, but the ladder itself untouched. Simon is going to paint it later.

It still works as a ladder with the tire on. Step up from the RMW bumper onto the tire.


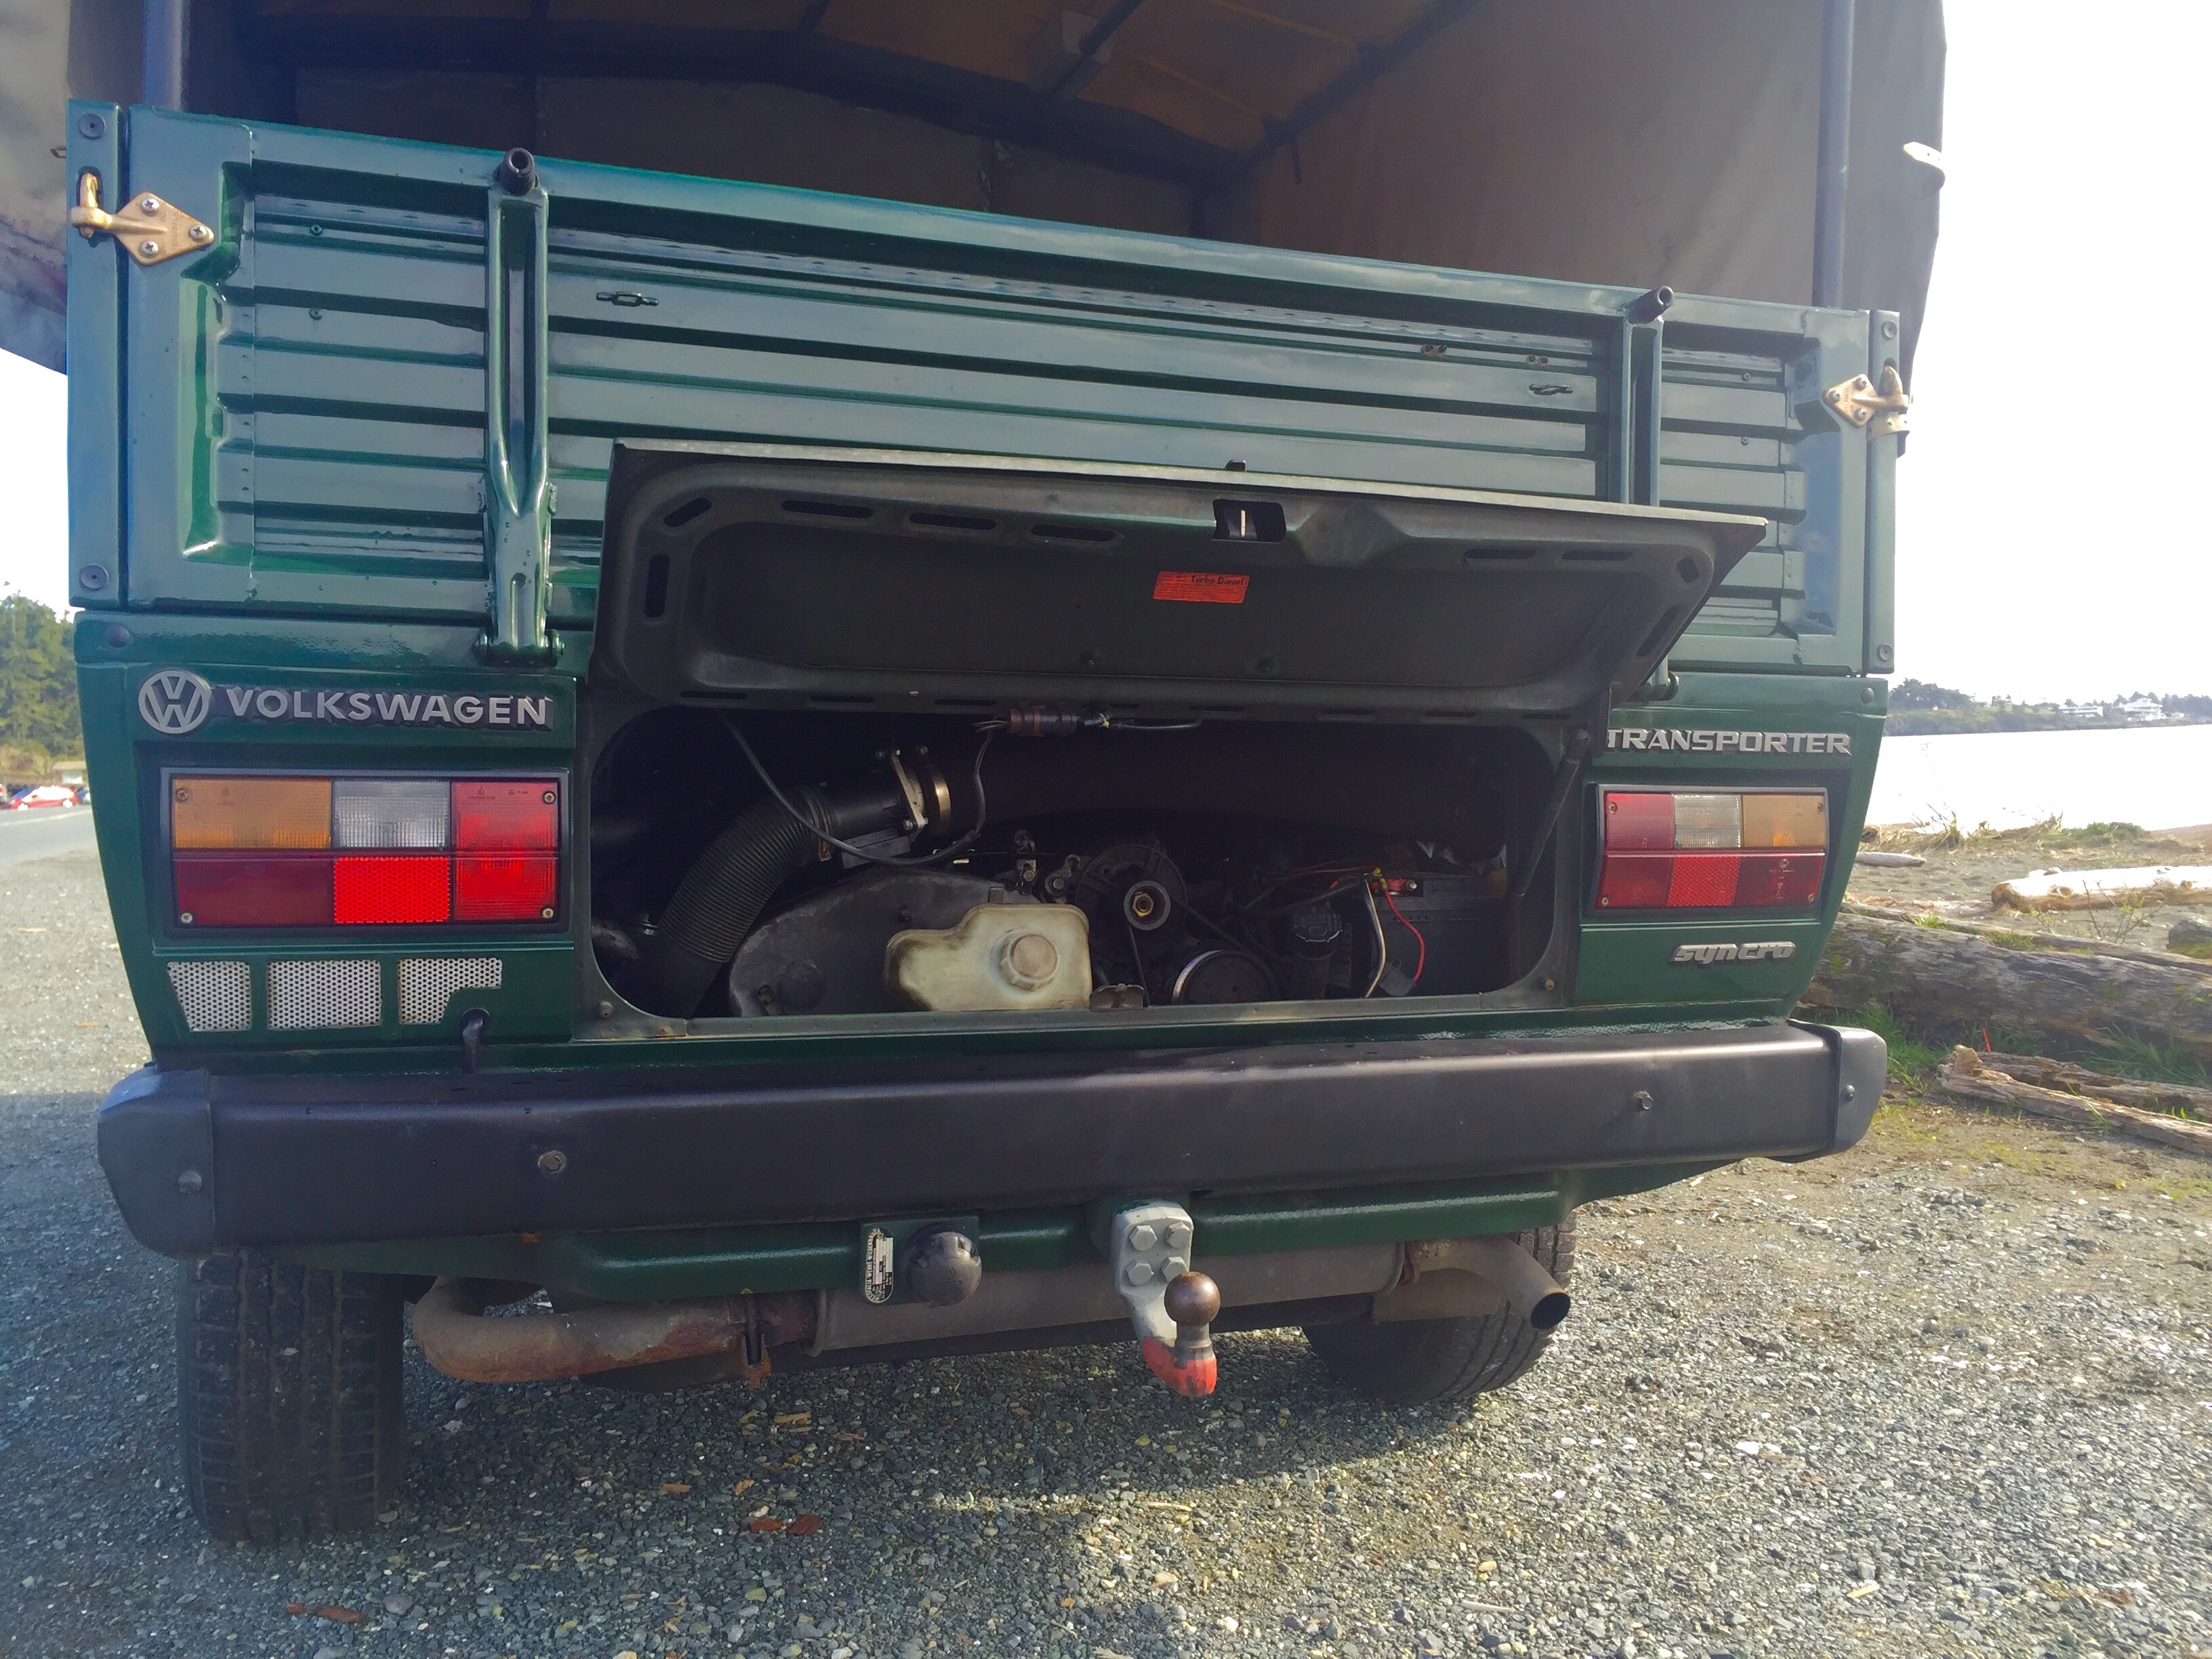
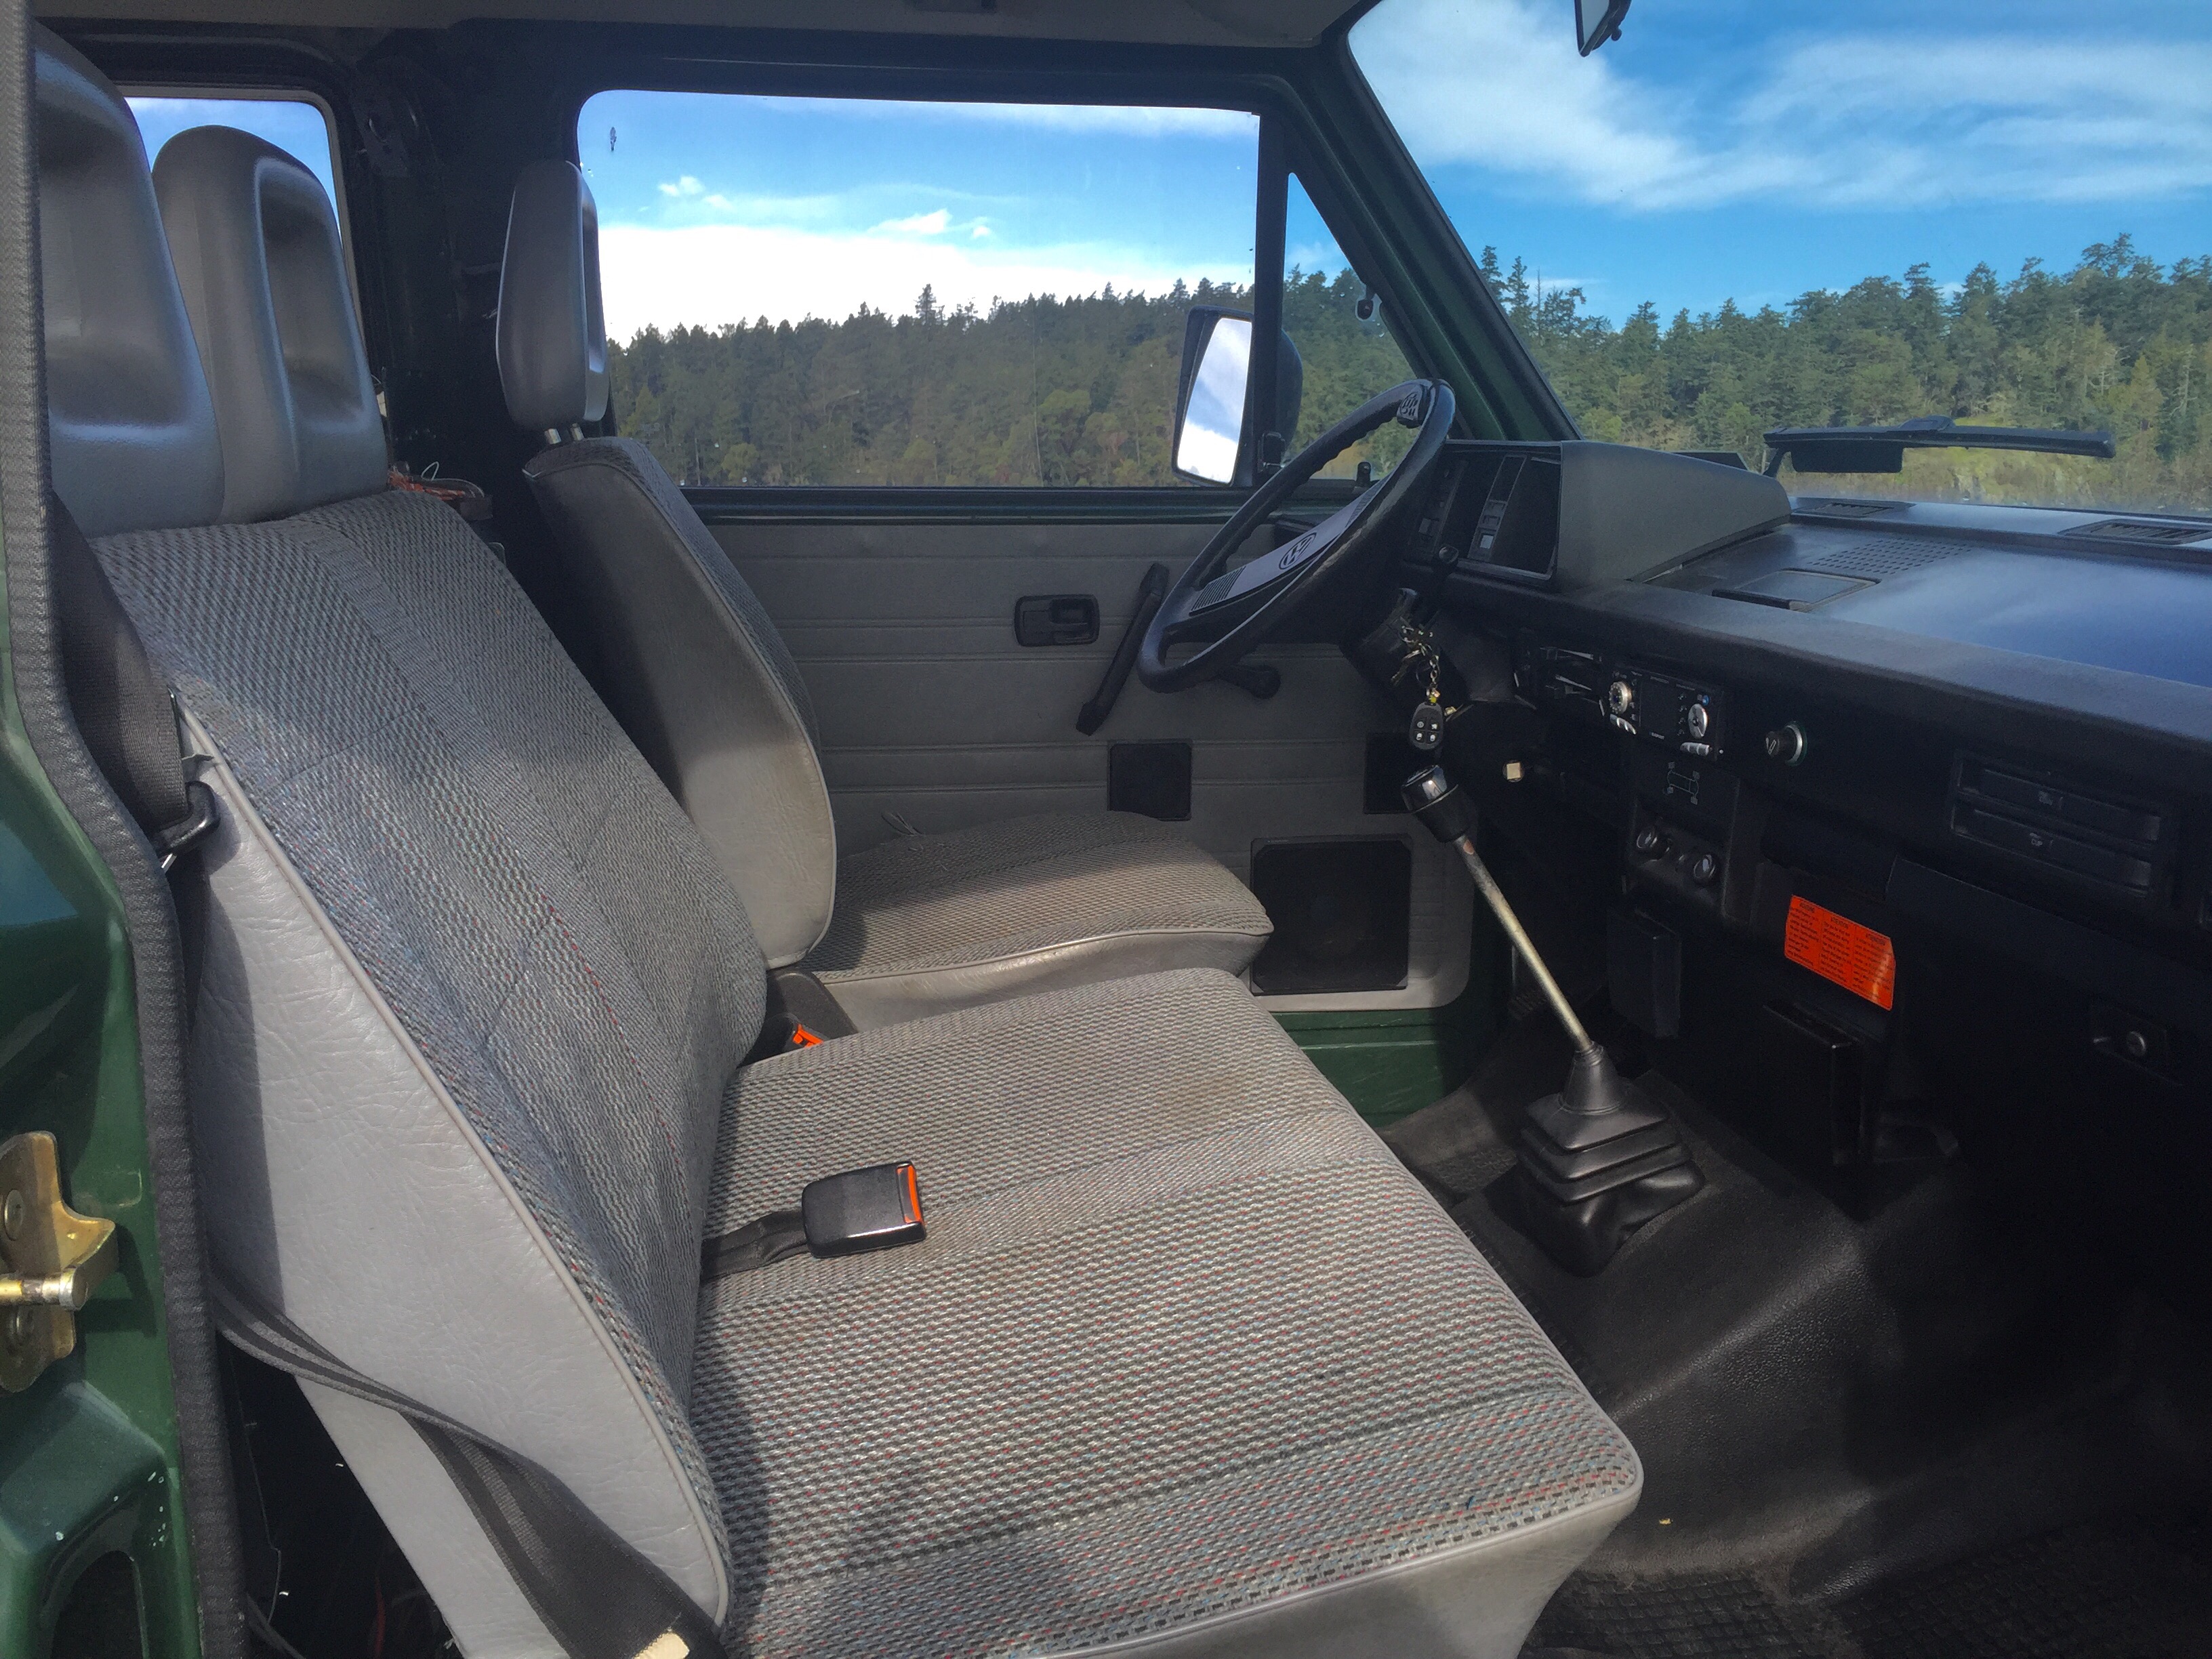
’89 syncro Doka
Good friend Simon just bought another syncro. It’s a private import 89 syncro doka that we believe was a German border guard vehicle. The jx diesel has been replaced by a 1z tdi, it has both front and rear lockers, 15″ wheels, rear cabin heater, and some rifle racks.
The van drives so very nicely. First time for me to drive a tdi powered van and it’s quite impressive. In fact, it feels more powerful than the subie 2.5 Simon has in his syncro Westy ( but that in part is due to the lower gearing and lighter weight of the Doka). The Subie is probably better for higher speed highway driving but on the trail the diesel is the champ.
Westfalia hitch. 
Vent for turbo inter cooler. 


Vanagon – syncro starter repair
Posted by albell in syncro, syncro specific repairs, vanagon on December 10, 2015
Tuesday morning the van turned over slowly, but did start. I had to drop by a couple of places before getting to work, and on the second stop the starter died. Nothing, no click, no movement. Did a rolling start to get to work and there I checked out things ( connections, battery) and decided the starter was kaput.
I have to admit that the starter had been acting up on occasion for the last 6 months or so. Occasionally it would spin but not engage the flywheel. I agree, I should have known better.
As luck would have it, workplace close by my work had a hoist and it was free. The owner let me use it and later that afternoon I got it up on the lift.
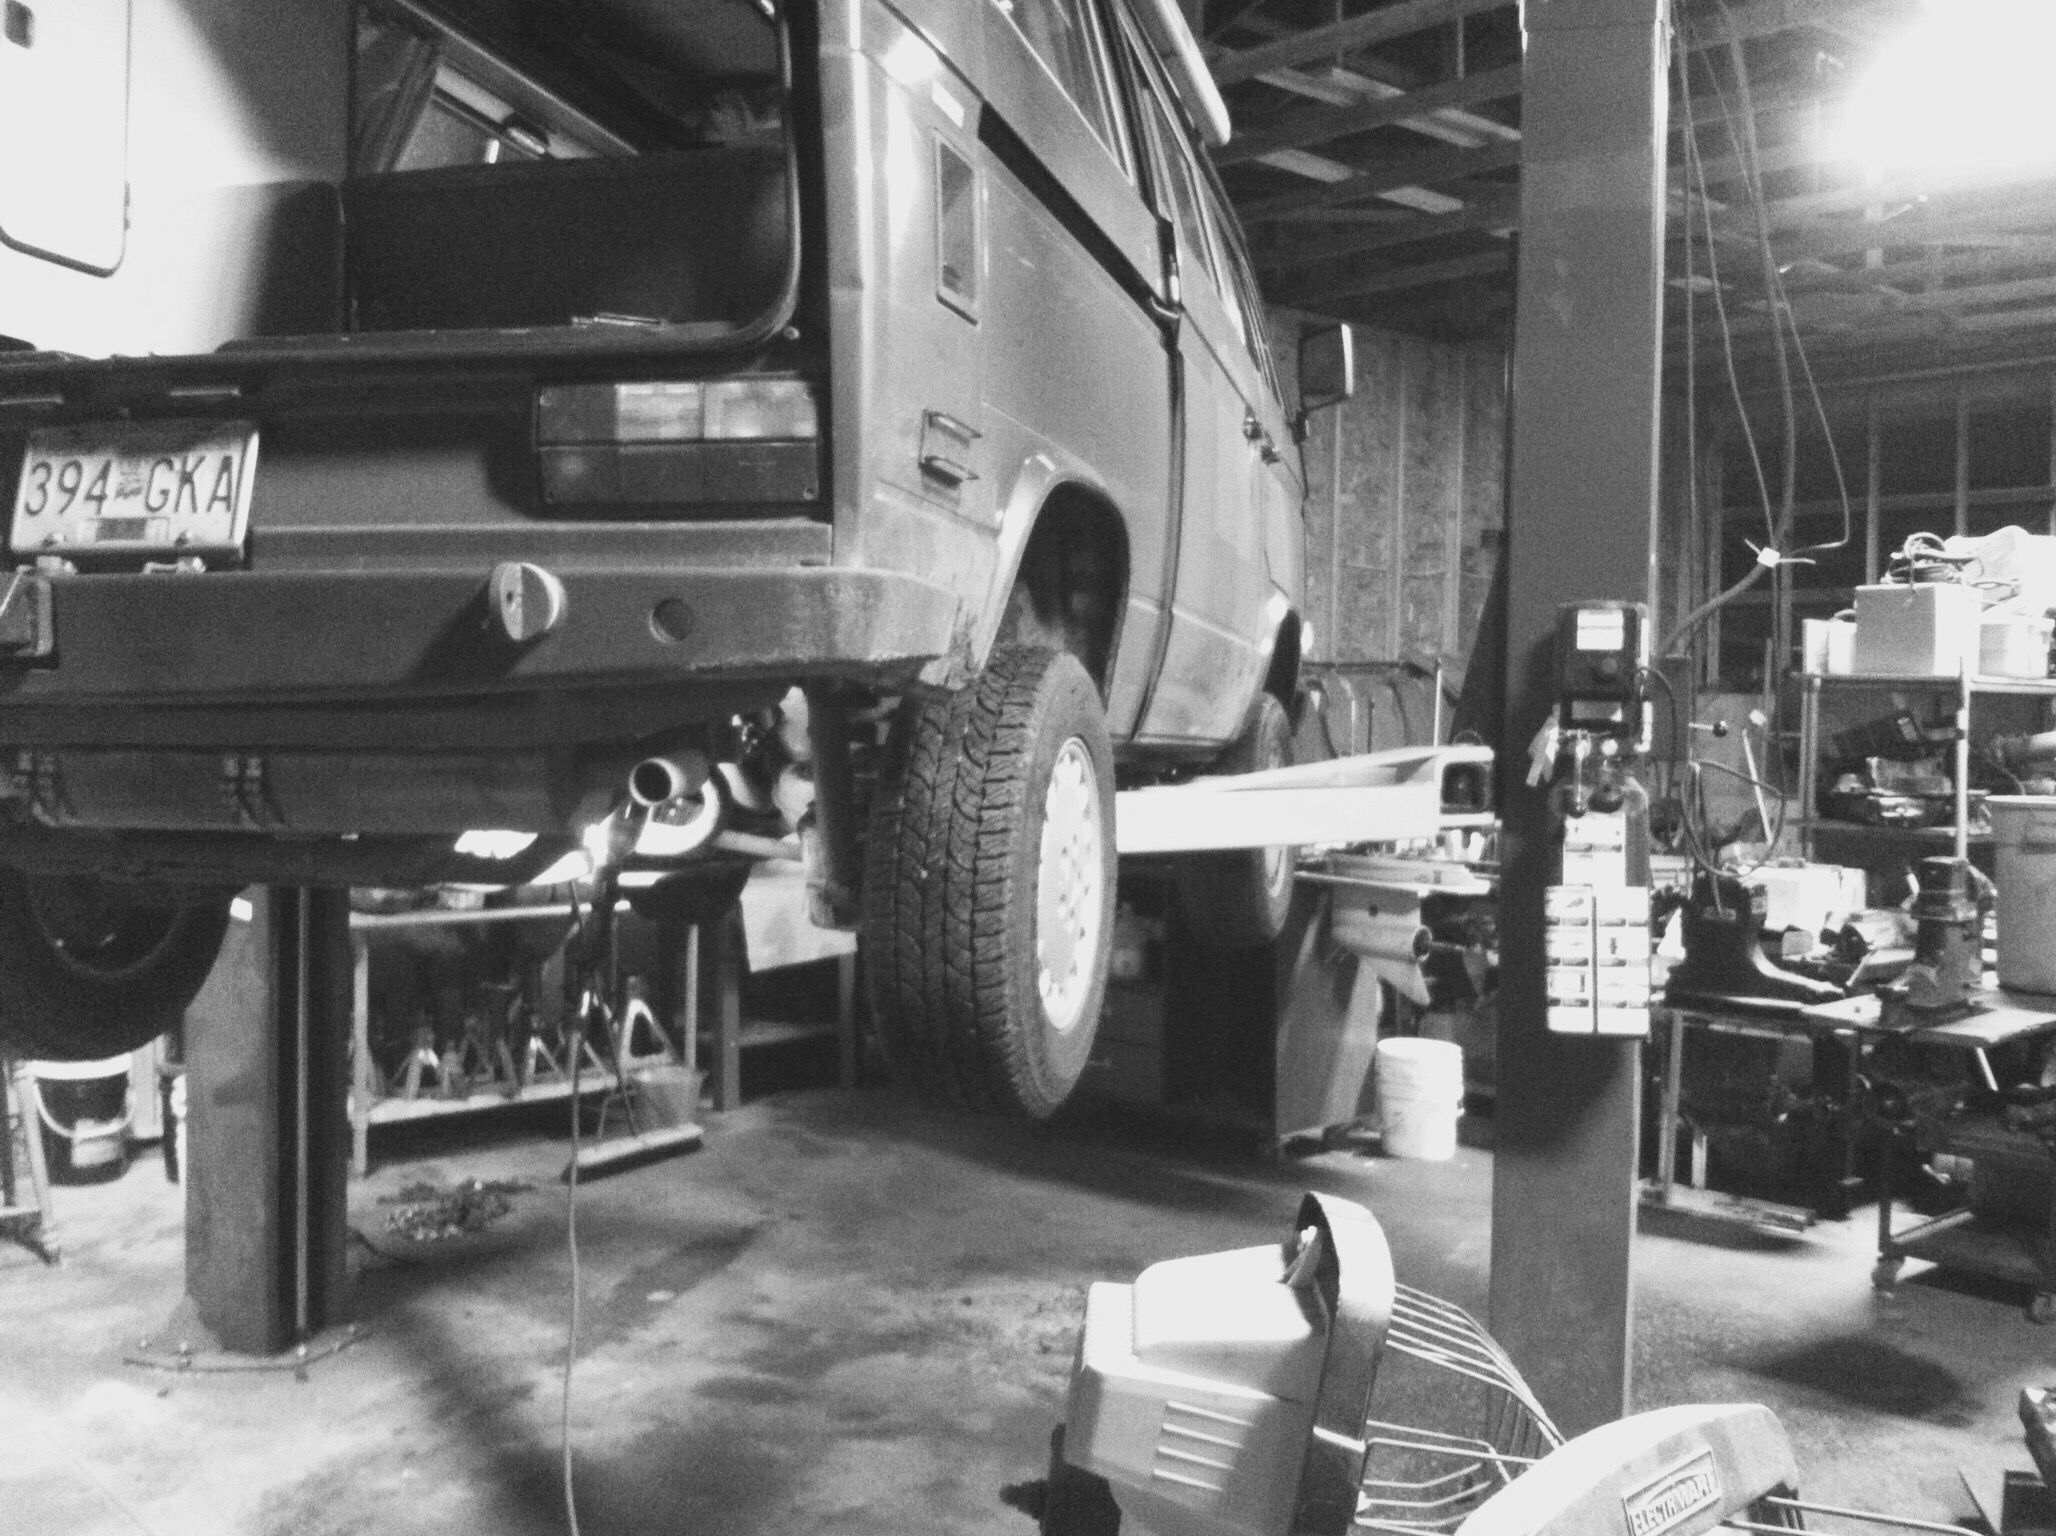
I really wasn’t in the mood to document the job, but I did take a couple of pics and while things are fresh in my mind I have a couple of notes about the job.
Bentley does a fair job of describing the procedure, and there are a few threads on the Samba with additional tips. This was the first time I had taken out a stater in a syncro with engine in van, and I had to use both sources.
Battery disconnected
Van still on ground, S boot on air intake and air filter removed. To get access to the upper starter bolt.
Upper bolt for starter mounting removed. 17mm wrench size on nut on engine side, hex key on transmission side (forget size).
Van lifted
Driveshaft disconnected from transmission. I found the boot ripped so I took driveshaft completely out. I had a ready to go spare axle assembly and I felt chuffed about that. This kind of preparedness doesn’t happen very often
Diff lock actuator. Now this is a little bit of a bear. I found the nuts that Bentley said were welded to the bracket weren’t. Also found that the rubber sleeve covering the actuator shaft was a section of heater hose. So there was no pushing that up to drive out the roll pin, I cut the hose off. You can sort of see the cut hose in this pic.
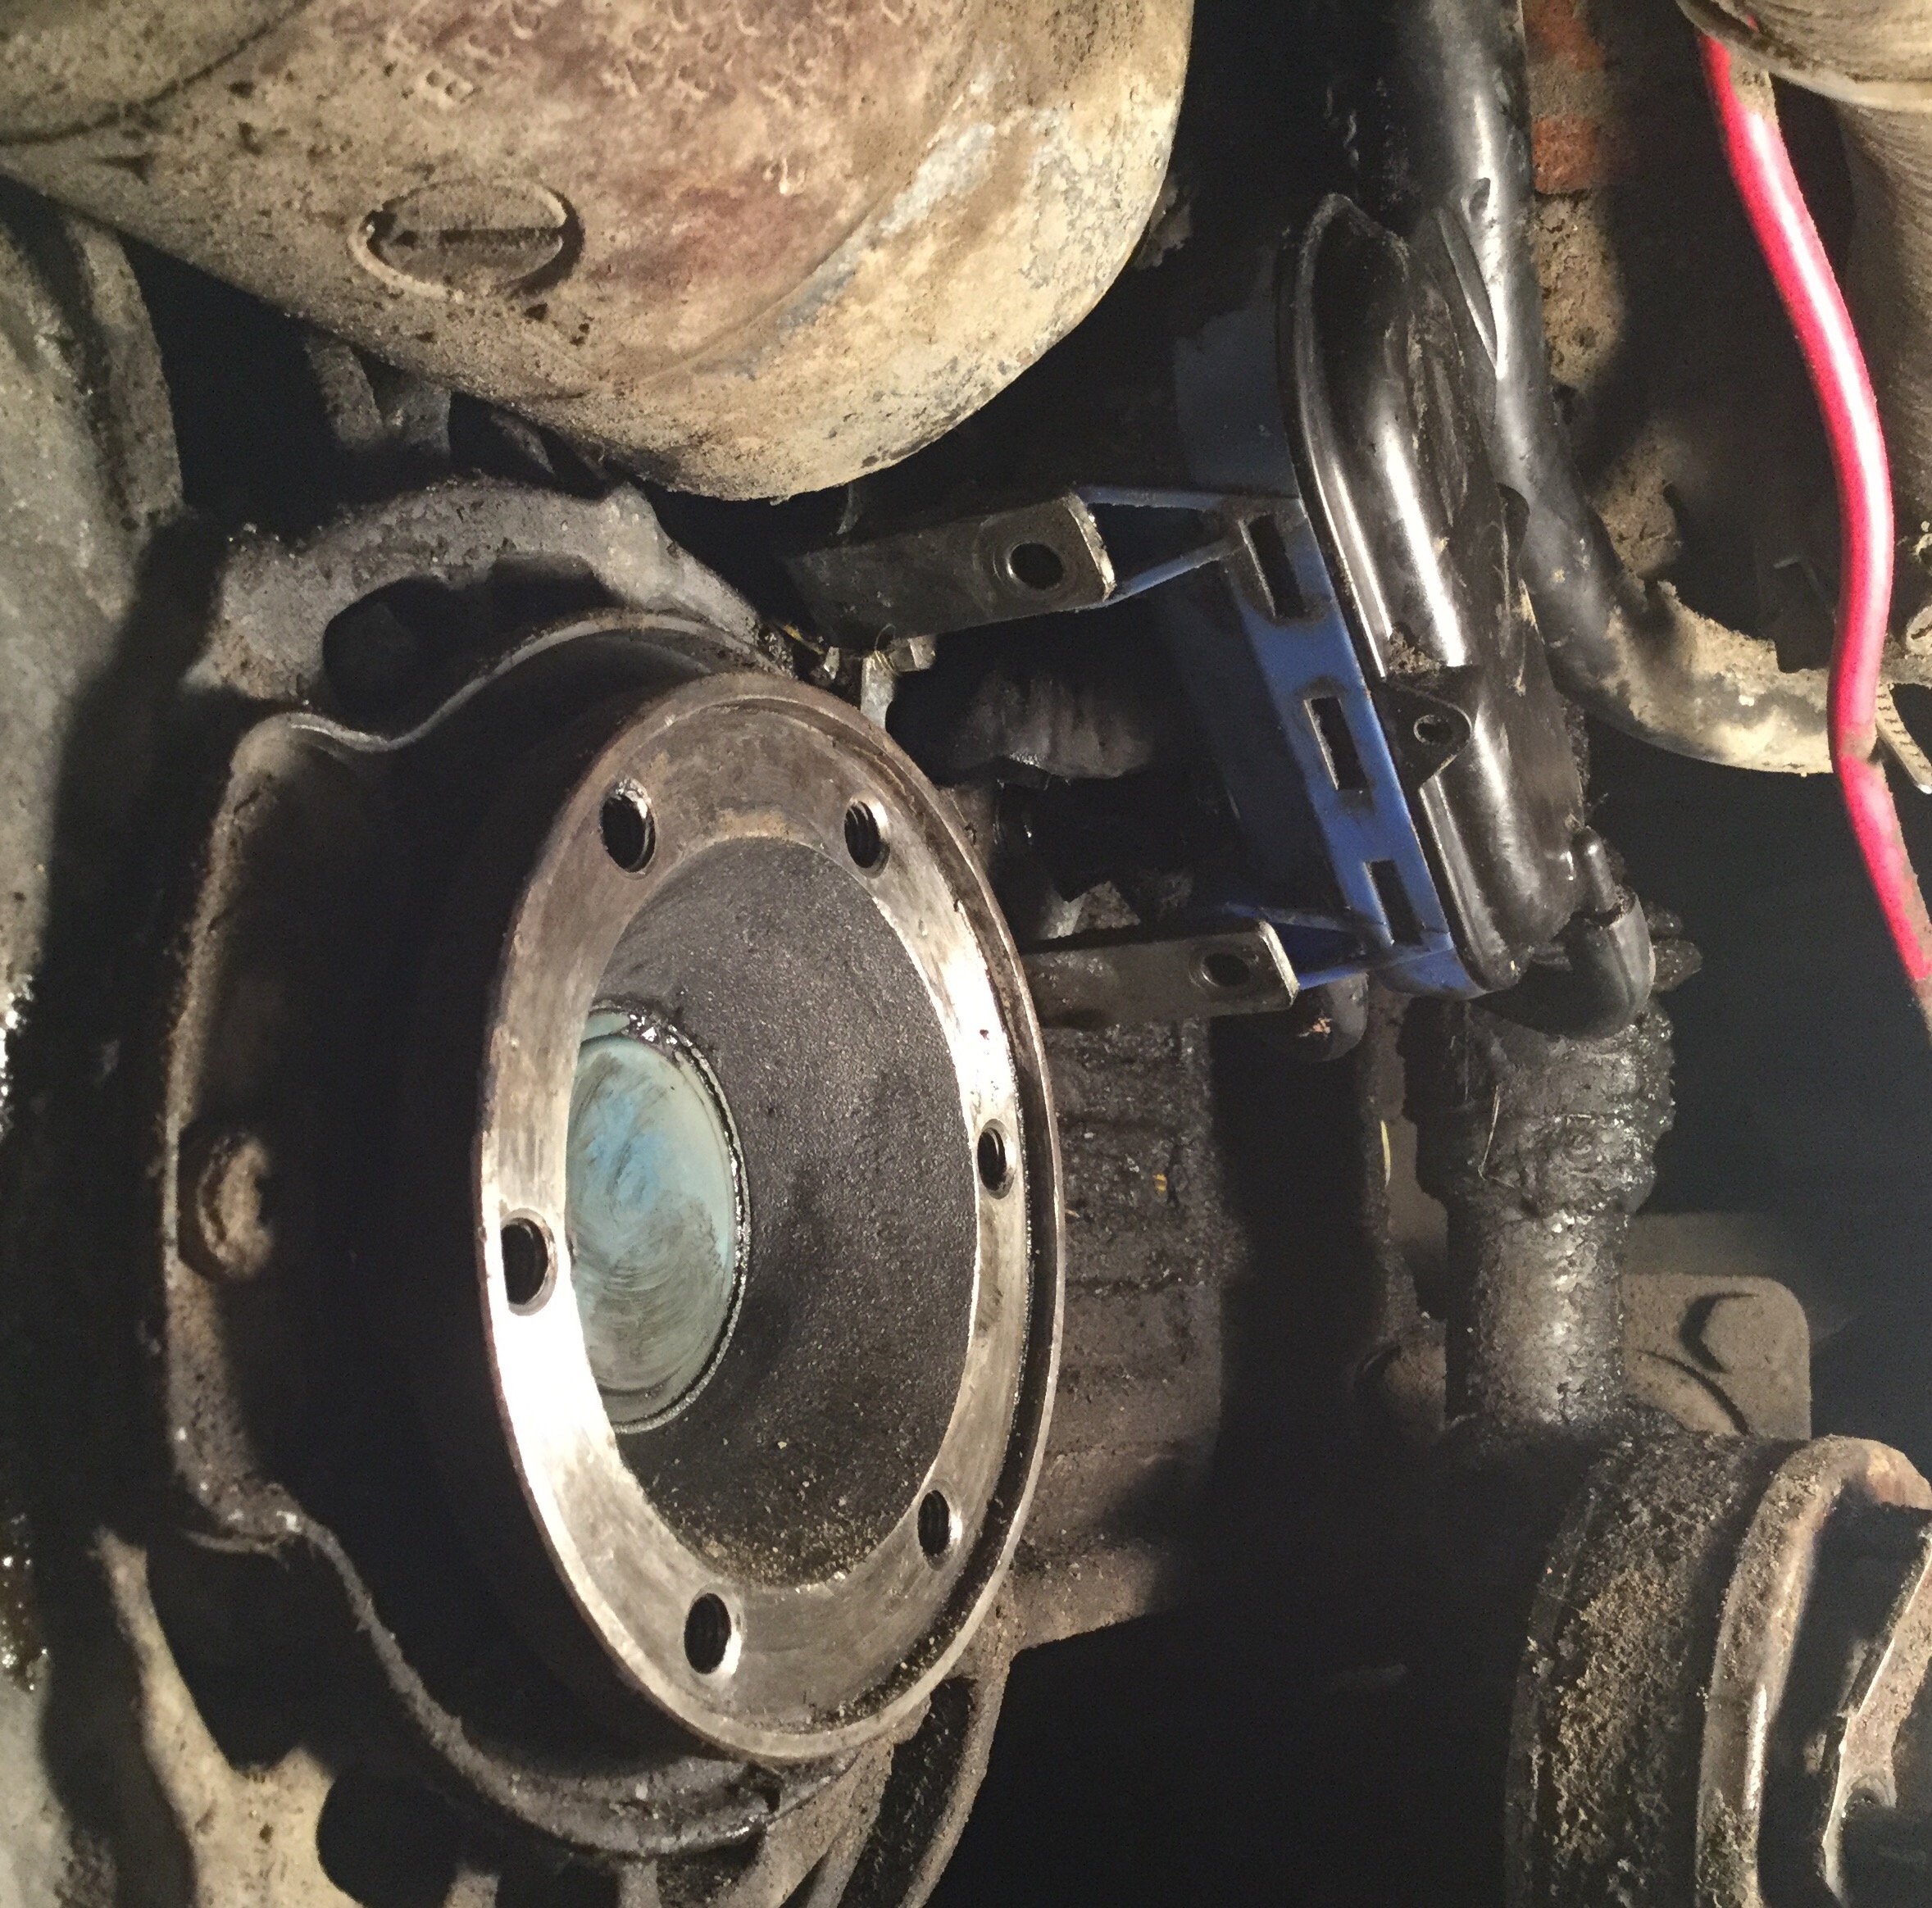
Driving out the roll pin wasn’t as hard as I expected. Room is limited in there but I managed to do it and leave the roll pin still actuator shaft.
Now the lower starter mount nut, and the jiggle and wiggle to get the starter out. Once the gear end was out and it dropped down a bit I could remove the electrical connections. Took the starter to the bench, took apart the solenoid. Look ok I guess, it would retract under power if I gave it a helping push. Removed one end of the starter and, well, have a look.

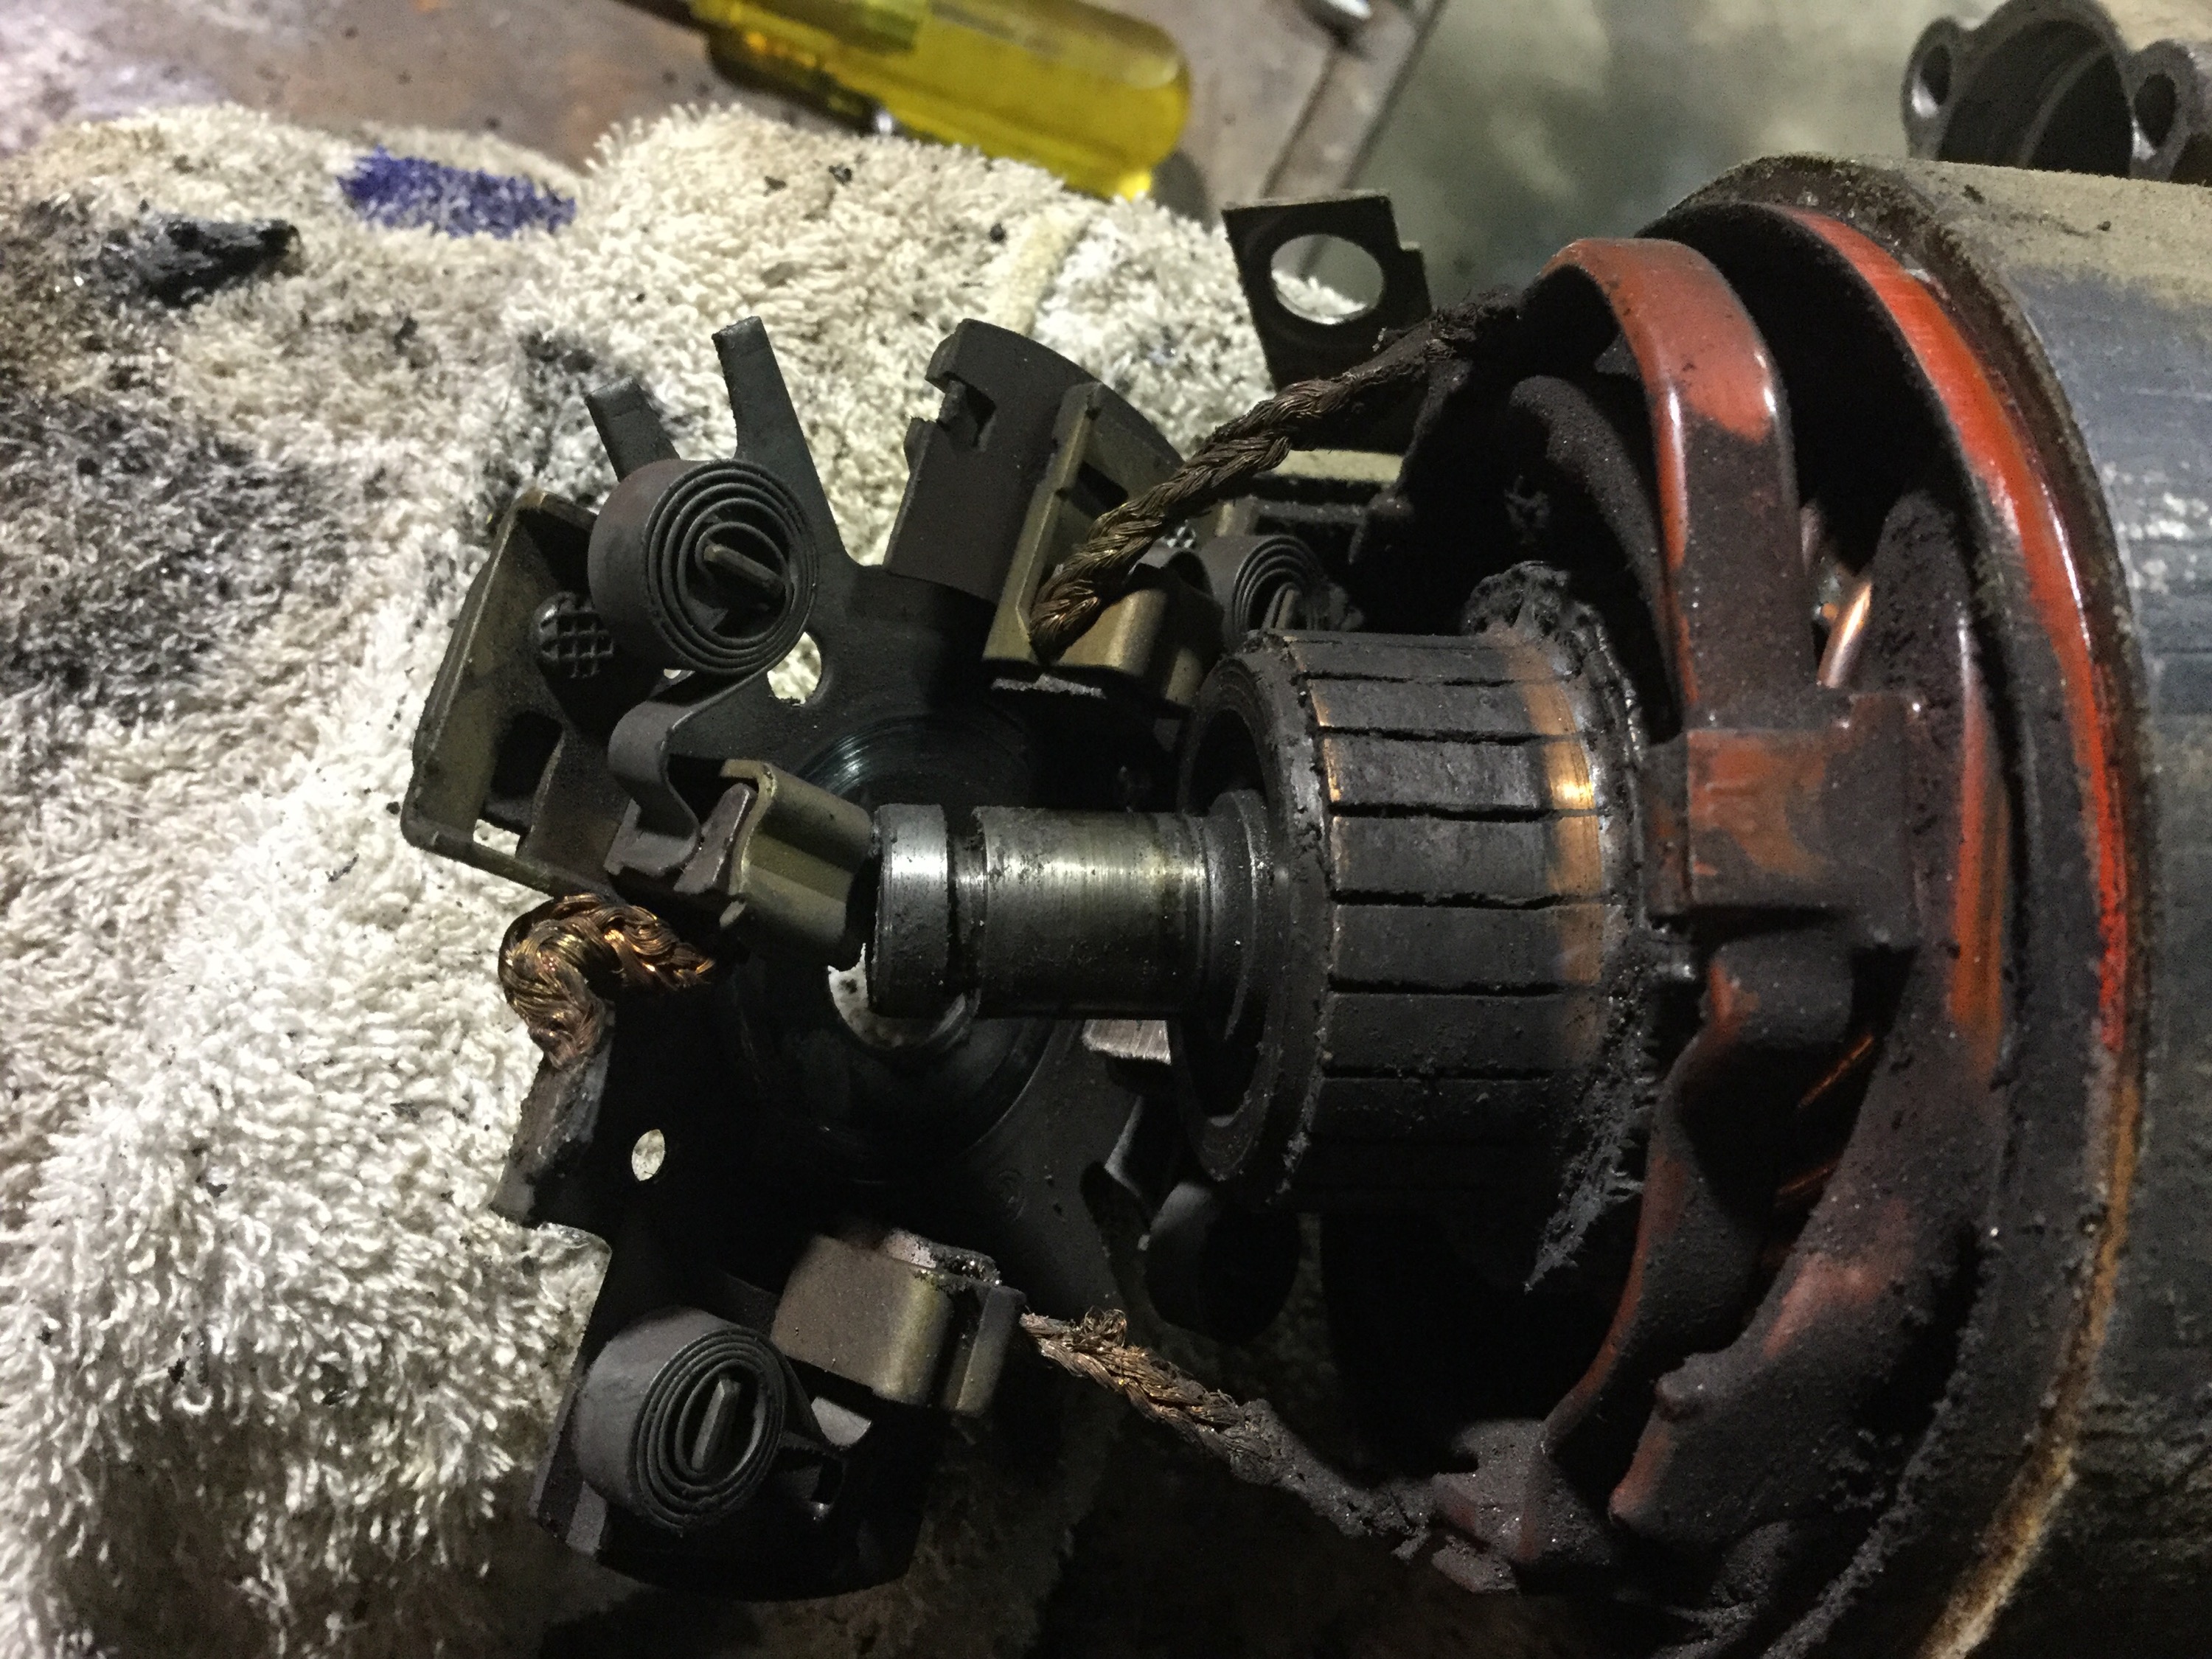
Brushes worn down to a nub. Commutator burned, dirty, ugly.
Next morning took starter to rebuilder in town. I can’t really explain why I chose to have it rebuilt instead of buying new (or factory reconditioned, whatever that means). Starter would be ready that afternoon.
Back out to work. Had some time to swap in my spare axle, but left transmission end up attached.
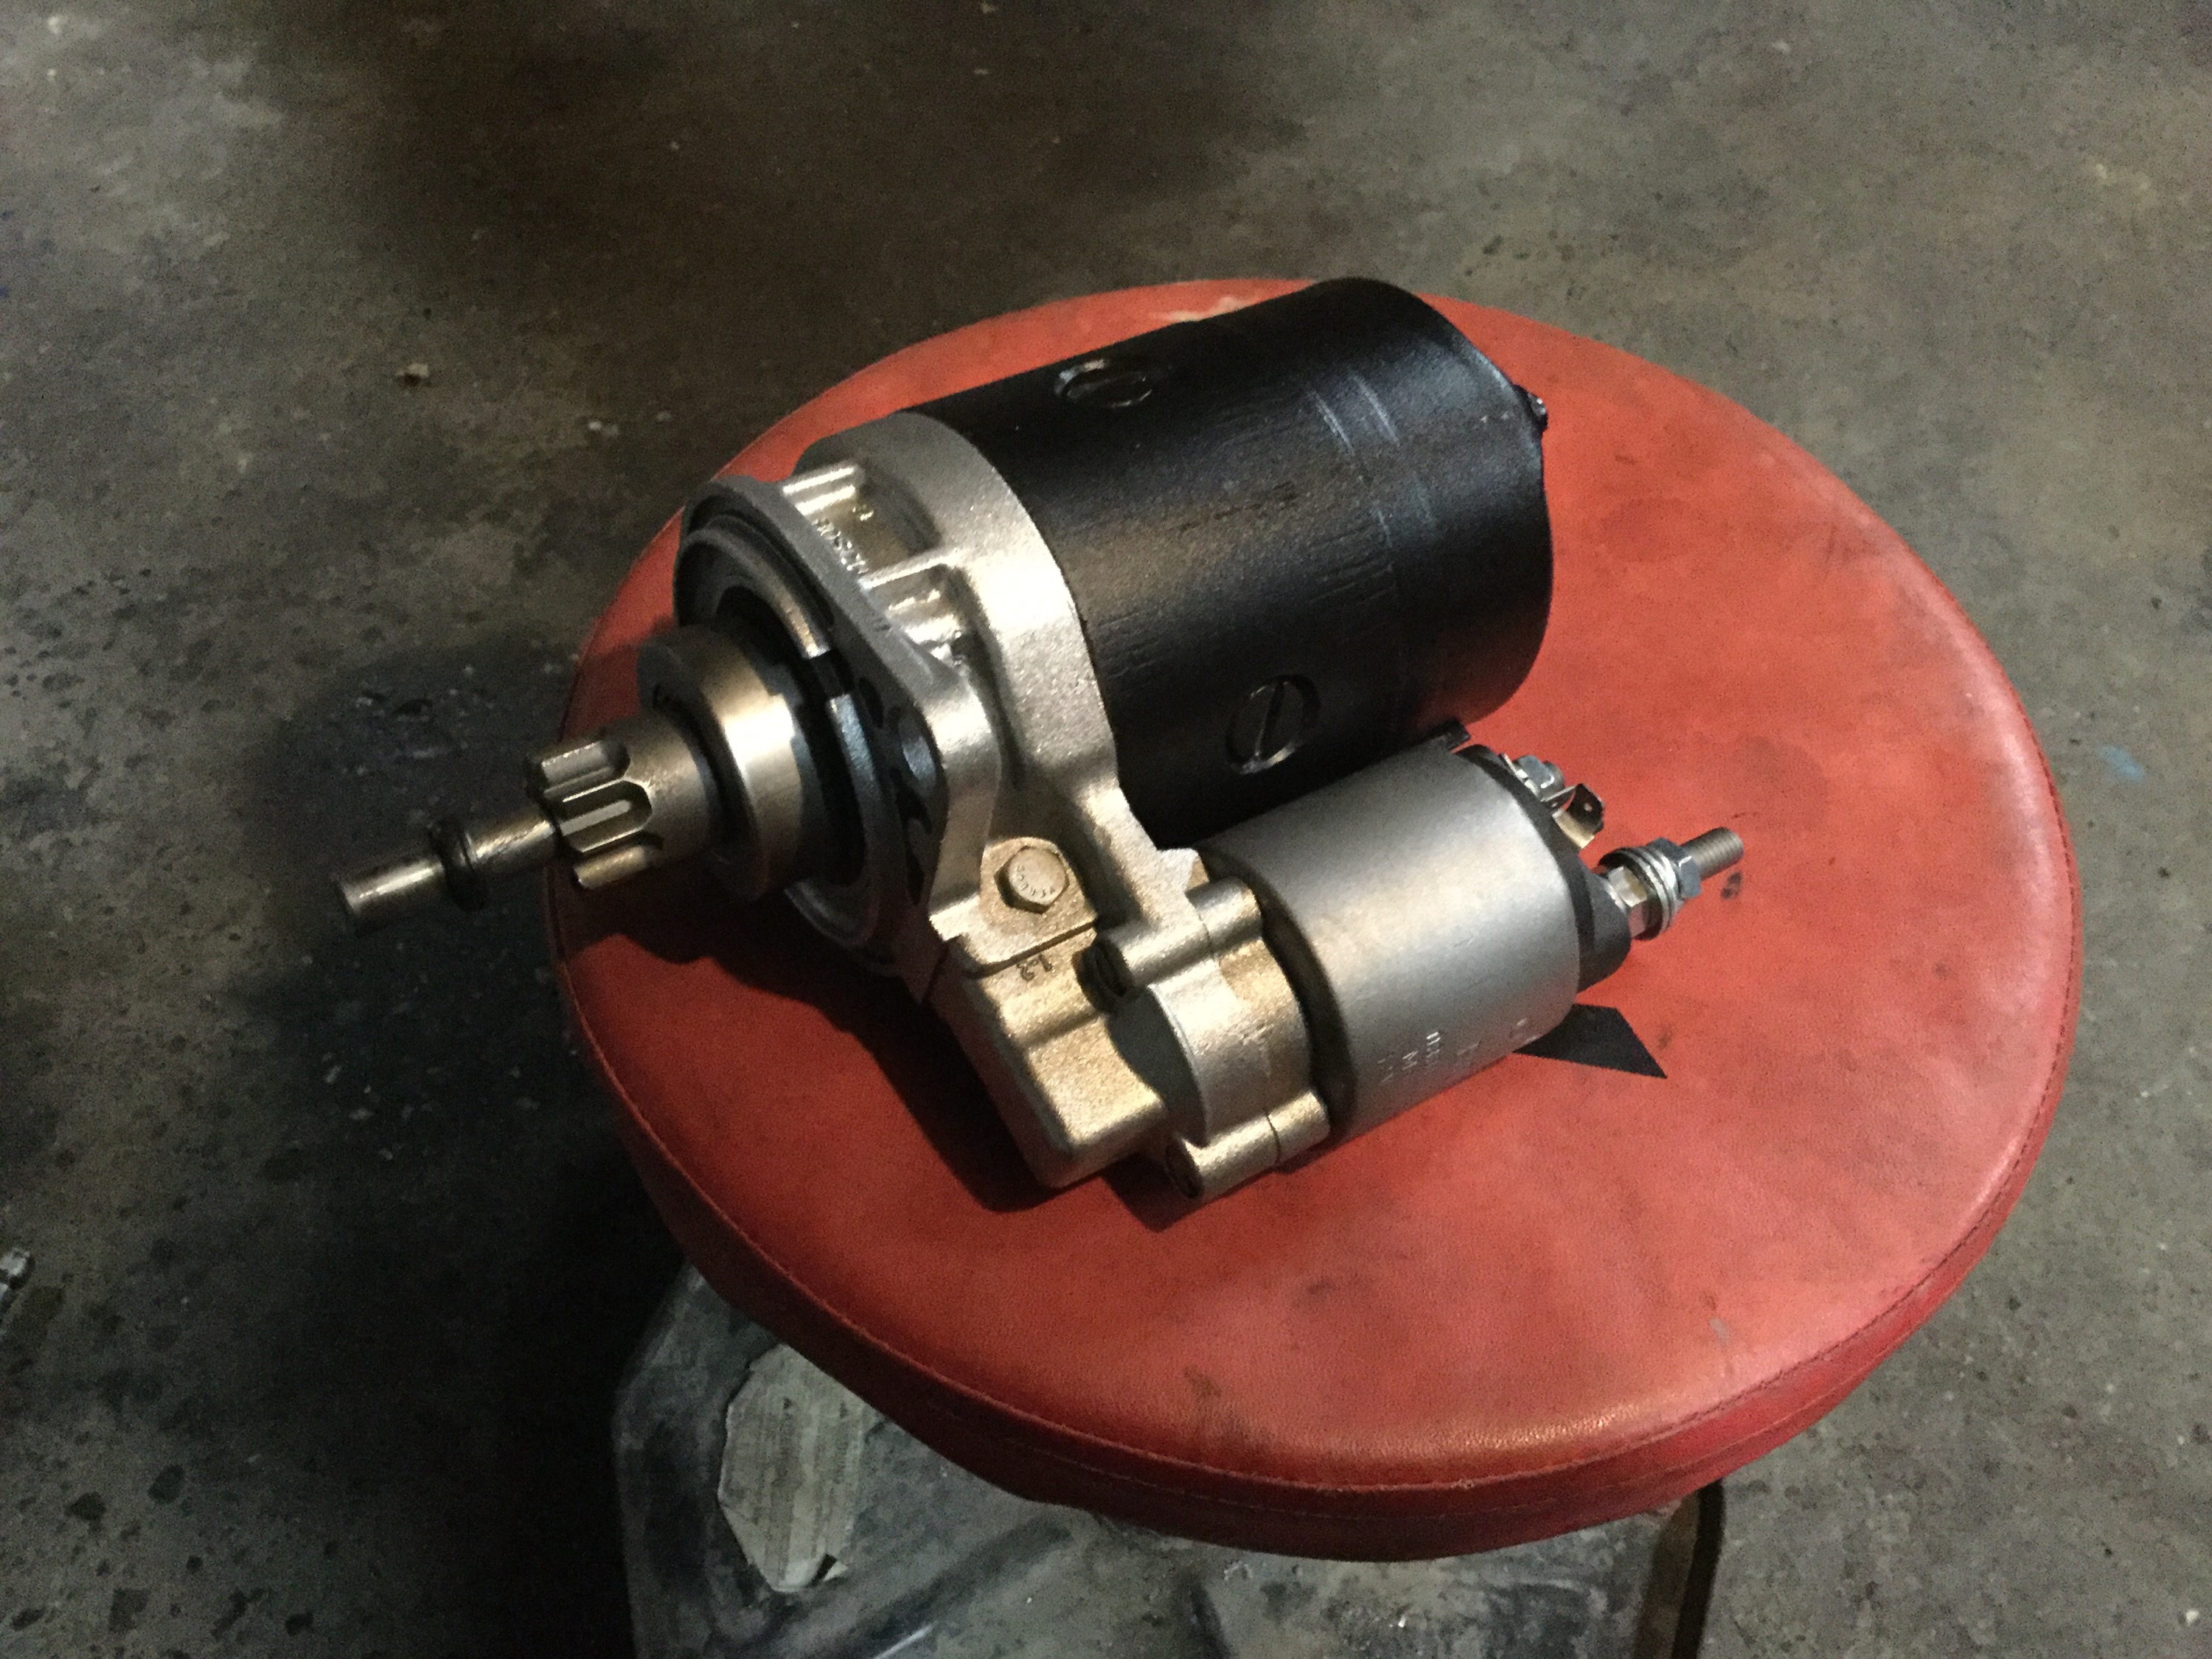
Back to town for starter. Labour charge CA115 ( 84/hr rate), parts 43 bucks. New solenoid, brushes, drive gear, commutator turned, armatures checked. Looks brand new.
I really don’t like how the signal wire is attached to the solenoid by a spade connector. So I soldered on a female spade connector, then crimped and soldered on a long pigtail to the spade. Heat shrink and silicone grease. Pigtail will lead to a relay in the engine compartment that I installed a few years ago.

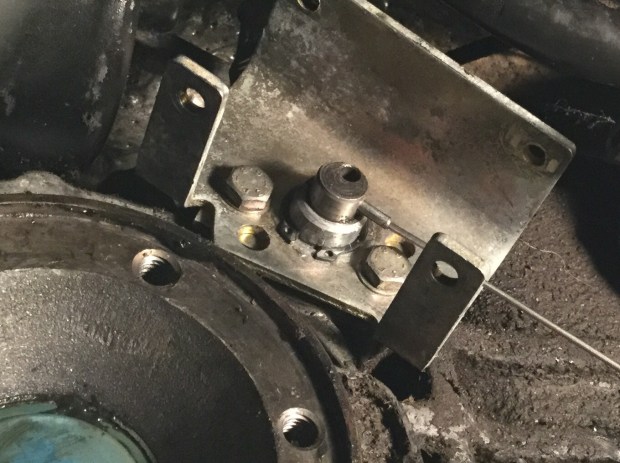
Diff lock actuator boot – well I copied what the previous owner did and used some hose. Polybraid stuff this time with a little window cut into it so the roll pin could be driven home. You know, the acuator shaft was pretty clean when I removed the hose so I figured it worked well enough to do same.
Getting the roll pin back in is a little tricky. What helped a bit was threading the roll pin onto the end of some stainless welding rod. It fit nicely and fetched up on the ID stamp of the rod.

Pic shows the idea without the clutter of the vacuum gizmo and the home made boot. The wire allowed me to get the roll pin in and engaged, then I could remove the wire and tap the pin home with small punch and hammer.
I replaced the starter bushing in the bell housing. Used a 7/16″ tap and screwed the tap into the old bushing and as the tap bottomed out in the hole the bushing screwed up on the tap and out. New bushing was a bronze, oilite type bushing so I soaked in oil before hand and gave it a bit of pressure between fingers with bushing filled with oil. Fingers on open ends. I thought getting the bushing in place would be tricky so I made a quick install tool from some brass rod. Rod turned down to fit snugly in the bore of the bushing, shoulder on the rod, and the turned down section just a little longer than the bushing length so I could feel the entrance to the hole. That worked out pretty good.
Acuator in place, starter then wiggled and jiggled up and into place. I used sealant on the mating surfaces. I made the lextrical connections when the starter was partly in place. Oh, forgot to mention, made a new wire from big stud in solenoid to alternator.
Inner cv joint connected
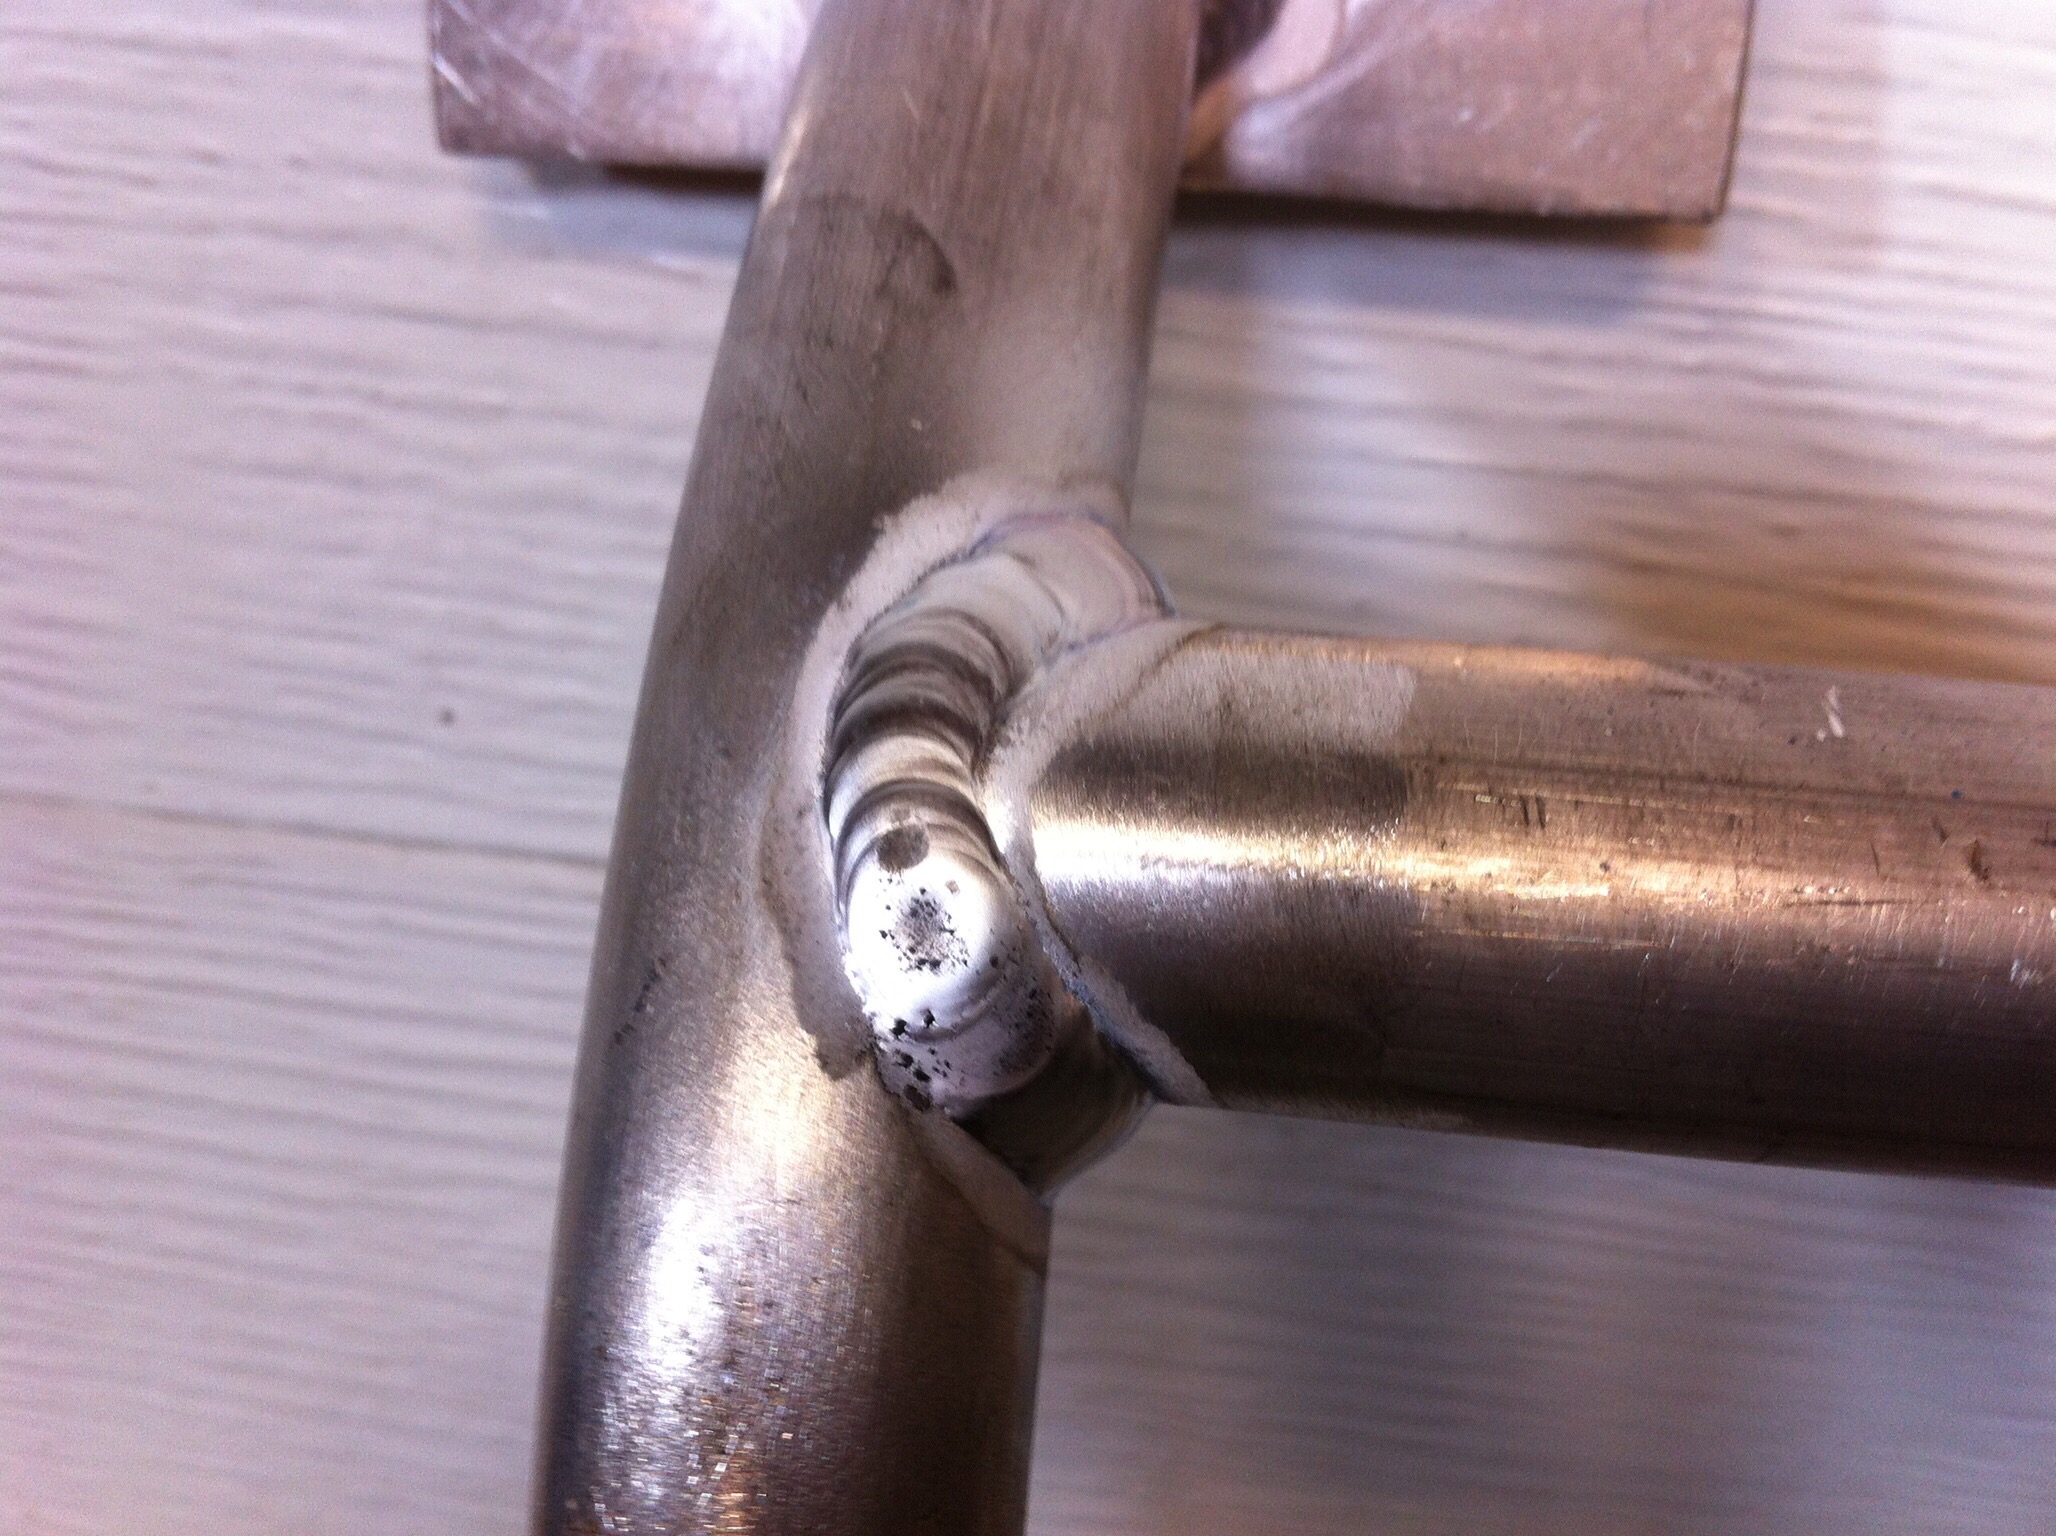
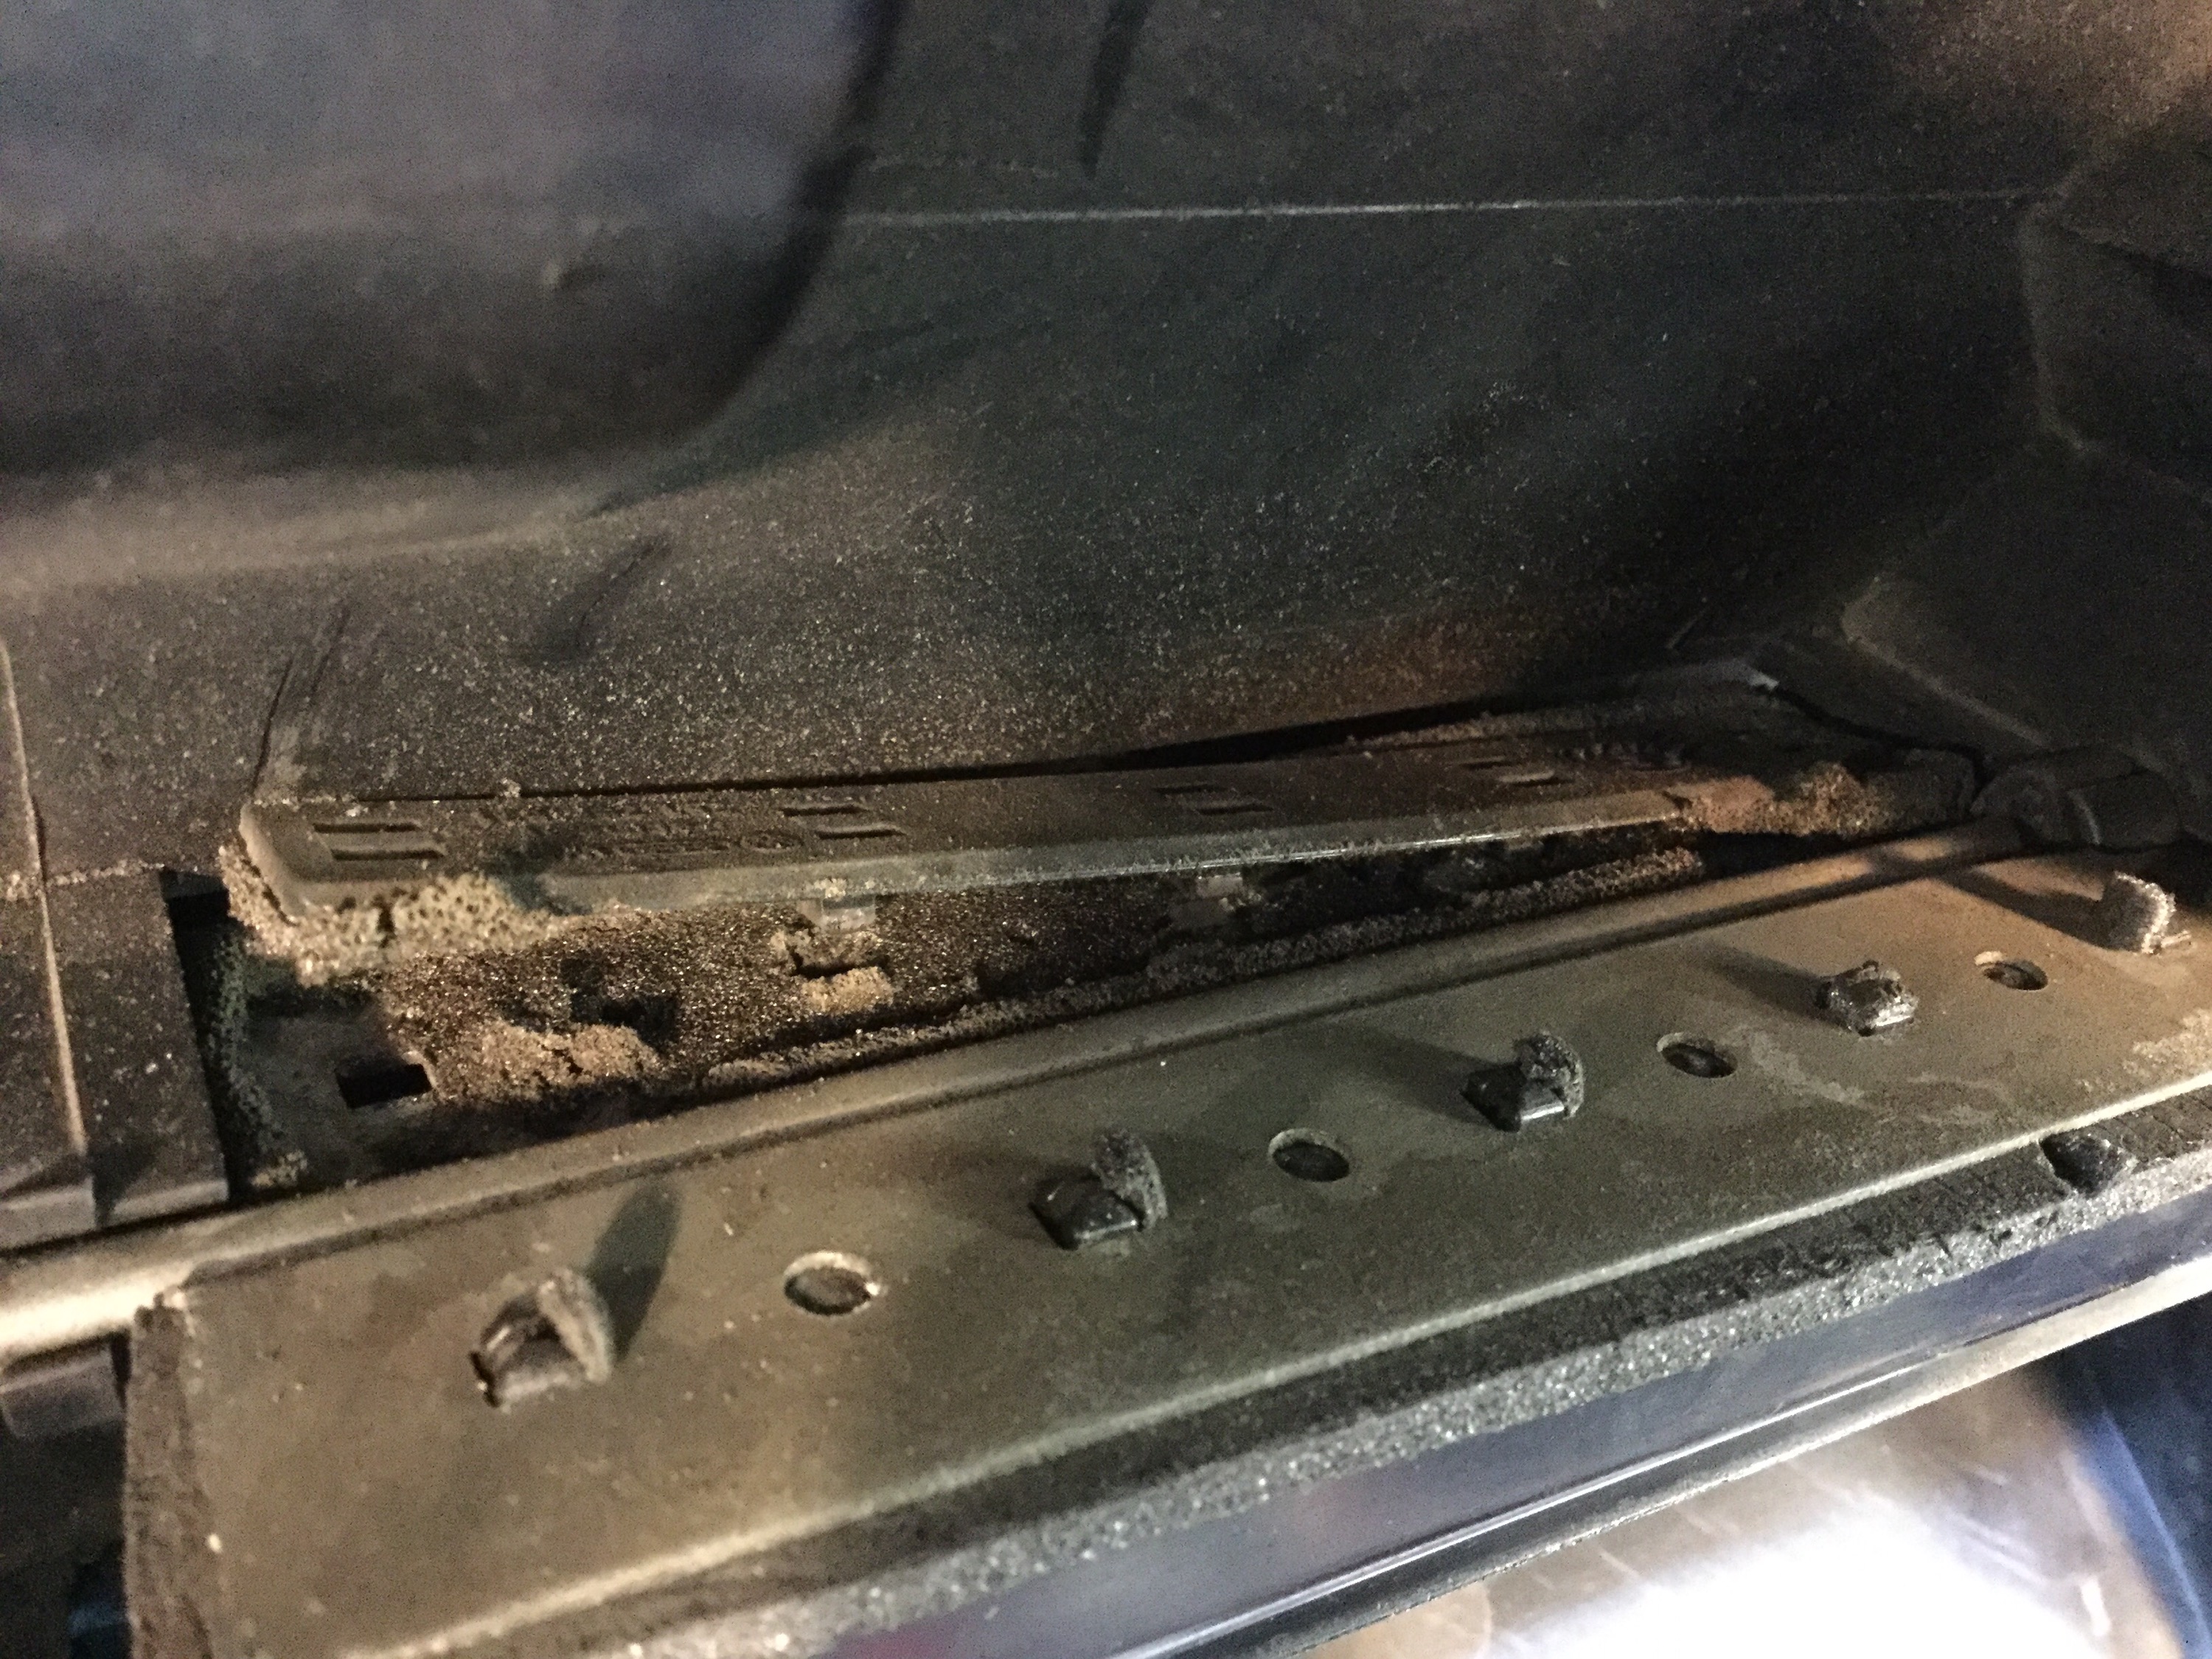
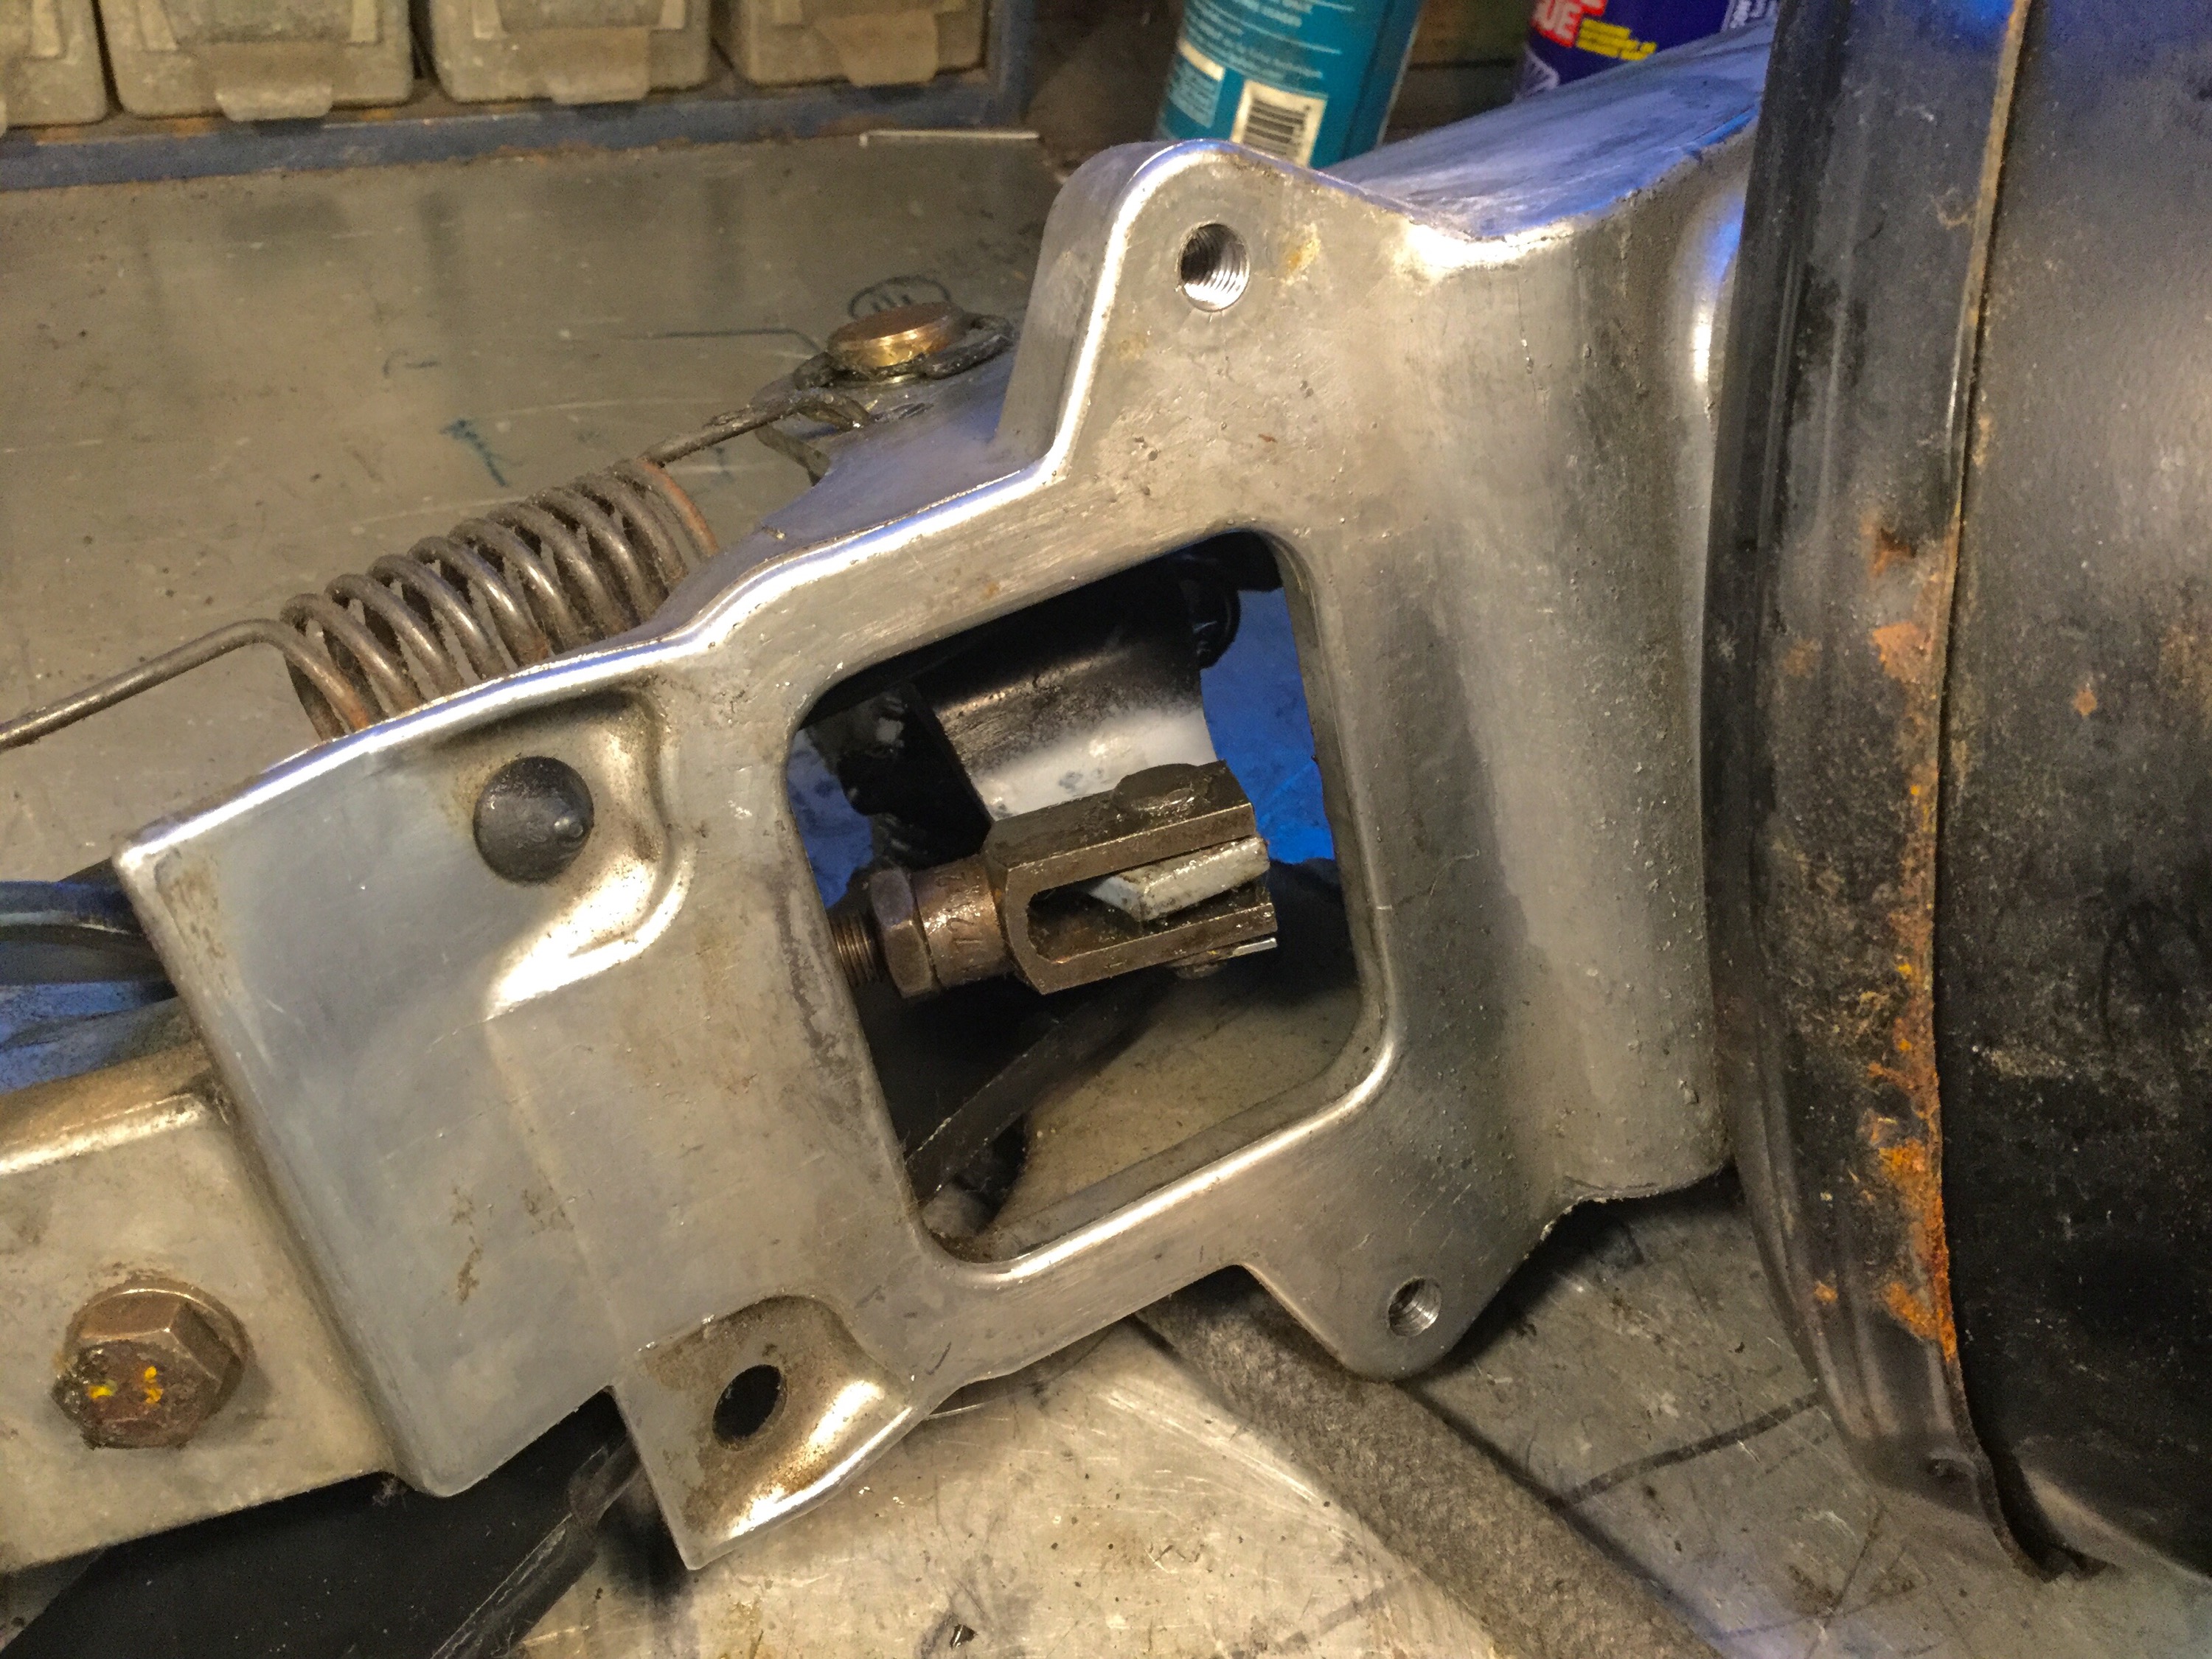
While van was on lift I decided to rotate tires. Noticed scraping noise on rear drivers side wheel. Pulled drum and found the adjustment lever had broken and the spring dangling. The broken bit was still in drum. Have no idea how that happened. So off comes the shoe, some prep on the metal, and I welded it back together.
Then van down to the ground, upper starter bolt installed, all the other mess in engine compartment cleaned up, the new wires from the started connected.
And yes, the starter worked. Jeez, much faster than before. My starter was dying a slow death.
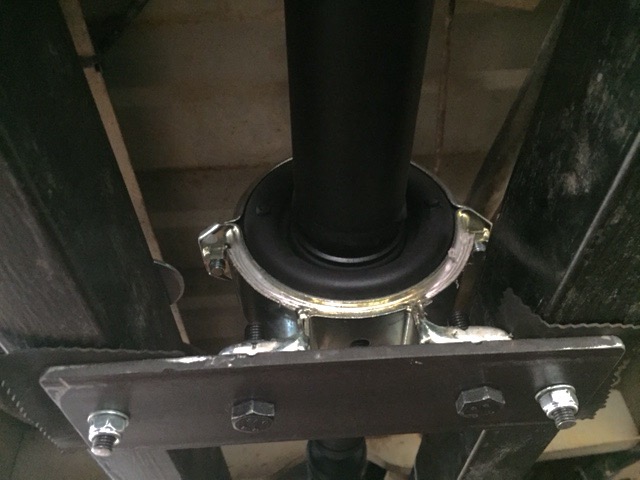
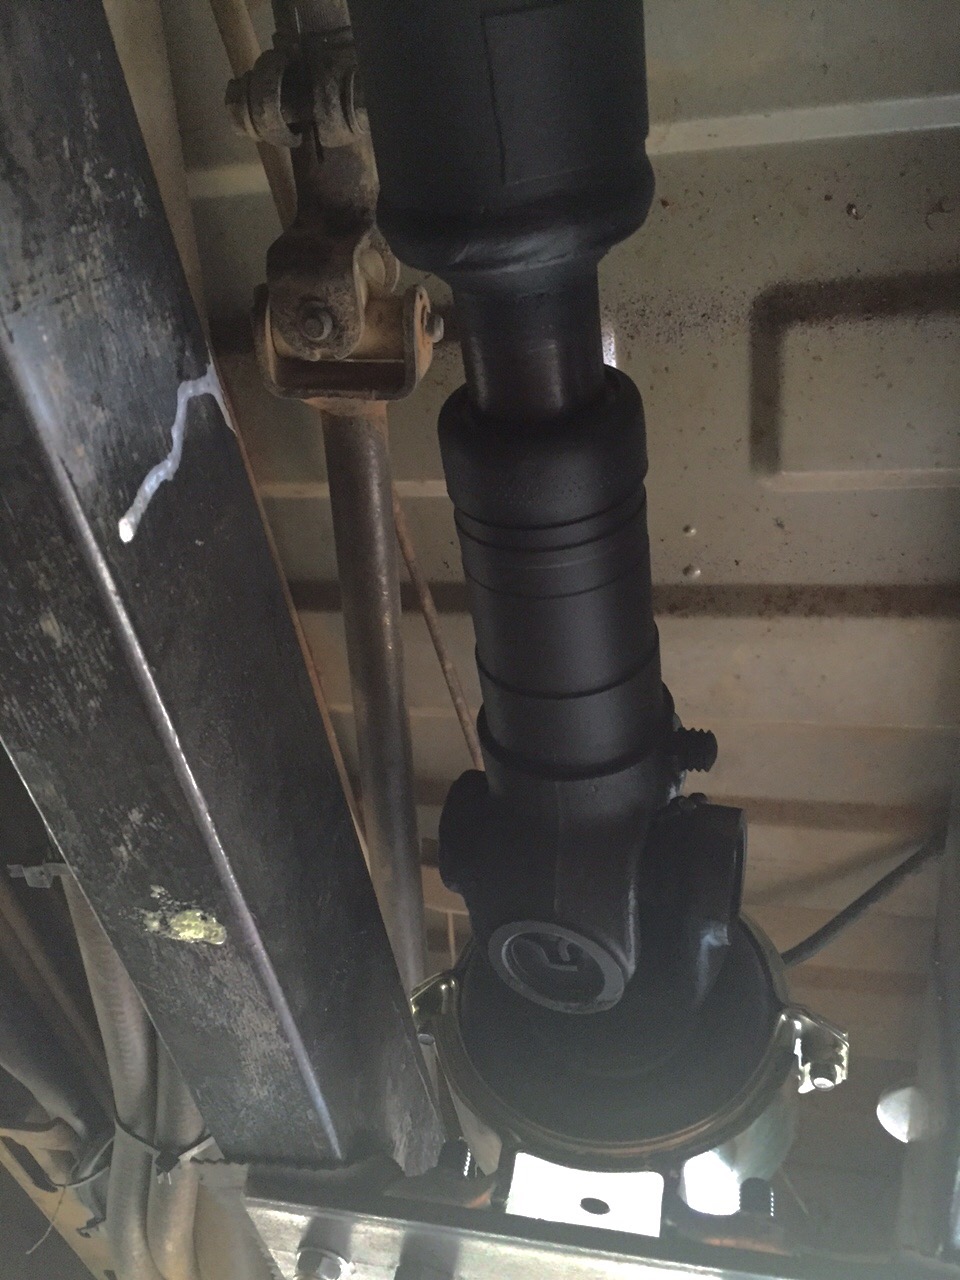
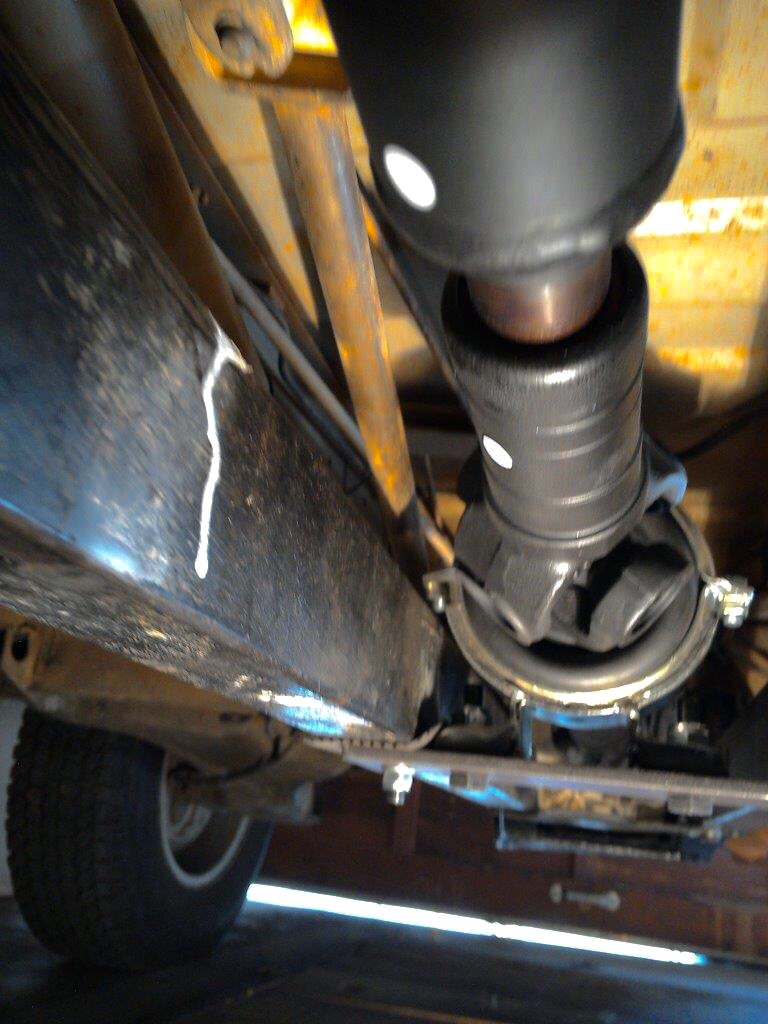
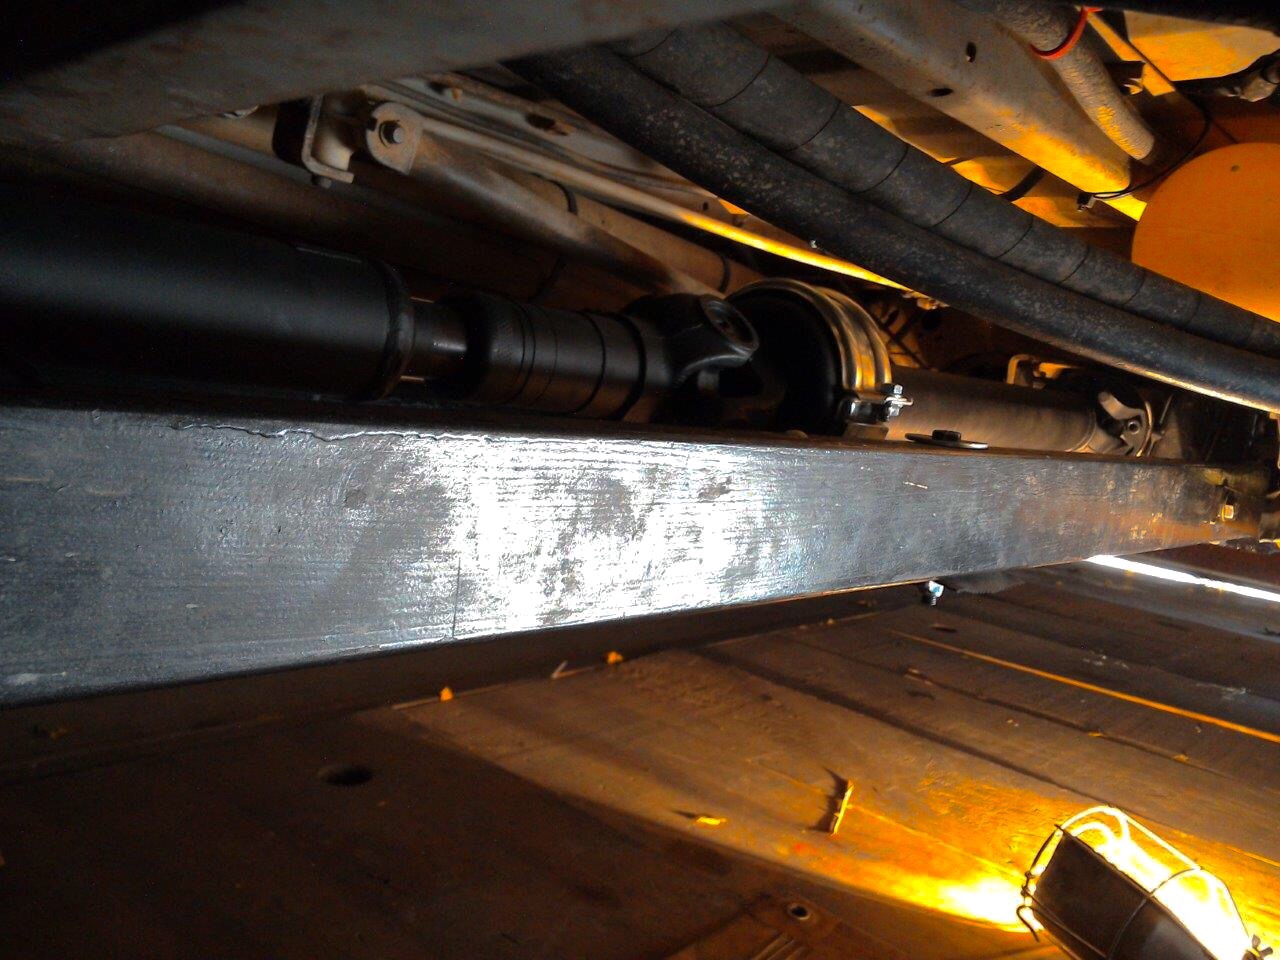
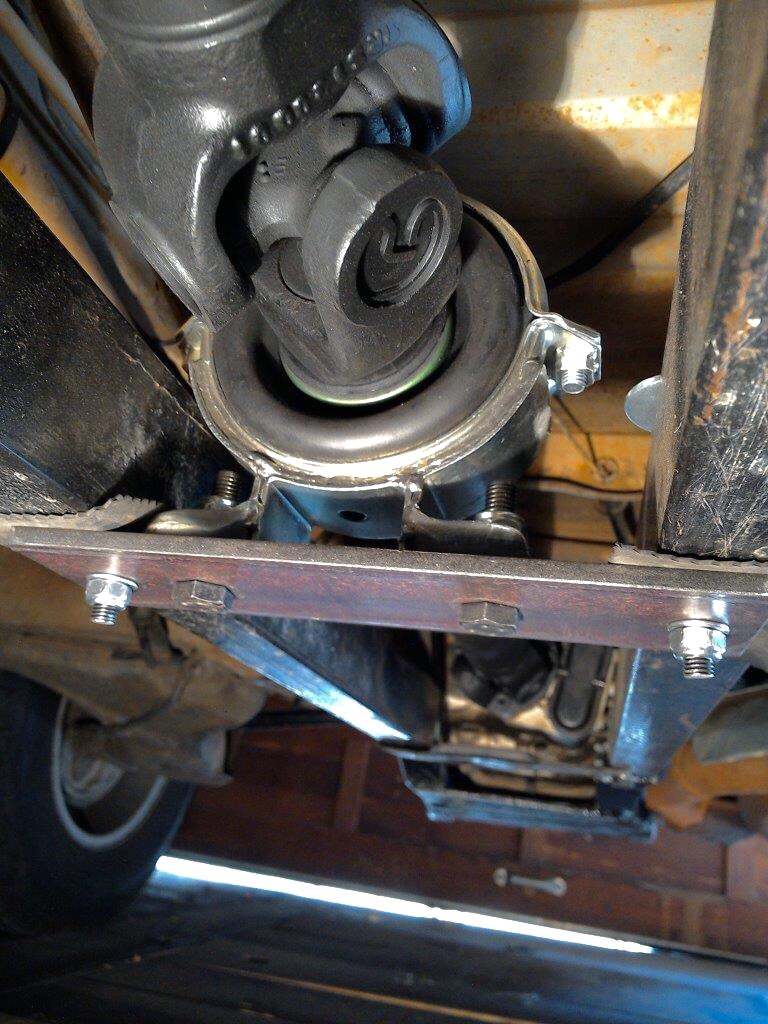
Syncro – propshaft with intermediate bearing support
Posted by albell in syncro, syncro specific repairs, vanagon mods on November 22, 2015
John B. sent along some pics of his new propshaft. He was having some difficulty in getting the stock set up running vibration free so he went this route.
Due to some errors on my side, I can’t find his emails where he described the set up. Until I get that info I’ll post the pics as is.


Addendum.
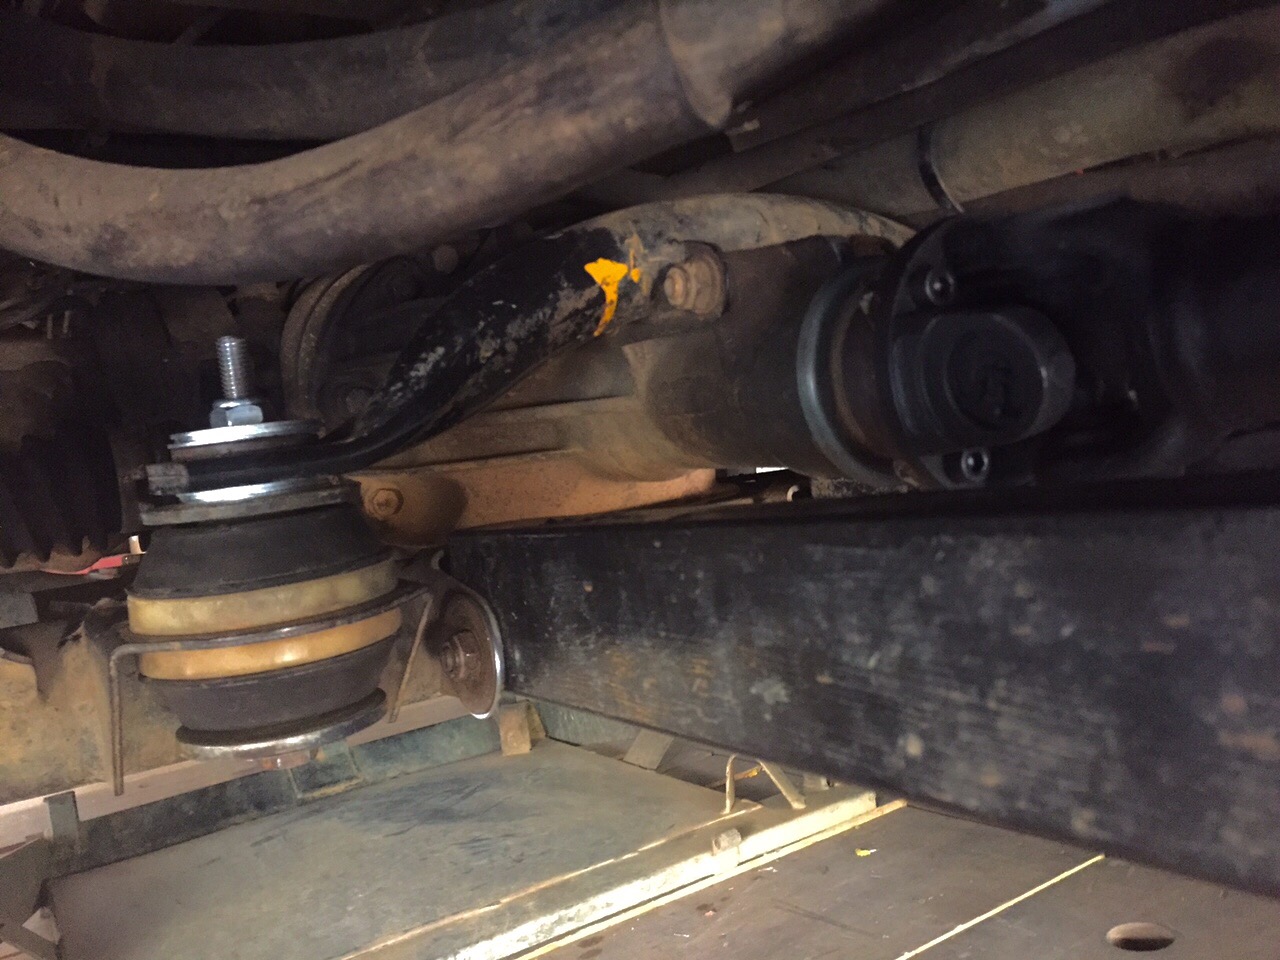
In reply to Hans’ comment about CV jointed prop shaft. A couple of pics. First is the flange of my spare propshaft. Approximate measurements make it a 74mm bolt hole circle, the recess is 47mm diameter and about 2.5mm deep.
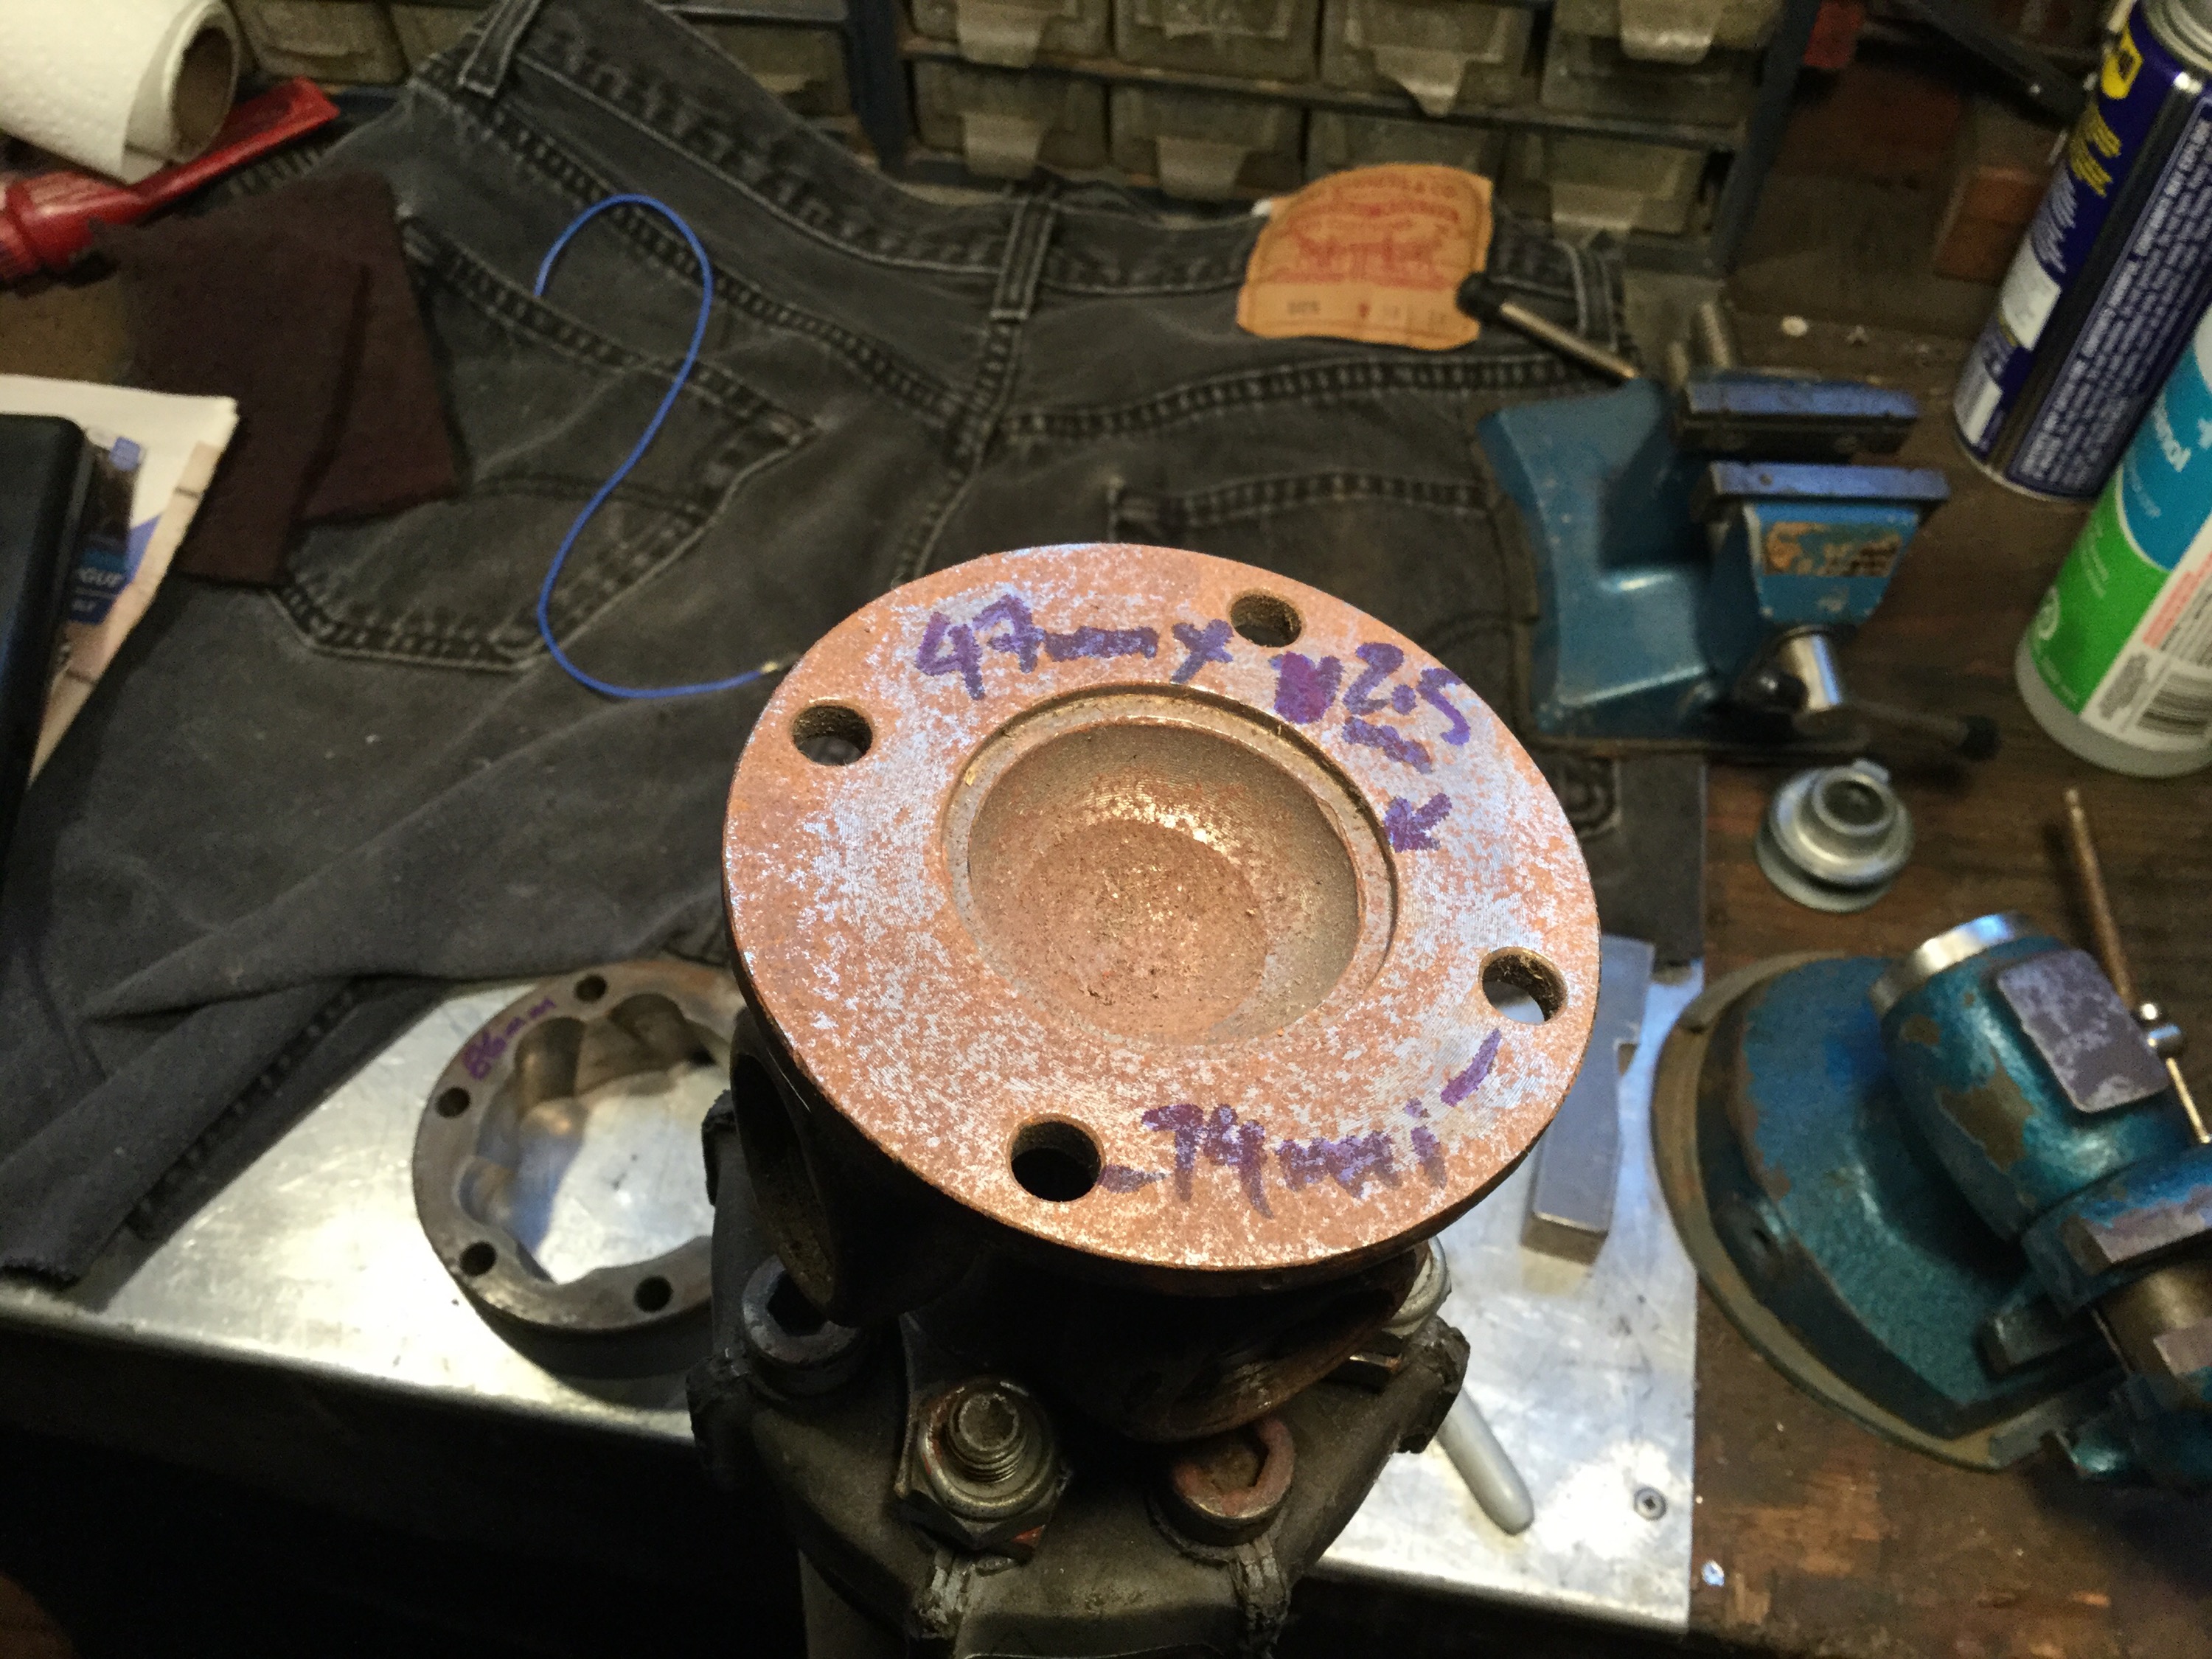
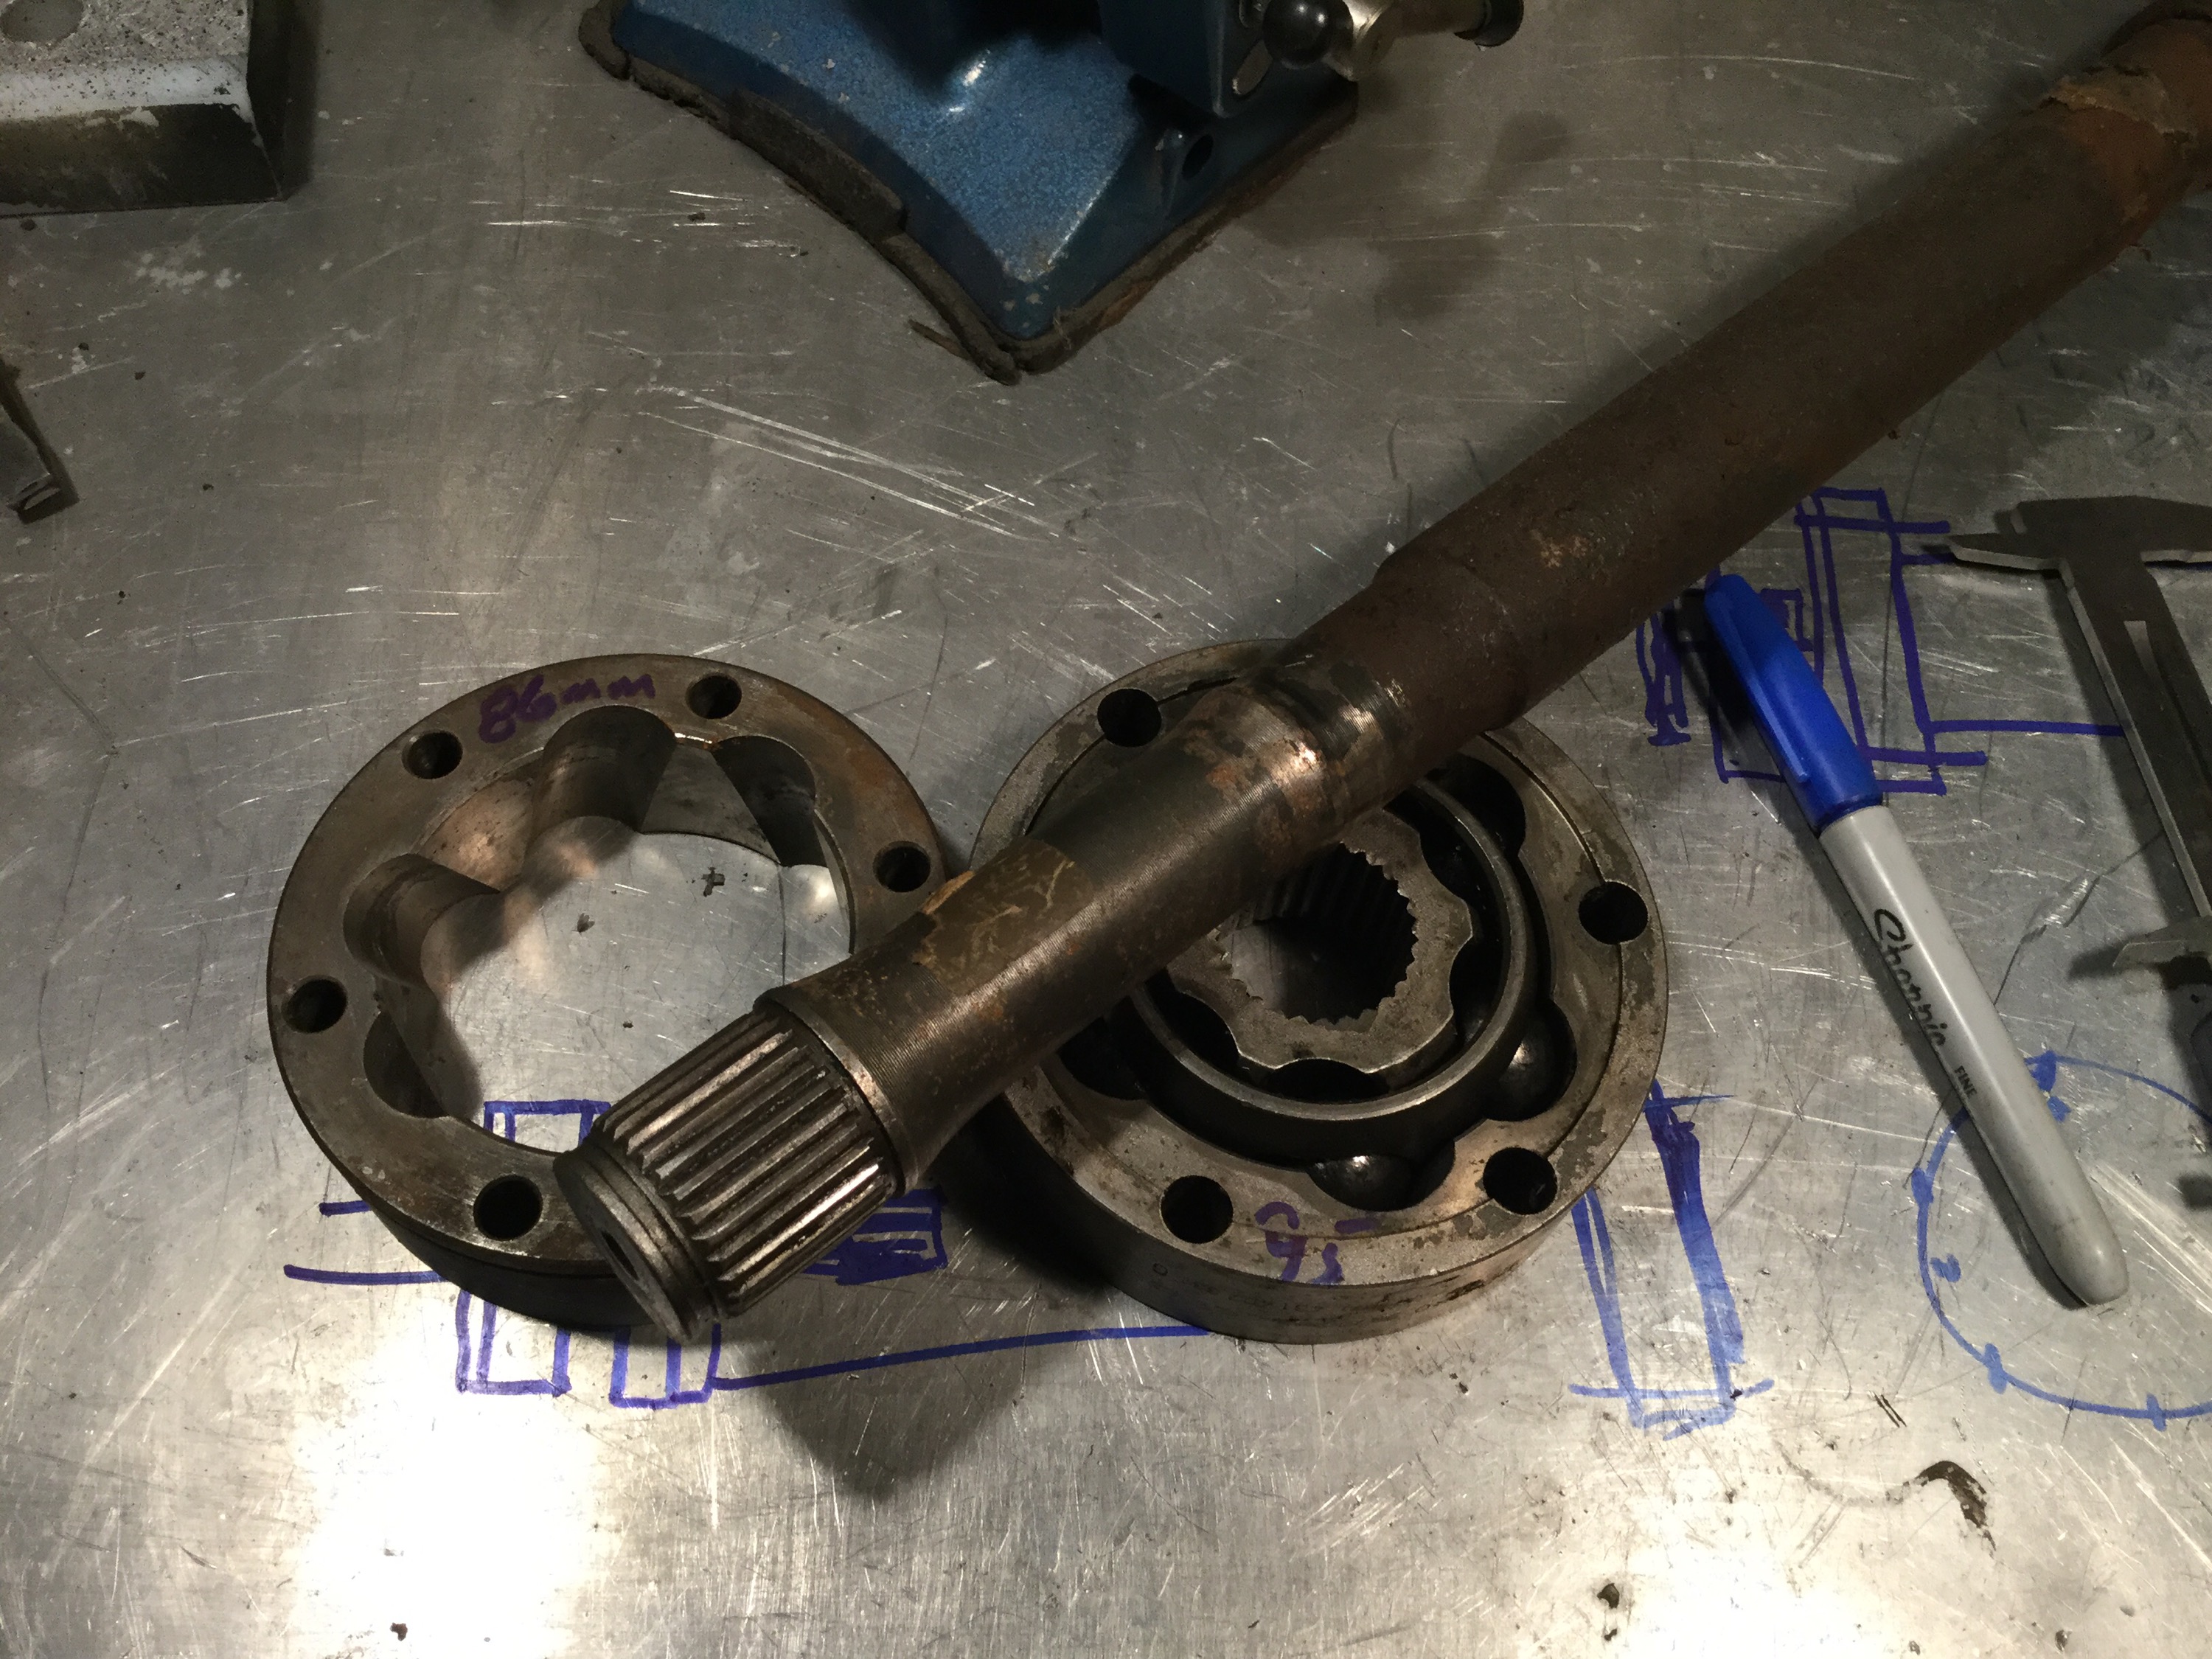
Stock 100mm diameter cv joint has a 6 on 86mm bolt hole circle.

A 108mm diameter CV joint, has a 95mm bolt hole circle.

I have the half shaft for that 108mm diameter CV joint. One could imagine cutting the spline section off and mounting it to a flange that mimics the stick propshaft flange, then the slides connecting to the 108mm diameter CV joint bolted to the propshaft. I hope you understand this is all just free thinking, just for discussion.
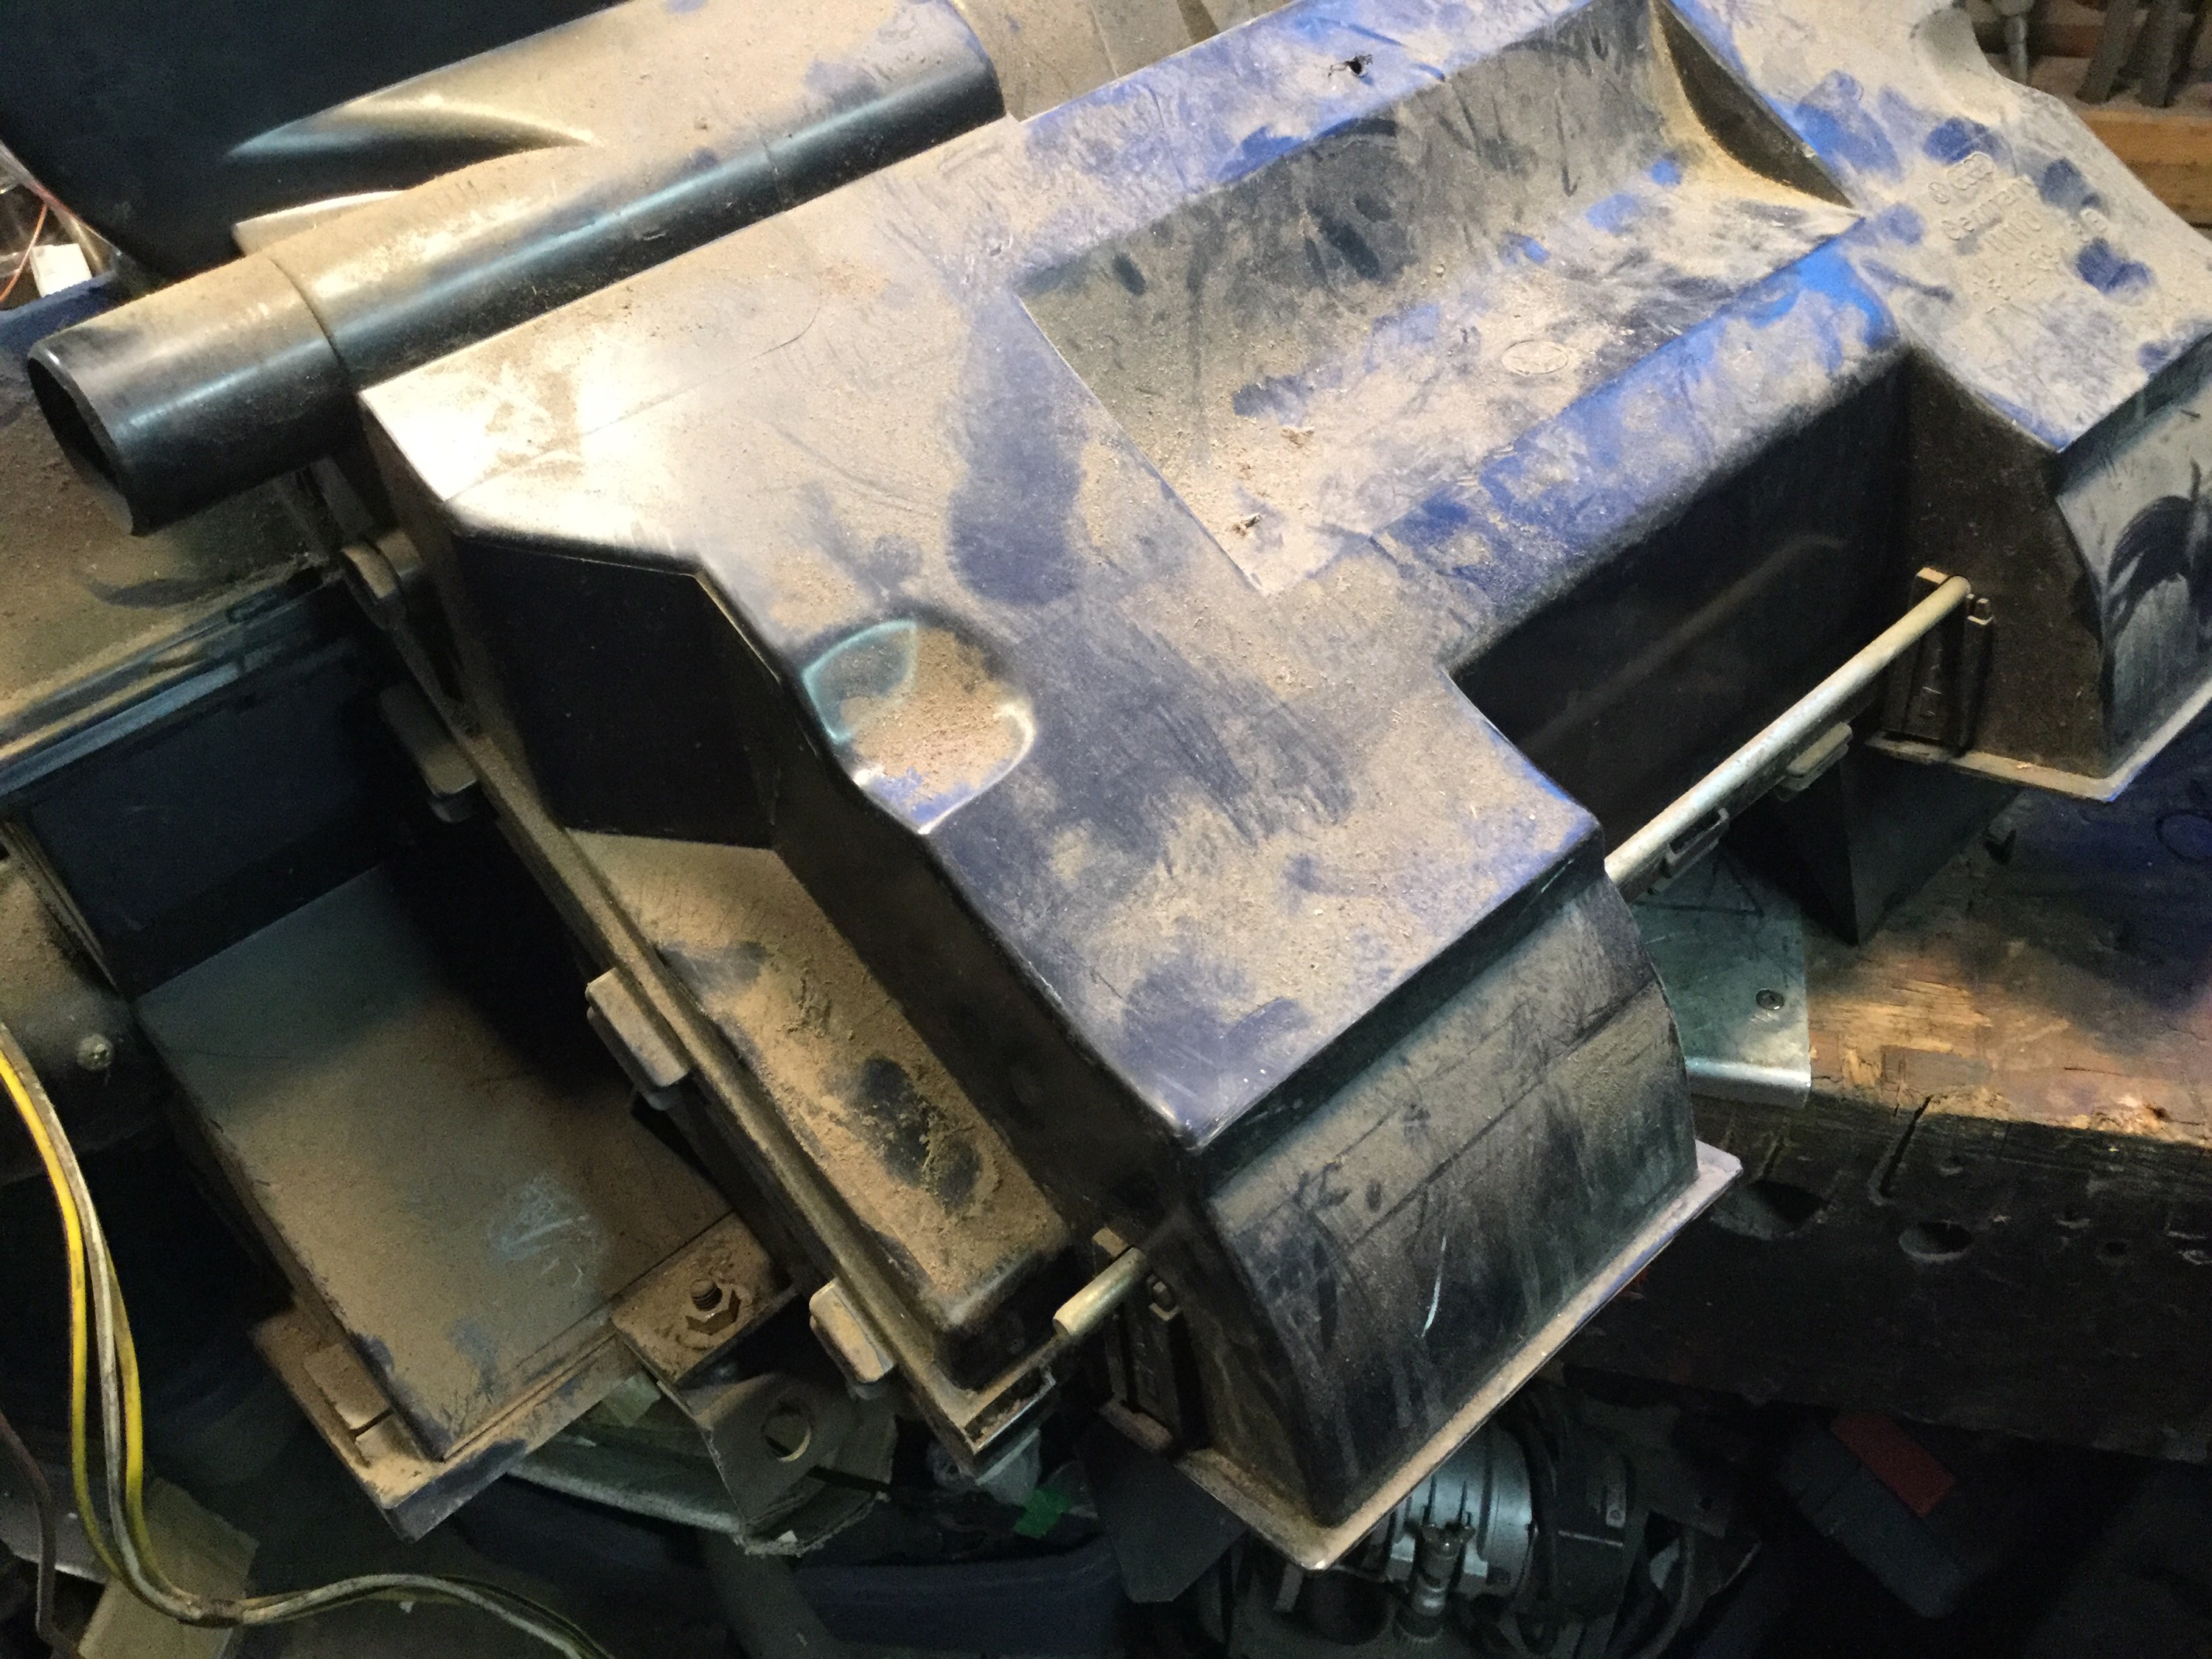
Vanagon – Doka heater box refoaming
But before the heater box work, I had to drill out the two broken heater box mounting bolts. I’m not an expert on this, and believe me I seldom have a good time doing this job.
The pedal assembly is still out of the van so I had much better access to the broken bolts. Sometimes I grind the stub of the bolt flat so I can pop a good centre punch mark, not this time though.

I’m pretty close to the centre of the bolt. The bolt stub is not centred in the middle of the sheet metal. When I am hand drilling ( as opposed to using the milling machine and having the work held firmly) I like to enlarge the centre punch mark with a small drill bit. No need to drill deep. The small drill easily finds the centre mark. Then I drill with a larger bit, right through. Finally I use a bit just slightly smaller than the bolt diameter, in this case it’s a 6mm bolt and the largest bit in the is pic is 7/32″, or 5.6mm.
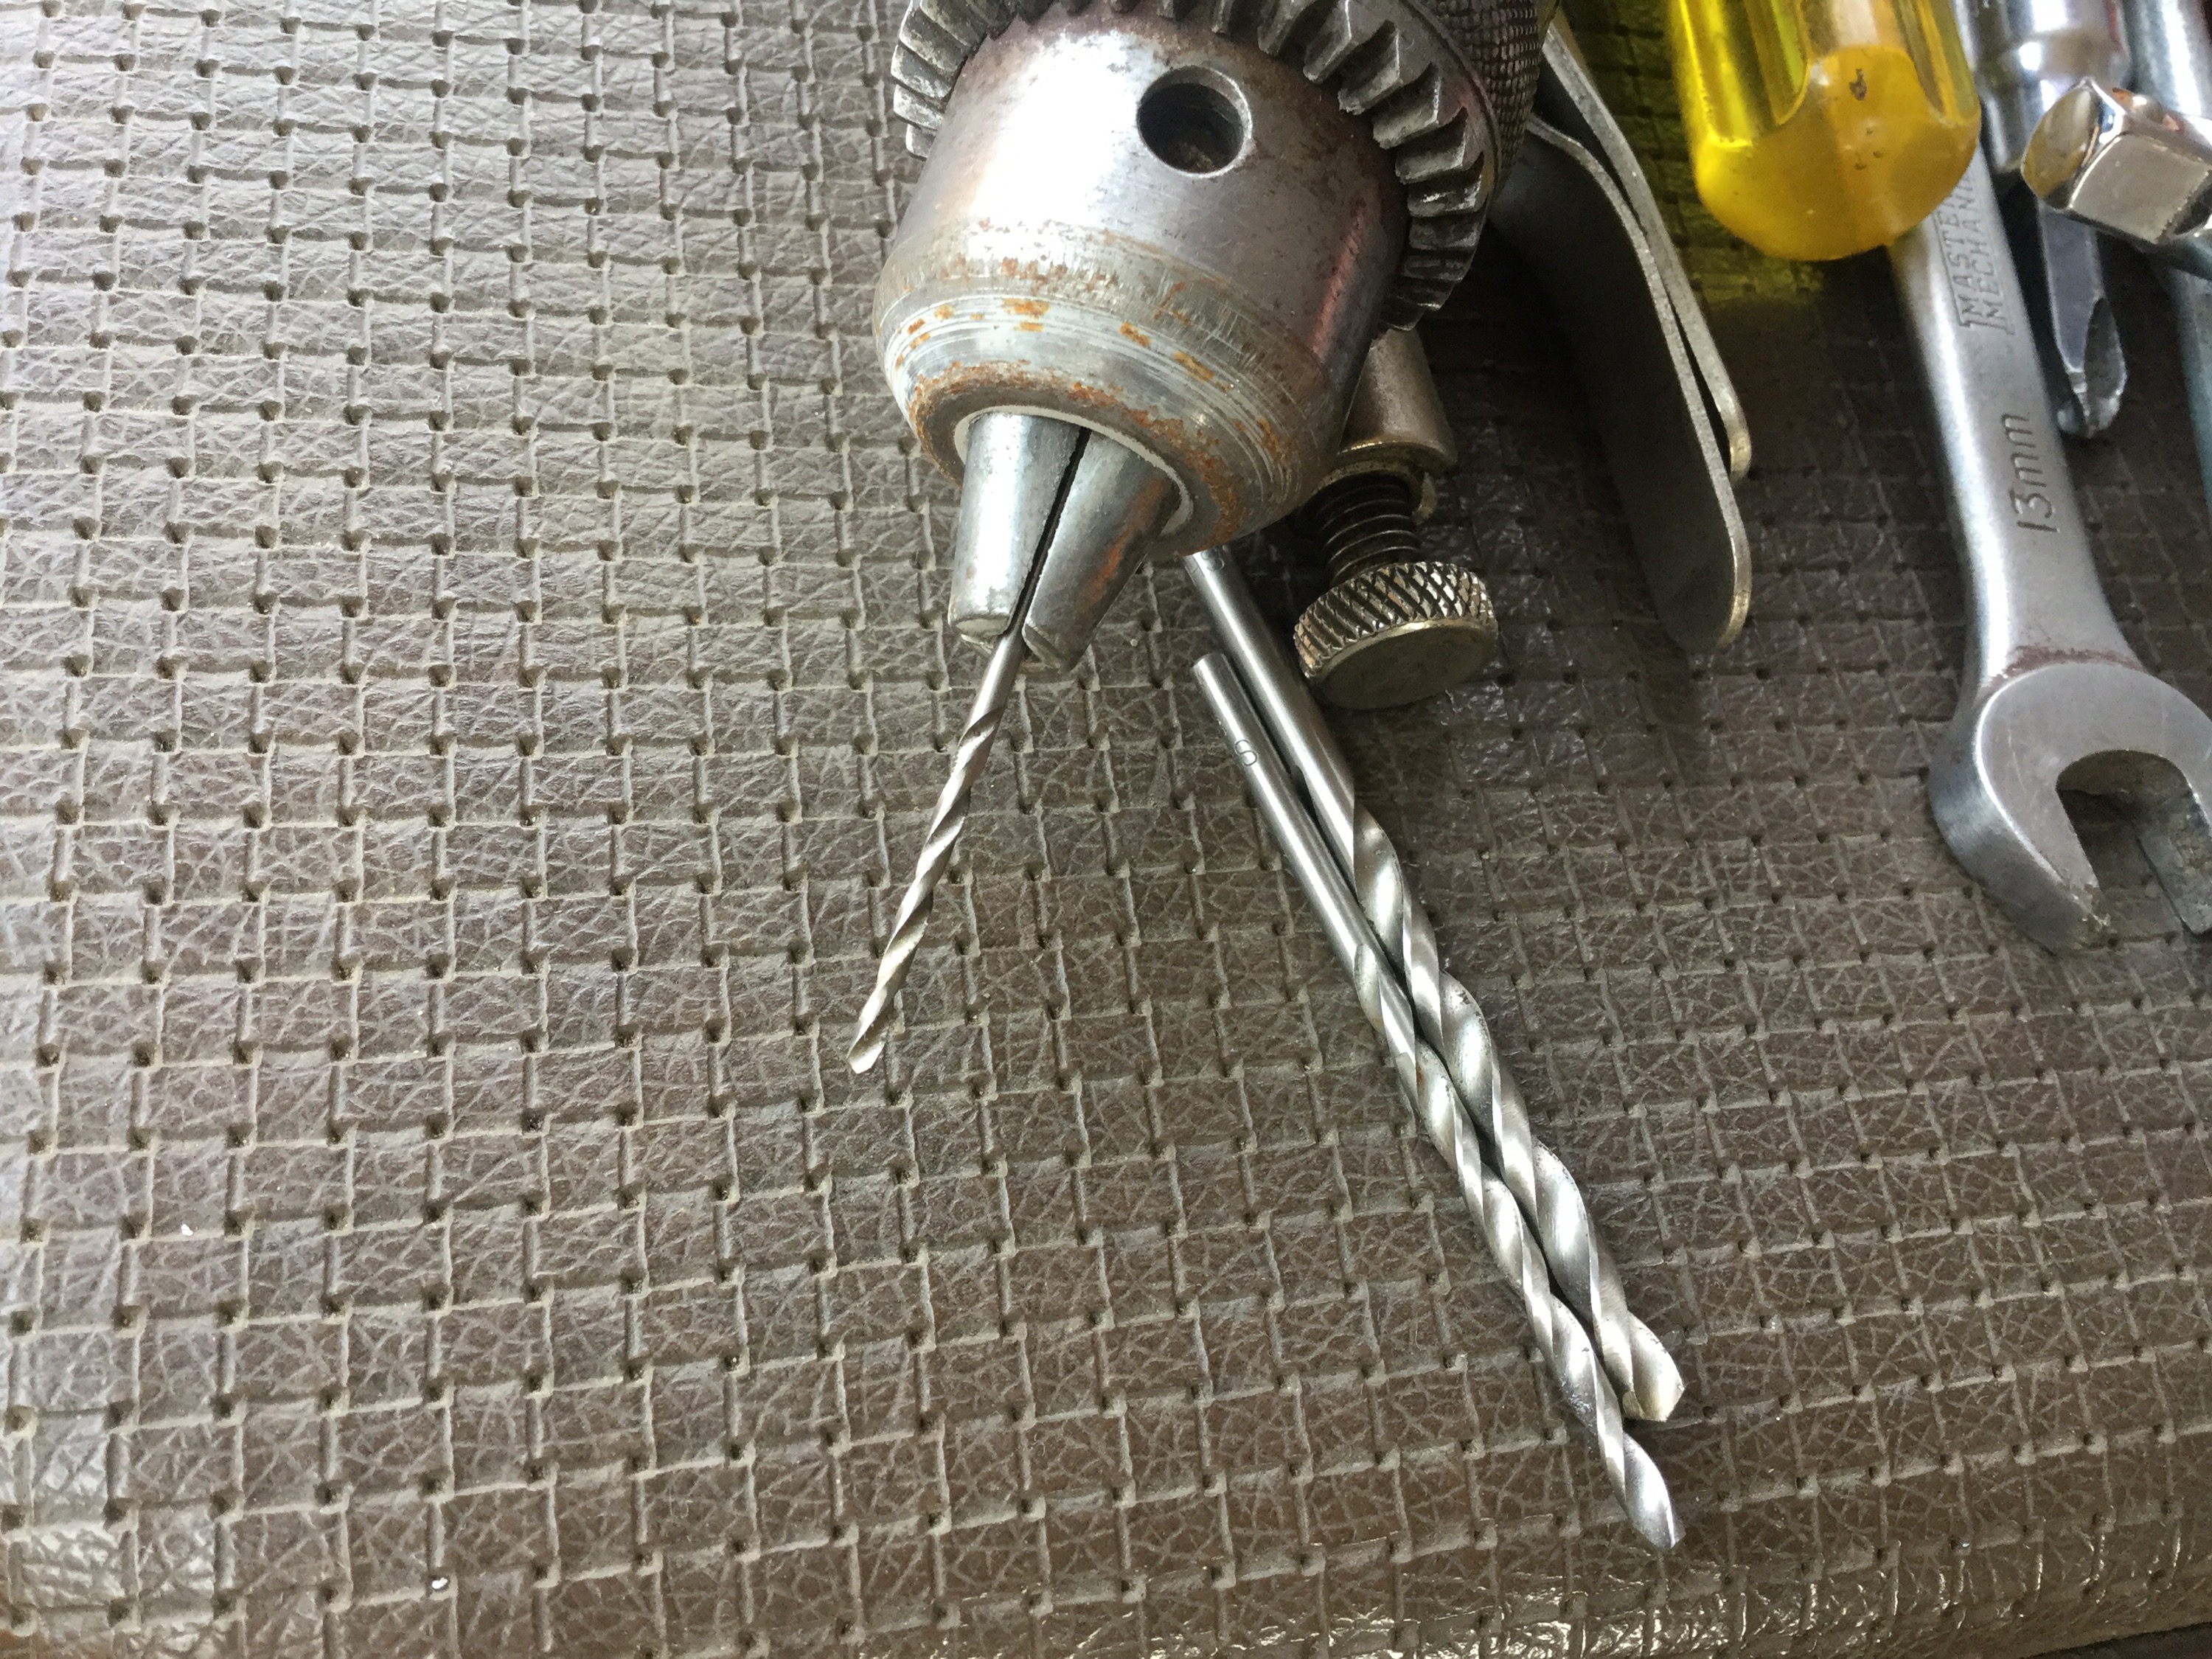
There it is. Some of the bolt still clinging to the hole. I poked around the edges with and awl and I got the remains out. At this point I would use a tap to chase the threads, but I had taken my metric taps to work…
So I used one of this self tapping 6mm bolts, actually one from the pop top hinge to body connection. I had a couple of spares. 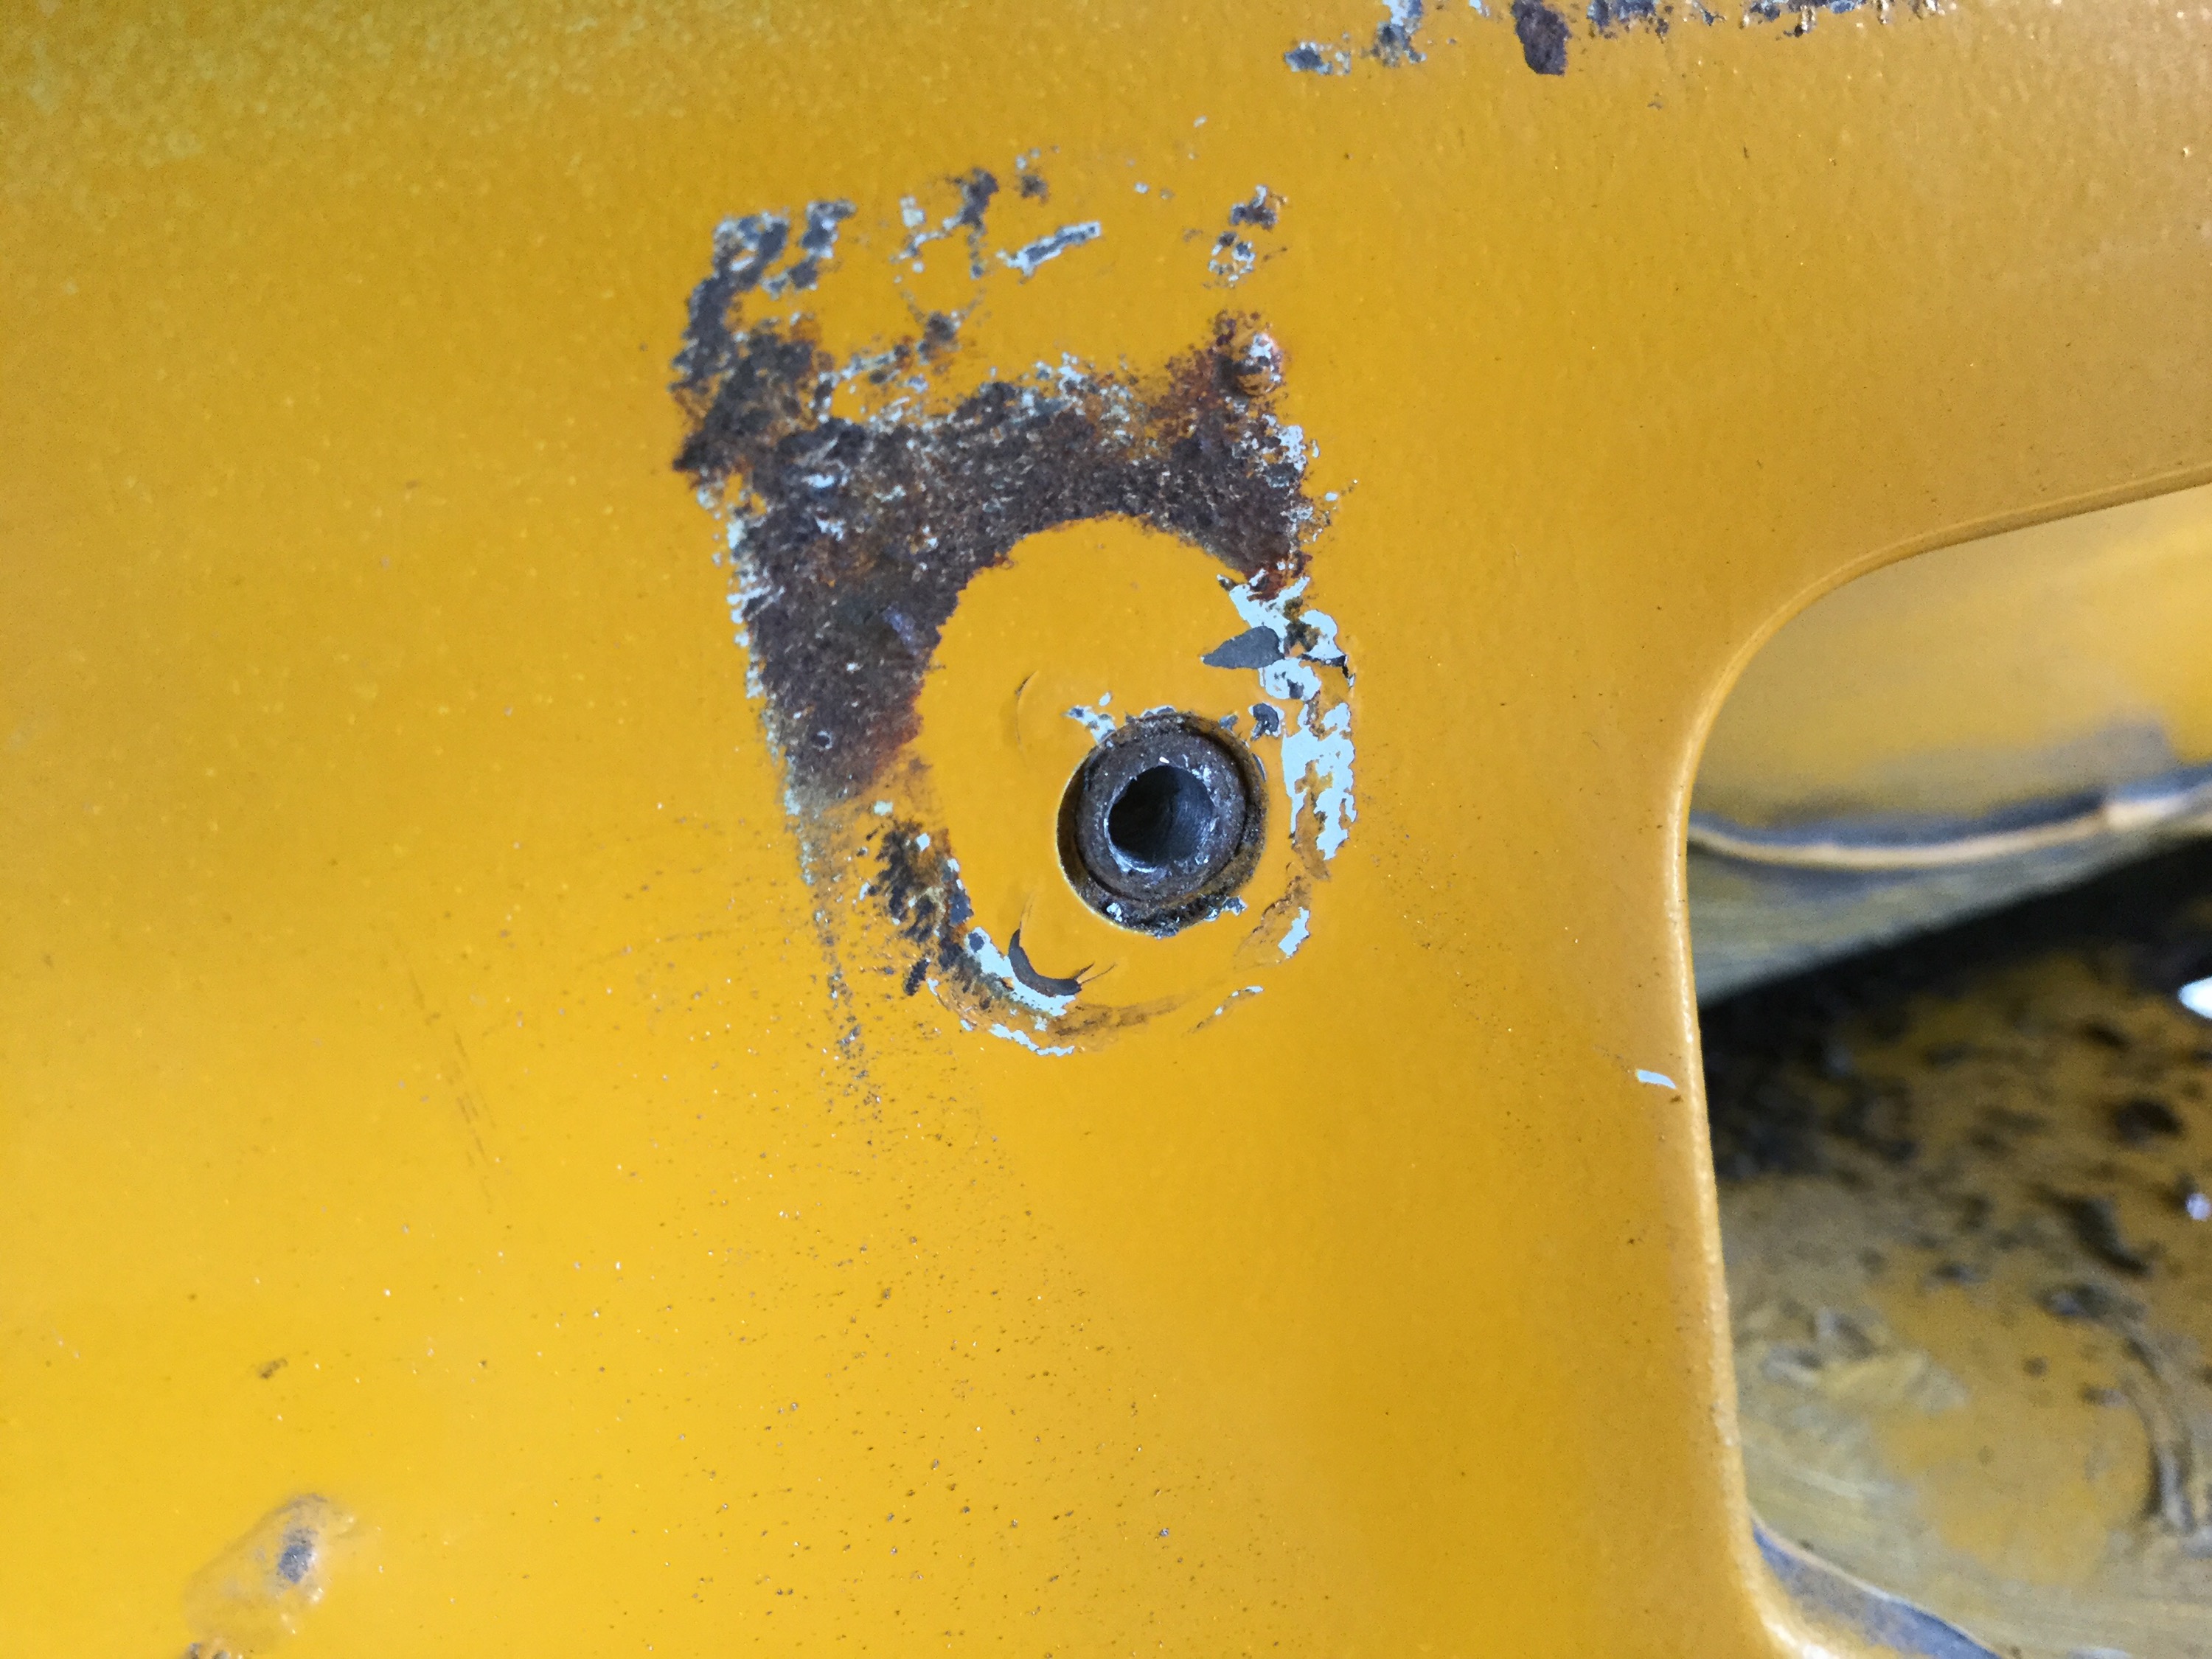
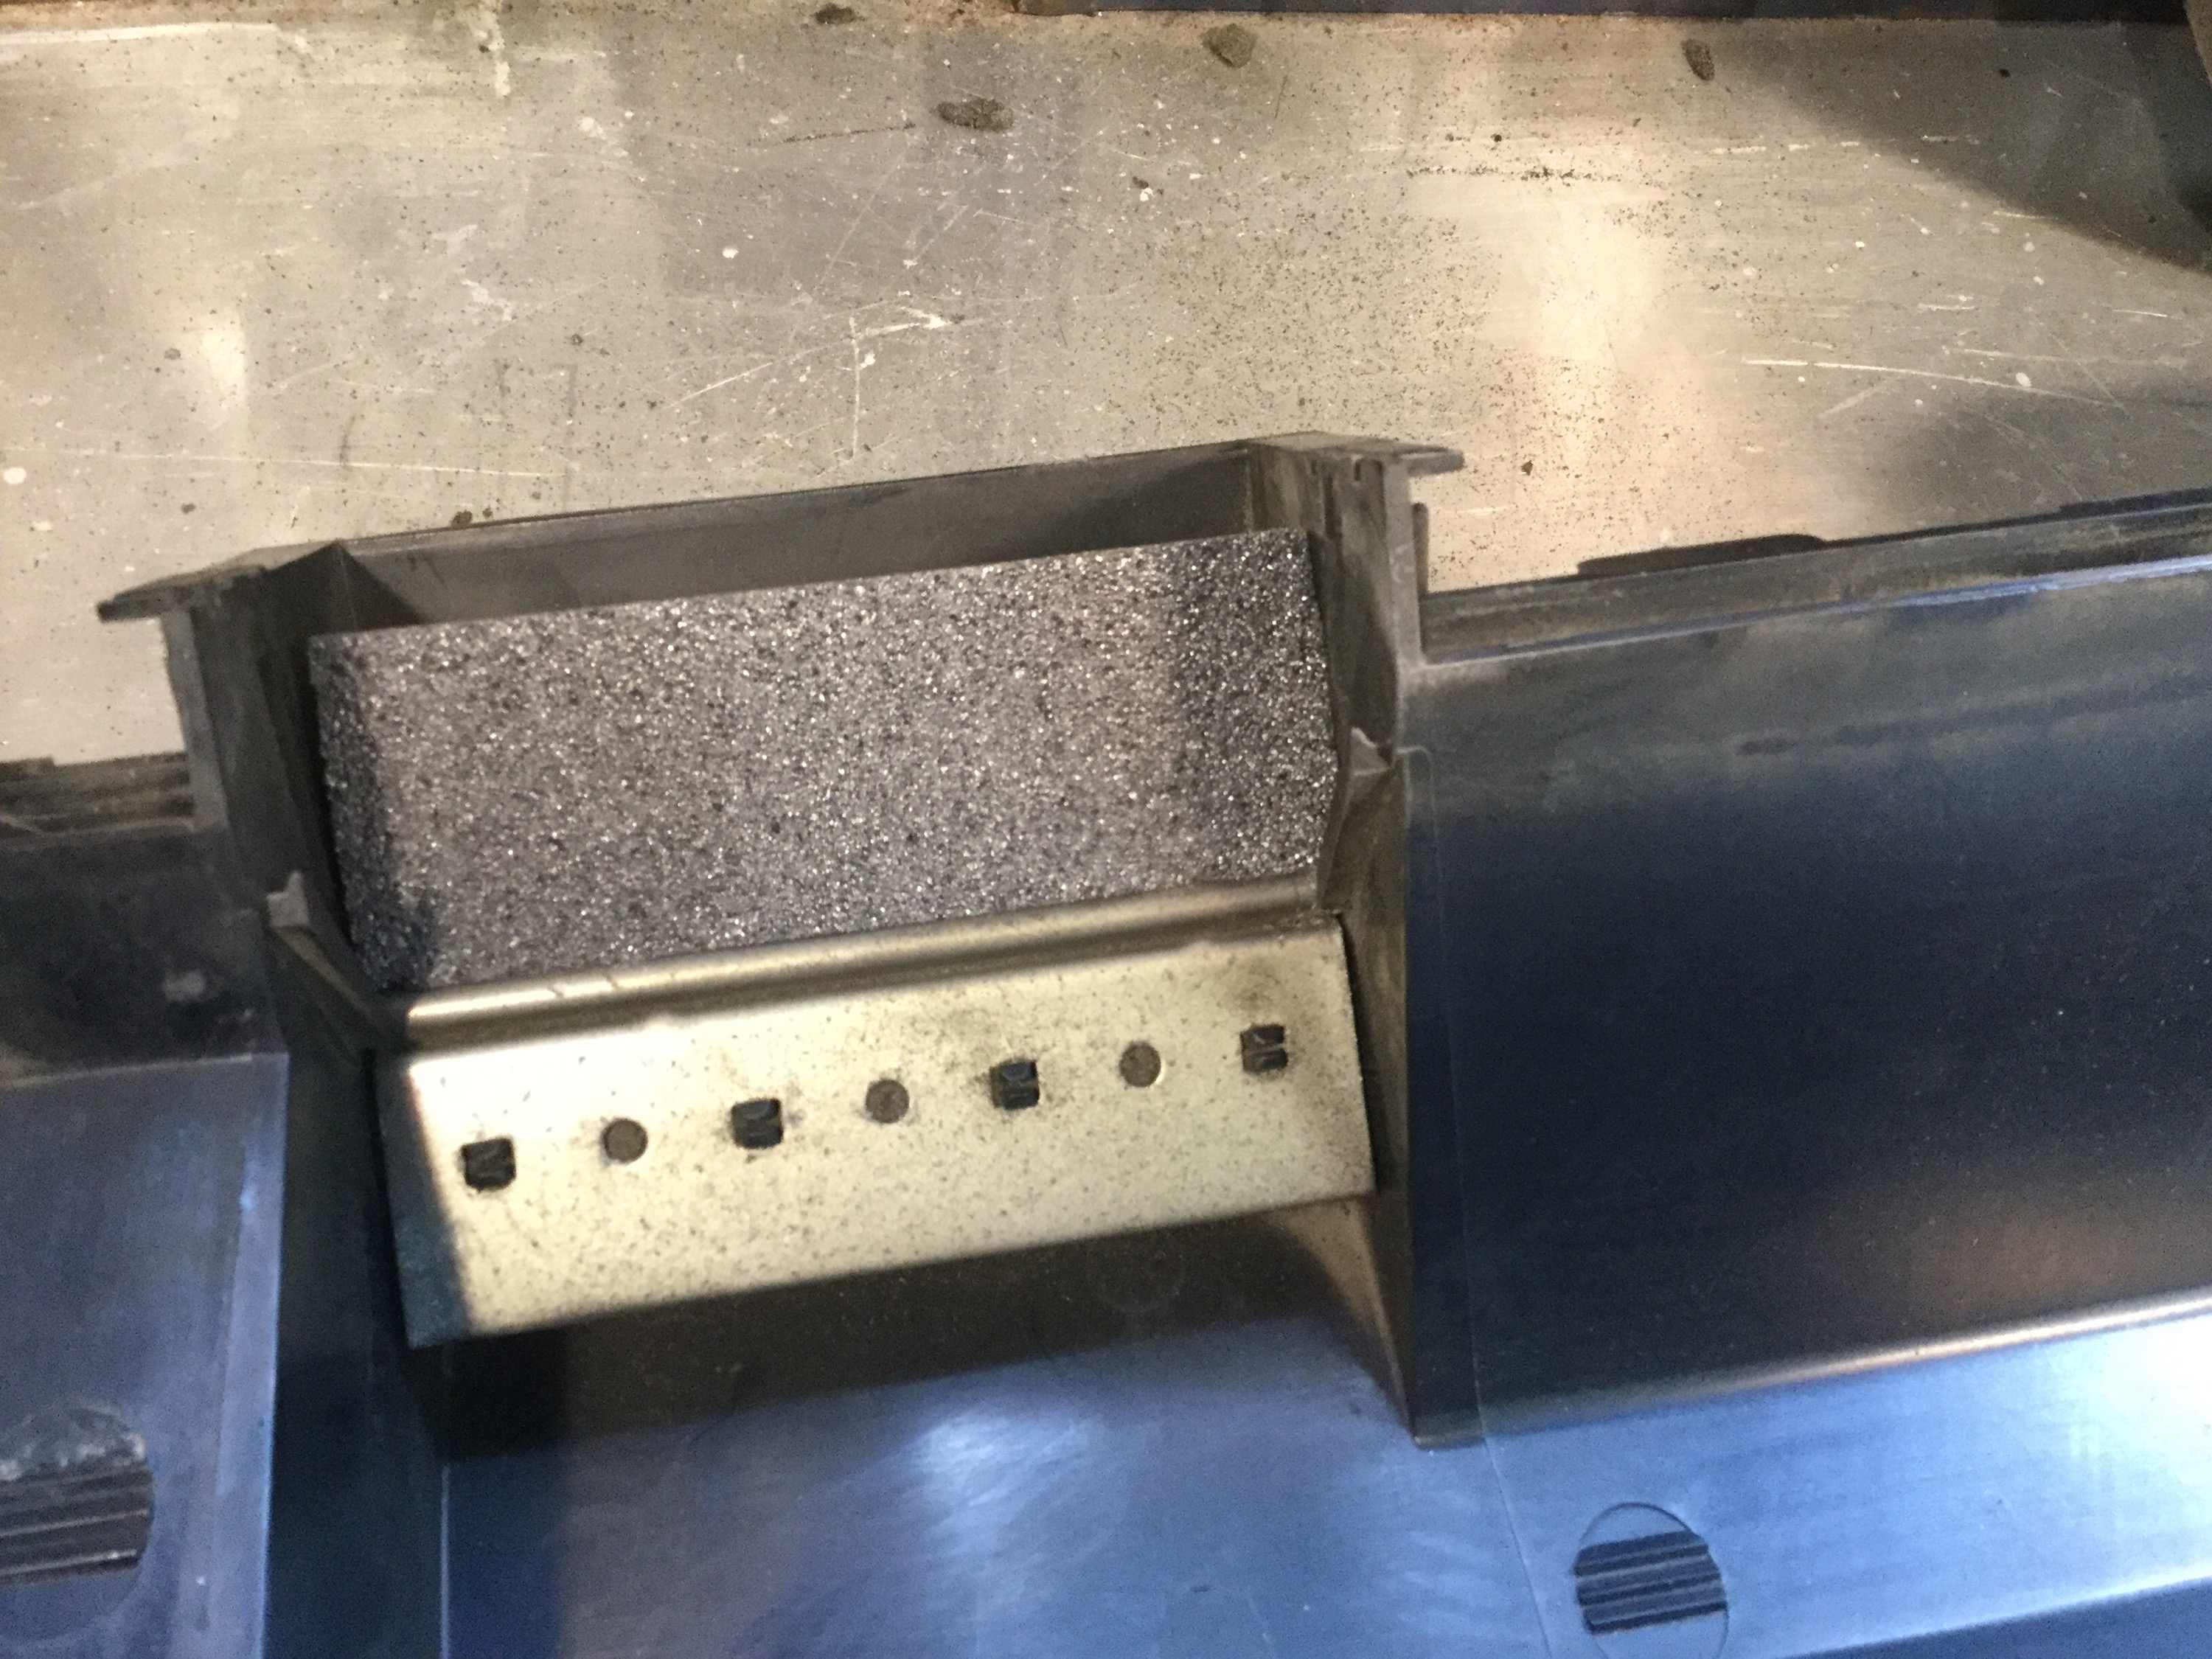
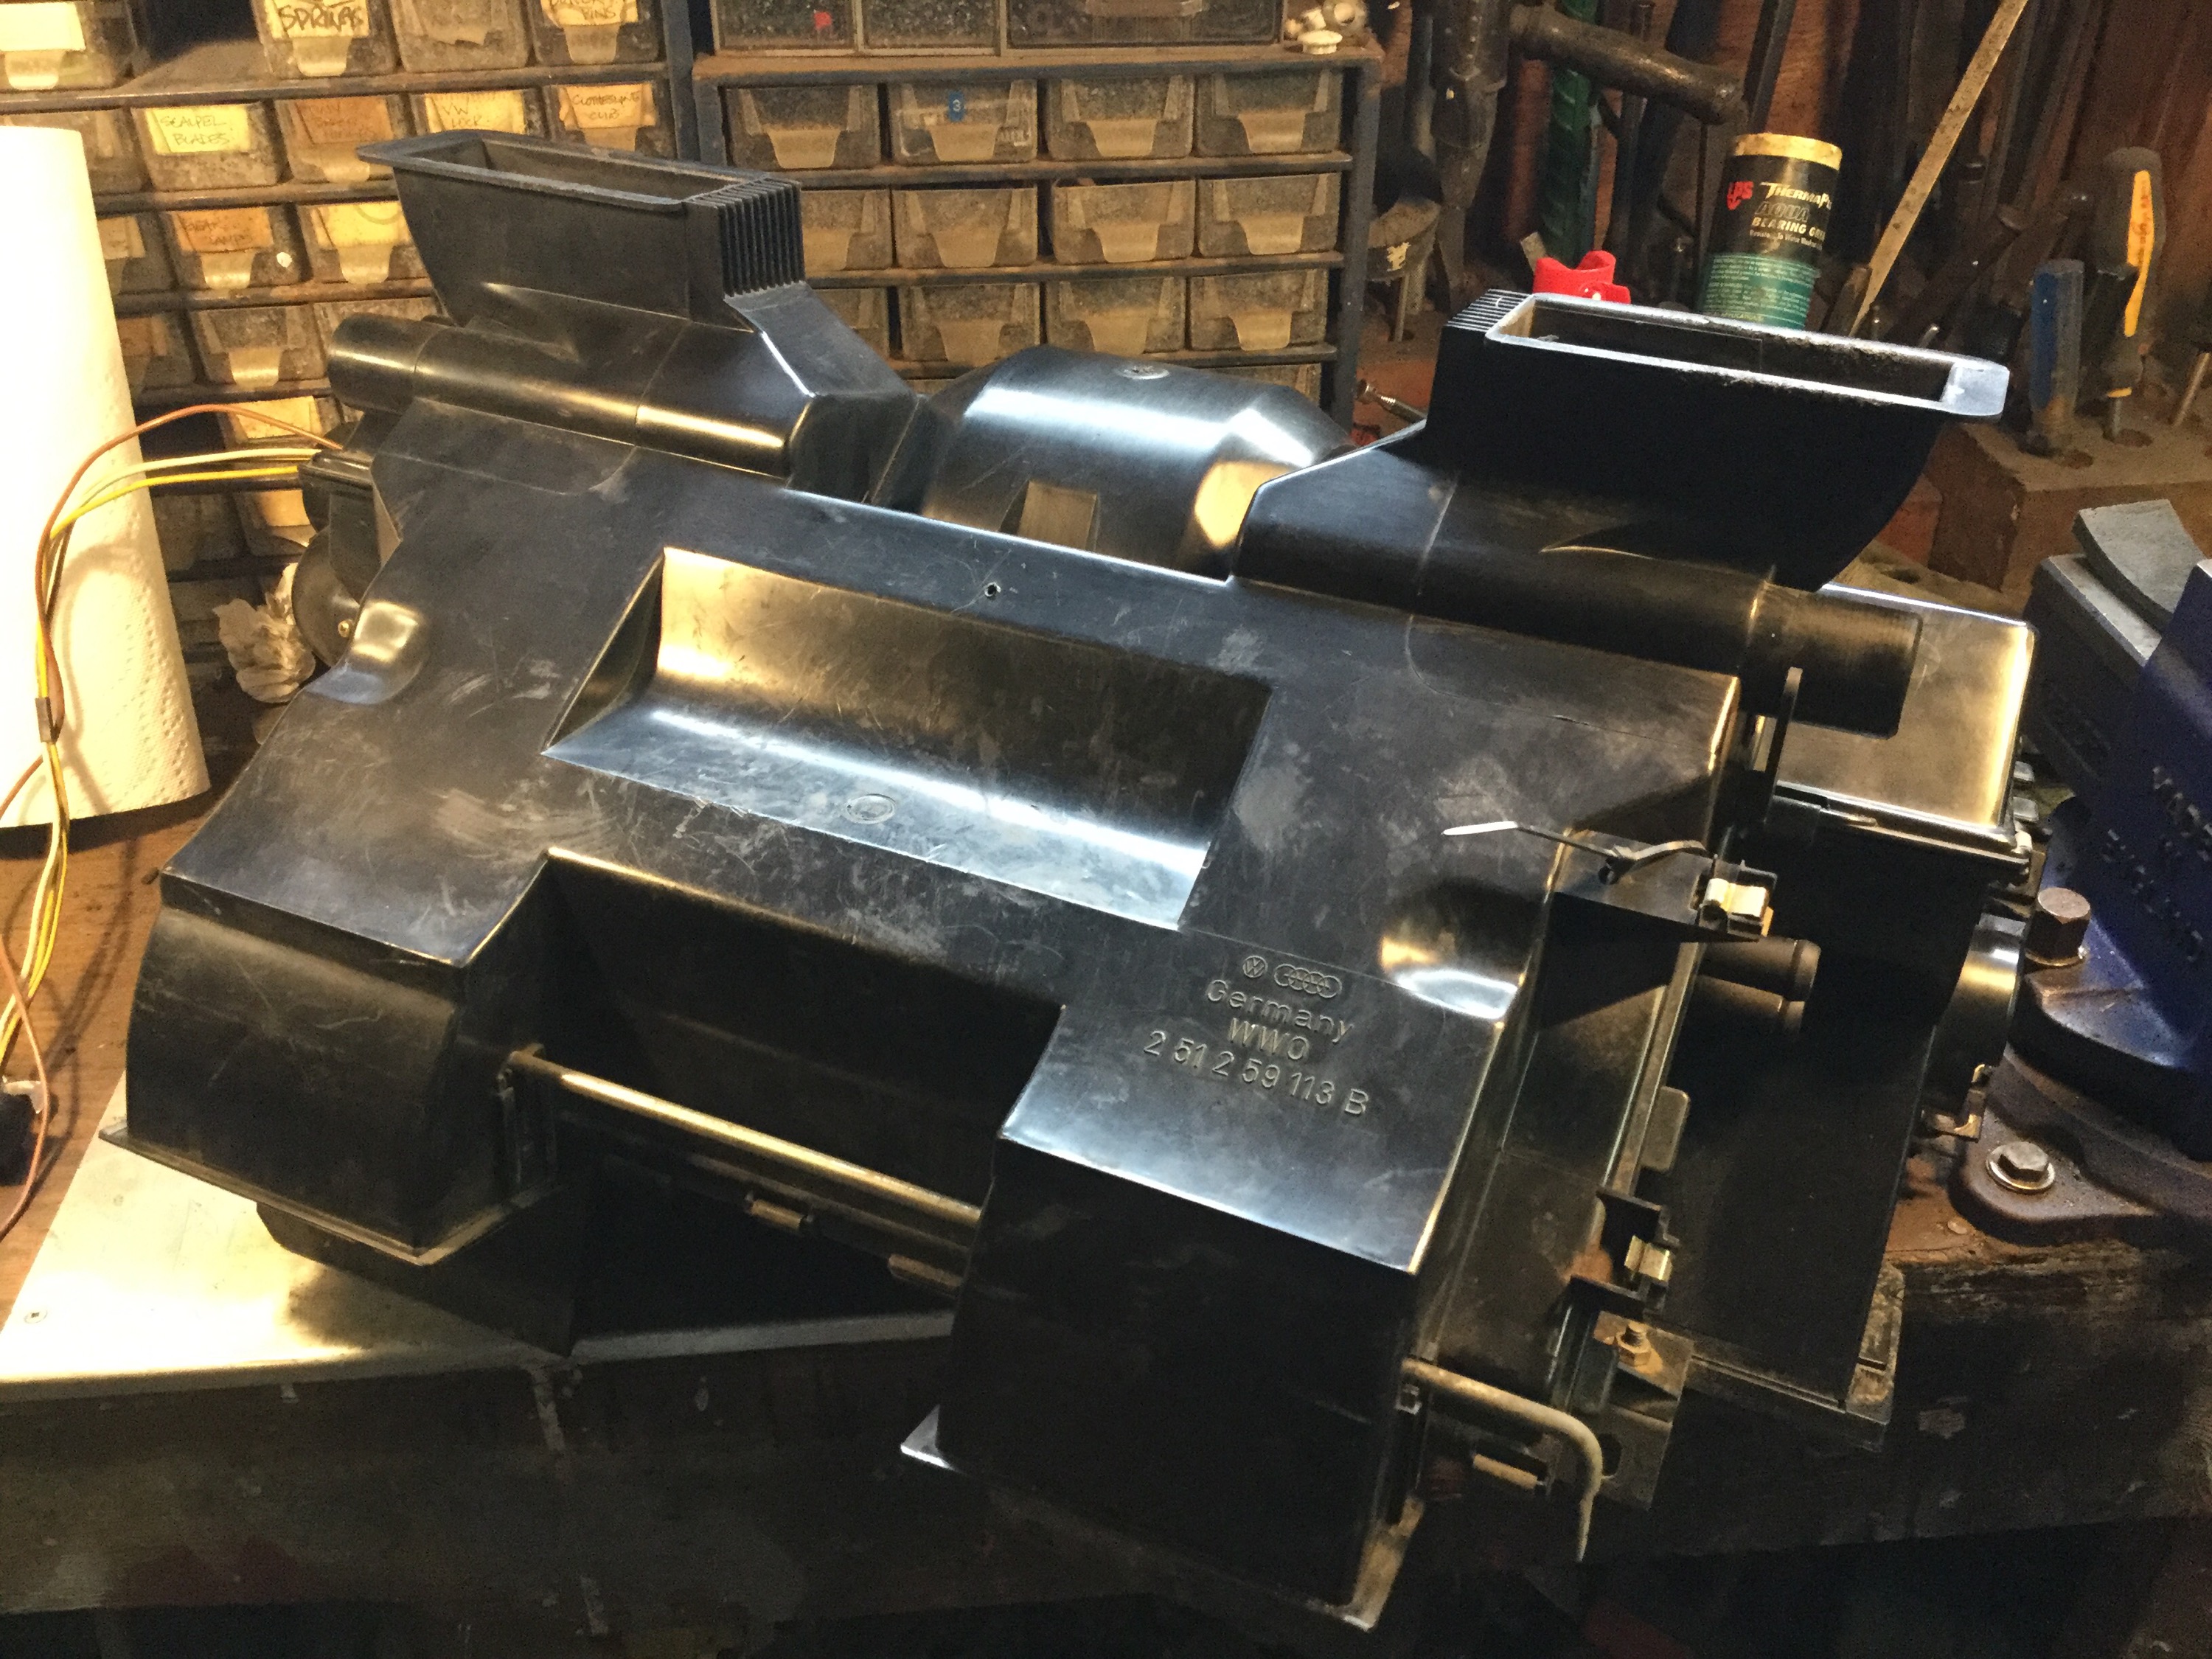
Now on to the heater box. Recall that I had split the box earlier. I washed the heater core and gave the internals a one hour soak with CLR brand rust and lime remover ( lactic acid, gluconic acid, and a surfactant). I started the refoaming on the upper half of the box.
The factory foam is pretty well gone. You can see how it is held, sandwiched between a plastic bit and the actual flap.


The foam I used to replace the rotten stuff is 38mm wide, 5mm thick adhesive backed open cell foam. It has a shiny plastic face which can, and was, peeled off. I got this foam at a local RV store. Oh and it has and adhesive backing which helps hold it in place when the plastic part is press back into place. It’s important to use a very compliant foam. You want the flaps to seal with little effort. If the foam is too stiff then the heater control lever and cable system isn’t really able to close the flaps fully.
New foam in place, plastic part not I’m place yet.
And here the plastic is in place. You can push the plastic part on, the little tabs will poke through the soft foam.
I cut the foam just large enough to fit the opening, if you do this job you’ll see just how big to cut. 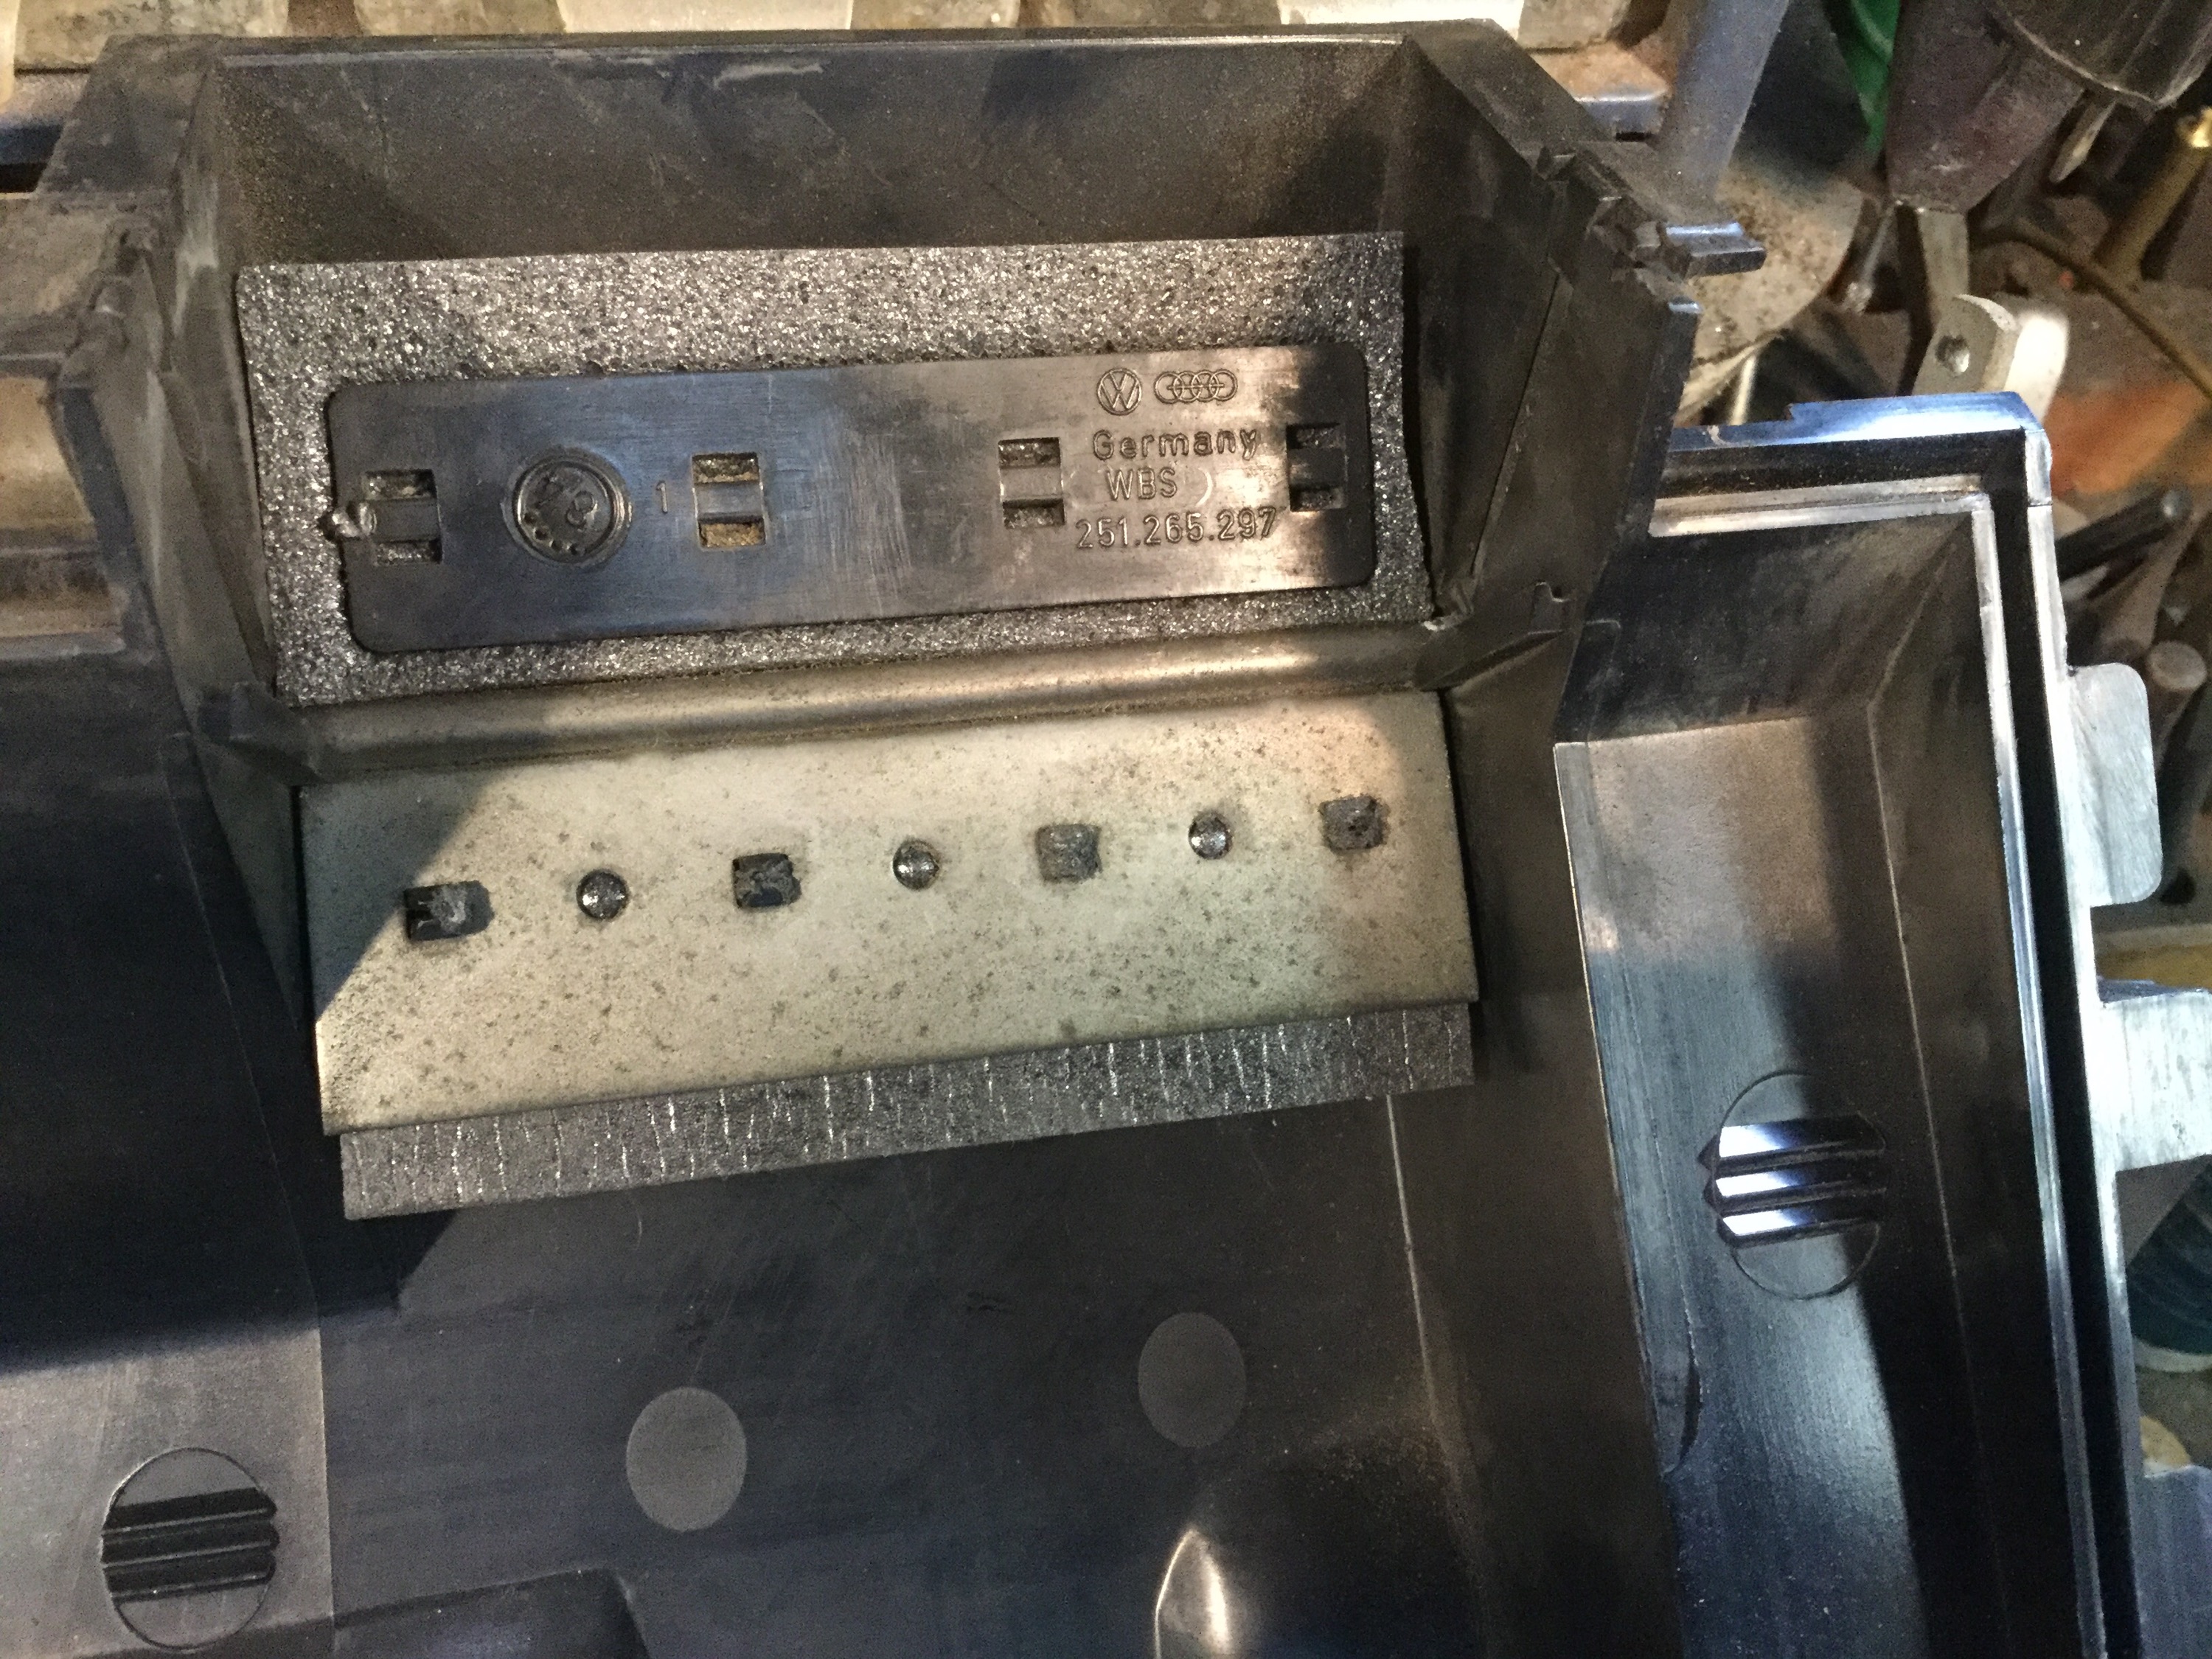
All the other flaps are similar. There are a few different heater boxes used in the vanagon, but the the refoaming principal remains the same.

On this box the passive flaps located on the blower and core side, didn’t have a plastic retaining plate. The foam was glued to the flap. I removed as much of the crumbling foam I could, and then was he the flap with 99% isopropanol. Then I played a heat gun on the flaps and noticed that the residual glue in the flaps became sticky again. I like that, it will add to the stick of the self adhesive foam.


You see how I had to us two strips on these flaps, and I didn’t quite get them aligned perfectly. The foam tape grabbed the flap. But who will see? Too late.
The heater core has a bit of foam around the sides and ends to seal it into its place. The old foam was, like the rest of the foam in the box, rotten. And I couldn’t get rid of the black on the core.
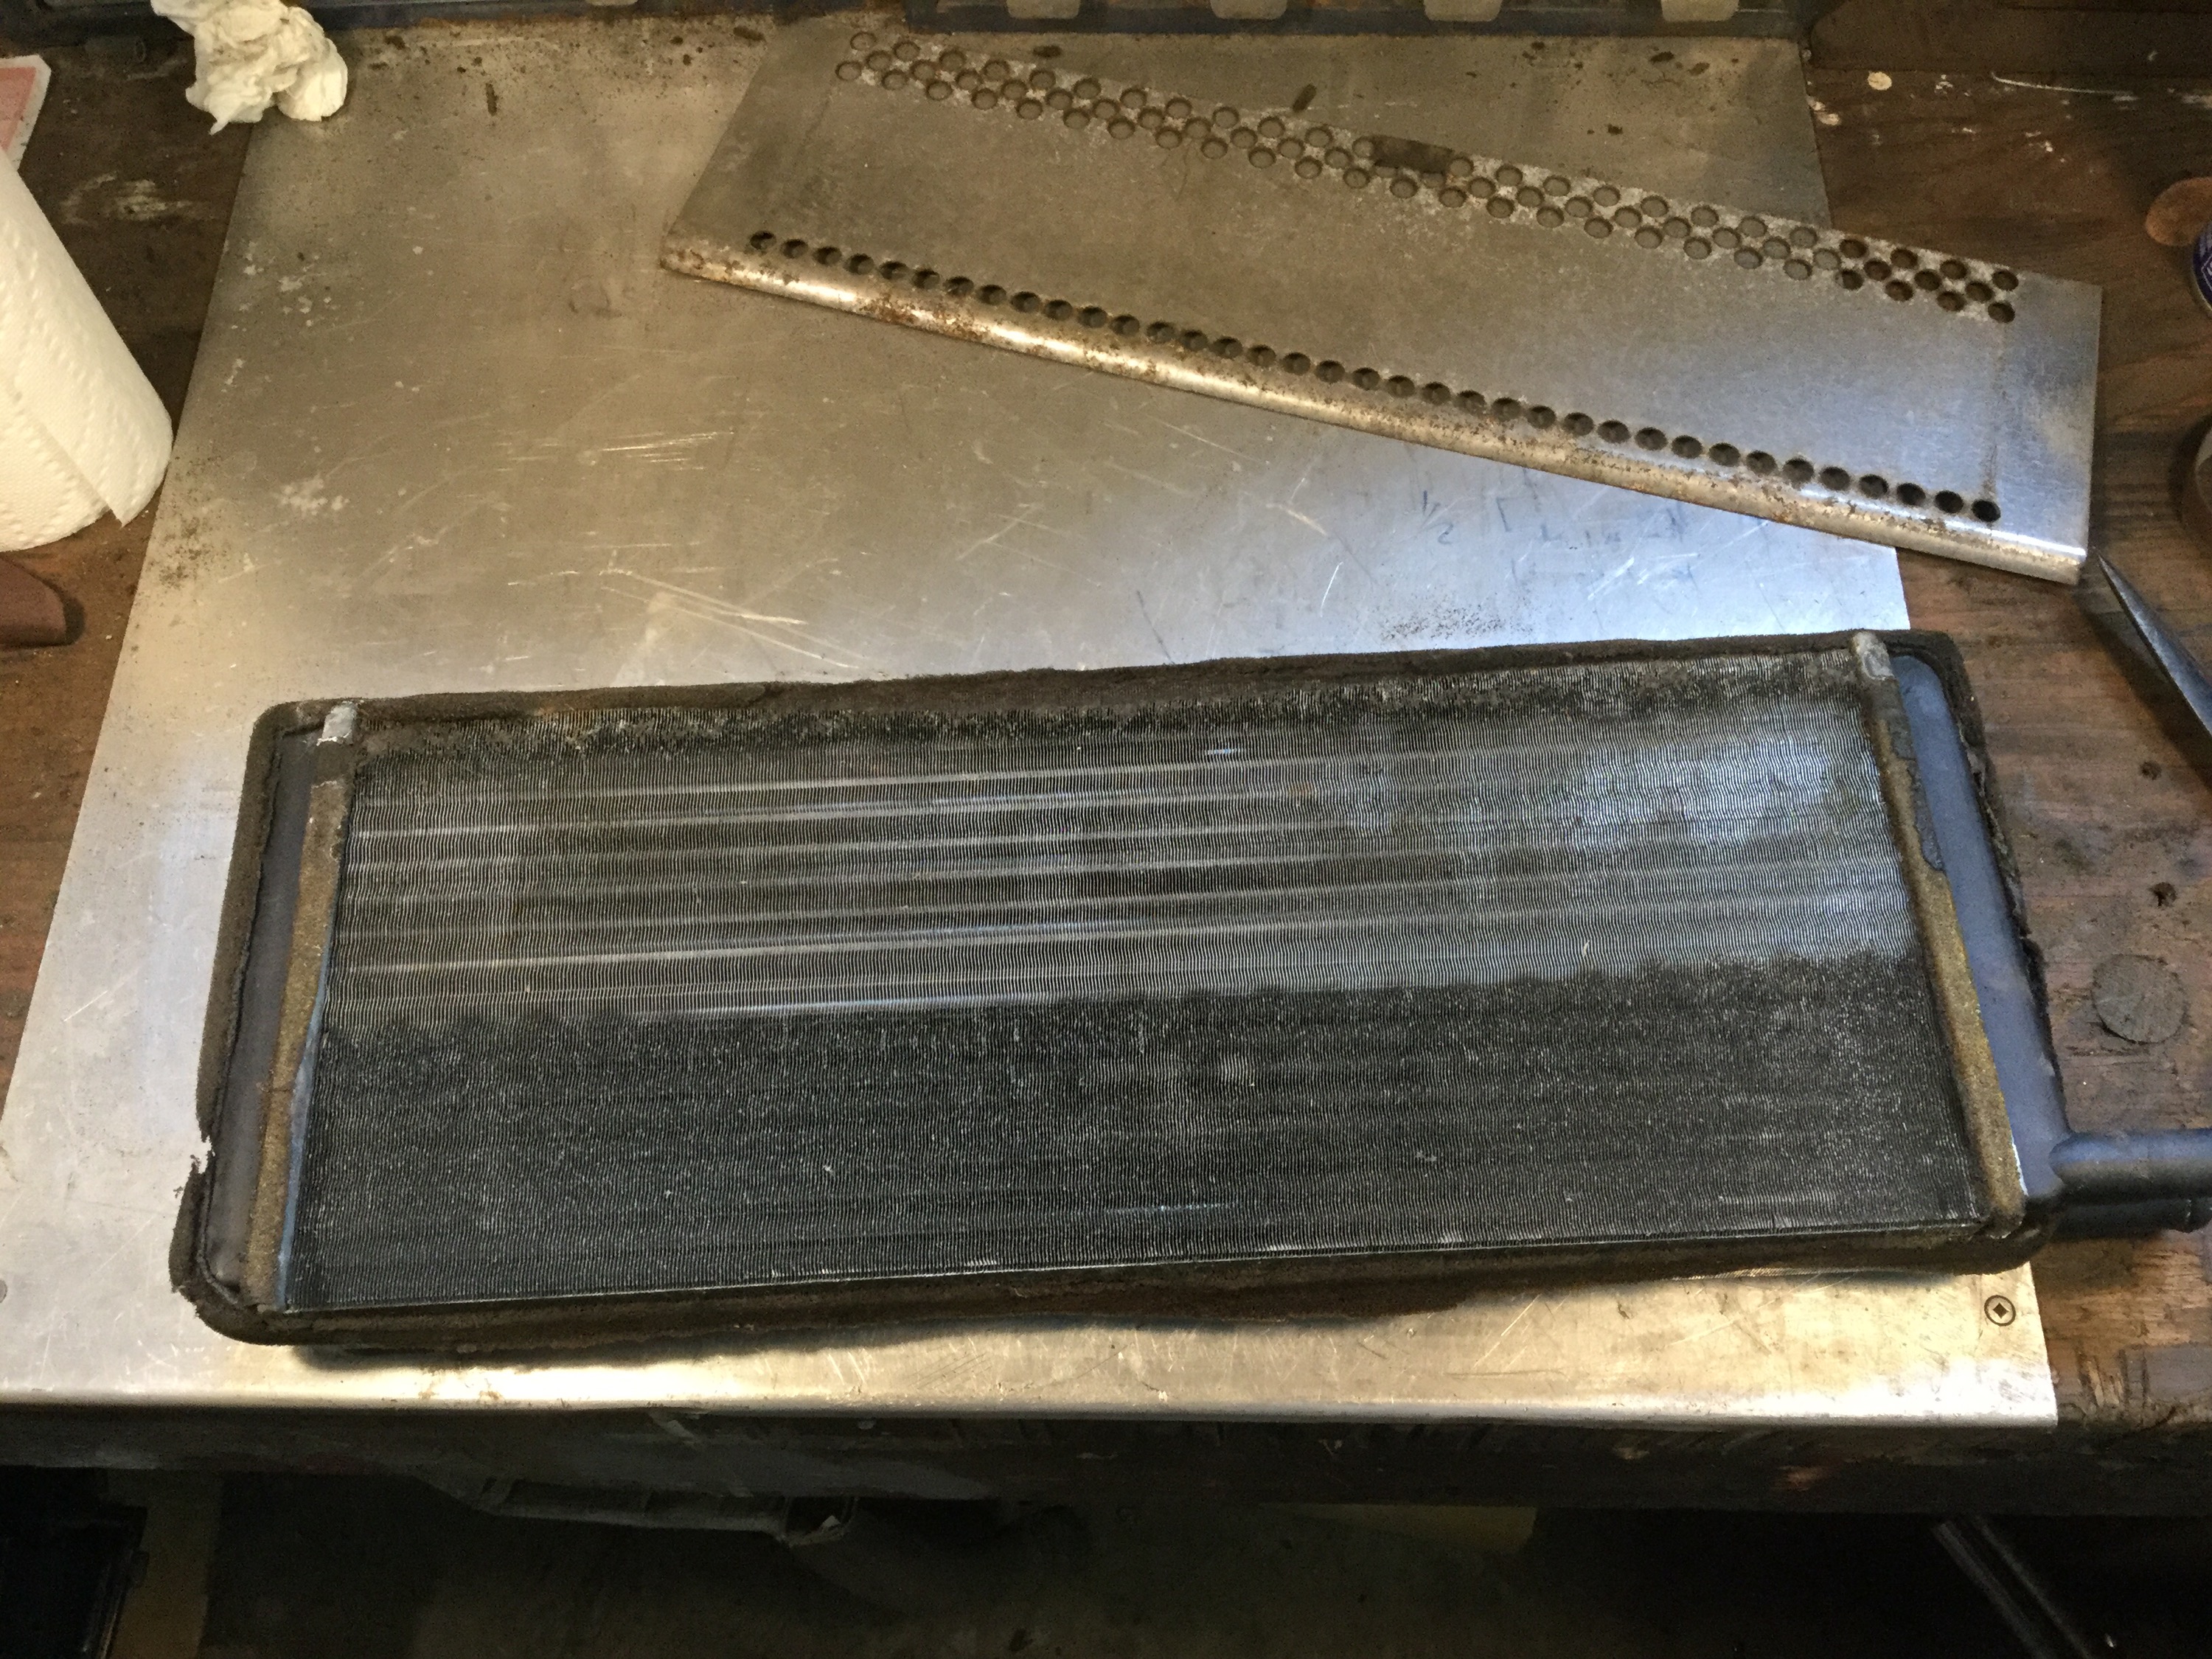

I used a good used fan, cleaned and lubed. Then finally the box went back into the van.

Phew!
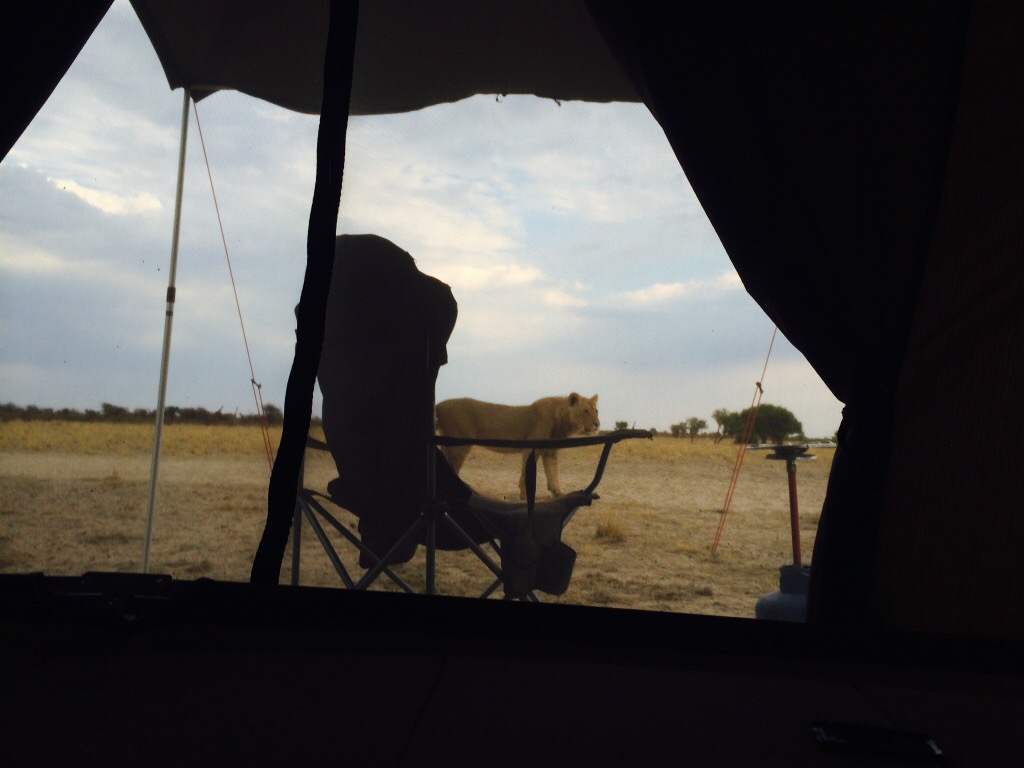
Syncro and lions in Botswana
Some more great shots from John B. in South Africa. Pictures a friend of his took while in Botswana.


Vanagon – Doka pedal assembly
The Doka has a clutch that engages approximately 5 Angstroms above full pedal. Some work has to be done, but I noticed when I was mucking around with the dash off that there was a lot of play in the clutch pedal.
I’ve posted about clutch pedal play before, right here. Indulge me as I go through it briefly again.
damn wordpress, I’m still composing this post…
Ok, some say you can get the pedal assembly out with the dash in place, coming straight up out where the instrument cluster sits. Perhaps, but you have to bend a wrench to get the forward two bolts that hold the straps that run from dash to body. Might as well take the dash off. Oh, and taking the rubber pedal pads off the pedals makes things easier believe it or not.
Pull the brake master cylinder from the booster. No need to disconnect the brake lines, but you have to remove the fabric covered rubber hose that supplies fluid to the clutch master. And also remove the vacuum line to the booster. Pull the elbow from the rubber grommet rather than trying to remove the hard plastic from the elbow.
Disconnect the metal clutch line from the clutch master. Spill more brake fluid. I hate the feeling of brake fluid on my hands.
Four 13mm headed bolts hold the pedal assembly to the van. Then it comes up out behind that body beam.
Ok, off to the bench with the messy bugger. How about a clumsy video that tries to show the amount of clutch pedal play?
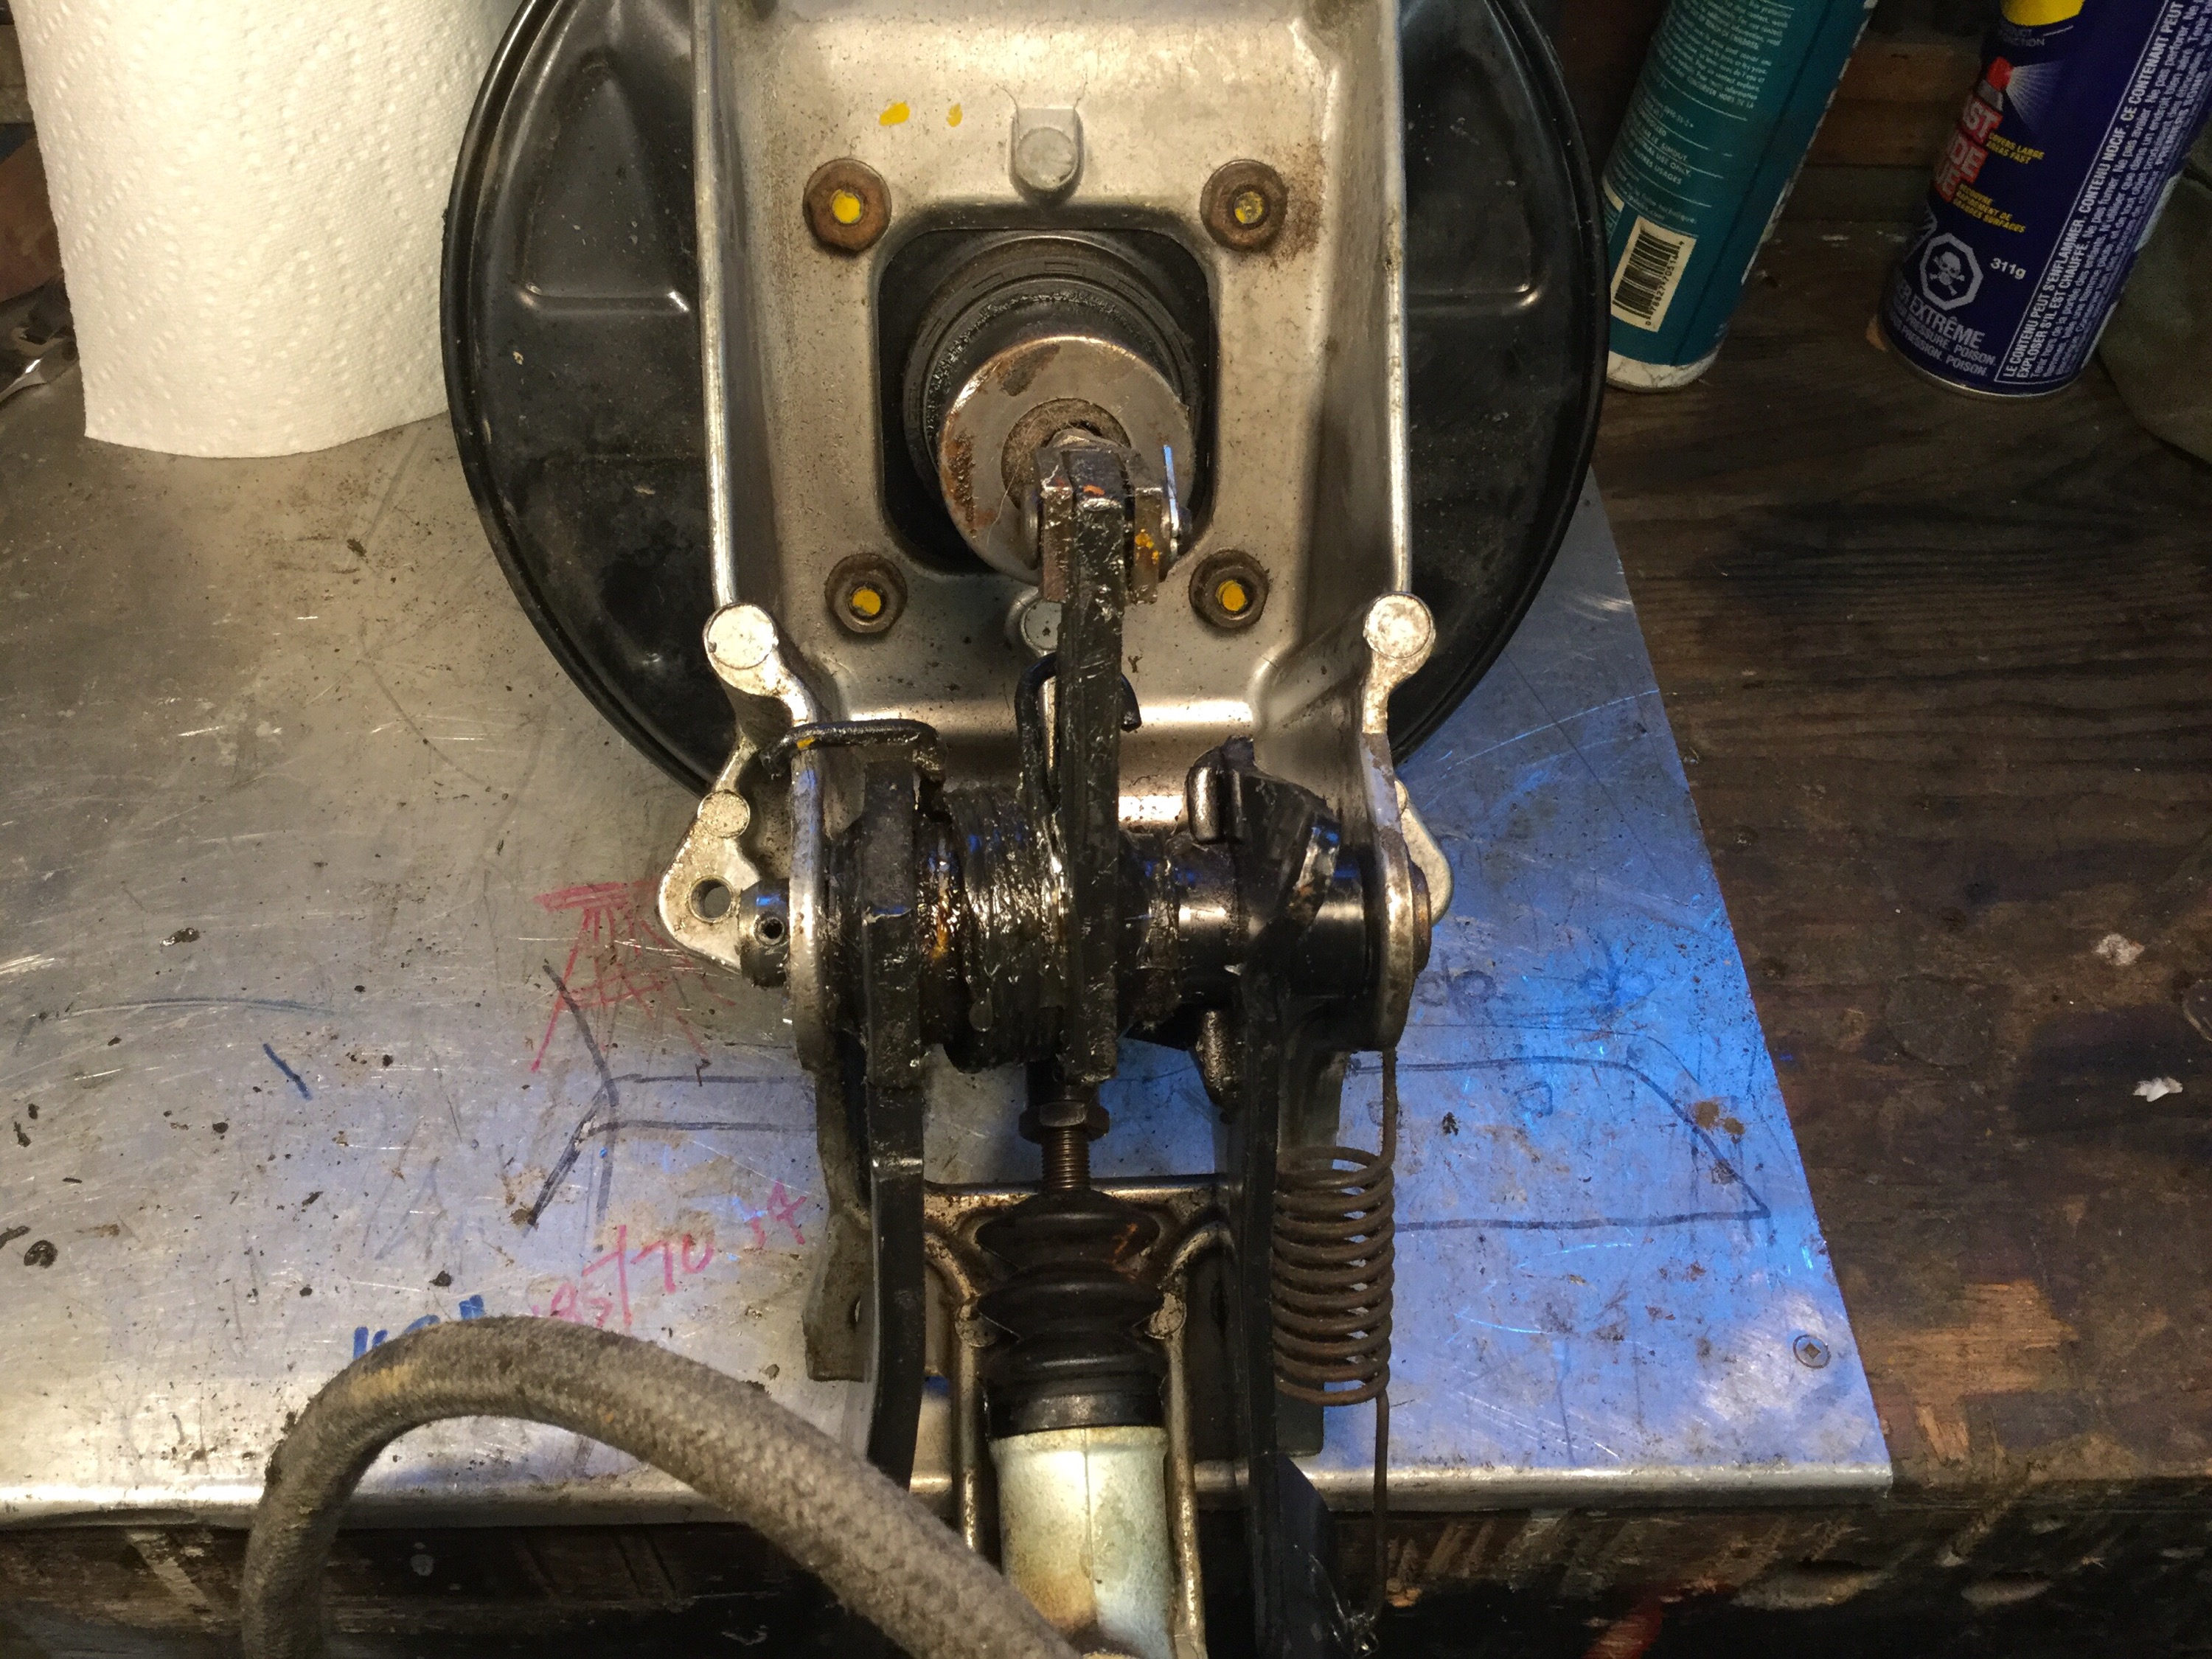
Well there wasn’t as much play in the clevis pin and yoke as I thought there was. But there was a lot of play between the rod that screws into the yoke and the cup it fits into in behind the master cylinder boot. There is that rod in the next pic, the clutch pedal removed from the assembly.

See? The hole isn’t as wallowed as I thought it would be. And the pin is in fair shape. I measured the pin, 7.95mm. I’m supposing the hole would have been nominally 8mm diameter.

Blobbed in some metal.

Filed off. Maybe a 7/10? I left a bit of a hole in the middle on purpose, to give me a hole location.

Believe it or not, I have a 7.5mm drill bit and an 8mm chucking reamer. This entire exercise was worthwhile for just being able to use them.


And the pin fit into the hole just right.

You know, I should have done the same thing with the brake pedal, it wasn’t as loose as the clutch pedal but it was, and is, a little worn.
Alright, put the things back together (cleaned and greased).
Adjusted the rod from the yoke to the master for just a little play and this is the result.
Vanagon – Doka dash off
Last weekend I pulled the dash off the yellow Doka so that I could do a refurb of the heater box. It could have been worse, but of the six machine screws that hold the heater box on, the heads of two twisted off, and another had to have head drilled off and stub removed with vice grips.
Hey look at this heater box. I think my 82 diesel Westy was the same, and that is the box is not welded together at those tabs. Yeah, there were metal clips, but no plastic welding. My 86 syncro and Simon’s 91 syncro heater boxes had the halves welded together.
The fan motor was seized. I did loosen it up and I click get it to run, but it will be replaced. The foam on the flaps was all disintegrated. The heater core was dirty but sound. I’ll get back to the box later, next post will be about the pedal assembly.
Apology
Posted by albell in Uncategorized on November 21, 2015

Reasons for radio silence these last couple of months:
– busy at work
– tired when I come home
– rain
– doing yard and house repair type work I should have done before
– idiotic mail dump deletion and slow recovery.
I have outstanding blog post questions to respond too, I apologize for being so unforgivably slow.
And sheesh, forgot one more apology. The Lesotho post from John B. is now unlocked and his commentary posted.
And hey, another mea culpa. The gif of Javier at the top of this post is from the site “if we don’t remember me” http://iwdrm.tumblr.com
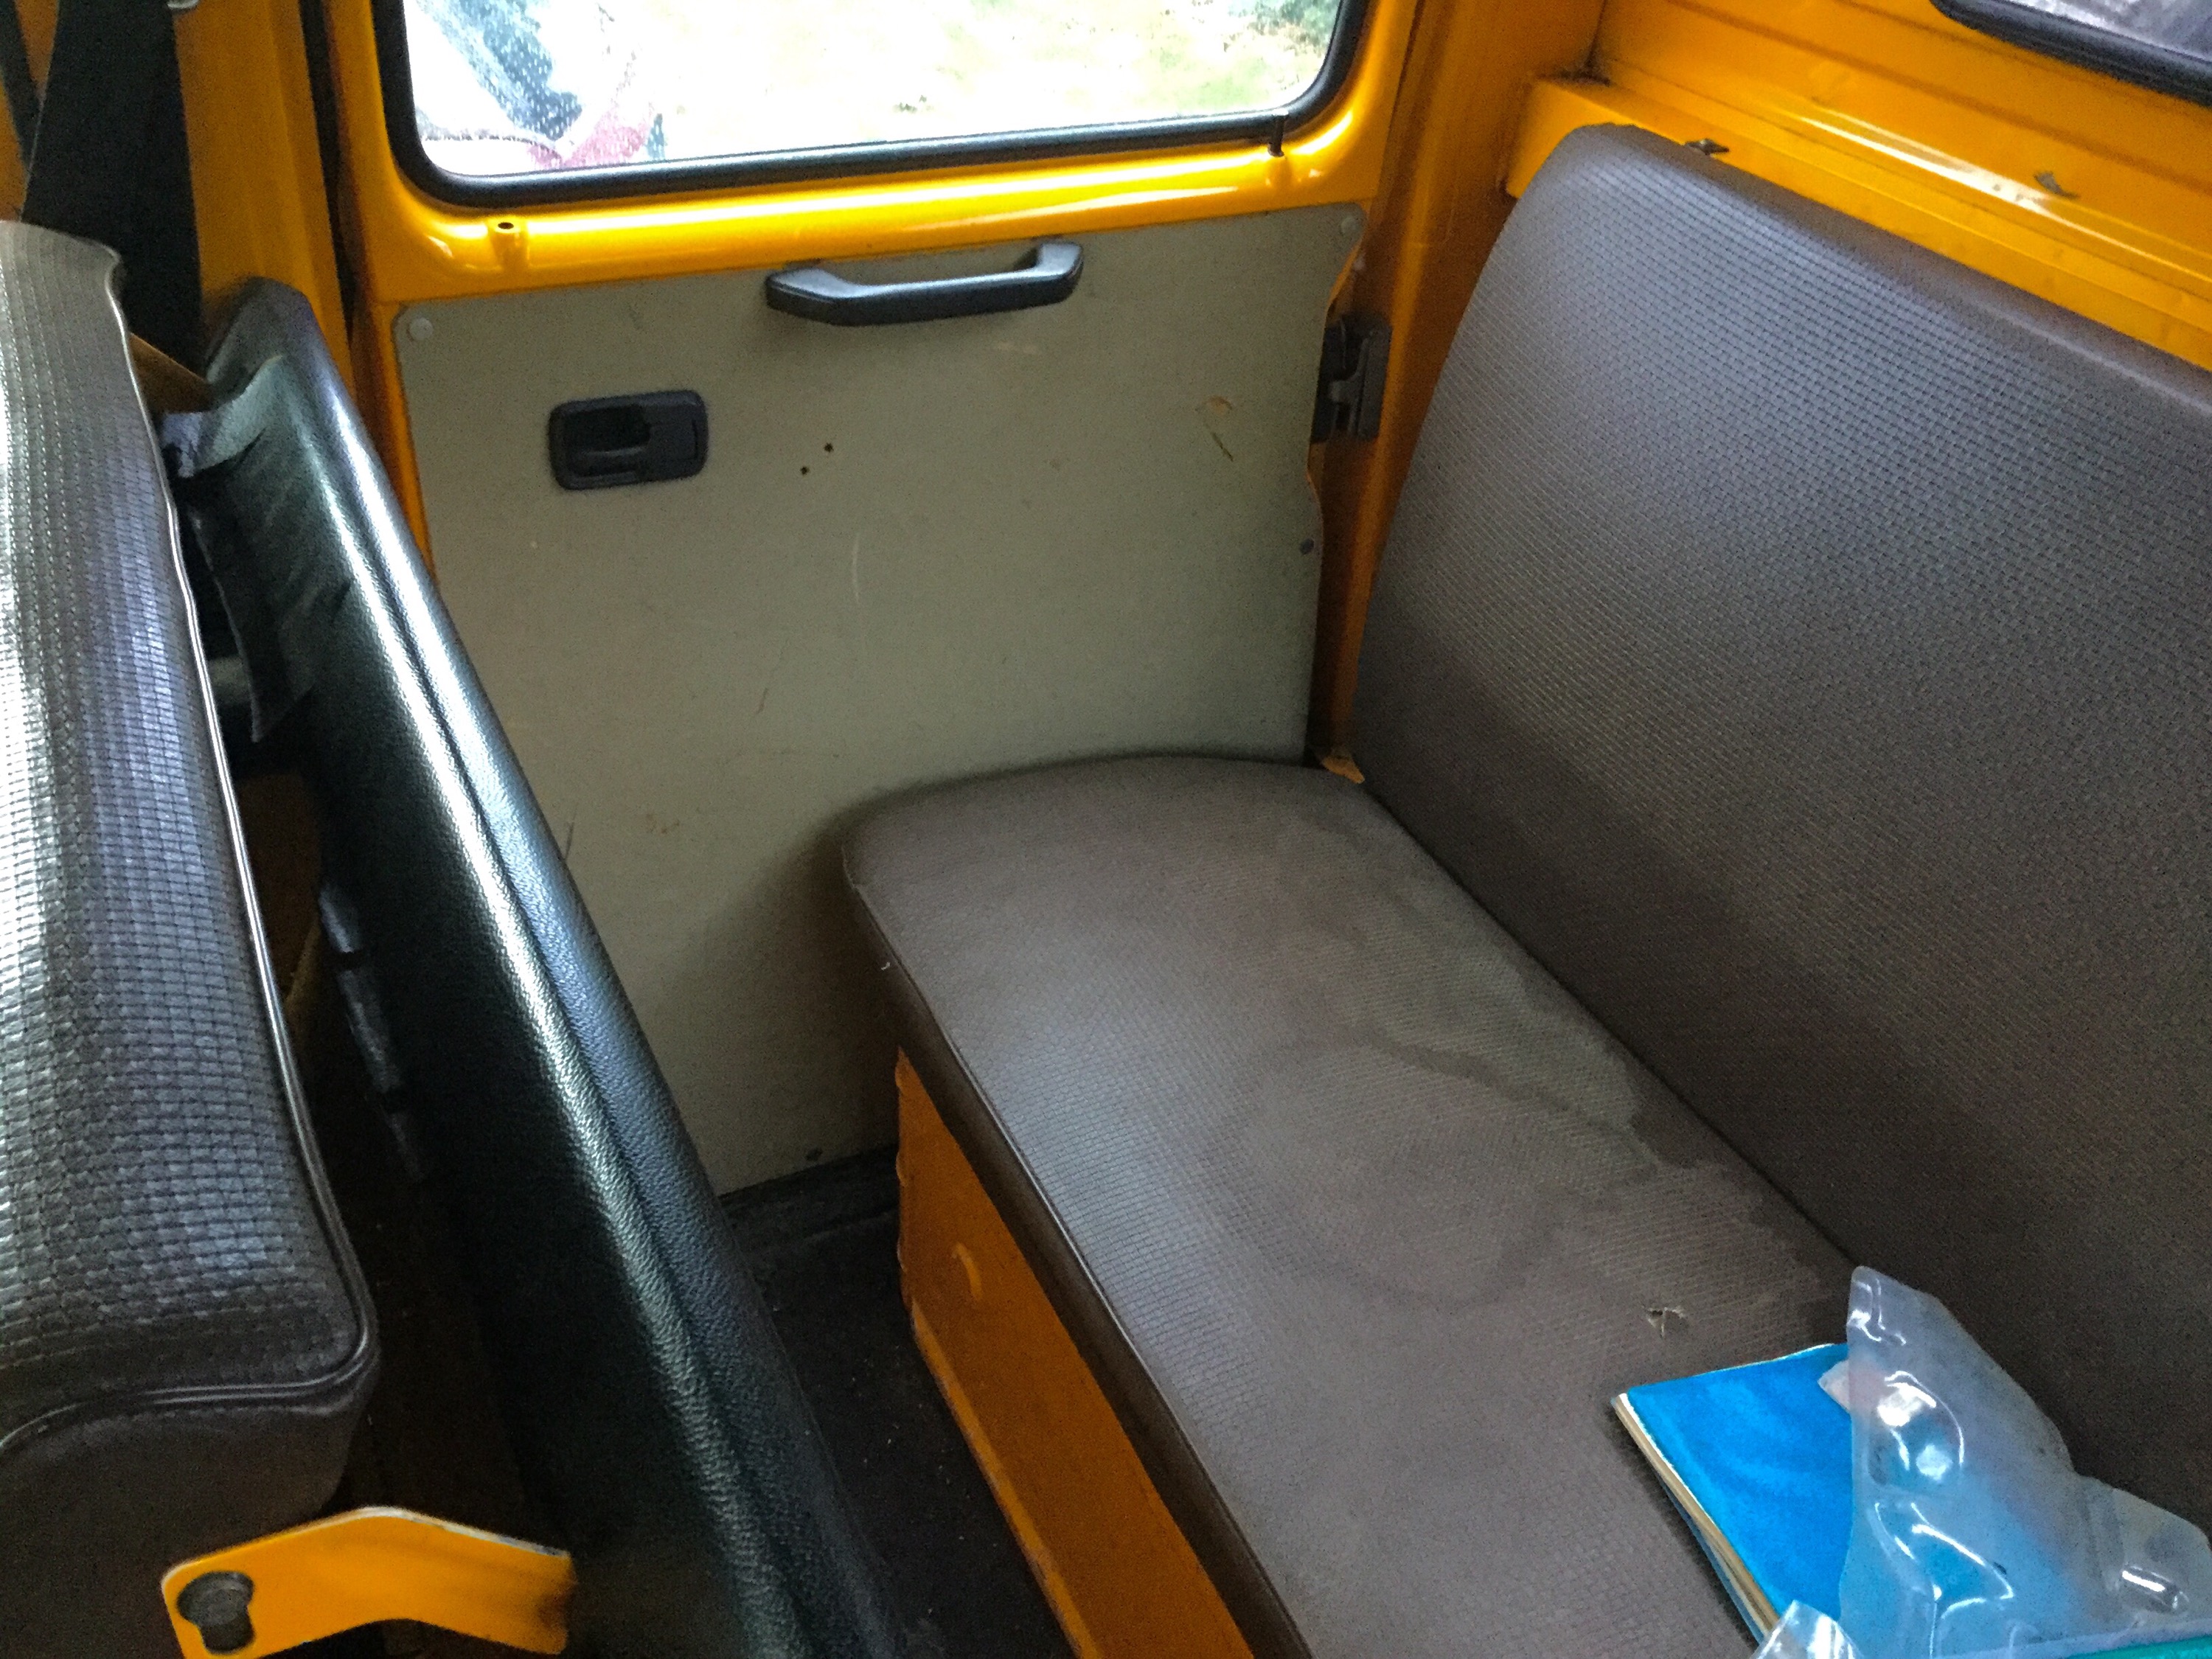
Vanagon – diesel Doka work – part one
My neighbour bought another Doka. Yes, same guy that has the nice green Doka that at did some heater work on. Blog post on that here.
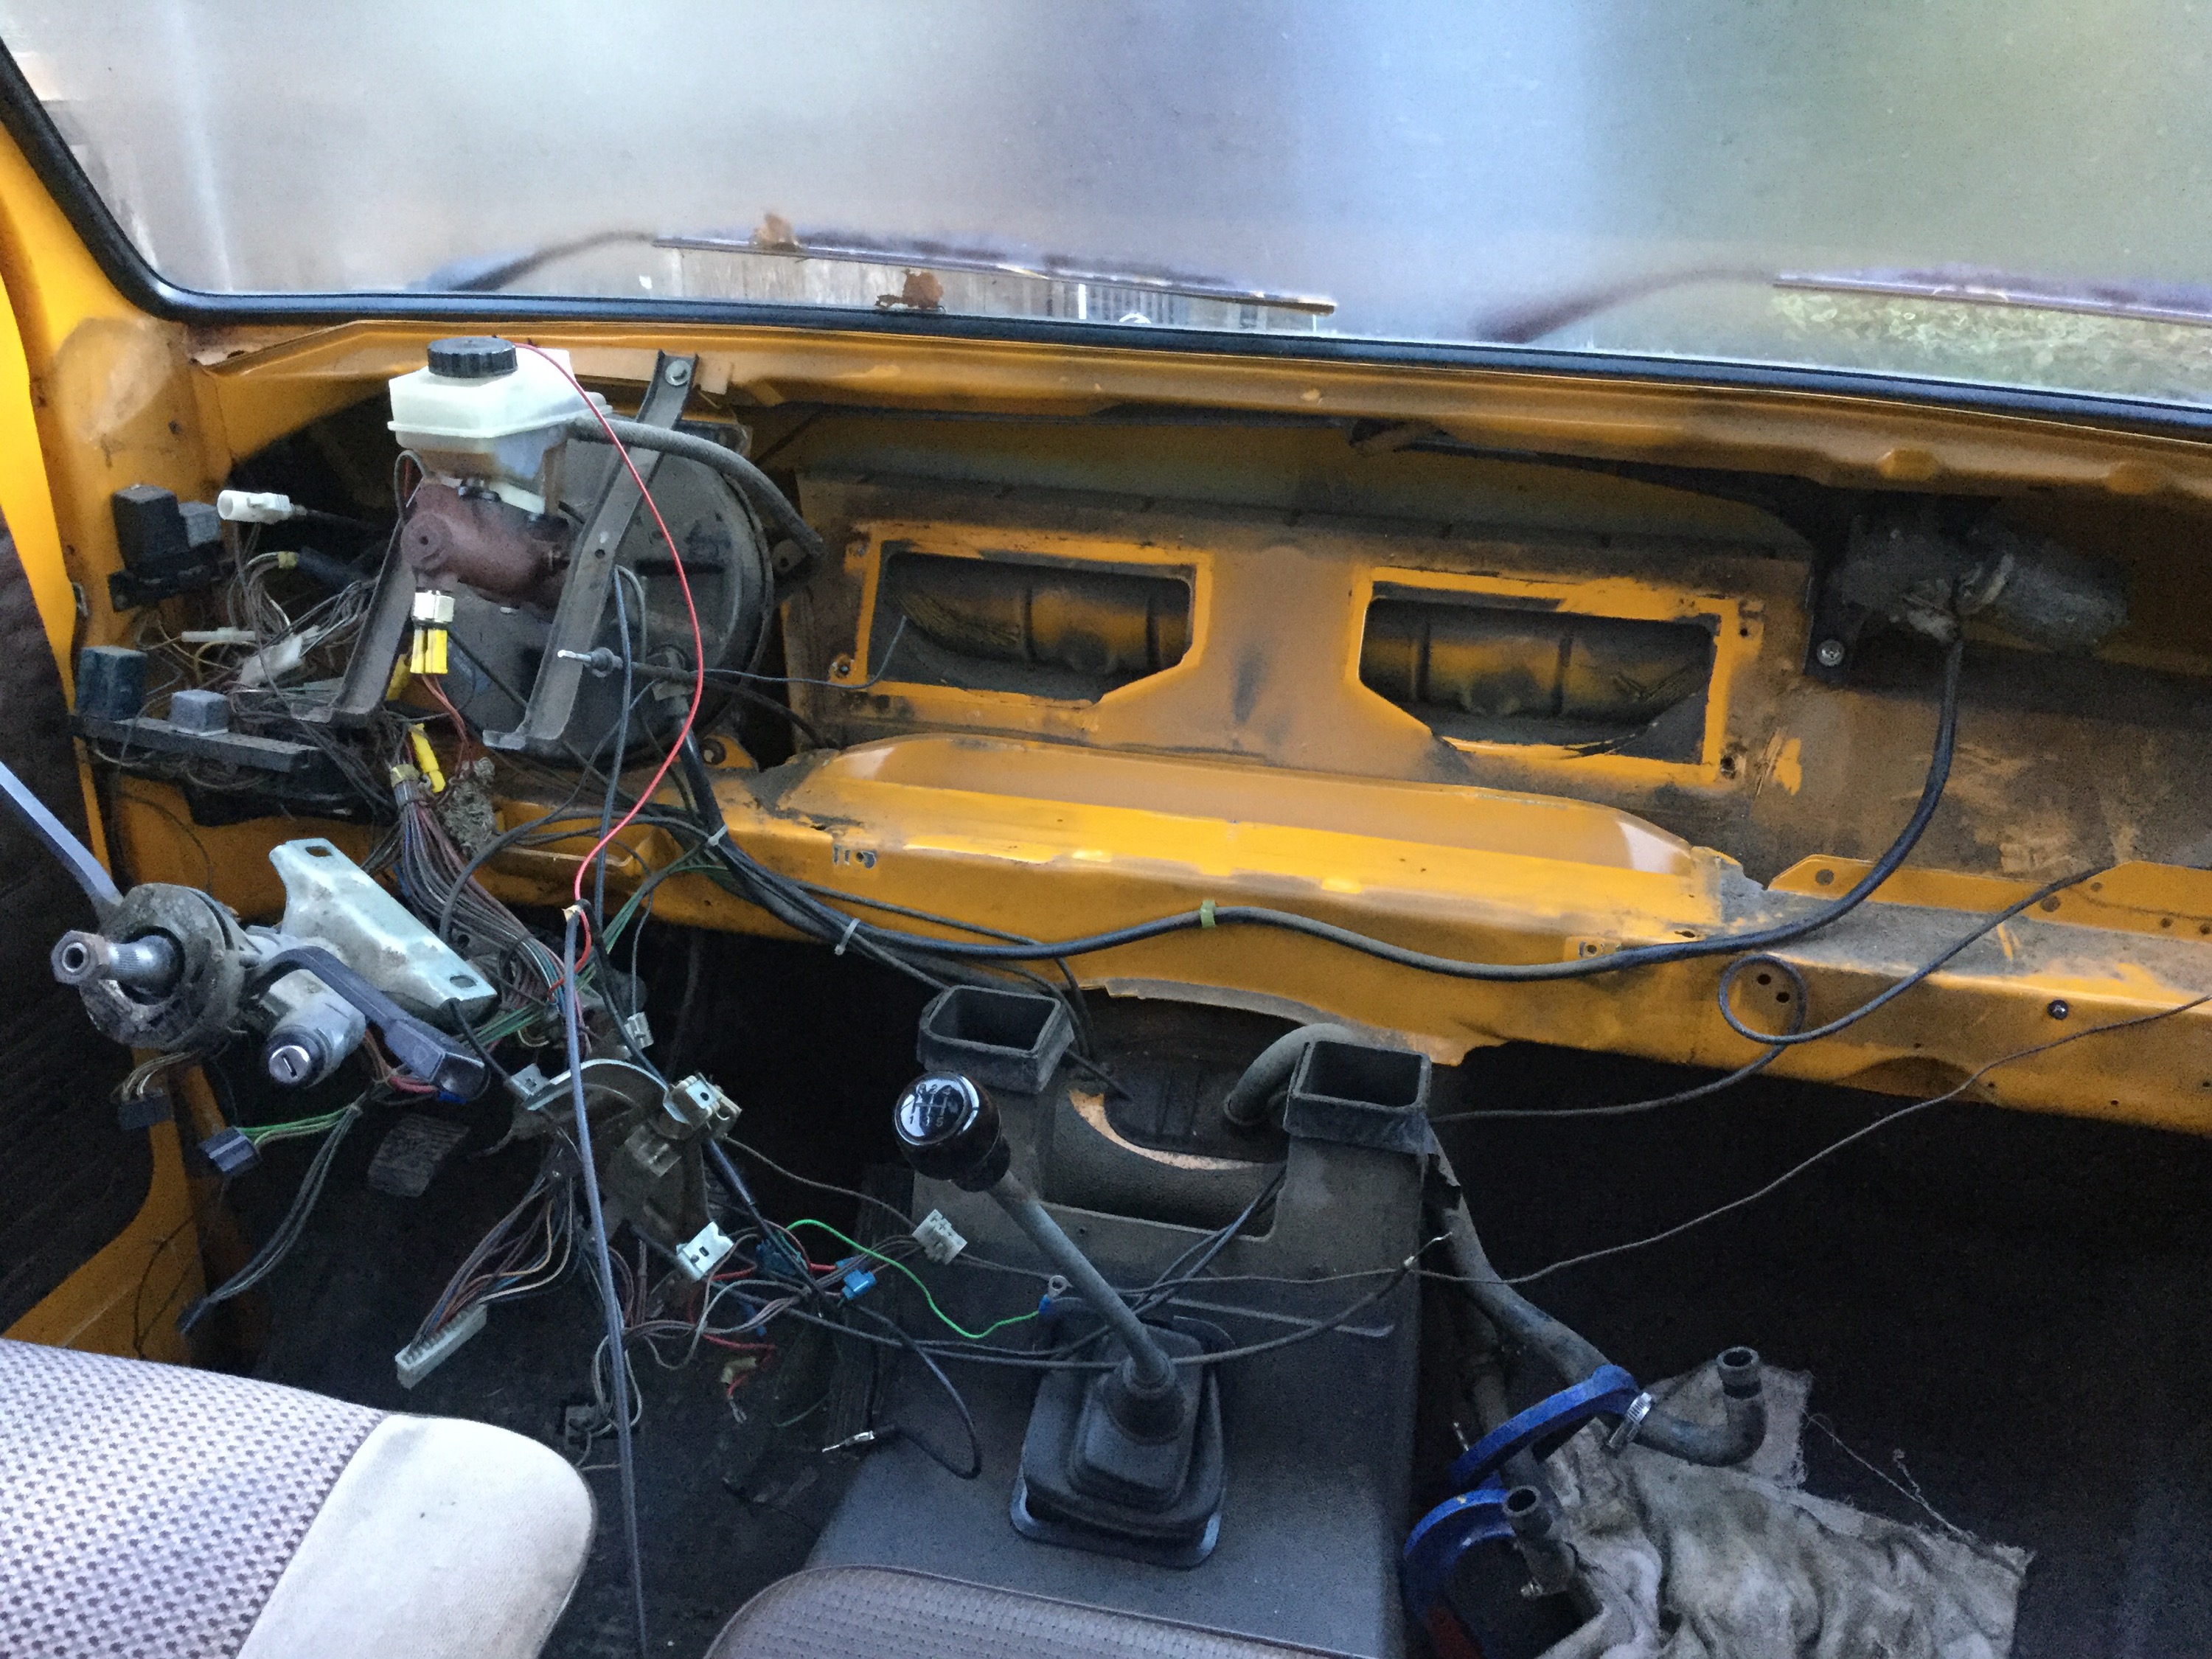
This one is an 85 diesel. A private import so it has one or two interesting things not usually found on North American vans. I’ve been talking some pics as I delve into the dash and the previous owner’s work and we start with the wide shots.
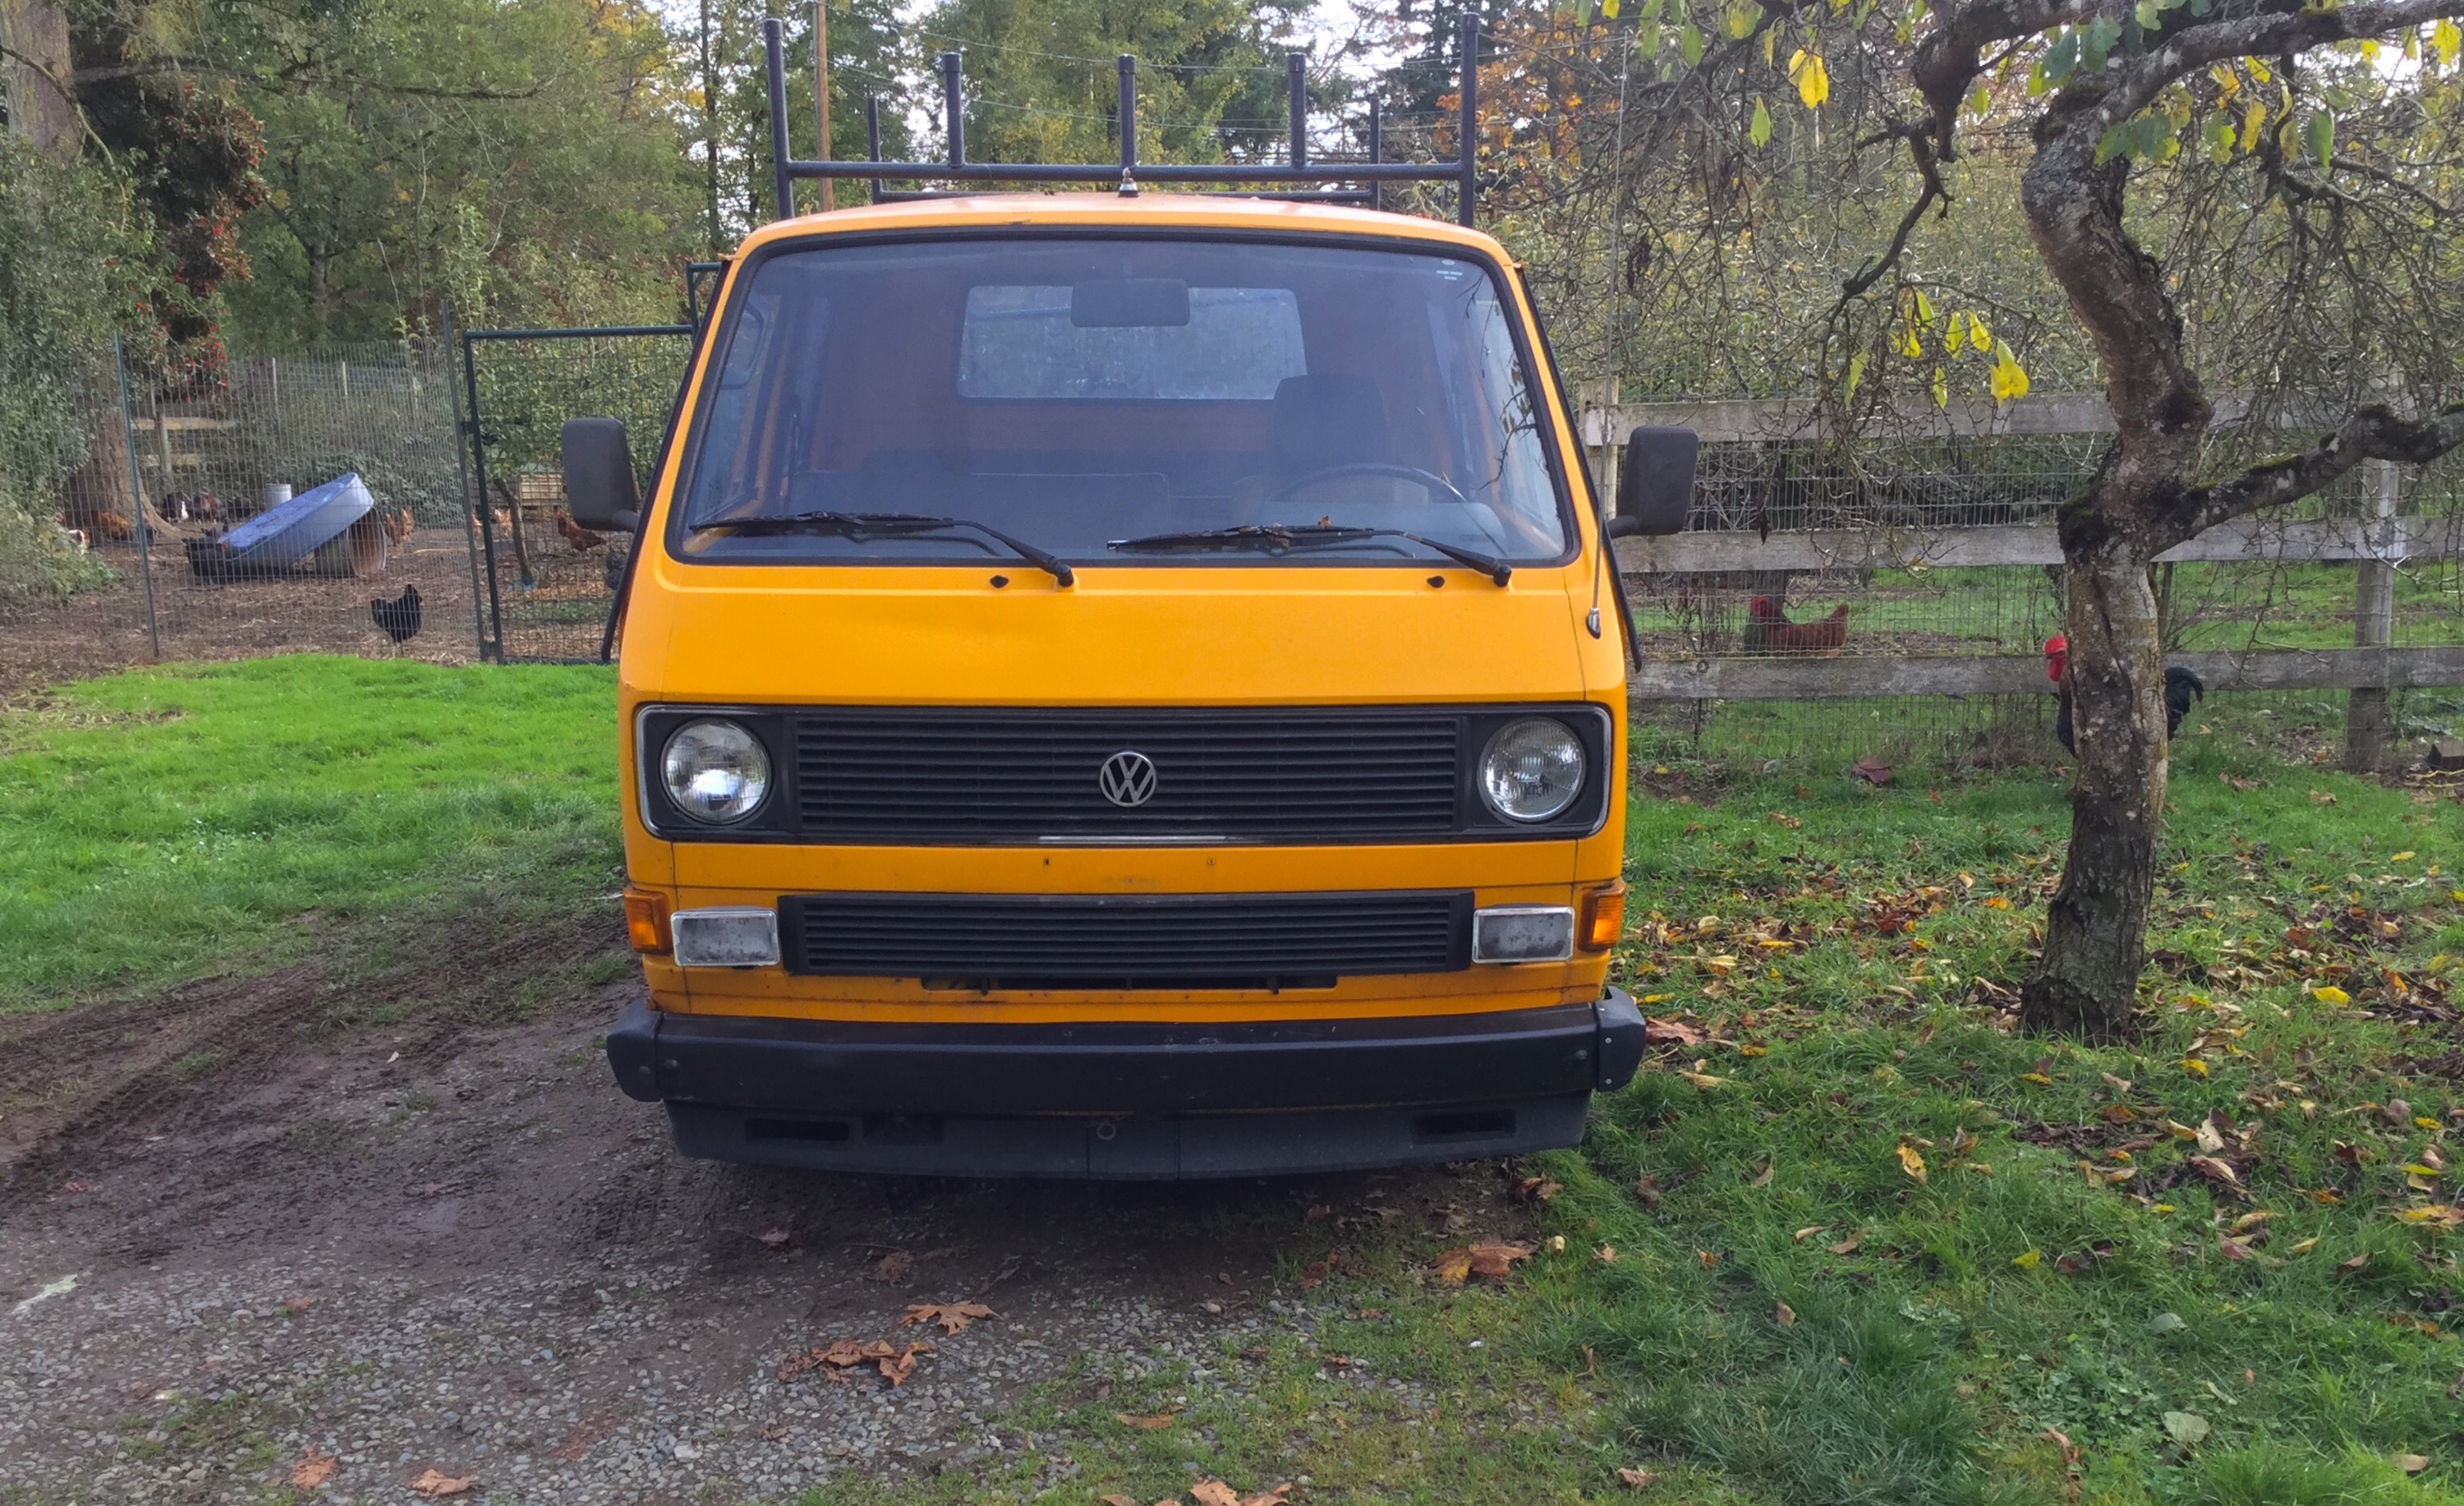

You can see it’s a bit rough around the edges. That rack is bolted to the roof, previous owner was a plumber. Not that there is anything wrong with that.
Fixed vent windows. 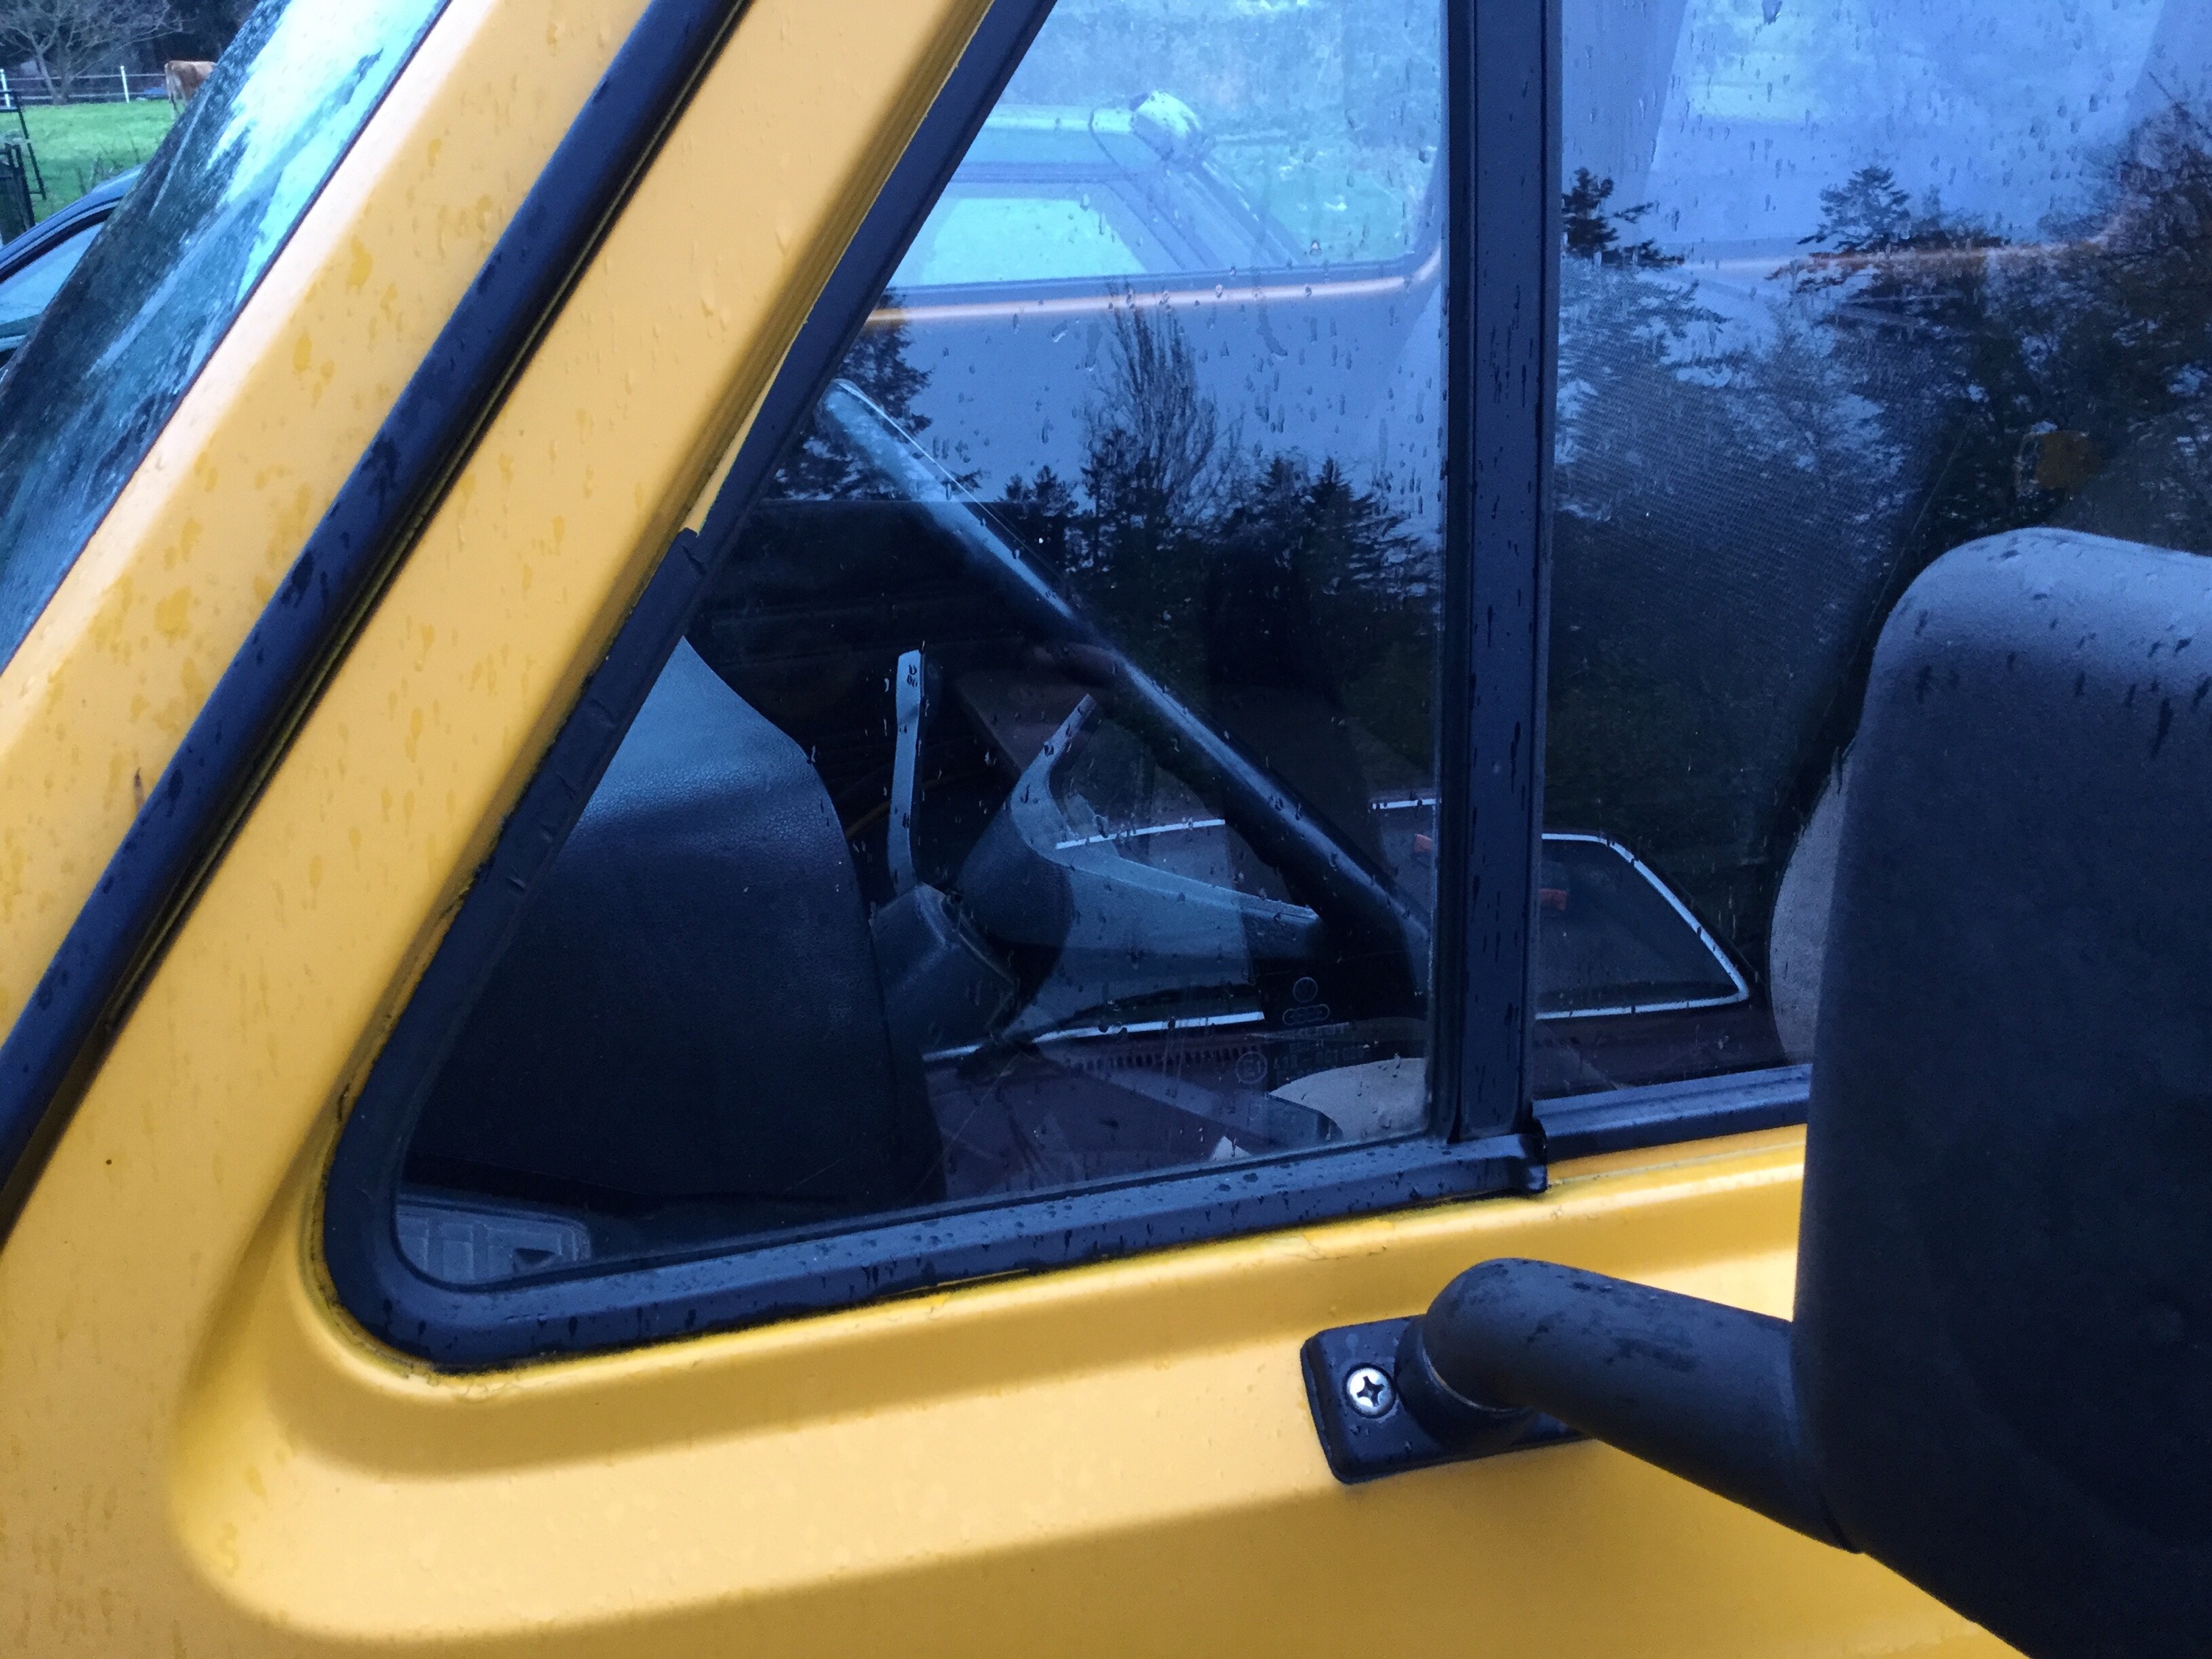
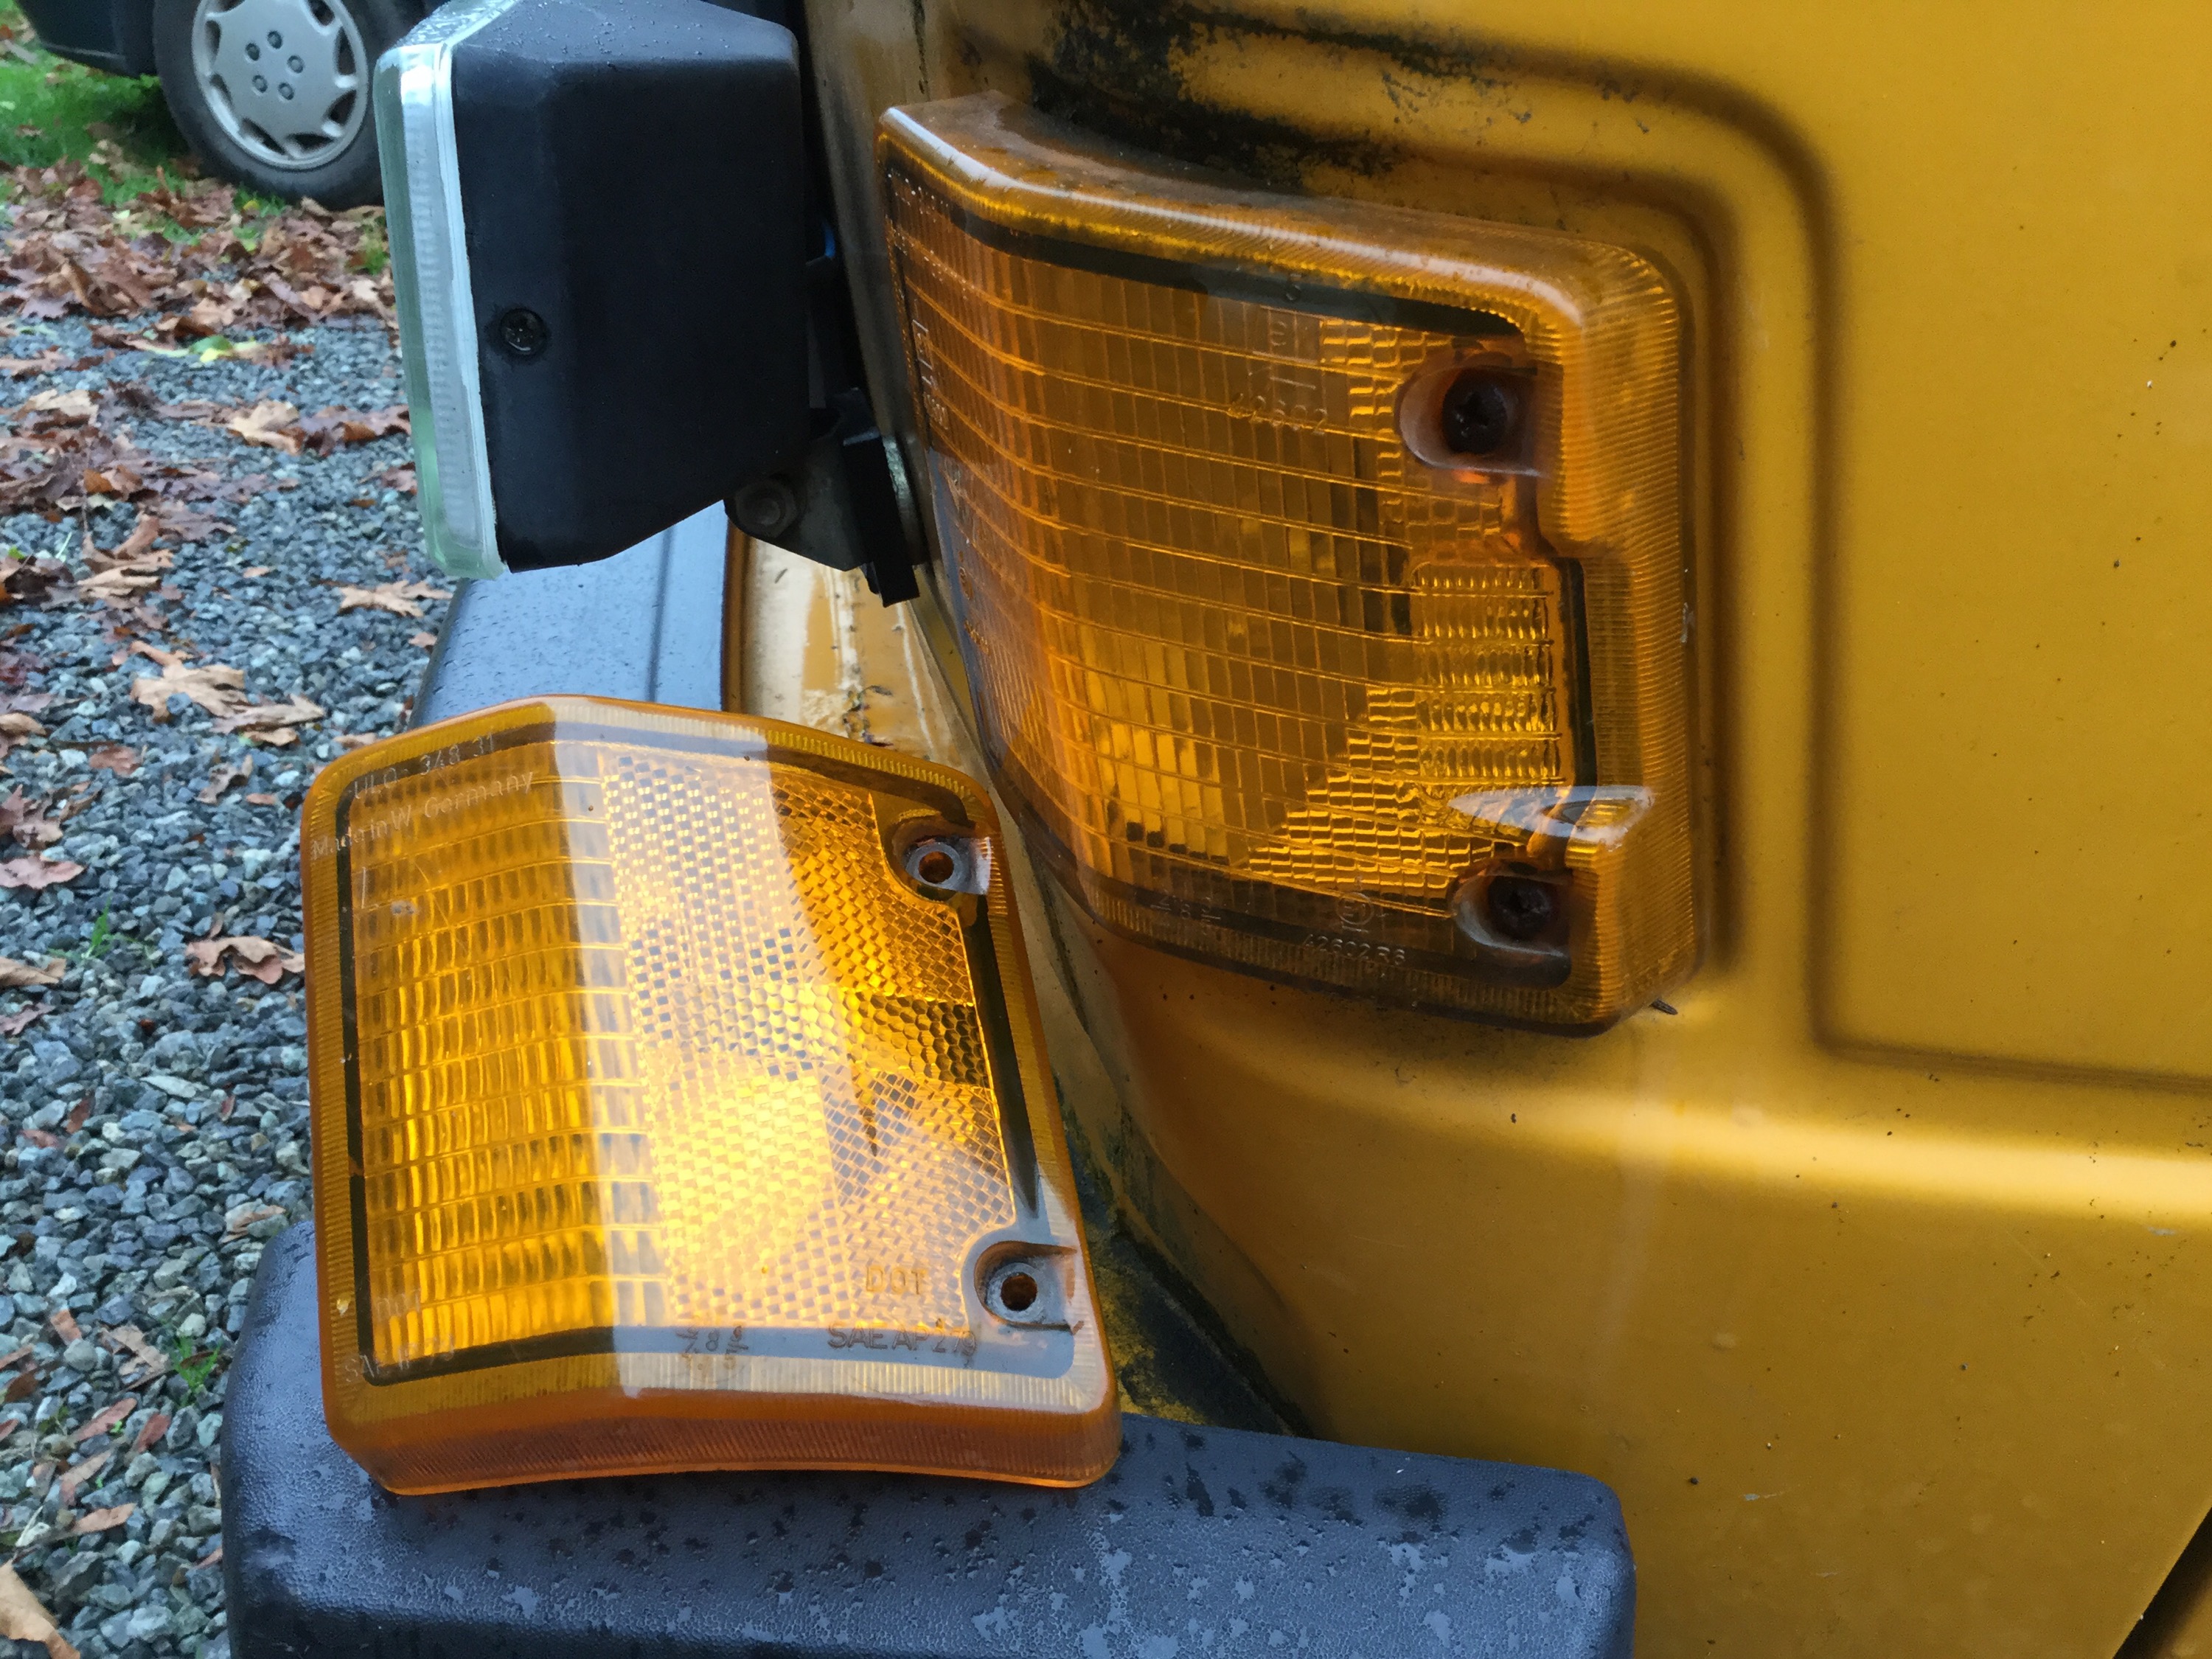
Front turn signal lenses slightly different.
Spartan dash. No padding, the skinny steering wheel with small centre section, no odometer, not even a clock. No handbrake or brake failure warning lights above headlight switch. Rear defogger switch added by previous owner to switch those ugly auxiliary lights
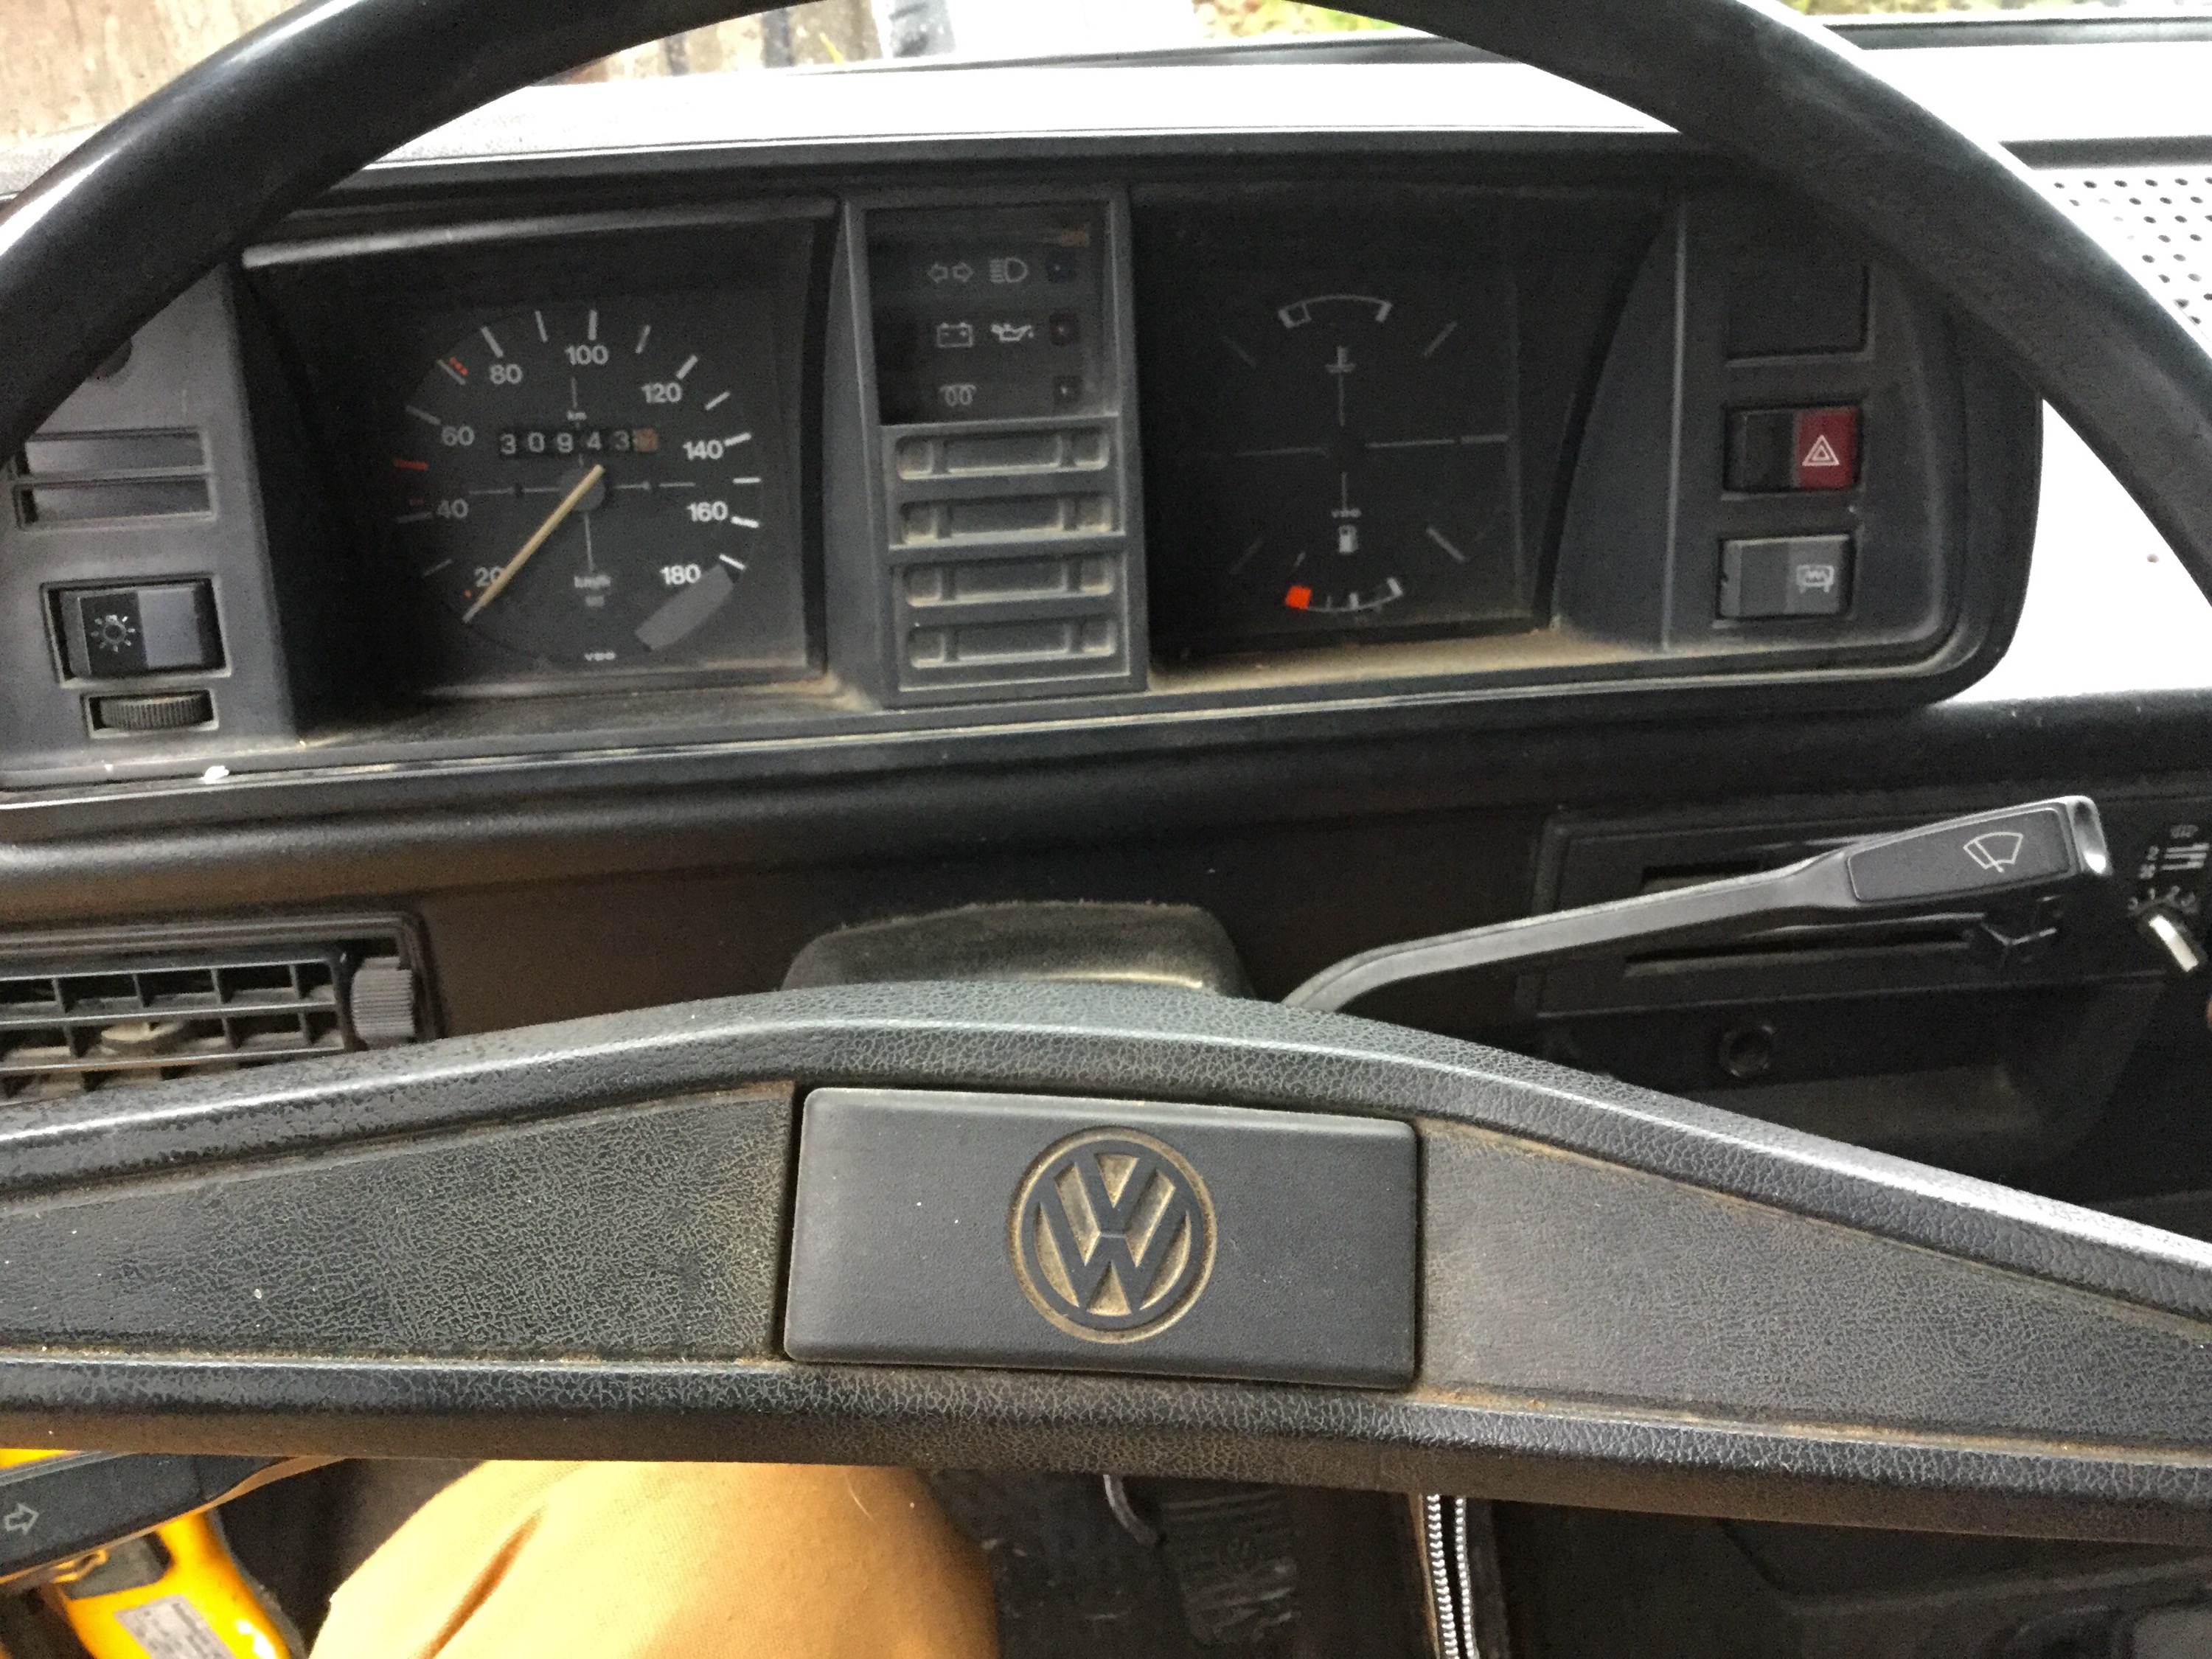
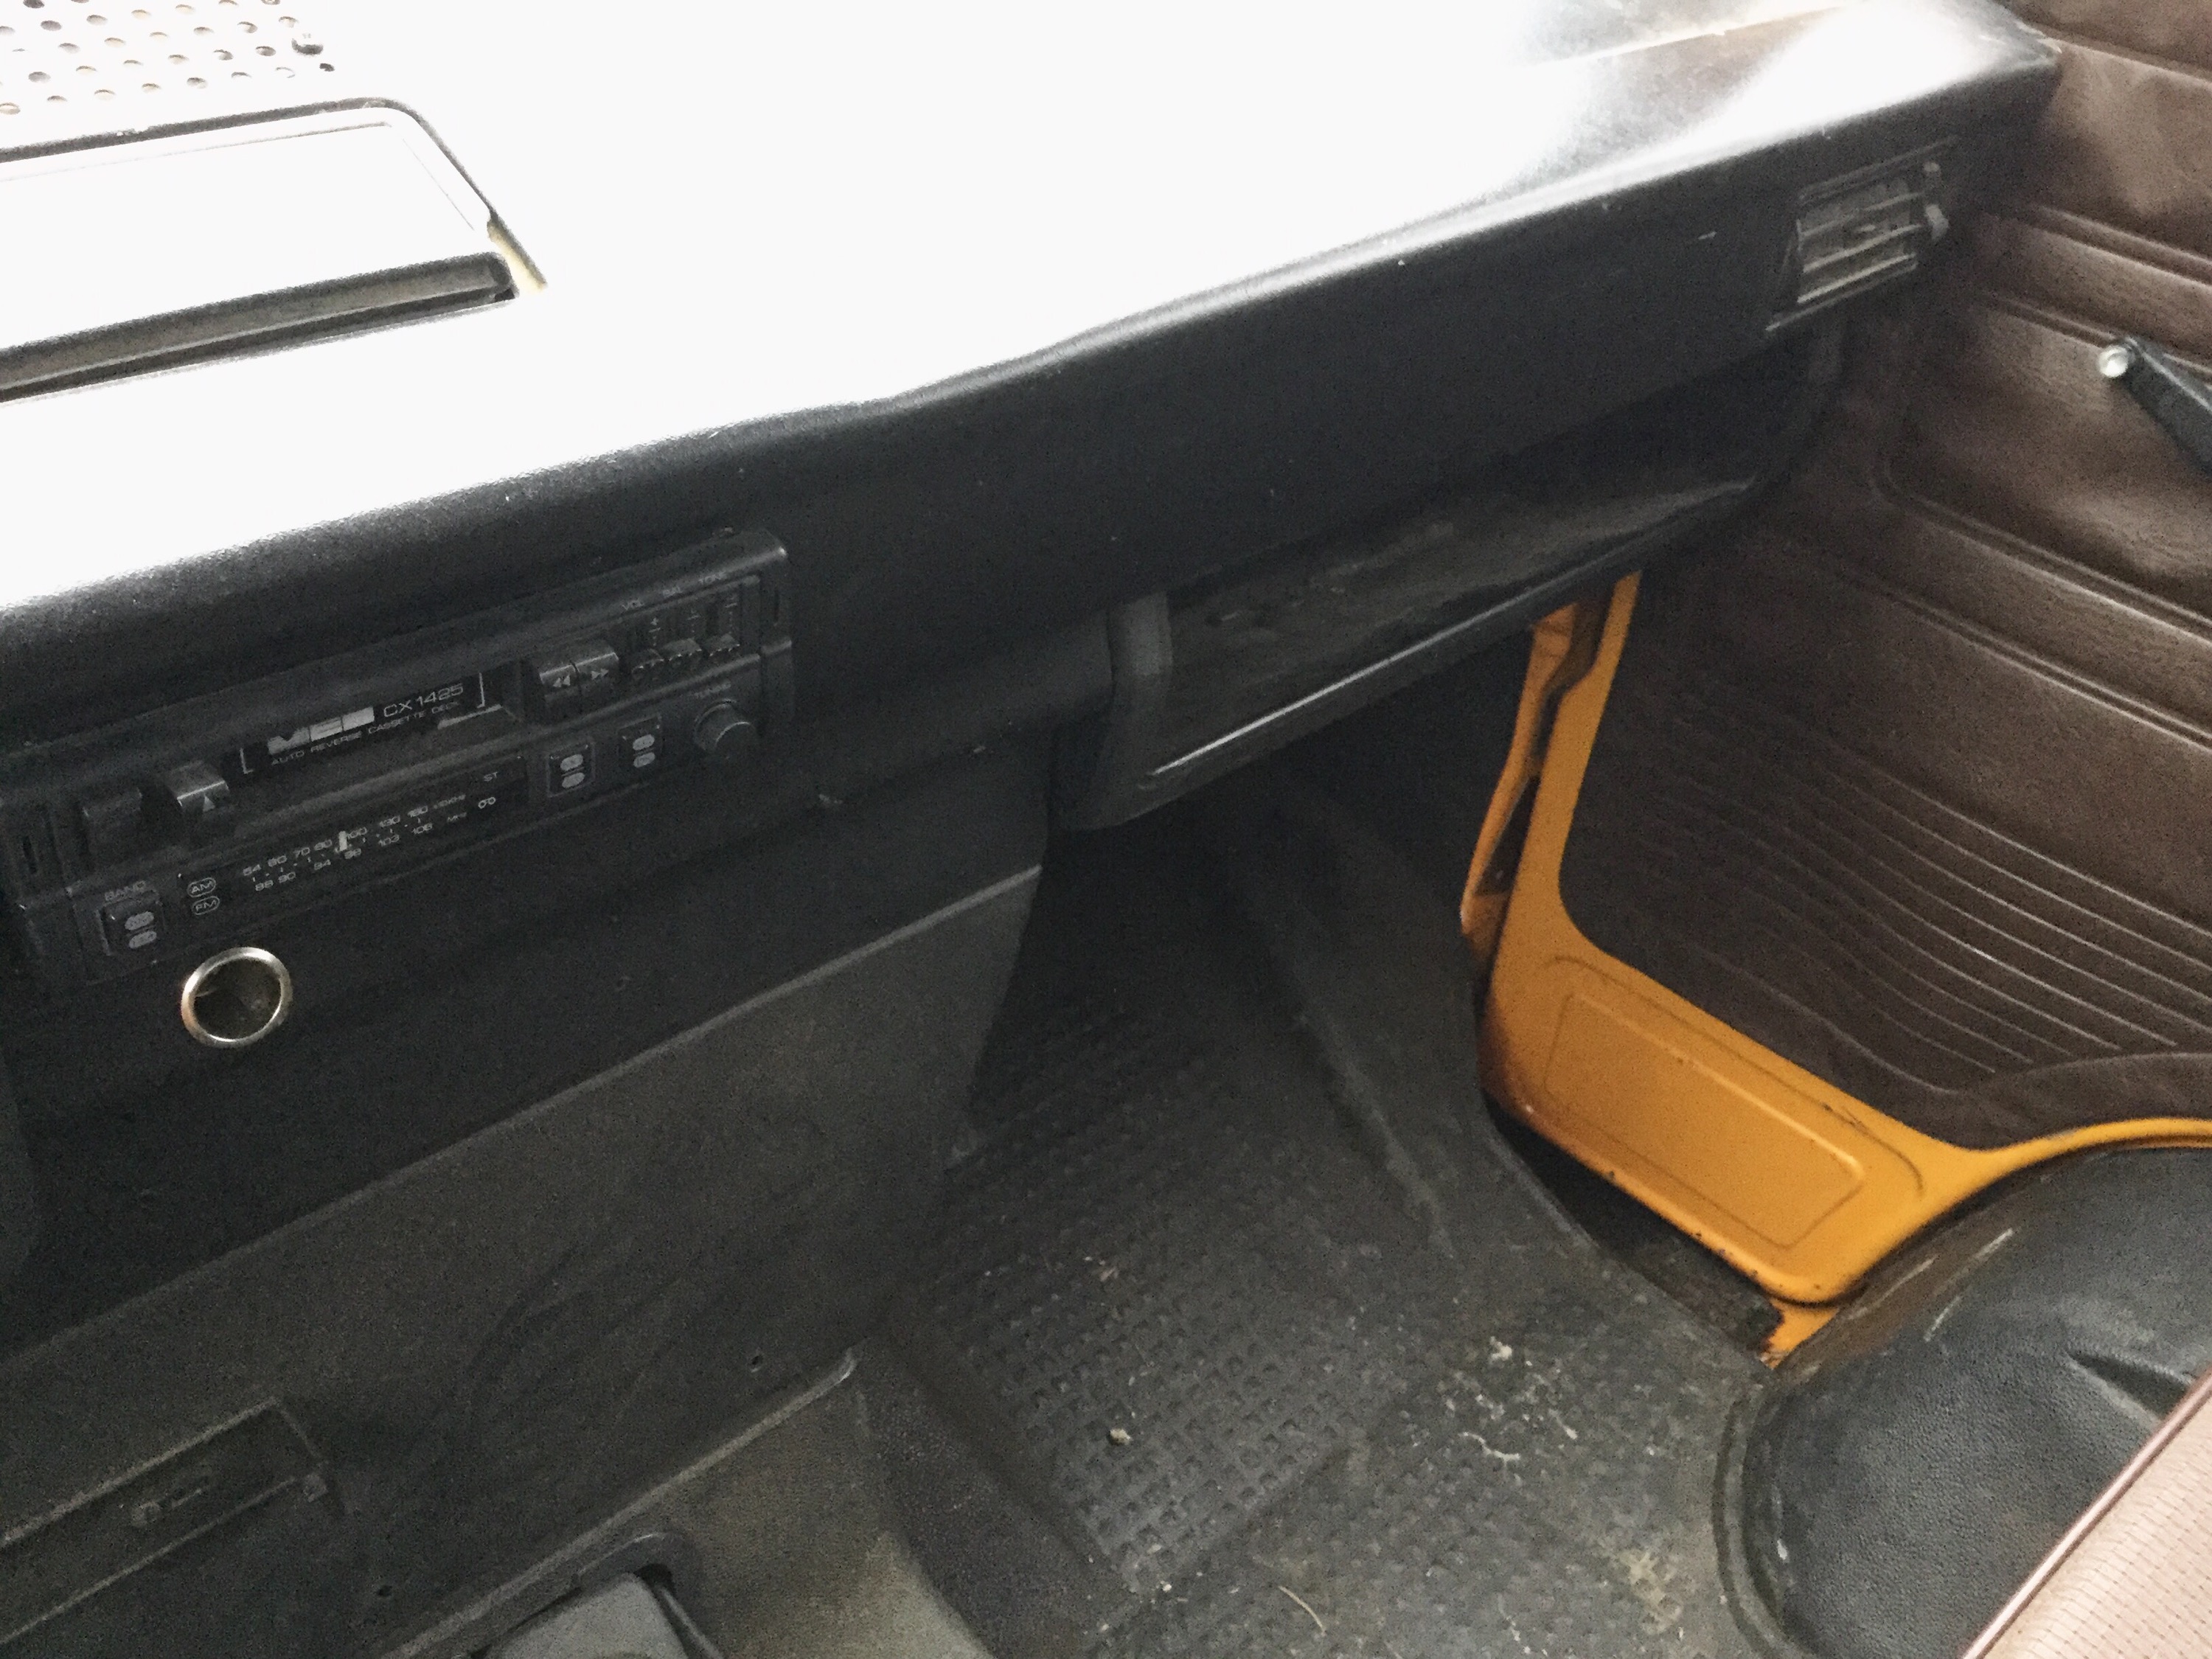
Tray instead of glovebox. Full rubber floor mat in great shape. Funny how the rubber floor mat is so sought after. No it’s not funny, so much better than carpet for most climates.
Yup, 5 speed. And first is low. 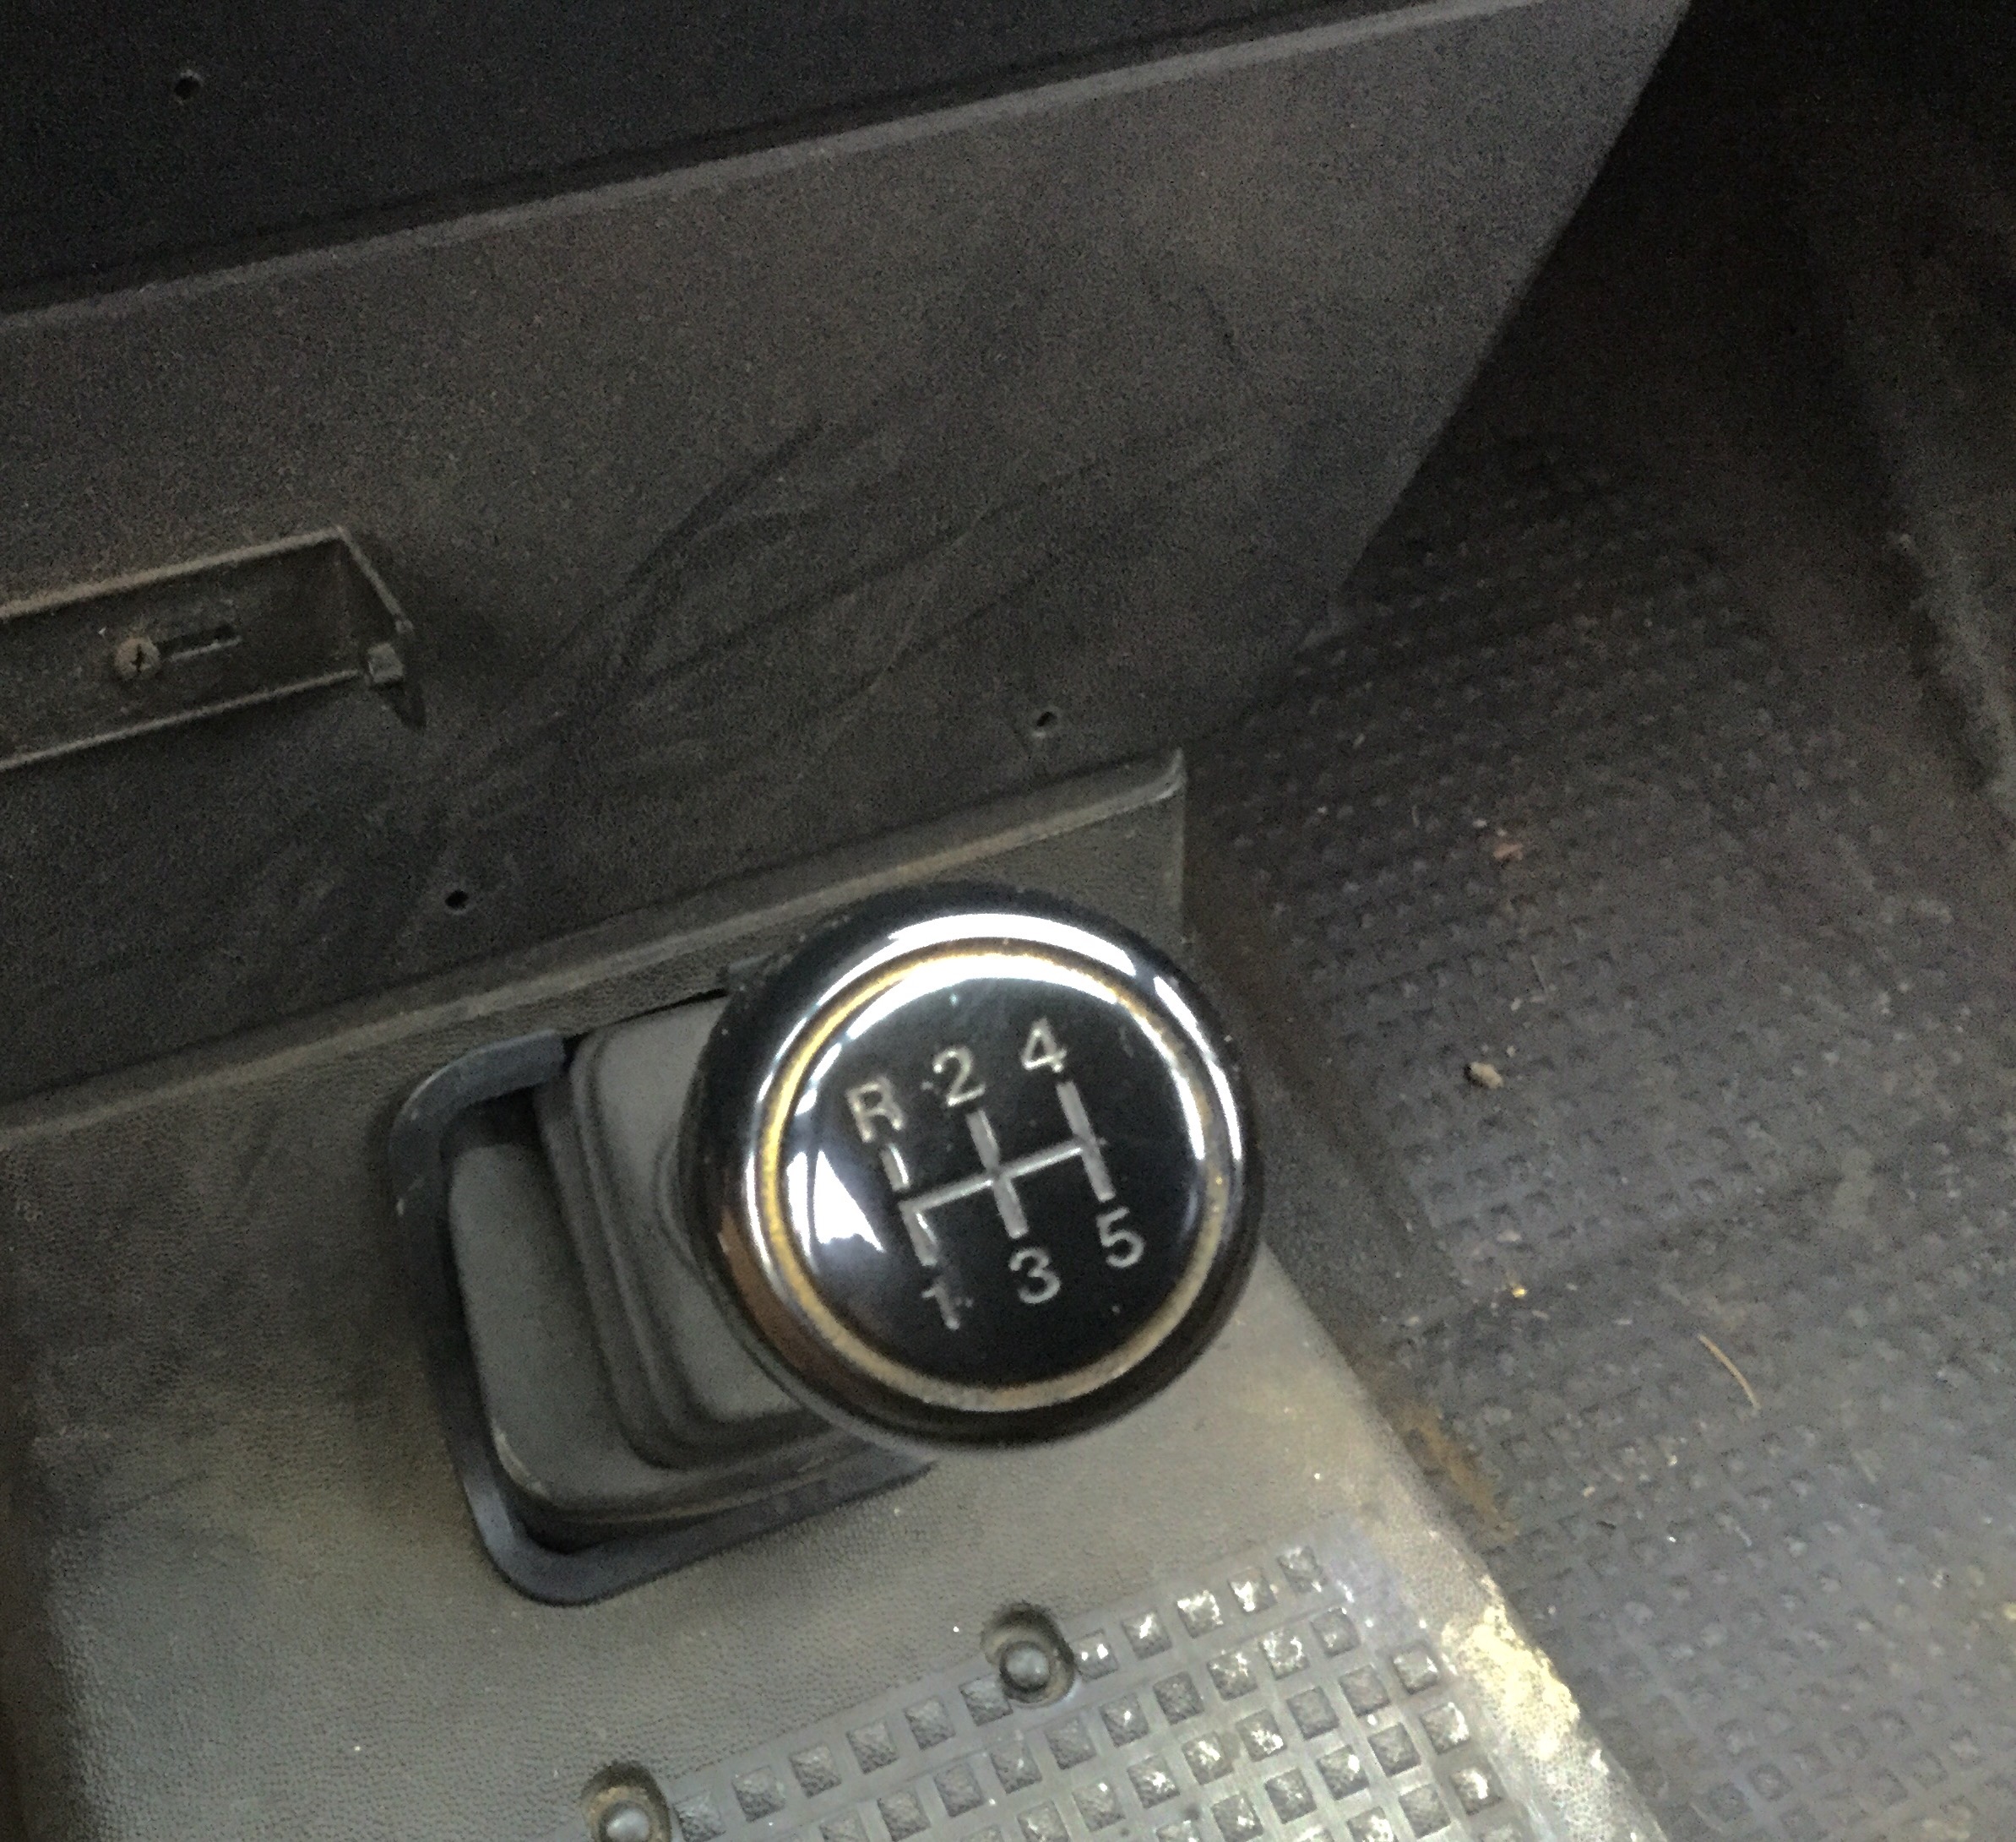
Double vinyl bench and replacement drivers seat.
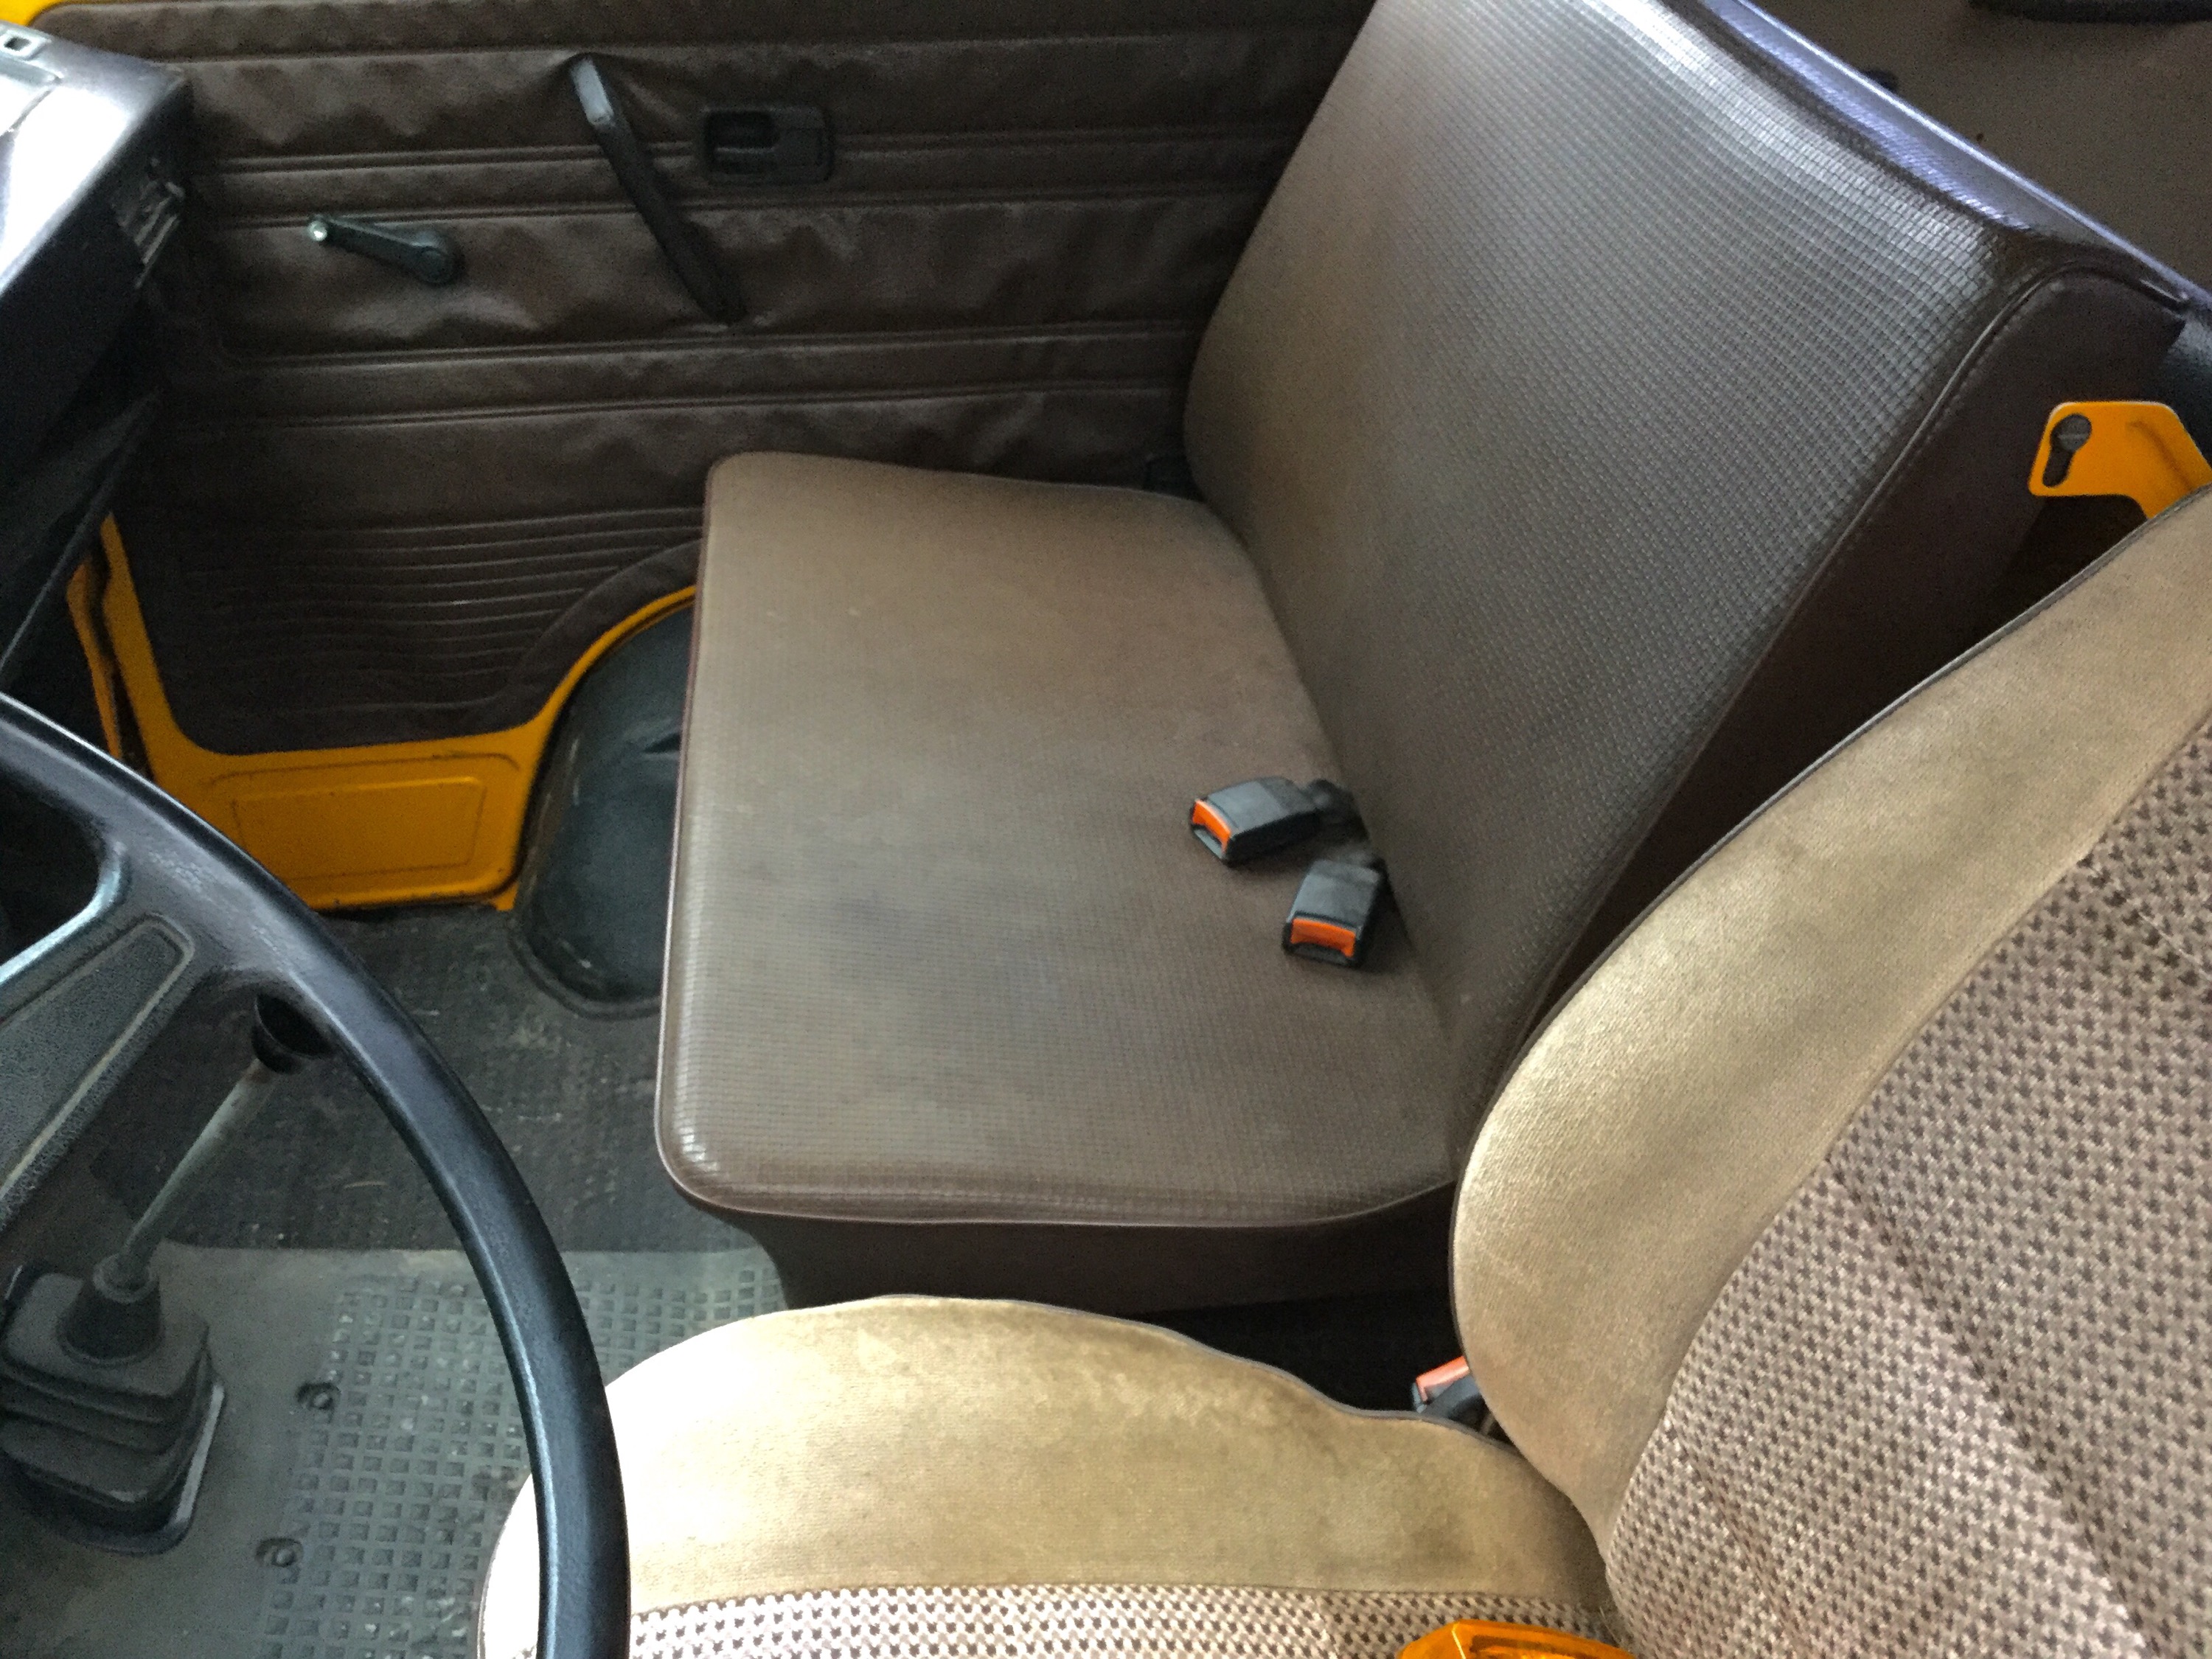
Very firm vinyl rear bench seat. And you have to sit up straight.
I’m deep into dash work and that will be subject of next part.
Syncro trip in Lesotho
Posted by albell in Uncategorized on October 17, 2015
John, B. was kind enough to send me pics of a trip he made in Lesotho. Thanks again John.
Hi Alistair,
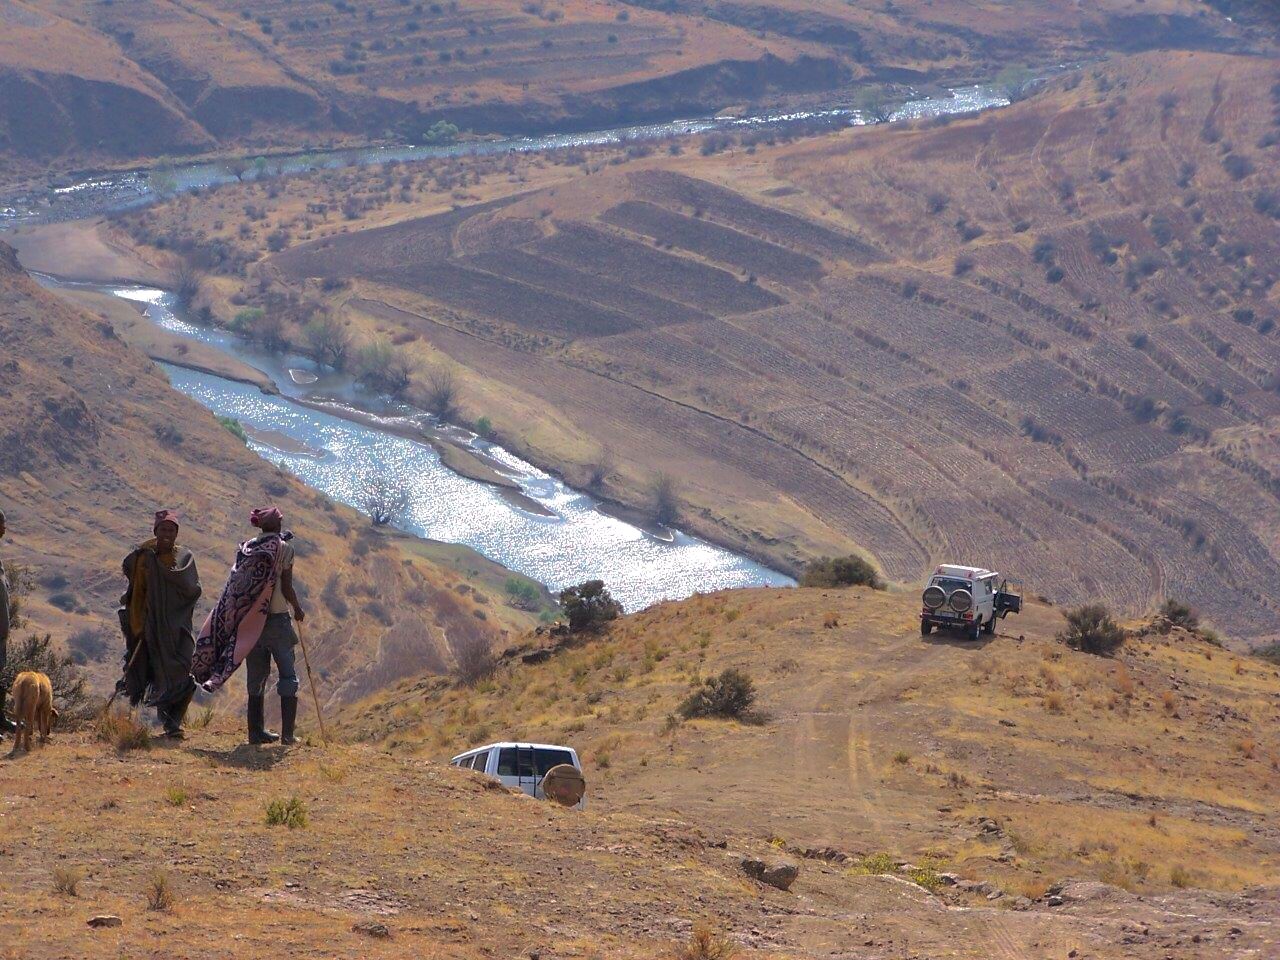
Lesotho is a mountain kingdom landlocked in the middle of South Africa. It is a country in its own right. It is part of the Drakensburg Mountains, literally means Dragon Mountains and they are a very high, wonderfully exciting range of mountains in South Africa. They get snow in winter, one of the few places that do and high enough up it is very stark and windblown. The Lesotho people still eke out a living in these mountains and are famed for their breed of horses that live up there and that they use to herd goats etc. There is very little in the way of economy and China has recently started building massive roads and bridges etc. as they are doing all over Africa now, in return of course for Diamonds and the like! Africa seriously has a new master or overlord, having gotten rid of us European Colonialists they now are rapidly trading their freedom away to China in return for infrastructure.
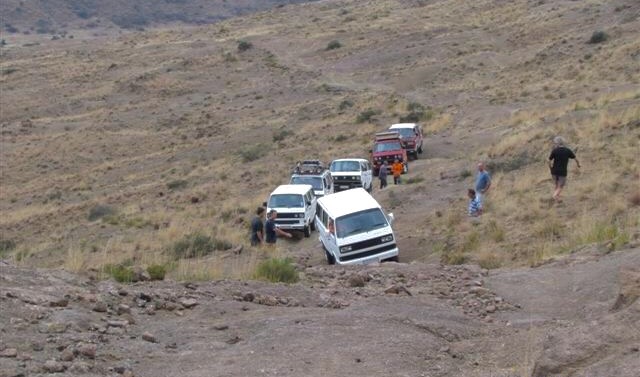
The motivation for the trip was that they were just about to tar on of the famous mountain passes whereby one gains access from South Africa into Lesotho. It will certainly change the region’s economy and make it easier for the locals to trade but at the same time at a huge loss in terms of pristine non developed mountains. So on the 24 of Sept 2014, eight VW Syncro’s headed for Cobham Nature Reserve just outside Himeville which is in the lower foothills of the Drakensburg to start this epic adventure.
We were going to attempt 3 well known and sometimes treacherous passes in one trip over 4 days. The Jeep club guys see this as their stomping ground and we in our boxy little vehicles were looking forward to treading in their territory!
Suffice to say the trip was exciting with the first pass totally smooth and easy as it had been prepared to be tarred by the Chinese road people! We then proceeded to get into the mountains proper and had an amazing time, sleeping above the cloud line and in river beds next to flowing rivers, completely self-sustained and cut off from civilization. We, as usual, attempted to do too much distance and our average speeds were so low as some areas had been washed away form the last snows and storms that we took a full day to do a few kilometres! But that’s how I believe these trips should be!
We had a trip, where although highly challenging, we had no breakdowns at all! Just shows that Syncros can be made reliable again if one spends enough trouble and time and money on them.
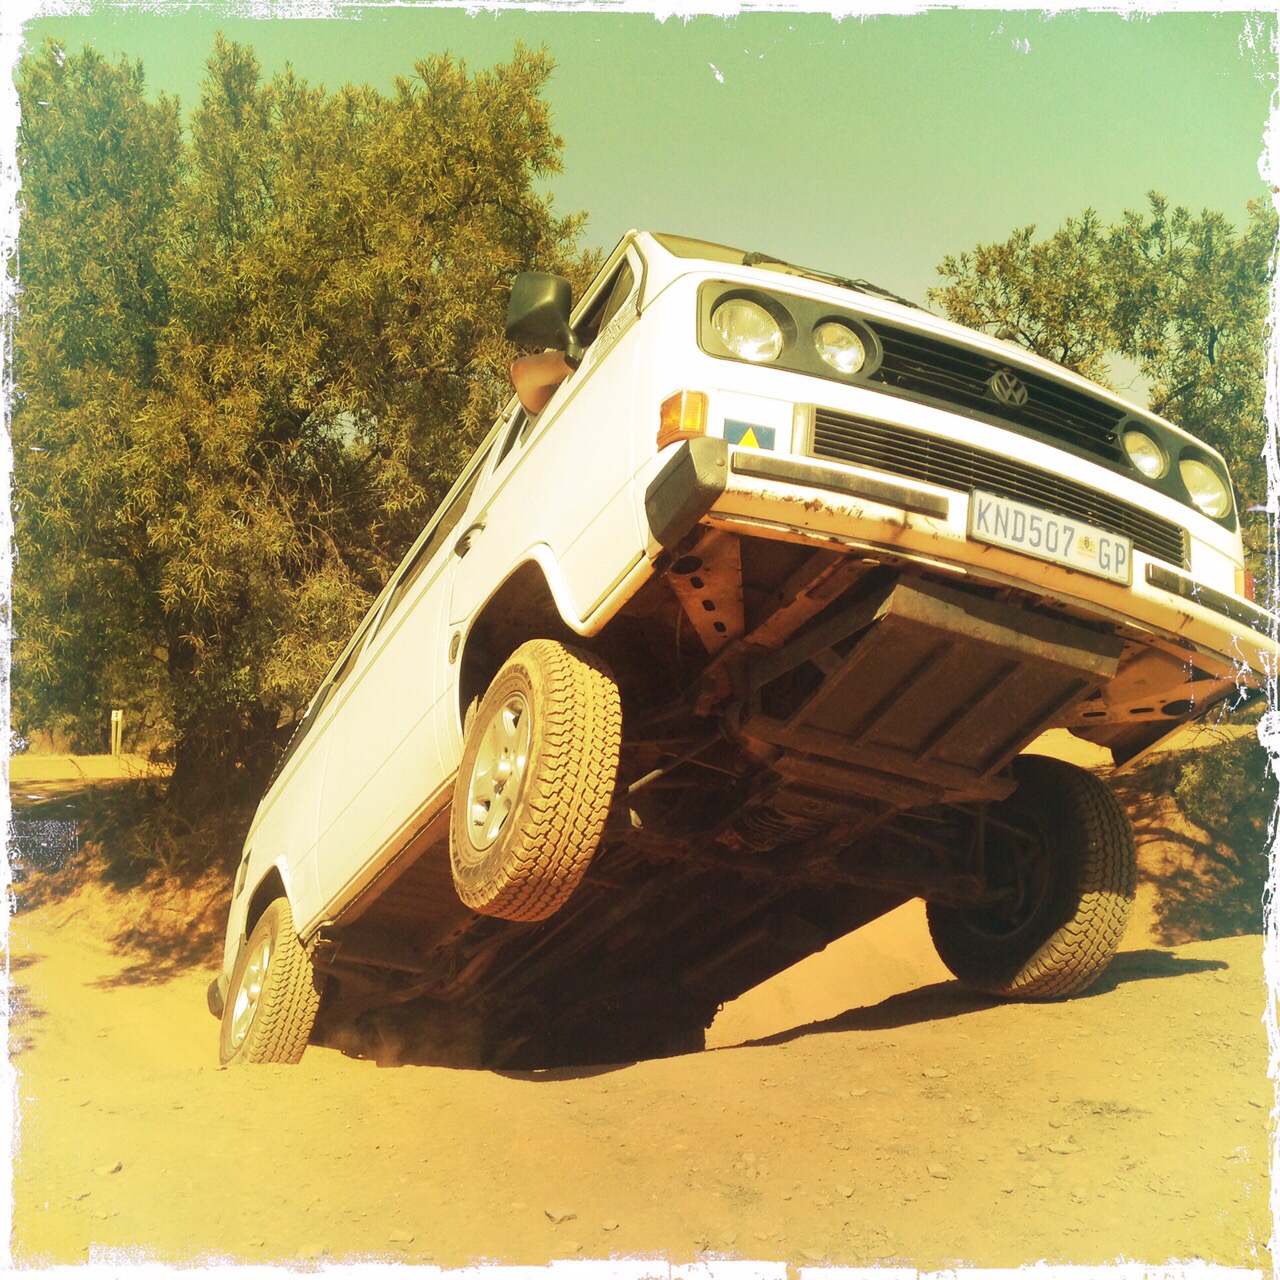
All the Syncro’s on this trip, bar one had upgraded to 15” wheels.
One of them is a rare (rare in SA, I think Europe had them a lot) imported factory built 16” wheeled Syncro but also fitted with 15” wheels for ease of finding tyres on trips into Africa. You’ll notice only one “Campervan” or Westy style roof. They were never brought into SA and so we are not used to having them and tend to rig ours out in a more modular in fashion and with standard rooftops.
2 Syncros had 2.0i Golf motors, 5x had 5cyl 2.6 VW (Audi) conversions and the one standard Syncro still had the OE VW WBX4 motor, although it had been stroked from 2.1i to 2.3i for more torque.
Interestingly, the standard 14 inch wheeled WBX 2.1 Syncro fared as well as any of the other Syncros, making one wonder whether we do mods for our own vanity rather than vehicle capability. It was an extreme trip in terms of needing both front and rear diff locks often engaged on very steep ascents and really good clearance for rocks on the passes and river crossings and the stock Syncro didn’t miss a beat!
I quote some excerpts from Stuart’s trip report at the time. He has agreed that we may use them. Stuart was the trip leader and owner of the 16 inch Syncro you can see in one of the pics, he also runs a Syncro business here and is a great source of parts and solutions to the traditional Syncro problems!…I quote…
“The track from Mantsonyane to Semokong is 67km in length, and we were far behind at this point. We met a group driving bikes on the track, they had camped at the river the night before, it was now 2pm and they had managed to do 5,5km from the river, they had a Ford Everest with a trailer as a backup vehicle and this was slowing them down, they had damaged the fuel tank on the decent into the river and said we were going to struggle to get up…. how right they were!”
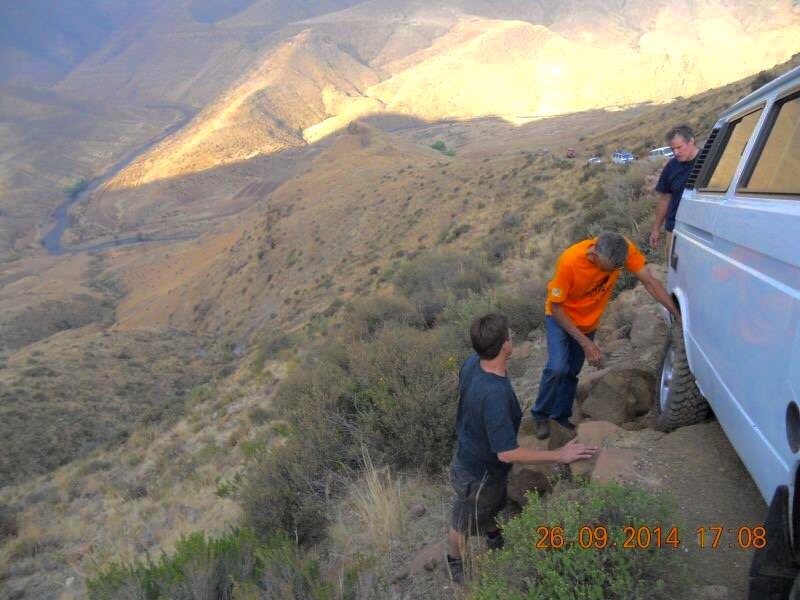
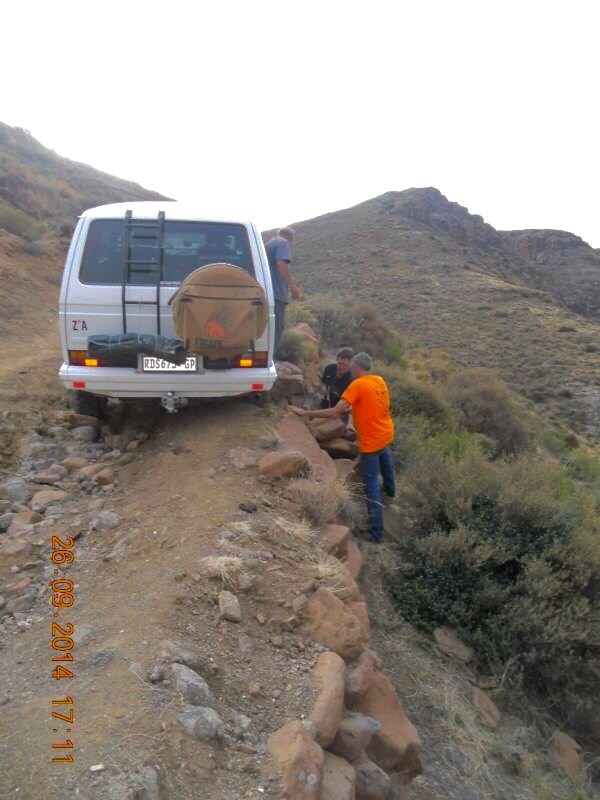
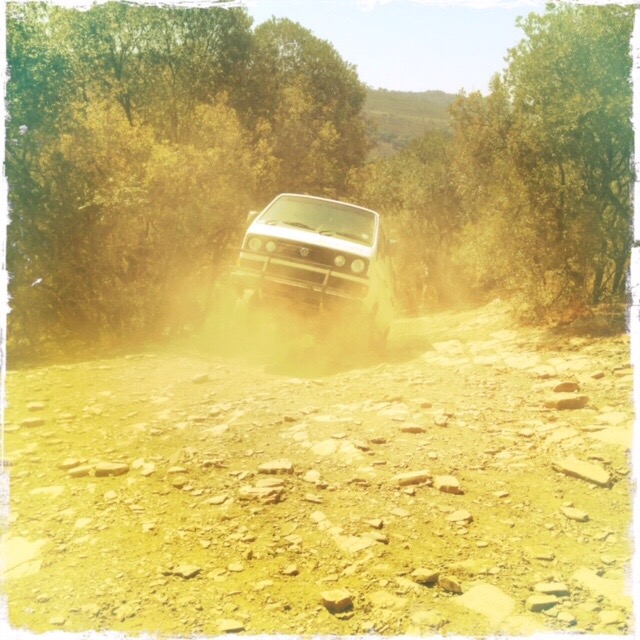
“We pressed on to the river, the descent from this side was daunting with a nasty 400mm step on an angle to go down, if you took the wrong line it would push you to the edge of the track with a near vertical drop to the river. Once we were all safely down we needed to get up the 8.8km with 500m in total climb in the next few hours, as it looked as if there was rain on the way.” (My comments, it was so steep that if you stopped to help another vehicle, you had to switch off in crawler gear, handbrake on as hard as you could, then get out and dash to the back of the vehicle and put rocks behind the wheels for extra safety as the vehicles often felt that they wanted to slide backward. It also helped starting off again to have the rocks behind the wheels! It was incredibly steep, the photos pay no justice to this what so ever)
“I (Stuart) was the lead vehicle, we stopped after every climb and got the rest of the vehicles through, there were 500mm in diameter boulders, huge washed out steps and deep gulley’s everywhere. Luckily at this stage there were short climbs with flat patches in between, the last 4km was different, basically one steep climb with 2x hairpin bends, no place to stop and wait for the others. Huge rocks, massive steps, and a side slope to the cliff edge, wrong line and you were a goner….
… Henning asked me to drive his Syncro up to the top, as his confidence was shaken. His description is all you see is “Blue Sky” while driving up the steps. We now had to get his Syncro back onto the track, the rear locker was spinning it closer and closer to the edge as the one wheel was stuck on a step. We flatted the step to a nice angle and I used the front diff lock to pull the Syncro towards the track. Then it was foot flat and to the top without stopping.”
“Another 2 hours later and with the light fading fast and the first few raindrops starting to fall we had all the Syncro’s almost to the top. At the top there was a deep gulley in the road, Paul’s Syncro slid into it and almost onto its side.
Looking up “Gorilla’s pass” from below and seeing three Syncro’s stuck on the narrow track in front really had me worried. There was no going back, and if one of the Syncros in front experienced mechanical failure we would have had serious problems. No trees for winches, never mind getting a vehicle in there to winch. I had horrible thoughts of broken side shafts, CVs, busted sumps, etc. The buses were often required to restart on the incline, with four wheels clawing for traction between rocks, smoke coming from clutches and tyres on the rocks….. But when it REALLY COUNTED the Syncro’s didn’t let us down!”
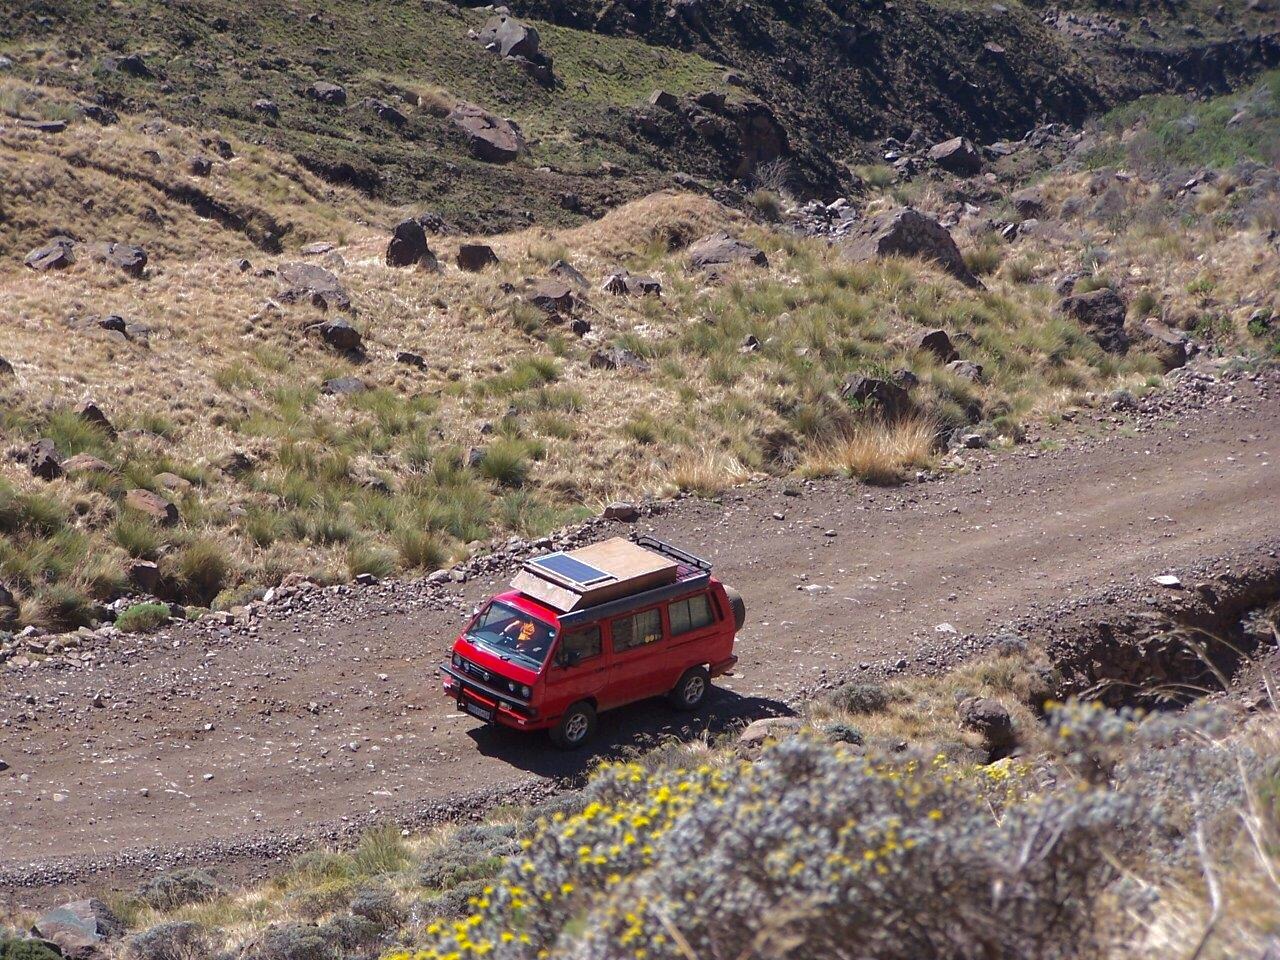


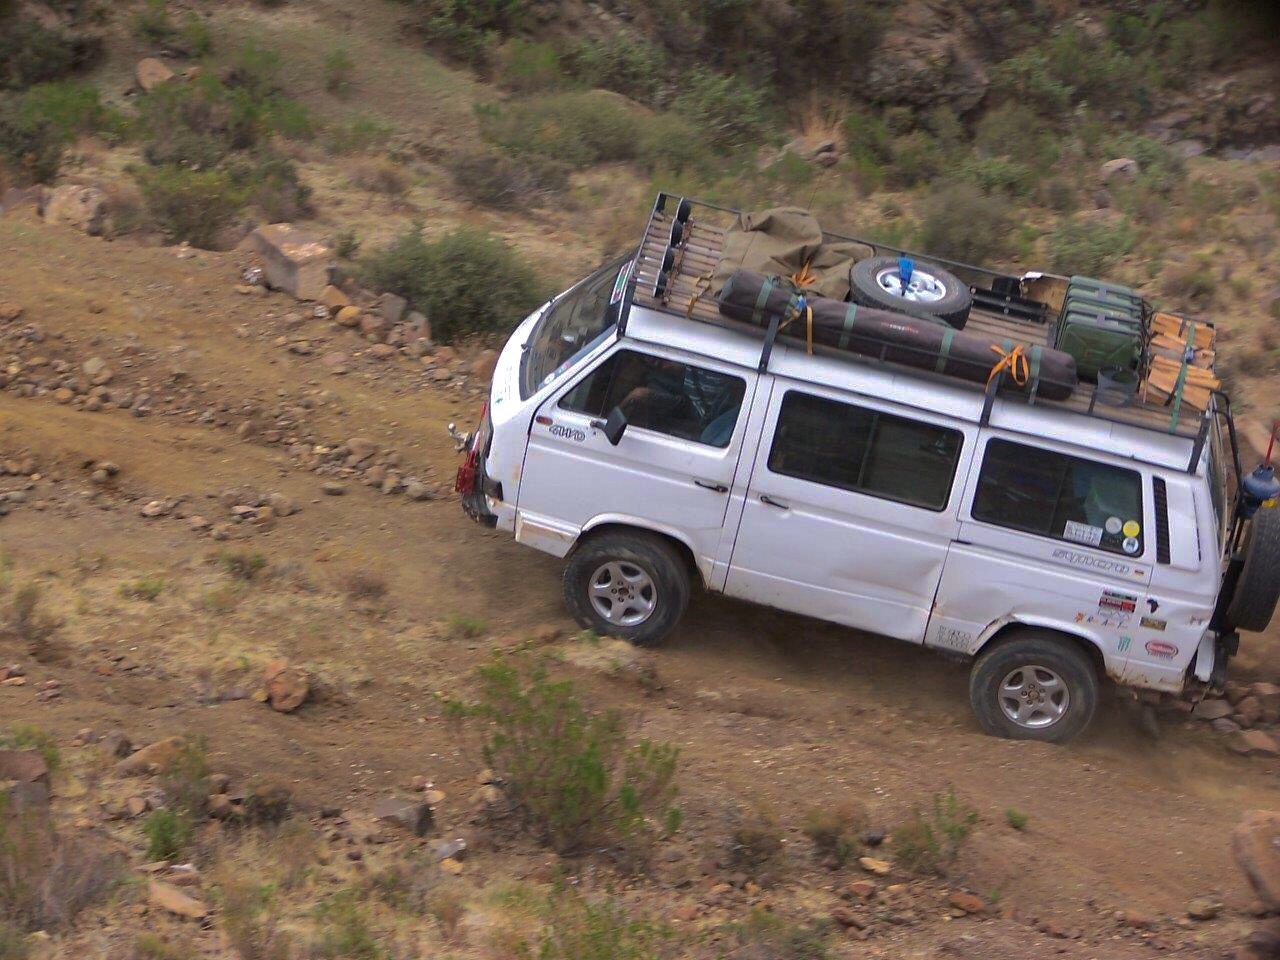
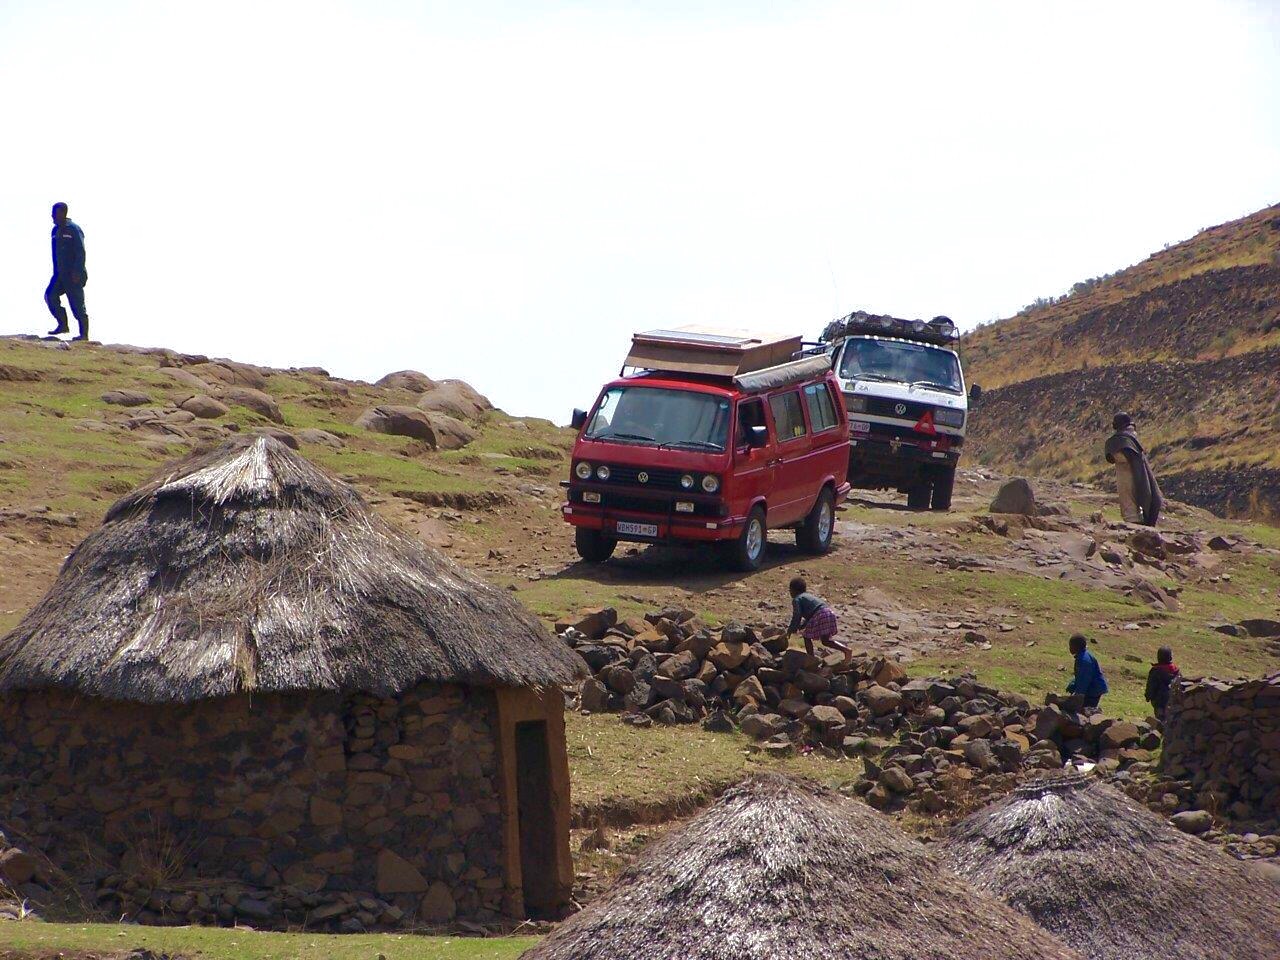


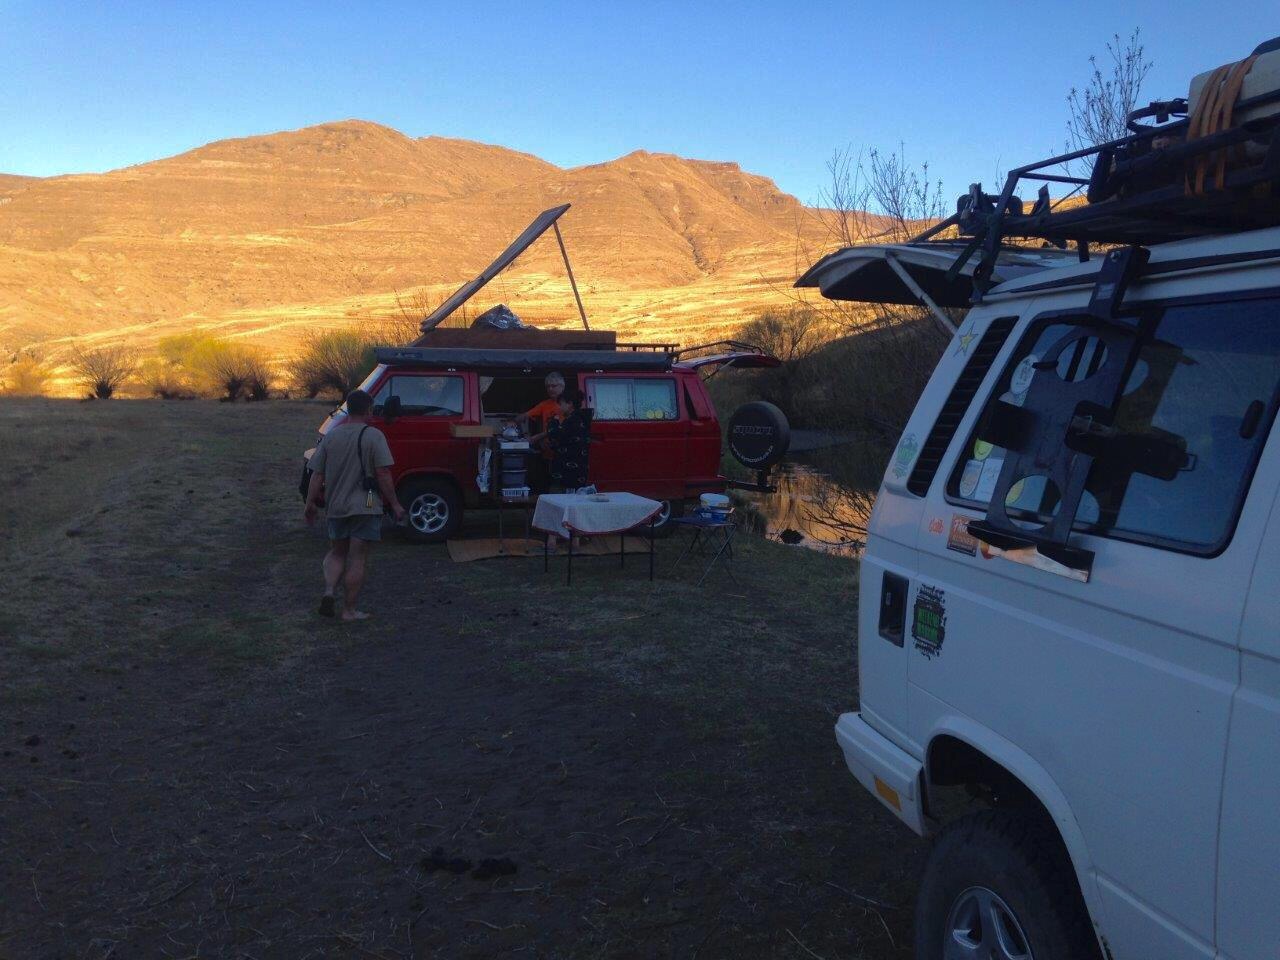


And a couple of shots of John’s van alone.
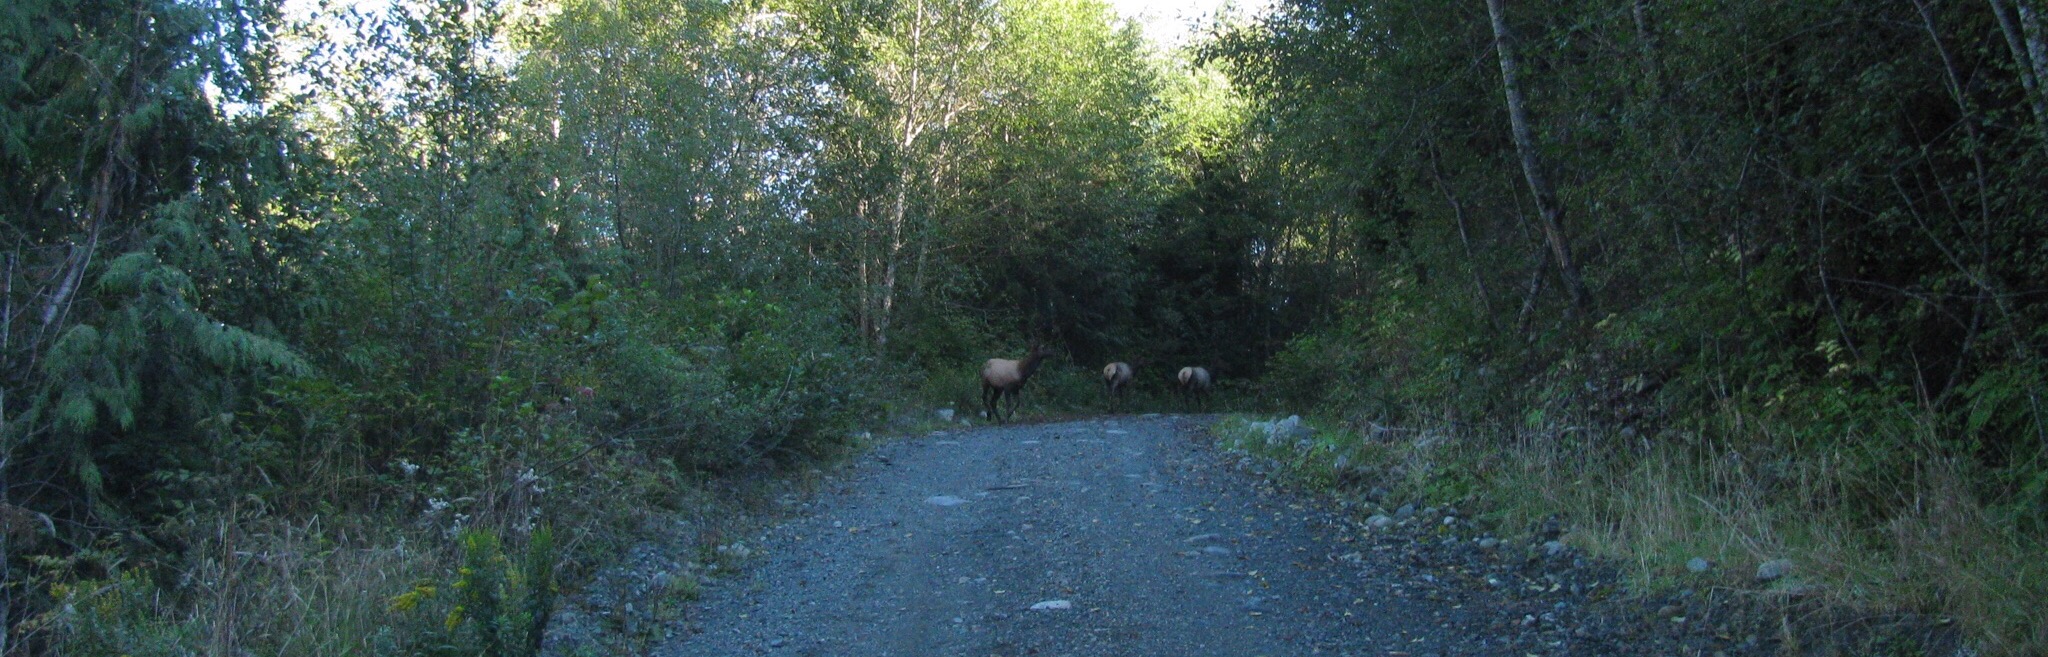
Trip – another wekender
nothing much to report, no bears seen ( lots and lots of salal berry bear poop though), but did see some elk.


Tool acquisition
I’m not meaning to boast or gloat but I just got a tool I’ve wanted for a long time. Good friend Dave gave me this 24″X36″X 4″ black granite surface plate. It’s in great shape, only a couple of very minor dings, and I’m really chuffed about it.


Polish dividing head
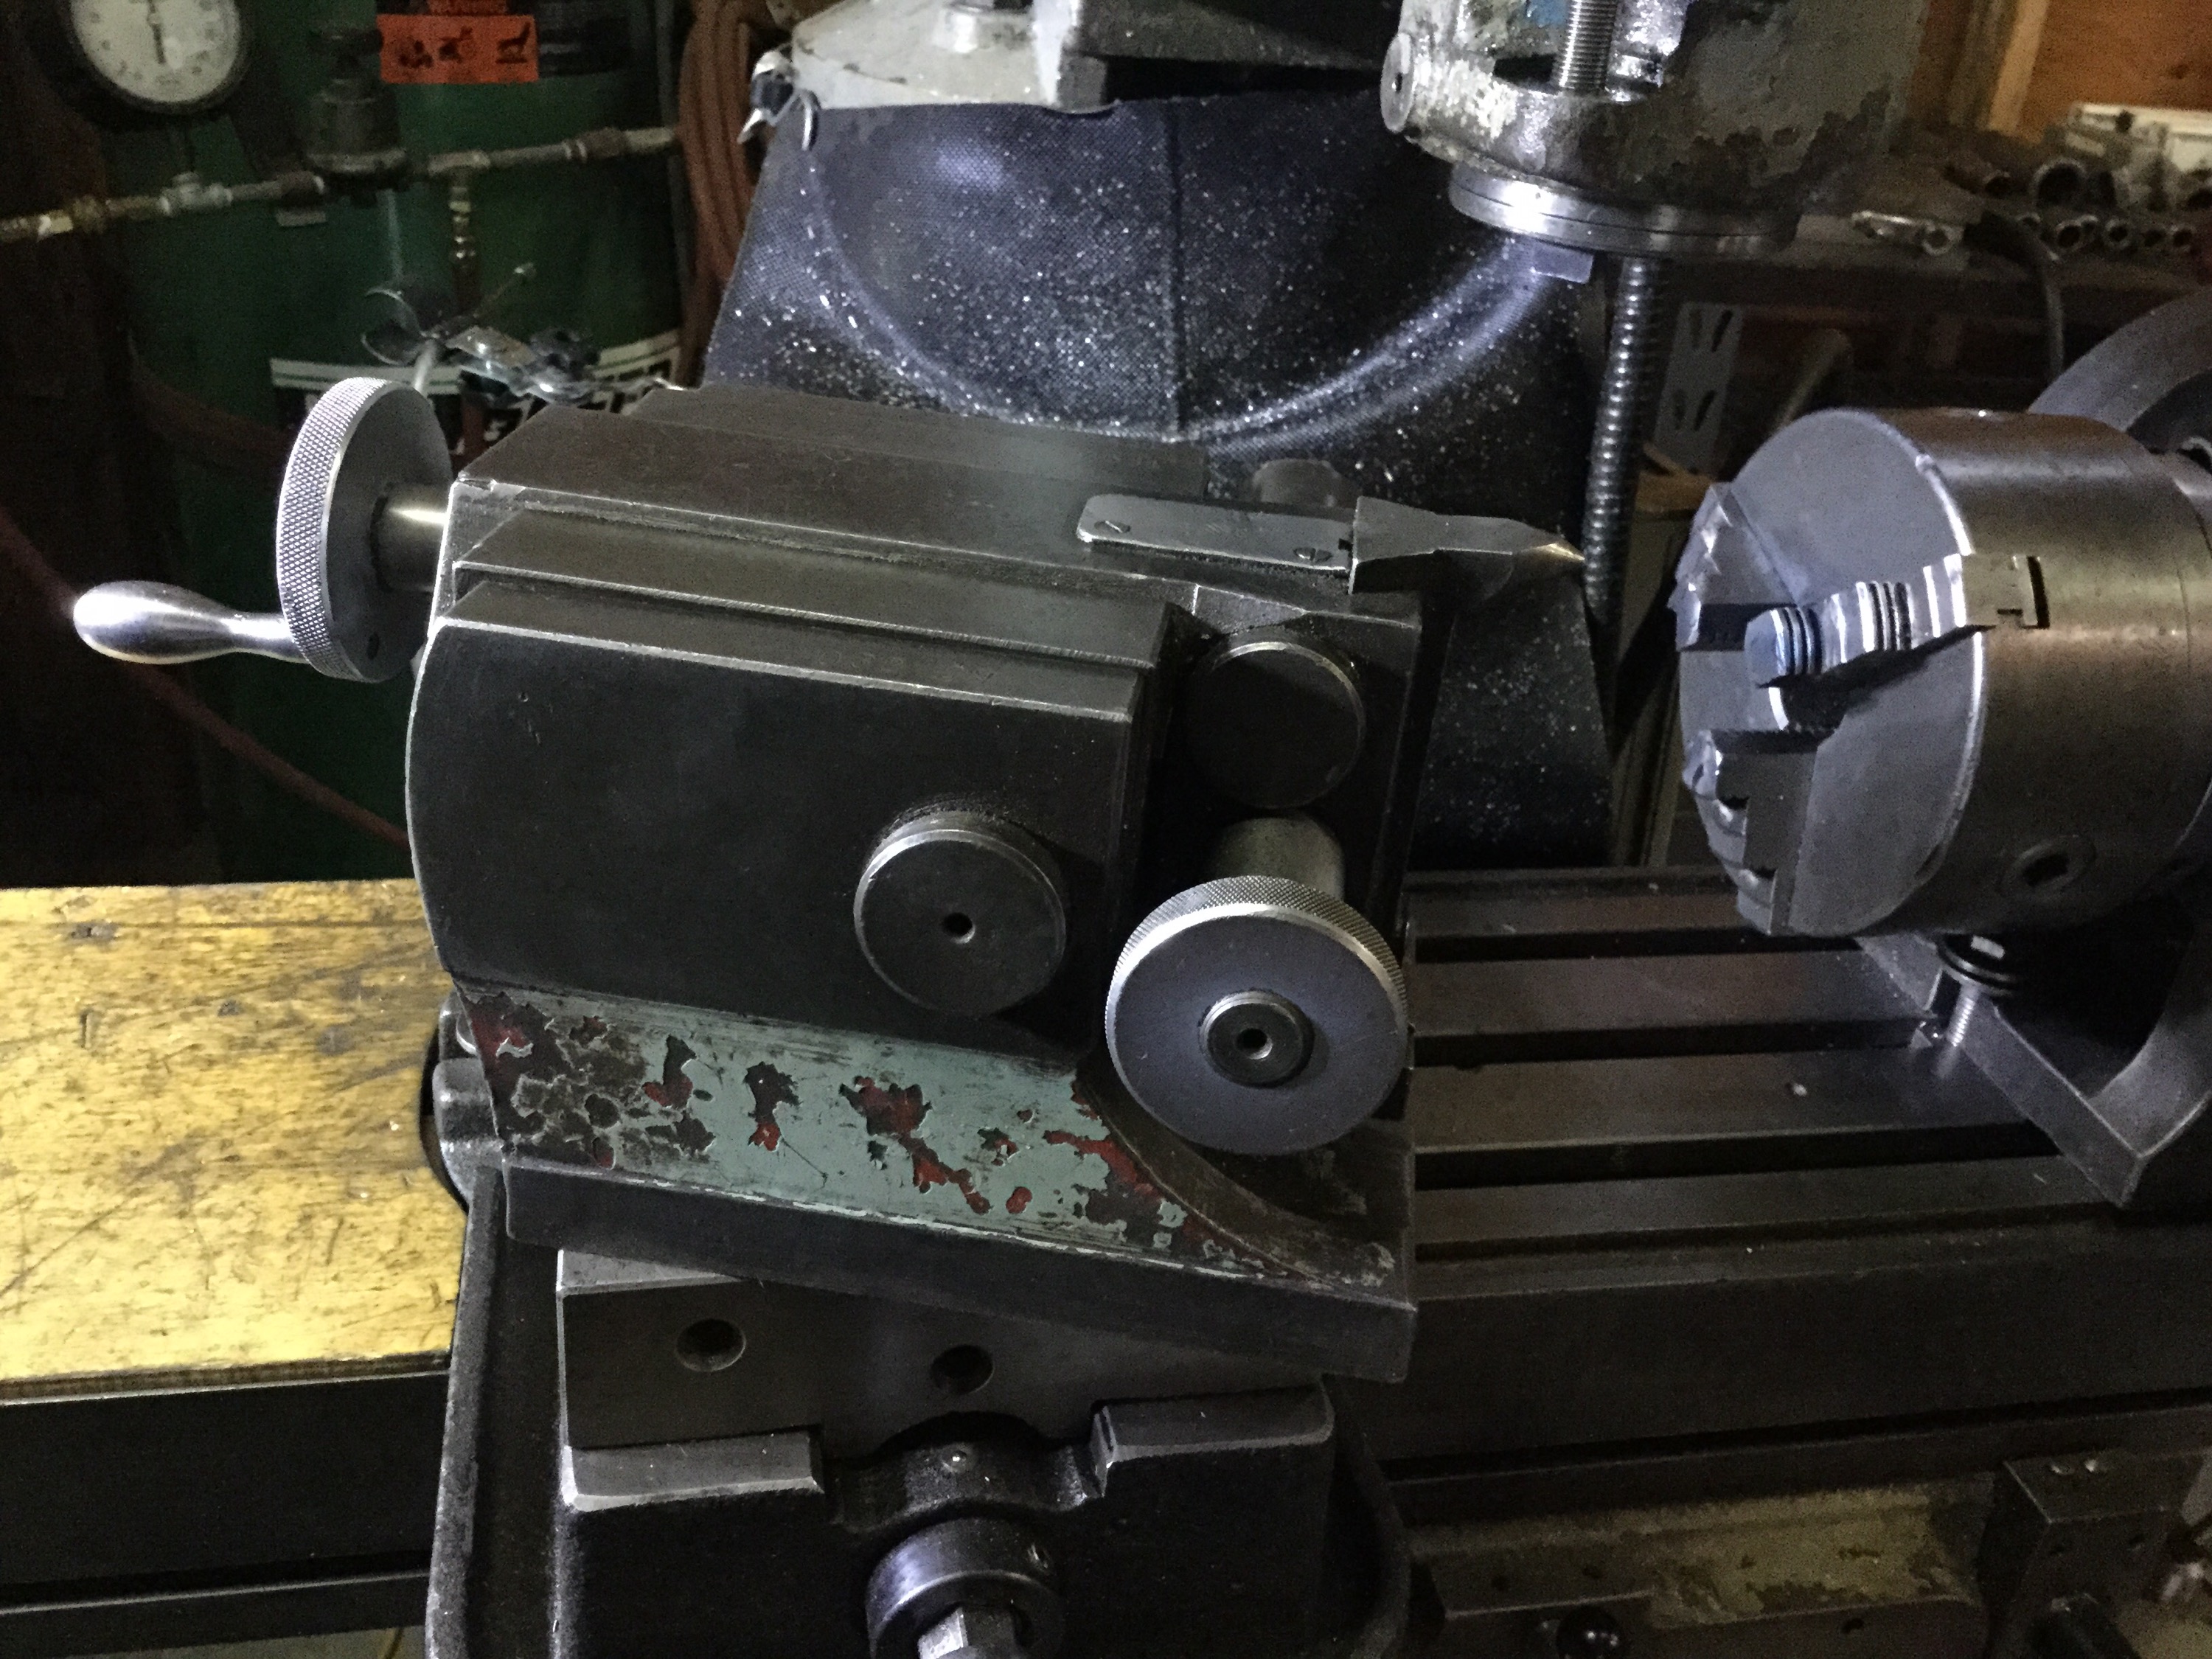
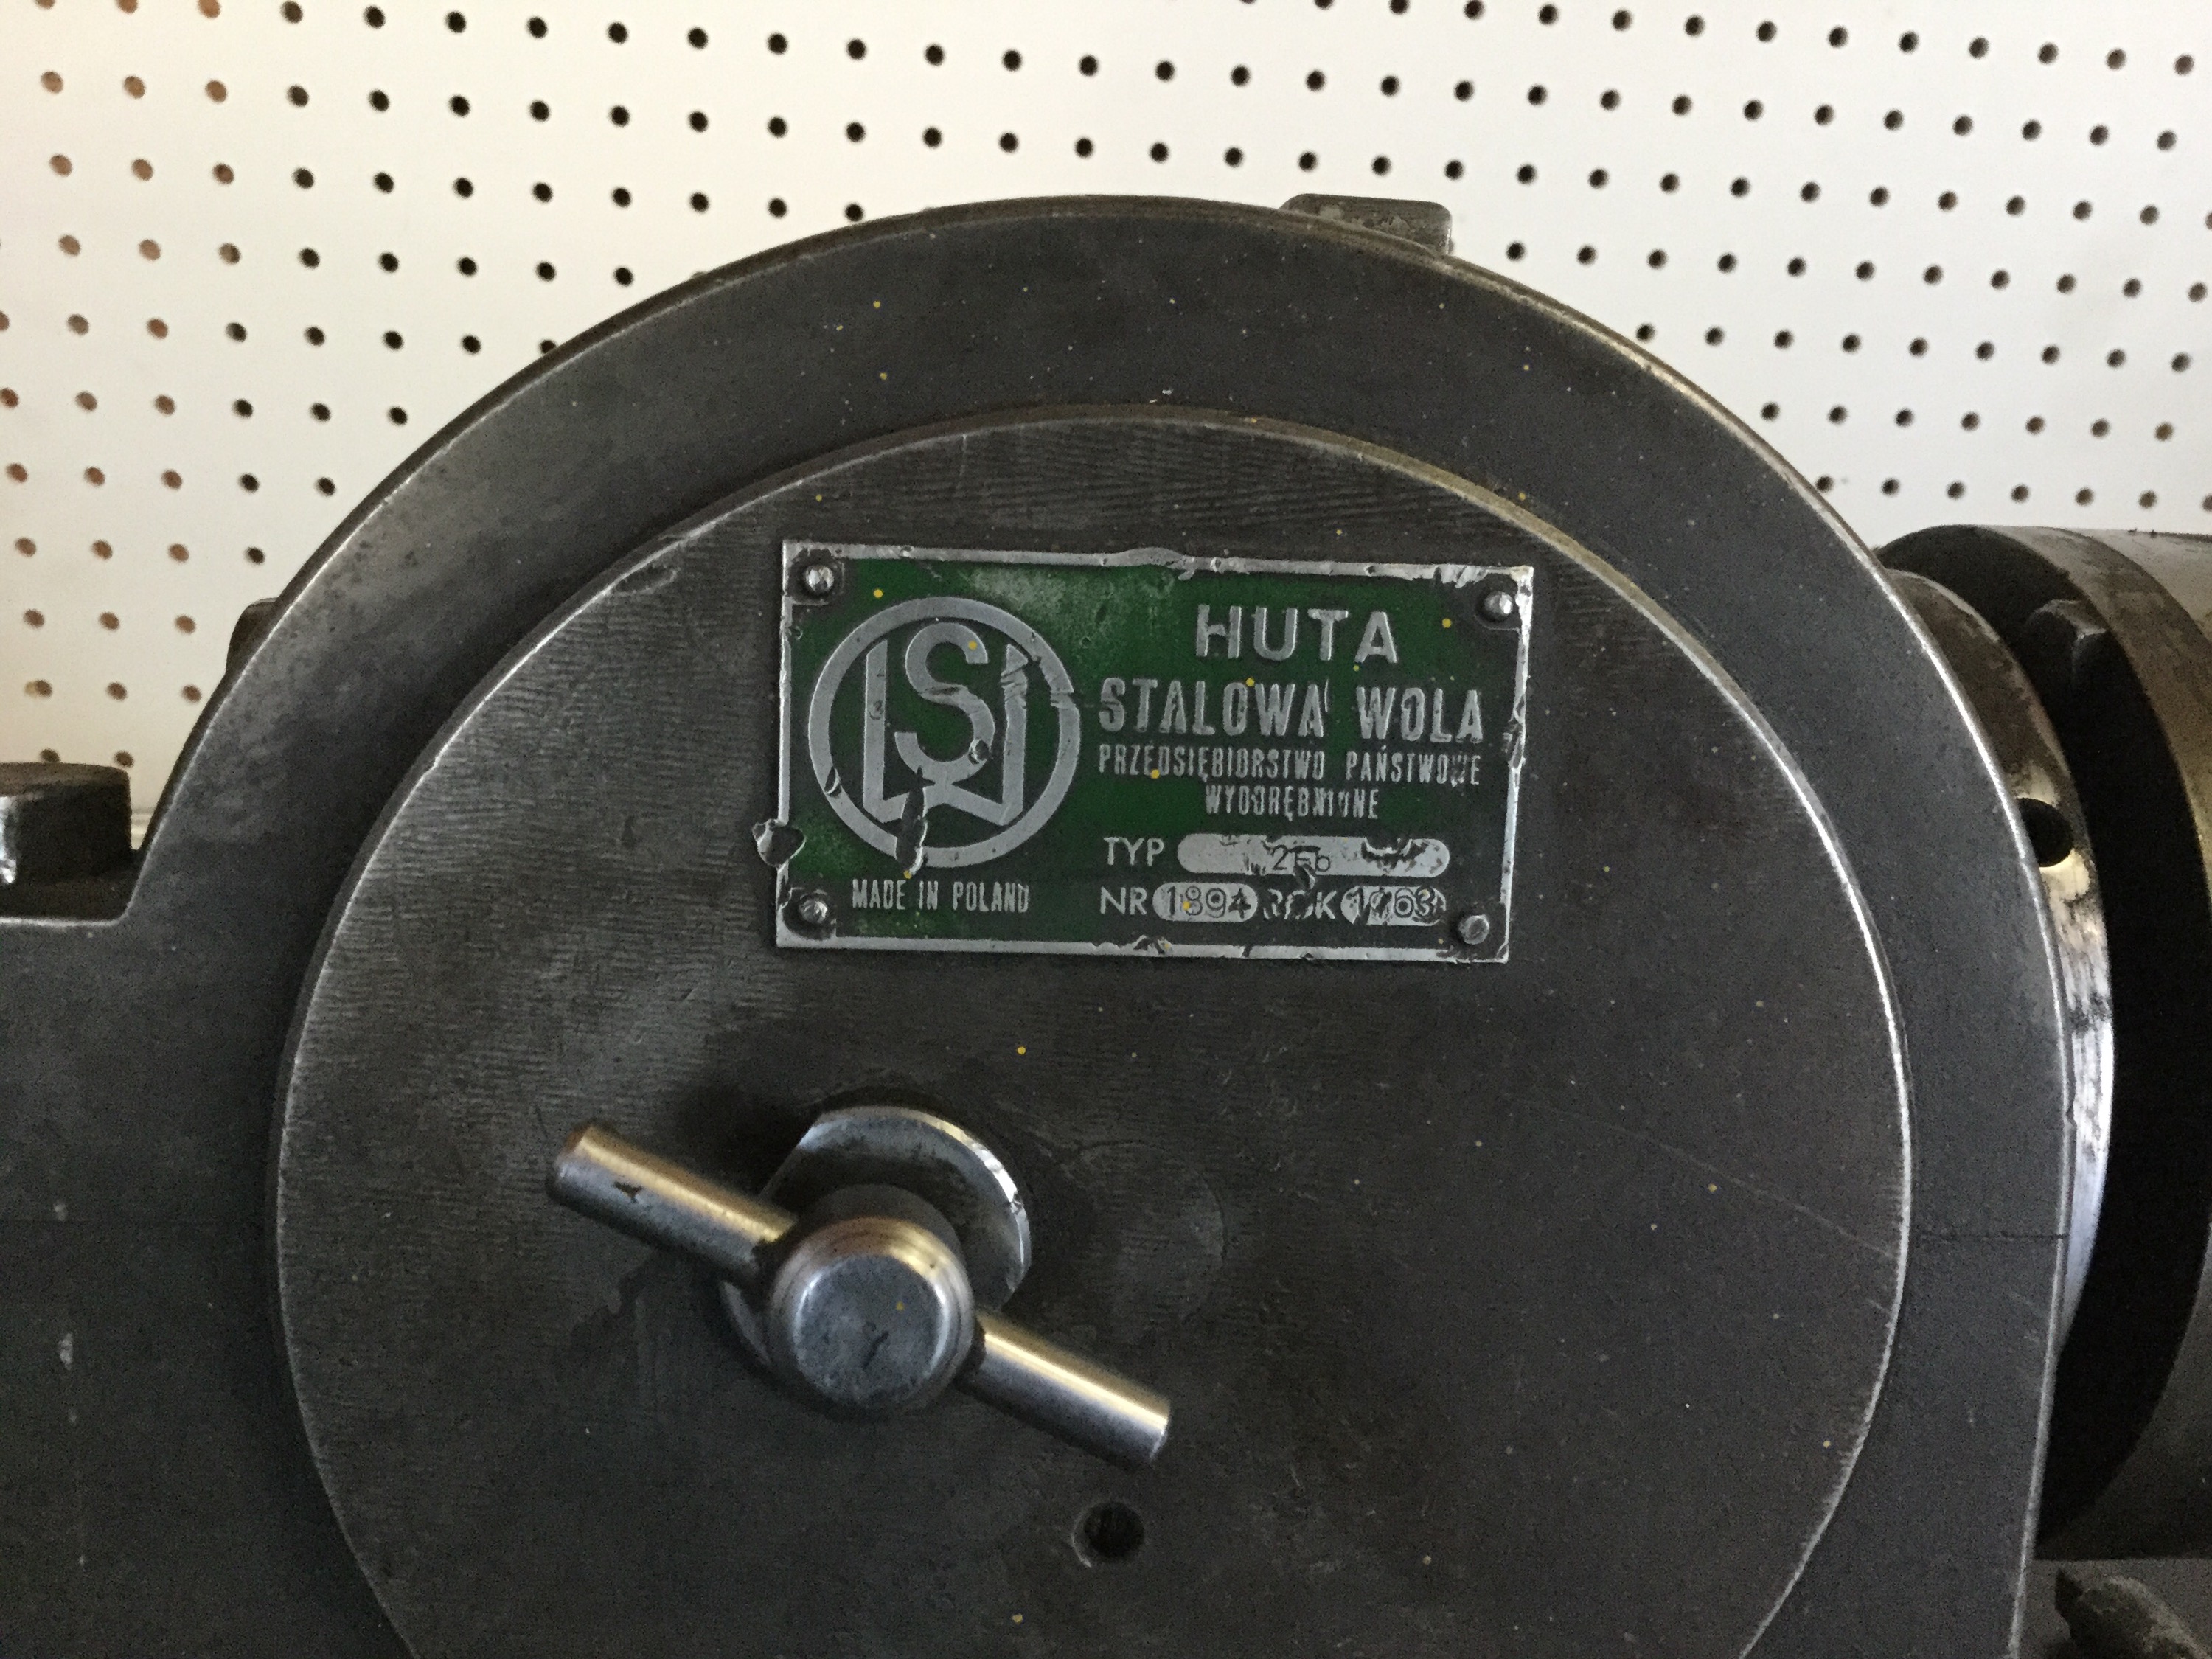
Posted by albell in metal working, metalworking on September 3, 2015
workplace purchase from recent auction at local metal work da Tory that went out of business, Ramsey Machine Works. No keen competition on the bidding on this item, I think we got it’d for 175 bucks. It looks like a very close copy of a cincinatti dividing head. It’s heavy, I can’t easily lift it and it take two to place it on the mill without bursting a gut.
Branded as Huta, nothing on the net about it, but the company was, or still is, an arms maker. Has the cool inner ring mechanism that I think makes 400,000 possible circle divisions.
I’ve used it already to make product. Cut the machining time down for a particular operation by… Well what took me an hour with my cobbled together jig now takes 20 minutes.
All old school stuff but so very cool. Btw, I just cleaned it up enough to use. Still needs some spit and polish ( no pun intended) but I don’t think I will be taking it completely apart any time soon.


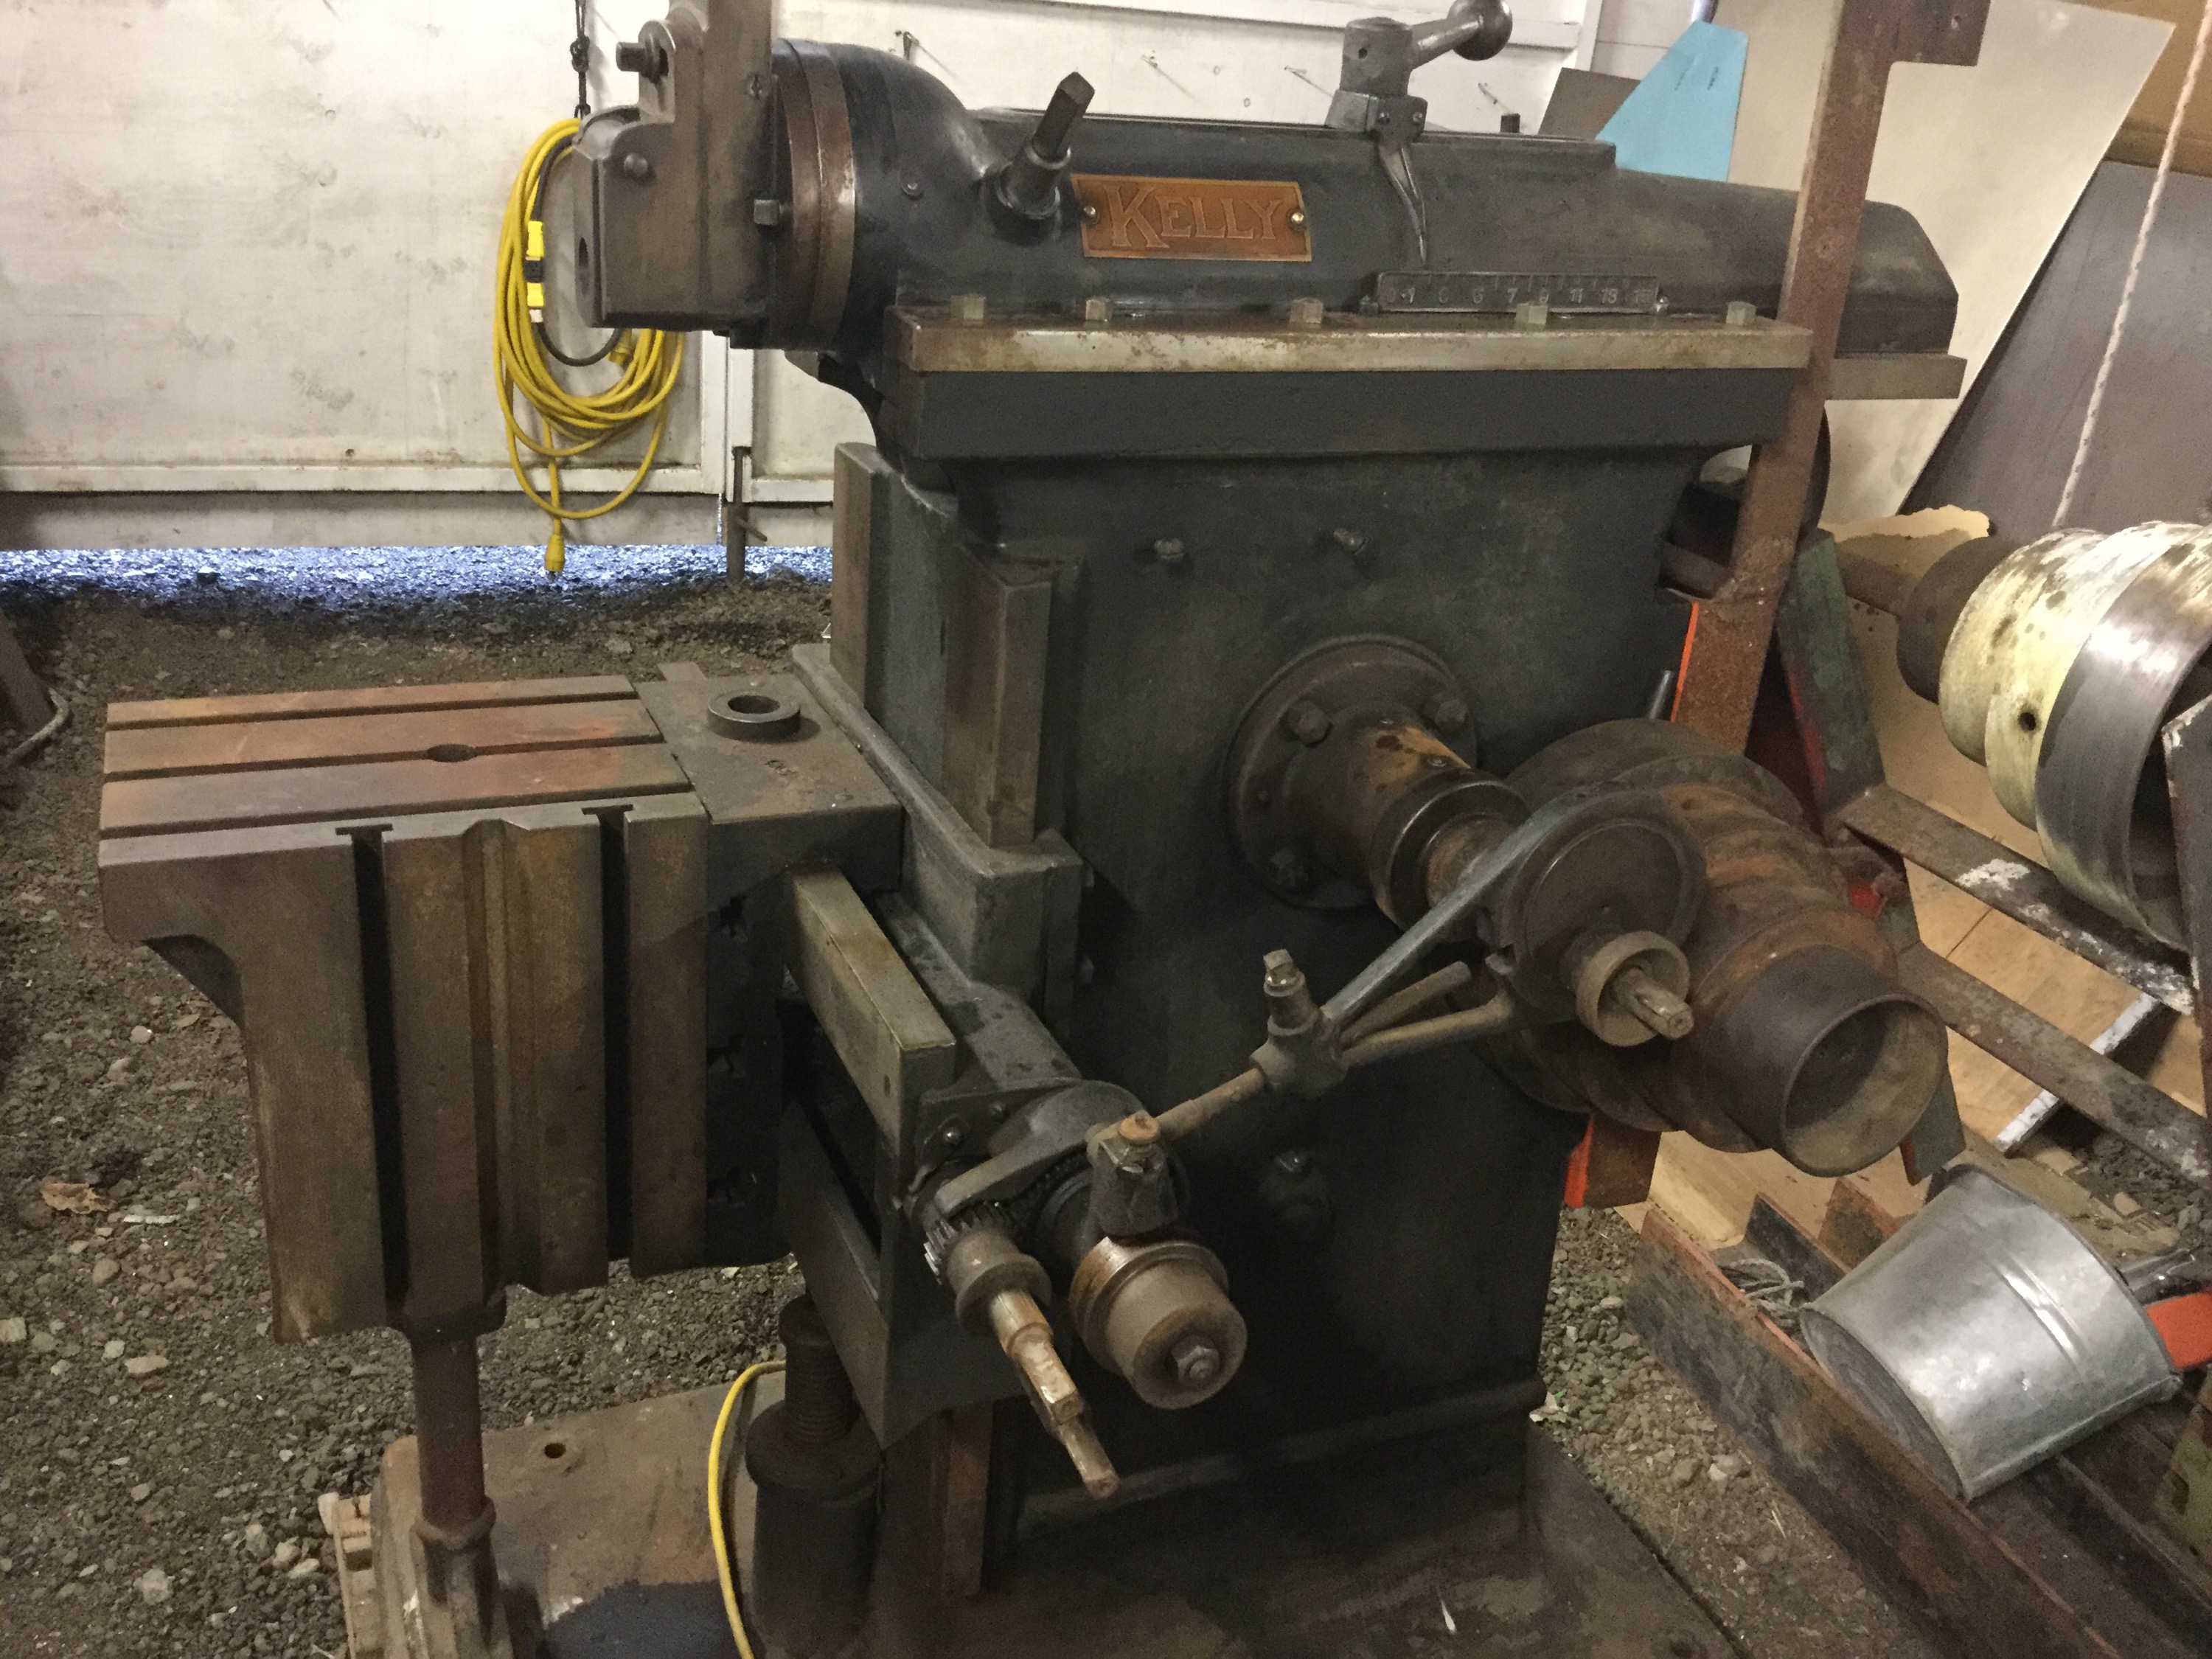
Vintage shaper
Posted by albell in metal working, metalworking on September 3, 2015
Got this beauty for scrap metal prices. It’s old, how old? I don’t know but I would guess early 20th century. It’s a little rusty but everything moves and I think I can get some flat belts, a sturdy electric motor and have it running. Even if it is only used to cut internal key ways it will pay for itself with the first job.


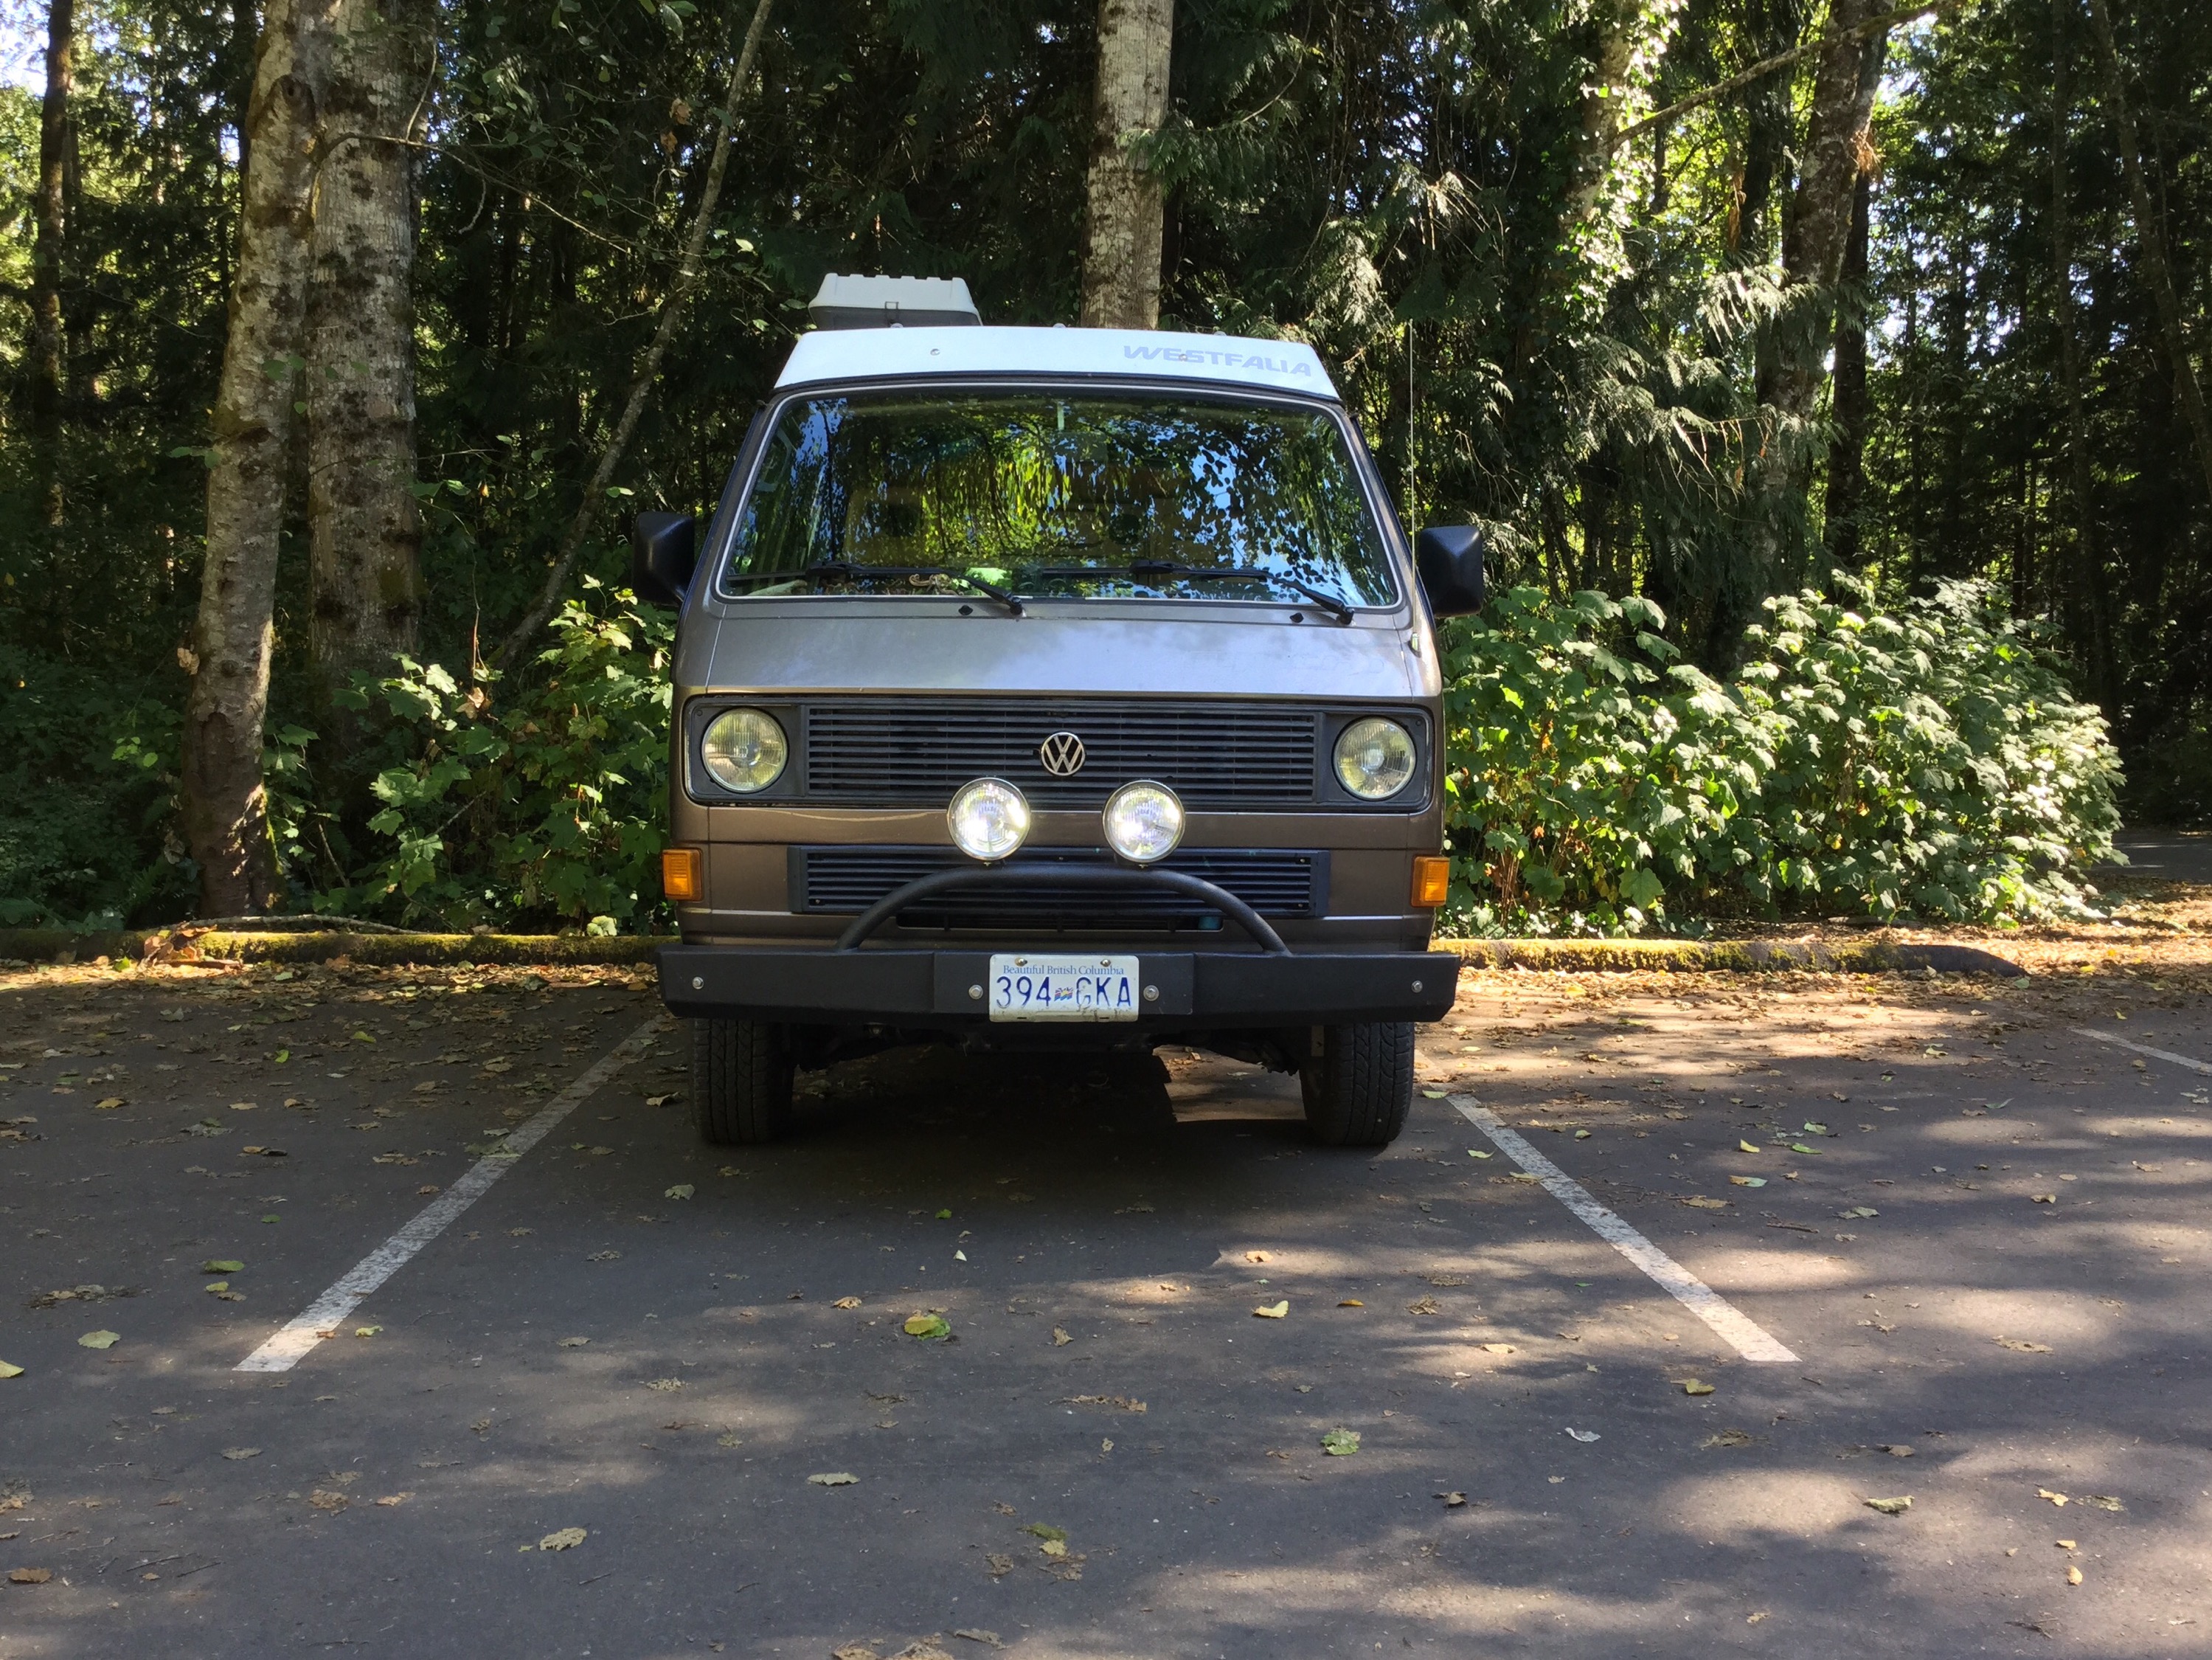
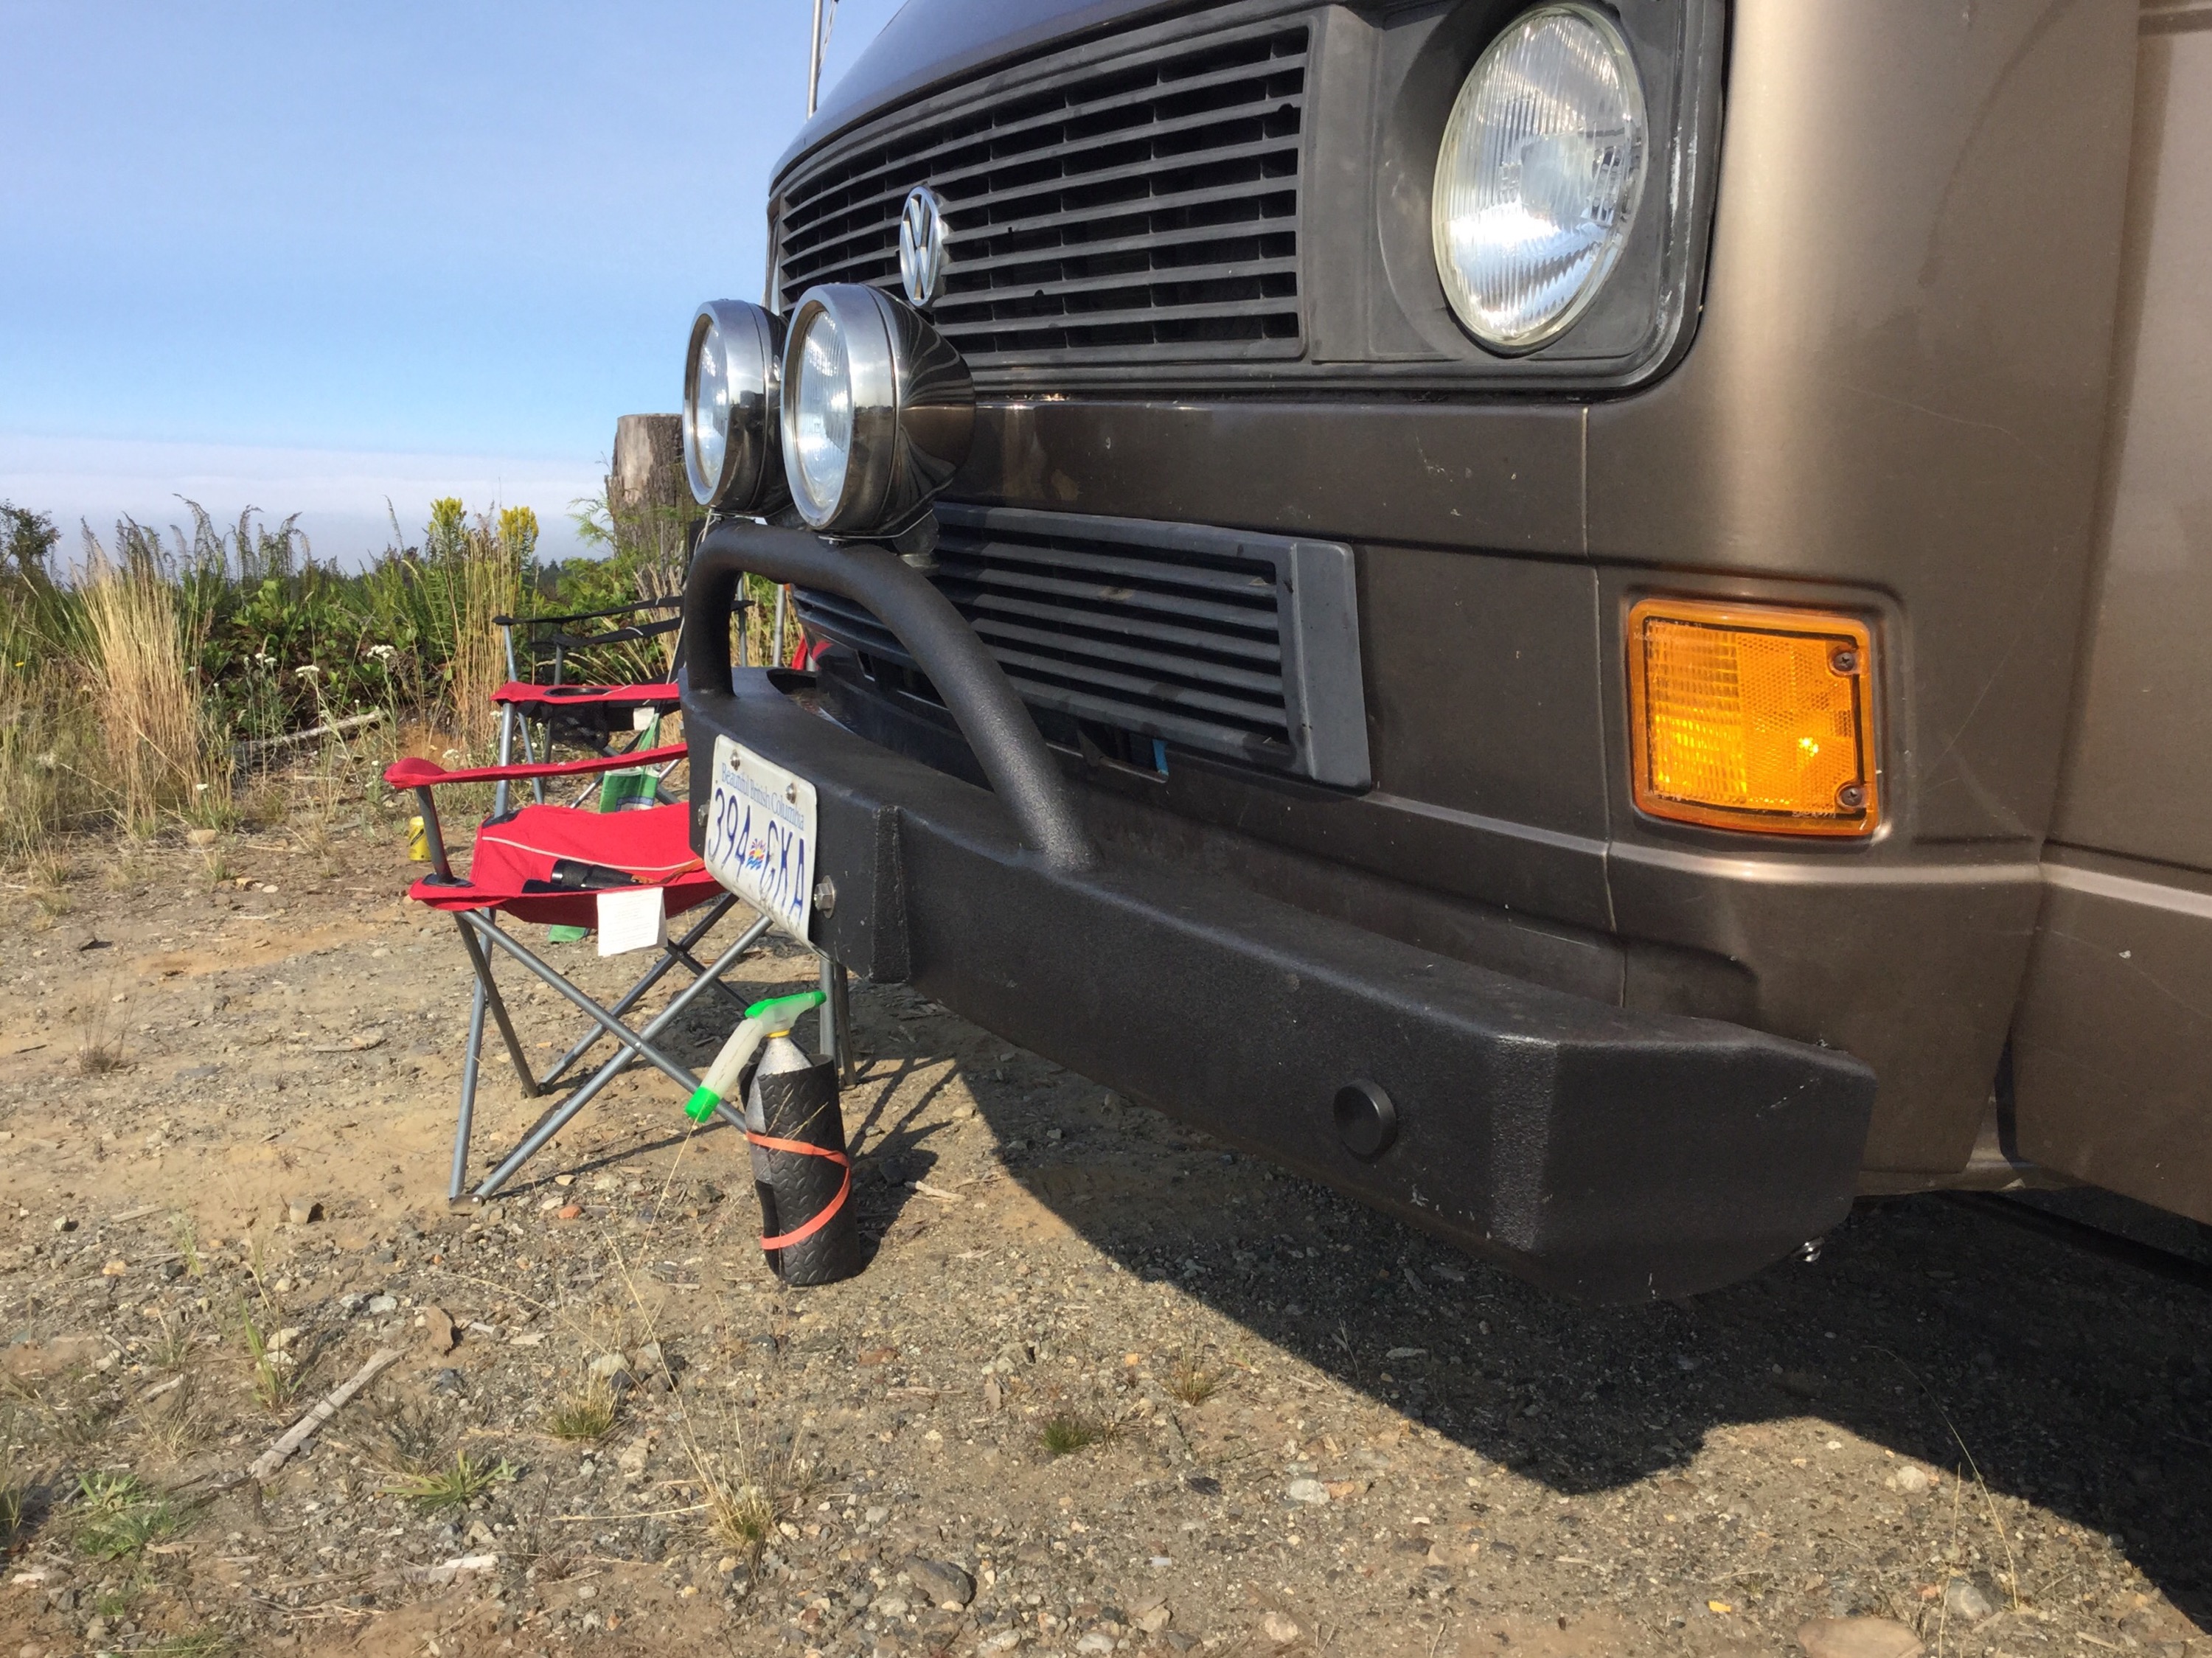
Vanagon – front bumper pics
Posted by albell in vanagon, vanagon mods on August 5, 2015
I’m declaring it done, well almost. Still fussing with ideas to cover the exposed bolt heads. I’m going to give it an 8/10. It is doing what I wanted it to do, but I really don’t like the end caps very much. I found it hard to enclose the “C” shape of the bumper because I carried the bottom angled section of the bumper right back to the standing seam on the body. It made for a big cross section to enclose at the ends. I added facets to the endcaps that really don’t do much for looks. Also noticed after painting how my casual approach to finish grinding and a little warping due to welding gave the top surface the hint of downturn towards the ends. Mostly this is a visual due to the sloppy finish grinding on the top edge. But now my eye is drawn to it and I get that pang of regret.
Oh well, that’s how it goes, I have to see the thing made then decide what I like and don’t like 🙂
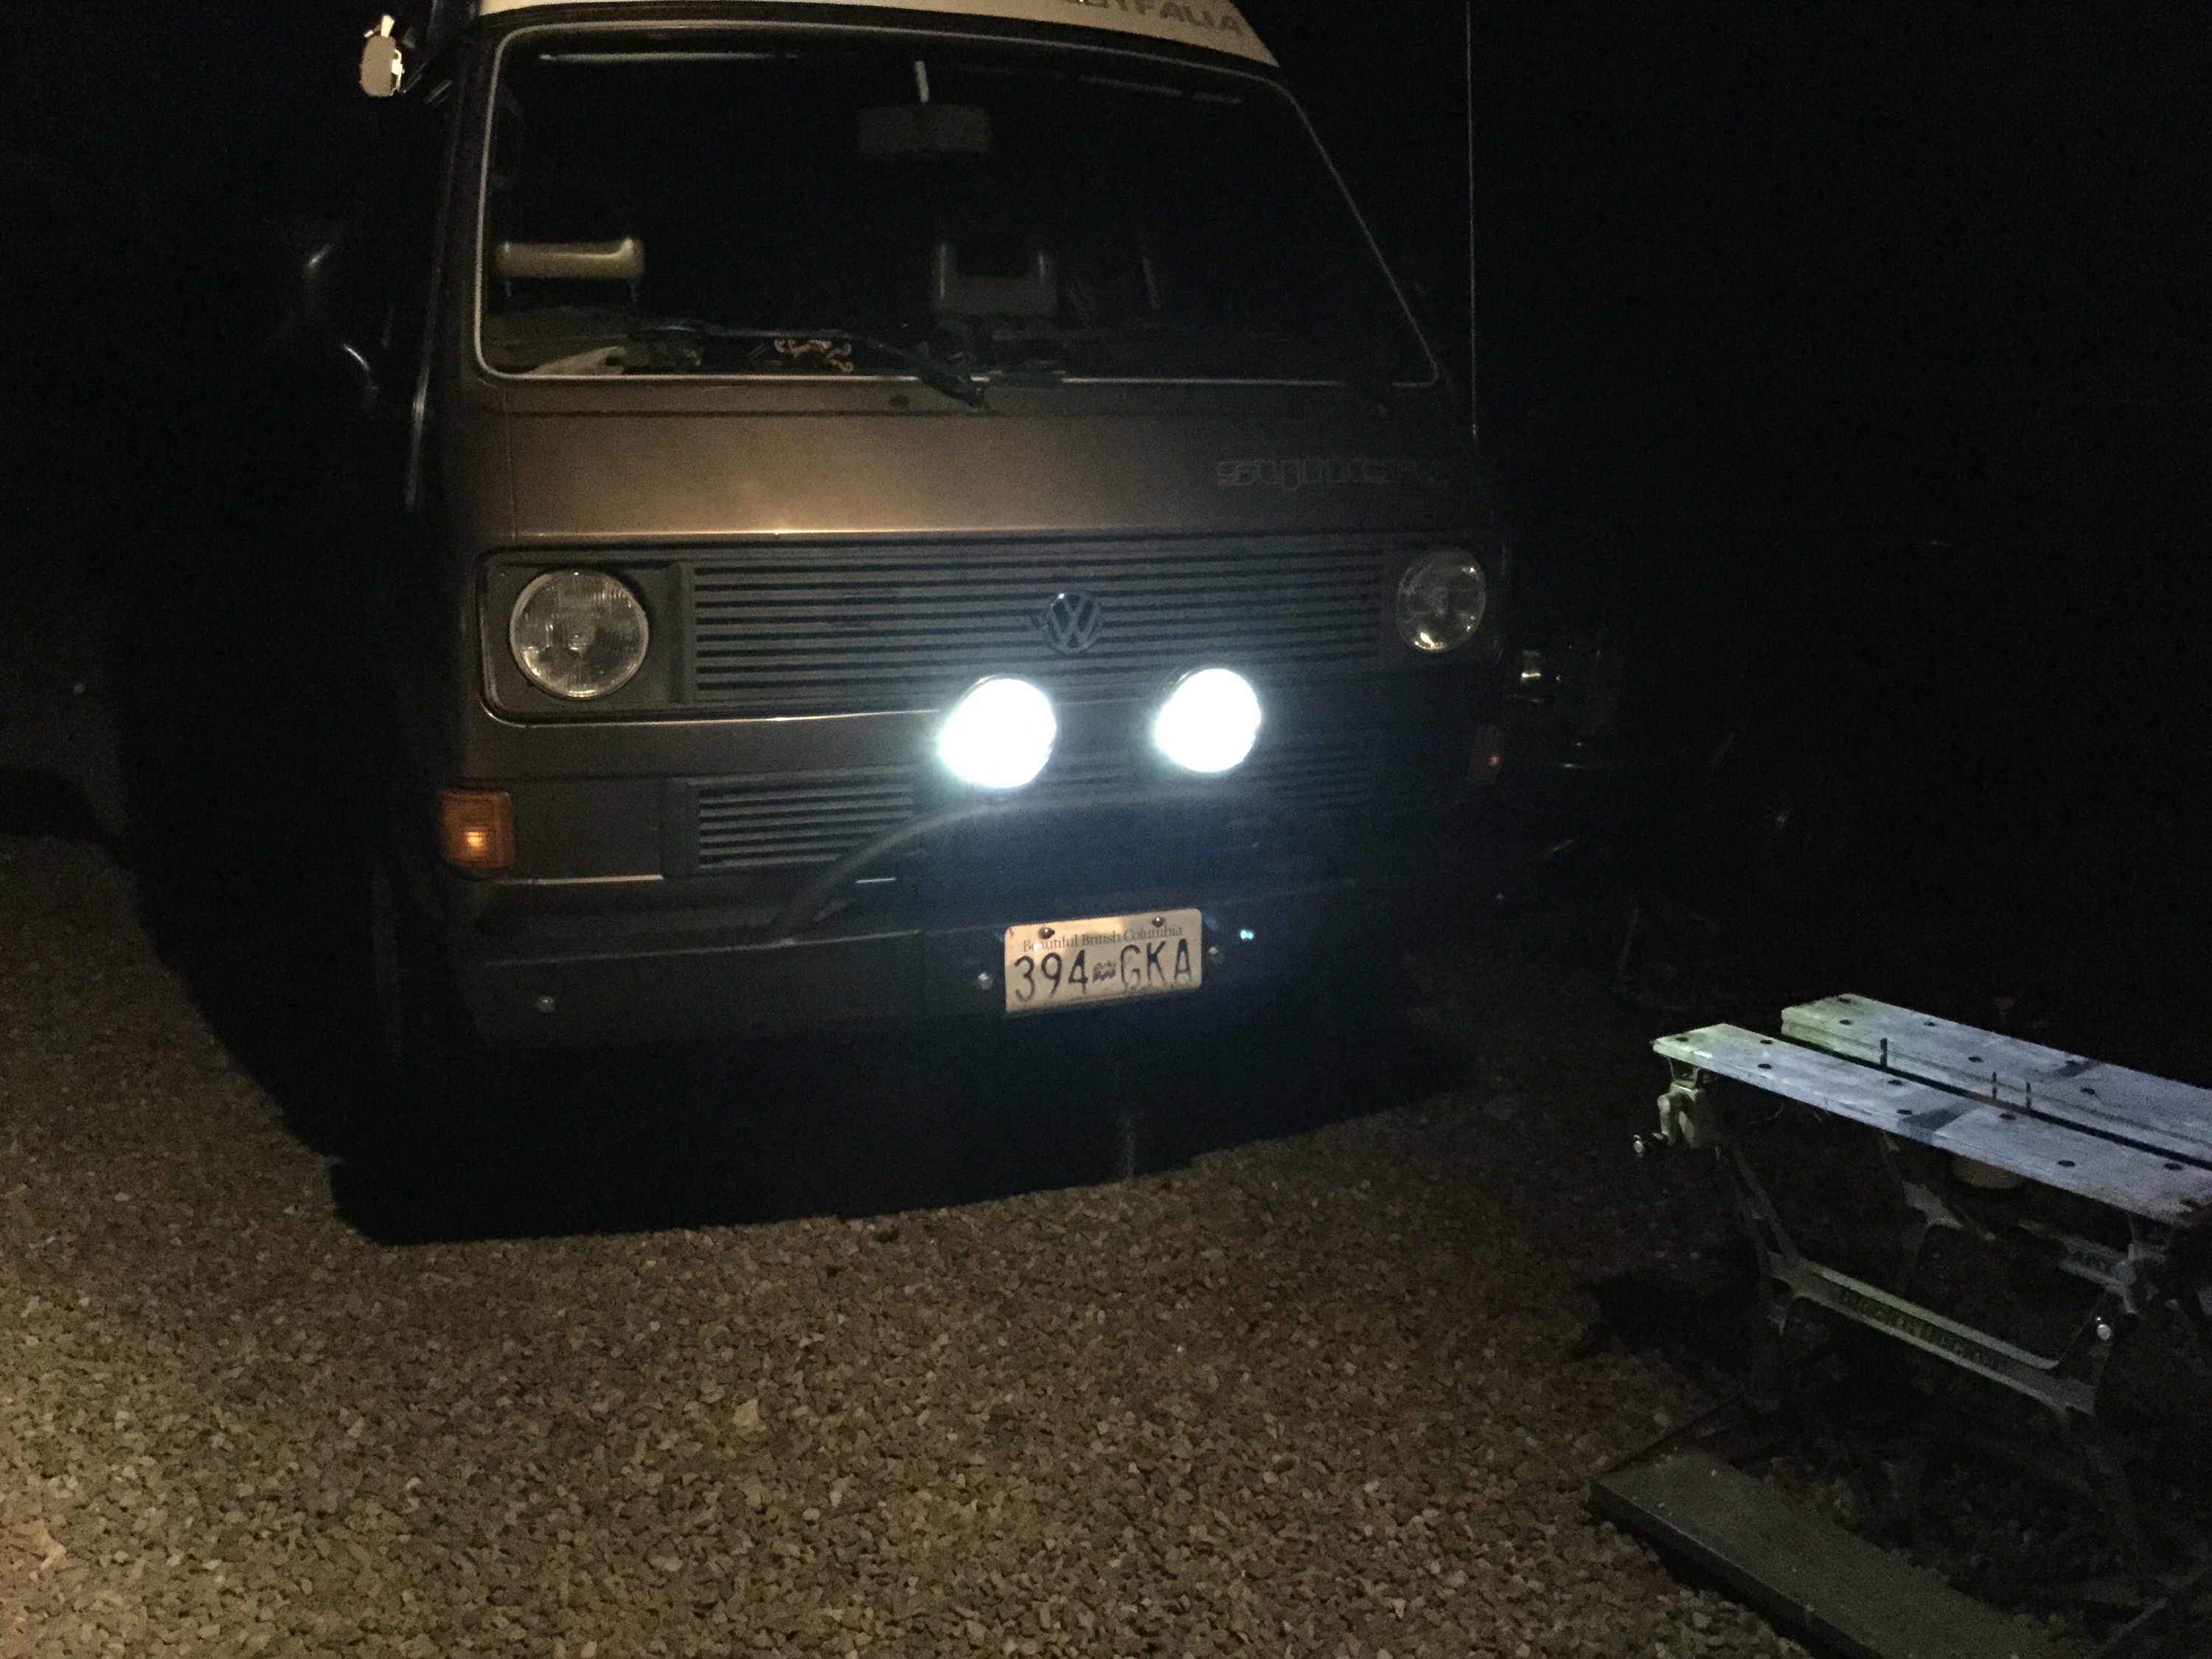
The light bar worked out ok. Places the lights approximately in front of the metal section between the upper and lower grills. One could argue that the lights are too close together, but I’ll leave that conclusion until I aim the lights and do some night driving.
As for the lights, I did manage to shoehorn the 6.5″ H4 lamps into the housings. Right now I have it wired to the fog light switch and only connected to the low beam filaments in the lamps. I plan on connecting (yes, of course relayed) to the hi-lo stalk switch so I can have both high and low beam auxiliaries. The lamps had city light bulb holders in them. I replaced them with 2W led eagle eyes. I wired them to come on with key on, thinking they might make DRLs. Not quite bright enough, but certainly noticeable. The night shot shows them on, appearing more brilliant than they actually are. I’ll see if I can dig out some pics I took months ago showing the eagle eye install. I’ll update this post then.
Wiring to the aux lights runs inside the light bar and out behind the bumper. The nice flat top surface really makes it easy to stand on to get things on the roof. The paint is rubberized rocker guard paint. Yes, not bedliner. I thought it would be be a better choice for touch ups after the inevitable scrapes on rocks. Certainly less expensive than bedliner. About ten bucks a can, took two cans to do the bumper. Aluminum was prepared by scuff sanding and acid based aluminum wash. Then one coat of self etching primer and about three coats of the paint.
I should mention how I mounted them to the sub bumper. The stock mounting holes (M10x1.5 I think) got reworked with helicoils for M11x1.5. I made a stainless steel bracket, like two “C” shaped pieces connected by a straight section out of 1/8″X1.5″ bar stock. The “C” parts fit over the sub bumper and are held onto it by two bolts running vertically down through drilled holes in the sub bumper. The bolts hold the brackets in place and also pinch the sub bumper a bit, pretty solid. On the back of the rackets I welded nuts for the M13x1.75 bolts that go through the centre section of the bumper. Trust me, the bumper is on there solid.


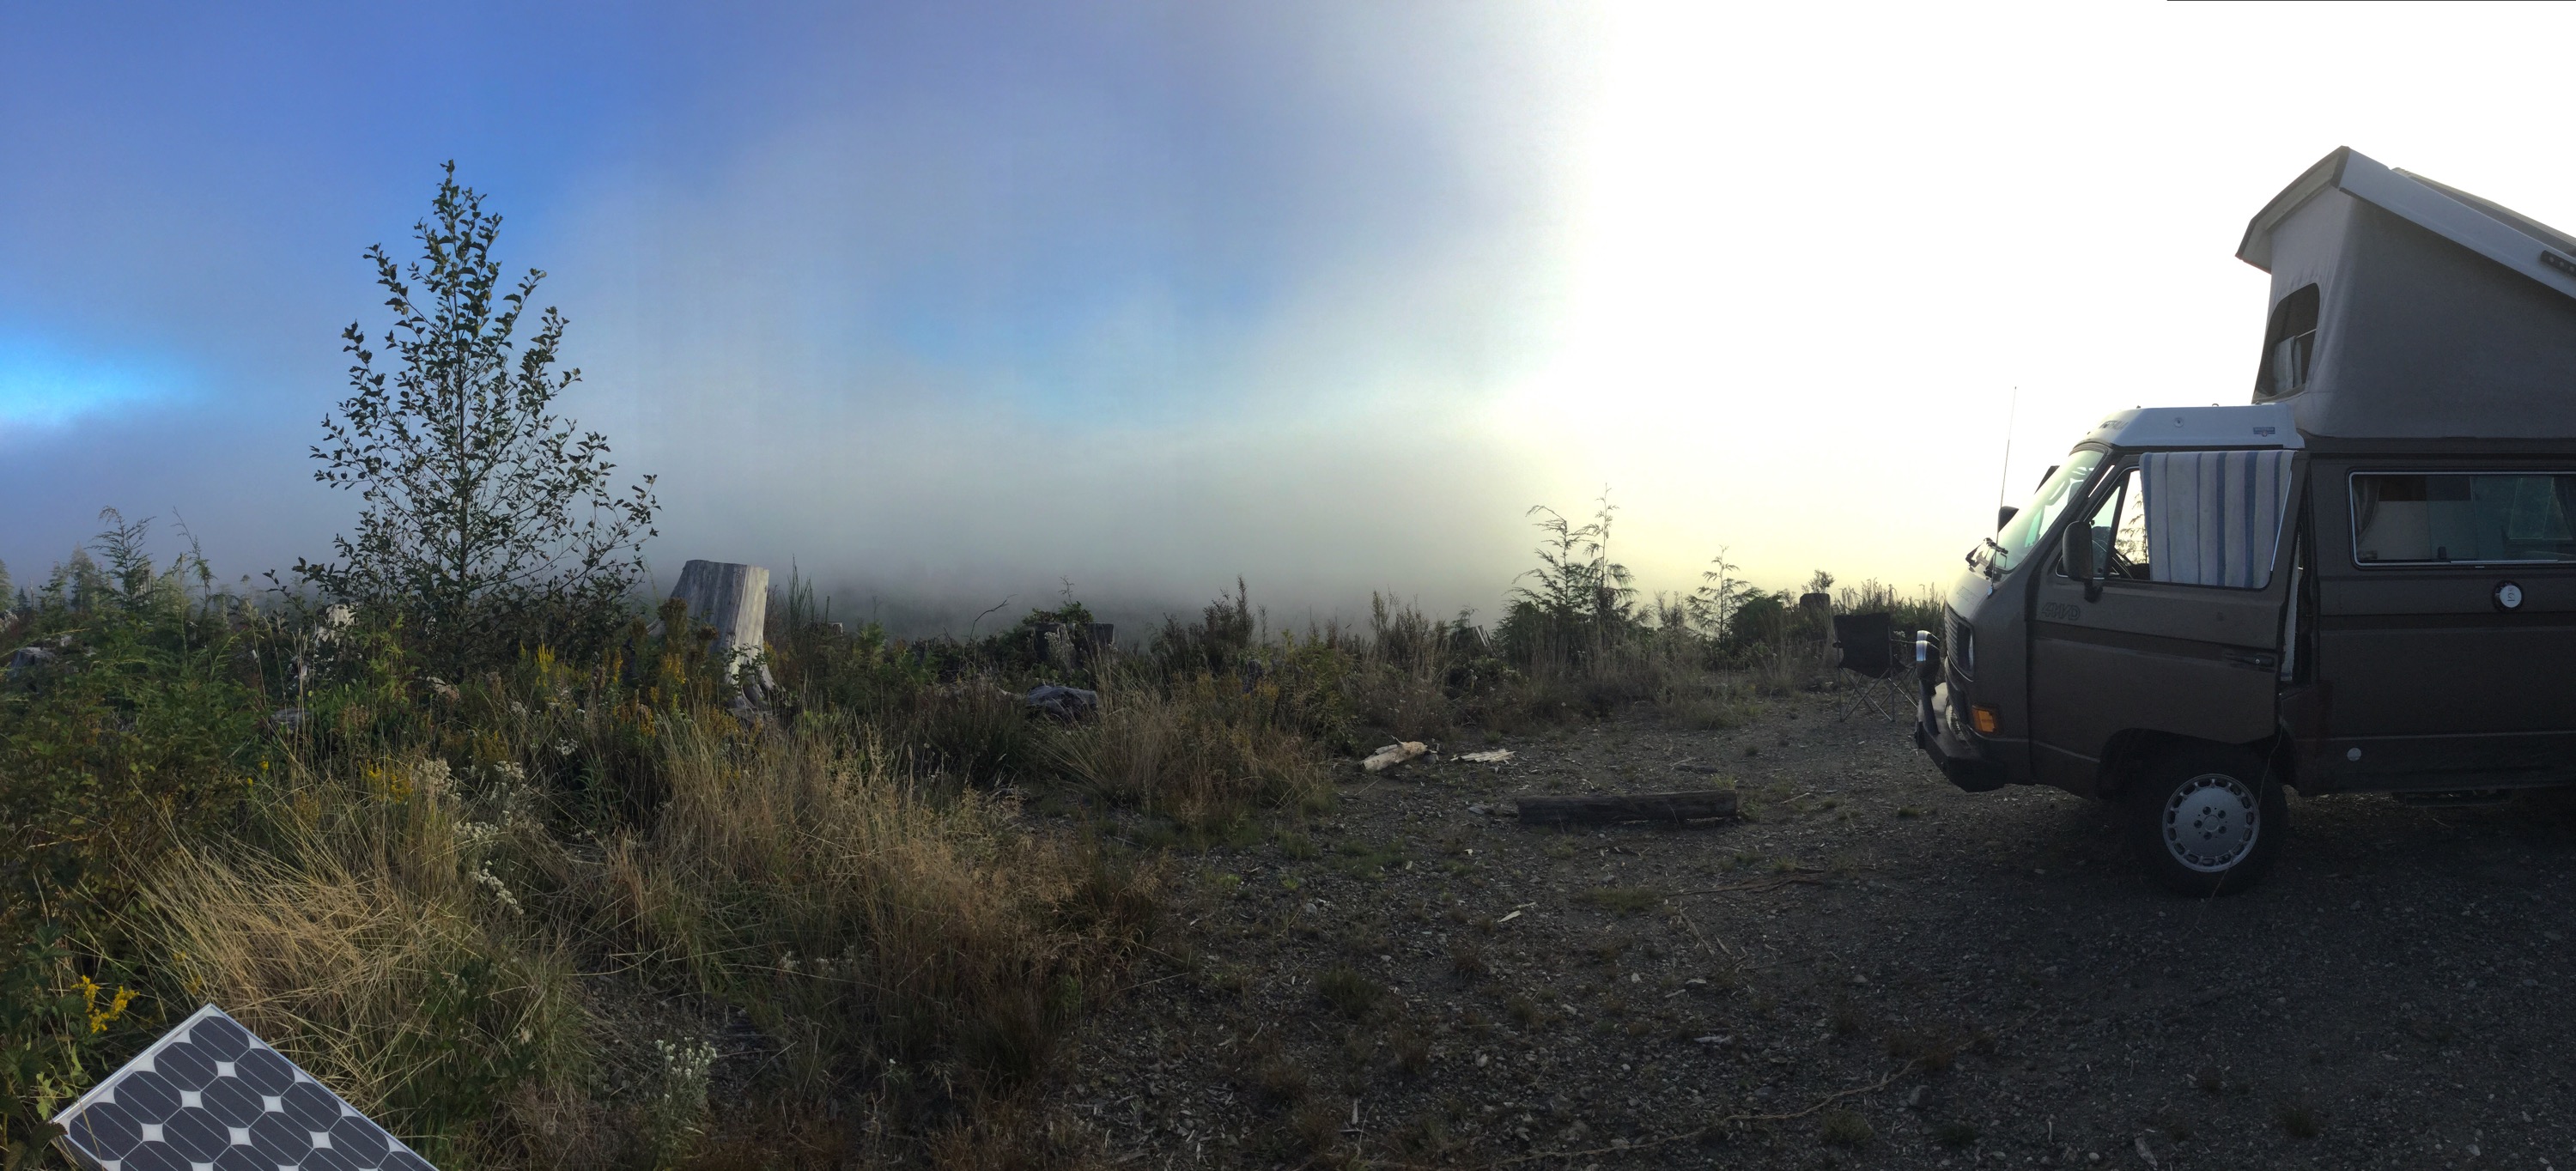
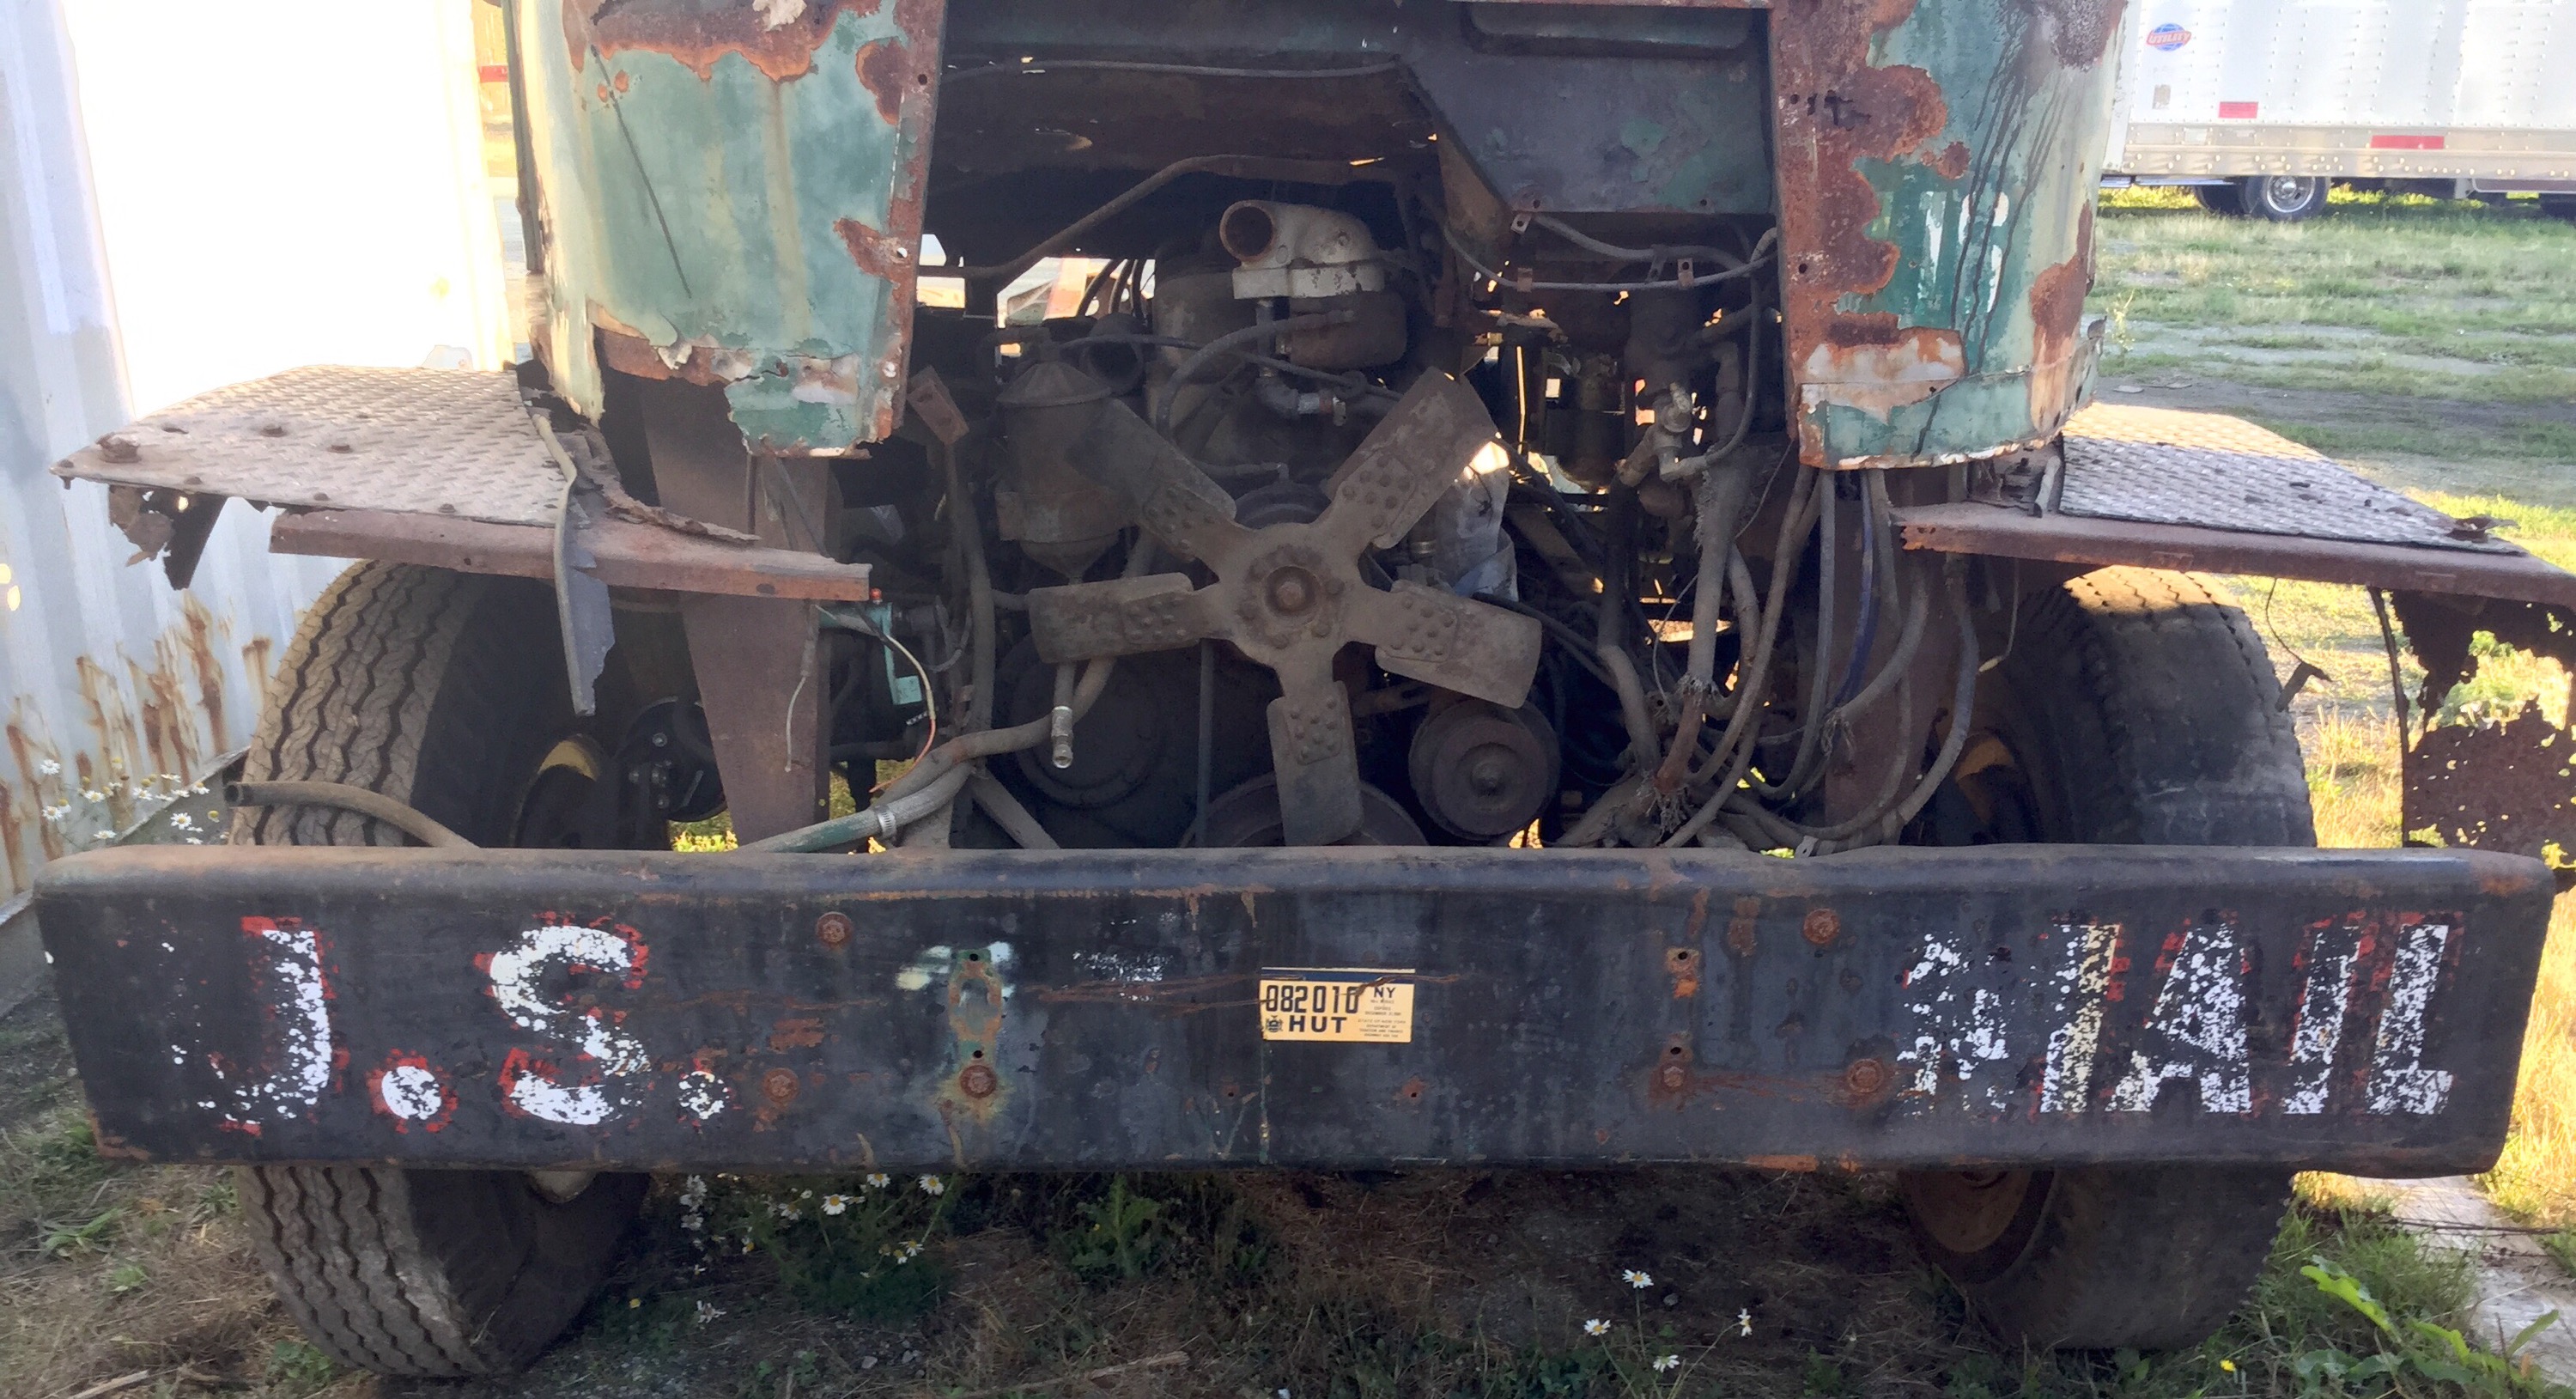
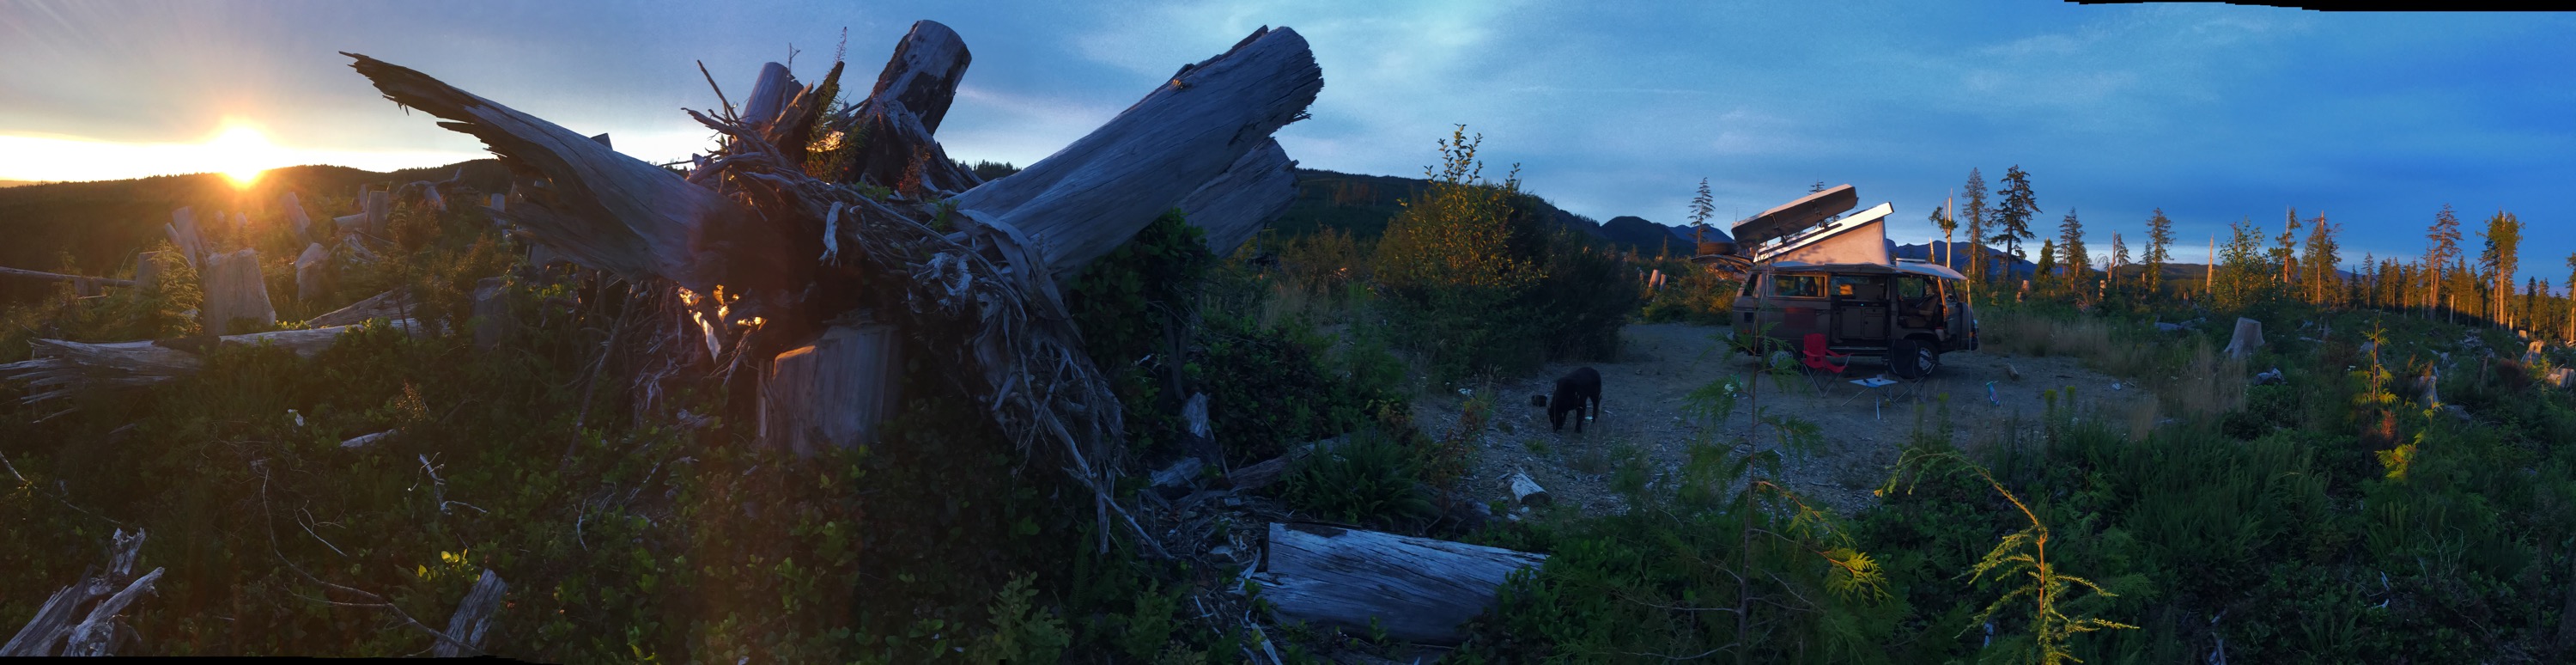
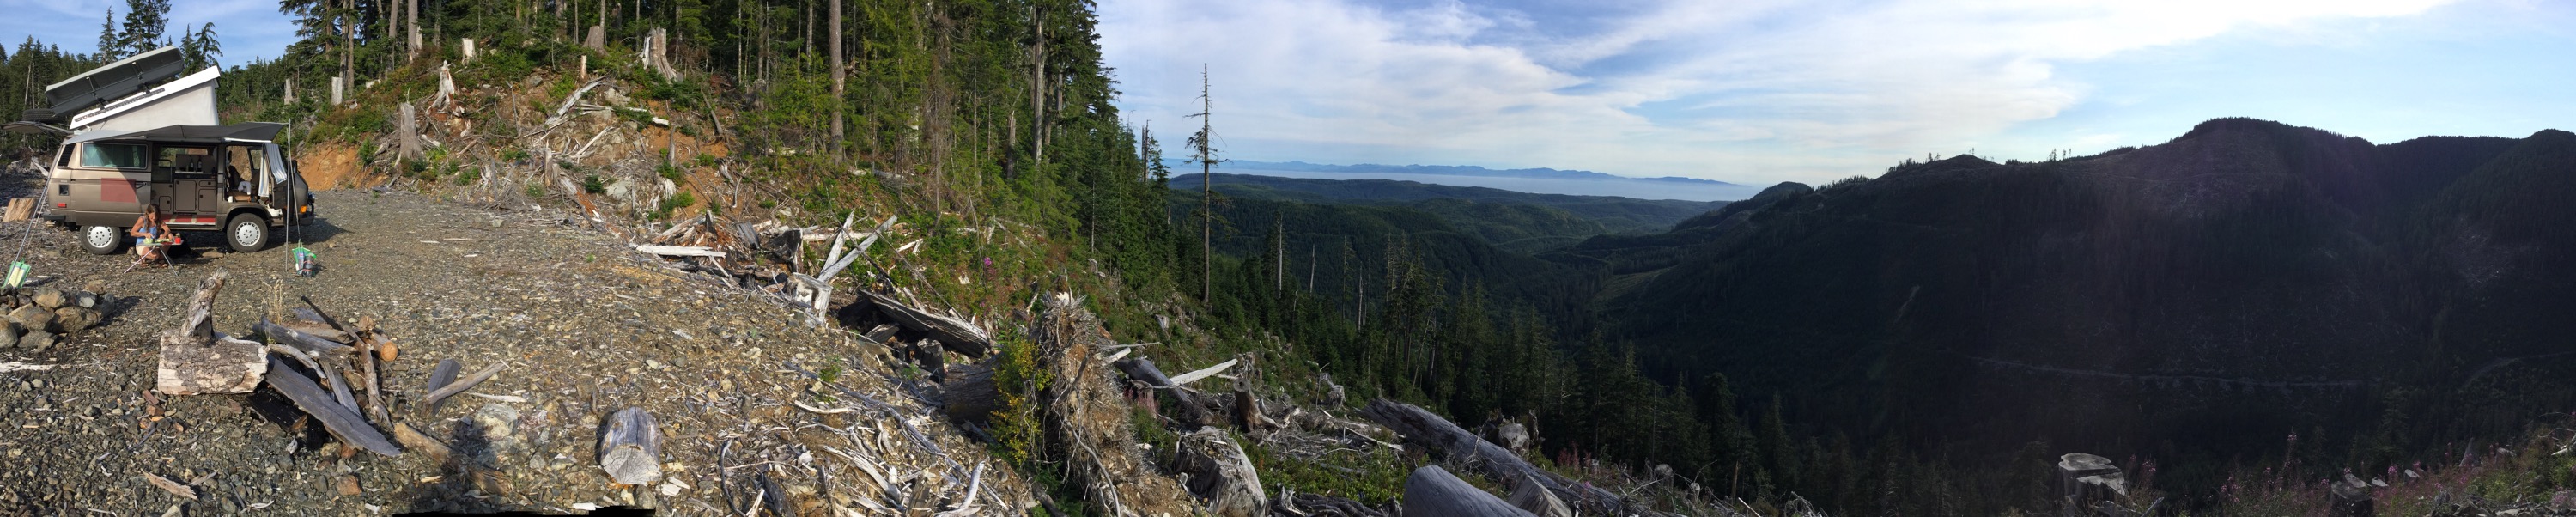
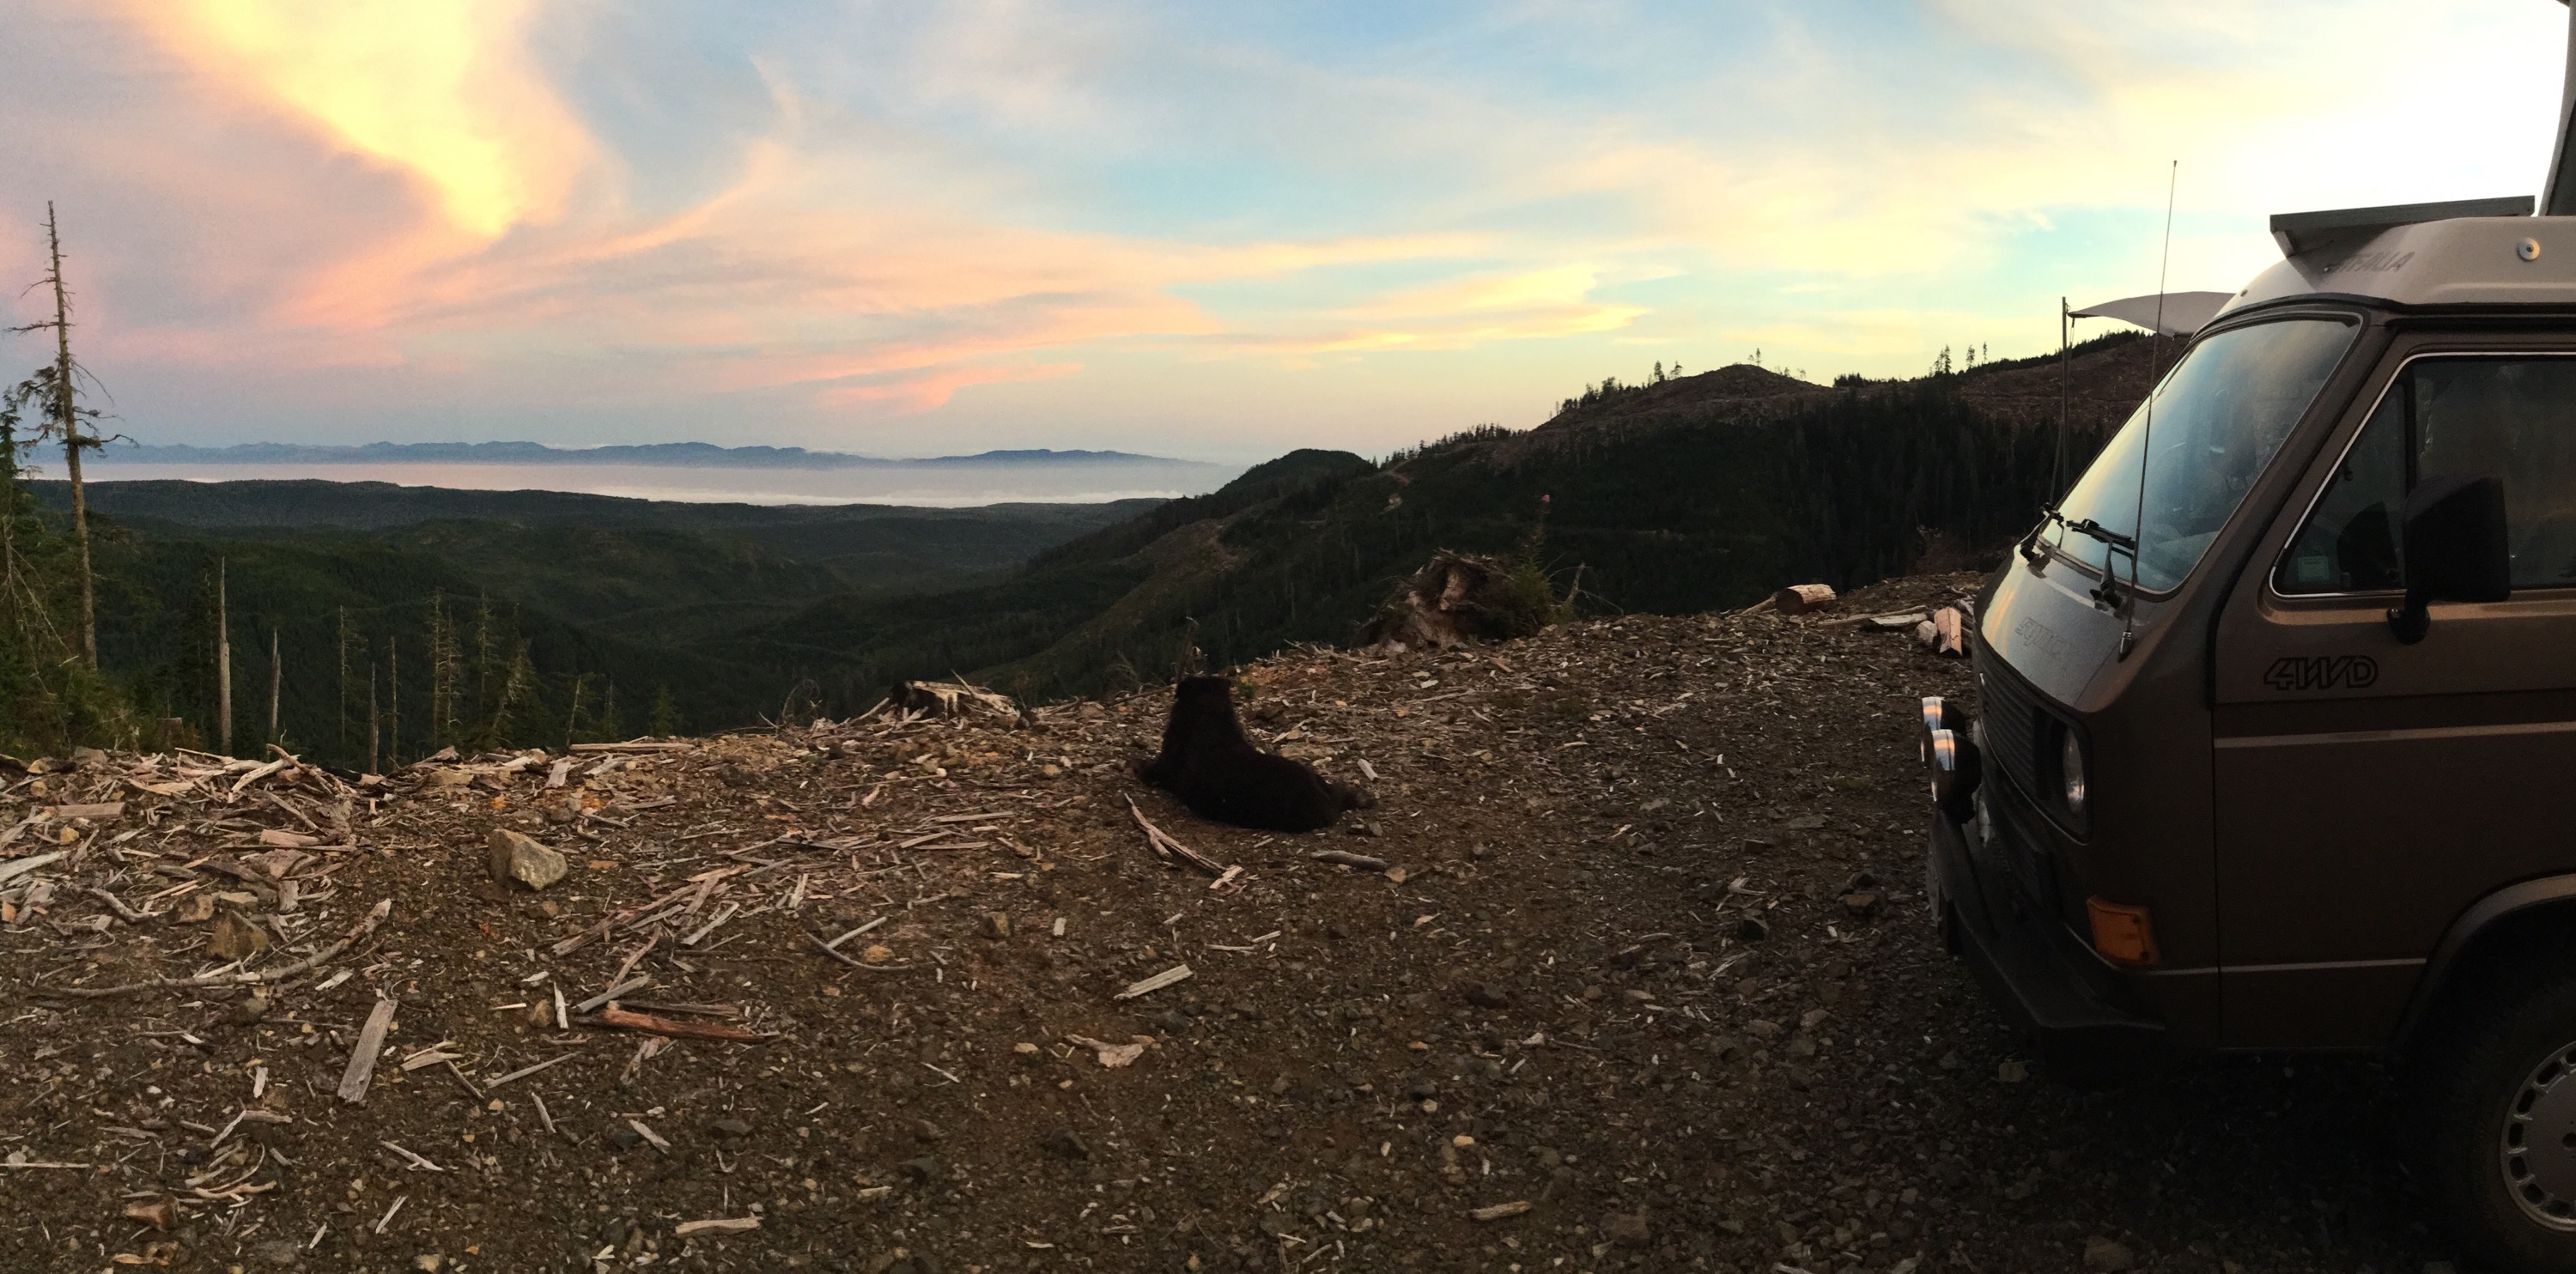
Trip – relaxation in sun
Departed last Saturday morning and both of us were tired from work week. So we headed to favourite spot, set up camp, and dozed off. No inspirational slogans or hipster hashtags on this trip 🙂 Supper of cold chicken wings, wine, bread, olives, etc. Smoke in the sky, Washington or Vern California fires? Certainly made a spectacular sunset. Next day we forced ourselves to do some exploring, scratched up the van some more, saw a bear. By the way, not as much bear poop on the trails as on previous trips. The berry crops change, the heat, the after sources, all must influence their behaviour. We both love bears and despise the poaching that goes on around here. There is no good reason that these coastal Vancouver island bears should be killed. Oh oh, sounds like a hashtag. Them on up to another favourite site, higher, back form the coast, and with an excellent little swimming lake. On the way found an abandoned truck. The mentality of some people, defies understanding. Signs of elk up there, poop and tracks. More longing, swimming, drinking, eating. Next day the fog and marine cloud closed in and didn’t burn off until about 2pm. Had one last swim and headed home. At Jordan River I noticed a familiar van at coffe shop. We had met years before in the road to the kluhdak, but right now I’ll be damned if I can recall names. All in all it was a great trip even if we were lazy and tired. 

And exciting video of a bear. Hey, it takes time to get the camera out…


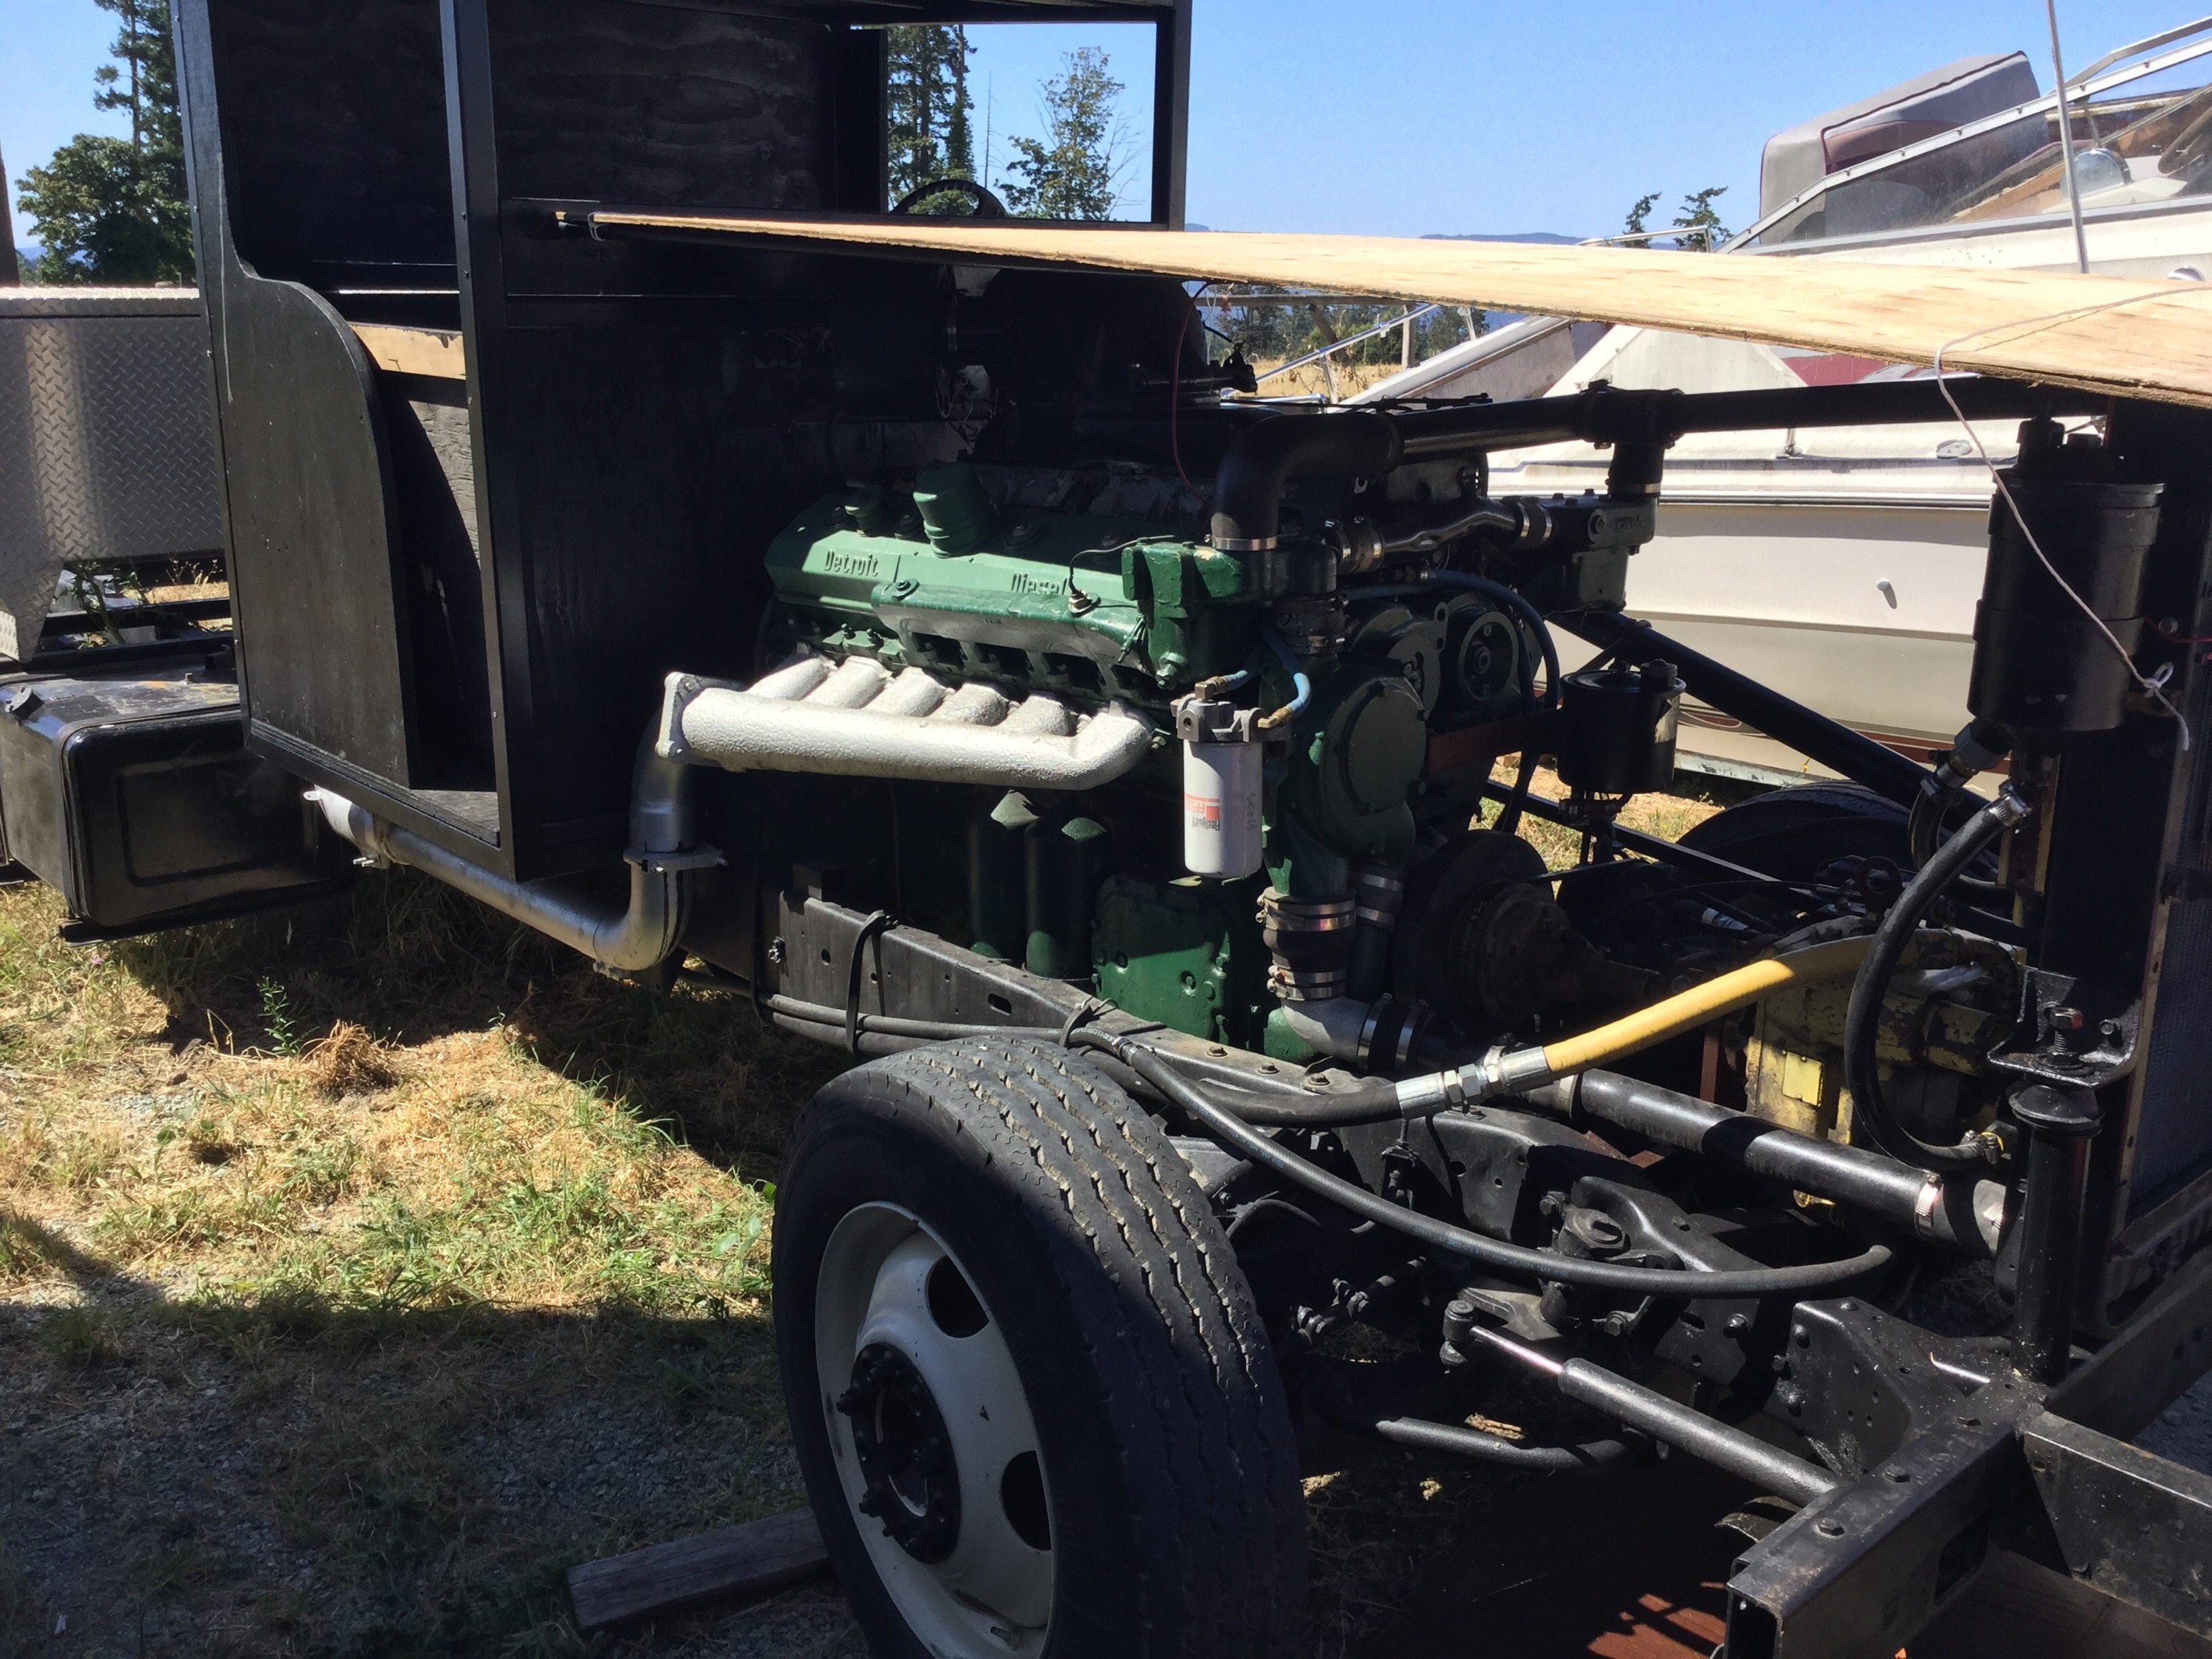
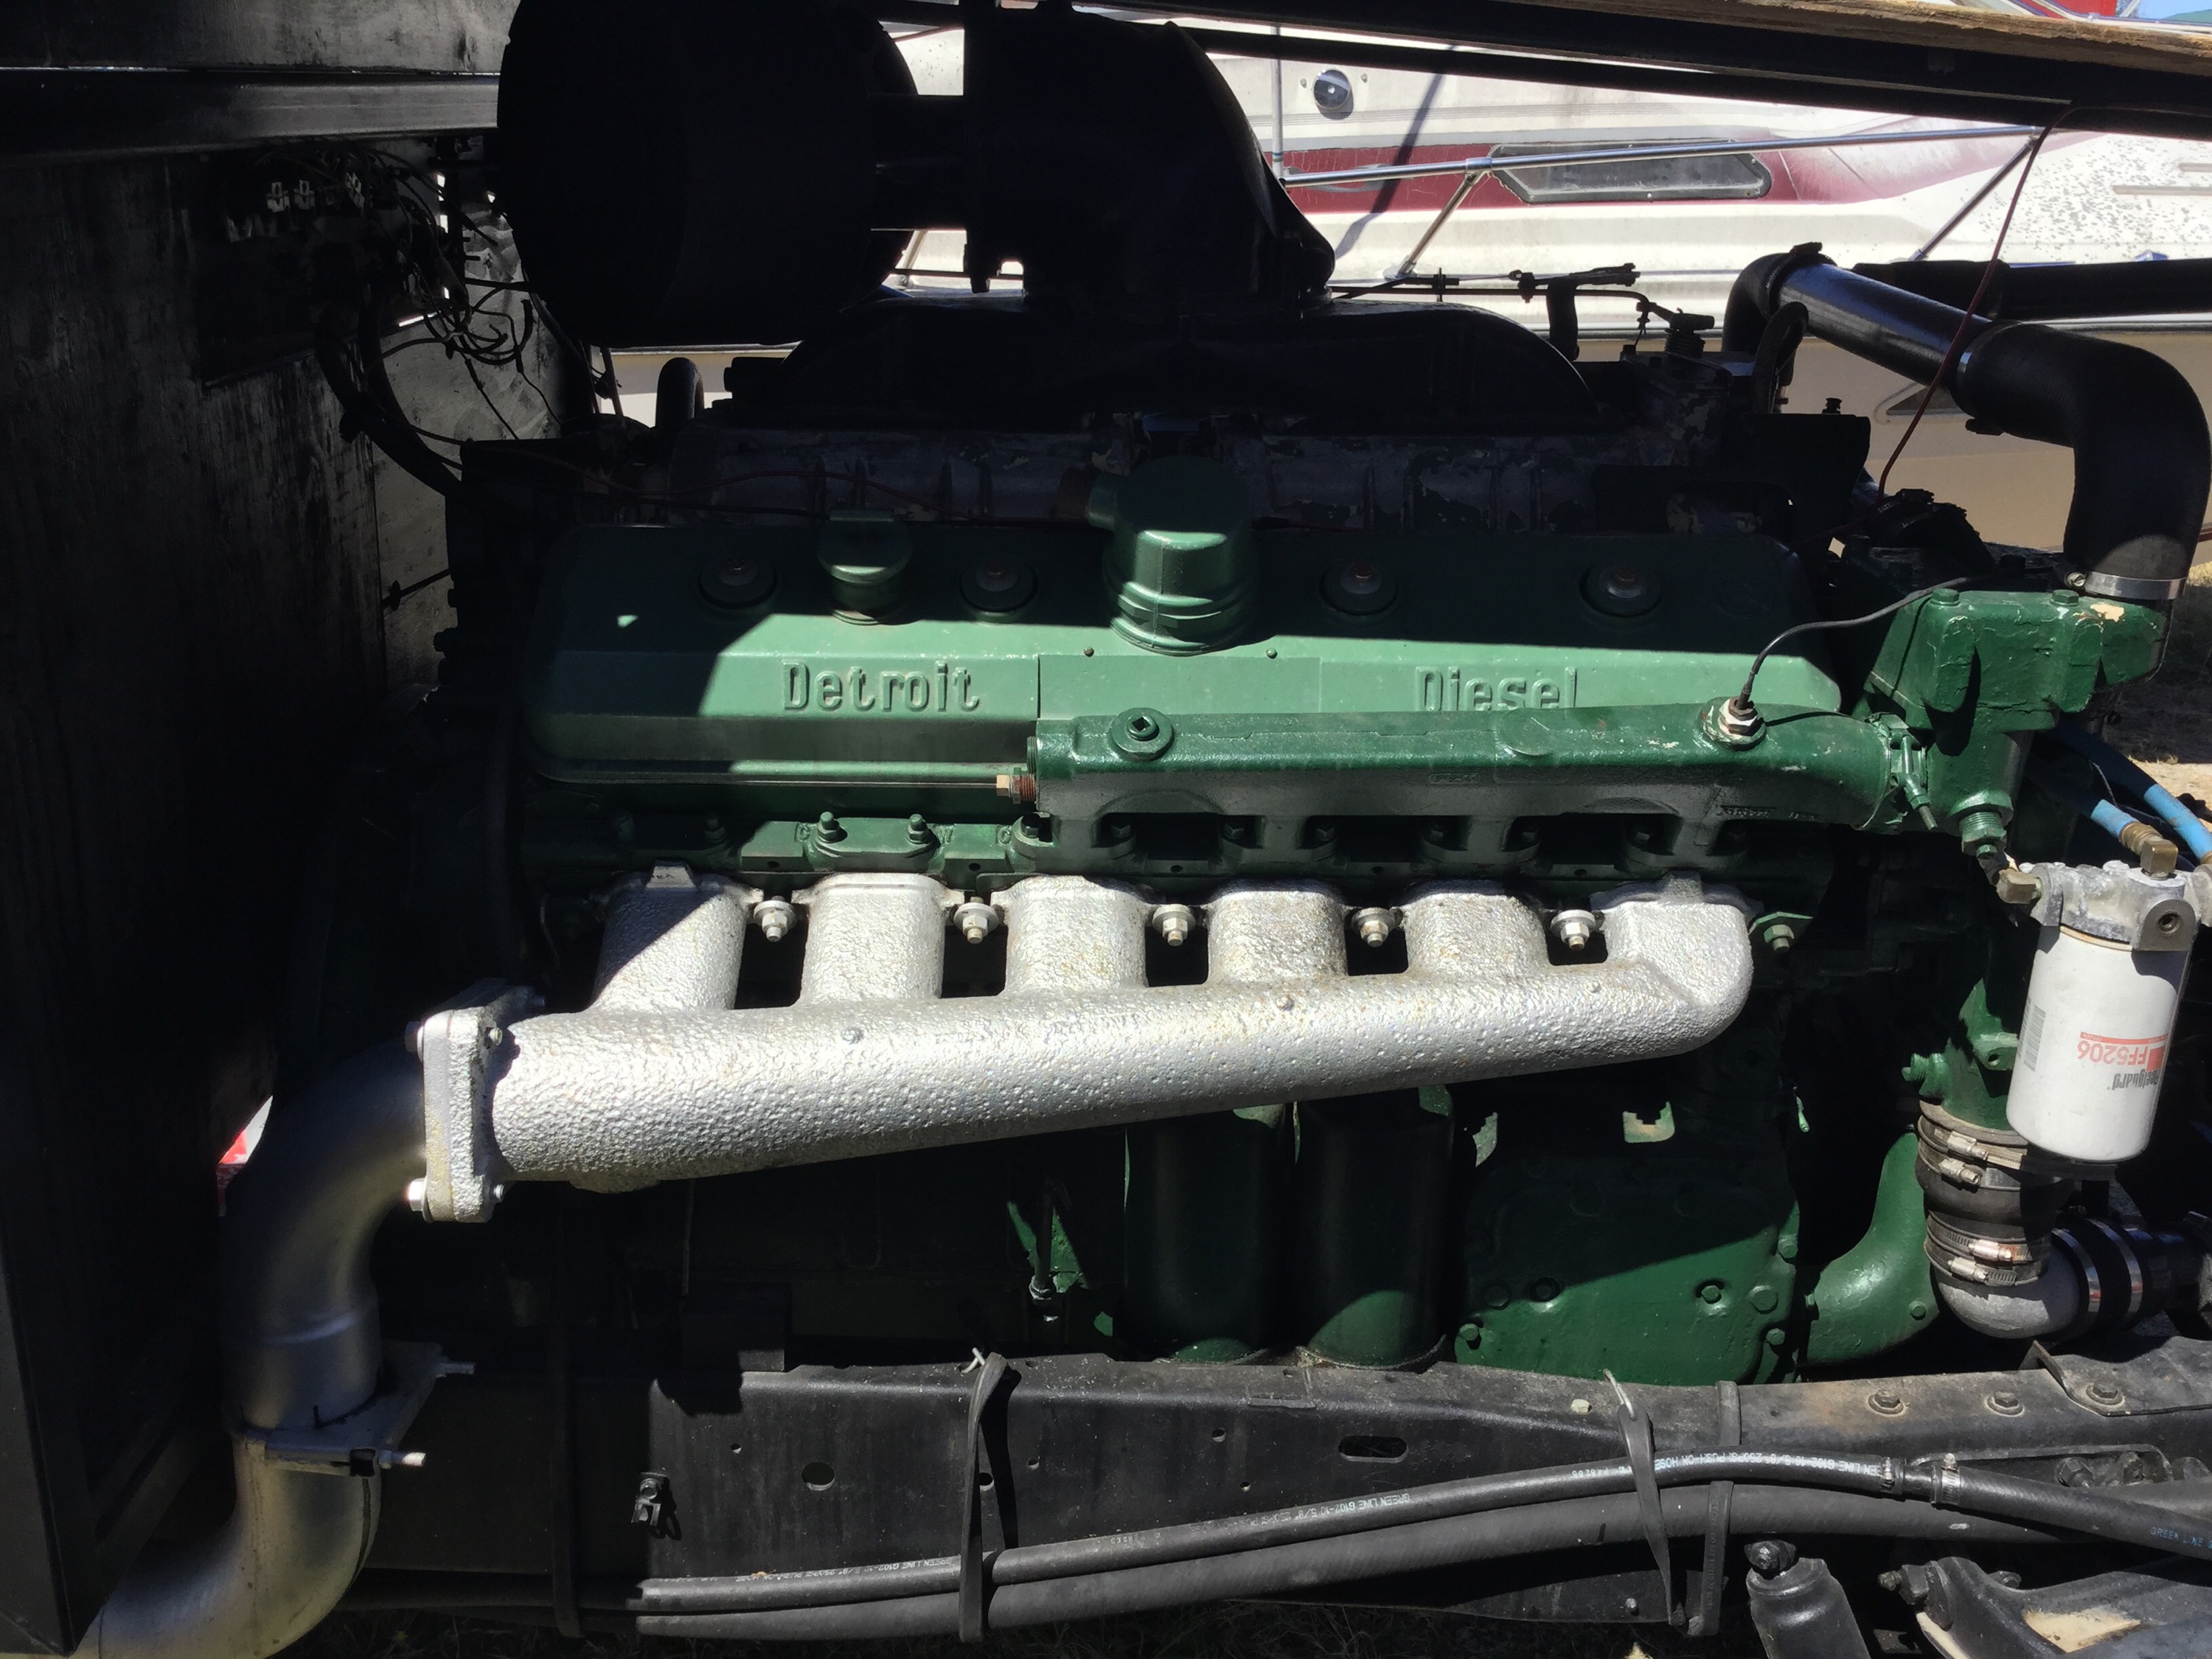
I have no idea either
Posted by albell in other cars on July 31, 2015
But, might be just a way to have a V12 two stroke diesel on a chassis.


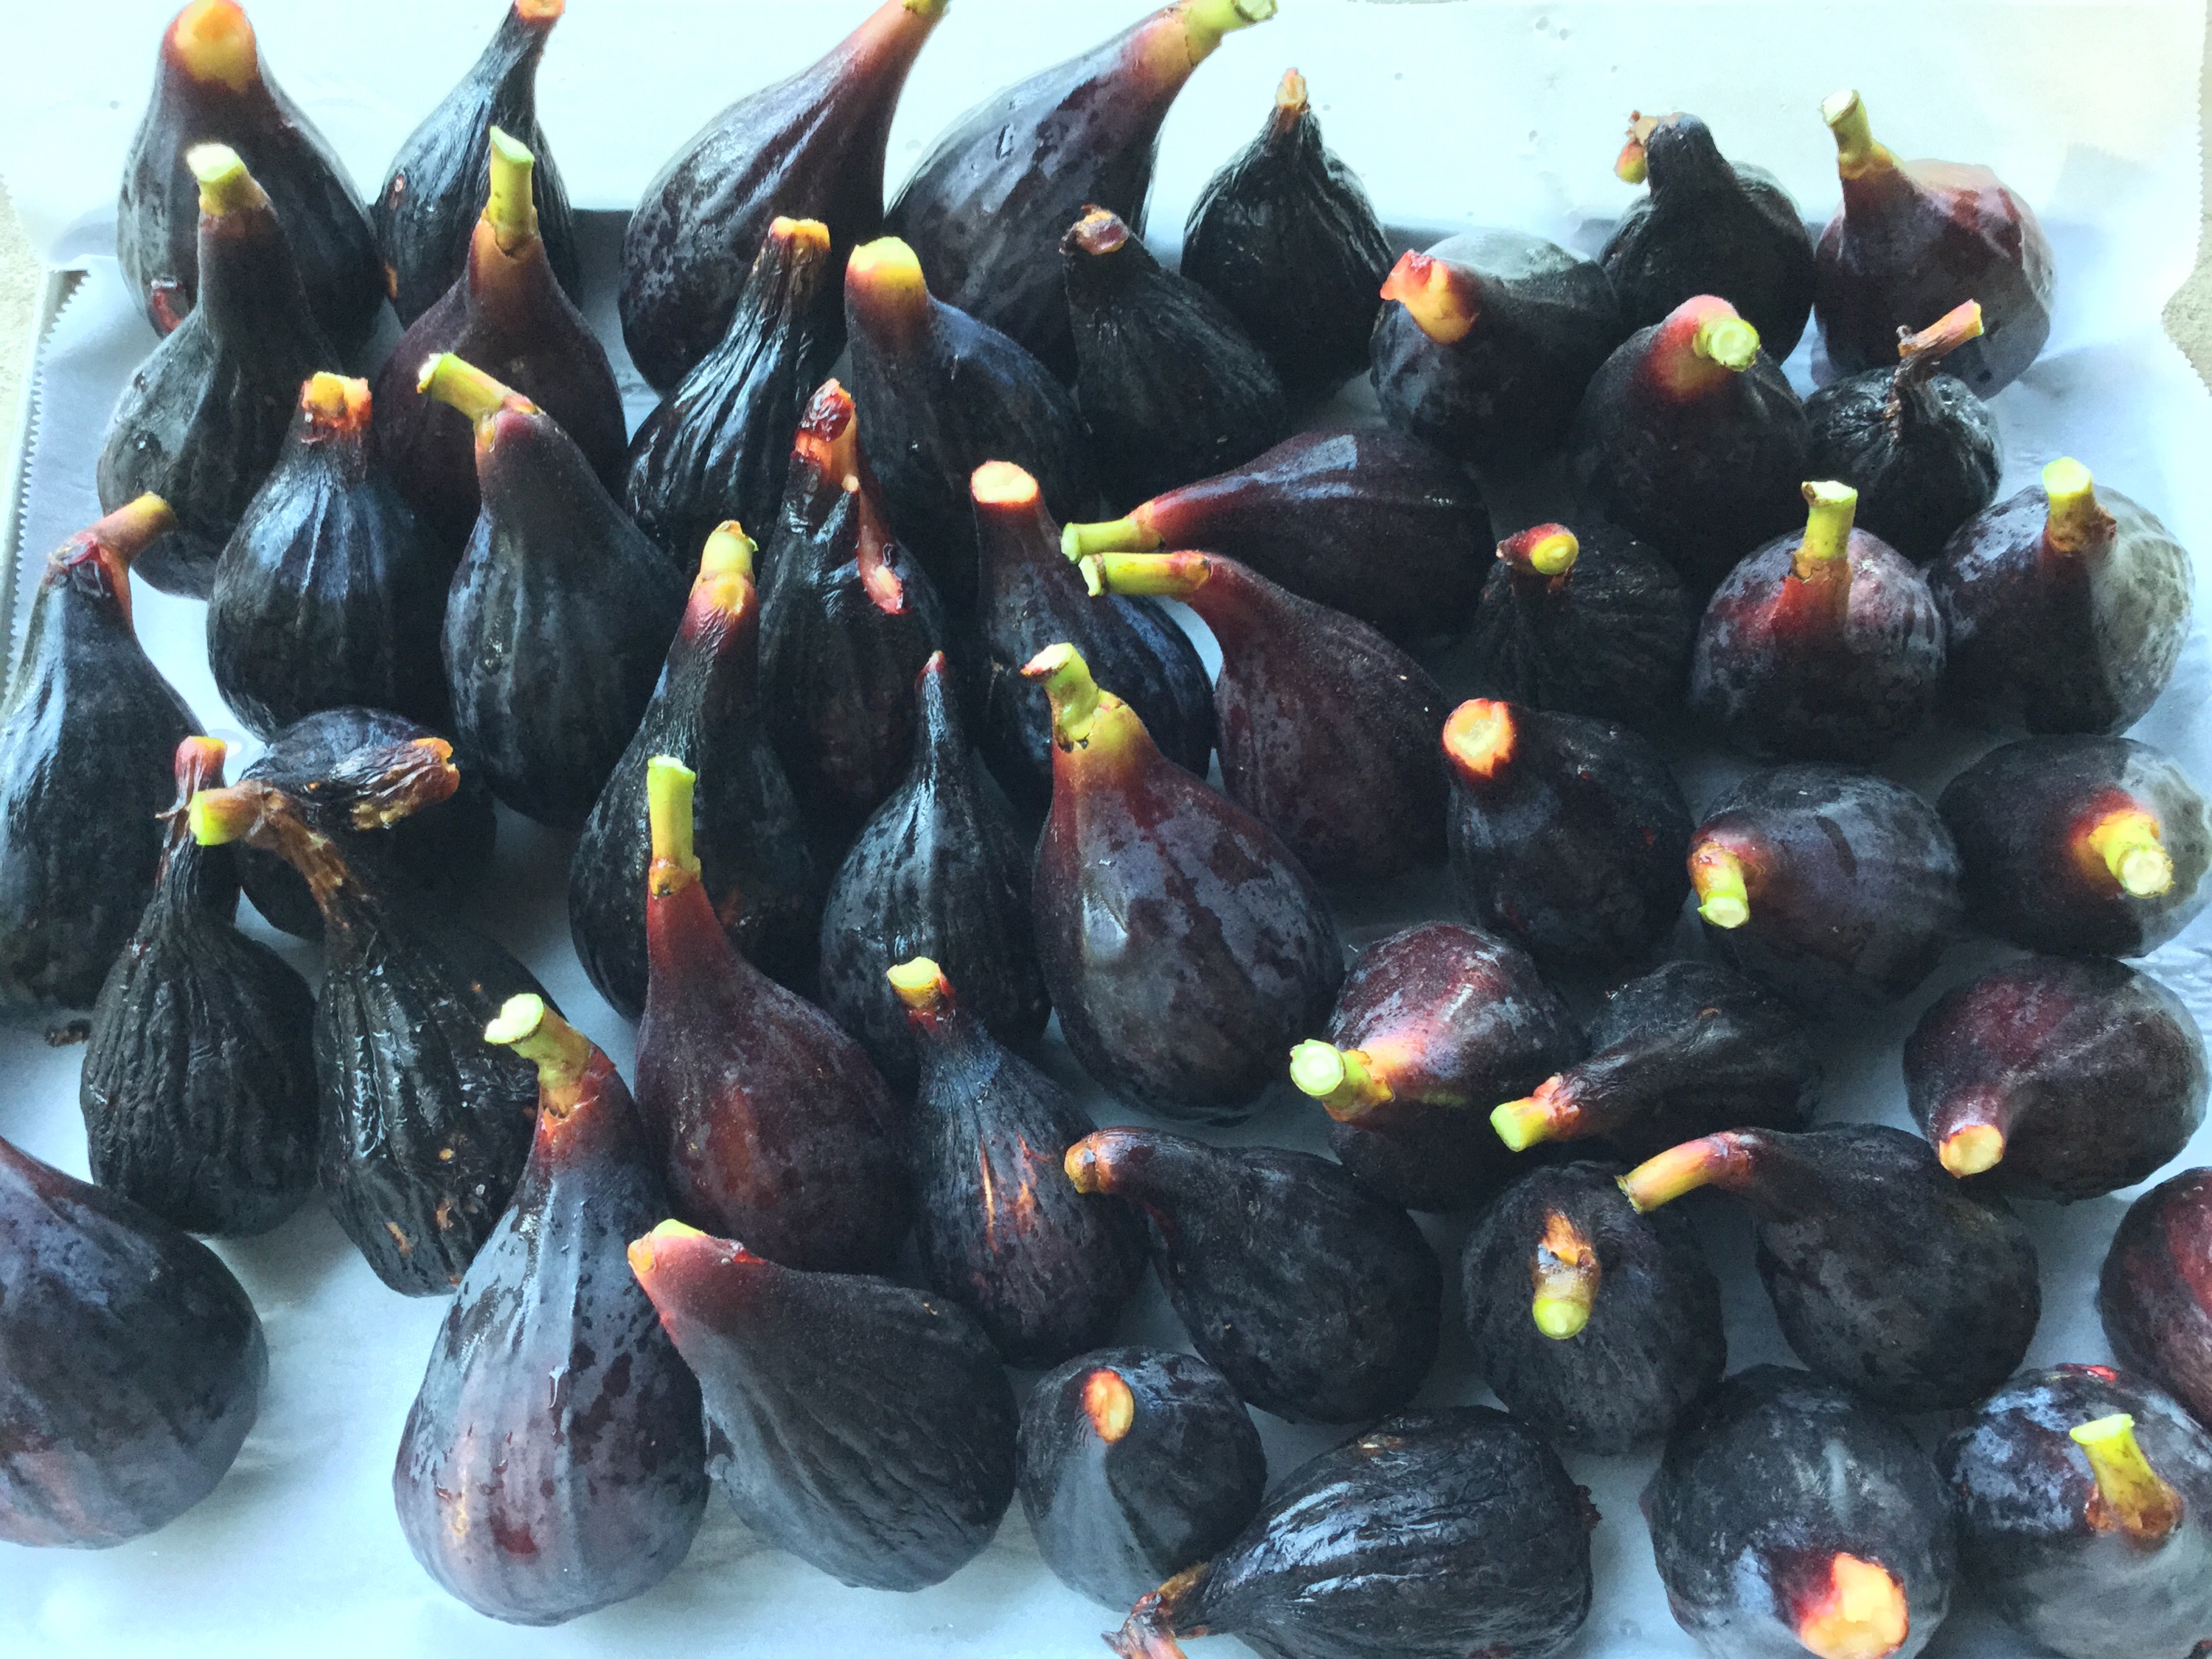
More figs
It’s a big tree now, but started as one shoot in a half wine barrel 22 years ago. Pumping them out every day now. Some to be frozen till we have time to make preserves. It tickles me to have a fig tree in the garden, it’s like we’re living somewhere exotic.
Vanagon – soft shackles on tow points?
Posted by albell in syncro, vanagon, vanagon mods on July 30, 2015
It might be a good idea, it might not. 1/4″ Spectra soft shackle to be used on the rear tow points of my bumper. On this example I have yet to trim the tails, I need to give the shackle a good pull first. one nice thing is that they pack into small spaces unlike a steel shackle. Note: 1/4″ Spectra has breaking strength of 6,000 lbs. tests have shown a soft shackle doesn’t decrease strength (infact, it can be 175% of single line strength). But, 5/16″ Spectra tests at 9,000 lbs, might be better to use 5/16″.
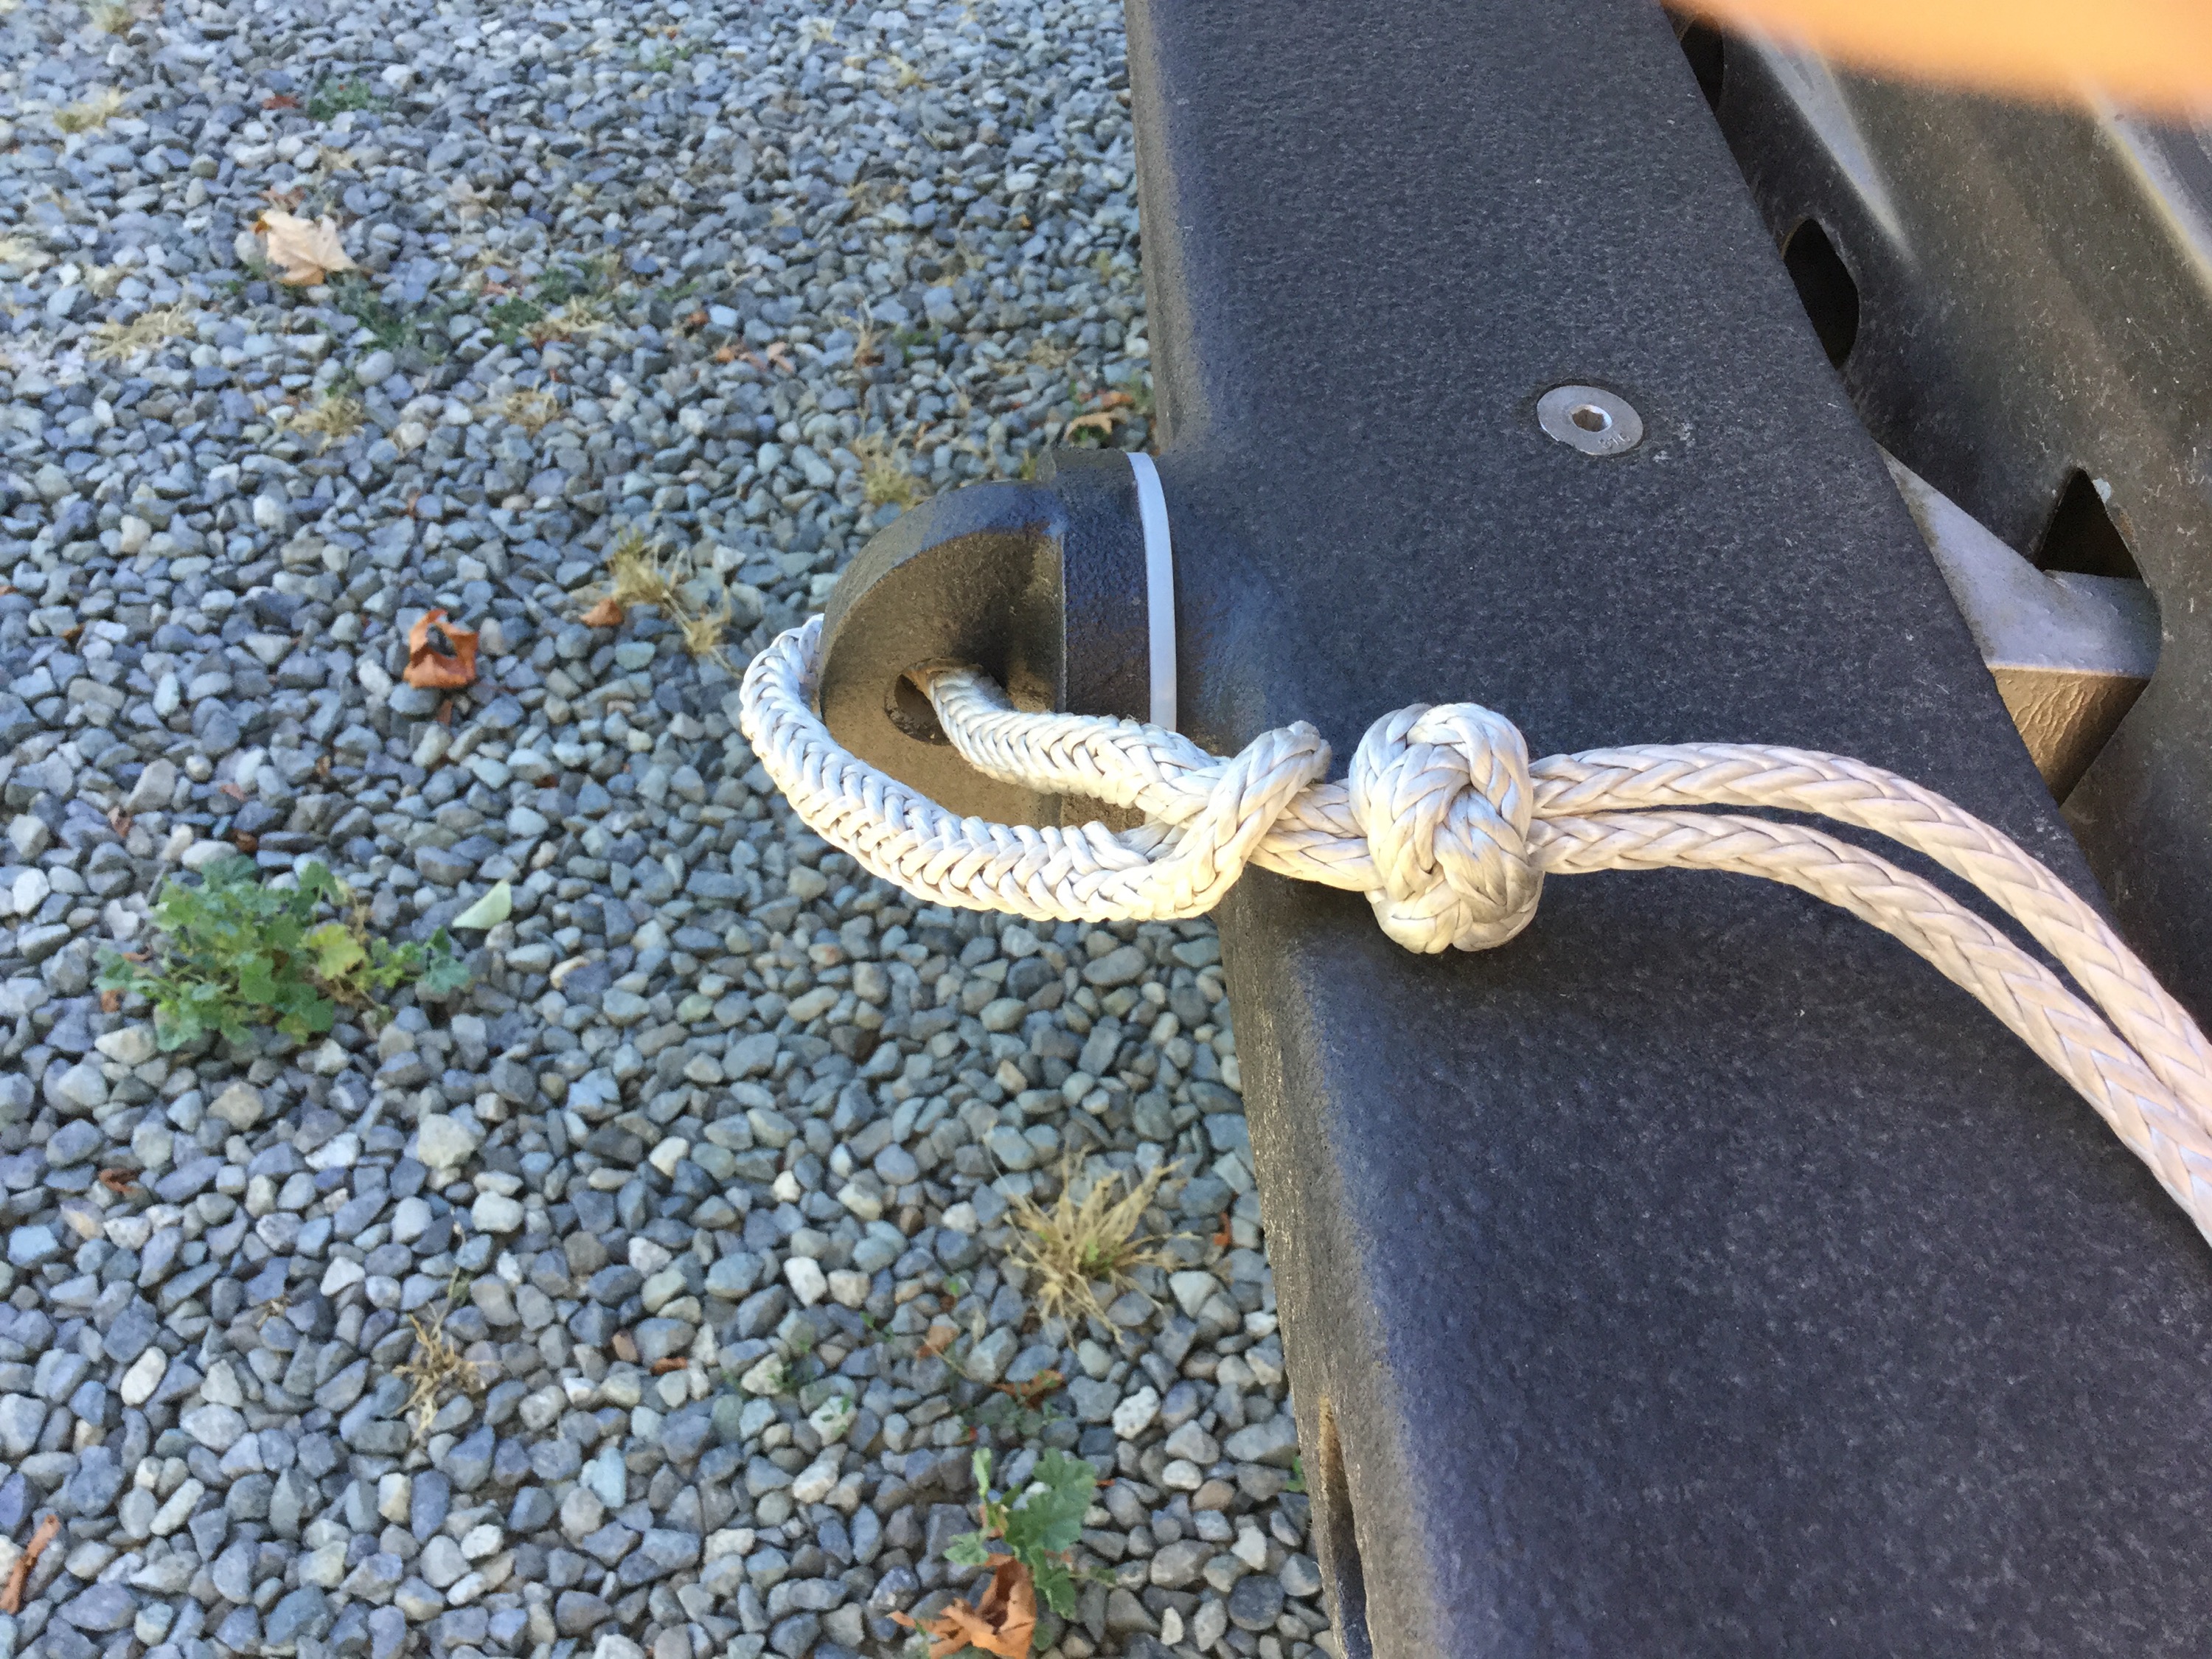
Here is link to instructions to tie this particular style.
How about a wedgie?
Posted by albell in other cars on July 30, 2015
i didn’t care for the TR7 when it first came out. I’m still not sold but this TR8 doesn’t look too bad. Well, apart from the rear bumper. But who am I to criticize bumper design?

Earlier than normal harvest
You probably know that it has been a hotter and drier summer this year in the Pacific Northwest. We harvested the first of our garlic over a month ago, the rest a couple weeks later. The plague of zucchini is upon us. And now the tomatoes, hot peppers, and figs are pumping fruit out.


Vanagon – one man’s spanner
I just received this message from another Vanagon blogger:
“How are you doing man. We’ve been blogging about the VW Vanagon for years. I have been inactive for a year and I really want to get back to doing what I love. Please post this indegogo campaign I have to help me restore the van: https://www.indiegogo.com/projects/restoring-an-icon–3#/story”
Have a look, worthy cause.
The kid knows what’s coming at that end. Shims, seal, end play…

Vanagon – aux battery, solar, and aux wiring diagram update
Posted by albell in vanagon, vanagon mods on July 28, 2015
Whoops! Uploaded the wrong diagram, hold on….fixed
I redrew my schematic to show changes made in the last year. I dropped the Doc Watson meter, added solar panel controller, and added large fuse at the big aux battery. And I added a 15A fuse on the small wire that runs from the ACR to neg return. It’s a safety in case of an internal fault in the ACR. Also, I corrected mistake in last diagram where the ACR was connected incorrectly to the aux fuse panel. Now you see it is fused at panel. I should make it clear that I do not have a power feed to the fridge cooling system. I may add that later, but I don’t miss it.

