Posts Tagged vanagon
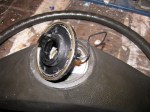
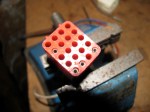
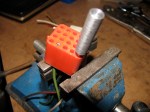
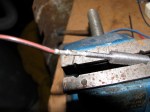
Dometic fridge flue assembly
Posted here just for vanagon list discussion…
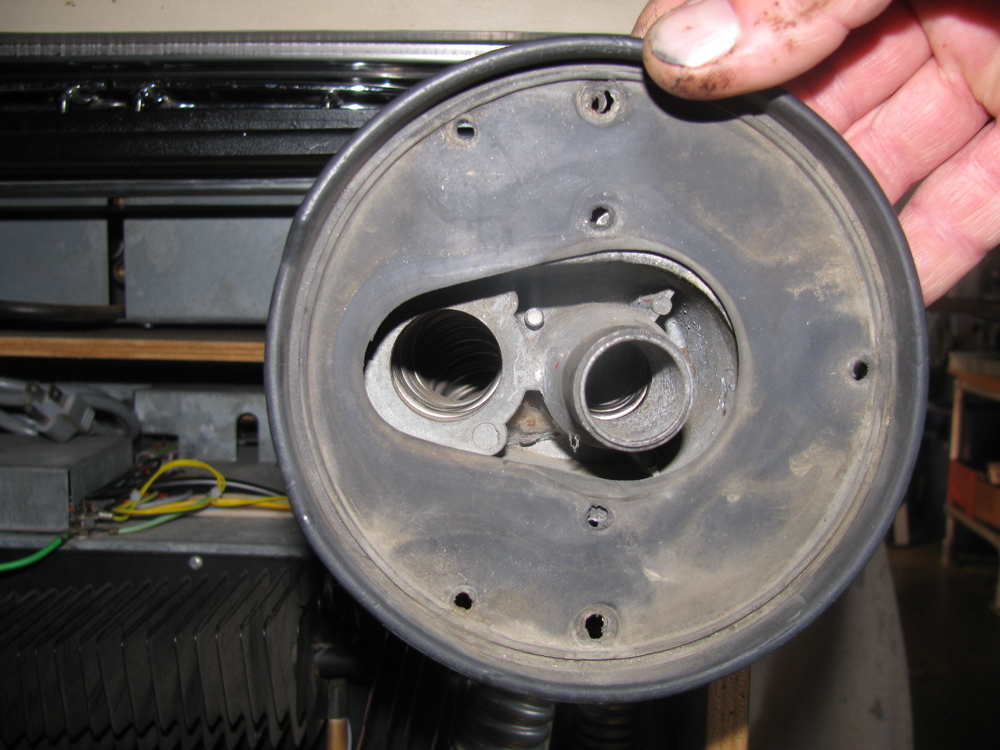
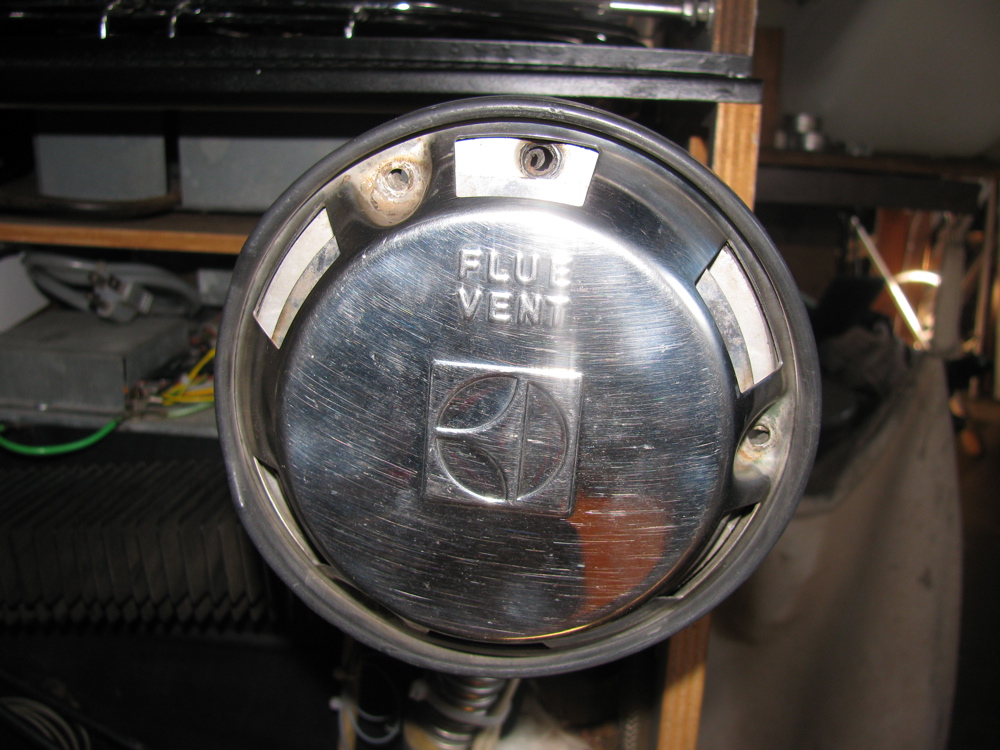
Assembly of flue, pics taken with fridge out of van. In van you would see fridge exhaust showing through hole in van wall. Try and arrange the exhaust to lie slightly inside wall, and exhaust and intake vents horizontal. The rubber gasket is placed on the van wall ( caulk backside of gasket with silicon or similar), then the next plate is offered up and the 2 machine screws inserted to pull the plate tight to the van wall. By the way, the threads in the holes in the exh/intake manifold are often pretty worn out. I found a 10-24 tap will cut new threads without drilling. You’ll need new screws of course, get stainless. You can see what I used in the pic. Then that plate is screwed to van wall by 2 sheet metal screws (the holes in van wall may be oversized, need to get bigger screws, and get stainless. Same thing with the 3 final screws). Next comes the plate with the offset hole. It only goes on one way and has to sit in the ridge on end of exh. tube. I find it easiest to put this plate on at same time as vent cover, holding the two in place with fingertips through vent holes. When assembled correctly, that trapped plate is held in place when the vent cover is screwed into van wall.


Westy sink/stove top rattles
Posted by albell in vanagon, vanagon mods on August 11, 2010
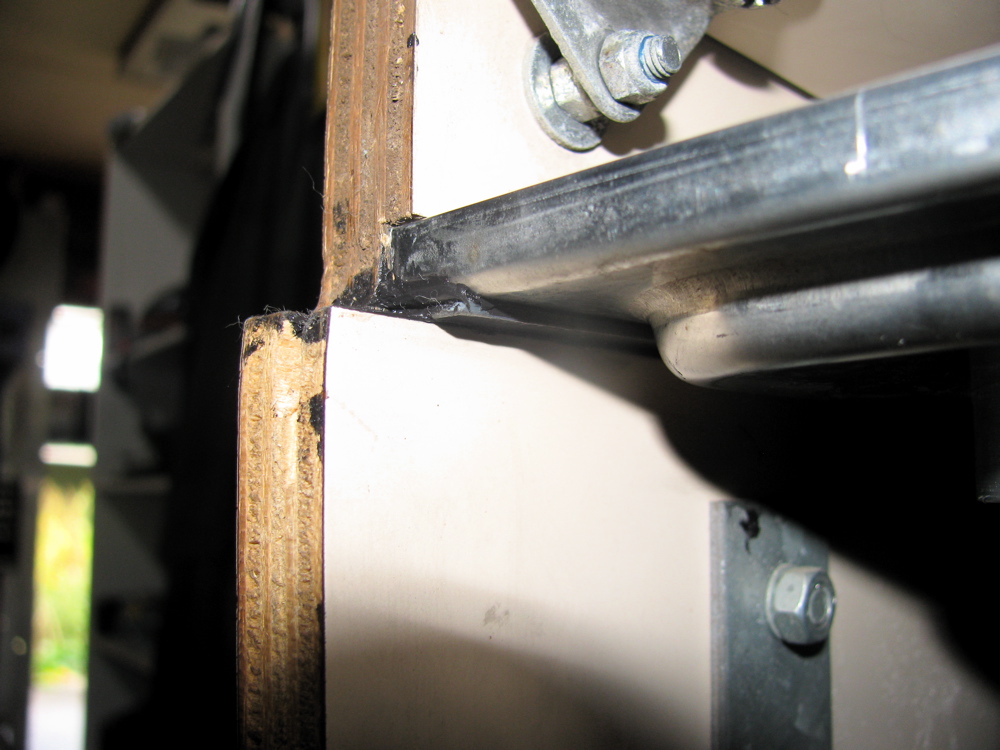
Every Westy owner knows that the stove top rattles when you’re driving on bumpy roads. The rattling can be reduced by:
– making sure latch on top adjusted properly
– installing new rubber/foam bumpers under lid front edge
– laying a tea towel or sponge on stove grate before closing top
– making sure that drain tray in held firmly by bullet catches in lid (not applicable to Canadian market versions)
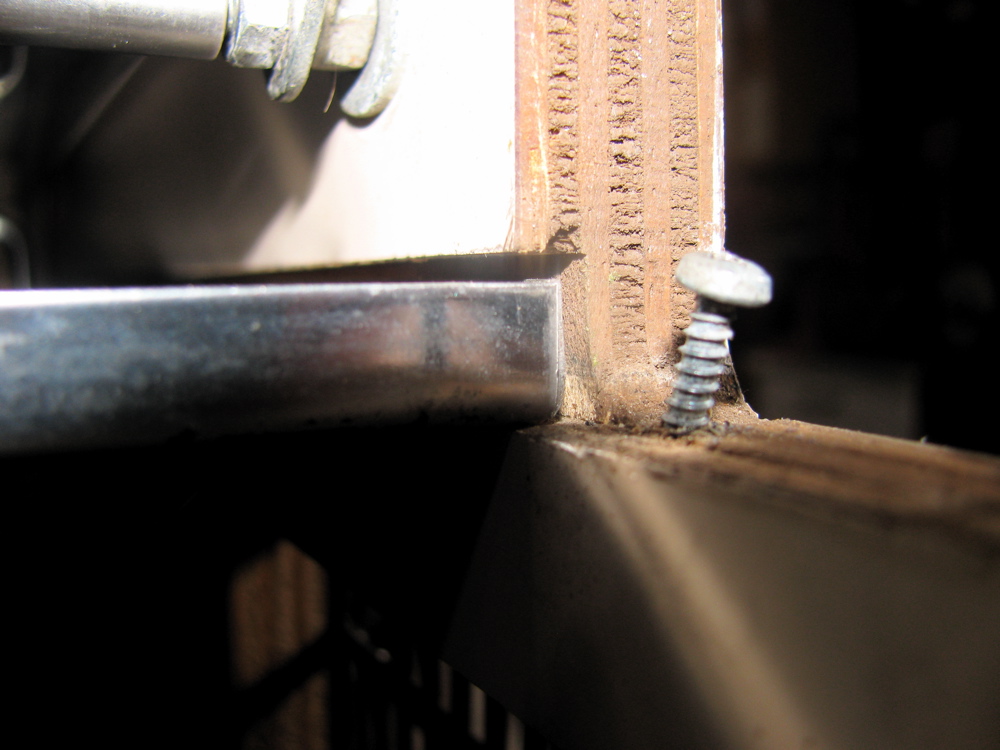
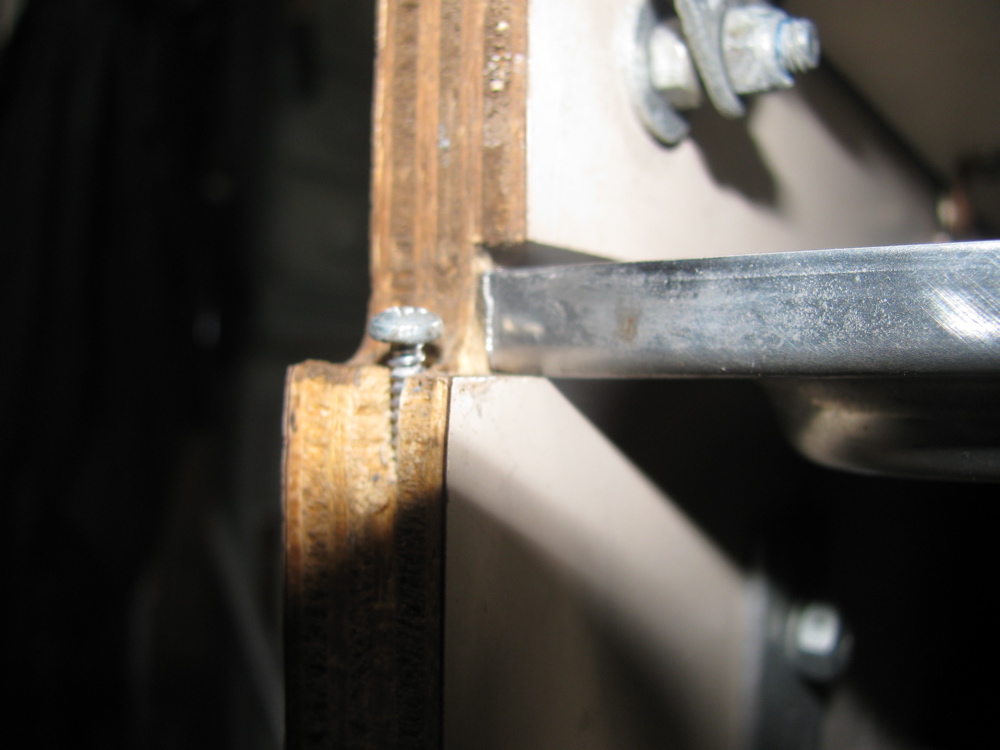
The rattling comes mostly, I think, from the stove grill and drain tray. But looking at the kitchen unit on the bench, I could see that the groove that the stove top sits in the cabinet is wide enough to allow the rear of the stove top to move up and down a couple of millimeters or so. The front fo the stove top is held firmly by the metal front panel (or should be if all the screws are in place tight), but the rear is only held by one screw to the back grill that runs the full length of kitchen unit. I tightened up the fit of the stove top in the groove with some thin plastic shims, silicon caulked in place. Pics show left and right sides, the gaps and the fix. The rear grill was removed.

Westy Dometic fridge performance
Posted by albell in vanagon, vanagon mods on August 11, 2010
A few years ago I recorded the temperatures inside and outside the fridge just to see how well it works. Data shown below. Unfortunately I did not record what I meant by “back fan on”. Was it the fan on the cooling fins on back of fridge? I think so. But was it cycling and what was the cycle period? It might have been the fan I added to the external water supply port on van, but I doubt it. Nothing worse than half assed experiments eh?
Oh, almost forgot to add, this is with fridge on propane power.

Westy kitchen unit clean up
Posted by albell in vanagon, vanagon mods on August 8, 2010
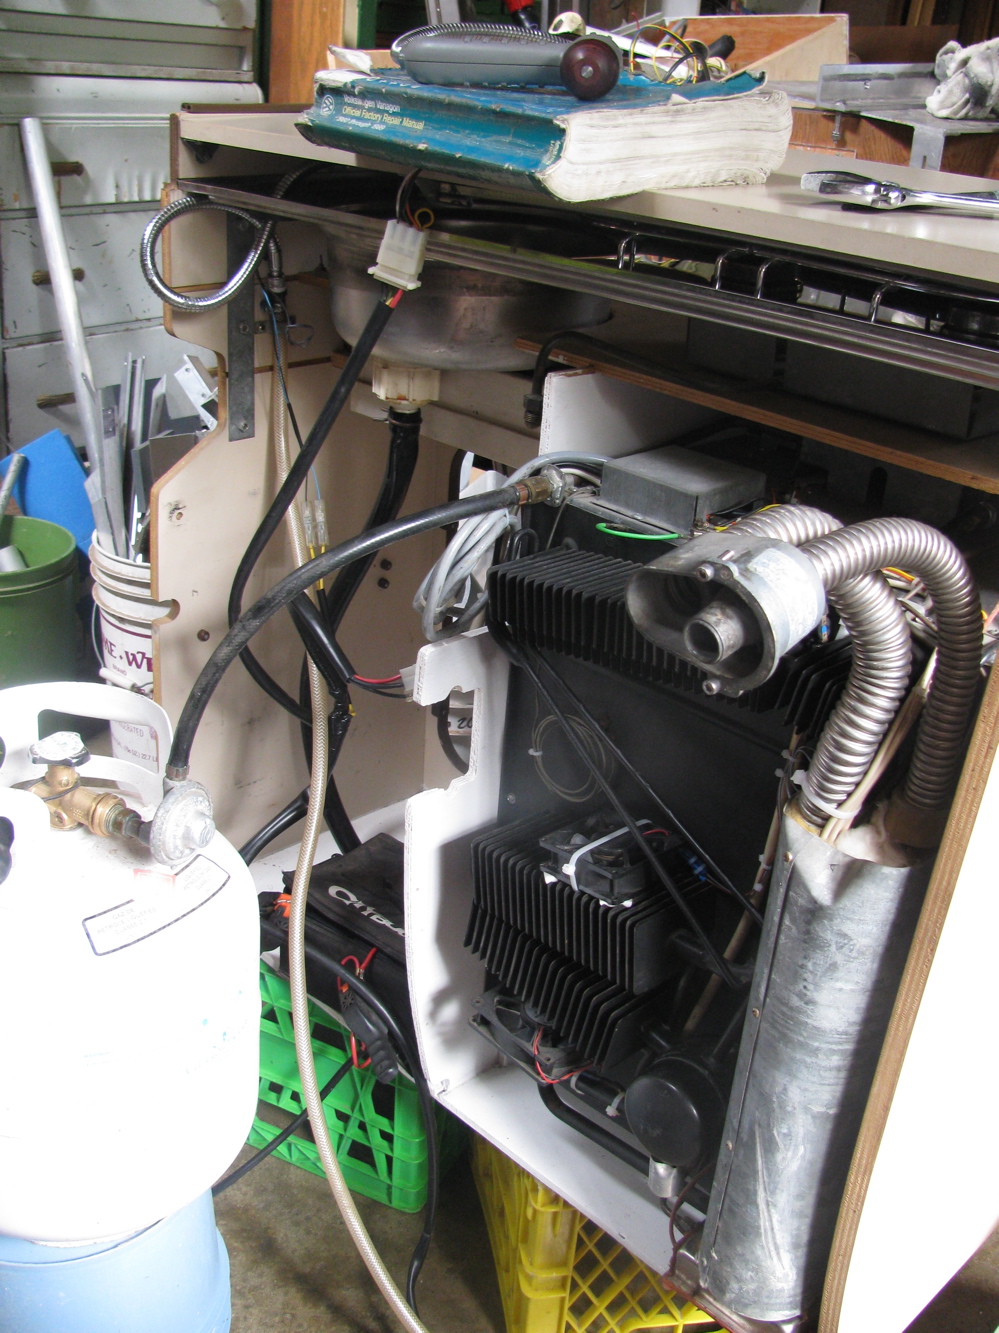
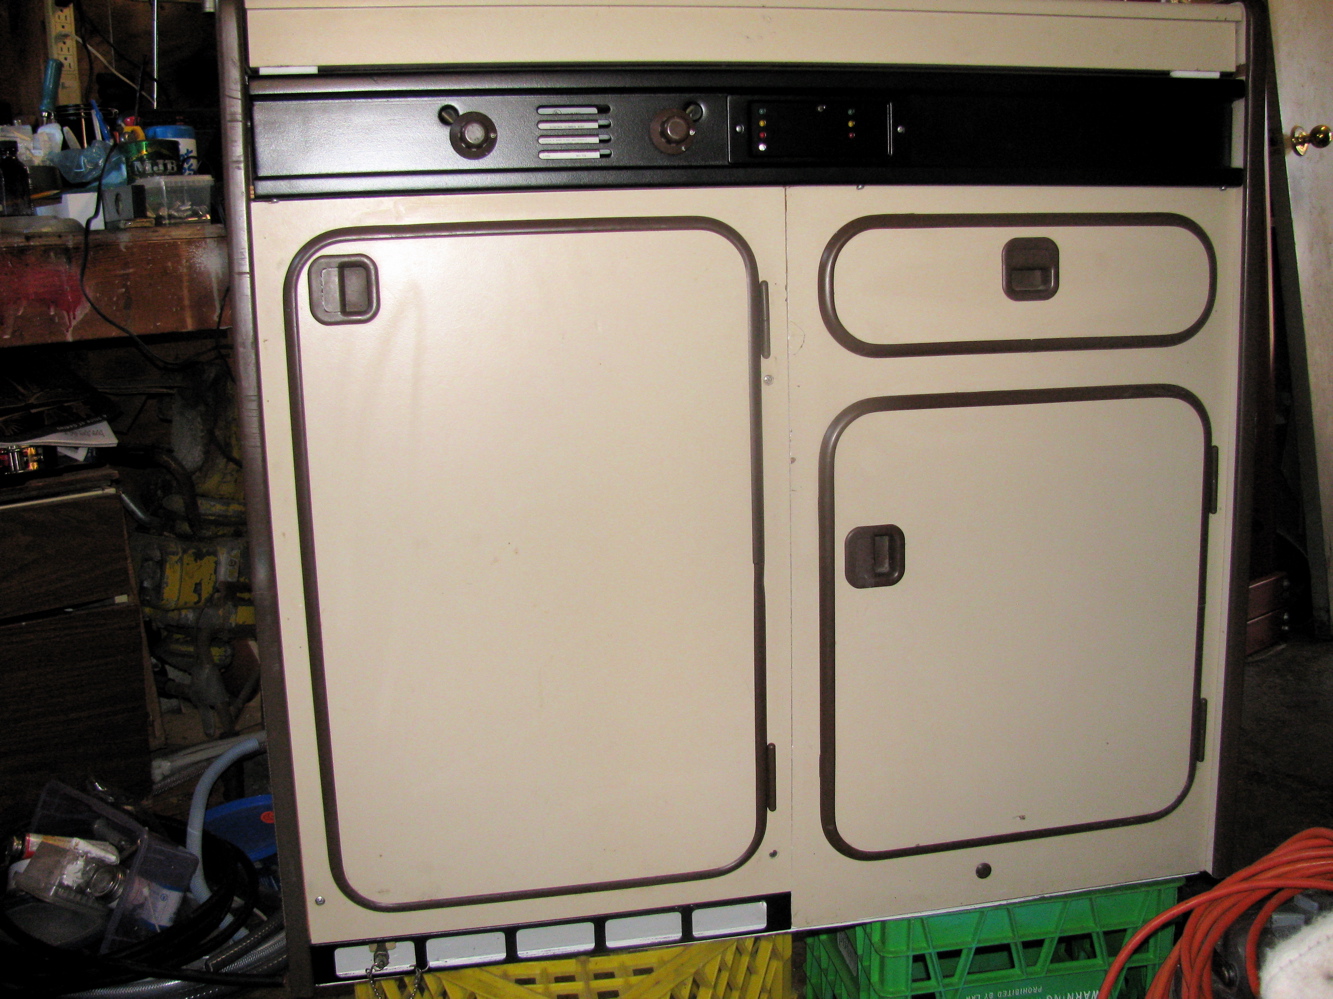
Spent some time cleaning up the fridge, sink, and cabinet. I added another muffin fan to fridge cooling coils. I’ve had a muffin fan installed for a few years since the original fan crapped out. These muffin fans do not move as much air as the original, but they were free, and as an experiment I decided to add another in parallel. It is cable tied to the second row of cooling fins, with some foam to isolate noise. I am sure the foam will degrade pretty quickly, but we’ll see before that if 2 fans arranged thus is better than one.
Over the years, I’ve done a fair bit of dicking around trying to get more air over the coils of the old fridge, and now I am back to pretty well stock. Best modification I ever did was to use the westy external mains water connection port as a vent. I took out the plumbing and put in a small fan. This really did get the hot air out from back of the fridge. But I don’t plan on cutting a hole in the syncro to do this mod when I install the cabinets though.
Other notes, water line to faucet fixed down to cabinet, and I never did find a good colour match for the brown on the metal bits… exasperated, I sprayed with satin black wheel paint. If I ever find a good brown paint match I’ll re-spray. The black looks a bit funny.
One pic shows propane tank and reg. connected to fridge, and small battery pack powering the electrical system. The fridge lit up easily and started to cool down nicely. Its amazing for such an old unit (1982) which has had a pretty well used life (you can tell by the tatty state of the cabinets) that it still works as well as it does.


Rear seat/bed bracket attachment
Posted by albell in syncro, vanagon, vanagon mods on August 3, 2010
I mentioned before that just drilling a hole through the sheet metal of the rear deck to attach the rear seat/bed brackets is not good enough to get a firm connection. The screws used are self tapping screws which sort of implies, I think, that the factory did not weld on nuts on the underside of the sheet metal. Looking closely into the holes in my ’82 Westy the metal appears thicker than in the same place on my ’86 syncro. Here is view from inside of van of one of the brackets in place (in place but askew).

So I set about making some little backing plates to give the screws more thread to love. I used 3/16″ thick stainless bar to make to little plates, 3/4″ wide, 1″ long and a hole in each tapped for 6 X 1.00 mm thread. My plan was to use some Sikaflex to glue the plates to the underside of the deck so that the would stay in place when I screwed the the brackets down. Here is exciting picture of one of the “plates”.

And here is one of the little chaps stuck up in the passenger side rear wheel well where the right hand bracket screw comes through – boy am I slow, it just occurred to me now to check the same place in the Westy to see if there is any similar thing going on. Edit: I just looked at the passenger side rear wheel well on my ’82 Westy where the bracket screw comes through, and lo and behold, looks like a nut is there, surrounded by goop. I assume same thing done for other bracket. So I am not completely mad thinking my little plates will work.
My plate:

Westfalia’s version:

On the driver’s side, the screw comes through above and behind the gas tank of the Syncro.

And here is the plate in place, all smeared with Sikaflex.

I’ll let the Sikaflex cure overnight and then I will remove the screws and I hope the plates will stay in place.
Start of the camperization
Posted by albell in syncro specific repairs, vanagon, vanagon mods on August 2, 2010
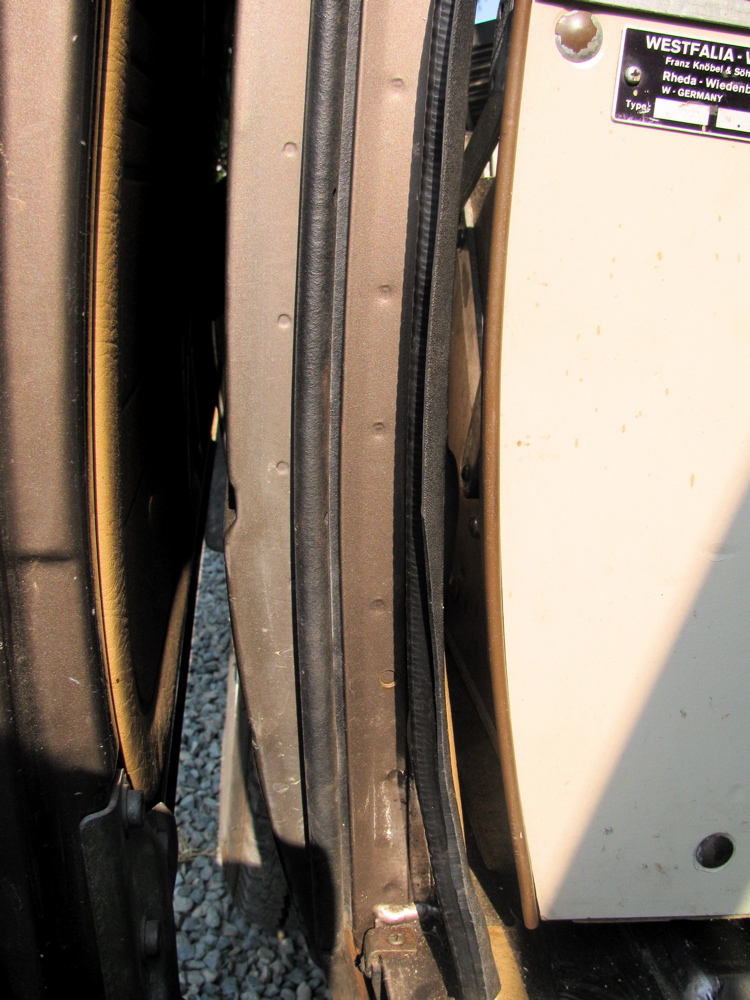
Finally… getting round to putting the innards of my ’82 Westy into my ’86 Syncro. Cleaning out the Syncro, the rear seats removed (boy they are heavy) and having a gander at just how much work it will be to put in the Westy stuff…
A few notes:
-the Syncro’s ECU looks like it was installed yesterday
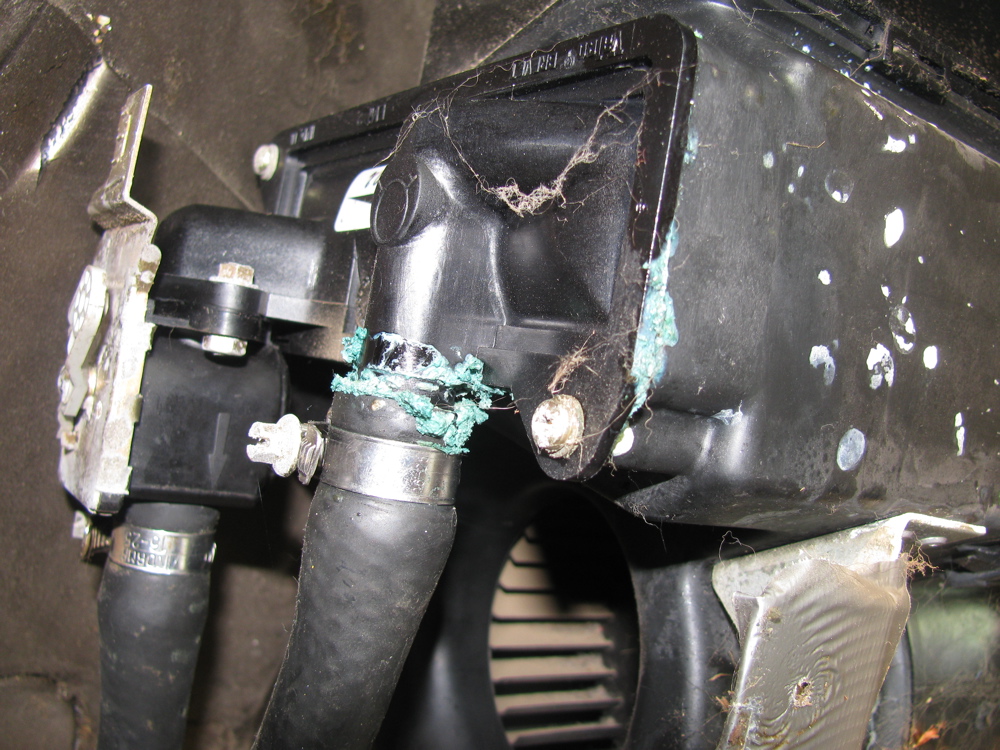
– the rear heater had a bit of dried up coolant at one of the hose connections. I pulled the core just in case it was leaking too. The core had a date stamp of “00” so I am assuming it was replaced 10 years ago. Closer examination showed that the core was sound, but I swapped in a fresh one – an Iltis front heater core, same part number as Vanagon rear heater core – that I got at a govt. auction. The “old” core has a better construction method, the end cap opposite the valve covers return tubes, where as the “new” core I put in has the end cap being part of the return path… so if that end cap fails we get leakage.
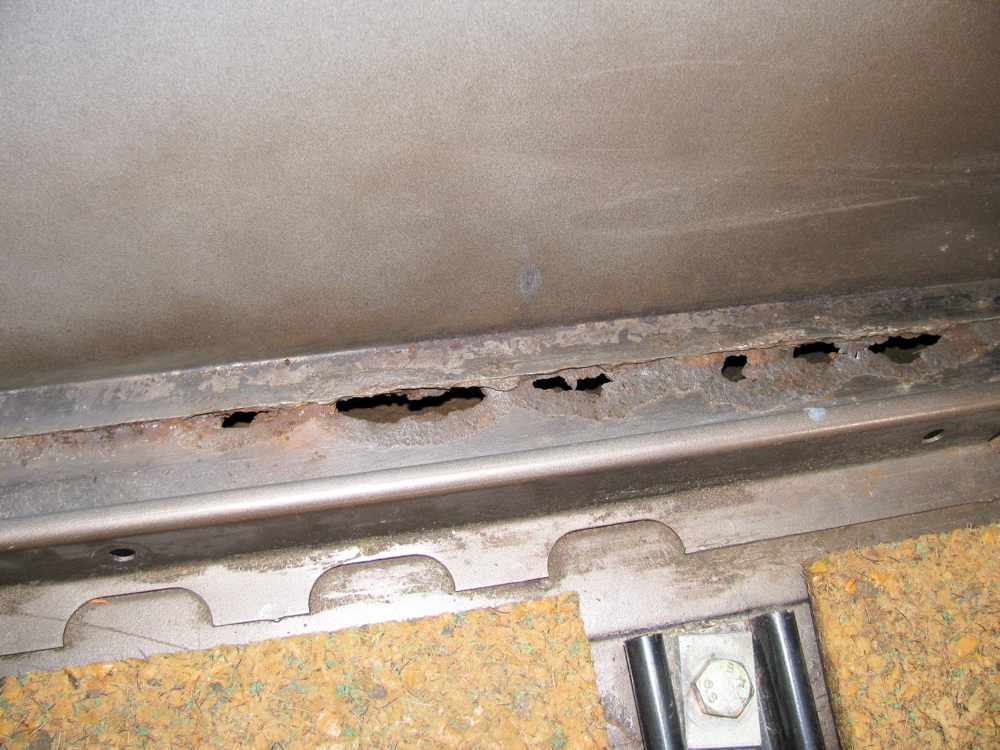
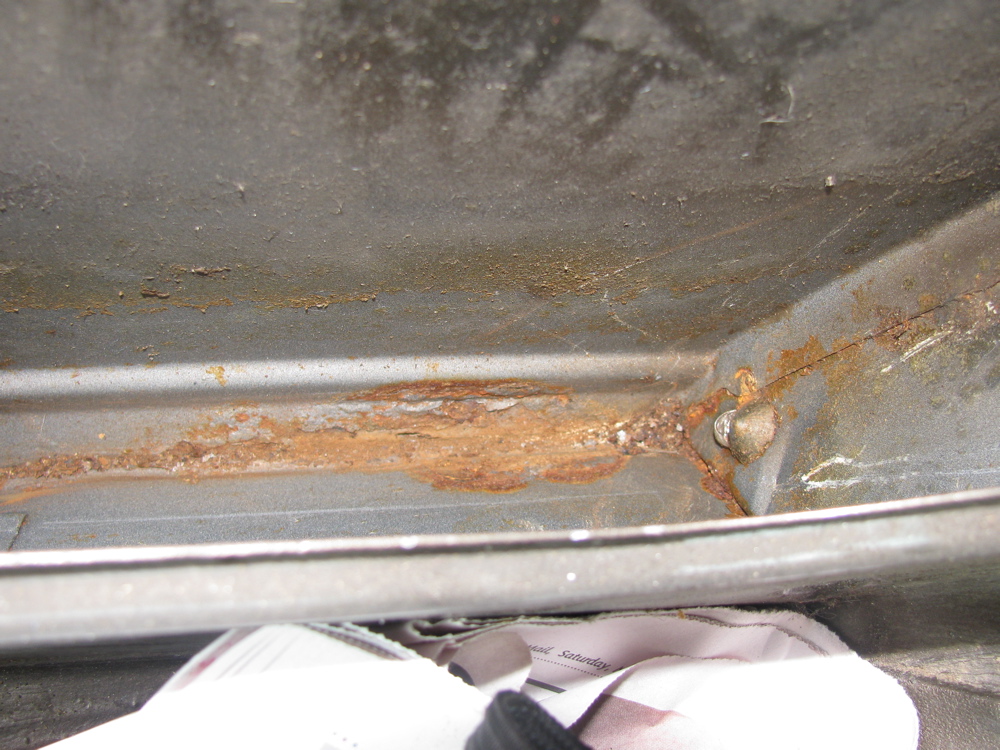
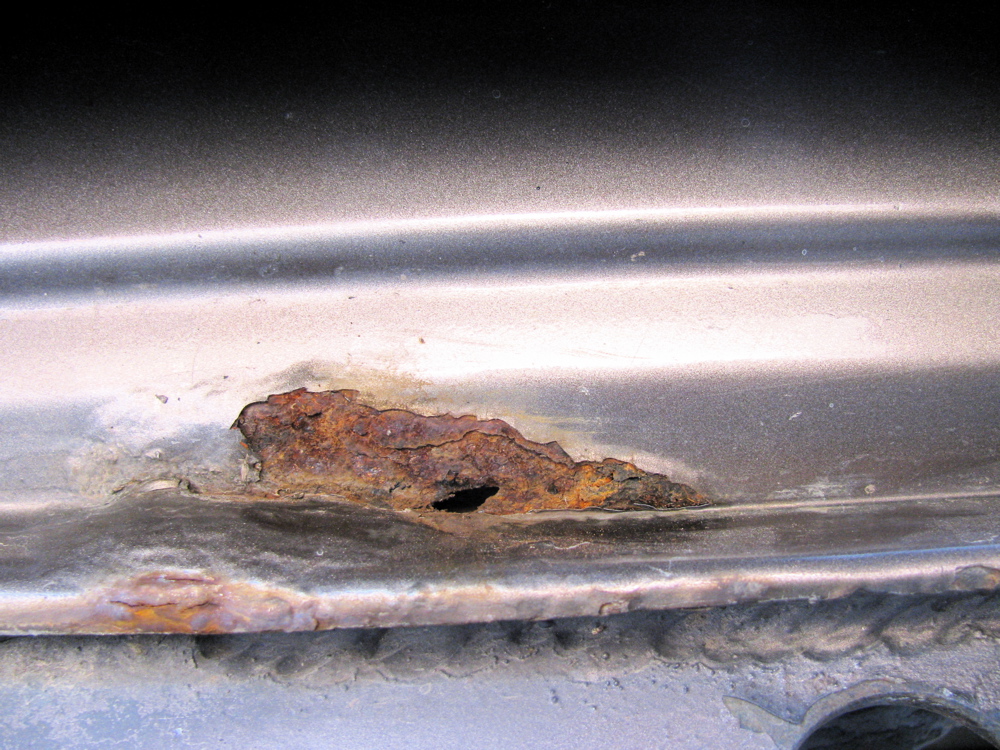
– leaking rear window washer reservoir had caused rust severe rust… Was like that when I got the van. To be precise, it was the pump that was leaking, I spent 5 minutes mucking around trying to seal the bugger, but hen found out they are pretty cheap and available.
– rust on drivers side inner lower seam worse than I thought. Again, I know, I know.
– the rear bench sits in ok, and I measured the holes in the Westy were the hinge brackets attach to the rear deck and drilled in the Syncro deck (after cutting out a bit of the asphalt based sound deadening stuff). I tapped for a 6 X 1.0 mm thread (not much threading meat available on the deck, there must have been a backing plate on the Westy, I’ll see about doing same on syncro) and I screwed down the brackets. Well, it turns out that now the bench sits away from the pass. side wall more than it should. I remeasured the holes and found that on the old Westy the hole is 5 mm further inboard than on the Syncro. Funny eh? Both sets of holes are centred in the “same valley” . Something must have changed over the years. I have noticed that some Westys have a trim plate on the side of the bench, this might have been Westfalia’s answer to some body change VW made. I have one of those trim plates, I may use it.
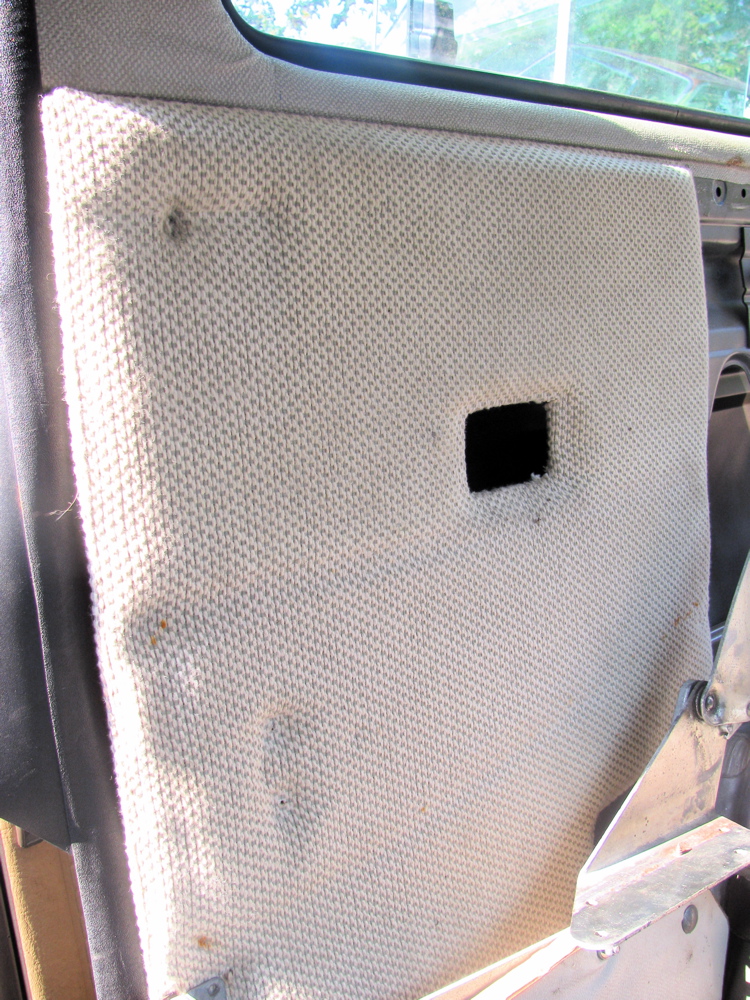
-I tried the wardrobe fitment, and it looks like it will fit with no modification, even though I don’t have the Westy modified ceiling. The headliner might need cutting though.
-I tried a panel from Westy… I recovered most of the interior panels on my old Westy about 10 years ago, its held up well and I may re-use them.
Many other little details to iron out, but nothing difficult


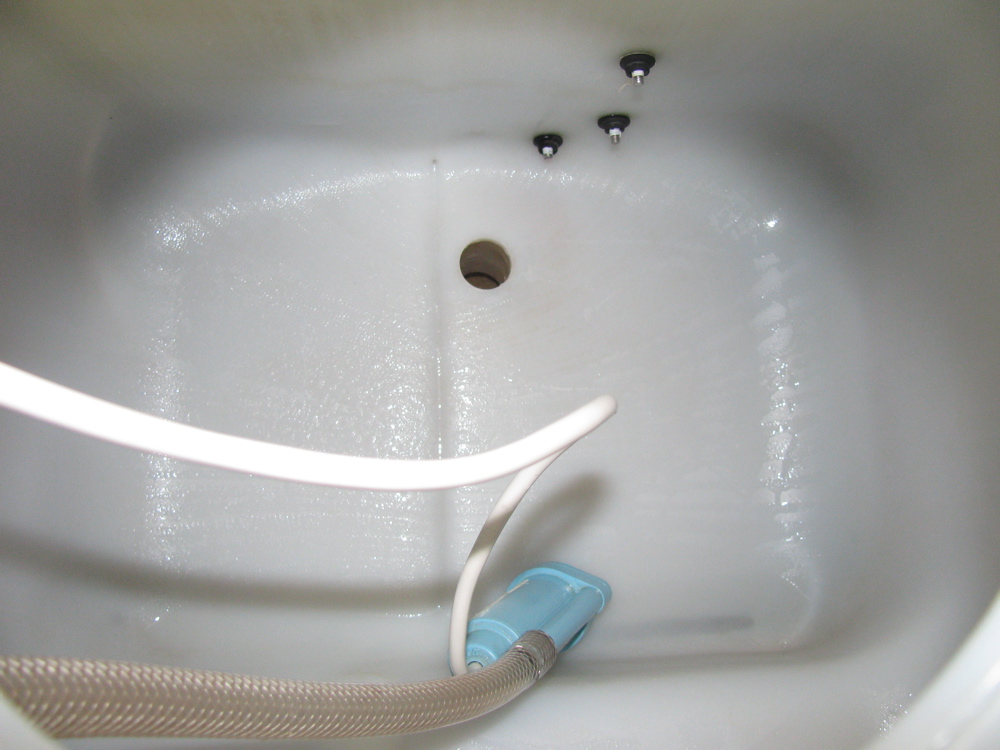
Westy water tank cleaning
Again, with all the Westy stuff out of the van and scattered around the place, I can do things easier… like really cleaning out the water tank. Over the years I have used chlorine bleach and more recently sodium percarbonate ( much nicer) at least onec a year to keep the tank reasonable “sweet”. But with the tank out, I could see grunge in the bottom grooves formed during casting of the tank. It looked like hard water deposits, so out with the heavy guns, HCl. Not too much mind you, mixed with water, but I can’t give the molarity of resulting solution. It did take care of the deposits and cleaned up the level indicator electrodes. You don’t want to be scrubbing a plastic tank like this with abrasive cleansers, that scratches the plastic and give dirt etc more places to cling on to.

Westy table mod
Posted by albell in vanagon, vanagon mods on August 2, 2010
I have all of the Westy interior out of my ’82 Vanagon now, and I am going over the parts in preparation of installing them into my ’86 Syncro. Some of the cabinetry was damaged in the accident I had with the Westy that took it out of commission. I was hit by the front end loader on the driver’s side, just in front of the rear wheel, so the Westy “wardrobe” and the low cabinets just forward of the wardrobe got a bit banged up. I’ve patched them up to be structurally, if not cosmetically, sound. While I have the cabinets in the shop I thought I might do some of those old modifications I never got around to before.
The first one is a modification to the table clamping system that allows the table “leg” to extend up and let you get into those top loading cabinets. This is not my idea, many others have done this. There are 2 ways to go about this, one is to install a rod, fixed to the lower mount of the table leg and the rod extends inside the table leg itself. The other route is to use some tubing, fixed between the upper and lower mounts, which the table leg inserts into. I chose the latter approach as I had scrap aluminium tubing lying around. You can see in the pics that I made a collar to join the tube to the upper mount. The collar is a close fit to both the tube and the upper mount. The table leg is a nice tight fit inside the tubing, actually tighter than I would have liked. Either the table leg or the tubing must have a slight bend for its a tighter fit when installed than I found when I tried the combo with a short bit of scrap tubing. Oh well, at least there will be no rattles.


ATZ 87 (1985) 9
German article from Automobiletechnische Zetischrift introducing the Vanagon syncro. Technical details etc., pdf 860 KB.
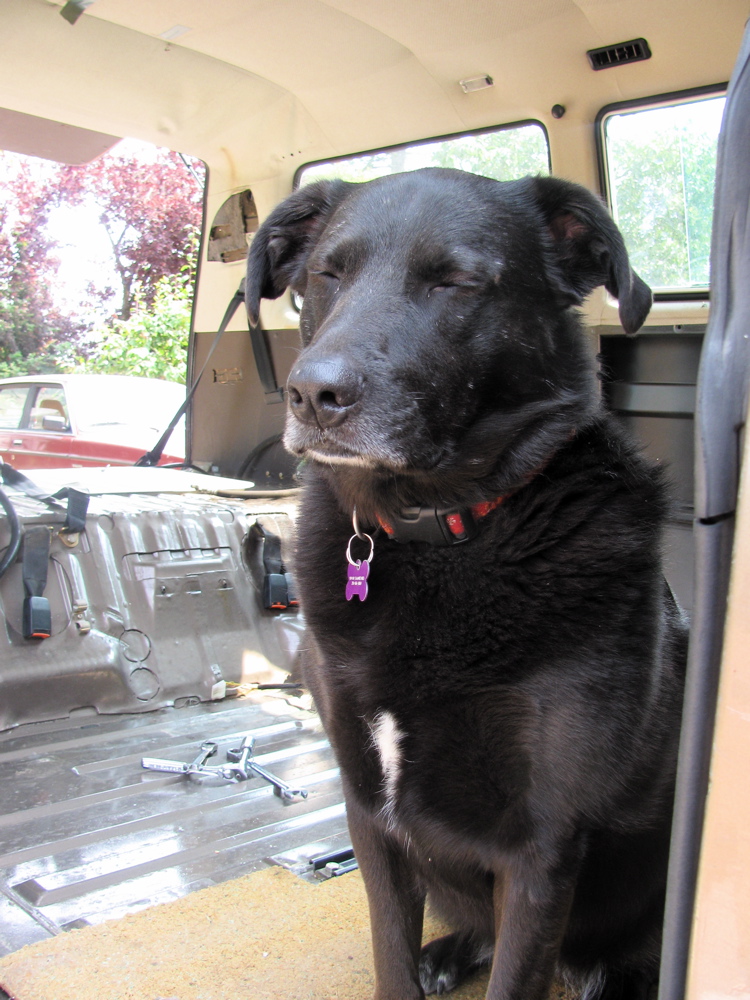
Ornament
Gets the seal of approval from Jake

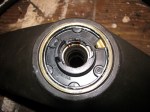
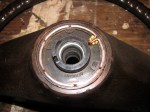
Horn contact ring
A question on the Samba about the “interchangeability” of horn contact rings made me get off my duff and fix a nagging problem of intermittent horn function on my ’86 Syncro. Someone in the past had made a fairly neat fix with copper wire to form a contact ring, but it only worked when steering wheel at a certain angle 🙂
I had a known good ring on the steering wheel of my ’82 Westy, so I whipped both wheels off, 24 mm socket (15/16″ also works) on nut, and swapped the contact rings. direct fit, no problems even though the steering wheels themselves are different. You just pry the ring out with a flat bladed screwdriver. Pics below show the two wheels and the home made contact ring. The larger of the two wheels is, of course, from the non power steering ’82.


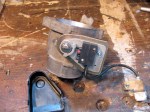
Throttle body fun
Yesterday I decided to take the throttle body off my ’86 syncro (2.1 l), to clean it up and double check the throttle valve position switch. Well it turned into one of those “why did I do that?” projects.
I had more than just idle curiosity driving me, the van had been having occasional lag in standing start acceleration which I thought might be due to the throttle valve position switch (TVPS), even though it had been recently adjusted. I was suspicious that the throttle shaft fit in the throttle body was loose and that might be affecting the TVPS.
Getting the throttle body off is pretty easy, I did find that the two bolts holding it onto the plenum were not tight, I wondered if that had allowed a little air leak? Who knows.
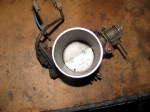
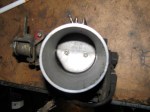
Got the throttle onto the bench and gave it a quick cleaning. Wasn’t as oil crusted as I had expected, someone must have been in here in the last few years. The TVPS had a black plastic cover on it, I had not seen that before. It sure keeps the actual switch nice and clean, see photos.
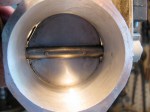
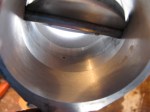
The bore and butterfly had wear in them, as expected. The design of the TB allows axial play and this lets the butterfly rub on the bore. The pics don’t show it quite as well as I had hoped. But there didn’t seem to much if any lateral play that would affect the TVPS setting.
Using a multimeter set on ohms and “beep” for continuity I check the TVPS setting. it was within spec, but I managed to fine adjust it to fall between a 0.003″ feeler gauge and 0.002″ shim stock. I was feeling pretty cocky at that point, and toddled back out the the van to re-install.
It was then I noticed the little clamp that connects the throttle cable to the TB was missing, argh. I must have dropped it between the van and the bench… probably on the gravel driveway. I spent quite a while searching, with magnet too, but no luck.
So I ended up making a quick and dirty substitute. Mild steel and a 5mm hex socket machine screw. It worked out ok.
I figured I’d blow the entire afternoon and take the crankcase breather tower off and check the O-ring that seals it to the case. The O-ring was as hard as hard can be, was it ever soft? It was also broken. The old ring broke into pieces getting it out. I didn’t have a replacement in the collection but I had a spare breather tower and I swiped the O-ring from that.
Cleaned up the oily mess from all the associated hoses, replaced some sections of braided rubber vacuum lines, and put everything back together.
The van runs pretty well the same, maybe a tad higher idle, will deal with that later. Needs a few more miles of driving before I admit it was all a waste of time 🙂
Next move… playing around with AFM spring tension. Yup dangerous grounds.


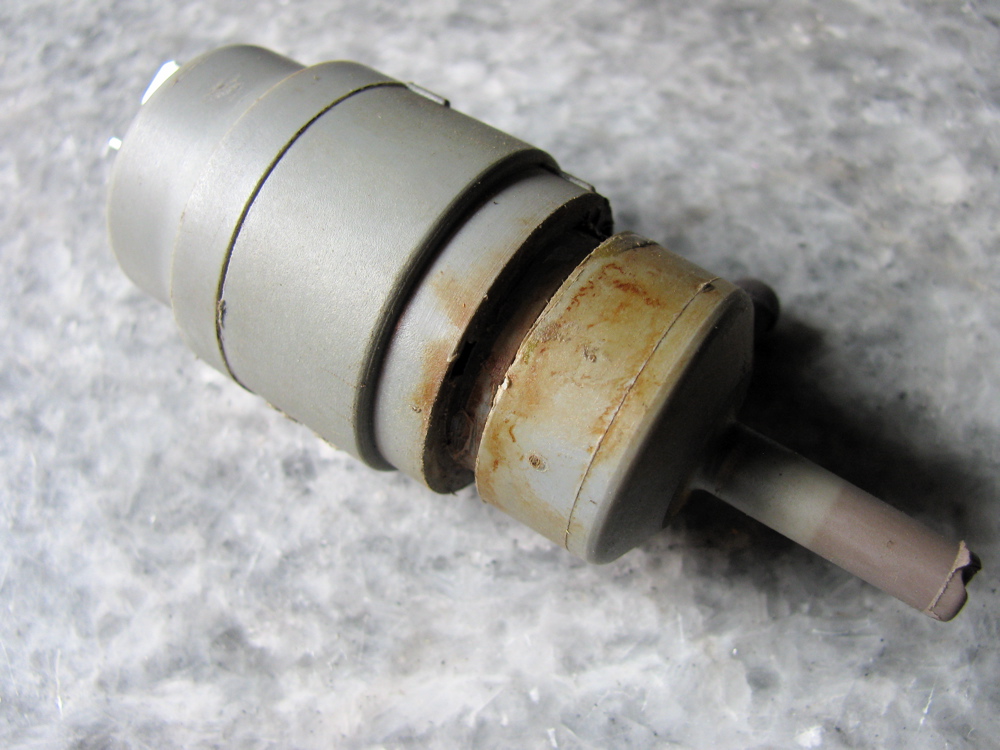
Rad. temp sensor story
Local friend and ’91 syncro Westfalia owner called me last weekend for some help in tracking down an unusual problem. I’ll list the symptoms in point form:
– he had been away for a couple of weeks and the van was parked.
– when he came back the battery was dead.
– his wife noted that the van was making “ticking noises”.
– when he used booster pack to start van, the radiator fan came on and was making a “twig caught in the blades” noise.
– the fan would come on with ignition on.
His first thought was bad radiator temp sensor, so he disconnected it (lower right part of radiator, as you face the van). Even disconnected the fan would come on when ignition on.
I came over at that point and we first dropped the spare tire to look up at what the rad. fan was hitting to make such a noise. Turned out that the 15″ wheels and beefy tired spare had pushed up a section of black plastic tubing (which I am guessing is the brake vacuum line) so that the fan blades would hit it. It wasn’t worn away enough to make a hole, but it was close.
We then started to pull fuses to see why the fan would come on even with thermo switch pulled. Oh, I have to say at this point the van does not have, nor ever did have, air conditioning (a/c complicates rad fan control a bit). We were using the Bentley manual, following the wiring diagram for a 91 westy. Diagram below, you can see how pulling fuse#1 should stop any fan power.

We were puzzled for a bit, thing did not make sense. Also we noted the rad fan had 2 red wires leading to it where above diagram shows red and red/black.
Clearly we were on the wrong track. We looked through Bentley and found a wiring diagram for a 450 W rad fan (in 1986 model tear section).
Ah ha! This looked better.

We found the relay and 50 A fusible link above and to the left of the fuse panel, right above the grounding “crowns”. Remember, still at this time, the rad fan would come on if ignition turned on, even if fuse #1 is pulled and thermoswitch disconnected. Oh and also the wiring diagram shows a blue wire into the thermoswitch where the van had a red/blue wire.
We pulled the relay and lo and behold the fan would not come on, yah! Funny thing was, the relay checked out ok using multimeter and it clicked on and off when energised. Putting the relay back in made tha fan come on, but this time disconnecting the thermoswitch turned the fan off.
Geez, this is long winded and boring tale…
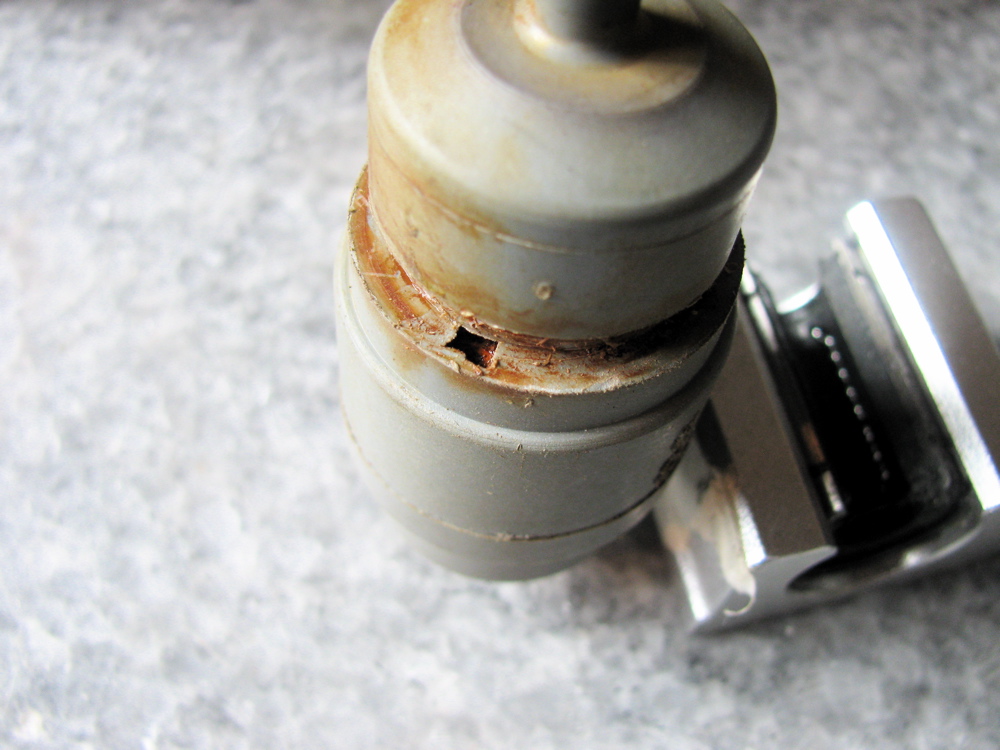
So we bought a new thermoswitch and swapped it in (this is not the time to tell what we found in the rad when we pulled old switch out) and everything worked as it should.
Note the erosion of the switch.
")
Theory time: we figure that when the van was sitting, the thermoswitch failed and allowed the second stage fan speed to come on. The brake booster vacuum line was worn and the battery drained. My friend’s wife must have heard it at the end of the battery life when the fan was slowly turning and making a clicking noise as it hit the brake booster vacuum line. This long run time caused the second stage relay to stick in the on position. Pulling the relay, the jiggling etc, caused the relay to open, and was then “under the control” of the thermoswitch, and again fuse #1.
Phew!
1987 US dealers Vanagon sales video
Bathe in the hyperbole…
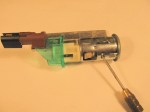
Vanagon lighter socket
April 1, 2010… I edited the original post. I must have been all hepped up on goofballs first go round as I based the instructions on a bench disassembly rather than the “real life in front of the dash how the hell does this come out” situation. Apologies to all who may have been misled.
Quick post showing the Vanagon stock lighter. Its a little tricky to remove from dash when you want to replace it (I found that accessory plugs do not fit as tight as I wanted, especially the iPod dock on a stalk gadget I use).
Warning, disconnect electrical power before mucking around lighter! (either main battery cable or fuse #3 which serves to supply juice to door lights, radio, and lighter in ’86 and up vans).
Really, don’t do any of this with power supplied to lighter.
The lighter has a plastic plug electrical connector on back. Go ahead and remove that first, accessing from behind glove box (and yes, spill of all that stuff you have collected over the years when removing the glove box).
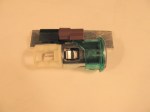
You can see the socket comprises of two parts; the illuminated green plastic ring, and the metal socket proper. The green ring has to be slid down the shaft of the socket first, or rather the metal body is slid out forward from dash. It is held in place by 2 tiny tabs that can be depressed from the inside of the socket. Once the metal body is out, the green ring can then be wiggled out of the dash, from the front, it can be tilted to get through hole.
In the pictures I have pointed out the slot in the metal socket that the green plastic tabs fit into. Its the slot beside the 2 elongated slots. Again, you depress the green plastic tabs from inside the socket and pull the metal socket forward and out.
I hope this helps, I know the assembly and fitment can be a bit puzzling first go round.


lock info
Update, April 6 2010 : good info on this page on lock R&R, and in English!
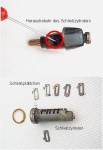
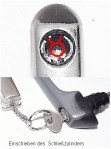
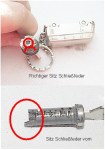
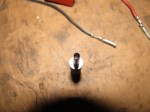
lock rehab
Images found on a German Vanagon site, and I can’t recall the URL so forgive me for lack of attribution other than any text on images themselves.
Handy references for some lock work.

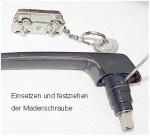
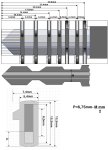

Multi-prong connector tool
Posted by albell in metalworking, tools, vanagon on February 28, 2010
Another trivial lathe job…
My ’86 Vanagon fuse box has multi-prong connectors in back. Some are spade, but most are the round prong variety, very similar to “Molex” brand. The individual metal connectors insert into the plastic blocks and are held in by “barbs” on the connector shaft. You can’t pull the connectors out of the block without damaging those barbs unless you have the special tool.
I made a couple of the tools for each size of connector. I used a large nail (spike) for stock and I have to admit to not really having confidence that the idea would work, so the you have to forgive me for choice of material and final finish. I am pretty sure there are commercial versions of this tool, better made and with a nicer finish.
As it turned out, the tools work perfectly well. You just insert the tool into the block, the barbs are pressed back into the body of the connector and the wire can be pulled out from the back of the block. The pictures below show the smaller sized tool. Jeez, I didn’t notice the rust on the little vice until I took the pictures. Winters on the west coast, damp and the workshop is not well sealed….


Update: Google “Molex pin remover” to see some nice and inexpensive commercial and home made versions.
Pop top conversion- Mosaik kit
Posted by albell in vanagon, vanagon mods on February 3, 2010
A neat way of doing it. Links below to UK Vanagon owners who have done it:
http://www.brick-yard.co.uk/forum/westy-poptop-fit_topic49144.html
http://www.brick-yard.co.uk/forum/topic30479.html
UK firm that makes the repro kit:
www.vwelevation.com
PDF of the original German install:
Mosaik-Joker_Aufstelldach
Gifs of the components:


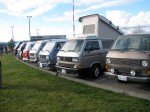
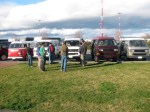
Victoria Vanagon meet
Last Sunday afternoon (February 1st), a few local Vanagon (and a couple of Loafs) owners gathered at Ogden Point. Here a a few snaps.


“G” and “M” connectors on ’86 fuse panel
I had to read the wiring diagrams when I installed the fog lights 🙂 The group of (mostly unused) spade connectors on back of panel have some interesting properties, especially G10. Here is what I decoded, your van’s panel may be different, but I hope this list will be useful in thinking about power taps.
The male spade connector group designated “G” in “that manual” trace out as follows:
G1 – X bus controlled power, fused through S12 (20A) (on my van it has BK/Y wire connected which feeds warm air blower switch)
G2 – #15 ignition switched power fused through S18 (10A)
G3 – X bus controlled power, fused through S12 (20A)
G4 – D+ alternator trigger circuit via alt. led light
G5 – #15 ignition switched power fused through S18 (10A)
G6 – dead end
G7 – power when headlights on
G8 – dimmer controlled dash light power
G9 – license plate lights power fused through S20 (10A)
G10 – power when windshield wipers run
and the M connections close by:
M1 – connected to G7
M2 – power with lowbeams
Shilling for Meguires
Was asked to treat the ’80’s style floor mats with the same stuff I used on the full front mat. Marvel at the before and after pics.


2.1 l wasserboxer throttle body
Old throttle body from my spare 2.1 l engine. Note the “cut out” on butterfly plate.


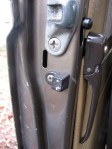
Rear hatch switch
For those who have wondered…
Metal tab screwed to hatch presses on the switch on the body. The switch is slightly larger and all metal, different than the slider and front door switches.


Full front rubber mat
Recent auto wreckers find. Its not ripped or punctured but looks tired even after power washing. I need to find some sort of rubber reconditioning agent to see if I can rejuvenate it.
Update: I used Meguire’s rubber and vinyl conditioner on the mat, 2 applications, sprayed on, let sit a few minutes, then wipe off. Worked quite well, the “high traffic” areas on mat less glossy than the rest of the mat.
I should mention the mat replaces the fitted carpet, not over it.


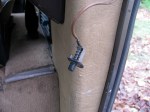
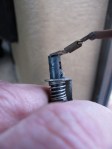
Sliding door light switch
Had intermittent failure of light switch in sliding door. Solved by bending the tiny triangular tab on switch so it rubs more in contact hole. Picture shows me depressing plunger fully to show tiny tab.

Mud
I just spent some time at car wash getting mud and hay and straw off the van from my recent around the farm vc testing. Its astonishing how much mud gets trapped in all the nooks and crannies.
